


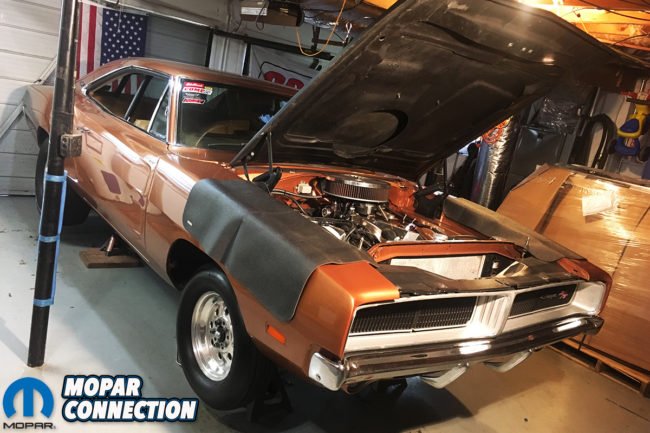
Here’s the deal: in the last two years, Mopar Connection‘s long term “Brazen” project ’69 Dodge Charger R/T has consistently devoured starter motors; and not just one or two, but six of ’em. The damage has been as diverse as it has been frequent, making diagnosing the issue quite the conundrum: Bendix gears grinding the inside of the cones; burned up armatures, contacts and plungers; teeth chewed off of the ring gear; and even a snapped nose cone.
Because of our big equal-length 2-inch tube Hedman’s Husler Street & Strip Racing Hedders (with slip-on 3½-inch collectors) that we installed a couple years back, we’ve had to go with the smaller, Nippondenso-style gear-reduction starter. And don’t think we skimped on the quality of the starters, either. We’ve cycled through all the options our local parts house had to offer and even a couple from the performance aftermarket. Whatever was killing our starters wasn’t a traditional problem (bad ignition switch, starter relay, etc.) because we cycled through all of the more mainstream solutions.
So what exactly was going on, you ask? After letting our FAST EZ-EFI’s fuel pump whir up to 44-pounds of fuel pressure, we’d turn it over. When everything was running right, the mini-starter would crank over and the big 11.25:1 535-stroker motor would fire right up, the EFI making it significantly easier on cold mornings or after sitting for a few weeks. Yet, when things weren’t running right, the starter would not extend the Bendix fully, missing a tooth on the Silver Sport Transmissions’ (SST) A41 overdrive‘s flywheel, and spin freely; that, or partially extend, biting the leading edge of the tooth and break it off.
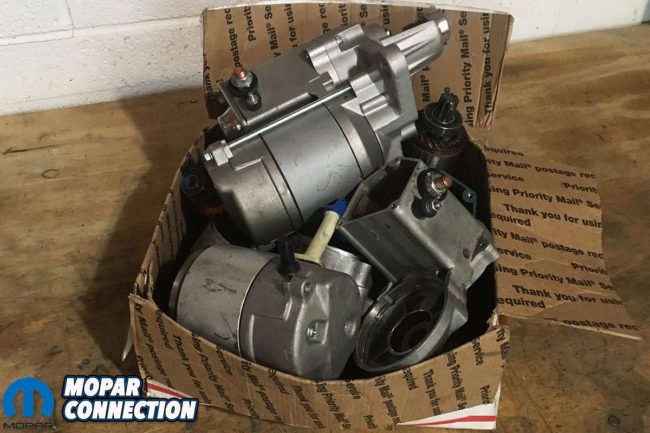
Above: Over the course of two years’ time, our Brazen Charger project car has eaten its way through no less than six mini starters, all suffering from a variety of failures. It took quite a bit of homework to discover the cause.
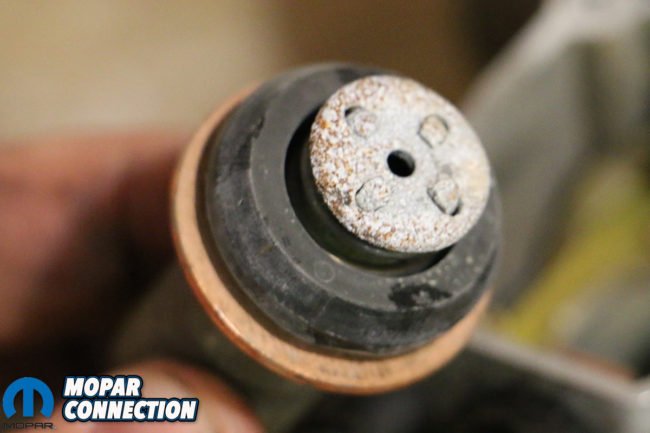


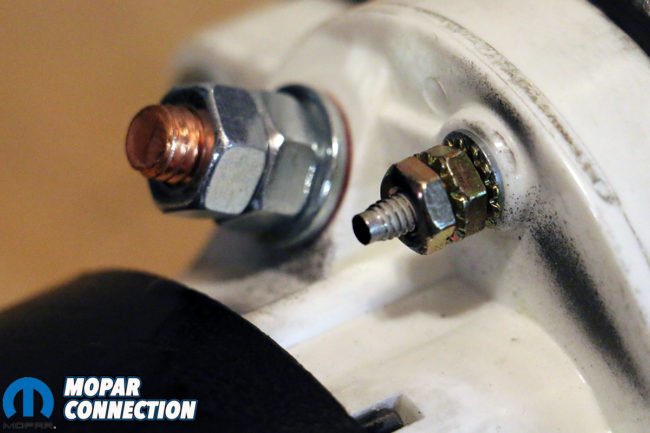
Above: According to JR Richmond of Powermaster Performance, the copper contacts from these different starter solenoid plungers, armatures and contacts all show the signs of low voltage/poor grounds. With so many accessories (EFI, ignition box, a transmission control module, etc.) pulling power at the same time as the starter trying to crank over, and there being a poor ground at the starter, the electricity was forced to find another way to ground itself.
Initially, we racked it up to combination of a poorly charged battery and too much initial draw (considering the draw from our EFI, twin SPAL fans, electronic ignition and two computers); so we checked our ground strap, and stepped up our alternator since the old 50amp factory unit was already making sounds that made us nervous. The slight bump to a 60amp unit helped keep our accessories going, but our starter still zinged freely now and again.
Diagnosing the physical damage to the flywheel and nose cones proved easier than the others: alignment. Mopar Connection Magazine talked to JR Richmond at Powermaster Performance, who echoed our diagnosis, saying, “Alignment issues will wreck havoc on a bell housing-mounted starter. Low voltage/grounds would be a close second to the alignment.” With that, we knew we were on the right track.
Whether it was a TorqueFlite 727 or a A-833 4-speed manual, as late as 1972 Chrysler used a big 7/16-inch shouldered stud above and a 3/8-inch bolt for the bottom for all starter motors. During assembly, as the line worker slid a starter into the bell housing and the nose cone engaged into the pilot hole, the large stud would keep the starter in place as as the top nut and bottom bolt were tightened.
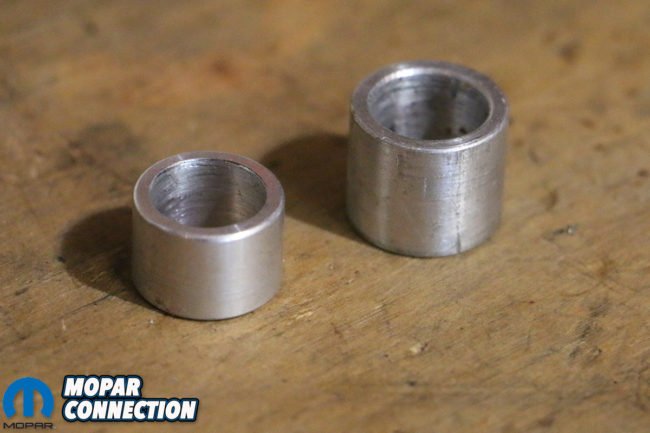
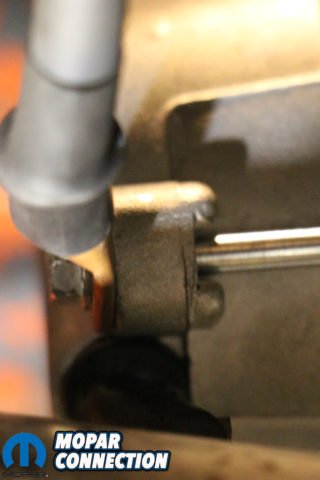
Above left: All starters for Chrysler engines have staggered bolt sizing; 7/16-inch above and 3/8-inch below. This was to fit a large-diameter, shouldered stud. If your bell housing does not have this stud (which is likely), you will need a spacer like one of these to insert between your starter’s top bolt hole and the bolt itself. Above left: In our particular instance, the Silver Sport Transmissions’ A41 4-speed Overdrive forgoes the factory “starter location plate” and uses this crescent-shaped billet aluminum shim. This shim requires its own spacer, as well as the starter. Without both of these, our starter would shift, twist and eventually break its cast aluminum nose cone.
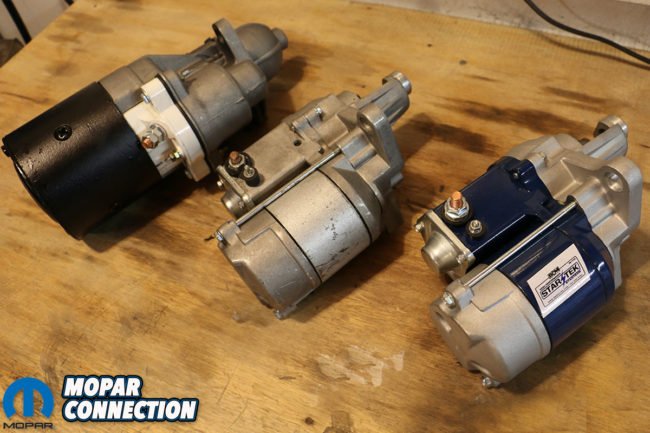


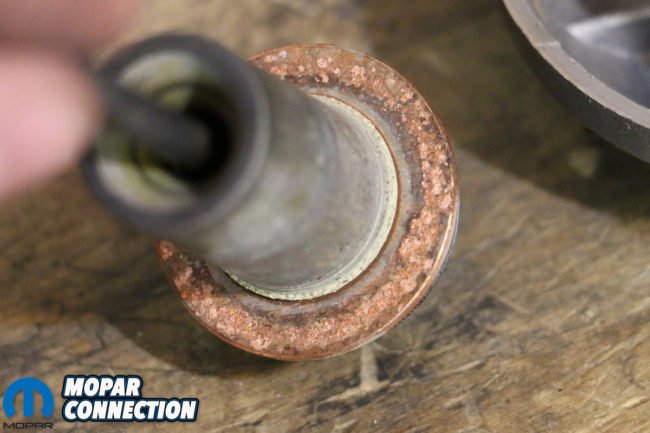
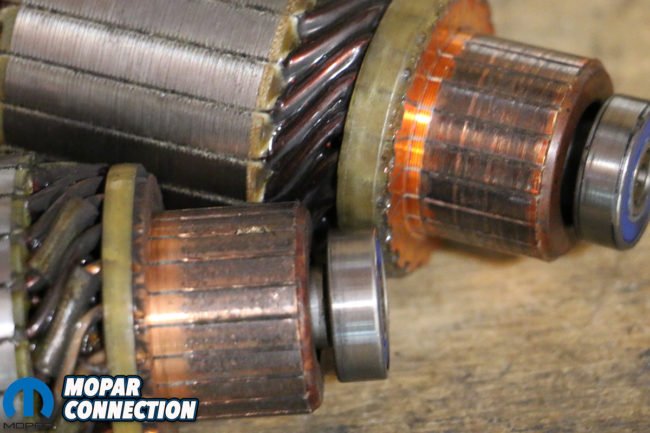
Above left: From left-to-right: a stock Chrysler-style starter, a standard parts house-issue mini starter, and a modern performance aftermarket (also a Nippondenso-style) starter. Above center: The Chrysler-style starter features a Bendix whose gear travels on a shaft with a bearing in the nose cone. Above right: The Nippondenso starter has a sprung-shaft Bendix pinion gear that extends to engage the flywheel when cranking. Low cranking voltage/poor grounding meant our Bendix gears weren’t extending deep enough to properly engage the flywheel.
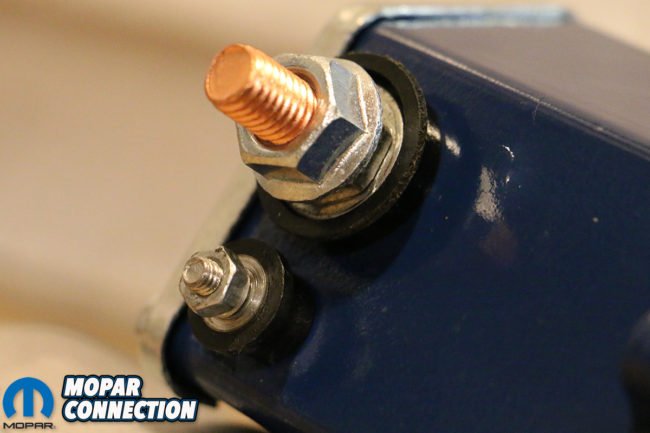
Above left: The 15.5-pound factory Chrysler starter places both the positive battery post and the ignition switch signal post directly above. The size and heft of the starter, in addition to its higher gear ratio results in slower, more laborious cranking and more draw on the battery over time. Above center: Nearly all Nippondenso-style mini starters have the terminals in this sequence, with the battery closest to the engine block. Above right: Powermaster Performance’s XS Torque starter features reversed-position terminals, providing for easier installation and service.
Over the years, many hot rodders were quick to extract the stud and replace it with a matching 3/8-inch bolt. Unfortunately, without a spacer to slide over the bolt to compensate for the size difference (7/16 to 3/8-inch), the starter would be able to move, torsionally stressing the case and snapping the nose cone. The SST A41 overdrive transmission doesn’t come with a 7/16-inch stud but two 3/8-inch bolts, and a single billet spacer not for the starter, but for the crescent-shaped shim that realigns the starter further out from the bell housing. We later discovered that while we installed our crescent shim with a spacer, our starter had gone without.
With some all-thread that we cut and cleaned up the edges, we created our own stud using two spacers, one from our SST billet shim, and the second for our new starter. This would ensure us proper alignment from here on out. (Chrysler also used a stamped sheet metal alignment plate for starters as well, but we couldn’t use one given our shimmed starter alignment on the A41.) With our alignment issue resolved, we returned back to JR for further suggestions.
“This can be ground related as well,” JR cautioned.”Pull the solenoid cap off and take a look inside. The copper contacts will show low voltage scenario if it is present.” As per JR’s instructions, we disassembled a couple of our most recently failed starters, snapped a few pictures and sent them off to him for review. The email came back quickly, “It is low voltage for sure. The switched voltage is low but this could all stem from a bad ground on the starter also. I like to run a ground wire from the battery directly to one of the starter bolts. You can’t beat it.”


Above left: We learned the most sure way to attach a battery cable terminal is to first fill the terminal cap with melted solder using a butane torch and a vise. Above center: With the solder still boiling-hot, insert the stripped, exposed copper wiring until it cools. Above right: Because the solder acts to weld the copper wire to the terminal, a crimp isn’t needed. So we heat-shrink a protective shroud over the connection.
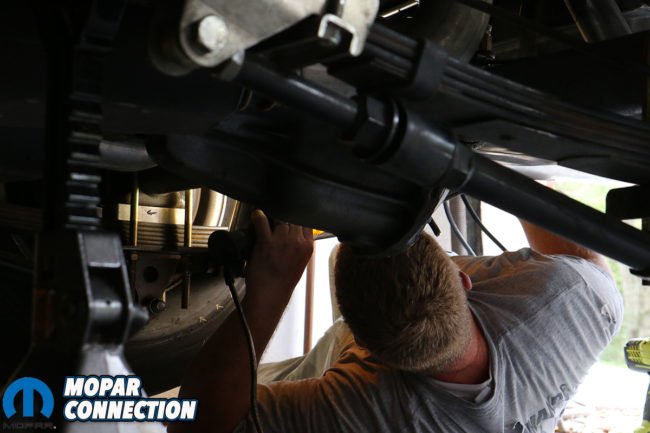
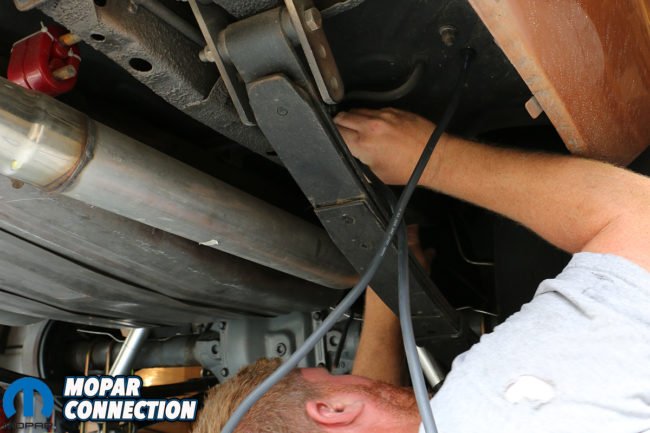
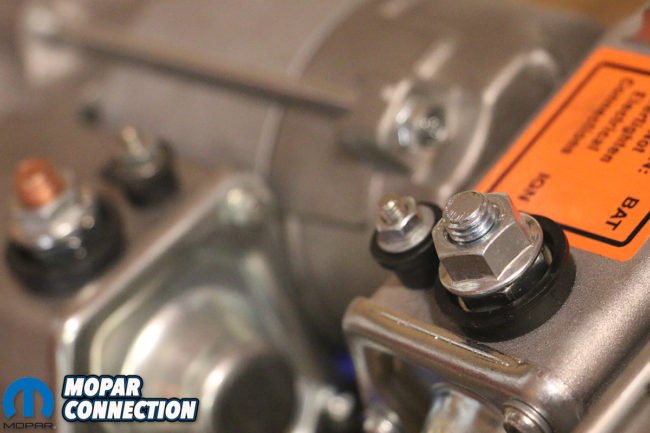
Above: Running a ground wire from the starter to the negative battery terminal sounds much easier than it is – at least if you want to do it right. We painstakingly weaved the cable through as much of the Charger’s framerails as possible, even feeding it (via a wire hangar) through the running boards. Nearly 20-feet of gauge-4 cable later and we had a true ground cable running from the battery to the starter with an extra terminal that screwed into the body for extra grounding.
Years back we learned that poor grounding is often the cause of most people’s electrical issues. When we relocated the battery to the Charger’s trunk, we ran a short length of gauge-2 cable from the negative terminal through the trunk and tightened it to a stud welded to the framerail. A second length of gauge-2 cable was ran from the positive terminal down the length of the B-body to the starter. Per JR’s instructions, we hustled to NAPA for a 20-foot spool of gauge-4 negative battery cable and ran it from the battery terminal all the way to our new starter.
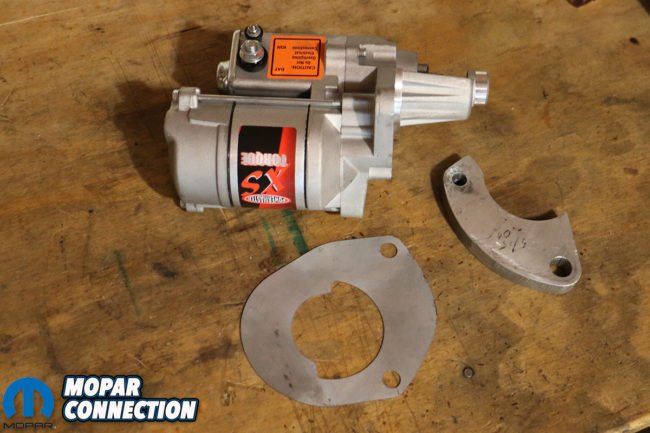
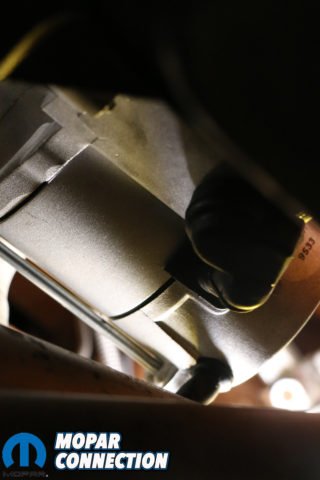
For our (final) replacement, we opted for Powermaster’s XS Torque Denso-style mini starter (PT# 9533). Producing 200 ft. lbs. of torque, with a 4.4:1 gear reduction, the XS Torque produces up to 1.8-horsepower allowing it to crank high compression engines with up to 18:1 compression. Even though our engine makes 700 lbs. ft. of torque with 11.25:1 compression, some thought we were going “overboard” with our starter choice. Powermaster cautions, “there is no such thing as having too much torque – even on a street vehicle – a 200 ft. lbs. starter will work for everyone.”
Powermaster Performance is the industry leader in aftermarket starters and alternators – whether you’re building a near-perfect restoration or competitively racing a high bank-hauling circle track race car, Powermaster has the right application for you. Additionally, they have poured the time and ingenuity into improving upon the status quo, most notably in its the considerable weight difference (15.5-pounds vs. 7.75-pounds) and reversal of the starter and positive terminals for Chrysler mini starters; typically the larger positive stud is closest to the engine block, making tightening it down (while in the car) a chore. Powermaster painstakingly reversed this for additional clearance and ease of use.

Above left: JR Richmond suggested that we paint our gear to observe how well the starter was meshing with the flywheel teeth, even sending this example image to follow. Above center: We ran our ground cable from the negative battery terminal, through the frame rails all the way to the starter, choosing to attach it to the long screws holding the starter’s body together. Above right: With all of our wiring neatly tucked away and far from our header tubes, we were ready to fire it up.
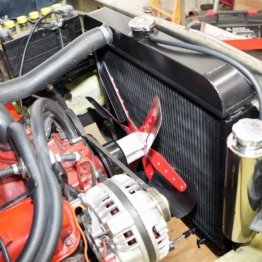
Above: With our new Powermaster XS Torque mini starter engaging our A41 overdrive’s flywheel nicely, all new ground straps to the frame and firewall, and a cable running from the starter’s body to the negative terminal on the battery (in the trunk) and our Brazen Charger is back up and running. And hopefully we’ll never have to mess with a broken starter ever again!
“I know,” JR commiserated, assuring: “Some of the issues you have gone through with starters are calls we get everyday. We can help you sort through the wreckage to keep the Charger starting reliably.” With our new high-output XS Torque starter properly aligned and mounted, and exactingly grounded directly to the negative battery terminal, we had one last step to check: Earlier, JR suggested, “I think taking some extra precaution on this one should help. I would recommend using some paint (yellow or white) on the pinion gear of the starter to check engagement.”
Noting the wear on our flywheel, we ordered a replacement from SST, and put it in a few days earlier. With some mechanic’s paint on hand, brushed the Bendix yellow and slid it into place. We also double checked our contacts for the engine ground strap to the frame rail and firewall. With the Charger still in sitting high on jackstands and the inspection cover off, we cranked over the big Mopar and smiled as it quickly caught and fired right up. We let the car idle for a few minutes, allowing the alternator to charge the battery a bit before turning off the ignition and re-inspecting our paint-marked Bendix. Engagement looked good and the face of flywheel teeth didn’t show signs of impact (another sign of misalignment).
Admittedly, this article won’t be of much help to those with mostly stock or even moderately hopped-up Mopars; but for those running an aftermarket Nippondenso-style starter we caution to either retain your factory transmission’s 7/16-inch shouldered stud or double check that your new starter came with (and you properly installed) the spacer over your 3/8-inch bolt. Next, there’s nothing wrong with an extra ground strap or two. You can’t “over ground” a car. And finally, consider stepping up the quality of your starter to a high-torque Powermaster Performance unit, not only for the weight savings (over half!), its reduced size, and Powermaster’s unique “flipped” terminals for easier installation, but the increased torque. It requires less draw to turn your engine over, and provides a faster cranking speed.


 Mopar Connection Magazine – The ONLY Daily Mopar Magazine © 2022. All Rights Reserved. Mopar Connection Magazine is the ONLY daily Mopar Magazine bringing you the latest Mopar news, technology, breaking news, and Mopar related events and articles. Find out the latest information about Mopar, Mopar products and services, stay up to date on Mopar enthusiast news, dealership information and the latest Mopar social media buzz! Sign up for the Mopar Connection Magazine newsletter for the latest information about new products, services and industry chatter. Mopar Connection Magazine is the best and only source you need to be a Mopar industry insider!
 by
by