


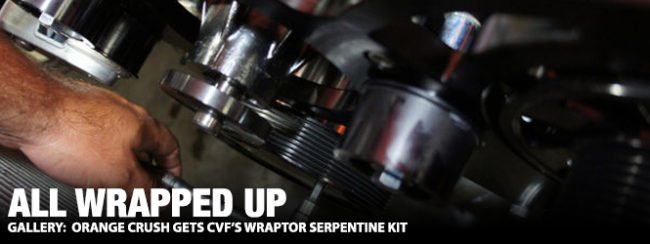
There are many reasons why serpentine belt drive systems are standard equipment on new cars rather than the classic V-belts. They have better grip, are more compact and reduce friction just to name a few. Although serpentine kits are a popular upgrade for many other brands of cars, it’s a rare site to see on classic Mopars. With the demand of autocross and road racing, we started searching for a serpentine kit for Orange Crush and quickly learned why we don’t see more of them on classic Mopars. Options are limited and many of them come at a very high price. We had impeccable timing as we called our friends at CVF, they were just finishing up their new Wraptor kit for small block Chryslers. This kit would have all new accessories, increased grip, and came in at a more affordable cost than the majority of the other kits on the market, exactly what we needed.
As you know, we have been racing Orange Crush more heavily this year and as we drive it harder, more issues become prevalent. One of these issues is belt slippage with the stock V-belts. We were already using CVF’s under-drive pulleys but they didn’t offer any more grip than stock. Slipping belt and losing power steering in the middle of a turn, even for a second, can be detrimental to our lap times. The stock V-belts rely on you to loosen the accessory, pull or push on it to tighten the belt and then re-tighten the accessory.
Even for street driving this can be an issue. If you over tighten the belt it will cause extra drag on parts like your alternator and power steering pump which will cause them to be overworked and possibly loose HP. If you don’t tighten the belts enough you will encounter squealing or slippage and the components will not work consistently. Depending on the car, you may have multiple belts to tighten. As we explained in our Flaming River power steering install, our stock pump was over heating and throwing belts when we first started auto crossing. Since then we have upgraded pumps and stopped throwing belts but we still have slippage during racing.
Autocross is unique to many other forms of racing as it is a short course and you are on and off the throttle so quickly that the grip from a V-belt can’t keep up. We talked with CVF about these issues and they immediately agreed we needed to step up to a serpentine setup. We told them that we were on a budget and many of the kits we were looking at were very expensive. We noticed that they offered The Beast kit and first asked about it. “The Beast kit has been a very popular kit among many Mopar customers. Although it utilizes our 8-rib serpentine belt for more grip, you won’t get the full benefit with that kit,” said Duane of CVF. We asked why not? “Not all serpentine kits are built equal. The Beast kit uses the same brackets as our V-belt systems. It uses 2 serpentine belts instead of 2 V-belts. It does offer more grip than your current V-belt setup and looks great but won’t fix your overall issue of slippage.” noted Duane.

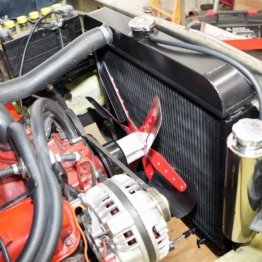
Above left: The installation was very straight forward, CVF includes detailed instructions that were easy to follow. Although installing the bracket, accessories and pulleys would have been mush easier with the motor out of the car, we didn’t have that luxury. Above right: The motor was in the car and we needed to install the system over one weekend because we had an autocross coming up the following weekend. The installation only took one day and would have taken less if we would have removed our radiator instead of just pulling the fans off.
Above left: We started by removing the lower radiator hose to drain the coolant. We suggest removing your radiator. We didn’t, and regret not doing so. Removing our electric fans gave us barely enough clearance but we can’t guarantee that for everyone. Above right: With the coolant drained, we removed the water pump, power steering pump and alternator along with their brackets.
We were at a loss, we thought, “Oh here comes the sales pitch to get us to spend more money for not that much more performance.” Duane continued, “The issues you are encountering while racing are due to slippage and more grip is what you need, but you also need constant tension on the belt. With the quick on and off the throttle during racing, the belt stretches which creates slack. That slack is what causes the belt to slip. Although serpentine belts stretch less than v-belts, they will still stretch. Our new Wraptor system is a true serpentine setup as it weaves in and out of the pulleys and uses a spring-loaded tensioner. The tensioner is key, as it will keep constant tension on the belt even when it stretches and prevent any slippage.” It was music to our ears, this is what we needed.
“Along with more grip, you will also gain the benefits of a more compact design, better components and a sleeker look.” After Duane sent us pictures of the Wraptor kit they installed on their mock up motor we couldn’t agree more. We knew it would give Orange Crush consistent power steering feel, better accessories and potentially free up some HP all while giving the car a modern look.
Above left: With all the accessories removed, we cleaned the water pump surface and the timing cover surface in preparation for the high flow water pump that is included in the kit. The new high flow water pump will need installed first. Above right: When installing the pump, you will need to use the 3 original bolts. Be sure you use some type of thread sealant on the bolts to prevent leaks. They will need torqued down to 36ft-lbs first because they are inaccessible after the bracket is bolted on.
Above left: With the 3 original bolts taped and ready we ran a bead of bluer tv around the water pump to ensure it wouldn’t leak. Above right: Install the new high flow water pump with the original 3 bolts and torque them down to 36ft-lbs. Again these bolts are almost inaccessible after the Wraptor bracket is installed.
They offer the Wraptor kits with or without A/C or power steering and can easily add one at a later date if your project changes. They also have the option of polished aluminum or a stealth black finish. Not only would we have a slick, modern looking serpentine setup but we were also going to gain an A/C compressor for a future upgrade.
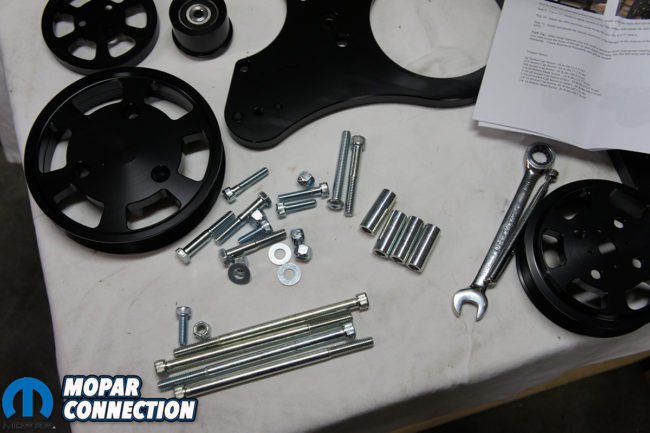
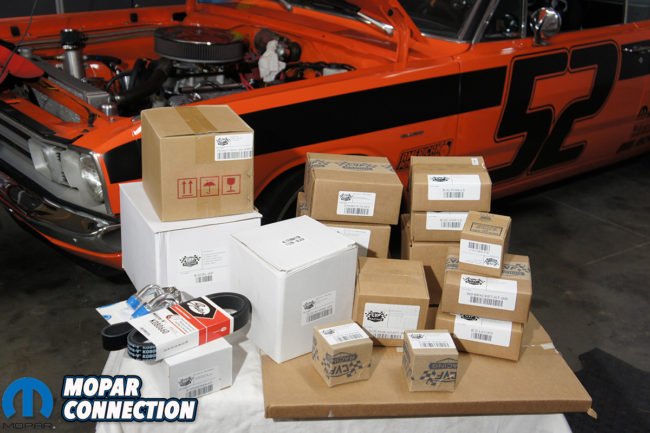
Going into the installation there are a couple things that we learned afterwards that we wished we had known earlier. We found out after opening all of the packages and piling pulleys and parts together that we should have left everything in its own box. We suggest opening every box to check everything is there, but leave each part in its individual box. CVF has labeled and placed the correct bolts, washers, nuts, pulleys and pulley covers in each box and can cause issues if they get mixed up.
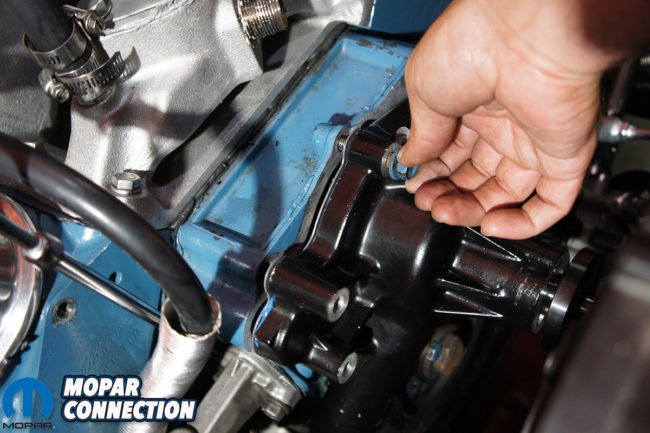
Above left: Find the four 3/8-16 X 6.5” SHCS bolts and coat the threads with a thread sealant. We opted for plumber’s tape but there are many different solutions. Above right: With the new high flow water pump installed you can install the Wraptor bracket with the four 3/8-16 X 6.5” SHCS & 1.68” spacer. You will need to torque the bolts to 36ft-lbs as well.
Above left: With the water pump and bracket installed, it’s a good idea to install the brass water outlet fittings. You will need to use thread sealant on the threaded parts of the brass fittings. Above right: Also, be sure to install the heater bypass (the bigger fitting) first because it’s difficult to get a wrench or socket on it after the second fitting is installed.
The Wraptor system has been designed to be compact and universal for small block Chrysler. It may fit your car differently than ours. They have also used a couple aftermarket accessories that might require some small modifications to work properly. First of all, they use a 140amp 1-wire alternator and its mounted on the opposite side of the car. We personally love this because we needed the higher amp alternator due to our Edelbrock fuel injection and all the other accessories we run. It required us to run a 6-gauge wire or larger to the battery compared to the stock 10-gauge wire. CVF is currently working on an online support center with technical articles and visual diagrams to answer many of the questions you might have on wiring single wire alternators. For the time being, feel free to call them for any help.
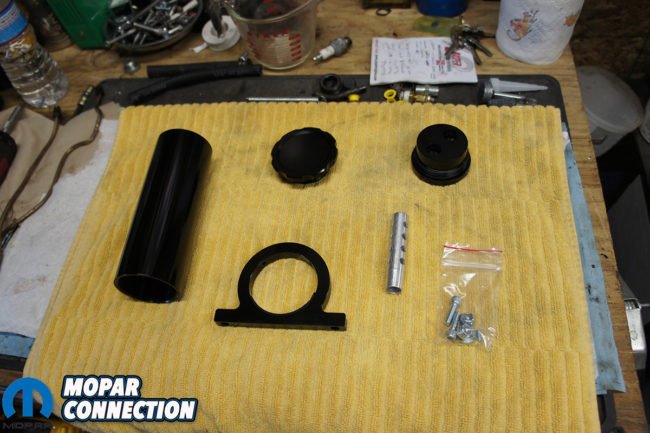
Lastly, before you dive too far into the Wraptor installation, you might need to have different fittings for your power steering. You will also need to find a place to mount the remote reservoir. As we stated earlier, CVF’s Wraptor kit is built to be compact and the factory style power steering pump is bulky and not easily mounted. The Type II power steering pump that is included will need to be plumbed to your steering box or rack as well as to the included remote reservoir that is included in the kit. We recommend laying out what fittings you will need to connect the pump to the steering box or rack and then to the reservoir. Then measure for the proper length of lines once the pump and reservoir are installed.
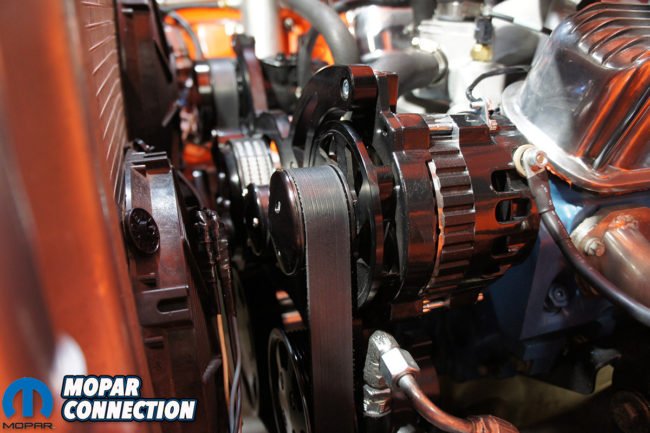
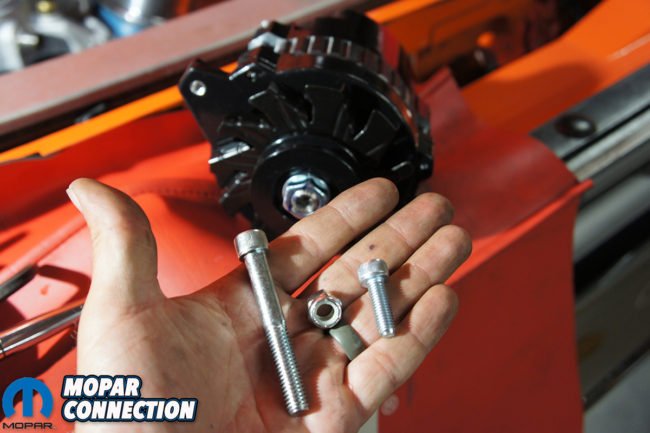
Above left: Install the alternator using the M8 X 25mm SHCS torqued to 36ft-lbs on top bolt and 3/8 X 2.75” SHCS torqued to 36ft-lbs on bottom bolt with 3/8” lock nut. Above right: Although it fit fine, the positive post on the alternator was pointed the wrong way and we needed to clock it differently.
Above left: We took the alternator off and found an E8 female star socket to remove the three long bolts on the alternator. It’s important that you have a good surface to work on and that you keep the alternator face down when removing the screws. Above right: Once the screws were removed, we re-clocked the housing without lifting it up and reinstalled the screws. Then reinstalled the alternator.
Above left: With the alternator installed, we needed to remove the v-belt pulley that came installed and replace it with the serpentine pulley. You will need an allen and crescent wrench. With the locking nut loose, remove the pulley along with the fan blade. Above right: Install the new billet fan and serpentine pulley with the existing washer and nut.
Above left: When installing the A/C compressor be sure the ports for the A/C fittings is pointed up. Use one M8 X 25mm SHCS in the top bracket hole and one M8 X 30mm SHCS in the bottom bracket Tighten both bolts to 36ft-lbs. If you opted for A/C delete you will need to refer to page 4 in the provided instructions. Above right: Once the A/C compressor is installed and tightened down, install the pulley cover. This will be in a separate box along with three button head screws. Tighten them down to 16ft-lbs.
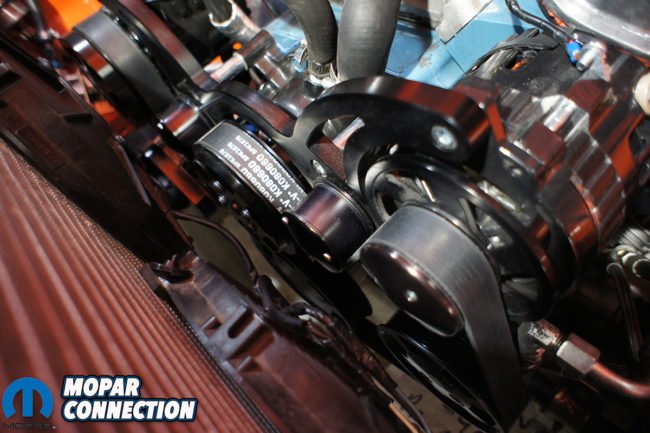
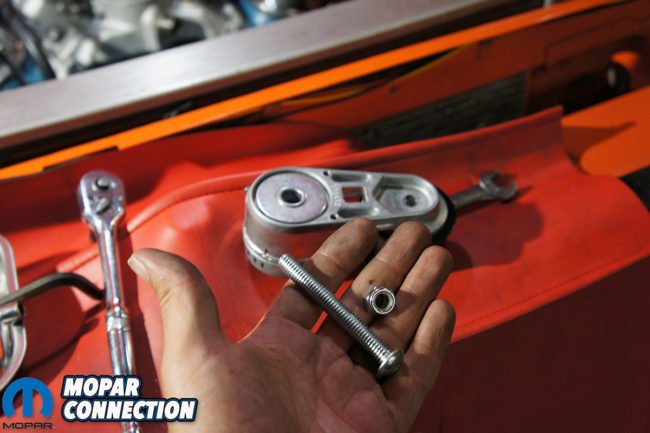
Above: The Gates spring loaded tensioner assembly can now be installed with the 3/8-16 X 3” BHCS and 3/8” lock nut. It will need tightened to 30ft-lbs. Do not install the billet cover plate until the belt is installed. You won’t be able to access the square 1/2” drive hole to lose the tensioner.
Above left: The two idler pulleys can be installed with 3/8 X 2.5” SHCS and 3/8” lock nuts. Tighten them to 34ft-lbs. Above right: The power steering pump can be installed with the two M8 X 40mm SHCS and tightened to 36ft-lbs. If you are currently using a factory style pump you may need to find other fittings to connect the new Type II style pump. We recommend plumbing the pump before you install the pulley because of clearance issues.
Above left: Included in the kit is a billet remote reservoir for the power steering pump. It assembles fairly easy and has instructions of its own. We have already been using a similar style pump that was previously plumbed in our Steered Right (and Left) article with a similar style reservoir which we reused. You will want to bleed the pump once its installed; if you need help bleeding it please click here for more info. Above right: With the pump installed and plumbed you can install the power steering pulley using the four button head screws that are in the box. Tighten to 16ft-lbs. We found it easier to do a final torque after the belt was installed.
Above: When installing the crank pulley, you will need to first install the billet spacer using the six 3/8” bolts that come in the spacer box. These will need tightened to 34ft-lbs.
Above left: With the crank pulley spacer installed, use the three cap head bolts to mount the pulley and tighten down to 34ft-lbs. Above right: The water pump pulley can be installed with the four button head screws that came inside the water pump pulley box and tighten to 16ft-lbs
Above left: With all the pulleys installed and tightened down, you can now install the Gates serpentine belt. We tried just moving the tensioner and sliding the belt on but had no luck. We removed one of the idler pulleys first, slid the belt on, using a long 1/2” drive breaker bar to release the spring-loaded tensioner pulley, reinstalled the idler pulley and released the tensioner. A second set of hands will make this a lot easier but can be done by yourself. Above right: With the belt on and tight, go back around and double check all the pulley bolts. It’s tough to tighten them to spec without the belt installed.
Above: If all the pulley bolts are tight, you can install the few pulley caps. Each cap comes with the screws you need in the box. It’s easy to over tighten the screws or strip them out. They only need tightened to 30in-lbs, again 30 INCH-lbs.

With all the pulleys installed, the pulley covers tight and belt installed the installation is complete. We reinstalled the coolant hoses, filled the radiator up, finished wiring the new 140-amp one wire alternator and bled our power steering pump so we could start the engine. We didn’t realize how much noise that factory V-belts make vs. serpentine belts. We let it run for a few minutes and then turned it off to check for any coolant and power steering leaks. Everything was sealed and was ready for a test drive. Although we took it around the block and it did well, it wouldn’t be until the following weekend when we would get to truly test it out on the autocross course.
That weekend came quicker than expected, but we were ready. This would be a local autocross so we drove the car to the event. As we expected the car did great on the way there. It was a long hot day but the Wraptor kit performed as we imagined. The high flow water pump kept things cool, the 140-amp alternator kept the battery charged up in between runs, and we didn’t lose power steering! The slippage was gone and we were able to rely on a consistent steering feel unlike before. Not only was the serpentine setup performing, we had a ton of compliments of how well it looked under the hood!
As we drove home from the autocross we reflected back on the whole process. There are many times that a certain upgrade isn’t worth doing, getting the parts are a hassle or nothing fits like it’s supposed to, but none of that applied to CVF’s Wraptor kit. From the beginning, CVF was knowledgeable, were able to ship parts quick, answer all of our questions we had throughout the process and their product performed flawlessly. They have hit a home run with the Wraptor kit. It out performs many other similar setups while not breaking the bank. If you have thought of possibly adding A/C or power steering and/or wanting a clean custom look on a budget, give CVF a call and order yourself a Wraptor all-inclusive serpentine kit today.


 Mopar Connection Magazine – The ONLY Daily Mopar Magazine © 2022. All Rights Reserved. Mopar Connection Magazine is the ONLY daily Mopar Magazine bringing you the latest Mopar news, technology, breaking news, and Mopar related events and articles. Find out the latest information about Mopar, Mopar products and services, stay up to date on Mopar enthusiast news, dealership information and the latest Mopar social media buzz! Sign up for the Mopar Connection Magazine newsletter for the latest information about new products, services and industry chatter. Mopar Connection Magazine is the best and only source you need to be a Mopar industry insider!
 by
by