


After avoiding a herd of deer and taking out a solid stone mail box, and both the insurance adjuster and body shop pronouncing the car’s death prematurely, we were left with very little hope for our ’70 Plymouth ‘Cuda convertible. Now, we had seen first hand what the AMD Installation Center was able to accomplish while replacing rusted sheet metal on Donny Lippard’s ’70 Charger, but the damage to our ‘Cuda was rust and collision damage.
They had already built the “Phantom ‘Cuda” for “Graveyard Carz”, and they had just finished Ted Stephen’s wadded up Daytona, so that helped bolster our spirits. We contacted the guys at the AMD Installation Center and Classic Muscle Metal knowing those would be hard acts to follow. Even after we delivered to their Cleveland, Georgia facility, talked with Craig Hopkins and Bill Crabtree who both said this would not be a problem for their shop, we still had our doubts while driving 6 hours back home to Nashville.

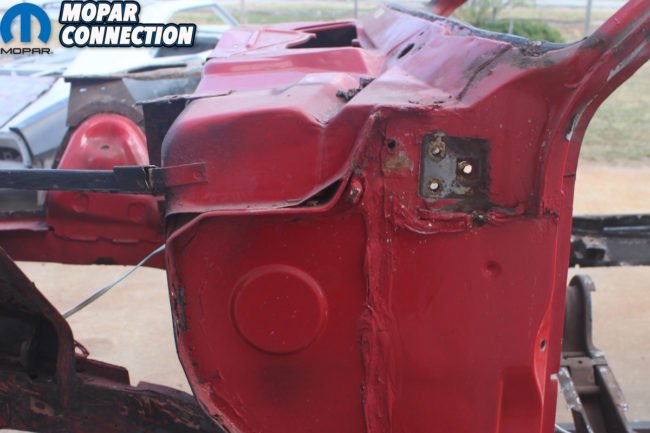
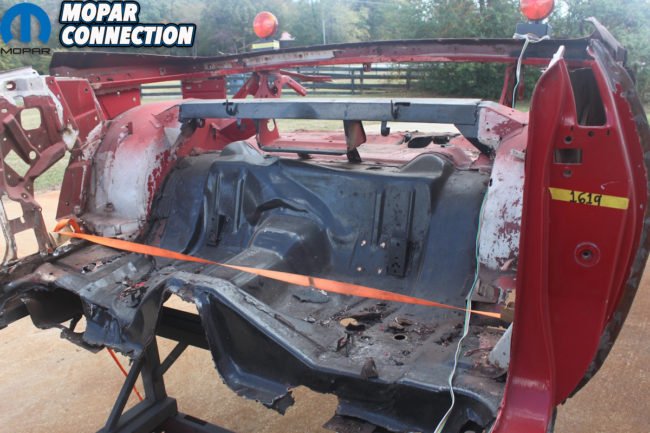

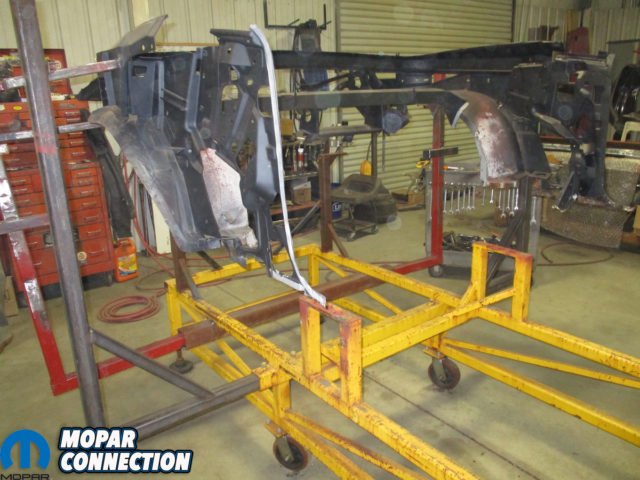
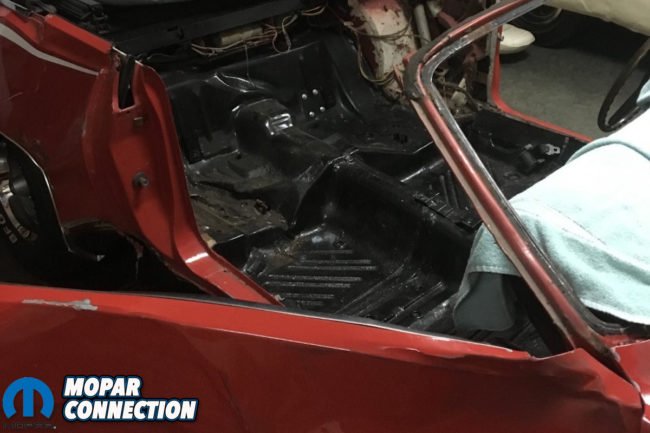
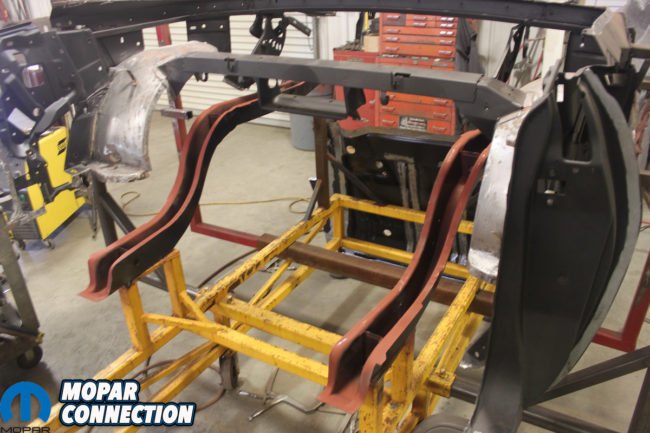
Top Left: One of the first things Craig’s team did was to remove the inner and outer rockers and expose the inner support beams of the convertible. Those beams are the “soul’ of the convertible. The driver’s side was perfect, the passenger side was bent. Top Right: All the front sheet metal was removed except for the radiator support, shock towers and frame rails. After blasting it was discovered that the front door jambs and the cowl cap would need to be replaced. Bottom Left: The quarters and front floor pans were removed. Here you can see the buckled rear floor pans showing how severe the force of the hit from the solid stone mailbox was. You can also see the yellow tape with the car’s project number written on it. The AMD Installation Center takes pictures of all the parts and carefully mark everything so that no parts go missing. Bottom Right: The outer and inner wheel houses were going to be replaced. They are modified for the convertible caps and inner support structure. Without this structure, you cannot restore the car. The inner rocker support beam can be seen with the damage from the hit clearly visible.
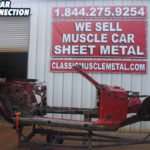


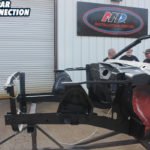
Far Left: As much of the un-usable metal is removed with only enough metal left to keep the shell together. The shell is then mounted to a trailer for delivery to the blaster. Middle Left: After the blaster does his thing you can see exactly what metal is left to work with. They seal the inner convertible support structure since it must be used because no one reproduces it. Middle Right: The little trailer the guys use shows this isn’t their first rodeo. It is complete with tag and tail lights so it will be street legal. You can imagine the looks they get while driving down the road. Far Right: Craig, Bill and the team are getting ready to take the car from the blaster to the shop. That is where the magic begins.
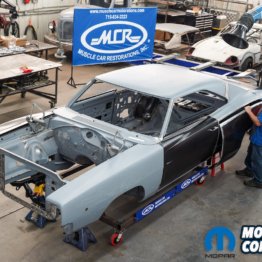
First things first, the ‘Cuda was “chopped”, wherein they remove as much of the damaged, bent or rusted metal that will be replaced while keeping the structure of the car as intact as possible. This is also the only way Craig and his team can see the condition of every panel and know what needs to be replaced or repaired. Often, what remains is not much more than a mere skeleton that requires gusseting and pre-made jigs to retain the car’s original shape.
After removing as many of the body panels as necessary, the substructure was loaded onto a trailer and taken to the blaster. There, any metal that is left was stripped down to bare steel and then sealed. The car, or what was left, was then mounted to their reassembly table. Once there, they continue to remove anything that is left until they were at the place where only solid metal is left. Only then can the process of (re)building the car back to original can begin.

Above: The convertible sub-structure, Dutchman panel, right and left trunk troughs, and the ever important wheel well caps. All were able to be saved. Some needed a few patches and the passenger side will still have to be straightened.
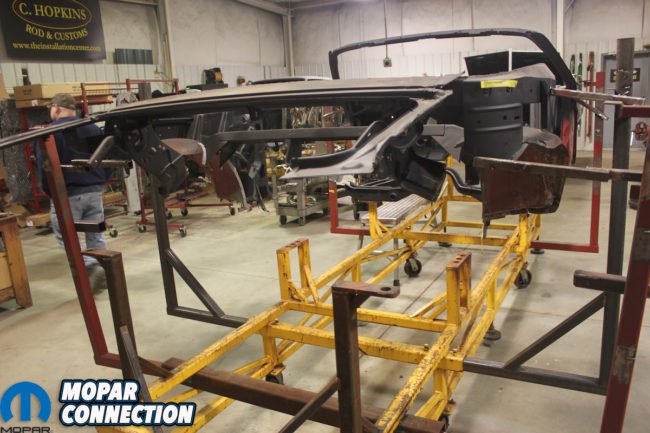


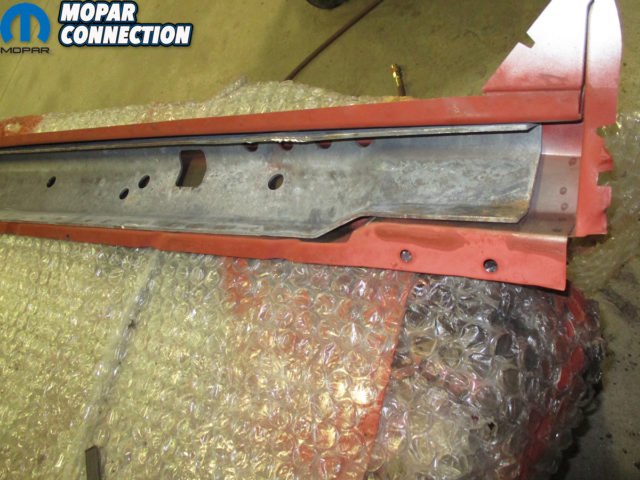
Top Left: Once the shell is mounted to the table, all metal that will be replaced has been removed. Even for the most experienced “do it yourselfers” taking a car this far, and getting it back together within factory specs would be impossible! Even most professional shops won’t touch a project this extensive. Top Right: With a lot of patience and talent the team was able to save the passenger side of the convertible sub-structure. Remember this was the side of the impact. No one reproduces this metal. Bottom Left: You can never have enough tools. Craig originally thought he would have to fabricate the rocker support beam. But after blasting, both the driver and passenger sides were in primo shape and zero rust. So, he made this tool and with his press he proceeded to massage the bent one back into shape. Bottom Right: Craig stayed after the beam until it fit perfectly into the new AMD reproduction outer and inner rocker panels. These are the “soul” of the car and the only structure holding the front and rear of the car together.

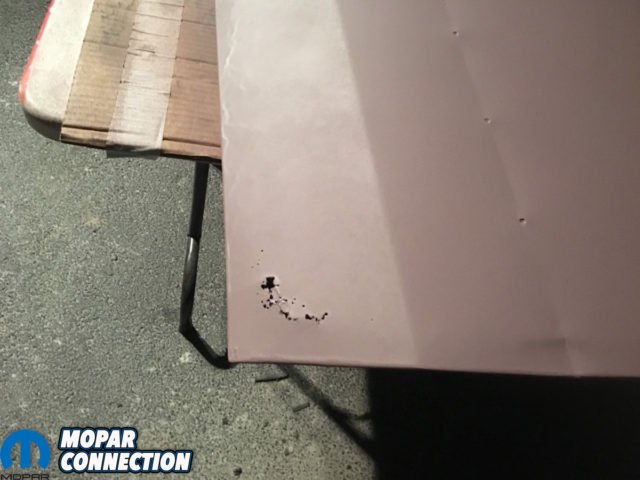
Far Left: Measurements and precision welds are a must when you start from scratch. These guys will not proceed unless they are positive the structure is within factory specifications. They have the talent and the experience to make it right. Middle Left: Just a quick reminder of what the passenger side looked like before taking the “Comeback ‘Cuda” to the intensive care unit in Cleveland, Georgia. Middle Right: While searching for original E-body convertible parts we answered an ad on Moparts connecting to “The E-body Convertible Guy”. After talking to him, he convinced us that we needed an original passenger convertible door and glass. He said he had rust free original parts and proceeded to insist on $2000 for the pair “because they are convertible parts”. After dropping over $7,000 for these and additional parts we received most of the parts. Far Right: The first thing we did was check the door and glass against our originals. The door was from a hardtop and had a rust out corner and tons of filler in it. Plus, the door glass had a chip on the top edge right where it could be seen. When we called about it he said, “All you have to do is drill two holes where the dimples are on the door”. After blasting the door and finding out just how bad it was, we finally got him to answer calls and texts. After much back and forth we gave him an opportunity to make it right. No cooperation from him. In this small Mopar world, everyone thinks the same about this guy. BEWARE!
The AMD Installation Center was able to save most of the convertible-specific parts from our ‘Cuda: the front frame rails, firewall, windshield frame and A-pillars, heavy duty rocker beams, and the convertible top sub-structure with modified wheel well caps. The inner and outer wheel wells had to be modified for a convertible. The heavy rocker beams that hold a convertible together were bent during the wreck. However, Craig wasn’t going to let that slow him down. He fabricated a tool to use in his press and with a lot of patience and determination, massaged the originals back into shape.
Additional convertible-specific panels were needed to bring the “Comeback ‘Cuda” …well, back. The quarter panels for convertibles are not reproduced – only the hardtop ones are. After searching, we finally found the needed quarter panels, original convertible doors, trim, glass, and other hard-to-find parts. To set the record straight, the hardtop doors and convertible doors are the same in ’70 and ’71, only the B-pillars are punched for the brass spring-loaded wedges that reinforce the doors. Yet, the door glass is different. So, don’t let any well-known “expert” tell you different and charge you three times what these doors are worth.

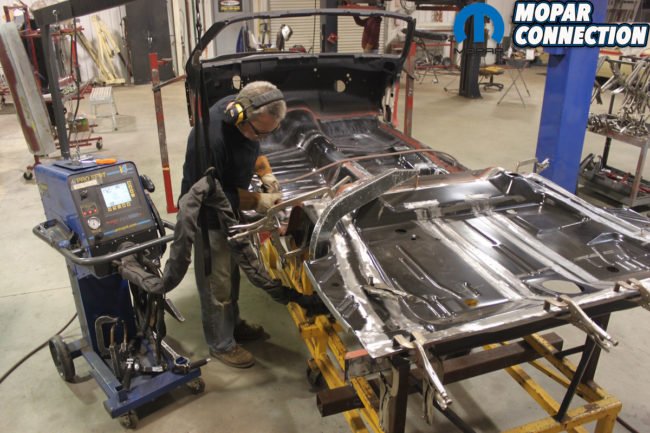

Far Left: After getting the frame rails blasted there was too much “rust through” to use them. Craig added these frame rails to the work order. One of the best parts about doing business with AMD Installation is zero doubt about the charges. You pay for the part and then the part has a set labor cost to install no matter how many hours is needed to make it right. Middle Left: The rear floor pan is then welded to the frame rails that are mounted perfectly in the jig. The spot welds look just exactly like the factory ones. The inner convertible structure is test fitted to guarantee correct alignment. After welding the metal is sealed. Middle Right: Here, one of Craig’s go to guys MIG welds any areas that need special attention. Since the rear frame rails are in correct position the remaining floor and truck pans can be welded in place. Far Right: Every seam is just like they were originally from Ma Mopar. No rust, no questionable welds, all correct factory measurements and alignment.


Top Left: The inner convertible sub frame assembly is not reproduced and you must have one to build an E-body convertible. The AMD Installation Center straightened the passenger side that took the hit. Top Right: The rusted corner of the convertible specific wheel well cap needed to also be saved since these are not reproduced either. Bottom Left: A patch was fabricated, fit, welded, and finished so that no structural integrity would be sacrificed. Check out the factory appearing welds from the rear floor pan to the rear frame rails. Sweet! Bottom Right: Inner and outer lower wheel wells had to also be replaced. After buying a “modified one” that the “E-body convertible expert” sold us for an extremely high price, Craig and his team modified the standard wheel well for the other side with no extra charge. Live and learn.
Now that Craig and his team had everything to begin, with the car mounted and aligned on the body table, they began to spot weld all the panels from the ground up, the same way the car was built at the factory. The AMD Installation Center has the equipment and experience to weld these panels identical to the factory appearance spot welds. The integrity of the car is as good as, and in most cases, better than the factory when they are finished.
Not only did the AMD Installation Center replace panels, they straightened critical, irreplaceable structures and patched any areas that were corroded. The work on these areas was impeccable. There were not any shortcuts taken to make the car right. Throughout the restoration process (because it truly is a restoration) the staff kept us up-to-date on the progress of the build with detailed pictures that were sent to our e-mail – they do the same for all of their customers.


Above Left: Special thanks to Classic Industries who provided a full trunk floor for the “Comeback ‘Cuda” Full floors and trunks pans are really the best way to go. When seam sealed there will not be any extra seams or welds. Just full factory panels that provide the original structure designed at Chrysler. Above Middle: Of course, the only hood that came on a ’70 Hemi ‘Cuda was the awesome “Shaker”. There are available metal parts to modify a plain hood into a “Shaker” But why do all that work when AMD makes a complete hood with trim ring again provided by our friends at Classic Industries. Above Right: Final appearance of the full trunk pan and the way it attaches to the inner wheel wells and the convertible specific wheel well caps and supports are perfect in fit and finish.

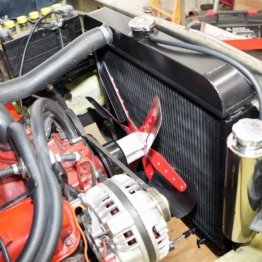
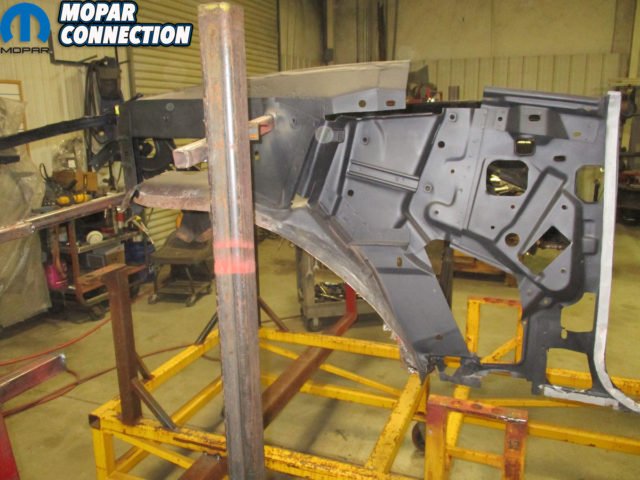
Above Left: Whoever did the conversion of the 1970 318 Barracuda convertible to a Hemi ‘Cuda convertible cut a lot of corners to say the least. They left the 22-inch radiator support and radiator in the car. Since all Hemis came with a 26-inch radiator and support we had to make the change. Above Right: We were able to keep the top cross member of the original radiator support and replace the passenger side panel with the 26-inch piece. The driver’s side panel is the same in both the 26-inch and 22-inch radiator support. The grille surround is the original and has been blasted and hit with grey primer.
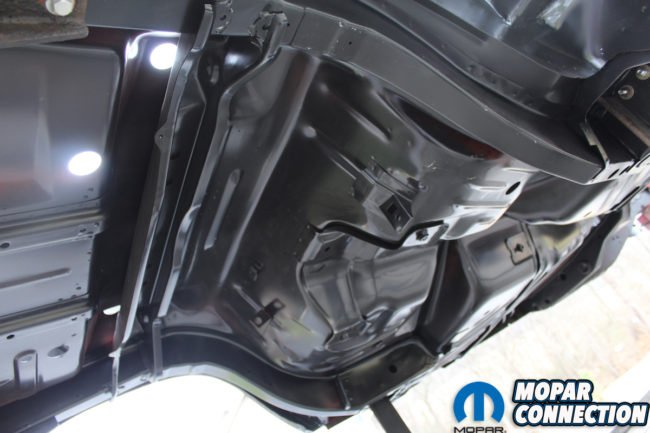


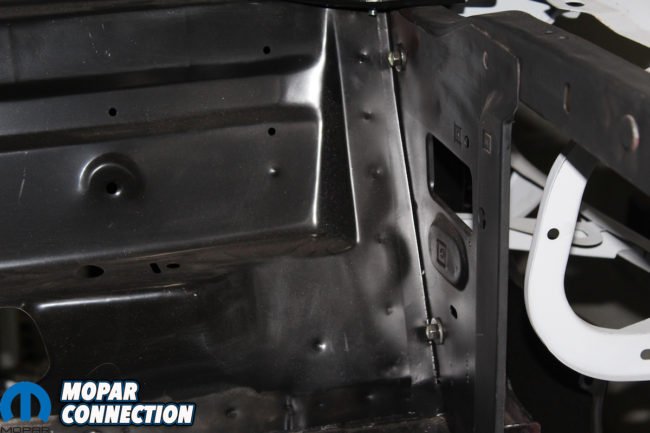
Above Left: The only way to achieve a factory correct undercarriage is to replace the full panel just like the factory. Patching in left and right, front and back floor partial panels, will always show no matter how much finish work is done. Above Middle: The precision that the crew at AMD Installation uses can be seen in every part of the new “Comeback ‘Cuda”. The rear panel, trunk floor, quarter panel, are all attached correctly without any extra patch welds or seams. Above right: Inner, outer, and convertible caps of the rear wheel wells were all returned to original condition. No quarter panel cut and paste here. When you reach inside and check the wheel, well lip, only factory seams will be there.
Because of the uniqueness of this project and the efforts required to make it happen, Classic Industries wanted to be a part of the “Comeback ‘Cuda” project as well (they were actually one of the first suppliers to come on board). They graciously provided us with the steel Shaker hood and trim ring, the full trunk pan, and the 26-inch radiator support. The parts matched up perfectly with all the other AMD sheet metal and helped in finalizing its transition from a plain Jane 318 Barracuda into a Shaker-topped 426 Hemi ‘Cuda.
Just as promised and right on schedule, Craig and his team completed the build. Then we called on Bill from Classic Muscle Metal. Bill and Craig’s offices are just a few feet apart which really makes the entire process easy. Any additional parts that are needed can be ordered and picked up at the same time you pick up the car, or even later if you discover other parts are needed and the best part is Bill will give you a 10% discount (and as much as a 20% discount) depending on the size of the order on anything you need from AMD simply by mentioning you saw them on Mopar Connection Magazine.
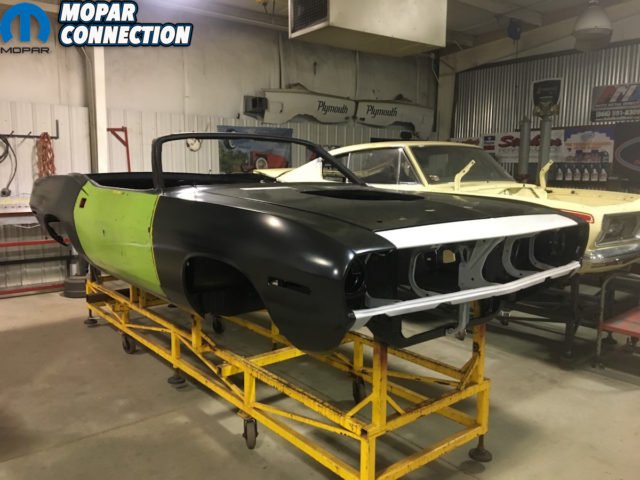

Above left: Here is the “Crushed ‘Cuda” transformed into the “Comeback ‘Cuda”! It is basically a brand new car! All the gaps line up and every seam is awesome. (Check out the garage art. Quarters from an Alpine White Superbird.) Above right: The guys helped us get the car off the table and onto the lift where we attached our pedestals with roller wheels. We fabricated these to bolt to the frame where the k-member attaches and the rear spring hangers. Classic Muscle Metal contact information is clearly visible. Give Bill a call for all your AMD needs!


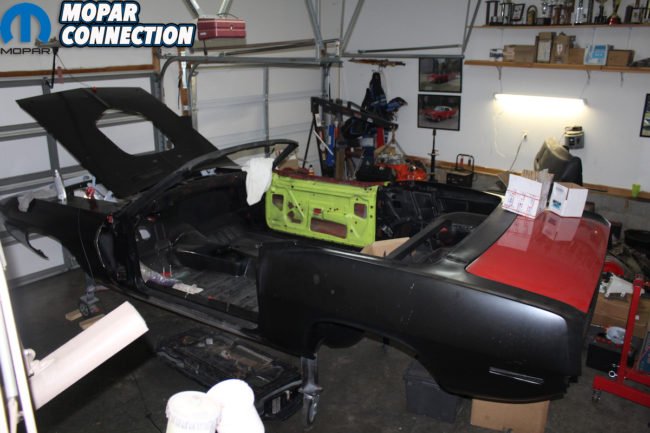
Above left: Six hours later and the “Comeback ‘Cuda” is back in Nashville. Lots of wind, interstate trucks, and by the time we left Cleveland, GA, it was dark. But with it strapped down well nothing moved. Above center: Without the suspension under the car it was necessary to use the cherry picker to unload the car at the house. One on the ground, and a smaller one on the trailer for the front, and in no time the car was off the trailer. Above right: The “Comeback ‘Cuda” is safe in the garage. The Hemi, K-member, front suspension, and 4-speed overdrive from Passon is already assembled. The doors and trunk lid are next on the list. They are headed for the blaster. With time to go over the car inch by inch now that it is home, the workmanship and the metal is perfect. Thank You, AMD Installation Center and Classic Muscle Metal.

Above: YearOne to the rescue. So many parts from one great source.
Usually it has been our experience that “settling up” comes with some unforeseen surprises and sometimes even serious and uncomfortable disagreements. Not so with the AMD Installation Center and Classic Muscle Metal. After going line-by-line over the estimate and the current invoices everything was as expected. In no time at all, the crew helped us load the car on the trailer and the “Comeback ‘Cuda” was headed home.
To be able to go from driving and showing the car, to survive the stone mail box and deer herd, to being pronounced dead by the insurance company, to now having a brand new 1970 ‘Cuda convertible body back home is nothing short of a miracle. Huge thanks to Craig, Bill, and team from the AMD Installation Center and Classic Muscle Metal! Next, we begin the body work, paint, and re-assembly of the “Comeback ‘Cuda”.


 Mopar Connection Magazine – The ONLY Daily Mopar Magazine © 2022. All Rights Reserved. Mopar Connection Magazine is the ONLY daily Mopar Magazine bringing you the latest Mopar news, technology, breaking news, and Mopar related events and articles. Find out the latest information about Mopar, Mopar products and services, stay up to date on Mopar enthusiast news, dealership information and the latest Mopar social media buzz! Sign up for the Mopar Connection Magazine newsletter for the latest information about new products, services and industry chatter. Mopar Connection Magazine is the best and only source you need to be a Mopar industry insider!
 by
by