


There is no better time than now to own a classic Mopar. Many parts are being reproduced and the aftermarket is full of great upgrades. Suspension has been a big focus for a while now and whether you call it resto-modding or pro-touring, having your Mopar handle like a new car allows you to drive your car more often, faster, safer, etc. Reilly Motorsports leads the way in performance suspension for a variety of classic Mopars and other custom applications. Their AlterKtion front suspension and Street-Lynx rear suspension utilize better suspension geometry, coil-overs and installation that doesn’t require cutting up your car.
The AlterKtion has been a very popular upgrade for everything from homebuilt rides to high end SEMA builds like “Raging Bird”. Its bolt in, no cutting, multiple motor configurations and much more. The Street-Lynx rear suspension has also been popular but can be a little unnerving unless your handy with a welder. Well, thats going to change because Reilly Motorsports (RMS) has introduced ready-to-install housings, Flex joints and rear sway bar option that makes the Street-Lynx easier to install and brings even more performance.
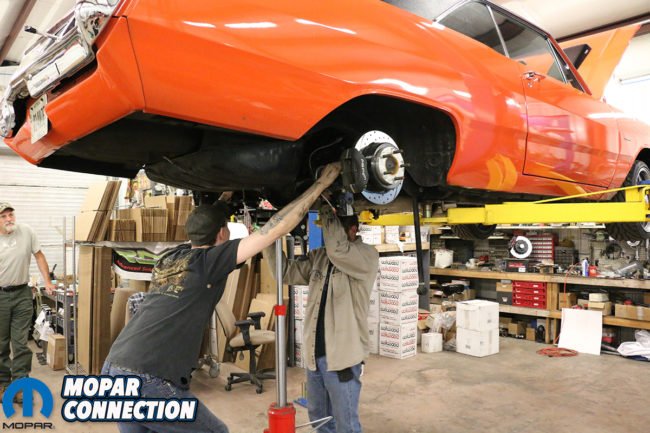
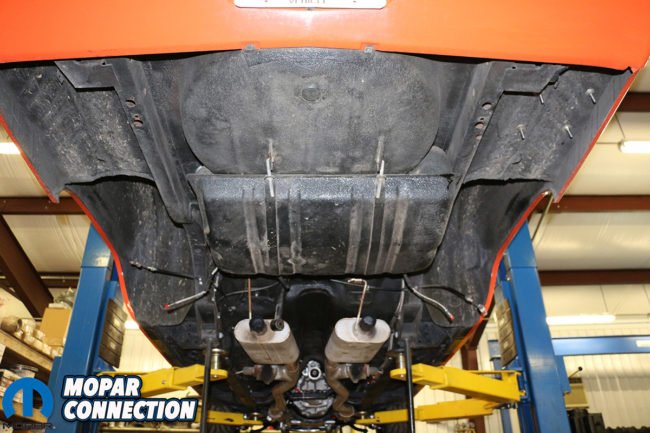
Above: Without going through a ton of details, you need to start off by removing your rear suspension. We already had the the old Street-Lynx to remove but most of you will have leaf springs that need to be removed. The rear axle, brake lines, fuel lines, exhaust, driveshaft and gas tank will also need to be removed.
If you’re not familiar with the Street-Lynx triangulated 4-link rear suspension it is a triangulated 4-link that replaces your rear leaf springs. The Street-Lynx utilizes coil-overs which weigh less and have many more options for springs rates. They are mounted in front of the axle to prevent axle wrap. The triangulated design its great for both street handling and drag racing. The triangulated design is more compact than other rear suspension setups that allows for stock gas tank and allows up to off the shelf three inch TTI tail pipes. The best part is you gain all this performance while receiving a better than stock ride.
The original designed Street-Lynx required welding on an extra perch to the rear axle housing along with the 4-link tabs. Before welding occurs you have to make sure the rear end was centered and that pinion angles were correct. Another downfall of the original design was many drag racers that wanted a rear sway bar but the design would not allow for one. These requirements have steered many customers away from purchasing the Street-Lynx.
Above: When we originally installed the Street-Lynx suspension we went ahead and mini tubbed Orange Crush and moved the mounting location for the bottom links inboard. This isn’t an issue for RMS but you will need to send measurements to RMS. We measured from center to center of our relocation boxes and send that measurement to RMS weeks ahead of time. Again unlike many of you, the upper crossbar was part of the original Street-Lynx and needed removed. If you have leaf springs there is no bar to remove and this makes the install go a lot quicker.
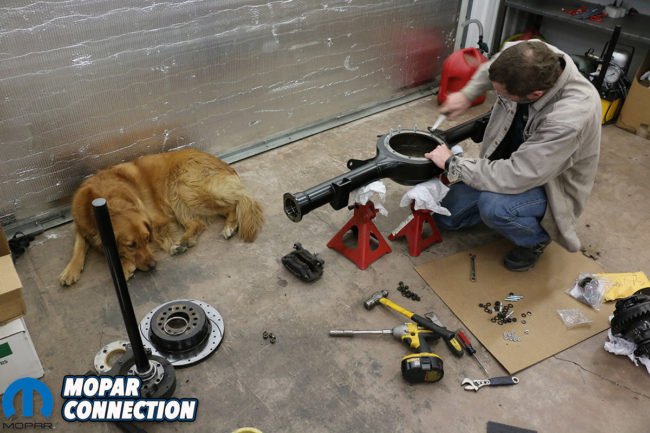
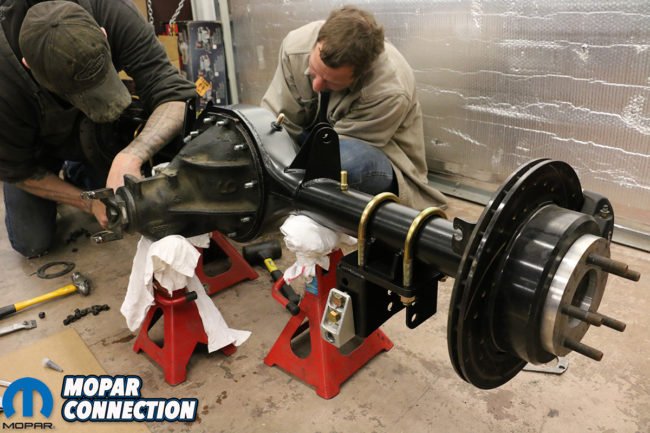
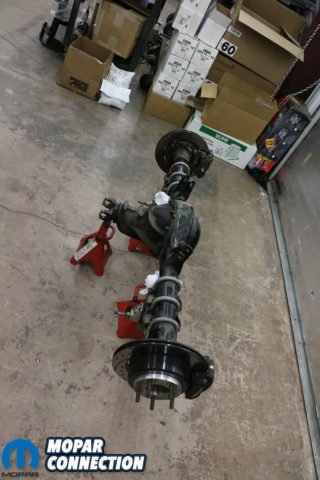
Above: While the crossbar was being cut out, we tore the old housing apart. We needed to reuse our brakes and center section in our new ready-to-install housing. The great part about the ready-to-install housing is you can fully assemble the rear end one time and your done. Now welding or fabrication required on the rear end and when it goes in its final assembly. We installed the center section, brakes and axles in the new Moser ready-to-housing. We bolted on the new Street-Lynx brackets to the perches and were ready to set it back in the car.
“If someone were to weld the Street-Lynx brackets on to a less than fair housing it could warp, causing issues with fitment of axles or worst the housing could break. This situation creates an unhappy customer who will most likely blame us which hurts our reputation. The other situation is someone welds the brackets on incorrectly and causes vibrations or handling issues, which again creates an unhappy customer who will most likely blame us for a bad product.” Unfortunately we had already faced many of these issues that Bill was talking about.
When we first installed the Street-Lynx system years ago, our welding skills were not quite up to par and most of all setting up the rear end was over our heads. We turned to a local shop that was supposed to have experience in doing 4-links. We trusted them to center the rear end and have the correct pinion angles. After installing everything we chased a bad vibration for a year due to incorrect pinion angle and then a year later we also learned that the housing warped while welding the brackets for the Street-Lynx. If RMS had the ready-to-install housings it would have saved us a lot of time and money.
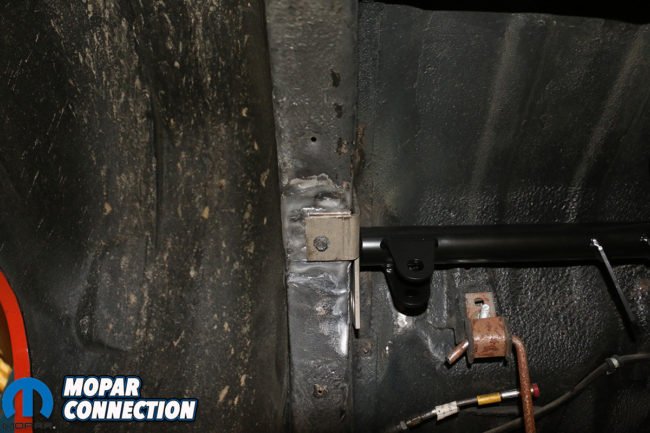
Above: Once the old crossbar was removed it was time to weld in the new one. This is the only bit of welding that needs to be done for the installation of the new Street-Lynx. The crossbar is the correct length and bolts into place via the original bump stop.
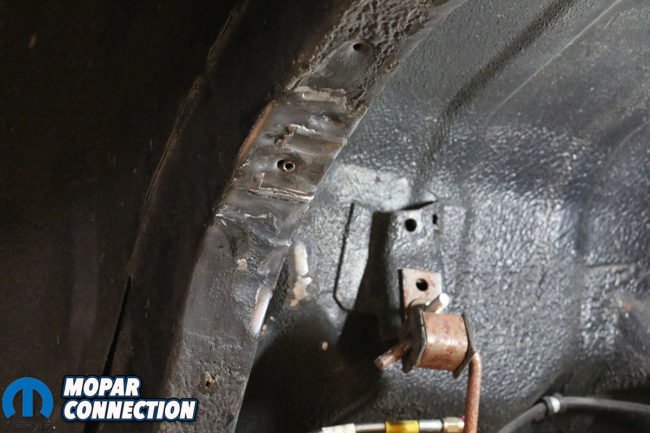
Above left: If you haven’t already be sure to run the grinder and clean up the frame rail where the cross bar brackets sit on the frame rail to ensure clean surface for welding. Above right: The crossbar has a pre-drilled hole that needs to be aligned with the front mounting hole of the bump stop. You can install the bar backwards so make sure that the bar and shock mounts are pointing forward to the front of the car. Once its in place start welding.
Bill had received many calls over the years of customers asking for them to weld on the tabs to their rear end housings if they would ship them theirs. “Some customers asked for fully welded housings because they didn’t have the skills or equipment to weld the heavier material on the housing. Others had very poor original housings and needed a new housing altogether.”
Being the super awesome company they are, Bill and his team at RMS have listened to their customers demand and have redesigned the Street-Lynx over time to fit their customers needs and wants. It took a while for RMS to redesign the Street-Lynx suspension and to create a ready-to-install housing. Now it’s here and is one of the best upgrades you can do for your classic Mopar.
Above: Once the crossbar is welded in place and cooled down, we shot some undercoating on the bar metal.
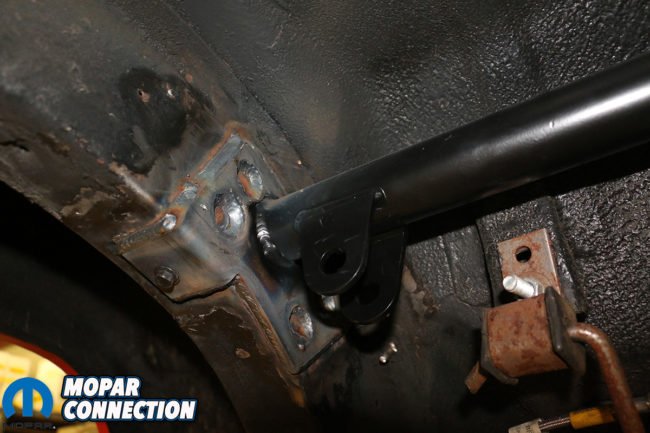
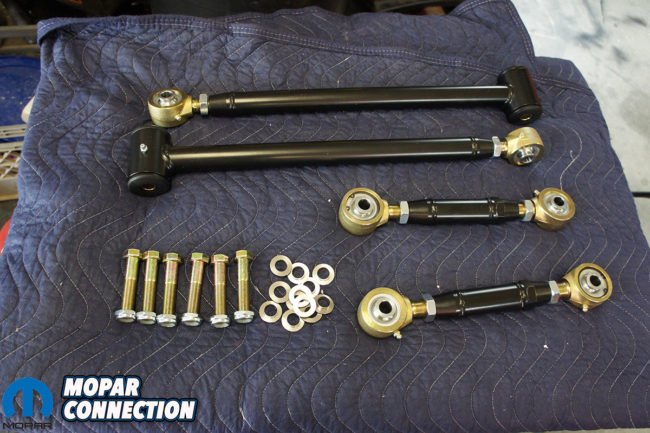
Above: It was time to hoist the rear axle back up in and start installing our links. You will need to measure and adjust the 4-link bars to the proper lengths described in the installation manual. No matter the application the upper bars need to have 1/4-inch of thread showing and both be the same length. The lower bars need to be set at proper length described in the manual.
“There were some issues that got in our way of selling a ready-to-install housing sooner.” Bill said, “To start with we needed to make sure that we had enough customer demand. Years ago we designed F-body suspension and I think we have sold 2 kits since then. I wanted to make sure there was plenty of demand this time around.” As much as Bill enjoys fabricating, he still needs to keep the lights on. “Once the demand was clear, we had to track down housings and then make up new jigs for every set-up we offered. A call to Moser solved our housings issue and then it was just the R & D time until we could release them.”
During the R & D process of the new ready-to-install housings they made a few tweaks to the Street-Lynx suspension along the way too. “After a few years of production we learned more about the Street-Lynx and how to improve its design. Although geometry stayed the same, we were able to condense the rear shock/link brackets from using two perches to one, added built in tow hooks and an optional rear sway bar for strip use.” Although the original use of the rear sway bar was drag racing, we new it would serve purpose for our short track racing too.
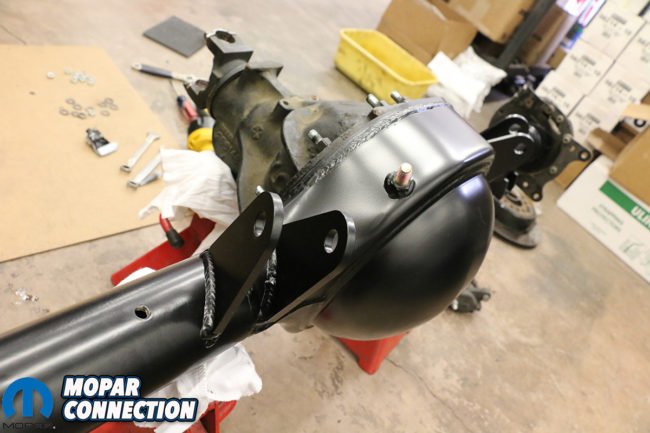
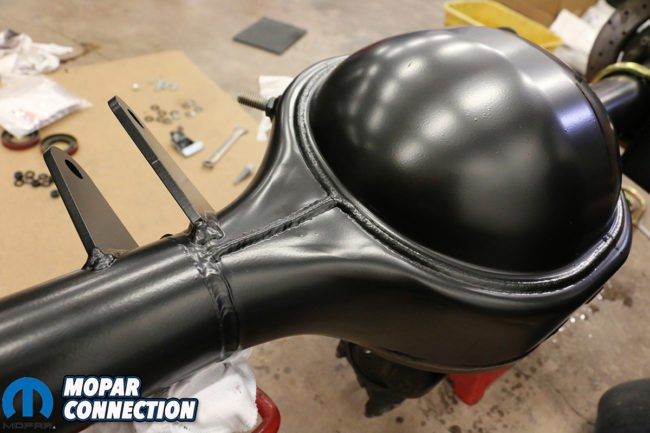
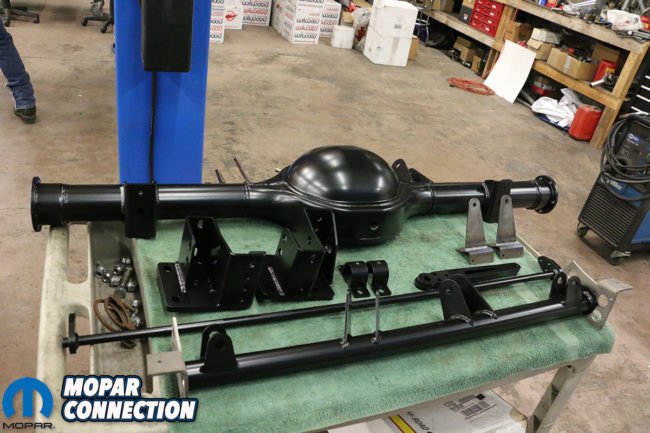
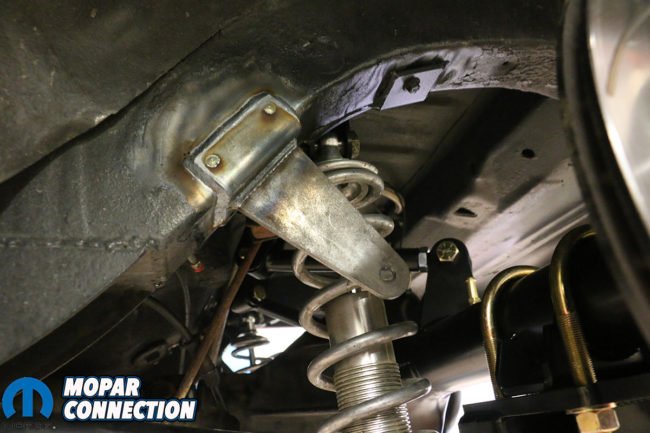
Above: RMS ready-to-install housings are brand new Moser housings that have all the tabs and perches welded on and ready to bolt on the the Street-Lynx suspension. They also come with a relocated axle vent and stud for a stock rear brake line. This takes all the guess work out of installing the Street-Lynx suspension and allows you to install it in less than a day.
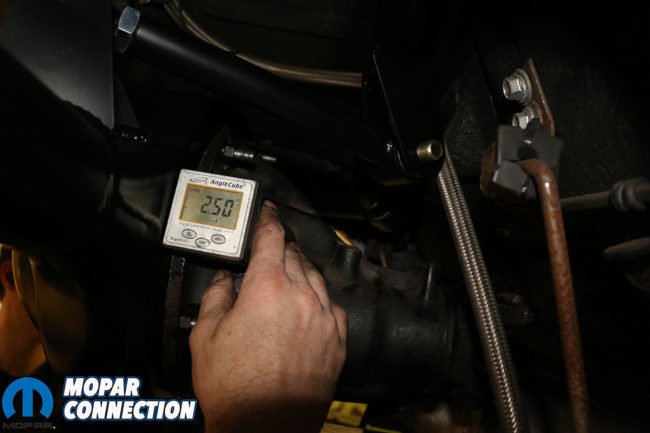
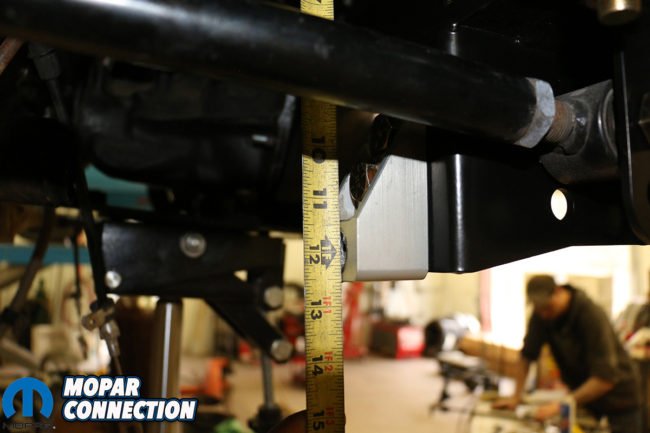
Above: With the 4-link bars installed we needed to check pinion angle. We raised the rear end to ride height, checking the distance of the shock mounts. Our pinion angle was sitting at 2.5 degrees negative (pinion pointing up) which for our application was fine because of our American Powertrain Magnum 6-speed transmission. Most applications should be between 0- and 1-degree negative.
The new Moser 8 3/4 housings may look a little different from the stock housings. This is due to Moser’s round back design. If you’re installing a triangulated 4-link rear suspension we don’t think looks are too important but performance is. The new housings are stronger, have a drain plug and use better designed housing ends to accept Wilwood and Baer brake kits easier. After welding on the brackets and making the necessary modifications, RMS powder coats them satin black. The powder coating is done in house to ensure flawless coating and different colors if you are looking for a custom look.
The demand for ready-to-install housings were not just for 8 3/4 but also Ford 9” housings as well. They are compact and very similar in size of the Chrysler 8 3/4” which make it a popular upgrade. The similar size which would make it easier for RMS to modify the Street-Lynx setup to work with the 9” rear. Moser also offers bare 9” housings with new axles and made it easy for RMS to offer both options.
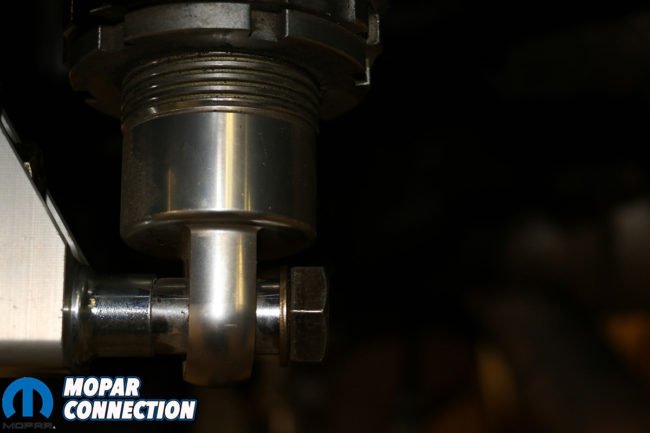
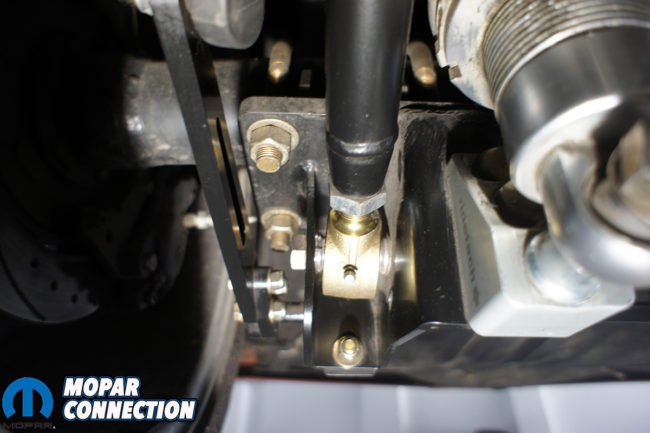
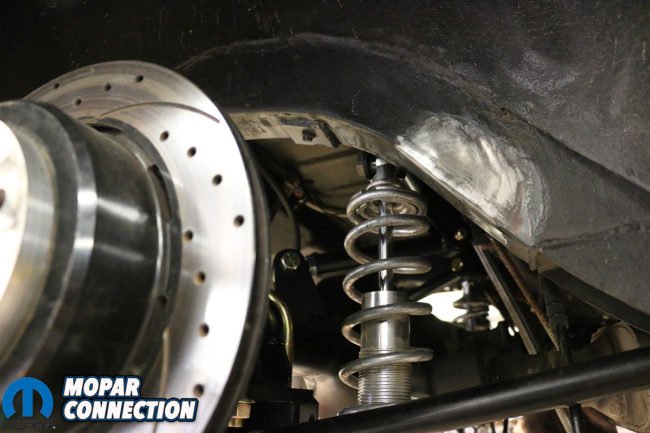
Above: Our shocks were already set up for our ride height but if your kit is new you will need to assemble the shocks. During assembly you must apply anti-seize to the coil-over threads to prevent gulling when adjusting ride height. We also suggest that you install a thrust bearing kit like QA1 7888-109. You will only need one kit for the rear. This makes height adjustment a lot easier and quicker. Also when you install the bottom shock mount bolt, the provided spacer needs to go between the shock and the mount. The threads on the bolt will need to be covered with anti-seize to prevent gulling of the shock mount too.
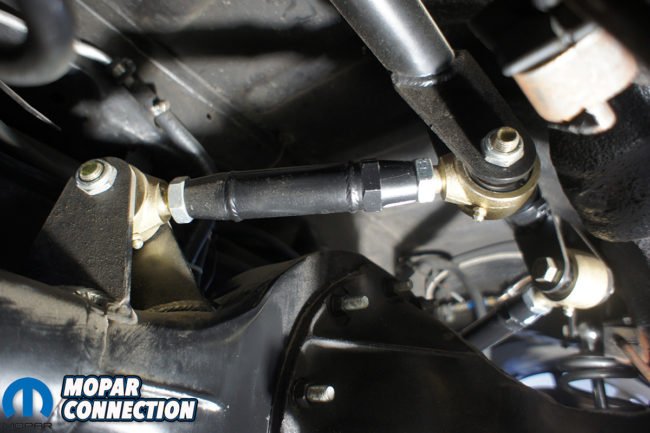
Not only has RMS unveiled their ready-to-install housings but they now offer heavy duty Flex joints. Before you had the option of spherical rod ends or rubber bushings for the Street-Lynx. The rods ends gave the best performance but very harsh ride and the rubber bushings gave the best ride but lacked in performance. The new Flex joints offer the best of both worlds. The delrin races help absorb vibrations on the road yet rigid enough to provide excellent axle control and driver feedback.
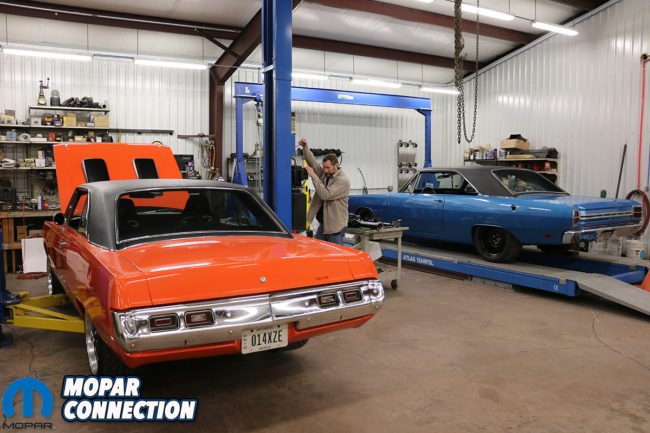
After talking with Bill about the new housings we had to have one for ourselves. Ours had seen better days, been tweaked and brackets welded at the wrong angles. We chatted with Bill a little more and set up a time for us to come over to get the new rear end installed along with a rear sway bar. Since Orange Crush was mini-tubbed and springs moved inboard we had to send Bill a couple measurements to make sure the brackets would be welded in the correct spots.
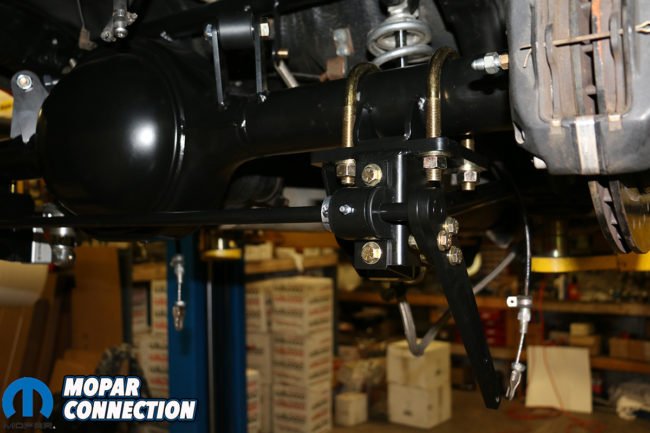
Above: With everything back in and sitting where it needed to, it was time to install the rear sway bar.
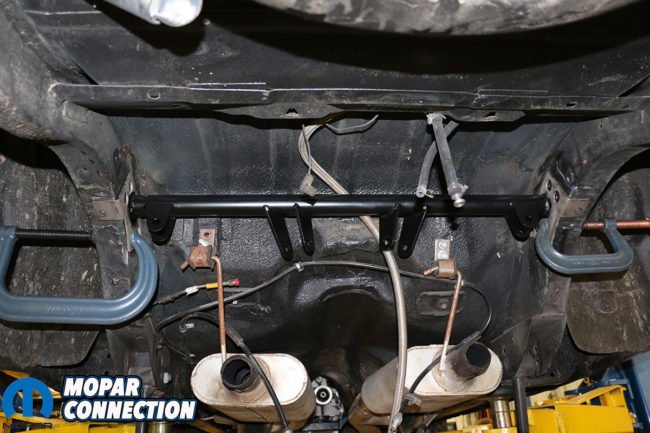
Above: If you opt for a sway bar you will need to follow the instructions RMS provides. Reinstall the fuel tank, brake lines, driveshaft and fuel lines. If you had leaf springs some of the lines might need to be altered to no interfere with the new suspension. We were lucky and since we had the Street-Lynx already in the car we had all of our lines routed properly. Once everything is installed cycle the suspension up and down to reassure nothing will interfere with the new suspension. Exhaust is a big one but you also don’t want fuel lines or brake lines getting pinched while driving the car. Its easiest if you remove the springs from the shocks and while the rear of the car is supported use a jack to raise and lower the rear end. When we first installed our Street-Lynx we didn’t do this and later on pinched a brake line.
We were planning on a couple of days for the installation but to our surprise it only took one day. It would have been a little quicker if we still had the leaf springs but it took some time to remove the old Street-Lynx cross bar while preserving the frame rails.
Once the installation complete there was nothing more to do but see how Orange Crush handled. Unfortunately we didn’t think to bring new differential fluid but also had a fuel pump going bad so we couldn’t do any testing while we were at the RMS shop. Once we arrived back home we immediately threw a new fuel pump on and filled the rear end. We couldn’t wait to see how the new flex joints and sway bar felt. We went out for a quick cruise and immediately could tell a difference.


Above: You can see the final results of the ready-to-install housing, Flex joints and rear sway bar.
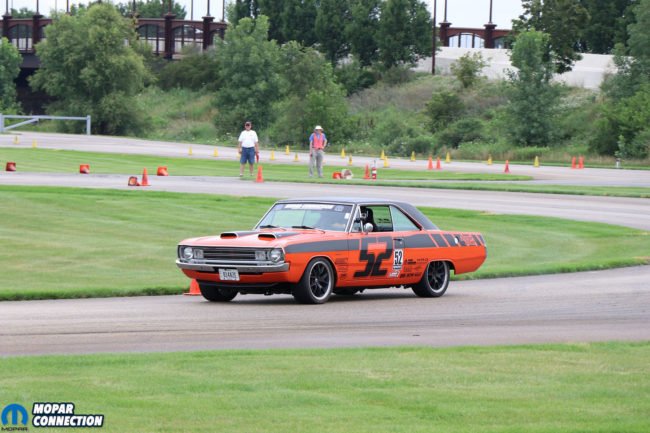
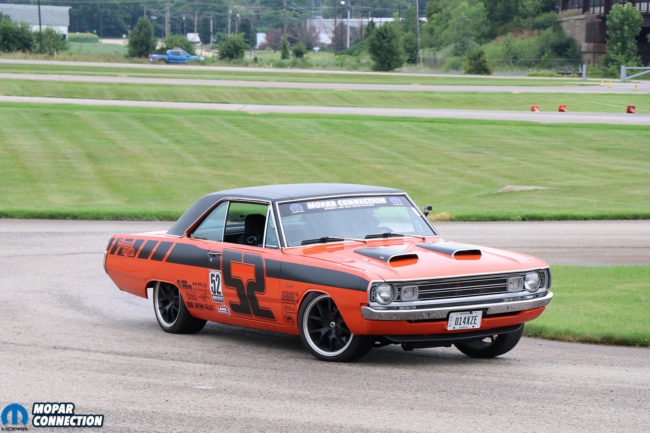
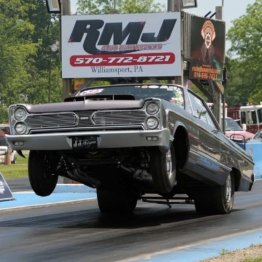
Above: Here we are racing the at this years past Motorstate Challenge.
The following weekend we had a local autocross to attend and would really put the new flex joints and sway bar to the test. During take off we found out that unlike before, we could launch the car as hard as we wanted and had no sign of wheel hop. There was a lot less body roll and more grip in the rear. We could feel it inside the car but after the event we saw a few pictures and could really tell a difference then.
Just when we thought that Bill and Reilly Motorsports couldn’t impress us any further they go and do something like this. We are really excited for RMS to be building the ready-to-install rear housings. It saves the customer time and ensures a perfectly welded rear end thats ready to bolt in. Not to mention having the option of 8 3/4 or 9” is a plus for many enthusiasts. The Flex links and the rear sway bar are incredible additions to the Street-Lynx suspension. If you already have a Street-Lynx setup or thinking about getting one for your classic Mopar, give RMS a call today and see how they can help.


 Mopar Connection Magazine – The ONLY Daily Mopar Magazine © 2022. All Rights Reserved. Mopar Connection Magazine is the ONLY daily Mopar Magazine bringing you the latest Mopar news, technology, breaking news, and Mopar related events and articles. Find out the latest information about Mopar, Mopar products and services, stay up to date on Mopar enthusiast news, dealership information and the latest Mopar social media buzz! Sign up for the Mopar Connection Magazine newsletter for the latest information about new products, services and industry chatter. Mopar Connection Magazine is the best and only source you need to be a Mopar industry insider!
 by
by