


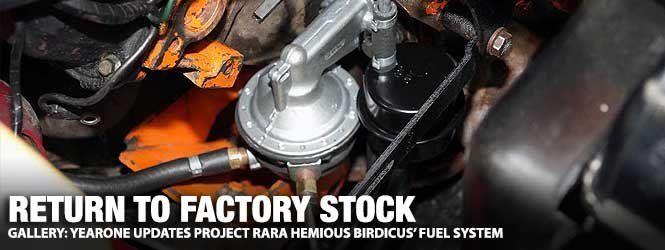
Since we purchased our Road Runner, Project Rara Hemious Birdicus, we have been aggravated by a highly modified fuel system that included an old and unbelievably raucous electric Holley fuel pump mounted at the fuel tank. Moreover, the fuel lines to the carburetors were cut and spliced to fit a fuel pressure regulator before the carbs. To top off the concerns, someone bypassed the mechanical pump, and the fuel filter was a straight pass-through. The vapor return line had been blocked off.

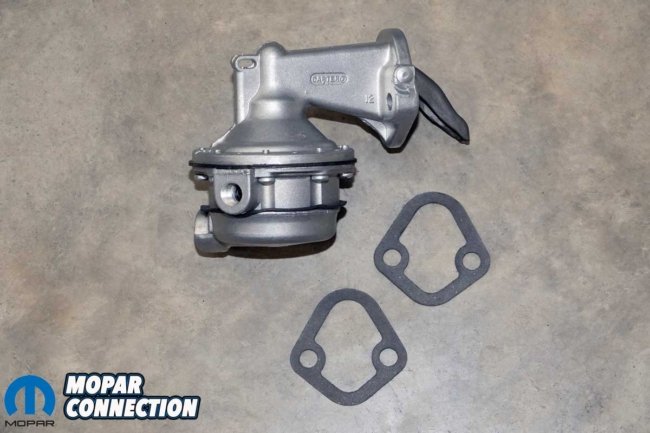
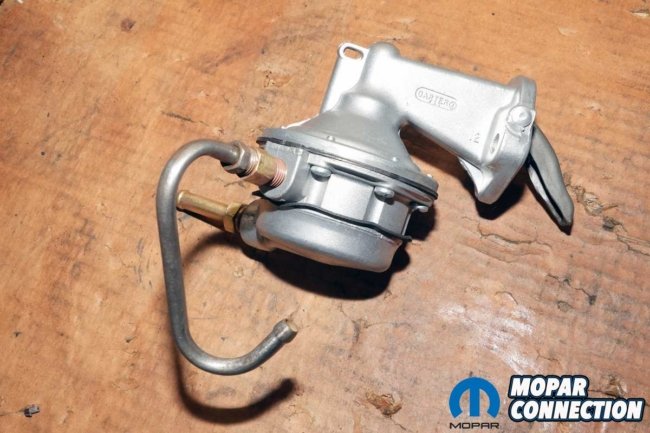
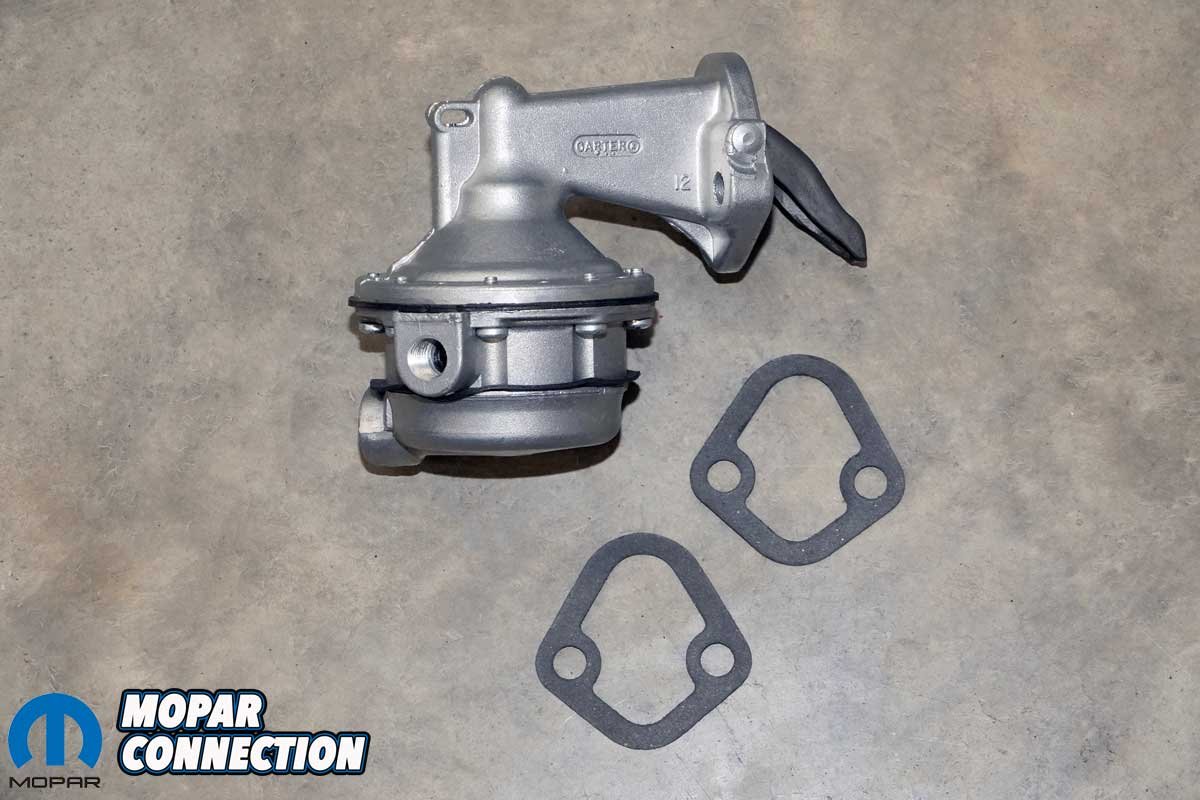
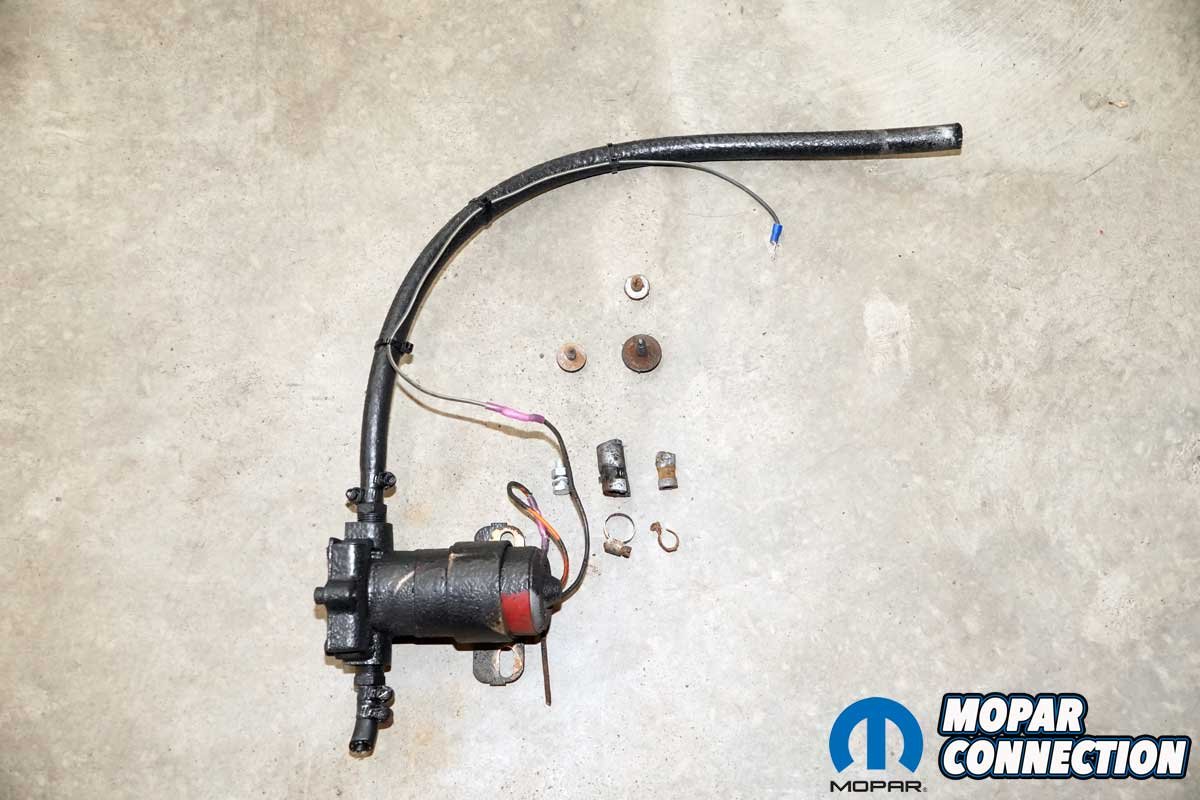
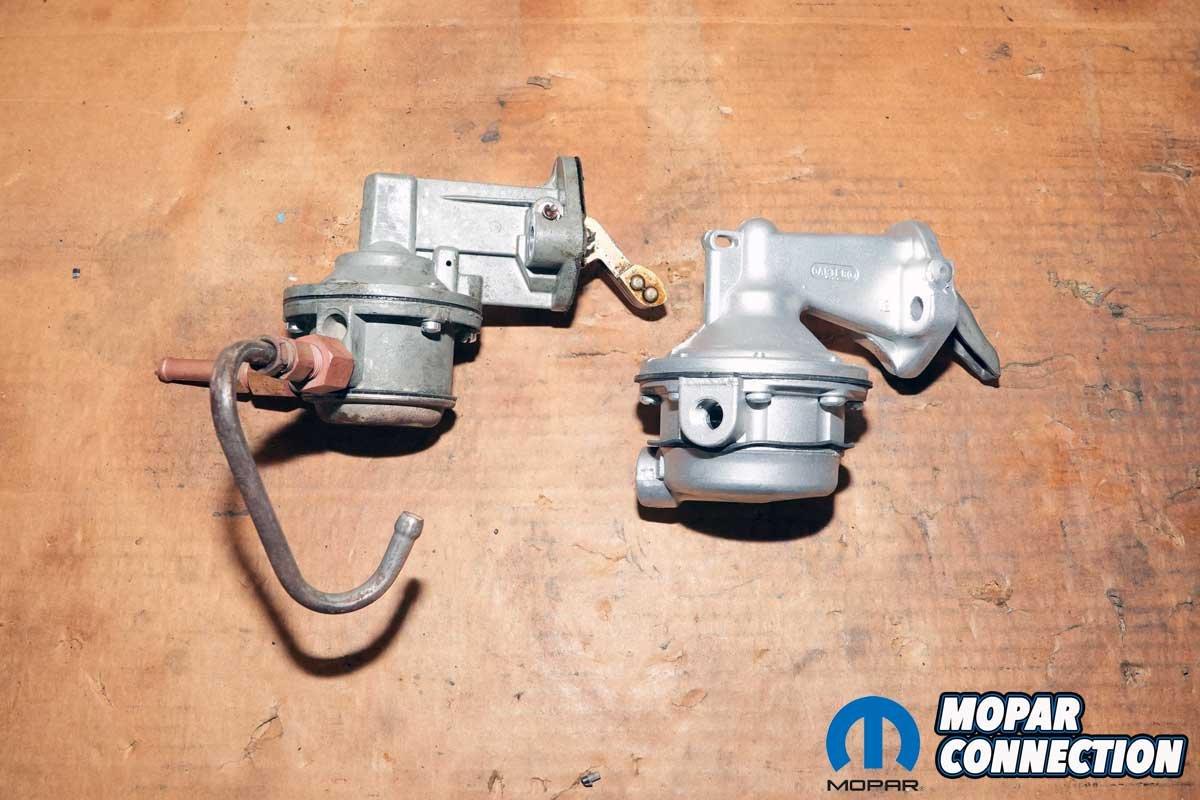
Above Left: Our list of parts we picked up from YearOne included all the hardlines to the carburetors from the vapor separator (top left). Additional parts include the brass fittings for the carburetors and the T-fitting that tied the lines together. Also, a bracket was included to support the hardline assembly. Above Right: Our Runner had a damaged, non-original Carter mechanical fuel pump. We wanted to find a date-correct pump, but the expense would be excessive if we found one. YearOne has a Carter mechanical that fits the bill. It was new and had internals that were compatible with ethanol fuels.

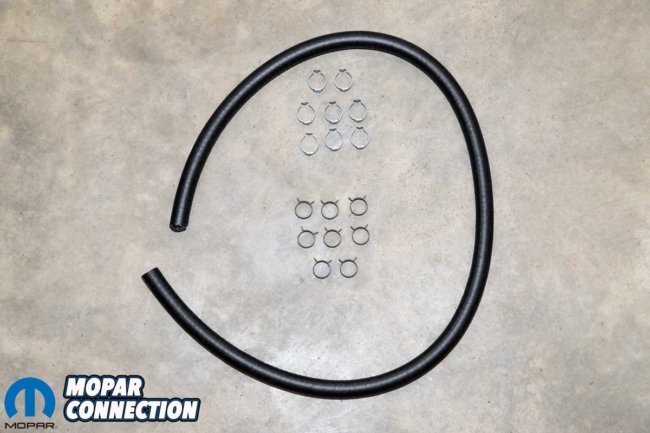
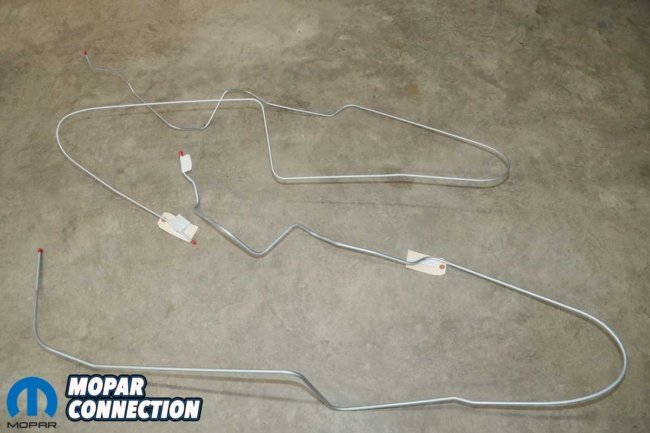
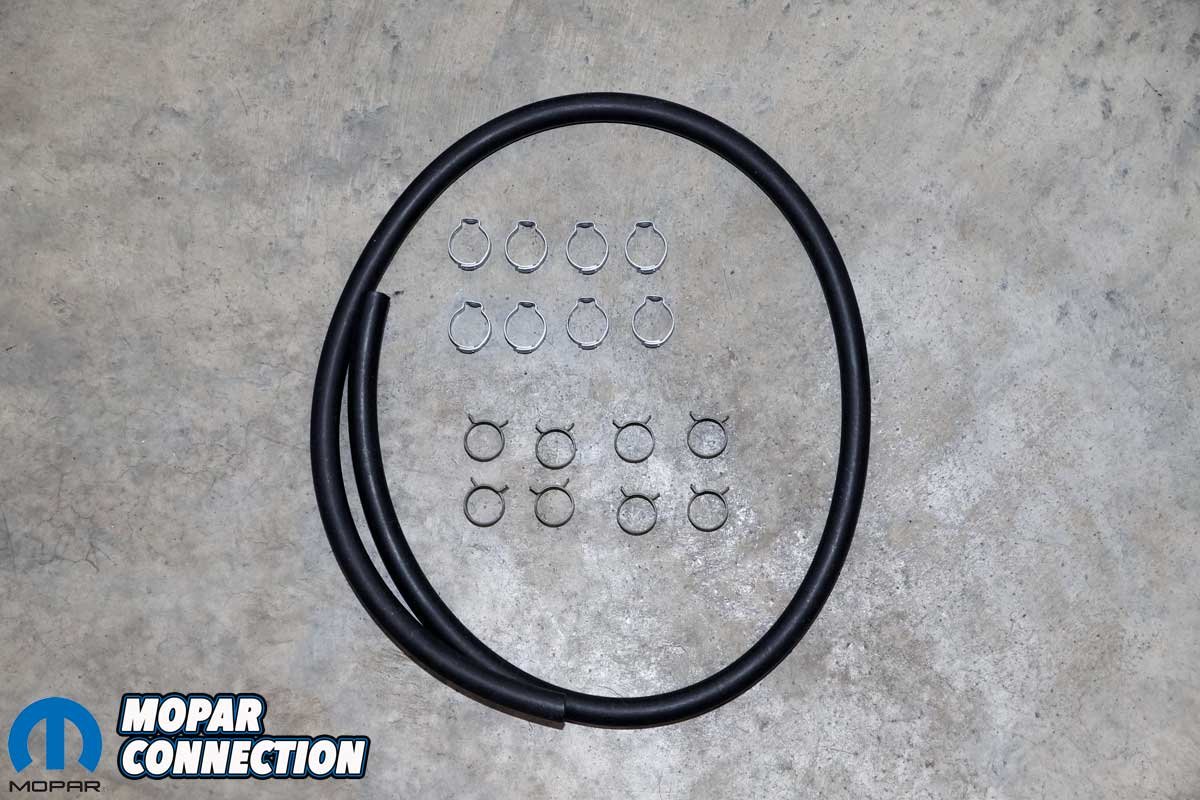
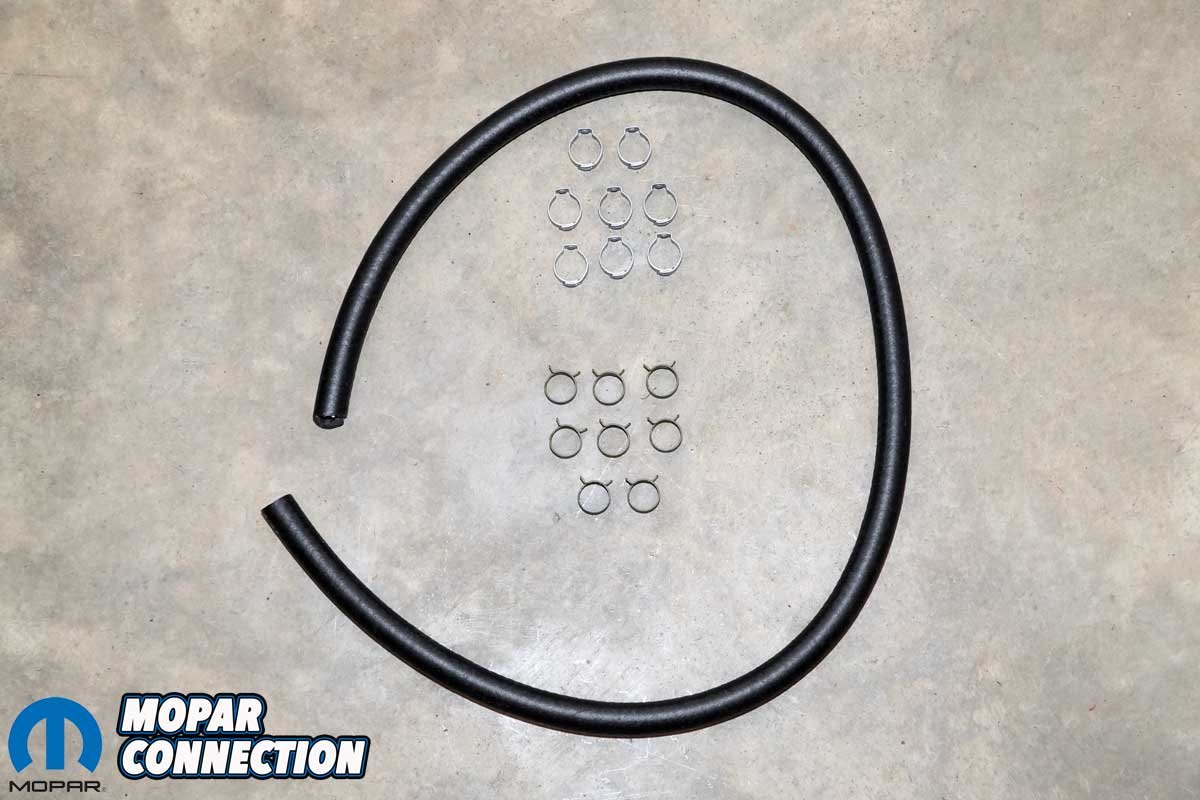
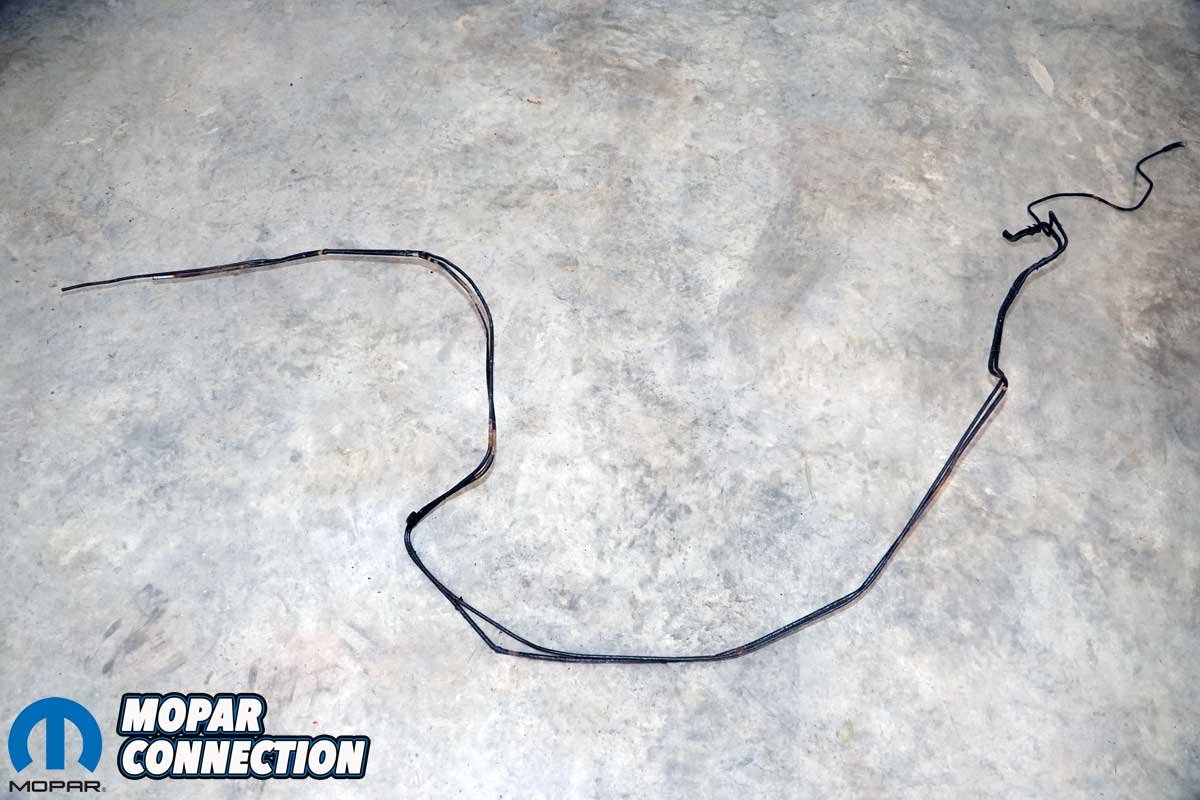
Above Left: YearOne had a 3/8-inch rubber fuel hose kit with clamps designed to work with the Hemi’s main fuel line. Above Center: Additionally, YearOne had a 1/4-inch rubber fuel hose kit for the fuel vapor line. Above Right: The main fuel and vapor return lines were lightly folded to fit in a box for shipping. With great care, we straightened out the bend in each line.
After rebuilding the Carter AFBs (Fueling Around with Eight Barrels), we worked with the reps at YearOne to get the parts we needed to return the fuel system to its factory condition. All the parts we needed were available from YearOne.
The Carter mechanical fuel pump (Part No. AF89) was an exact copy of the original design. Our current mechanical pump was not the original, and while we wanted a correct date-coded pump, those are hard to find, expensive, and usually require a rebuild to operate with ethanol-type fuels.

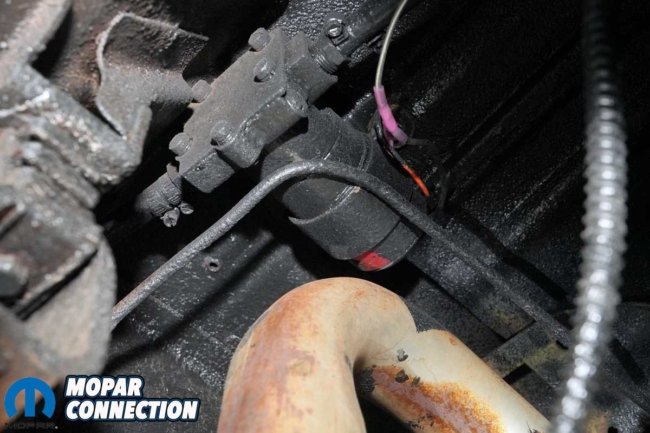

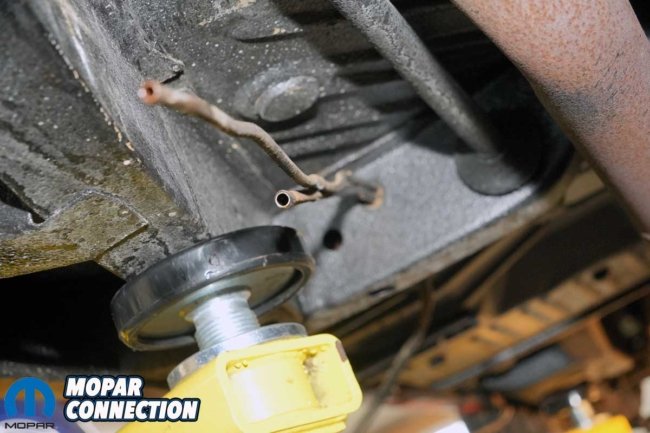
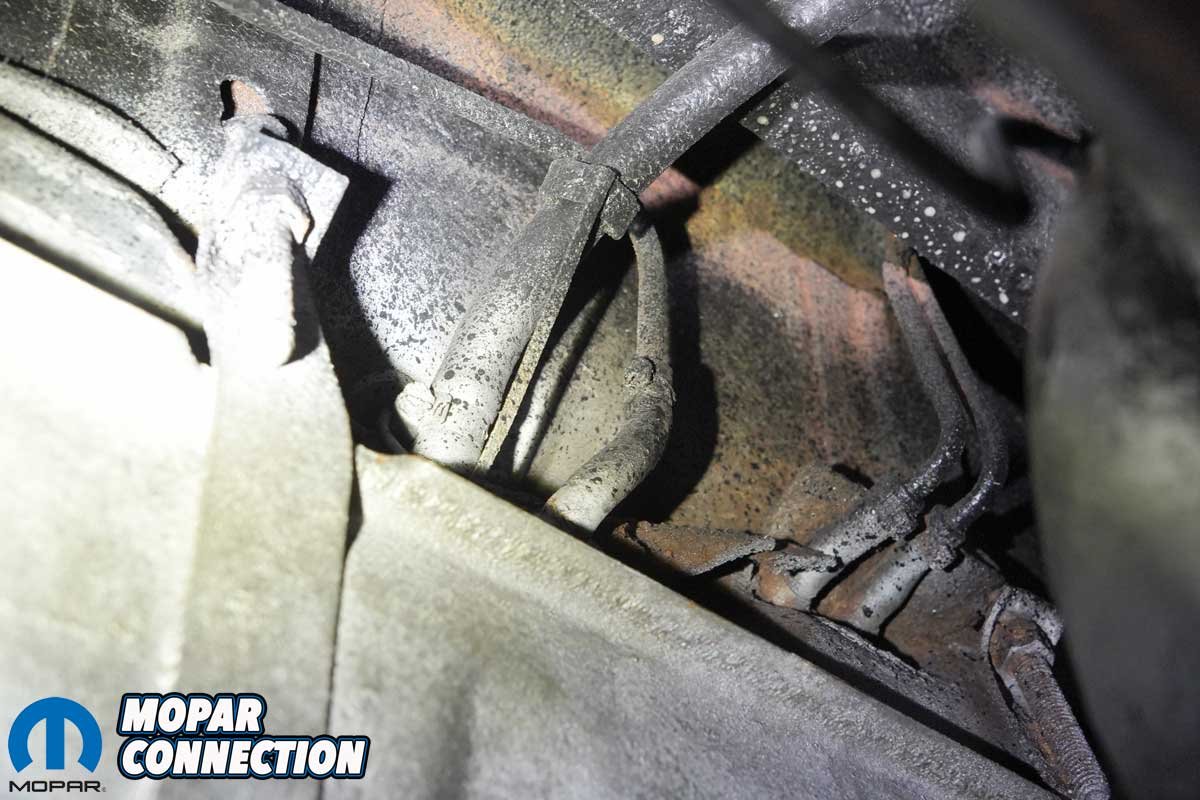
Above Left: The main fuel line (left) still had its ground strap installed, and it was intact, which was a good sign. It meant we did not have to search for a replacement. The vapor line was next to the main fuel line. If it had been functional (no vapor separator), it would have returned fuel from the vapor separator located at the fuel pump. The last two lines were part of the refueling system. Above Center: At some point, a Holley electric fuel pump was added to the Runner. It was unbelievably loud and not acceptable. Above Right: The two fuel lines (main and vapor) routed from the fuel pump, around the shock and exhaust, and into the right rear wheel well.

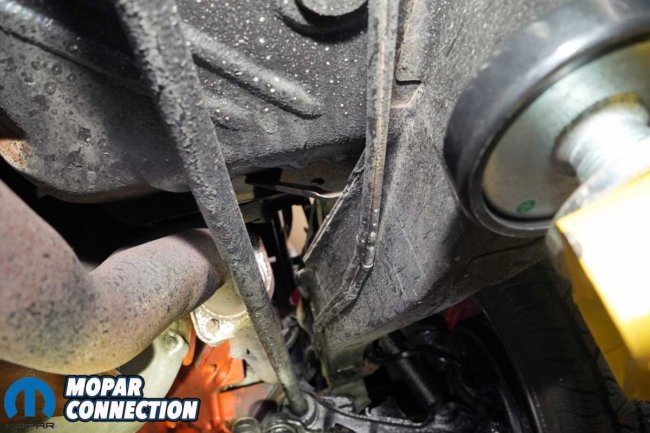
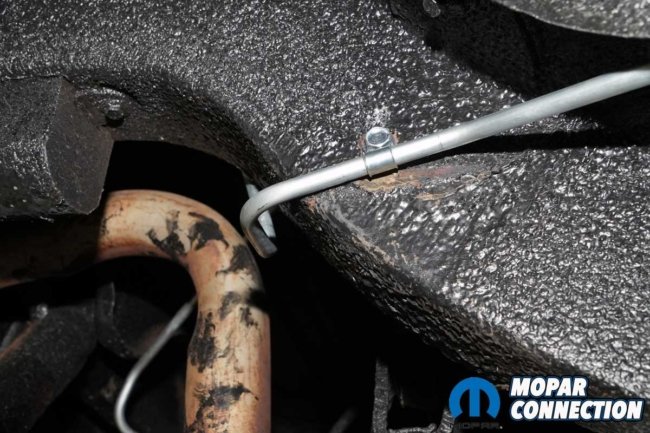
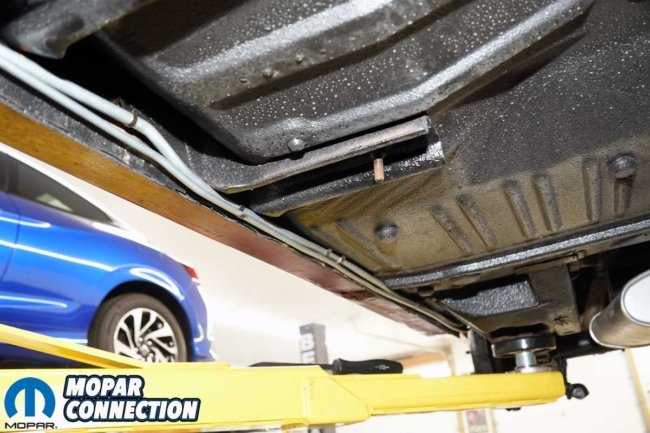
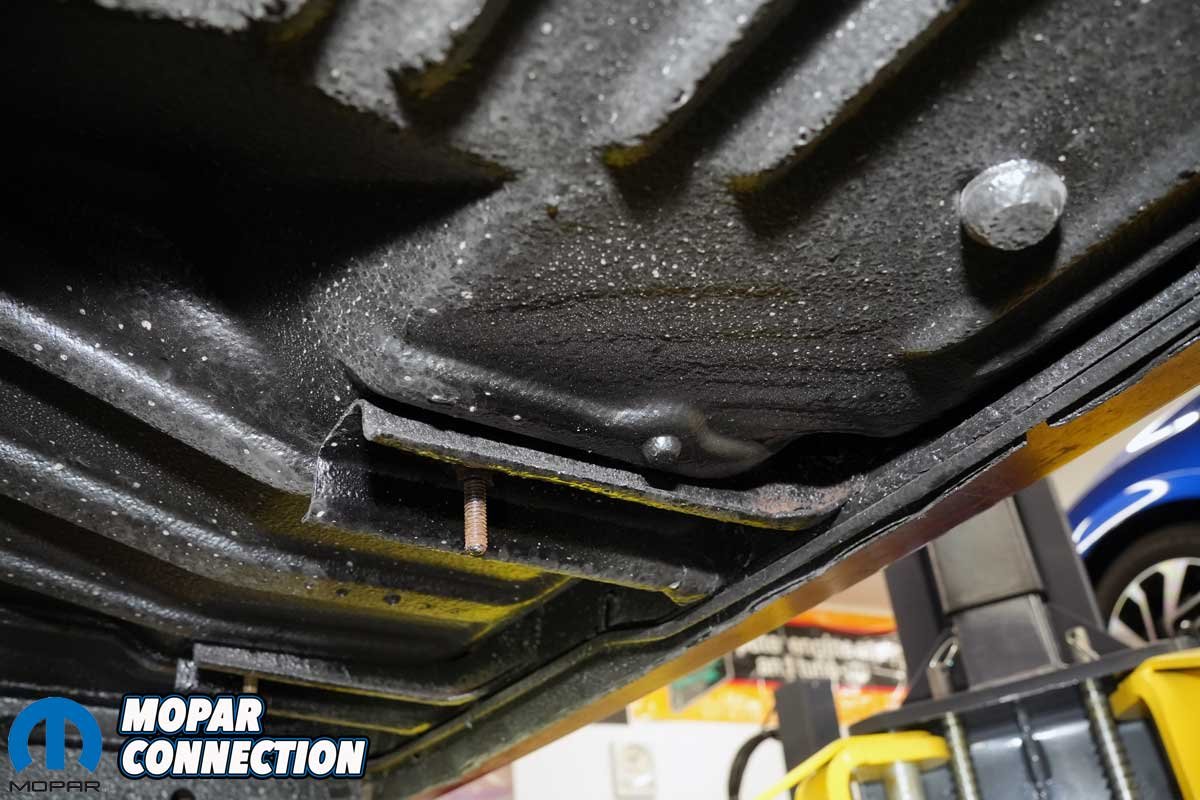
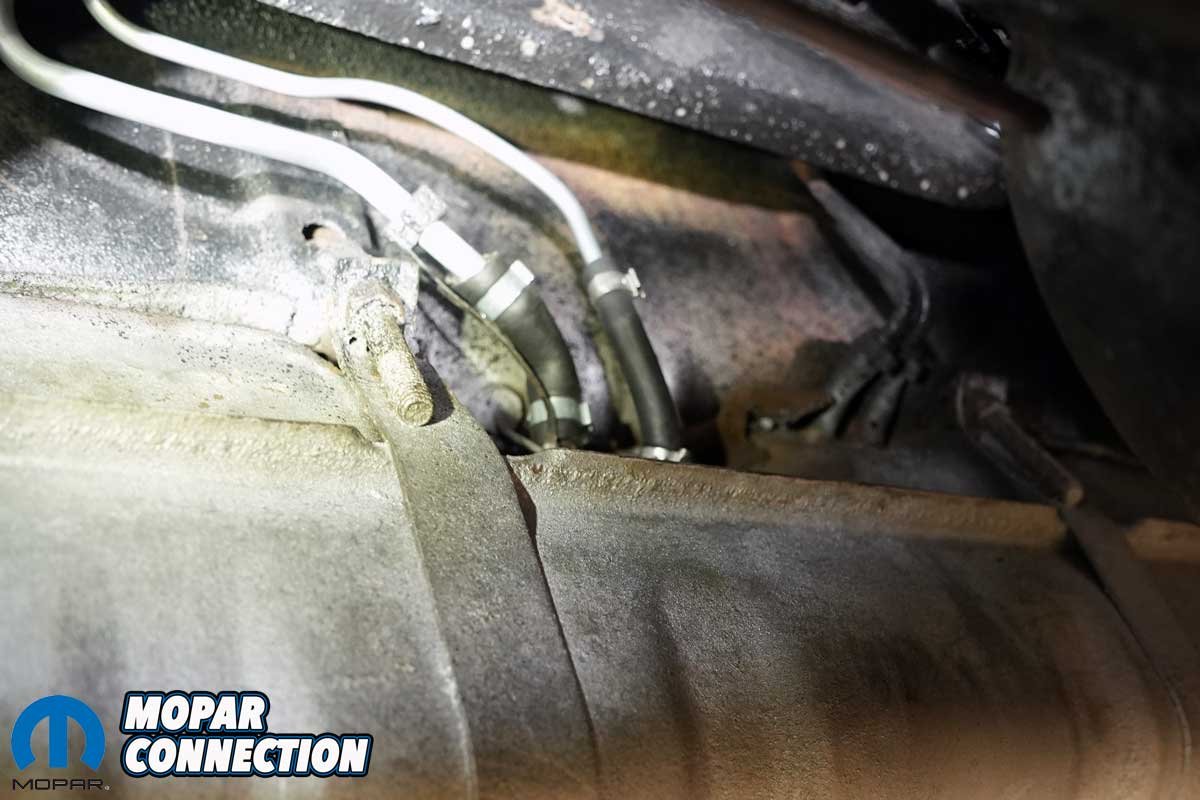
Above Left: The two fuel lines had multiple clips to secure them to the chassis. Above Right: The fuel lines hugged the lip of the rocker panel from the rear wheel well to the unibody frame support for the torsion bar and transmission.
The other components to complete the fuel system were:
• Main Fuel Line 3/8-inch & Fuel Return Line ¼-inch Set – Part No. QRB16SET
• Pump to Carb Line, 4pc – Part No. DRF84
• Rubber Fuel Hose 3/8-inch Set – Part No. CK0002
• Rubber Fuel Hose ¼-inch Set – Part No. CK0003
• Mopar Fuel Line Clip Kit, 3/8-inch and ¼-inch Return – Part No. FL14
• Vapor Separator – Part No. X868
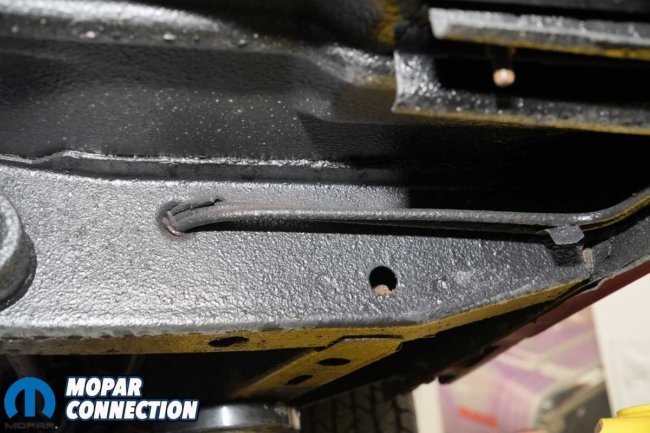
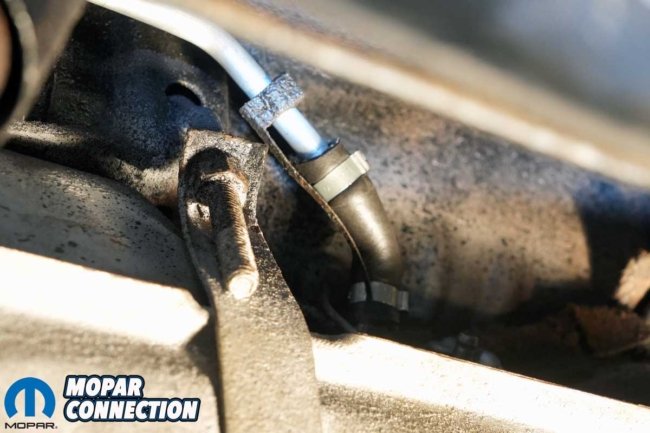
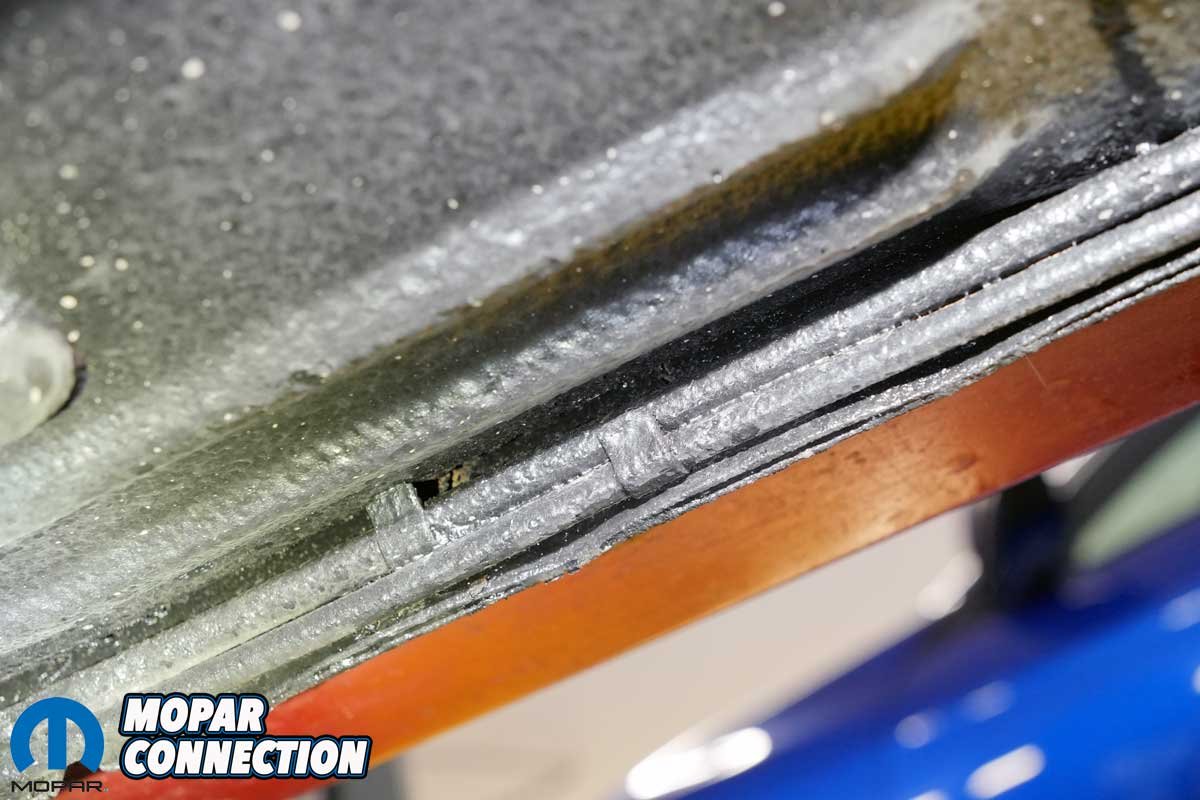
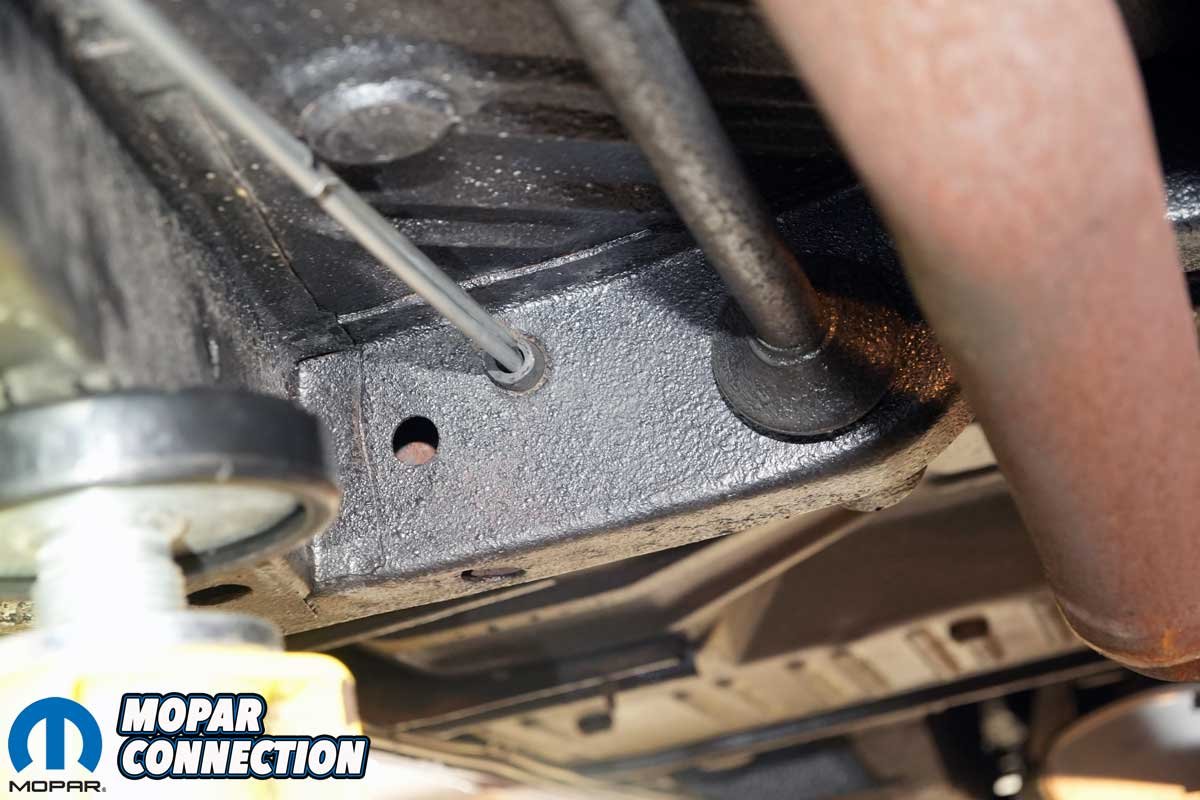
Above Left: The two lines are fed through the frame. A rubber hose is used as an insulator to protect the lines. Above Right: From the frame pass-through, the fuel lines run up the frame rail to the mechanical fuel pump hanging on the side of the Hemi.
Weeks before upgrading the Road Runner’s fuel system, we attempted to rebuild the damaged Carter mechanical fuel pump. We found it on the side of the block, almost separated in two. Several of the screws holding the two halves of the pump together were missing.
To reassemble the pump, we took it off the Hemi, cleaned it, installed new screws, and attempted to manually actuate it to pump fuel. It was toast. For a moment, we considered this a significant setback, but it led us to the discovery of the new Carter fuel pump from YearOne.
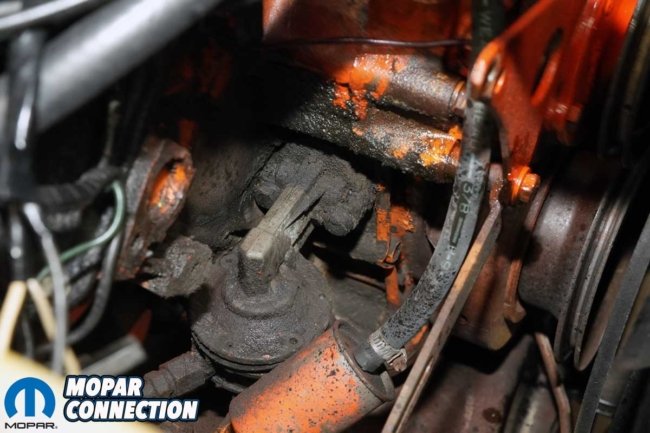
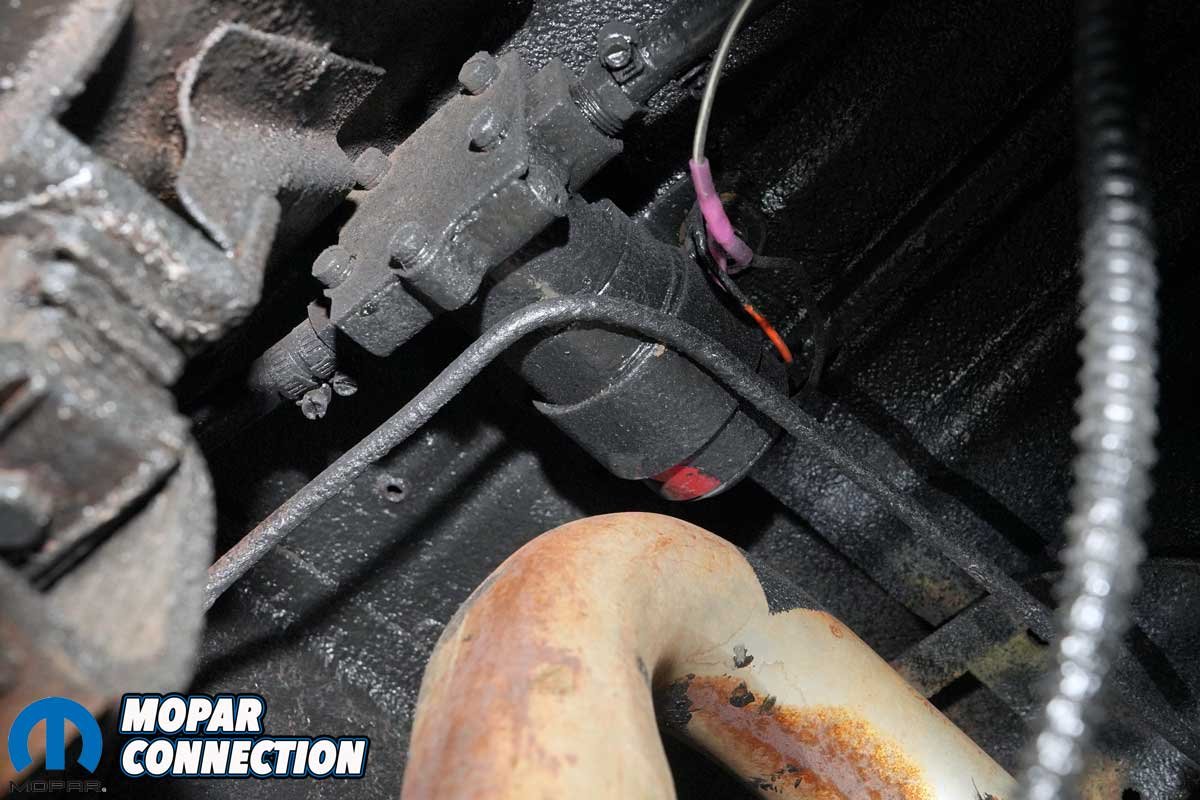
Above Left: The mechanical pump had been bypassed prior to our purchase of the Road Runner. The fuel flowed through the filter (orange) to the carburetors. Since most of the pump’s screws were missing, it had almost completely separated into two halves. Above Right: Shortly after we acquired the Runner, we took the pump off the Hemi, cleaned, reassembled, and evaluated its performance. It would not pump fluid, so we needed a new one. However, for now, we had to reinstall it to block the hole on the side of the block.
Our plan of attack to repair the fuel system was to remove the electric fuel pump, the main fuel line and return line, the filter, the fuel regulator, the carburetor lines, and the broken mechanical pump. We approached this task with precision, starting with the removal of the clip-on ground strap between the fuel line and the fuel sending unit at the fuel tank.
Once removed, we delicately detached the considerably aged rubber hose sections from the sending unit, ensuring we did not damage the surrounding components.
Above: The fuel lines to the carburetors were a combination of the original hardlines and old aftermarket rubber lines. Instead of the brass T-fitting, a Holley regulator was used. The entire assembly was a mess and should have been removed (or never installed) long ago.
After disconnecting the negative battery cable, we cut the 12-volt source wire at the electric pump and unthreaded the ground wire at the chassis. The ground bolt was not original, so we discarded it. We then cut the rubber fuel line from the pump. With everything on the pump detached, we unthreaded the mounting bolts and dropped the pump out of the Runner.
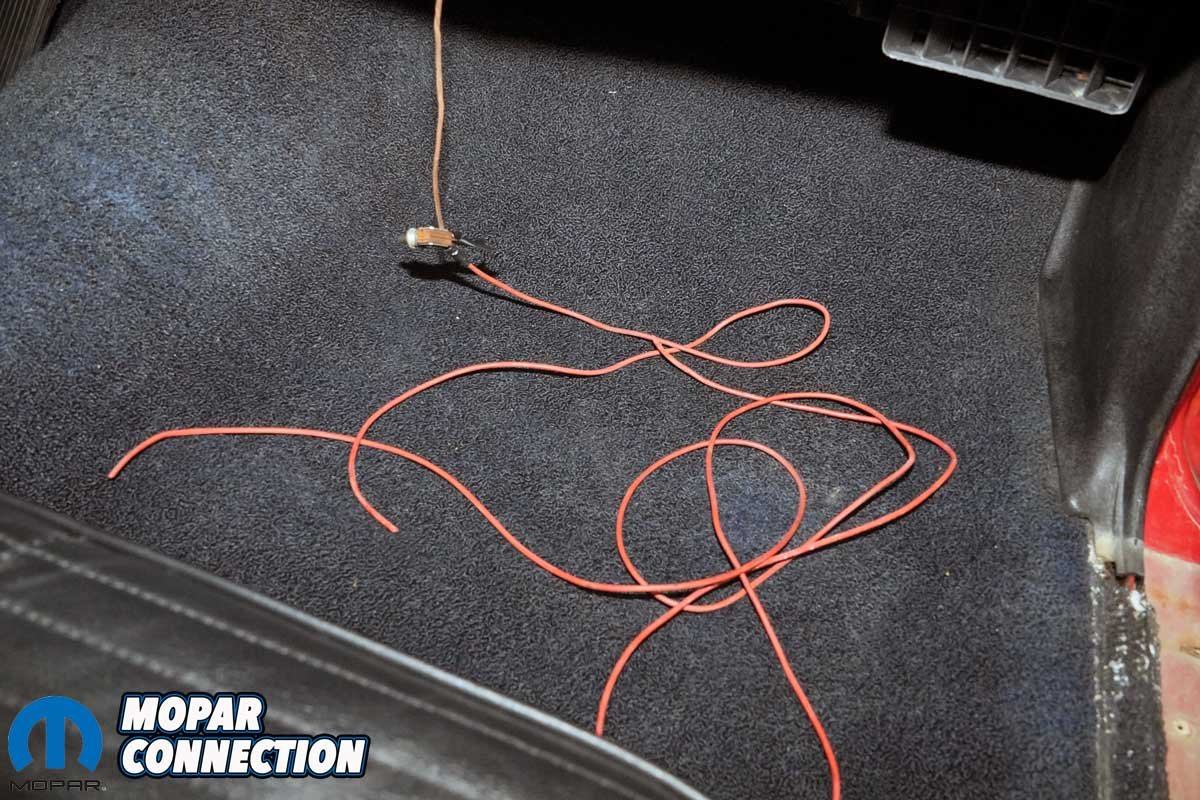
We traced the 12-volt wire to a toggle switch under the dash (attached through the glovebox) and then to the fuse box under the glovebox. After removing the passenger-side rocker panel trim, we drew the wiring from the trunk into the interior of the Runner. Once we pulled the wire from the fuse box, we fished it through the kick panel. The wire and switch were discarded.
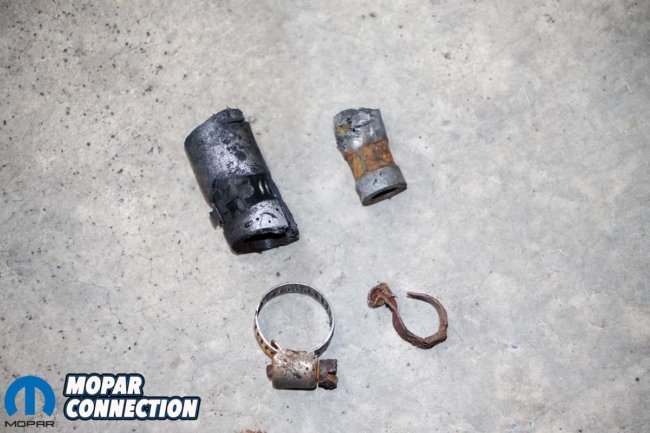
Above Left: The rubber lines would not release from the fuel-sending unit, so we cut them off. Above Right: The main fuel line rubber hose may have been replaced at some point (based on the worm clamp), but the vapor line (still had the factory-appearing clamp) was likely the original from 1968.
With the pump and wiring eliminated, we focused on removing the main fuel and vapor return lines. The fuel lines were secured with bolts, brackets, and two types of clips that retained the lines to the wheel well, the rocker panel, and along the front frame rail to the aftermarket filter.
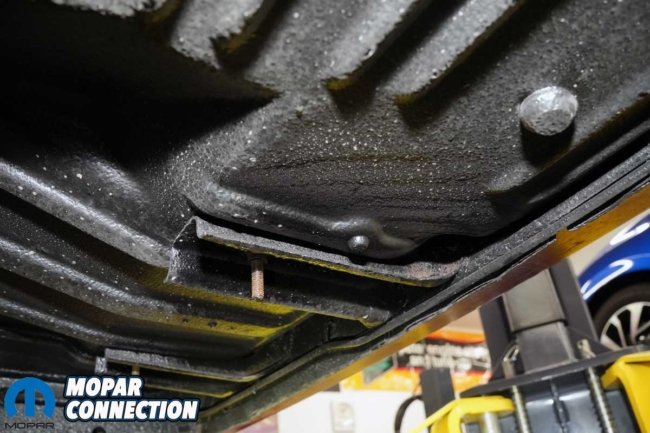
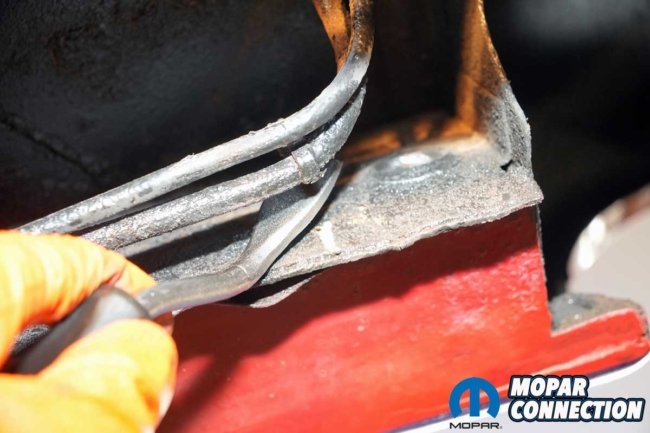
After cutting the rubber hose at the filter, we pulled the fuel lines from the chassis. To make it more challenging, many of the Mopars of the muscle car era ran the fuel lines through a hole in one of the support rails by the transmission. That meant the fuel lines had to be fed through the hole, which required us to bend the lines gently as we proceeded. To make the job even more fun, fifty-seven years of debris and undercoating rained down on us.

Above Left: We removed the electric fuel pump ground from the chassis. Someone had recently added a new ground wire. Above Center: We cut the 12-volt wire that fed the fuel pump. Above Right: With the power and ground removed, we unthreaded the pump’s bracket bolts and pulled the pump from the chassis.
Once we removed the fuel lines from the Runner, the only remaining parts of the current fuel system were the filter, regulator, parts of the factory pre-shaped fuel lines, and aftermarket rubber hoses. We cut the rubber line on the filter’s outlet and discarded the filter.
We had removed the fuel lines at the carburetor in our AFB rebuild story, so we knew they would unthread without any drama. With everything disconnected, we fished the assembly up and around the spark plug wires and out of the engine bay.

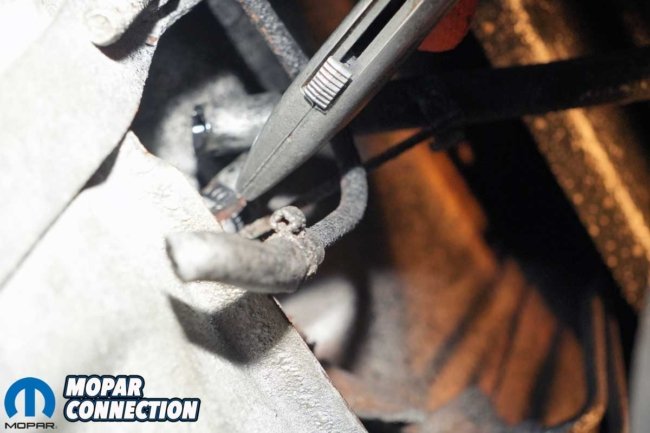
Above Left: We removed the clips that secured the fuel lines using a door panel removal tool. Its forked-shaped end slipped on either side of the clip, and the bent shaft allowed us to apply leverage to release the clip’s anchor. Above Right: We cut the rubber supply fuel line to the fuel filter. The vapor line had been capped years ago, so we did not need to disconnect it from anything.


Above Left: After we removed the rubber insulator hose from the frame, we gently pushed the fuel lines through the hold toward the car’s rear. Above Center: We had to bend the fuel lines to allow them to clear the hole in the frame. It was a bit of a fight, and fifty-seven years of debris ended up on us and all over the shop floor. Above Right: The fuel line was a bear to remove, but it was finally off. After bending the lines to clear the frame, we had to remove the right rear shock to allow us to feed them around the exhaust and through the right rear wheel well.
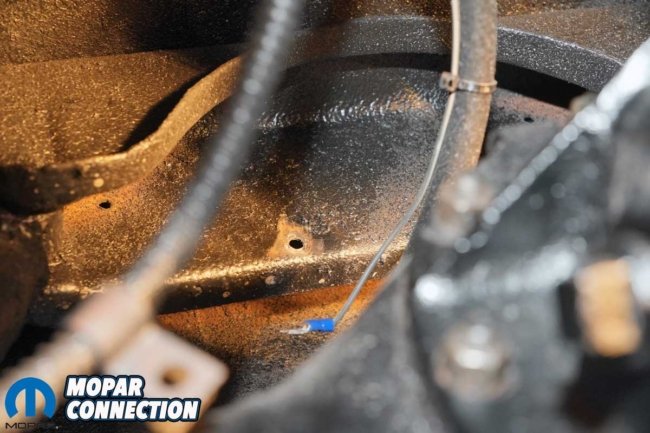
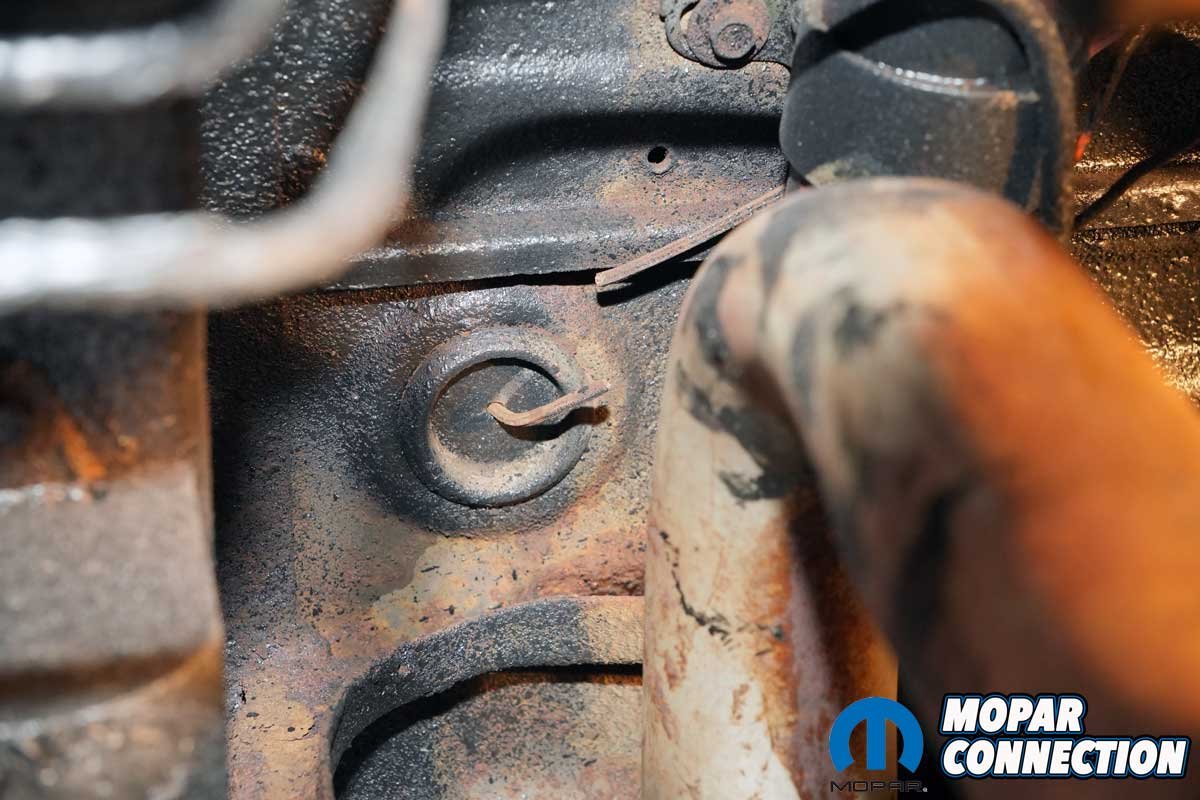
The damaged mechanical fuel pump was the last component to come off the Hemi. The camber/caster alignment access hole in the passenger side lower apron made an excellent access point to the bolts that retained the fuel pump to the engine. Using a long 3/8-inch extension, we were able to reach the bolts.
When we pulled the fuel pump from the Hemi, the pump push rod also slipped from its bore. With everything removed at this point, we took the opportunity to thoroughly clean the chassis and engine block, affording us a clean slate for the new components.
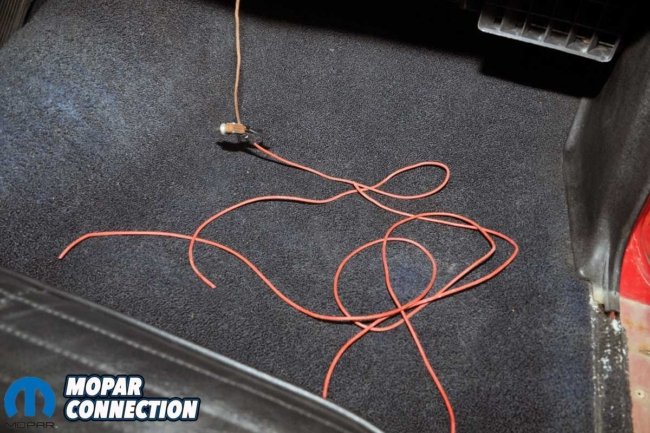
Above Left: The last component to remove was the non-functioning mechanical fuel pump. Two bolts secured it to the Hemi. The fuel pump push rod also dropped out when the pump was pulled. Above Right: We tidied up the electrical system by removing the 12-volt feed wire that extended from the fuse box to the trunk, passing behind the kick panel and under the rocker panel trim.

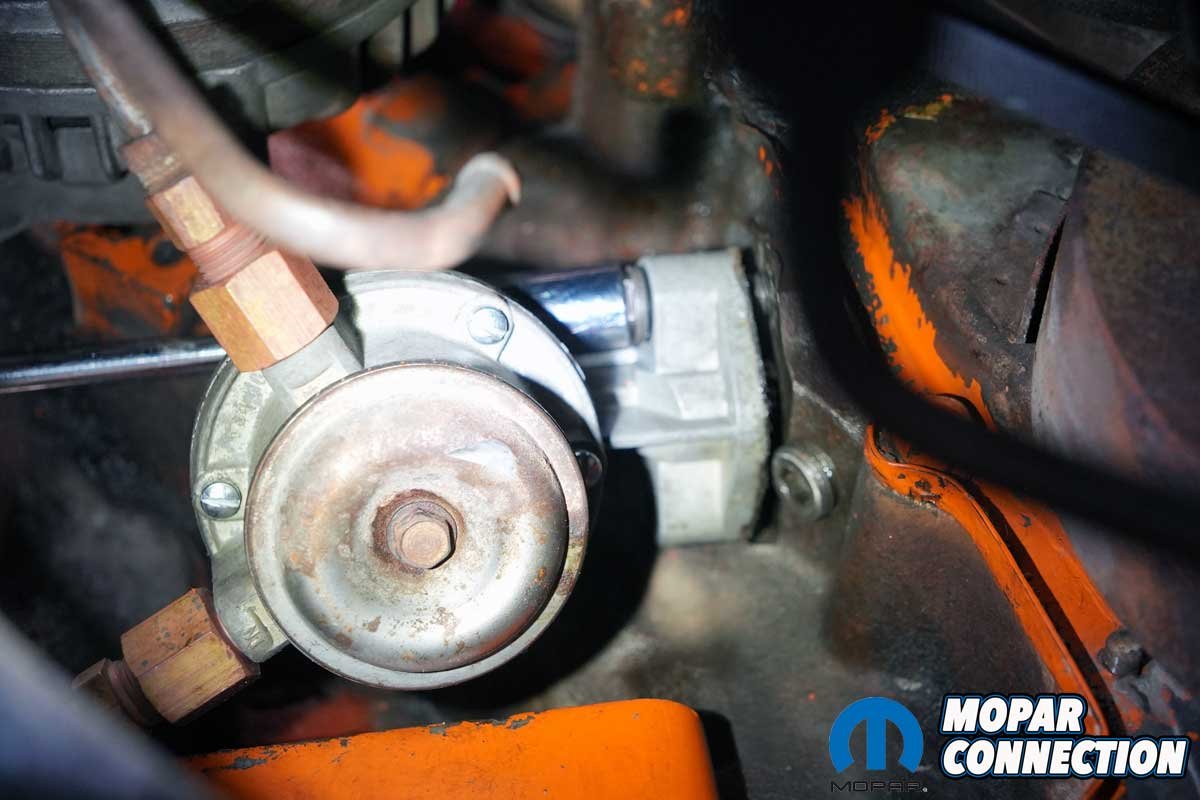
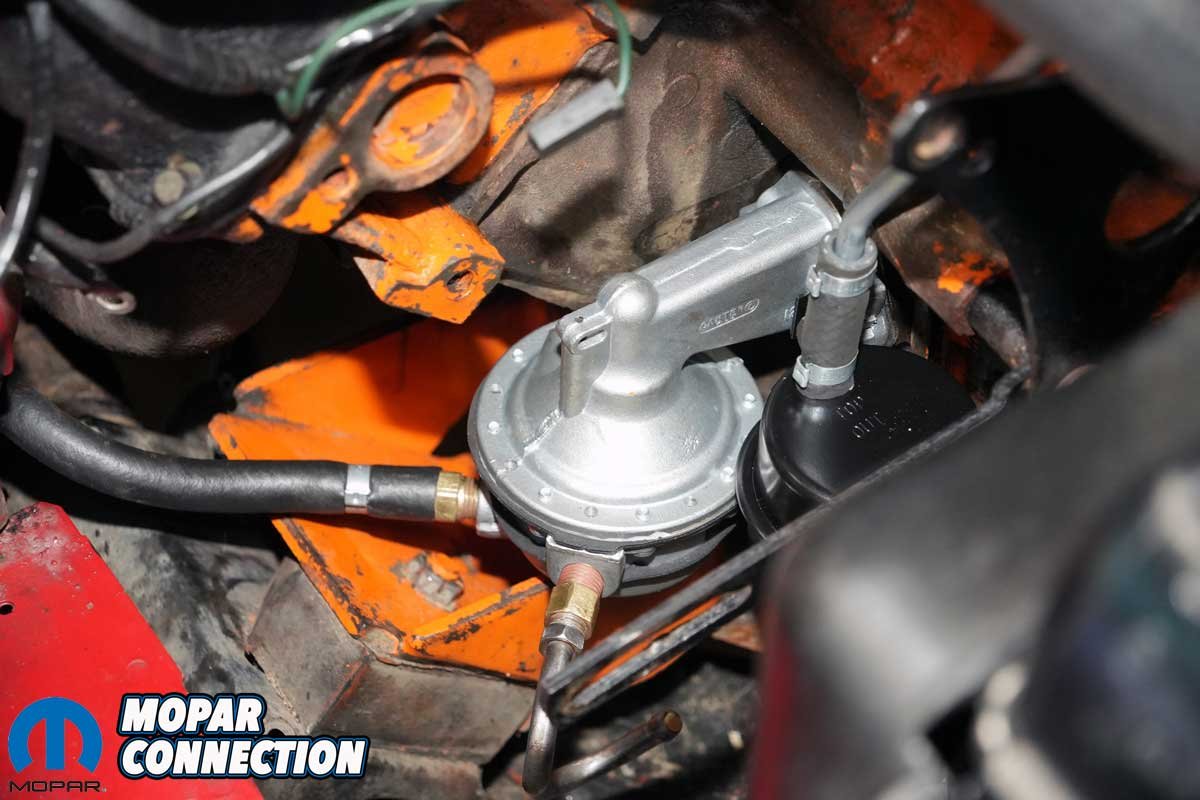
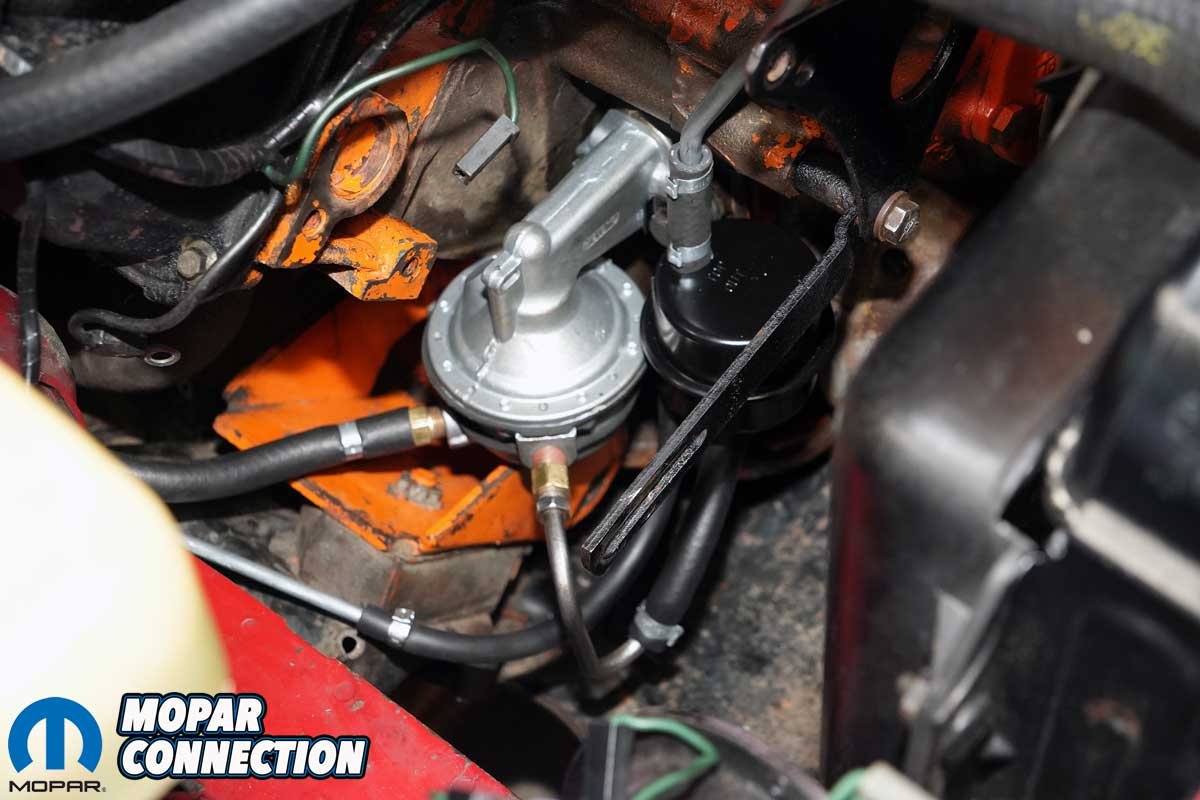
Above Left: The old non-original pump (left) still had all the factory lines on it. The two pumps were both Carters and similar in appearance. Above Center: Although the new pump came with plenty of new fuel lines of different angles, we elected to use one for the inlet, but we used the factory line for the outlet. All we did was clean and install it with the factory reducers. Above Right: We applied a dab of grease to keep the factory fuel pump pushrod in place while we installed the fuel pump.
After cleaning the Hemi the best we could, we started the reassembly by preparing the fuel pump. We removed the elbow-shaped outlet fuel line from the old mechanical pump. It had two adapters on it to allow it to fit the pump. We broke down the entire assembly of adapters to determine what we needed for the new pump.
Although the new Carter pump came with fuel lines and adapters, we elected to clean the factory outlet fuel line and use one adapter. For the inlet, we used a fuel line provided with the pump.
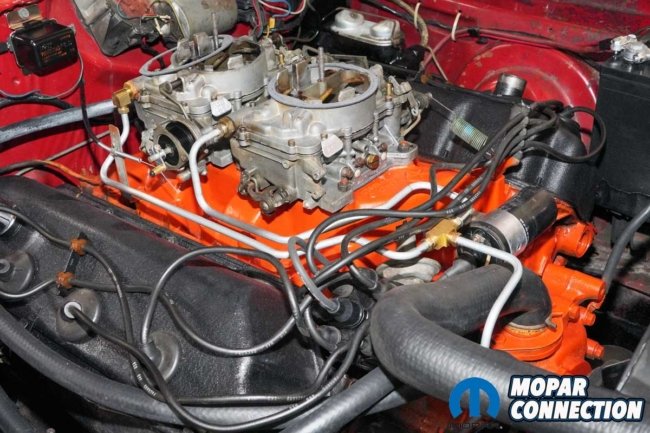
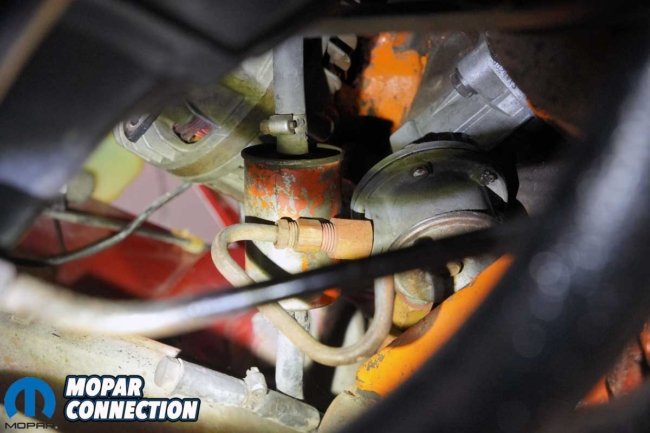
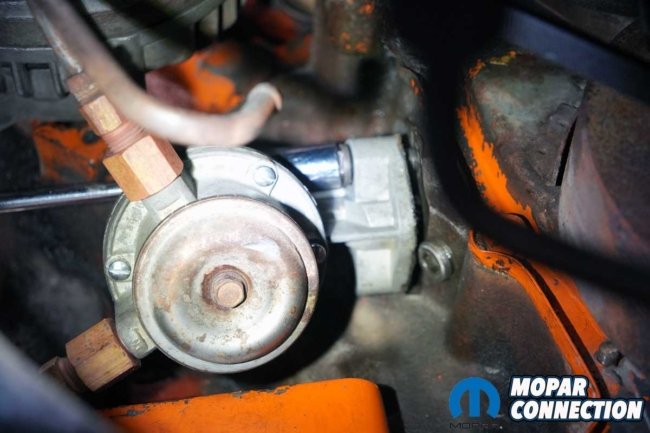
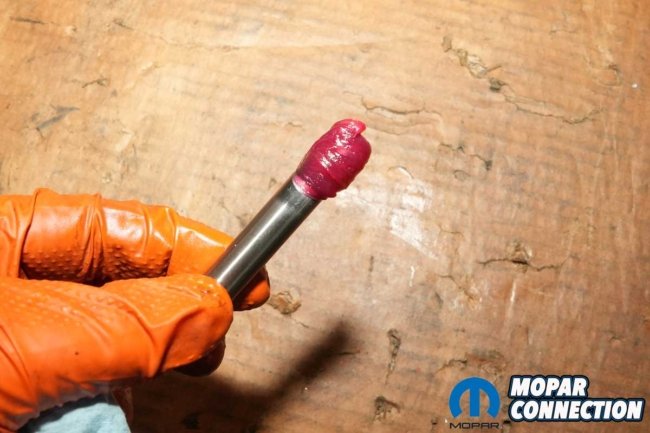
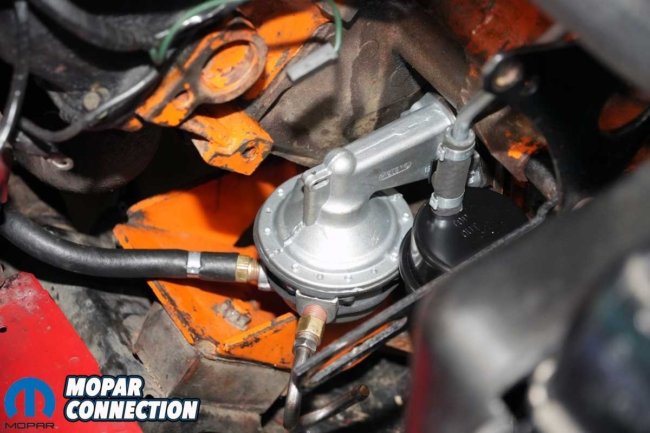
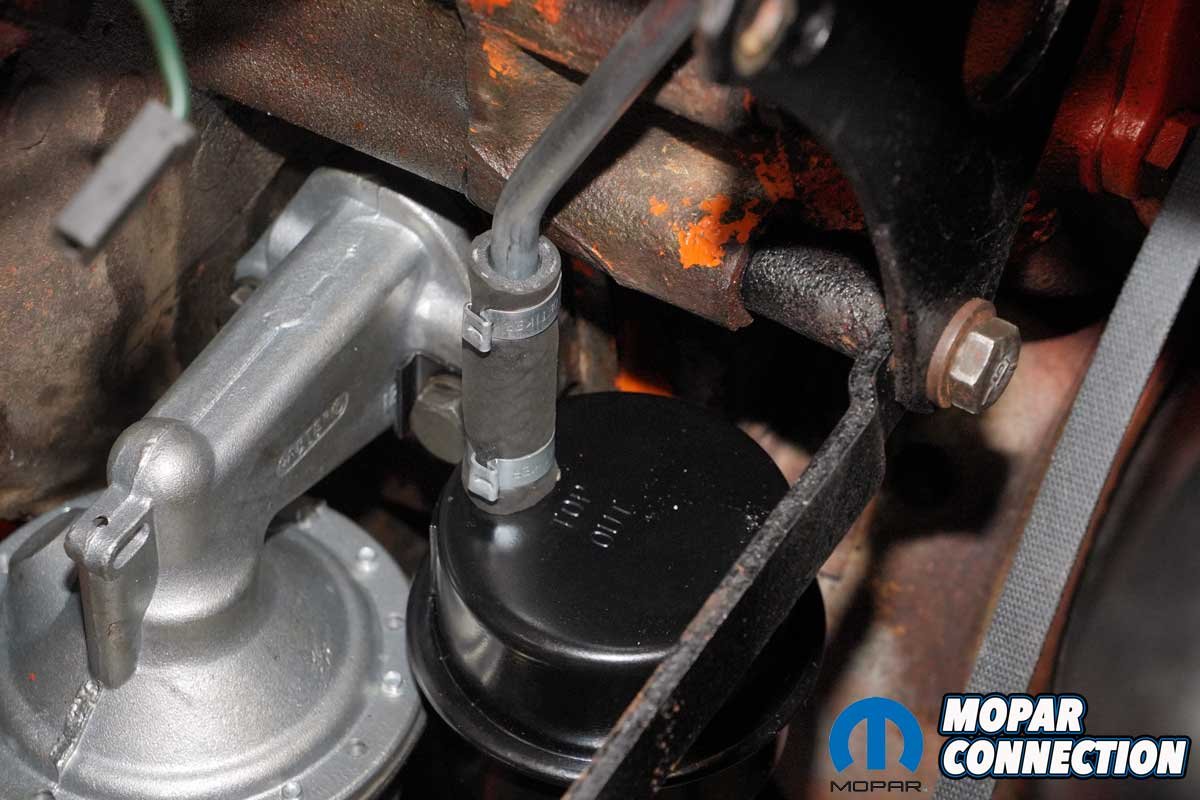
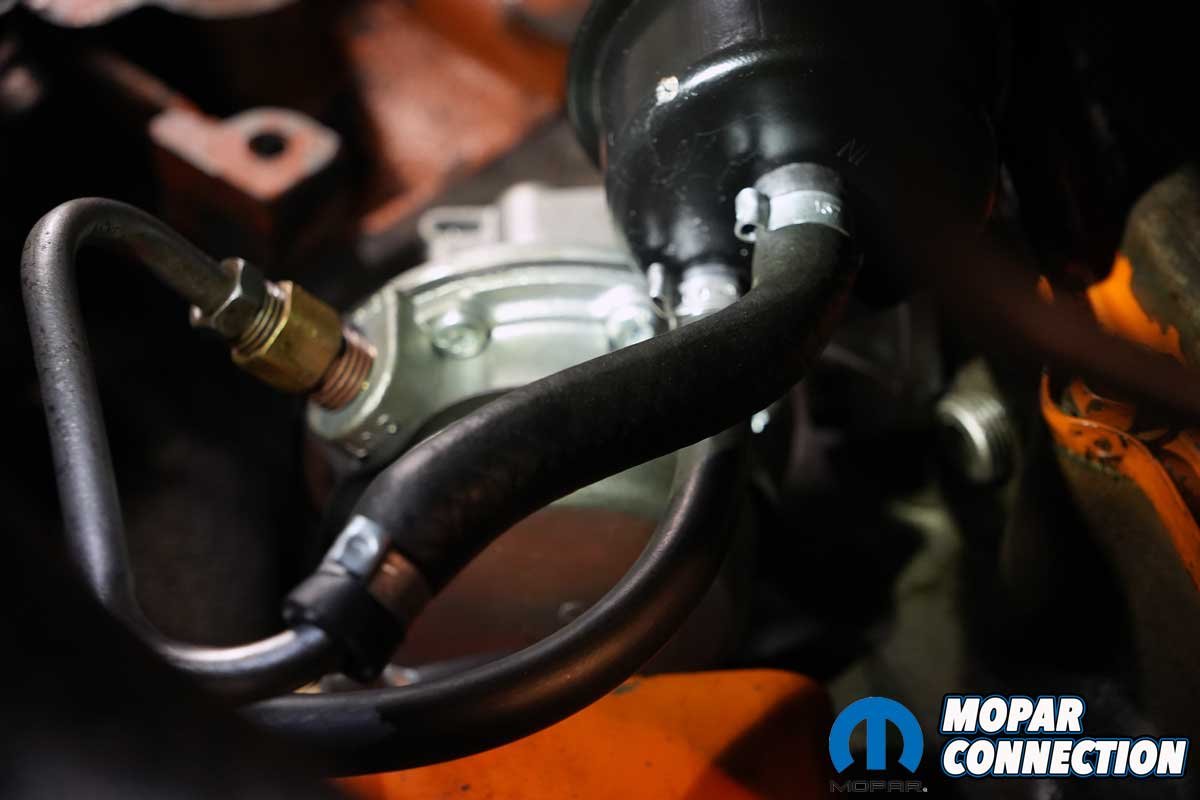
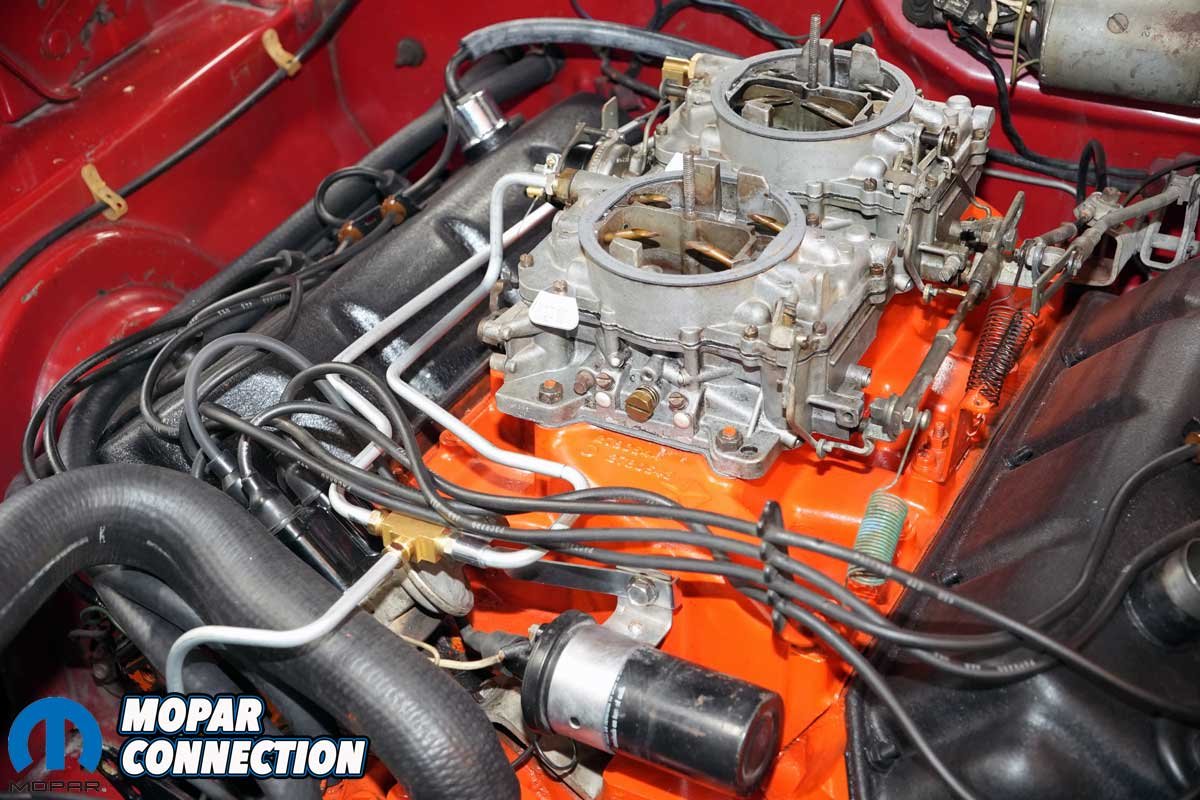
Above Left: We used a pair of CV joint pliers to mimic the factory crimps on the fuel lines. The pliers crimp and depress at the same time. Above Center: One fuel pump bolt retains the vapor separator. We crimped a hose from the separator to the feed line for the carburetors. Above Right: The line extending over the upper radiator hose came from the vapor separator. The brass T-fitting distributed fuel to a fuel line for each carburetor. We installed new fittings in the carburetors. Although difficult to see in this photo, a bracket was attached to the upper bolt of the coil bracket. It supported the fuel line just to the right of the T-fitting.
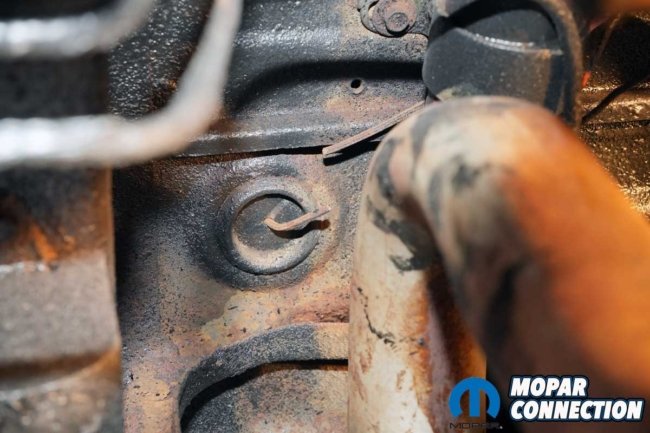
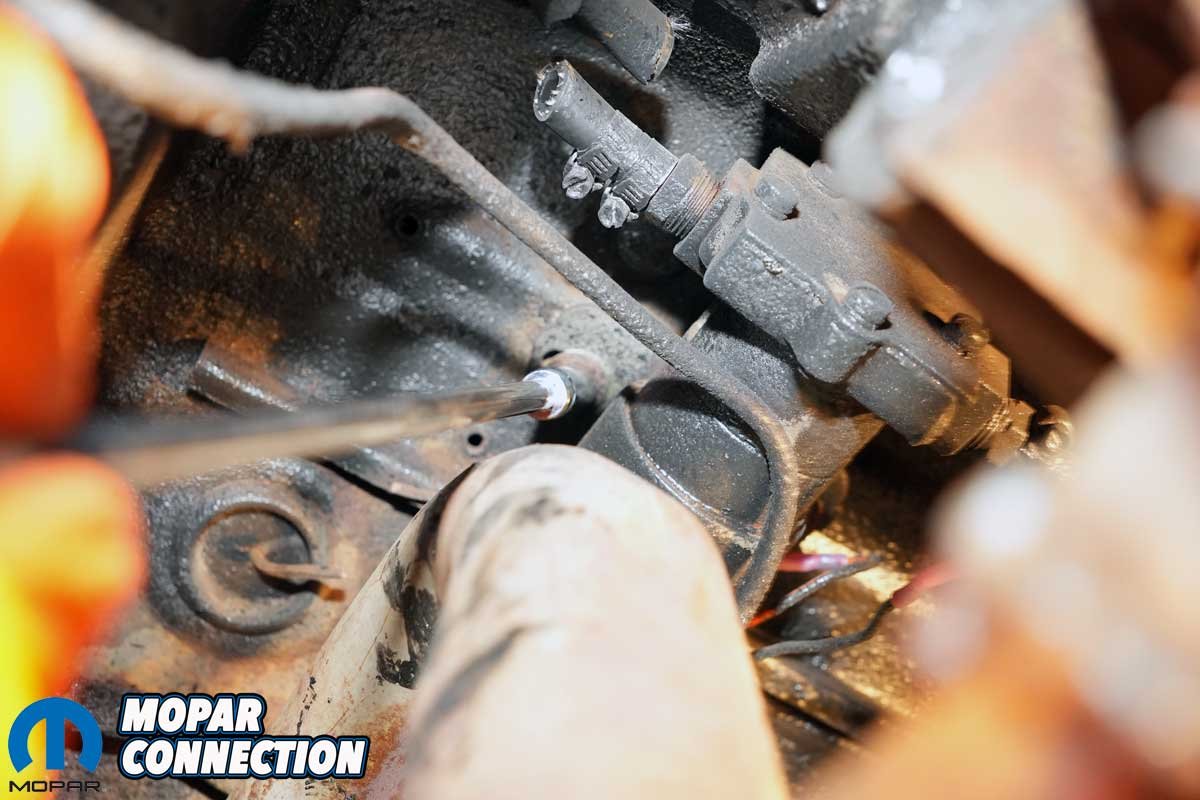
We had the pump ready to install with the fuel line properly oriented and the gasket in place, but first, we had to reinstall the pump pushrod. The problem with the pushrod was that it would drop out of its bore before we could slip in the pump arm. We added a grease dab to the pushrod to hold it in place, which worked well. We installed the pump along with the vapor separator and torqued both bolts to secure everything to the block.
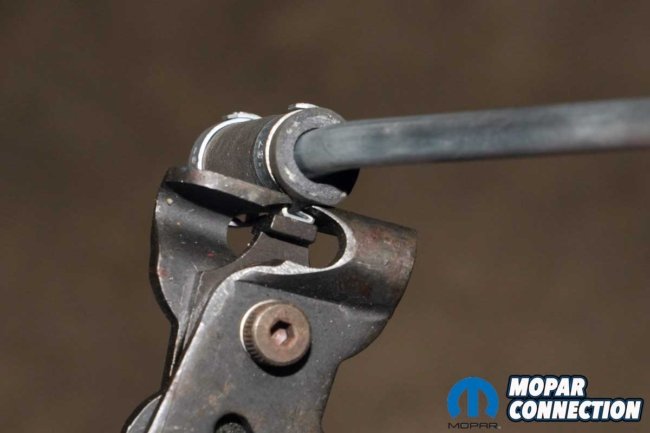
To fasten the rubber hoses to the metal lines, we used a constant velocity (CV) joint crimper tool to tighten the Oetiker/OEM-style (Ear Clamp) clamps to the hose. The tool pulls both sides of the clamp toward one another while a center tab pushes the pinched area flat. The result is a tight, compact clamp that secures properly and appears factory installed.

Above Left: We ran the new main fuel line through the frame and up to the pump. Then, we carefully secured the line to the rocker panel with new clips from YearOne. Above Center: Also included in the YearOne kit was a bolt and clamp to replace the factory pieces. Above Right: We installed the hardline to the fuel sending unit and reinstalled the factory ground strap.
Above Left: We ran the vapor line from front to rear after successfully routing the main fuel line. We used S-clips to secure the vapor line to the main line. Above Right: The vapor line was secure to the main line, and each line weaved through the chassis to get from the sending unit to the fuel pump area.
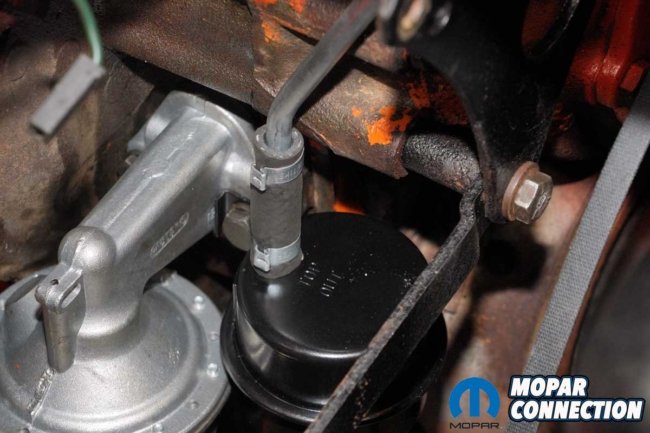
We added a rubber hose from the pump to the vapor separator. An additional hose was crimped to the separator outlet and attached to the fuel line that fed the brass T-fitting to the carburetors. From the T-fitting, we ran a fuel line to each AFB. The right fuel line (to the front carburetor) had a support bracket that secured the line to the top bolt of the coil bracket on the intake manifold.

Above Left: We attached the main fuel line to the fuel pump. We removed the alternator to make installing the rubber hose less complicated. Above Right: Although difficult to see in the photo, the final line to plumb was the rubber hose from the vapor separator to the vapor line.
The main fuel and vapor lines were gently folded for packaging, so we had to straighten them out skillfully. Starting with the main fuel line, we manipulated the line through the chassis to the fuel pump, along the rocker panel, through the rear wheel well, and around the exhaust and right rear shock to the fuel-sending unit. We followed the same procedure with the vapor line.


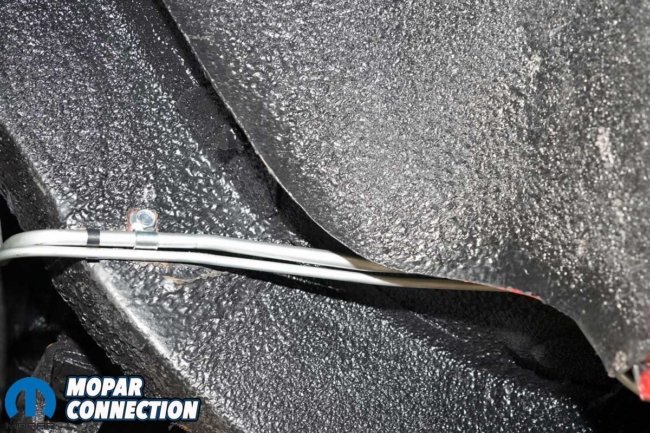
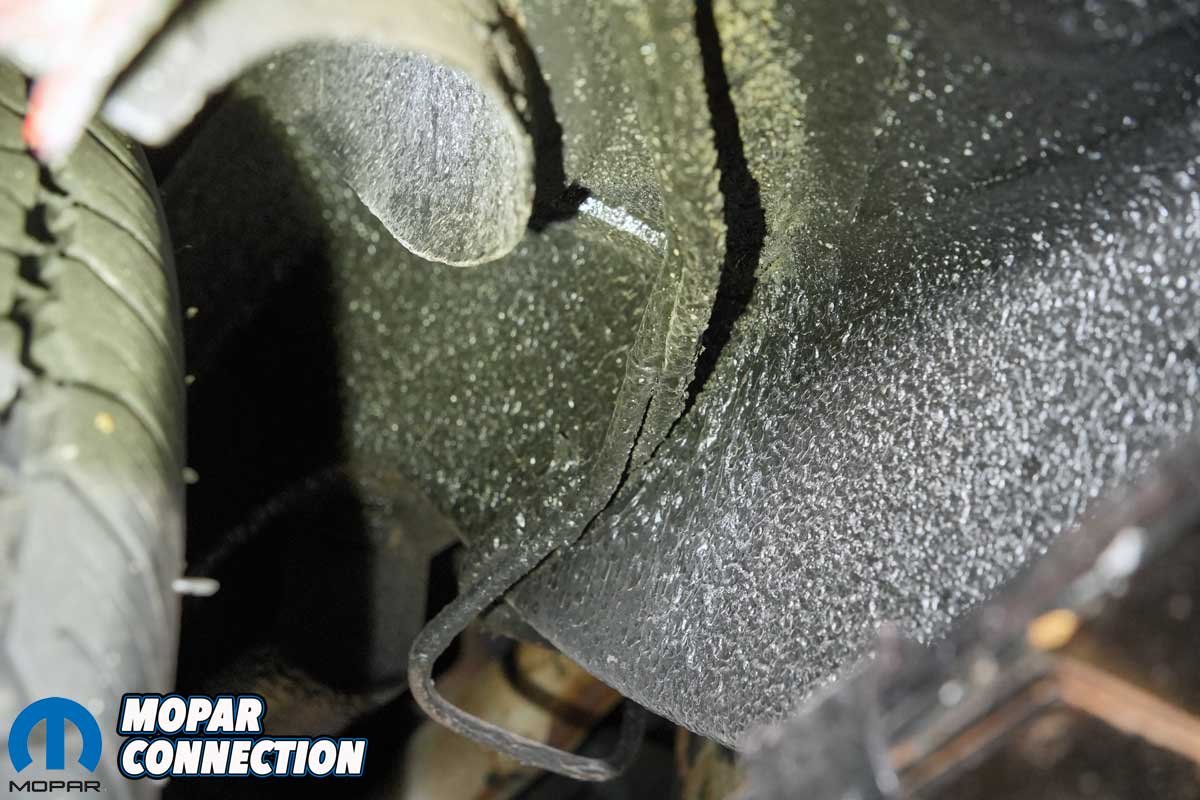
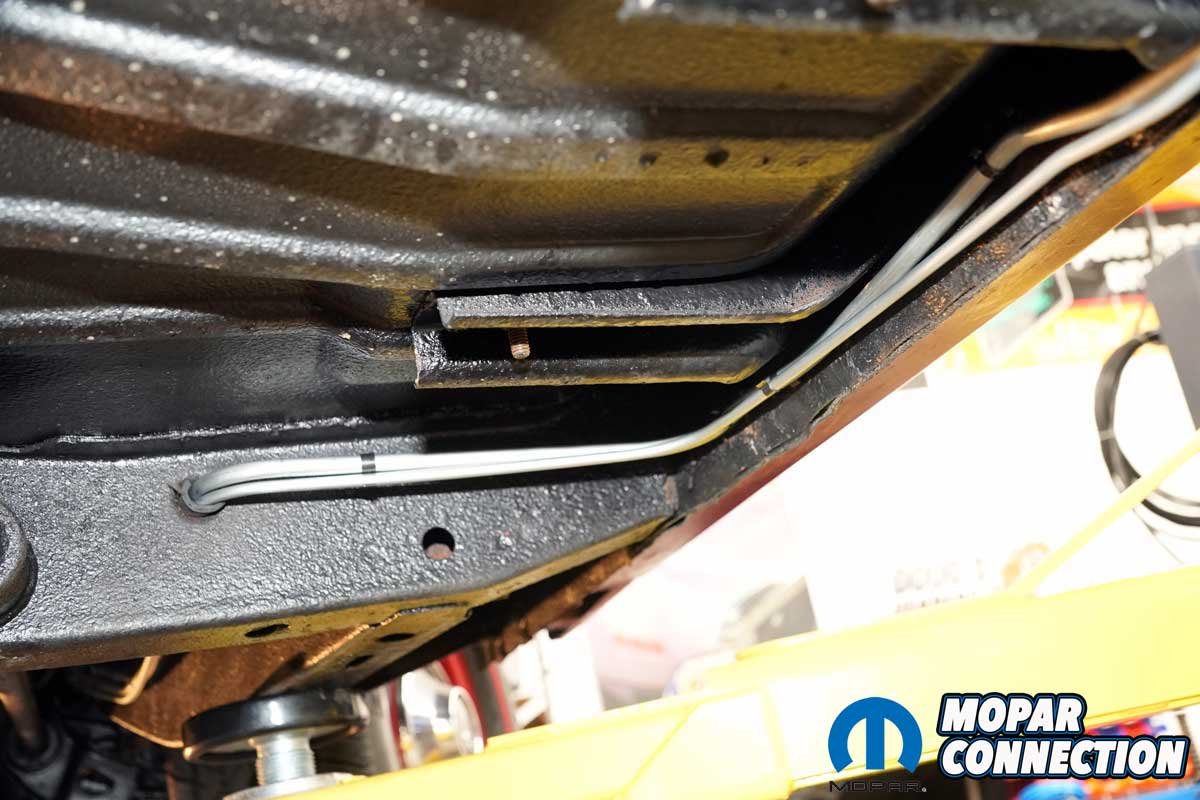
Above Left: The fuel and vapor lines were complete from front to rear, just like in 1968. Above Center: We added a rubber insulator where the lines passed through the frame. Above Right: The insulator can be seen on the other side of the frame.
With both lines loosely in place, we installed the fuel line clips to secure them to the chassis. We mounted a bolt and clamp in the rear wheel well to hold the fuel lines in place. Next, we installed rubber hoses on the fuel-sending unit’s main fuel and vapor lines. Once both hoses were clamped securely, we added the factory ground clip to the new main fuel line and the sending unit.

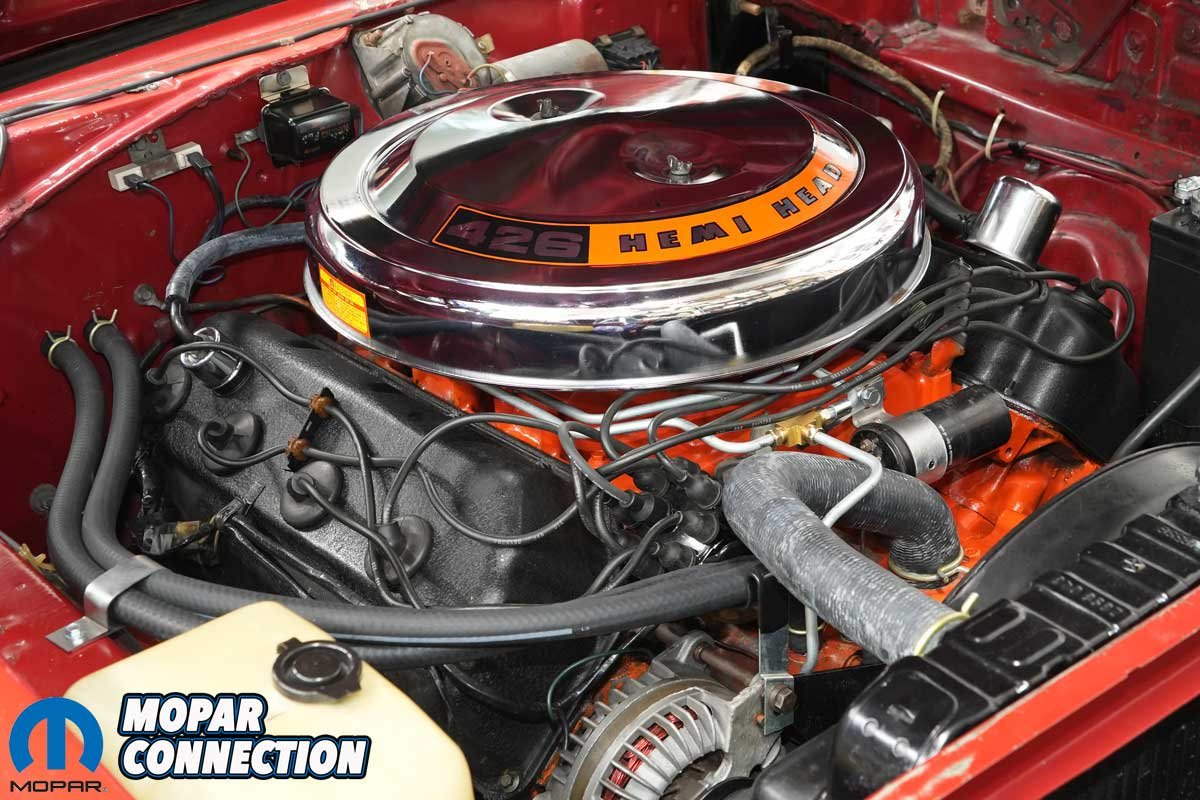
Above: The fuel pump looks factory original. It should operate for years, and best of all, unlike the electric pump, it will be quiet. We attempted to clean as much oil and debris from the cylinder head and block as we could while we had access.
Moving to the other end of the fuel lines, we crimped a rubber hose from the main fuel line to the fuel pump and a second rubber hose from the vapor line to the vapor port of the separator. To finish the installation, where the fuel lines extended through the unibody frame, we installed a rubber hose as an insulator between the fuel lines and the hole through which they extended, just like the factory did.


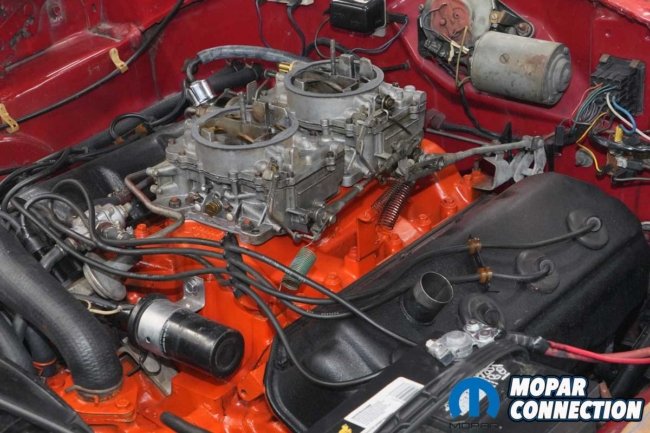
Above Left: The fuel lines wrap around the other components flawlessly. The support bracket extends from the coil bracket to the right fuel line. Above Right: With the “chrome dome” installed, the engine bay is slowly returning to a stock appearance.
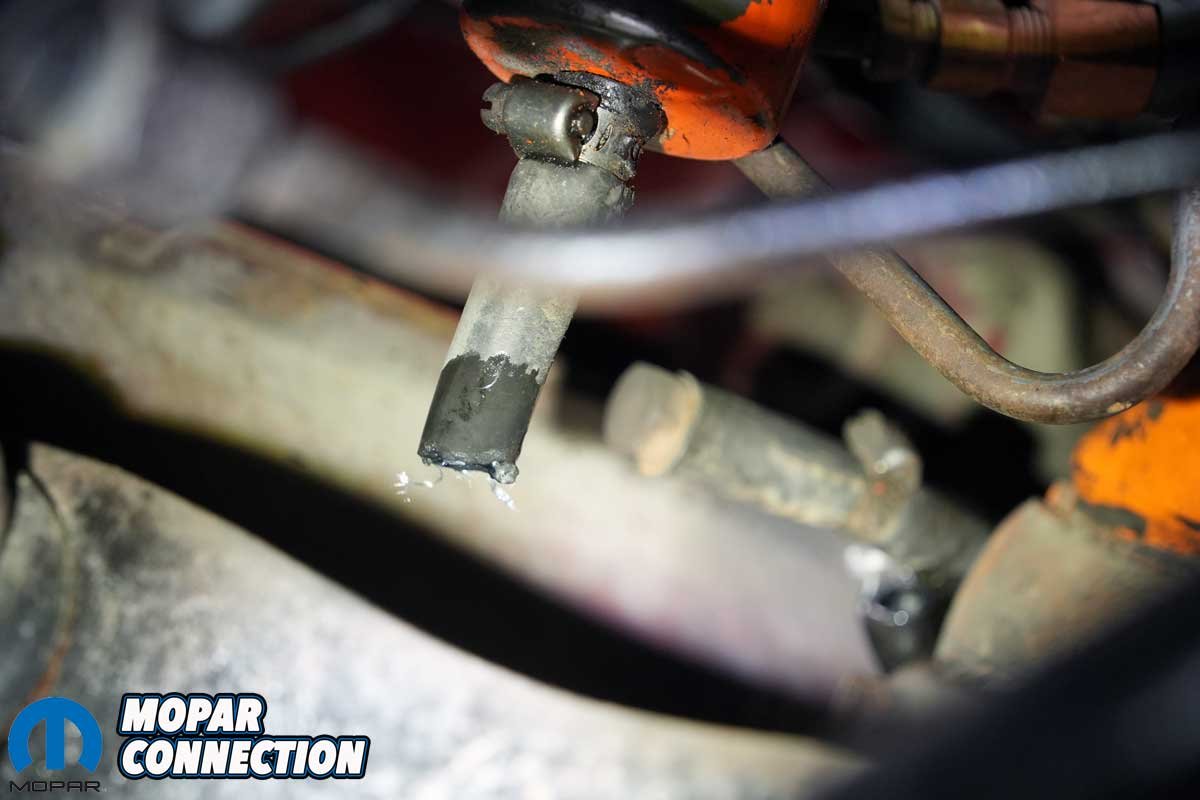
The final step was to start the engine and look for leaks. We depressed the throttle pedal, set the choke, and released the throttle. We were pleased not to hear the electric pump when we twisted the key. The Hemi jumped to life, and we looked for leaks. Unfortunately, we had one at the vapor separator. After shutting off the engine, we re-crimped the culprit clamp. Our second run evaluation proved to be successful.
We are pleased with how well the YearOne fuel lines, vapor separator, and pump fit our Runner. For more information about fuel system parts for your Mopar, check out YearOne or contact one of their sales reps (Monday – Friday 9 AM – 6 PM EST).


