


The dash in our 1970 Pro-Touring Dodge Super Bee has seen better days. An ultimate streetcar cannot have a cracked dashboard, inoperative gauges, or mismatched plastic interior colors. To fix and modernize the dash, we constructed custom-made panels and utilized swap meet parts acquired at the 2023 Holley Moparty. We contacted Classic Dash, Holley Performance, and YearOne for specific parts to complete the upgrade.


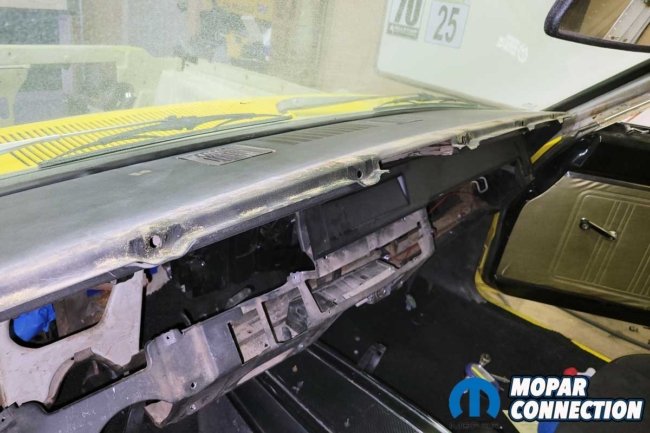
Above Left: To remove the cluster, we had to remove several trim panels, including the knee bolster. Above Center: With the panels and instrument cluster removed, we noted the wiring behind the dash would need to be addressed soon. Above Right: We test-fitted the Holley 12.3 Digital Dash. To properly fit the Digital Dash, we needed to permanently lower the steering column by 1/4-inch and notch the knee bolster.
Two types of gauges came in the 1970 Coronet – sweeping and Rallye styles. An overhaul can be completed on the sweeping style, but it is less complex on a Rallye gauge dash. To begin the cluster removal, we disconnected the battery. Systematically, we removed fasteners until the cluster was free from the dash assembly.


Above: Several measurements were required to center the Digital Dash with the steering column. Once the Digital Dash was centered, we mocked up several panels/brackets to secure the display. We would cover all the brackets before the project was finished.
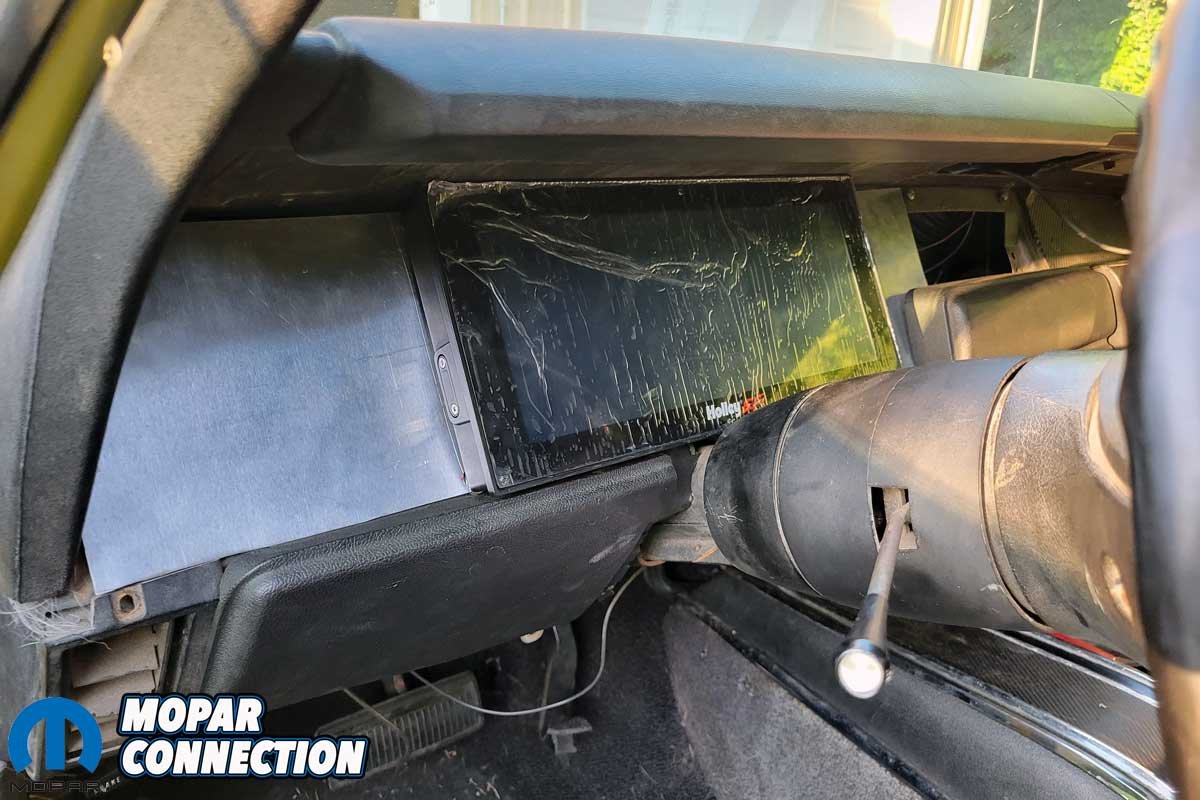
Once the cluster was out of the way, we test-fitted the Holley 12.3 Digital Dash (Part No. 553-111) and realized a few modifications would be necessary. A small section of plastic located around the steering column at the knee bolster had to be trimmed. We also used body shims to lower the steering column by ¼-inch to clear the Digital Dash. After the column was adjusted, the Digital Dash fit where the factory cluster had once been.


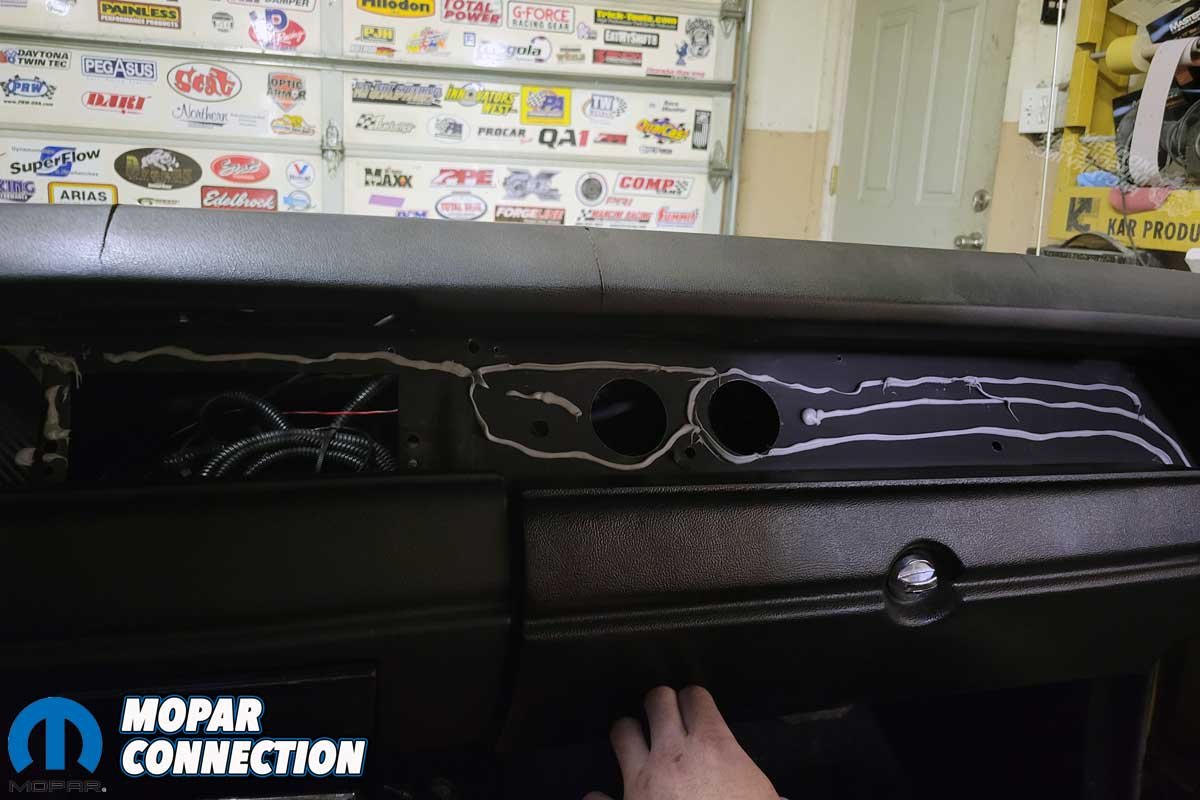
Above: A Classic Dash 1968-70 Mopar B-Body Dash Panel was selected for the Super Bee. We glued the panel above the glovebox, over two round holes, and the radio opening.
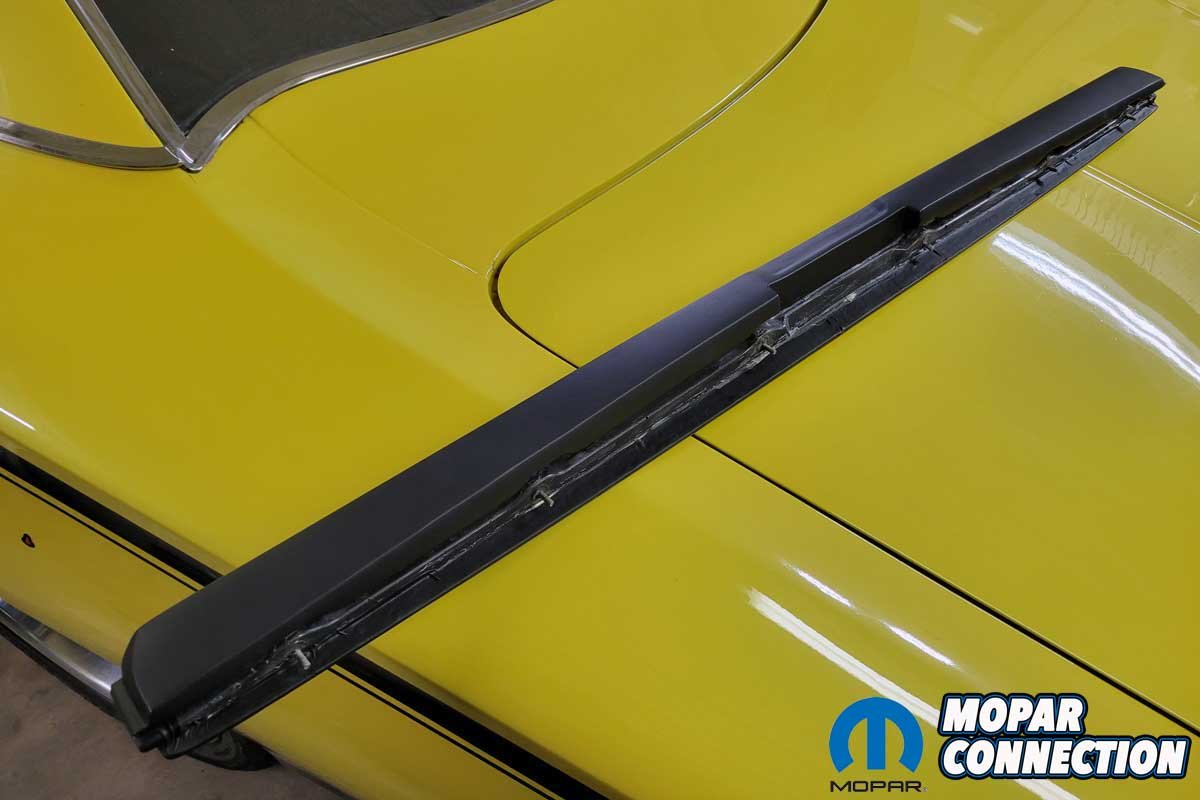
With the dash disassembled, it was a perfect time to replace the dash pad. We had obstruction-free access to the backside of the dash. The dash pad fasteners unthreaded without any problems. A new YearOne dash pad (Part No. MM647BLK) was selected to replace the cracked original. The YearOne pad looked like a concourse piece compared to the original pad. The new dash pad had the correct textured material, mounting studs, length, and width, and it even included the proper notch for the heater, ventilation, and air conditioning (HVAC) controls.

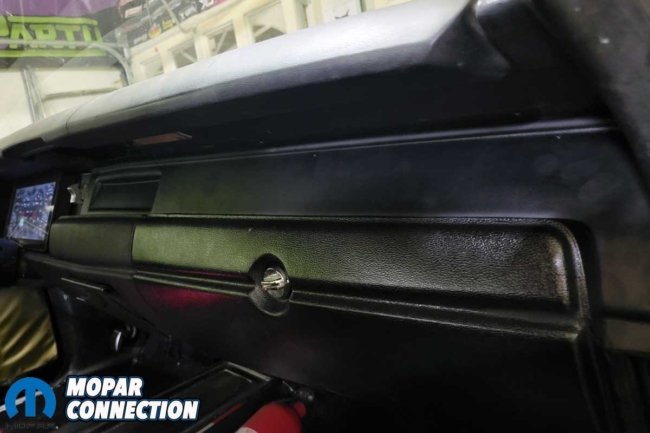
Above: The Classic Dash panel fits well. We ensured the glovebox door did not interfere with the panel. The factory and aftermarket black colors matched.
The metal dash structure was free from damage, and it was not faded, so we bolted on the new pad. On the right side of the dash, two large holes had once housed aftermarket gauges. A Classic Dash kit (Part No. 718680011) designed for B-Body Mopars was selected. It would cover both holes and the radio hole that remained after the radio was deleted.
Additionally, the kit included mounting screws and J-clips. However, we planned to hide the screw heads, so we used epoxy to glue the panel to the metal dash housing. Note: take time to ensure the glove box door will latch; some adjustments may be needed. We removed the steering column to make detaching the knee bolsters easier. With the bolsters removed, we repainted them to freshen up the interior.

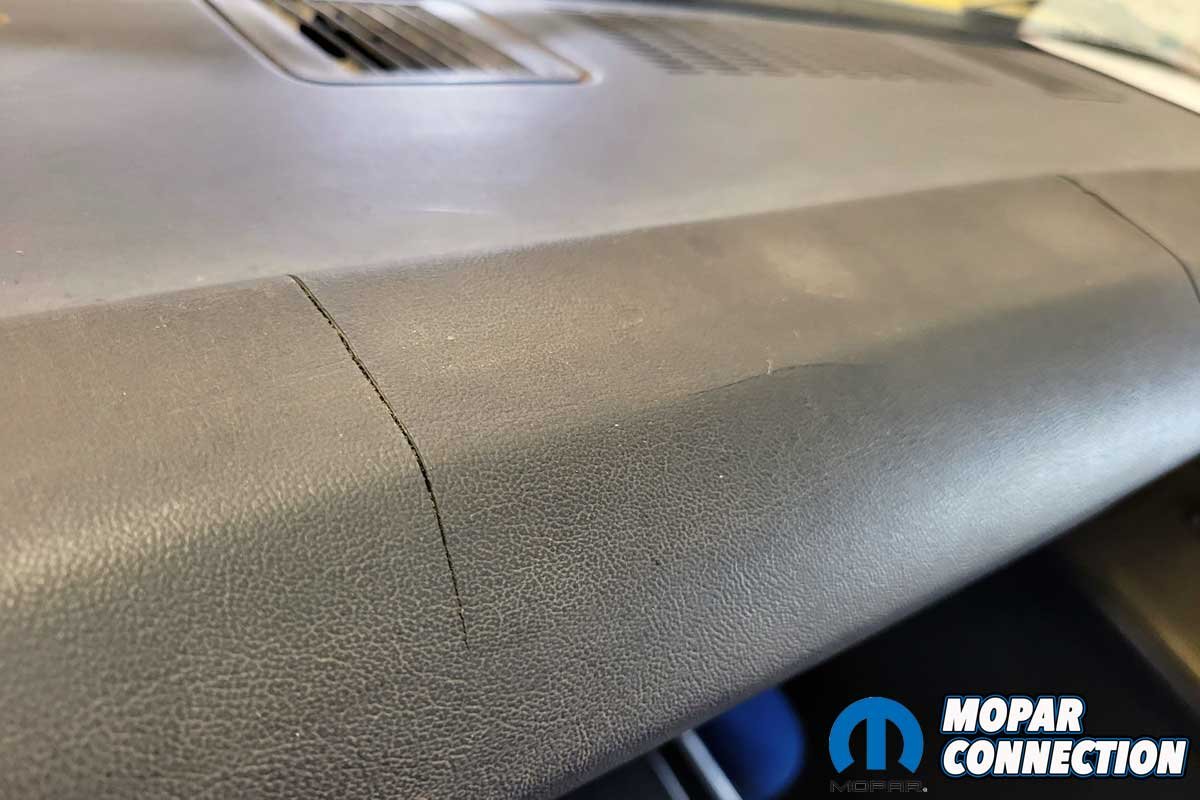
Above: The factory dash pad was sun faded and had several large cracks. We had access to all the fasteners on the dash pad’s underside. With a little effort and some out-of-position contortion, we had all the fasteners removed.
The plan is to add Vintage Air, and since the center bolster has no vents, we got lucky while looking around the Holley’s Moparty swap meet and saw a center section with A/C vents for a B-Body, so we grabbed it for $100. After a bit of modification to the mounting holes of the center section, we got a tight fit next to the glove box door.

Above: The YearOne dash pad was an identical replacement for the factory pad. The new dash pad had all the mounting provisions and fasteners, which made the installation easy.
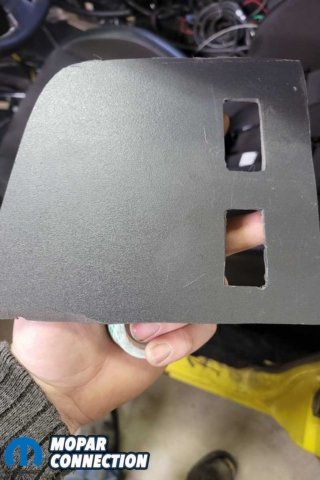
Working with our Rallye gauge cluster, we traced its shape onto black expanded PVC, which is ¼-inch thick. It has a similar texture that matches the right side of the dash, and it is easy to cut, trim, and manipulate.
We tested the fit of the PVC multiple times, and after the proper sizing, we drilled holes for provisions to install the Holley dash and a pass-through location for the wiring. The selection of the Holley dash was perfect for us because we have a Holley Terminator operating the Gen3 Hemi under the hood of the Super Bee.
Above: We marked the location where we planned to install two factory toggle switches. We selected black expanded PVC to construct our finish panels. It is easy to cut, shape, and notch, which allowed us to mockup several quality panels that fit around the Digital Dash properly.
Because the Holley components were compatible, we only needed a controller area network (CAN) wire from the Holley touch screen to the Digital Dash. We did not need an aftermarket box or dual input senders to get a signal. However, the Digital Dash has plenty of input ports if EFI is not used. We used one of the input ports for the fuel level sender unit.
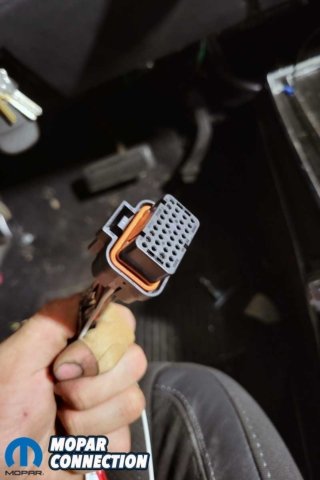

Above: The Holley Digital Dash has a controller area network (CAN), significantly reducing wiring complexity. It works with other Holley components, such as the Super Bee’s Holley Terminator system and input sensors from many manufacturers.
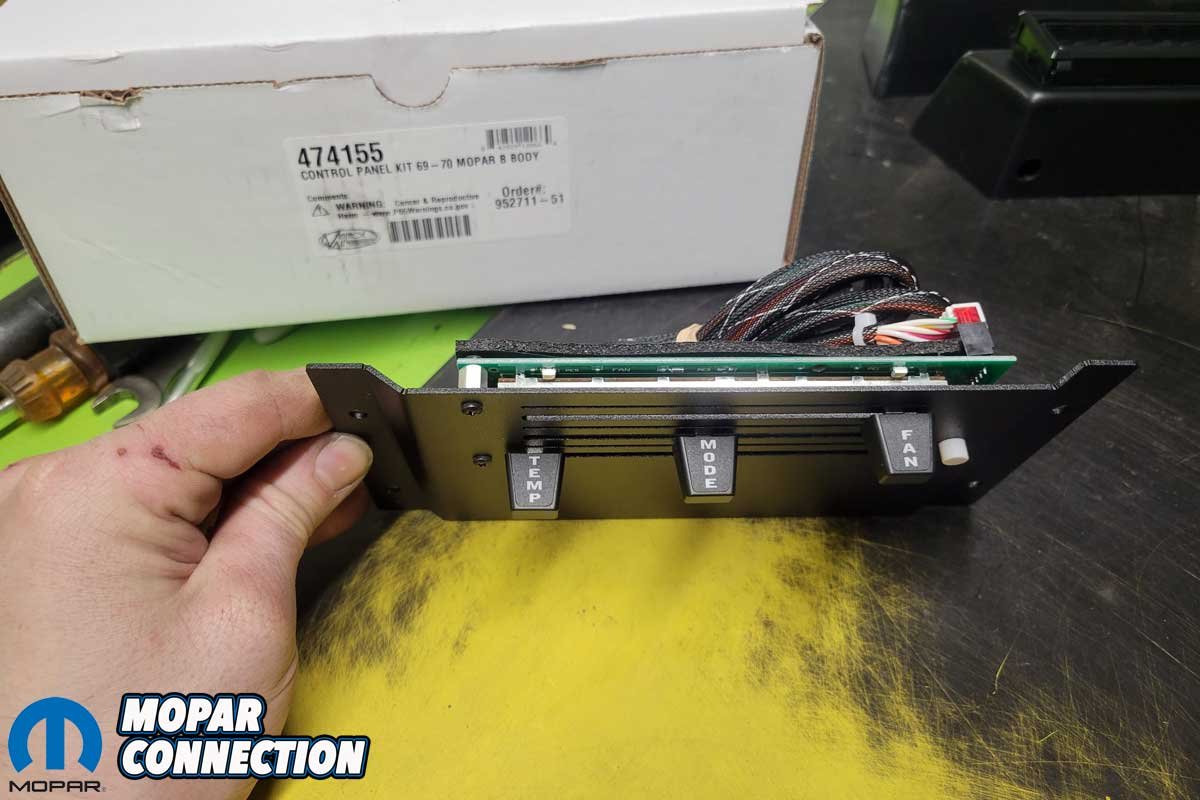
Since we planned to reuse the factory switches for the wipers and lights, we cut rectangle holes into the PVC to house the switches. The factory nuts and bolts held the switches in place. Upon reinstalling the knee bolster, we noticed a large gap between the new PVC panel and the bolster, so we cut up another PVC panel to fill the gap. We installed a Vintage Air control head unit to finish the area where the HVAC control head should have been. The rest of the Vintage Air kit will be installed later.

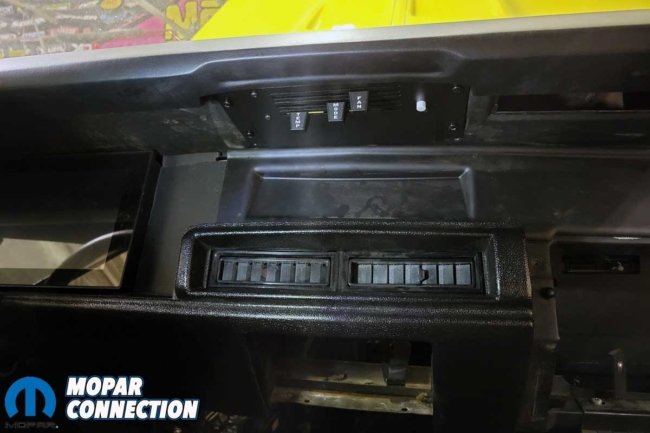
Above Left: Although we did not plan to install the Vintage Air components into the Super Bee, we felt the HVAC control panel should be installed to complete the dash upgrade. Above Center: The control panel fits nicely between the YearOne dash pad and the Classic Dash panel. Above Right: The freshly painted steering column contrasts nicely with the new Digital Dash and the black dash pad and trim panels.
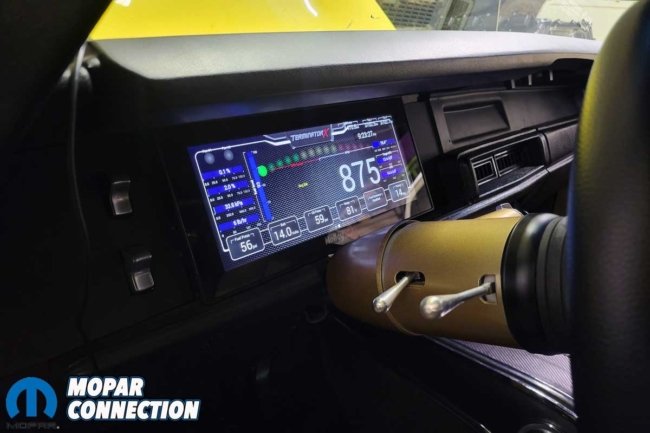
A few features with the Holley 12.3 dash we have enjoyed since the installation include the touchscreen, GPS speedometer, auto-dimming, multiple display designs with the ability to load custom displays, and the option to set warning indicators with colored lights. The Holley dash even displays turn and high beam indicators.
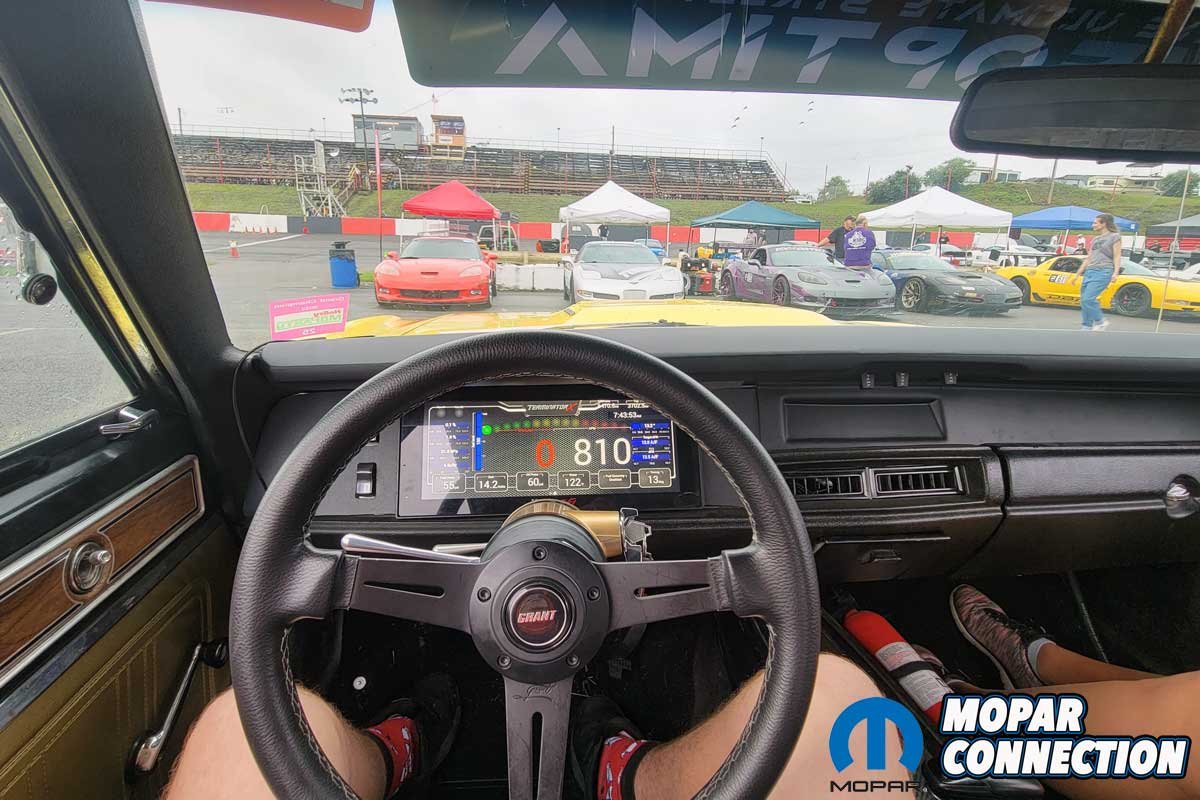
Above: The upgraded dash is ready for years of racing. The transformation from the old, faded, damaged dash to the 21st century is stunning; everything fits well and works properly.
With the installation of the Holley Moparty, Classic Dash, Holley Performance, and YearOne parts, we have transformed the aged dash into a 21st-century command center that perfectly represents what is expected of an ultimate Pro-Touring Super Bee.


