
Shortly after we picked up our 1967 Dart GT, we set out on a test ride to evaluate the Dart’s drivability. While out on our cruise we witnessed a shovel flying off a dump truck that pulled out of a quarry a few miles back. Unfortunately we were stuck in a narrow construction zone that limited everyone’s range for dodging the shovel. The three cars in front of us quickly pulled left and right trying to avoid the shovel with no such luck. The first car nailed the shovel sending it into the other lane which then caused the second and third car to also run over the shovel. Then it was our turn.
Quick to the brakes the four wheel drums did not react as quick as we would have liked. Limited to jumping lanes with consequences or trying to completely stop which was highly unlikely we opted to straddle the shovel. Driving over the shovel we started to feel at ease until we heard a giant thud in the rear. As we clinched the steering wheel we watched the shovel continue to spin out of our rear view mirror. We quickly regained focus checking on the car’s vitals and at first we seemed unscathed.
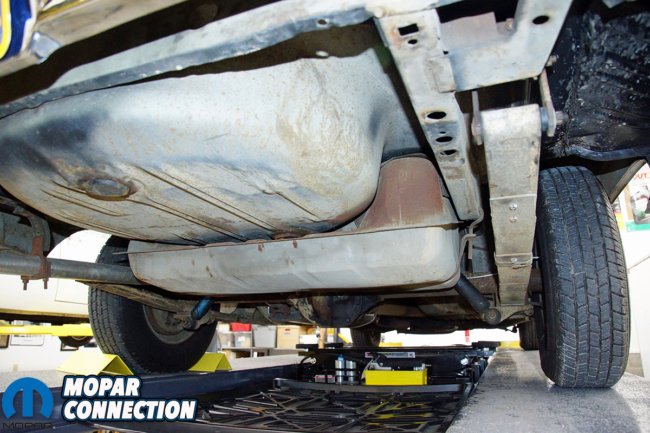
Above: Luckily nothing else on our undercarriage was damaged by the rouge shovel.
As we exited the construction zone a few miles further down the road we passed all three cars that hit the shovel before us. All of which were pulled over on the berm with flat tires. Although it sucks, we were happy that our 50+ year old Dart made it out of the chaos unharmed. At that exact moment we noticed fuel gauge seemed awfully low. We watched it as we drove a couple more miles and noticed it was dropping very quickly. We immediately pulled over to check our tank and we welcomed with the strong aroma of fuel as we opened our doors.
We noticed a trail of gasoline had followed us to the shoulder. We examined the fuel tank where we found a hole. While serious, we were able to press on, but for safety’s sake, we placed our fire extinguisher on the front seat and limped the Dart home without any additional excitement, except for a nearly empty tank.
Top Left: You can see the damage from the shovel. Top Right: A closer look reveals a crack in the tank which is not safe.
For those unfamiliar with the 1967 Mopar A-bodies, there are several things that are different from the 1968-76 versions, and one difference is the design of the gasoline tank and how it mounts to the chassis. We were concerned we would have difficulty finding a new tank, which would leave us searching for a good used one. Luckily for us, Classic Industries has the one-year-only tank and all the related hardware.
To get the Dart back on the road, we picked up a 1967 Mopar A-body, Zinc-coated steel, 18-gallon fuel tank (part no. FT6002A), a 1964-74 Mopar fuel filler neck grommet gasket (part no. MF296), and a 1960-76 Mopar A/B/E-body 5/16” fuel sending unit pickup filter that was a molded reproduction of the original (part no. MF285). Removing fuel tank is no simple task and decided that the gasket and filter should be changed to prevent future issues.
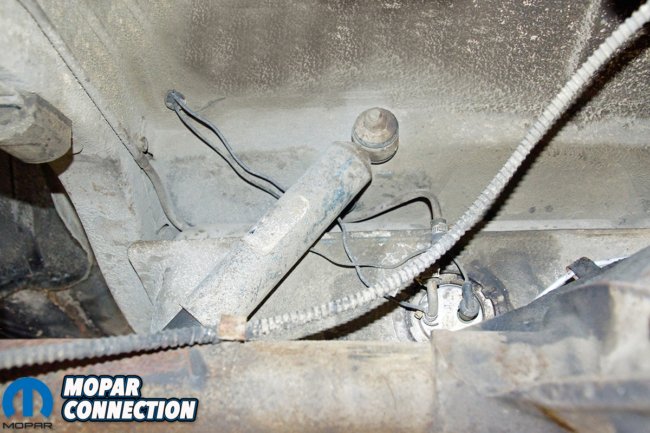
Top Left: You can see the fuel gauge wire and fuel line hooked into the tank. Top Right: We pulled of the fuel gauge wire along with the ground strap. Bottom Left: We disconnected the fuel line. Bottom Right: With everything disconnected it was time to start lowering the tank.
The tank removal was a straight forward affair. We placed the Dart onto a drive-on lift, but the same removal procedure could have been completed on the garage floor or a concrete driveway. At the fuel sending unit, there was one wire for the fuel level gauge, a rubber fuel line between the fuel line to the fuel pump and the sending unit outlet and a ground strap from the chassis and the inlet to the fuel sending unit. Everything was disconnected and moved safely out of the way.
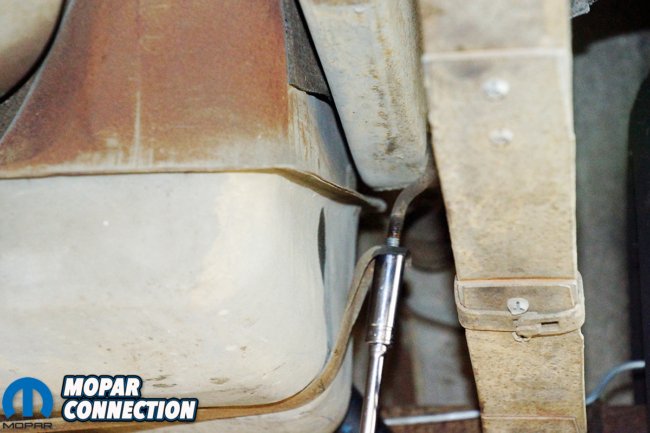
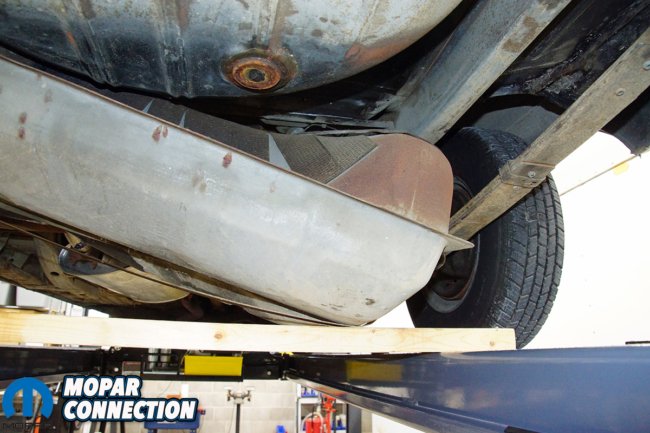
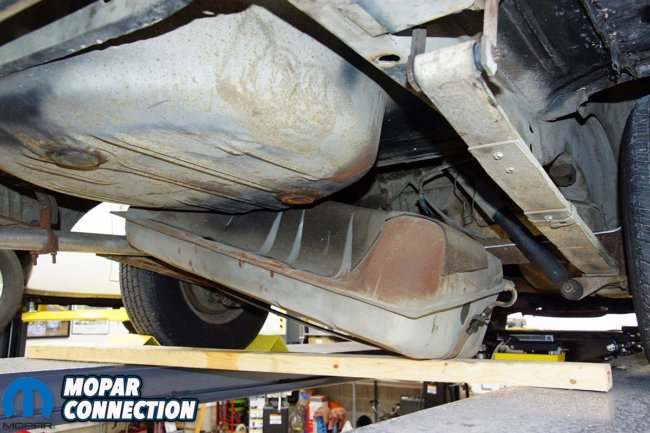
The 1967 A-bodies have only one transverse tank strap rather than a pair of longitudinal straps. We backed off the strap’s J-hook nut at the passenger frame rail and dropped the passenger side of the tank onto a 2×4, which supported the tank. You could easily utilize the ground to support the tank also. The driver side of the tank strap was maneuvered from the frame rail, the tank was pulled off the filler neck, freed from the chassis, and placed on the floor.
Top Left: We lowered the tank down and used a 2×4 to support the right side. Top Right: The only thing still holding the tank in is the gas filler neck. Bottom Left: With some wiggling we were able to slide the tank off the filler neck. Bottom Right: You can remove the filler neck before dropping the tank but is not necessary.
Once the tank was on the floor, the fuel sending unit lock ring was knocked loose with a punch and a hammer. With the lock ring removed and with a slight pull, the sending unit was loosened and then manipulated from the damaged gas tank. The old fuel filter was pulled from the sending unit, and the unit was cleaned. The new Classic Industries filter was pushed onto the fuel sending unit.
We slipped the fuel sending unit through a new gasket and into the gas tank, and the included lock ring was tapped into place. After the filler neck grommet was installed into the tank, a light coat of grease was applied to the grommet to aid in the tank’s installation. We transferred the rubber isolator pad from the old tank to the new tank, and with that, the gas tank was ready for reinstallation.
Top Left: With the tank out we carefully removed the rubber insulator. Top Right: With a punch and hammer we removed the lock ring for the fuel sending unit. Bottom Left: We carefully maneuvered the sending unit from the original tank for use in the new. Bottom Right: With a new fuel filter on and new gasket in place we installed the fuel sender into the new tank.
The factory tank strap and rubber insulator were in good shape, so we reused them. We maneuvered the strap into the factory anchor on the driver side of the Dart. Once the strap was anchored, the tank filler grommet was carefully guided onto the filler neck. An upward push allowed the strap to wrap the driver side contour of the tank. We reinstalled the factory J-hook into the passenger side of the chassis.
With the tank supported by a shoulder, the strap was extended to the J-hook and secured with the factory nut. The tank was wiggled into place, and the strap was tightened to support the tank. To finish the installation, we replaced the rubber section of the fuel line at the sending unit, and we secured it with new hose clamps. The ground wire was reconnected to the fuel sending unit outlet pipe, and lastly, the wire to the fuel gauge was reattached to the sender.
Top Left: The new lock ring and older sending unit fit perfect. Top Right: A new gas filler neck grommet was installed in the new tank and a light coat of grease was applied to ease the reinstallation of the filler tube. Bottom Left: Our rubber insulator was laid on our new tank before installation. Bottom Right: All of our hard work paid off and looks just like factory.
The gas tank was filled with about two gallons of fuel, and there was not any spillage onto the floor from around the filler neck grommet. With the ignition key in the run position, the fuel gauge needle moved, so the gauge seemed to be operating. We did a once over of the Dart, and then we took the Dart down the street to the gas station. The tank was filled and we did not have any leaks. The fuel level swung to the full position on the gauge. After a little ride, we returned home and checked the tank for leaks once more and did not find any.
Even though there are no guarantees as to what will be stumbled upon while cruising your classic Mopar around town, it is good to know that quality restoration parts are just a few keystrokes or a phone call away, if they are ever needed. Classic Industries got our Dart quickly back on the road. With a large selection, fast shipping and great prices we got our parts without shoveling out a lot of cash.






lmao, it seems almost incomprehensible that you would run over something that actually indicates it hit the under carriage (the crunching noise) and not pull over. Fortunately the car didn’t erupt into flames after leaving a trail of gas and kill someone. Oh, and don’t pull over and either get the shovel out of the road, get the plate number of the dump truck or notify the police. It’s how motorcyclist get killed or maimed.
Yeah, we can’t vouch for Chris’ decision-making paradigm on that one.
I replaced the gas tank on a 1967 barracuda with that same factory single strap system, I didn’t feel comfortable driving with one strap, I added another strap opposite the factory strap that attached to the spare tire holder than up to the front undercarriage with two j bolts and fabricated bracket mounts.