


 The trump card when it comes to budget engine building is and always has been availability. Decades ago, Mopar’s 383 cubic-inch big block fit the mold perfectly; any Joe Shadetree could snag one out of anything from a Chrysler Newport to a Plymouth Road Runner to a three-quarter-ton Dodge D200 pickup.
Nowadays, the G3 Hemi has matched and, in some cases, vastly surpassed the venerable 383’s proliferation in salvage yards. The 5.7L variety has become especially commonplace with its widespread use in several car, truck, and SUV models since 2003.
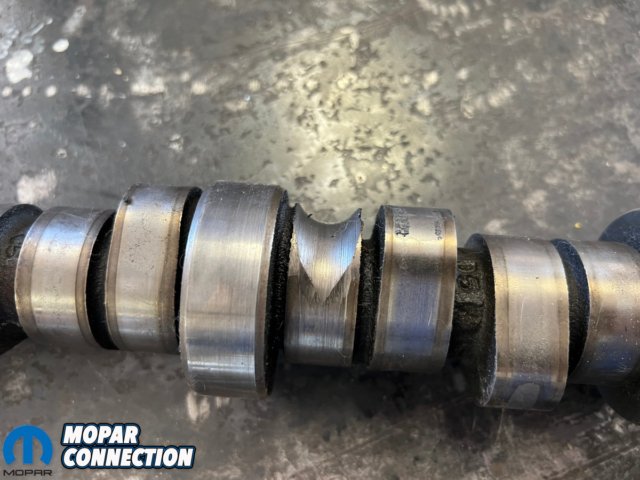
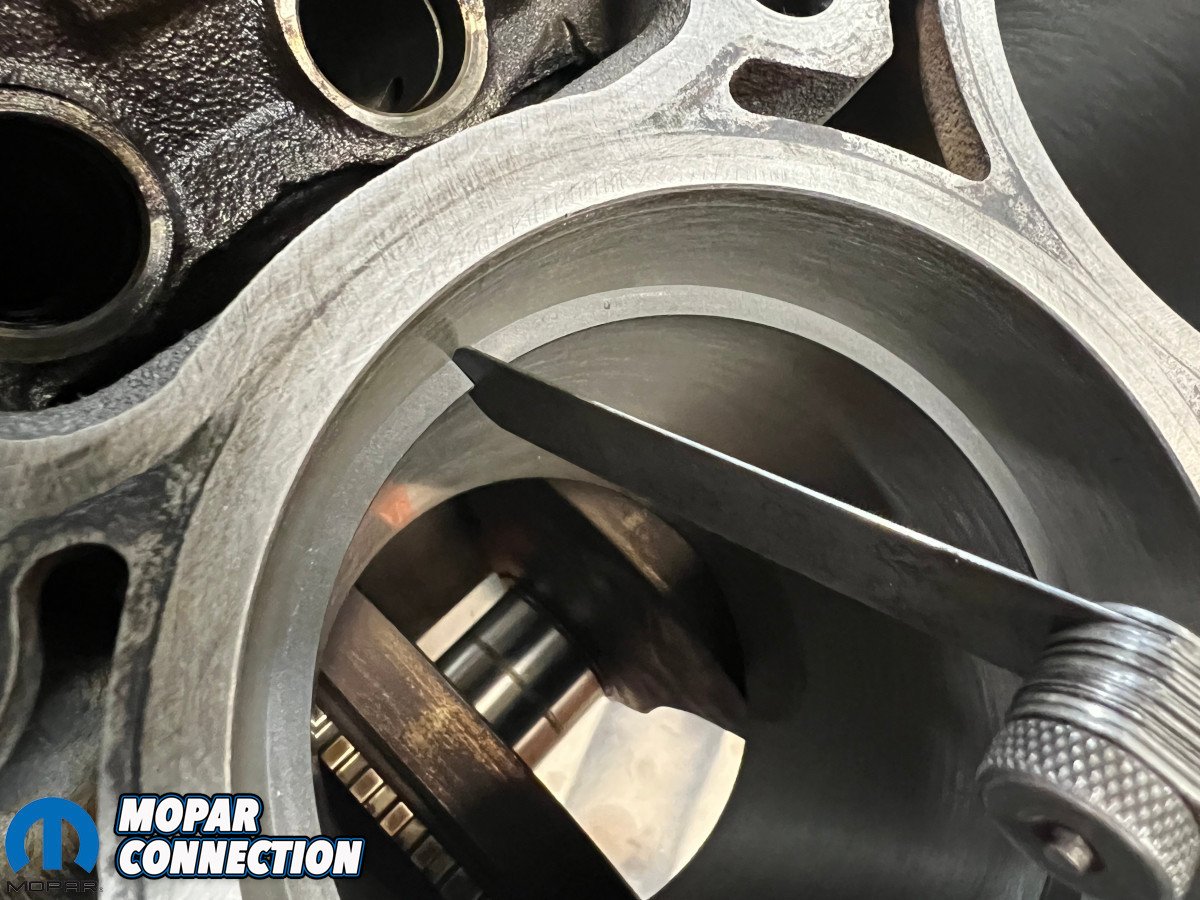
Above: Here are the results of the infamous Hemi tick let gone too long. The lifter’s roller locked up and commenced to eating a camshaft lobe.
Like many engine platforms, the 5.7L Hemi has not been without its own sub-generations. Luckily, there are basically only two versions: the Eagle (2009+) and the pre-Eagle (2003-2008). Ma Mopar made significant revisions to many key components of the Eagle engine, although most talked about would be the much-improved cylinder heads and variable valve timing (VVT).
The Eagle heads alone, said to flow 300+ CFM on the intake side straight from the factory, are why many swappers flock to the 2009+ 5.7L engines. It takes almost nothing to surpass 400 horsepower, very little to hit 450, and just a bit of smart part selection for 500 ponies.

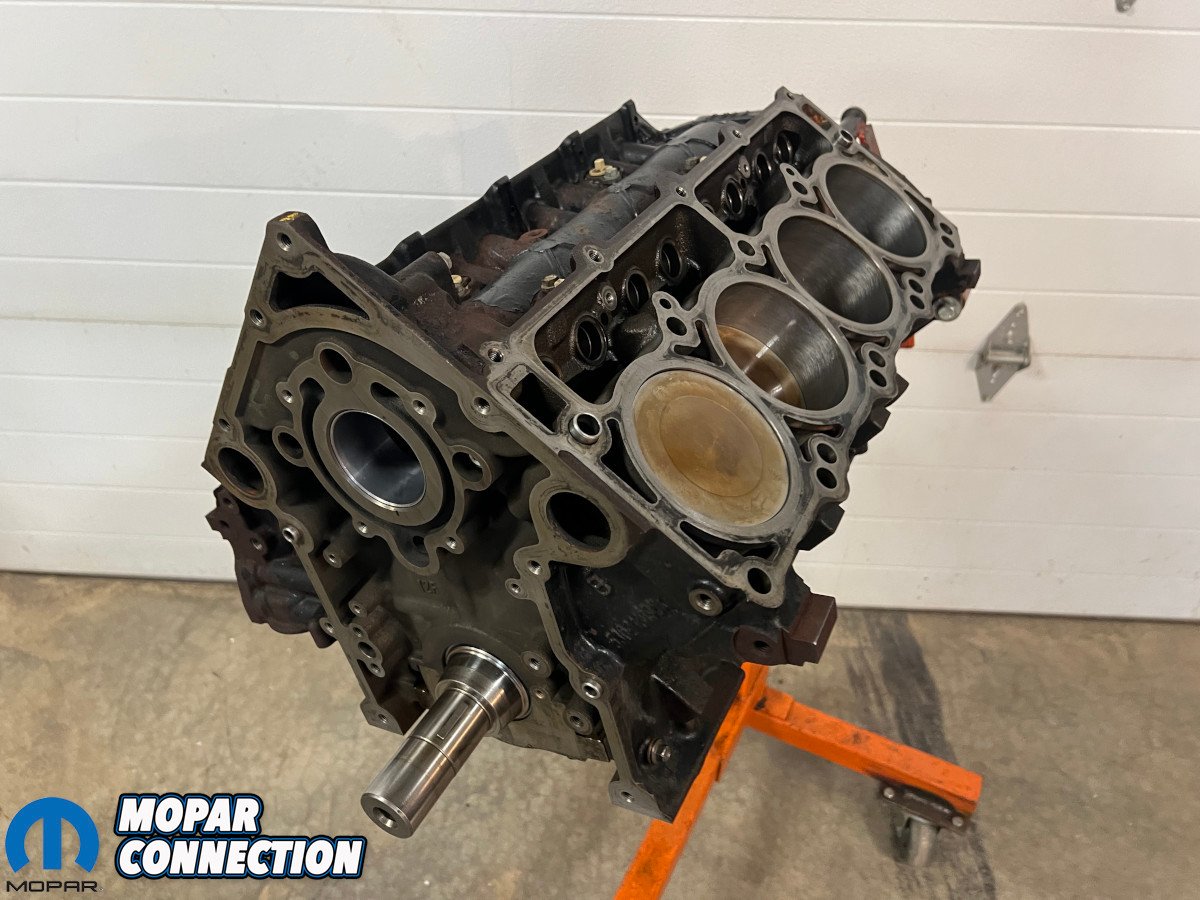
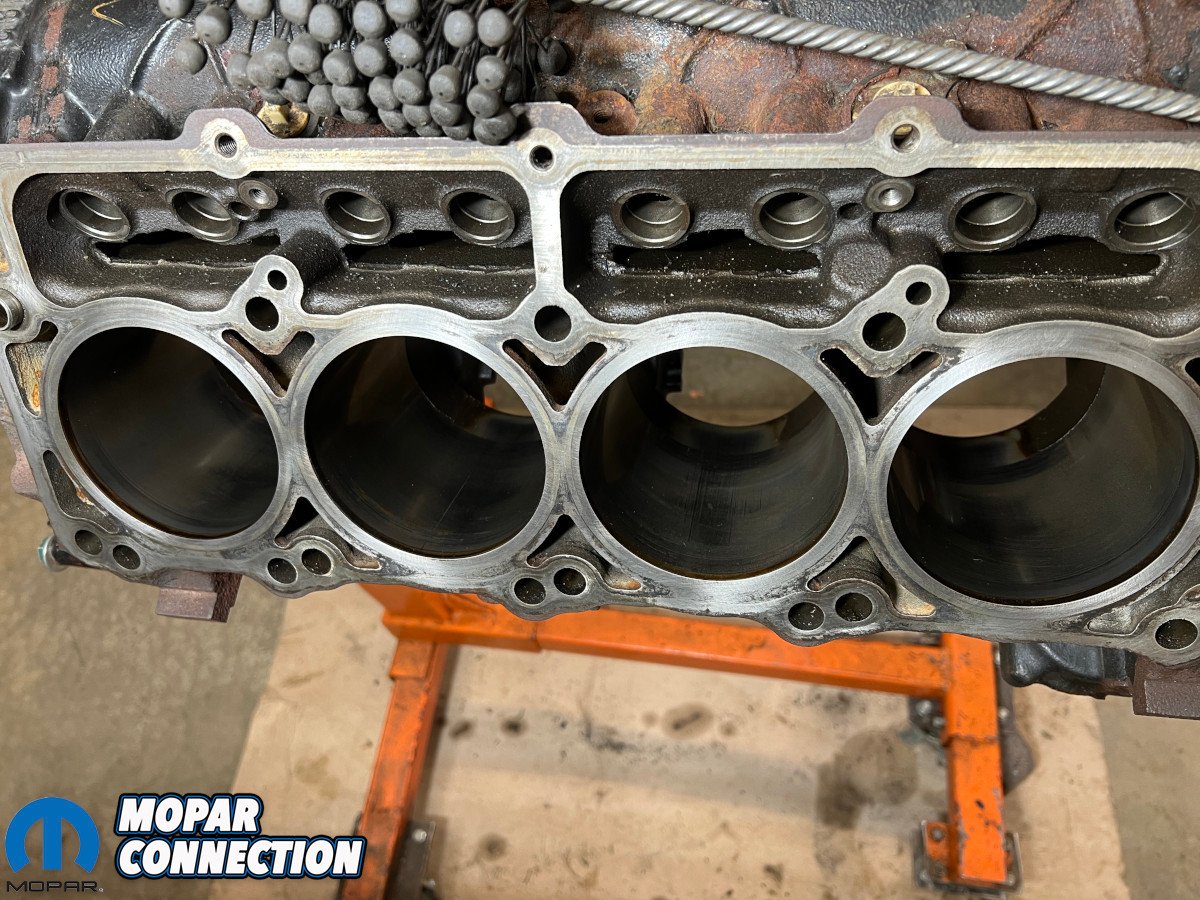
Above left: Cylinders measured in at an unmodified 3.917″. Above center: Bores and pistons looked like they had some miles on them, but also looked plenty saveable. Above right: The bottom end seemed fine as well other than a thick coat of sludge.
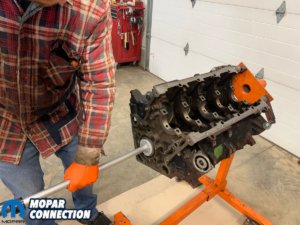
The donor for this particular budget-minded building block was a 2012 Ram 1500 truck. Bought in running condition by the previous owner, the drivetrain was destined for an ‘80s Dodge truck. That project came to a hasty halt after the cylinder heads and oil pan were removed to get a gauge on internals.
Unfortunately, it didn’t take long to find real bad news as this lung had fallen ill with the well-known lifter failure and completely destroyed a camshaft lobe. It might’ve been running when the last guy got it, but it sure wasn’t running well.
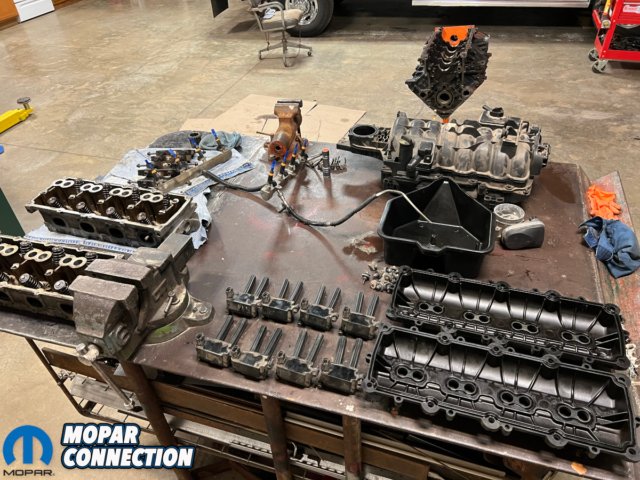
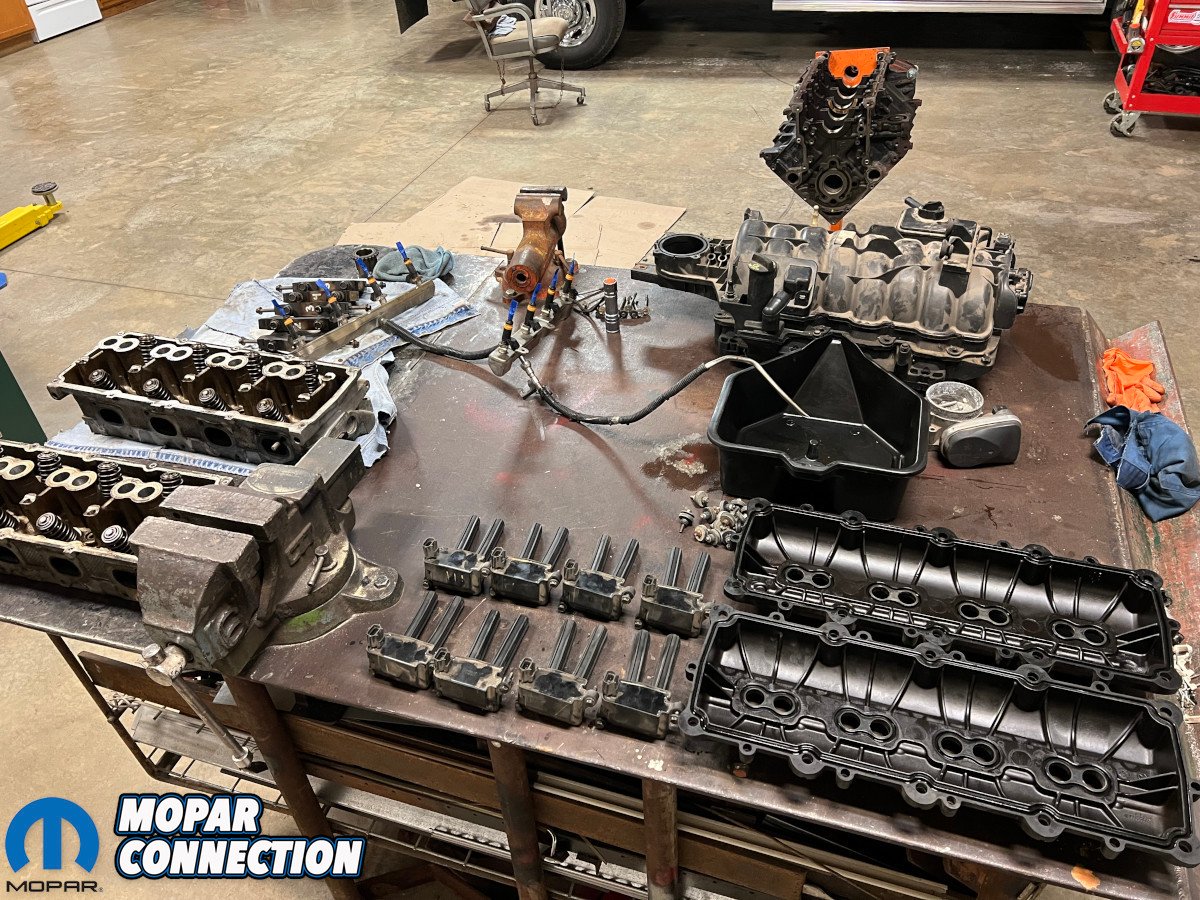
Above: Paramount to any engine build’s success are organization and labeling during the disassembly process.
That’s where we picked up the literal pieces for $500. A complete-but-disassembled 5.7L Hemi, wiring harnesses, and two-wheel-drive 65RFE automatic transmission were all part of the deal, a fair enough price given its uncertain state.
Disassembly was the first step in getting a handle on what we really had on our hands once it was back home. Every component was labeled as it was stripped down to the short block. Then, pistons came out one at a time, each getting a tag with corresponding number so they could eventually make their ways back into their respective holes.
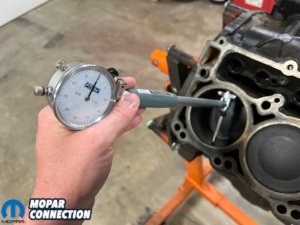
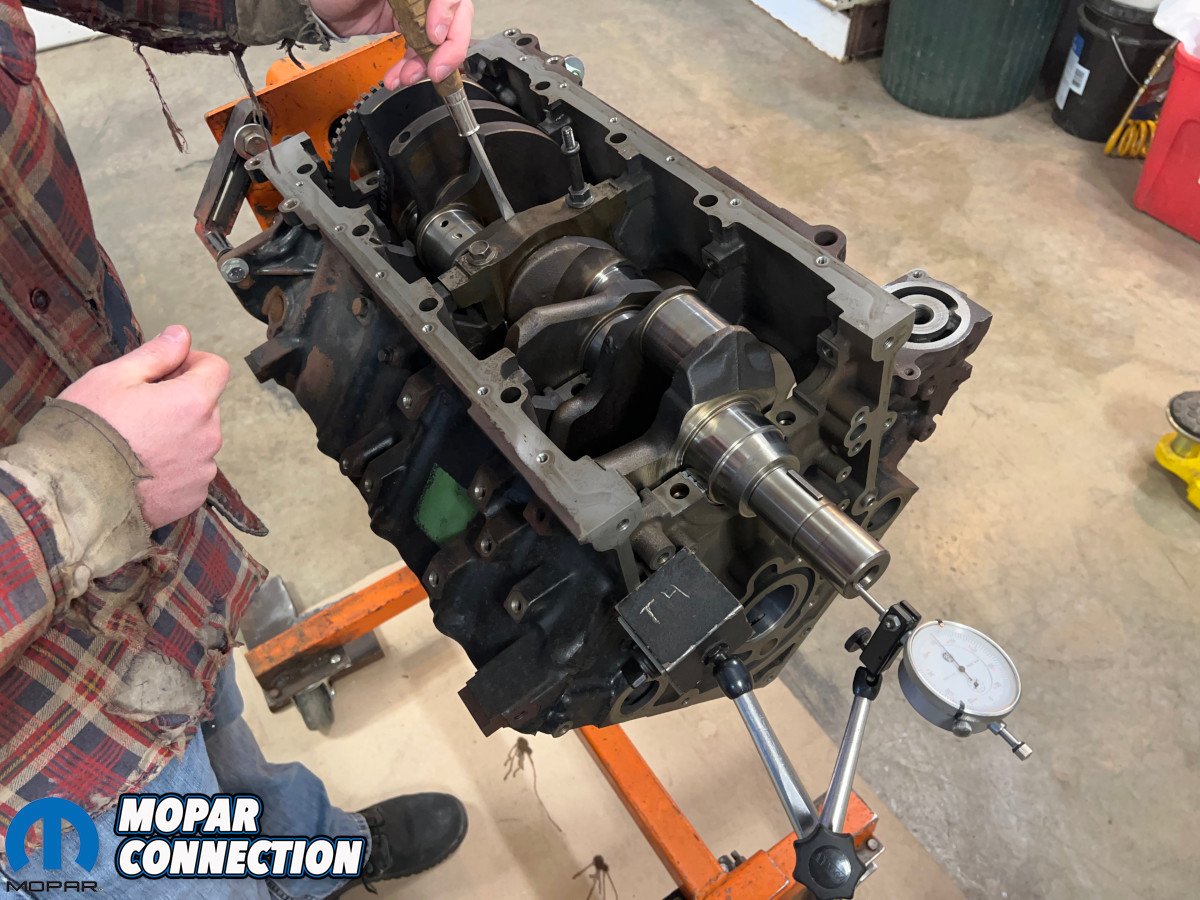
Removing the main caps and crankshaft left a barren and beaten block with naught but it’s camshaft bearings still in place. Measuring bores for size and taper yielded relieving results; each was still the factory size of 3.917” (99.5mm) and taper was under the service manual’s half-thou (0.0005”) specification. That meant the OEM pistons could be reused, saving the cost of block machining and new pistons.


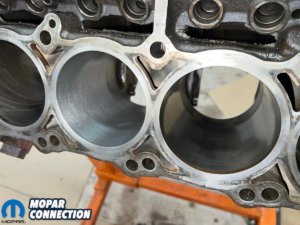
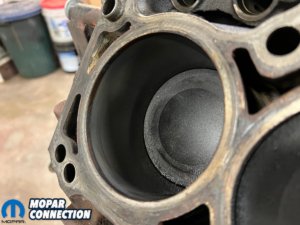
Above left: Cylinders were a little scuffed and scratched, but not scored. Above center: An old ball hone and liberal use of WD-40 helped clean them up. Above right: The ball-honed bore (left) passed the eye test as much more consistent and cross-hatched compared to the untouched one (right).
None of that meant the cylinders were perfect by any means. With at least 200,000 miles of abuse, there was a slight ridge at each top along with glazing and a few scratches. On a high-horsepower race engine, that would’ve made a trip to the machine shop absolutely necessary. On an economical 450-horse street motor, the always-controversial ball hone was a more pocket-friendly option.
Mopar Connection’s own Kevin Shaw provided a fine “dingleberry” hone video a few years back which was used as a reference for our own cylinder cleanup chore. If nothing else, the hone certainly put some crosshatch back in the bores while also deglazing them in the process. Oil consumption and compression leakage rates will be the only true test of its effectiveness once the pistons have pumped some break-in revolutions.
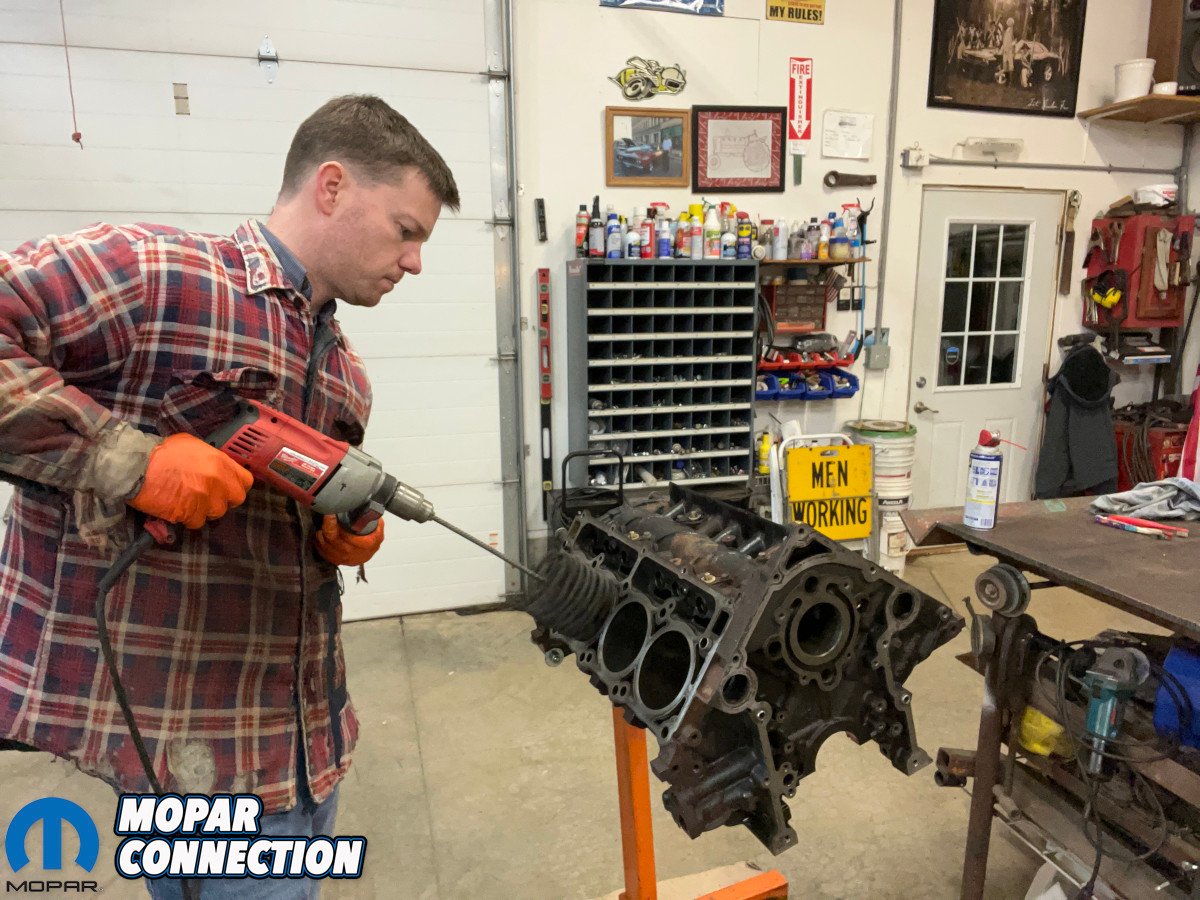
With the dirty work done, the block was wheeled outside to be degreased and pressure washed thoroughly. The goal was to remove any loose original paint and hose out metal dust created by honing and general cleanup activities. All machined surfaces were wiped down with WD-40 right away to prevent flash rusting.
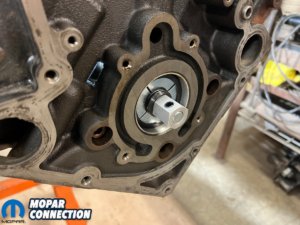
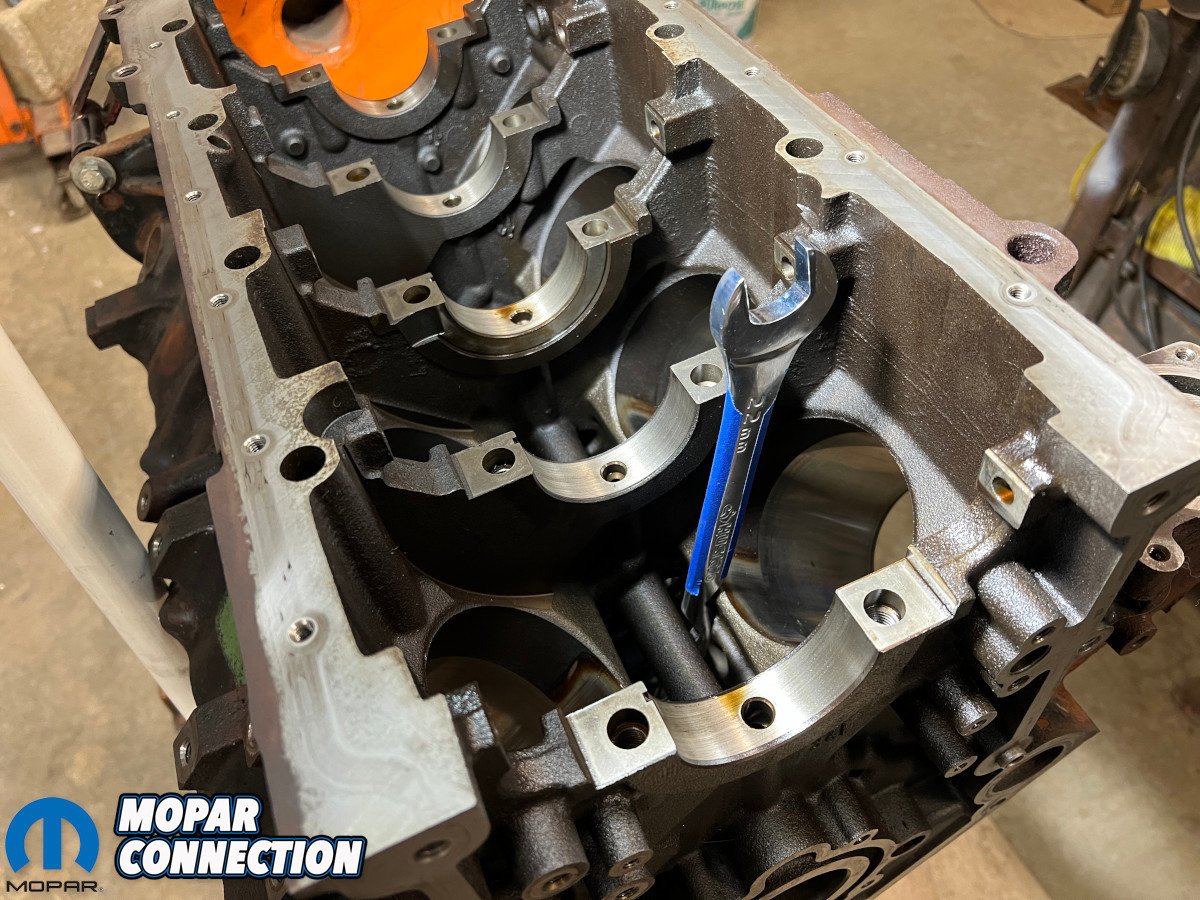
Above left: COMP’s cam bearing tool featured all the right expander sizes for our G3 Hemi. Above center: Hillbilly Garage’s specially-modified 22mm wrench was a must-have. Above right: Note the as-received cuts at the perfect locations to clear the block and main oil gallery.
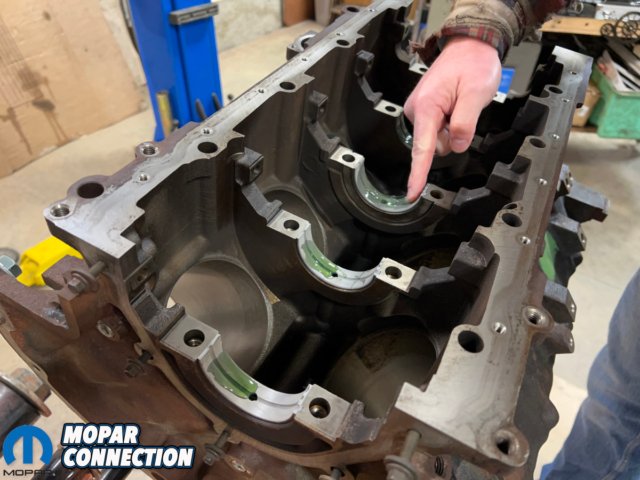
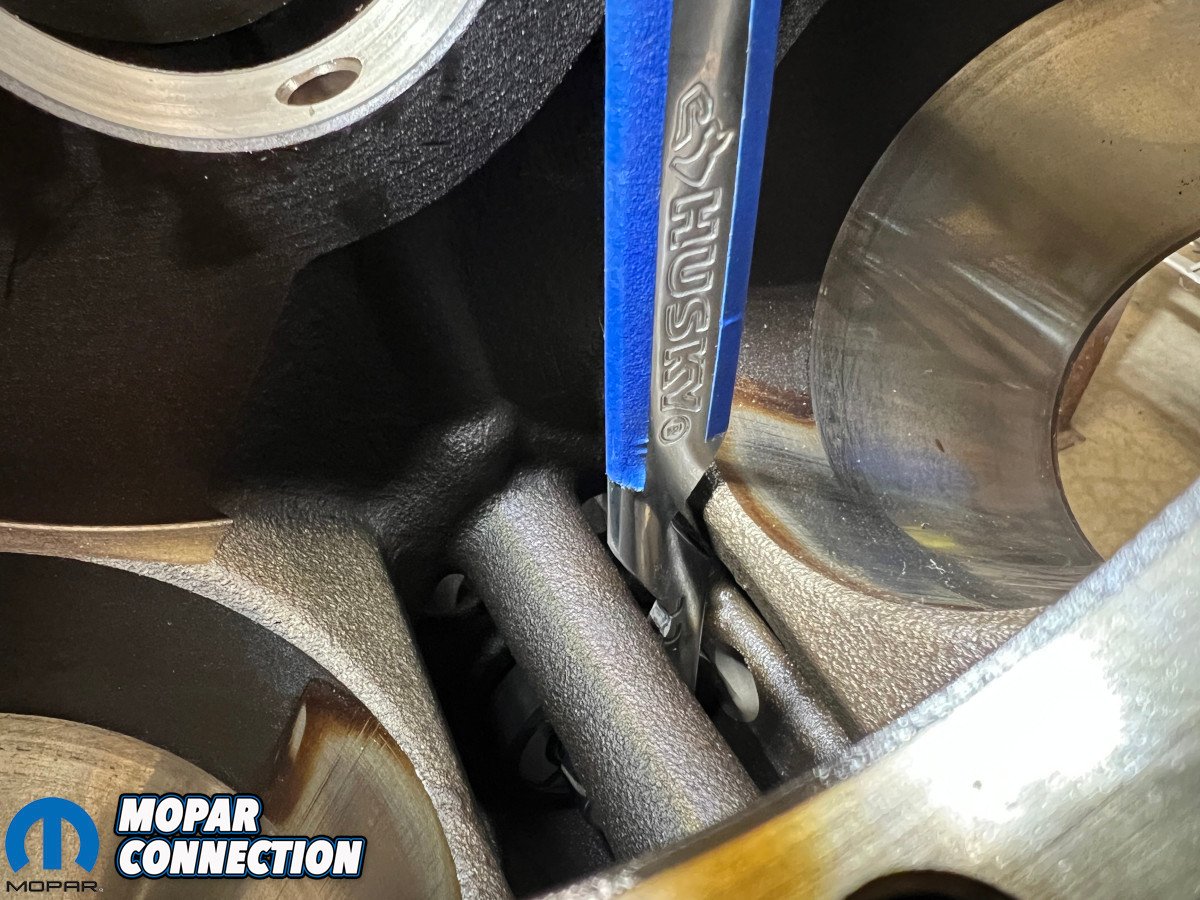
After that, the fabled “non-serviceable” camshaft bearings were the only remaining vestiges of this homely Hemi’s previous life and we were out to prove the service manual wrong with the help of Ronnie Williams and his YouTube page.
Straight from the book, Ma Mopar says, “Do not attempt to replace cam bearings for any reason. If the cam bearings are damaged, the cylinder block must be replaced.” Mr. Williams would beg to differ with one of the few how-to videos available online about the subject.
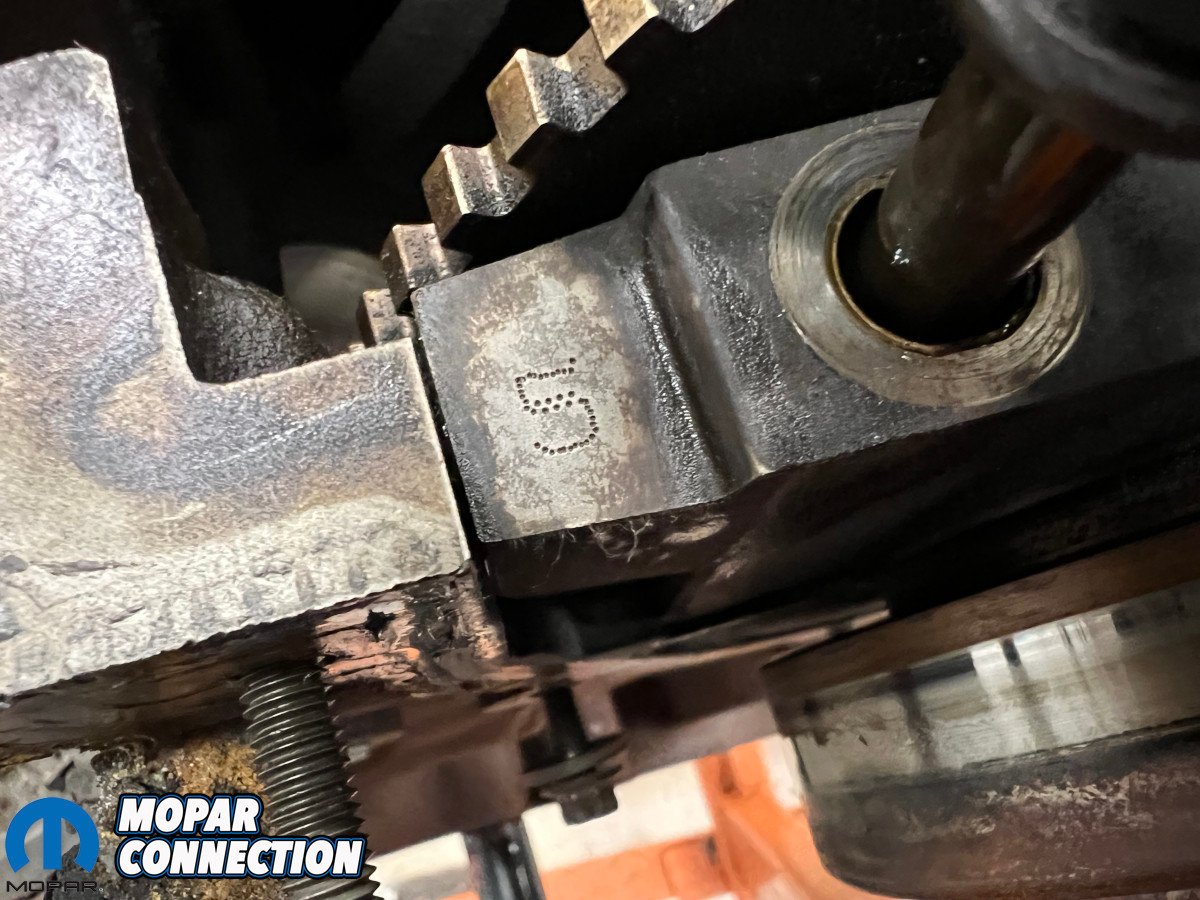
Just two tools were required for the job: a bearing installer (COMP Cams P/N 5312) and Ronnie’s specially-ground 22mm wrench. Following his video instructions to a tee, the rear soft plug was knocked out, then the old bearings were removed. Number five, the rear and the smallest, was first and came out the back. Numbers one, two, three, and four were driven out the front in that order.


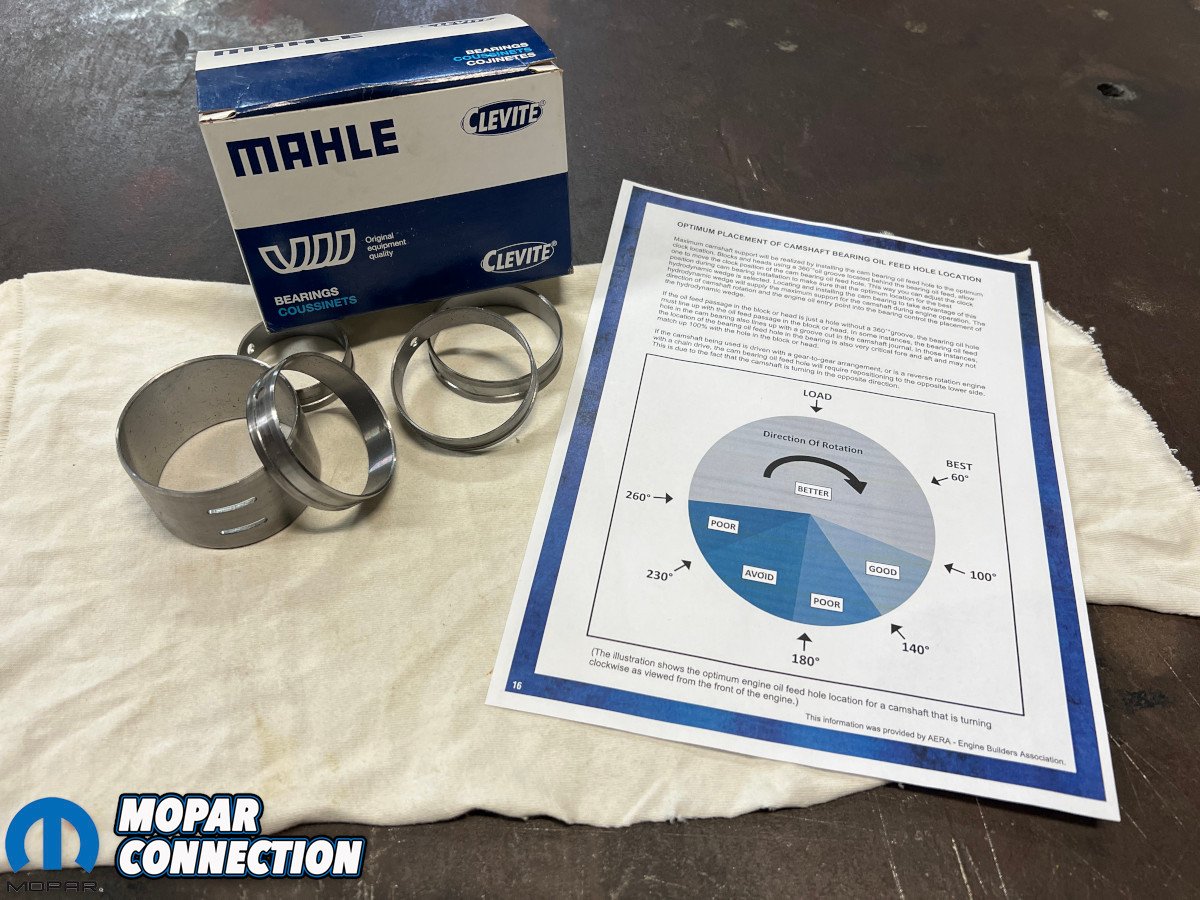
Above left: New Mahle cam bearings were supplemented by online documentation about oil feed hole location. Above center: Bearings were marked at bottom dead center as a reference to get the feed hole at 2 o’clock. Above right: The COMP tool knocked all five in without issue.
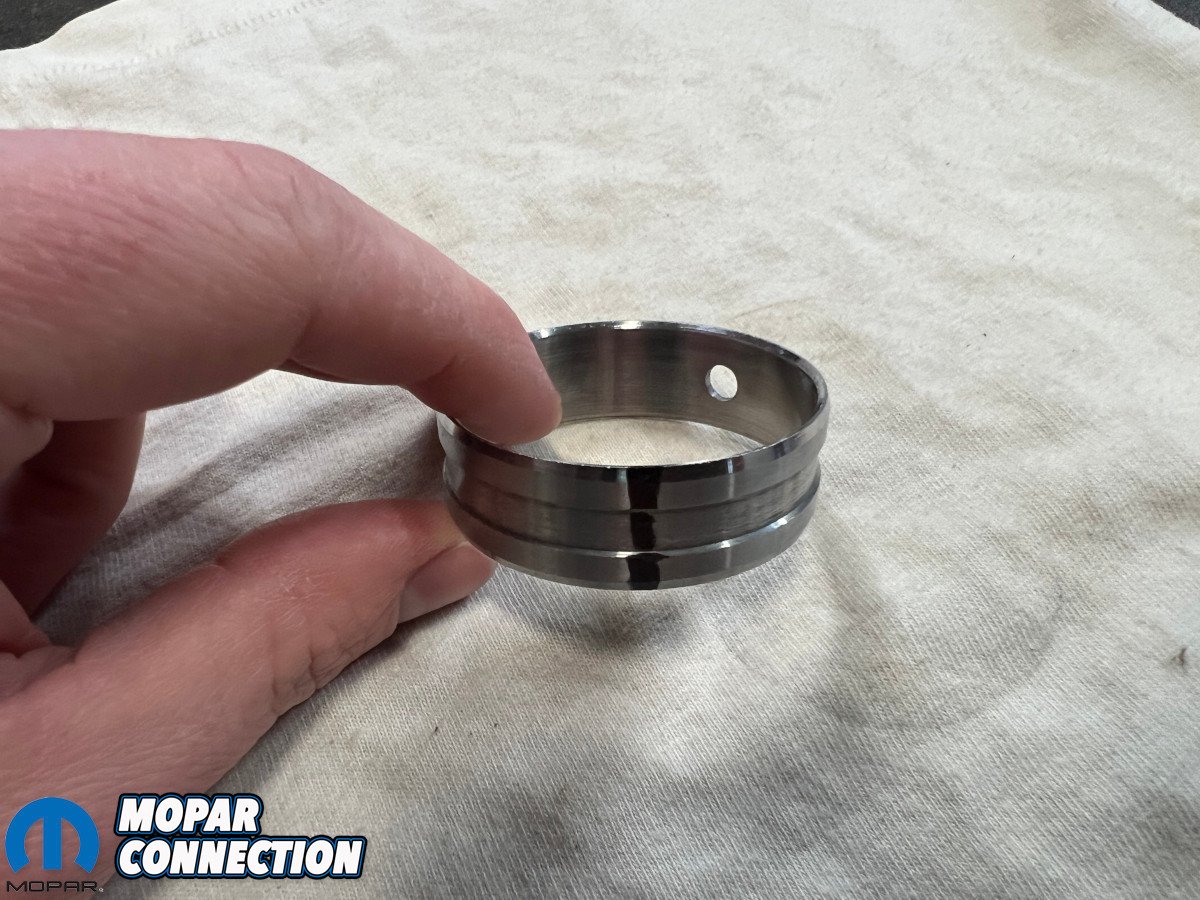
A new cam bearing set specific to the Eagle-era Hemi, sourced from Summit Racing (P/N SH-2191S), featured the all-important backside groove. OEM bearings were groove-less, meaning the single hole in each bearing needed to line up exactly with the oil feed hole in the block. Back-grooved cam bearings not only permit some wiggle room, but actually allow the oil hole to be clocked to a specific location.
General consensus among suppliers is that the optimum location of an oil feed hole to maximize the hydrodynamic wedge created by the oil is at roughly 2 o’clock on a clockwise cam. Therefore, a mark was made at bottom dead center with the hole in that position as a reference point during installation.
Bearings were beat in starting with five and working forward through four, three, two, and one while keeping a careful eye on oil hole orientation and centering in the journal, both of which were detailed in Ronnie’s all-encompassing how-to.
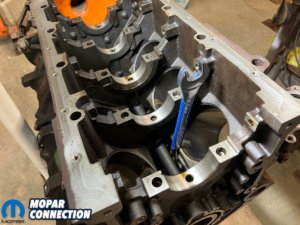
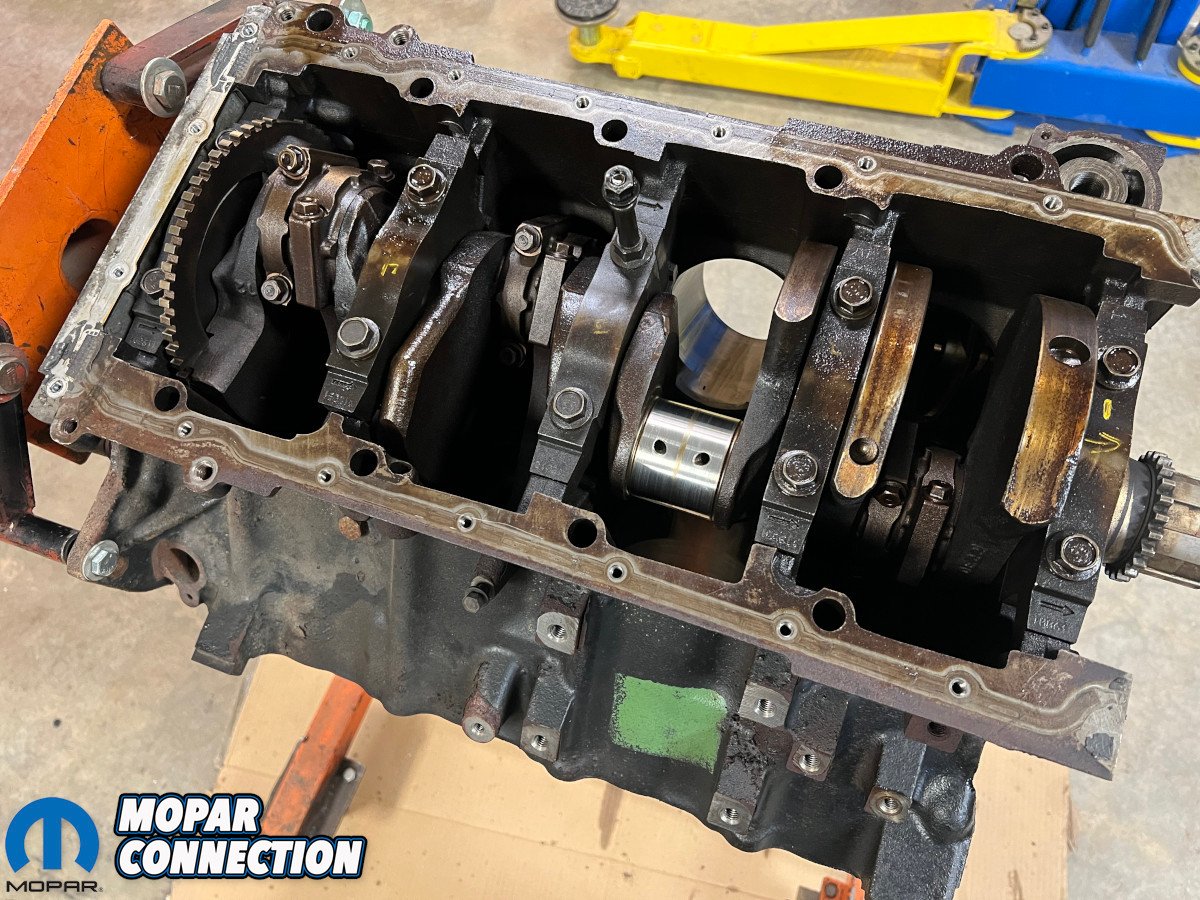
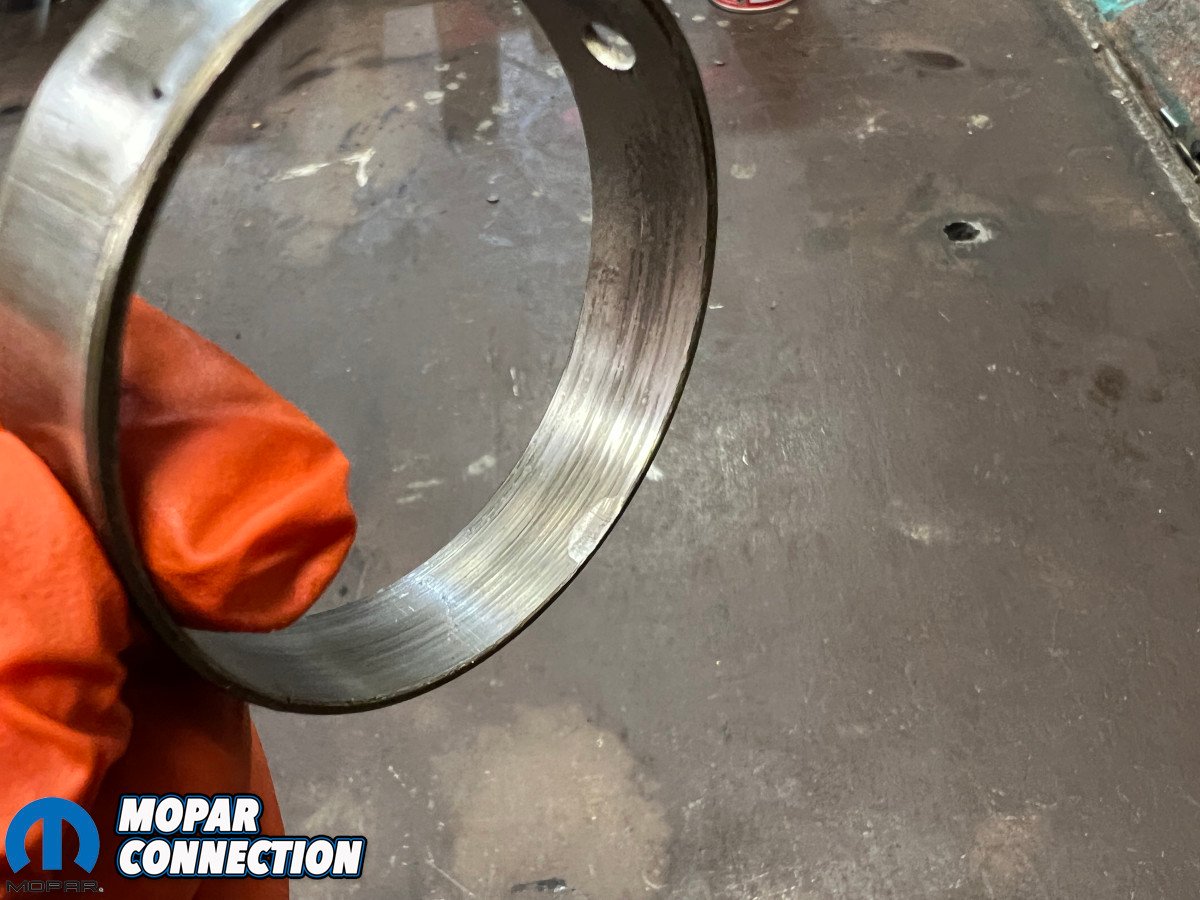
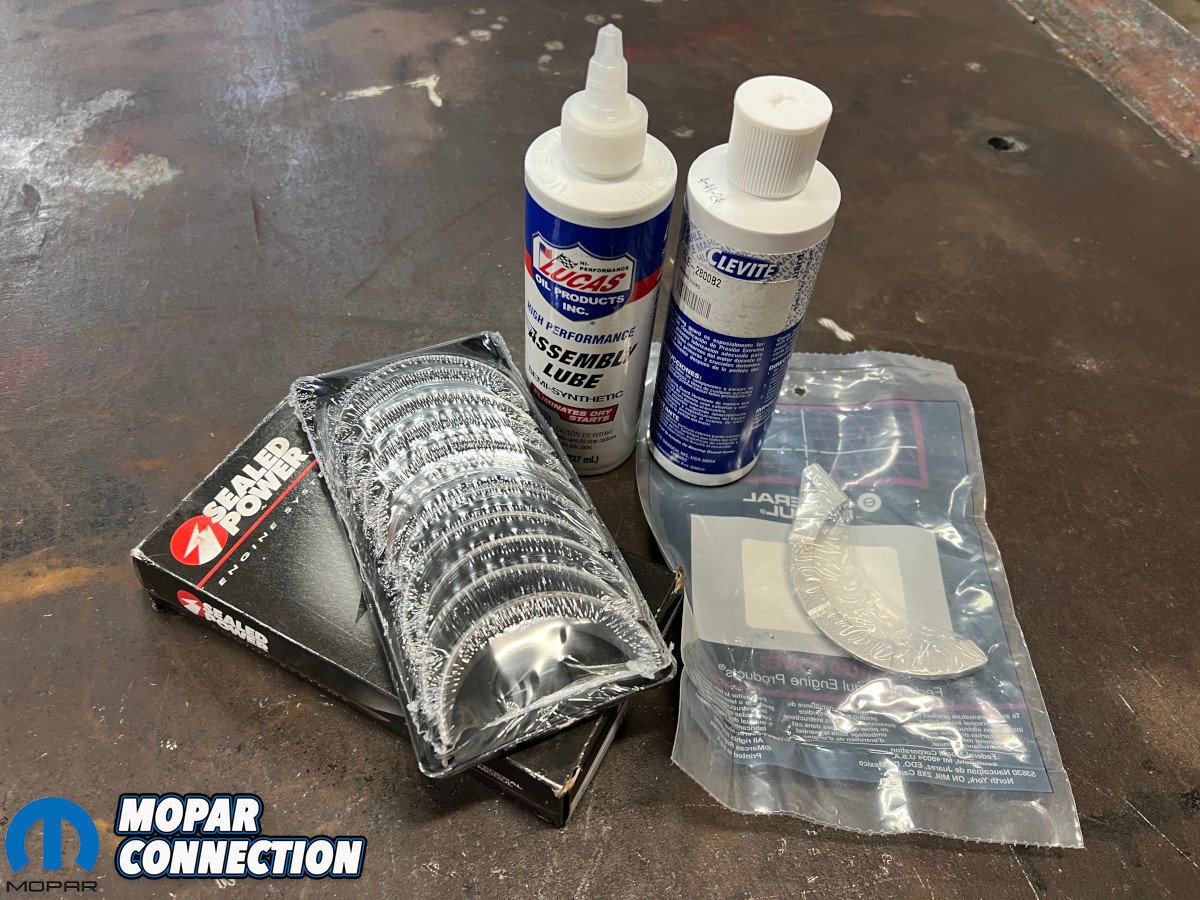
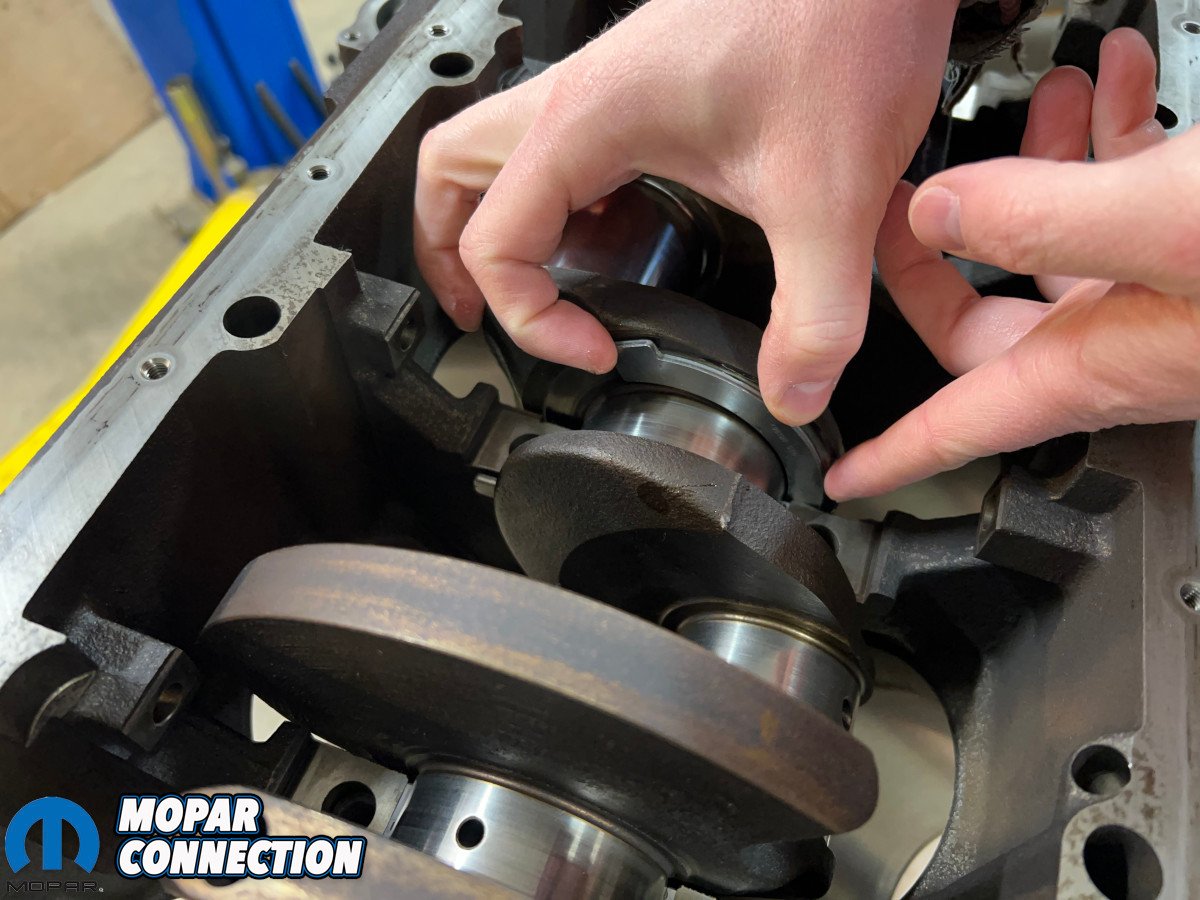
 While the block was upside down, it was a good time to get the crankshaft dropped in. Here again, Summit Racing was the go-to for both main (P/N 7419M) and thrust (P/N 4961F) bearings. The crankshaft was in the same shape as the bores in that it was standard size and required standard bearings after polishing out a few minor dings.
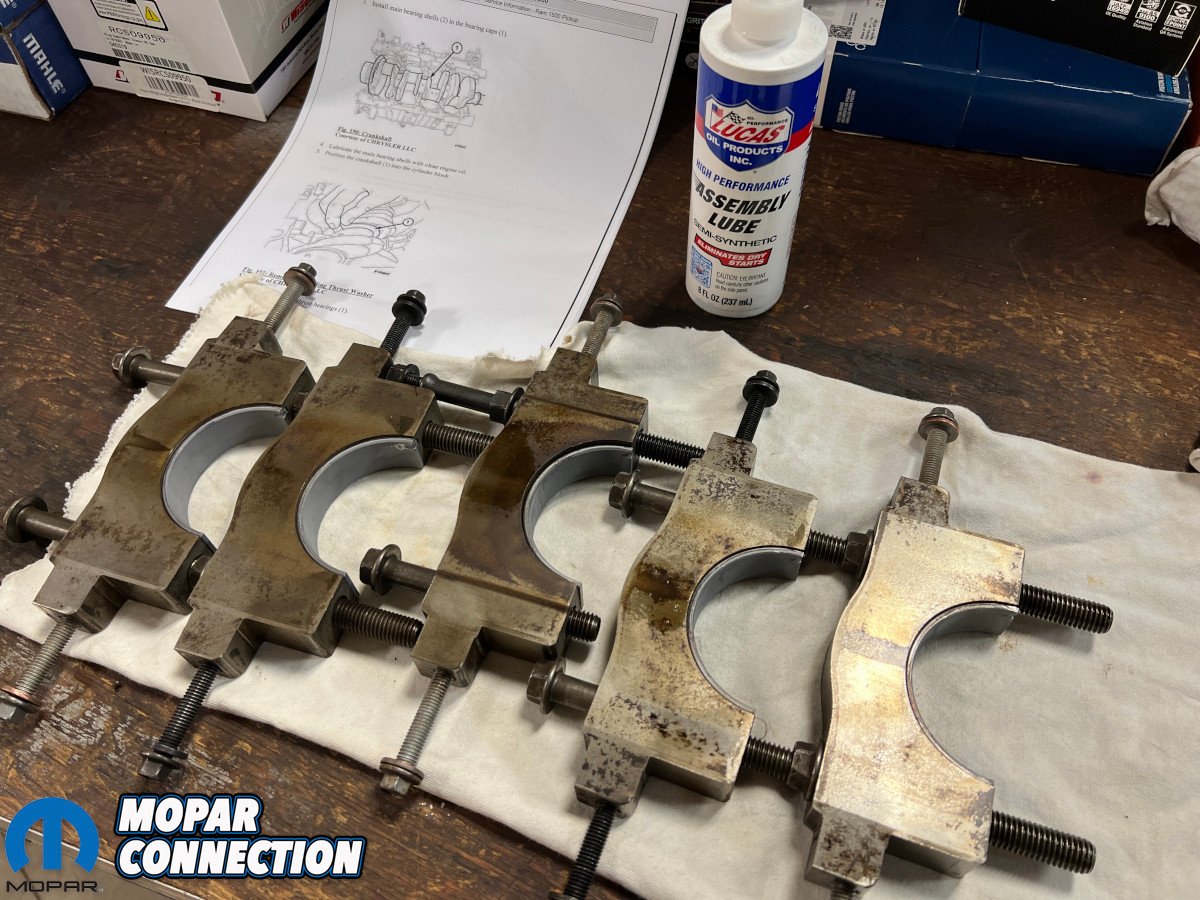
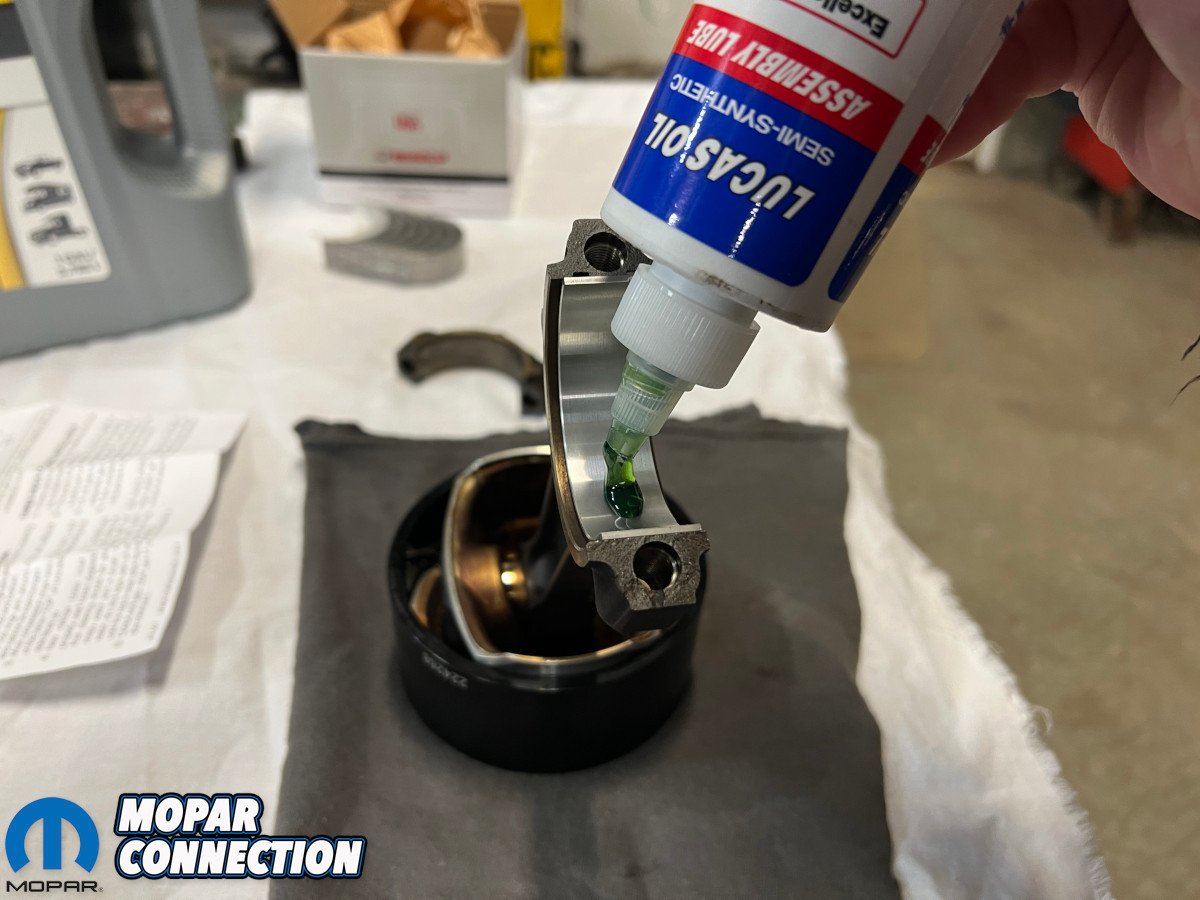
Main bearings were doused with Lucas assembly lube (P/N 10153-1) which was delightfully thick like honey, a preferred consistency for assembly purposes so it doesn’t just drip away. The thrust bearings on either side of the middle bearing cap slid in, the one with the long tang fitted on the back side.

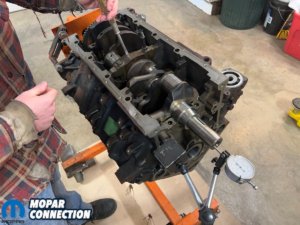
Above left: Thrust bearings slid in before main caps. Above center: Just the center cap was in place to verify end play. Above right: Crossbolts got torqued last.
A magnetic-based dial indicator on the snout of the crank measured end play. With just the center main cap on and snugged, a short screwdriver shimmied the crank fore and aft, resulting in a measurement of 0.006” that was perfectly within the manual’s range of 0.002” to 0.011”.
Four of the five stock bearing caps on modern Hemis have home position dot-peened on top along with an arrow towards the front of the engine, eliminating the need to mark them upon disassembly. The lone unnumbered cap would be the middle guy with just an arrow. Main bearing bolts were reused and torqued in order as defined by the Ram manual. Crossbolts on each cap received the same treatment.

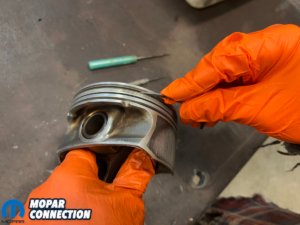

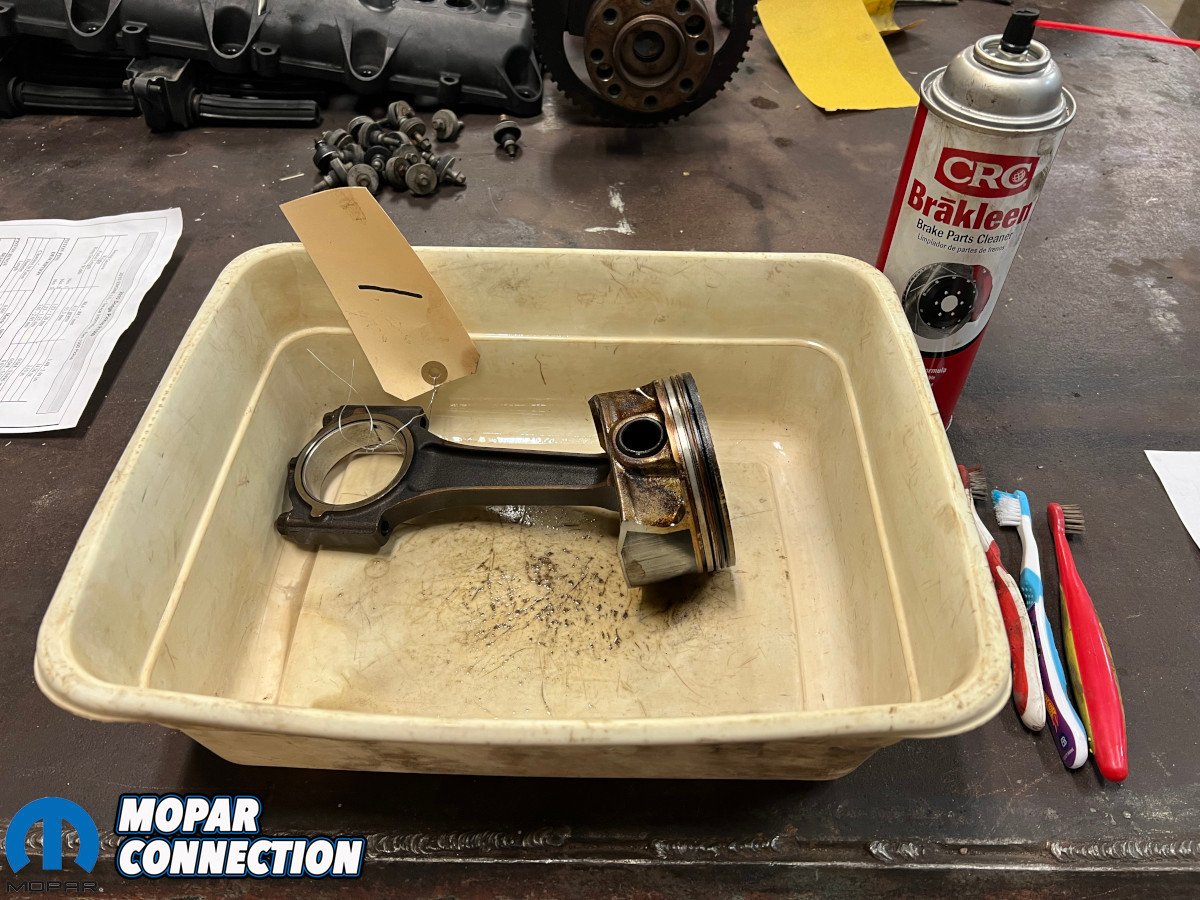
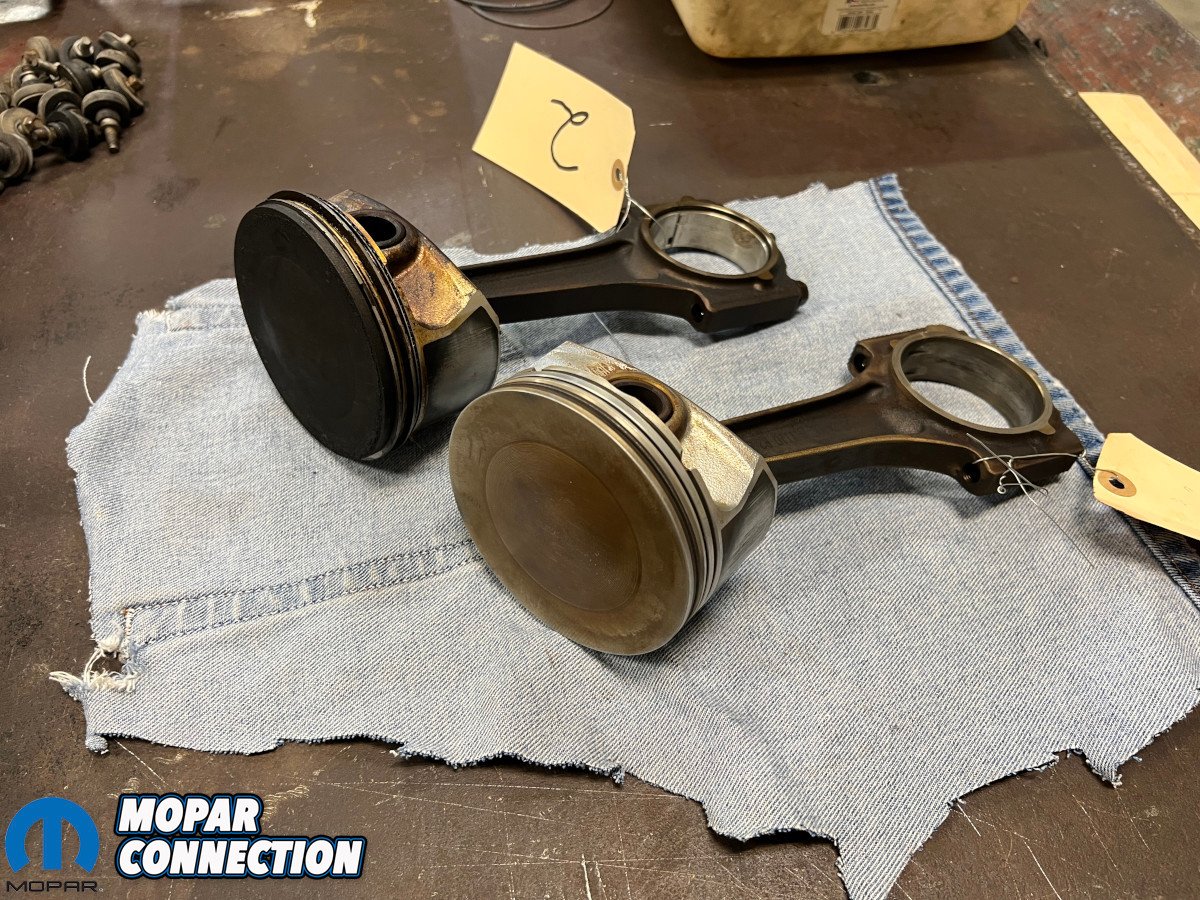
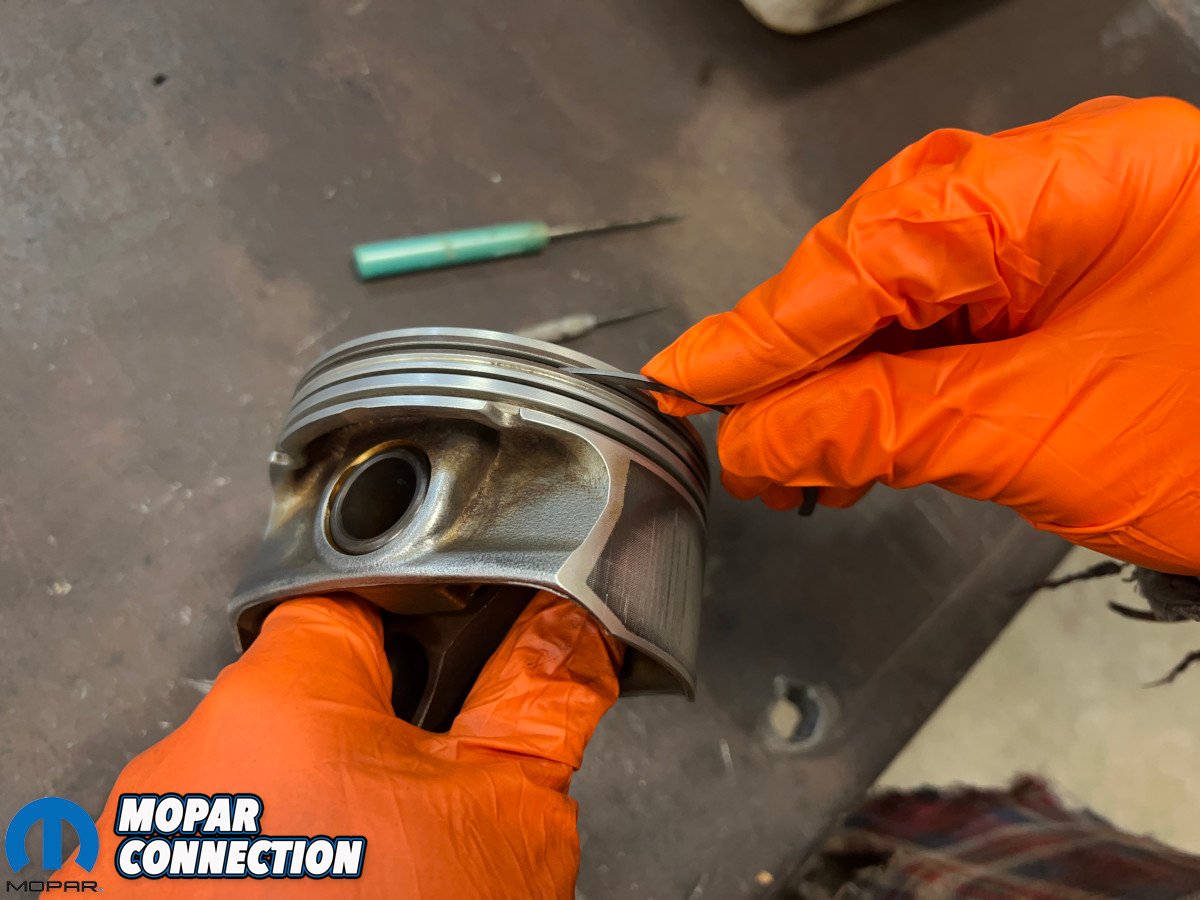
Above left: Each rod and piston assembly was scrubbed via brake parts cleaner and a toothbrush. Above center: An old piston ring cleaned each groove of carbon deposits. Above right: A side-by-side shows what a little elbow grease was worth.
Pistons got a thorough scrubbing and each top needed wire wheel time to remove an unhealthy layer of carbon deposits while being careful not to disturb what was left of the black Molykote on the sides. Dirty ring grooves can wreak havoc if not completely rid of buildup and the old mechanic’s trick of using a broken ring to clean out each one seemed work like a charm.
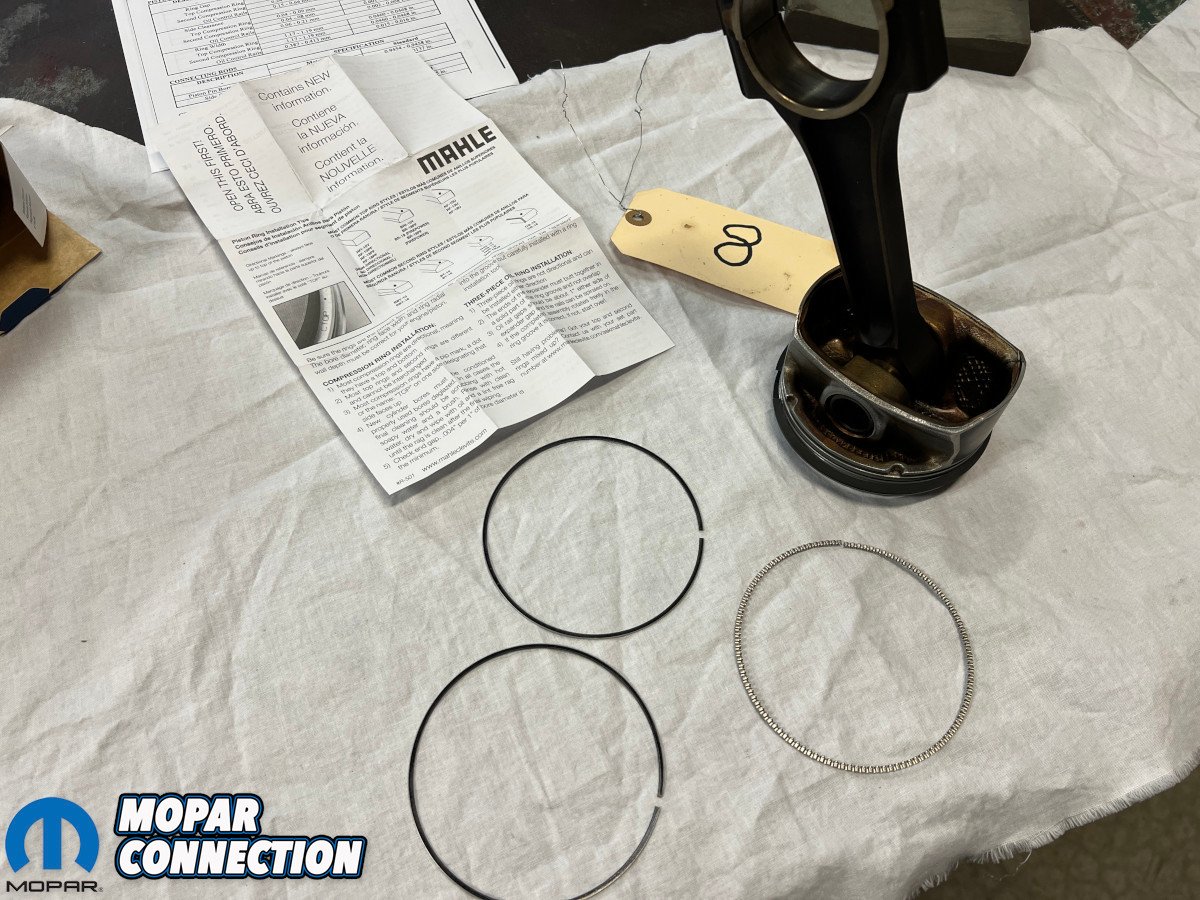
Before they were loaded into the block, new rings (P/N 42108CP) were fitted to each cylinder. Proform’s electric piston ring filer (P/N 66758) took care of any too-tight gaps, although the Mahle rings were actually really close right out of the box. A light and careful deburring of the ring ends helped ensure bores wouldn’t be scratched upon entry.
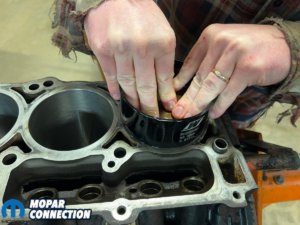
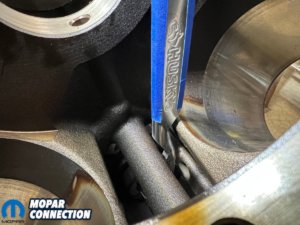
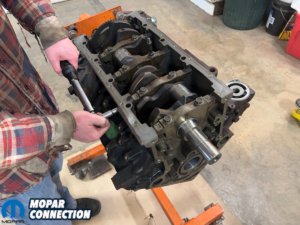
Above left: Pistons with rings were pre-loaded into the Wiseco sleeve on the workbench. Above center: Installation was a breeze and didn’t even require a mallet. Above right: Rod bolts were torqued and turned to finish it out.
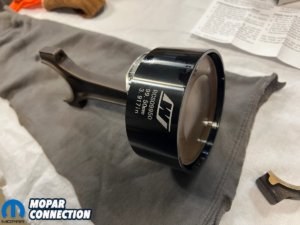
That entry was assisted by a tapered ring compressor (P/N RCS09950) sized specifically for the Hemi’s stock 99.5mm bore. With ring gaps placed at the manual-prescribed staggered positions and a shot of assembly lube on all bearings, the Wiseco compressor sleeve (a magnificent piece) allowed each oiled piston to be tapped in easily to their original cylinders.
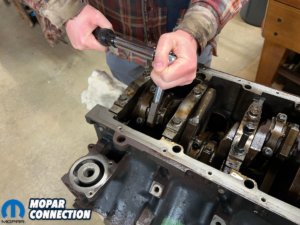
Following careful guidance onto the crank journals, each rod received its partner cap which would not be interchangeable with any others. New Mopar rod bolts (P/N 6506335AA) got the call as an insurance policy and were torqued to factory spec. With the crank bolt threaded into the snout, it all spun over with ease, checking the final box for a completed rotating assembly.
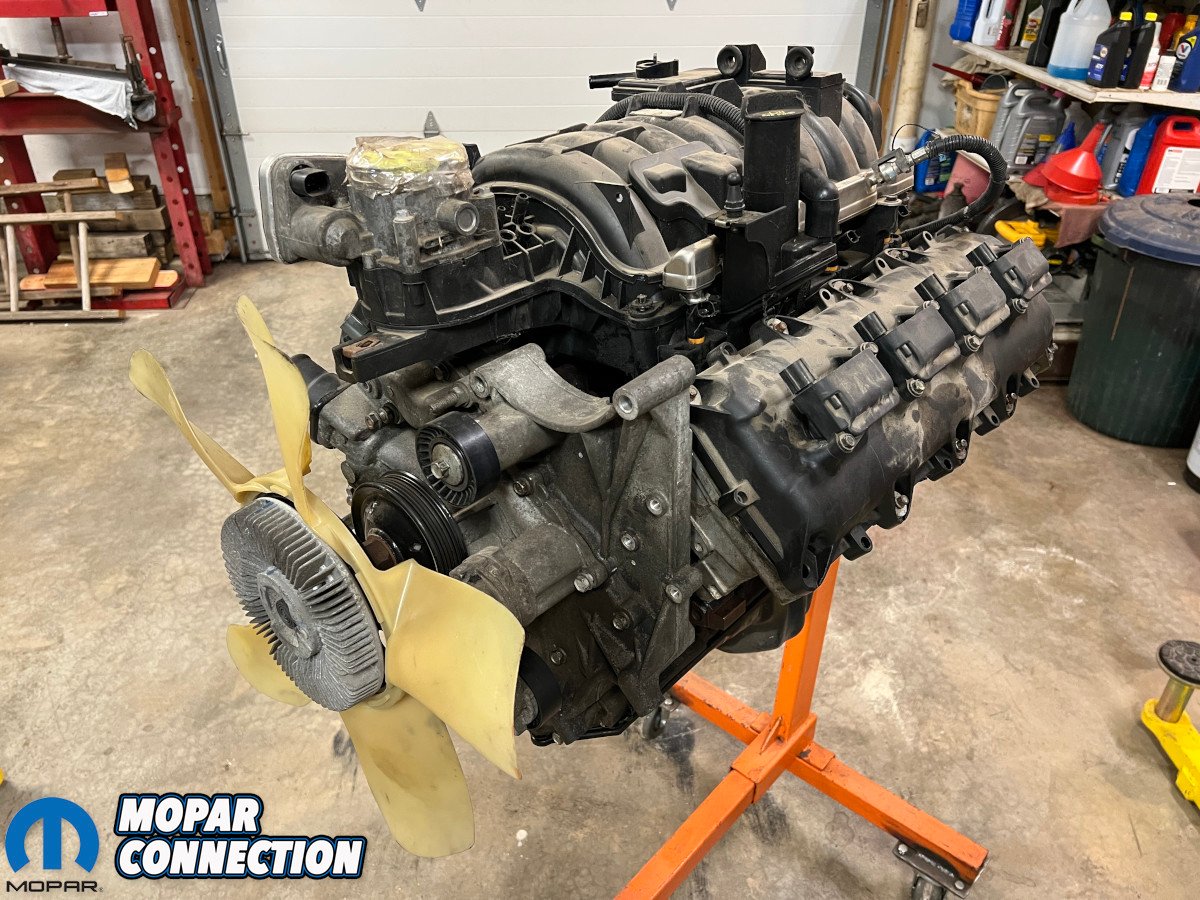
Next up is the fun stuff: a COMP valvetrain package (P/N MK201-300-17), Blackbird Performance timing cover (P/N BBP-031-93K-AL), freshened Eagle heads, and Edelbrock Pro-Flo 4+ EFI (P/N 36140) are all waiting in the wings for what should end up being one healthy Hemi.


