


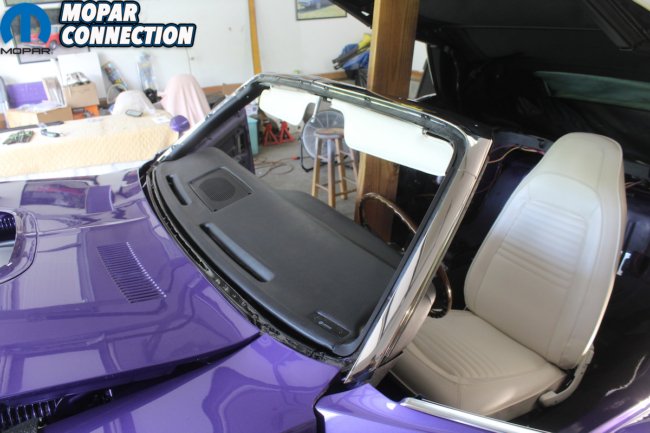
We have all the interior installed except for the rear seat and panels. That is intentional so we can get all the convertible trim, and top mechanisms, installed and functional. After that we can finish installing the interior and windshield.
One of our biggest challenges is since almost all the metal is new, we are going to have to drill the holes for the installation of the stainless trim. Then install the stainless all on an already painted Comeback ‘Cuda. In hindsight, and as a recommendation to our readers, this should have been done before paint.
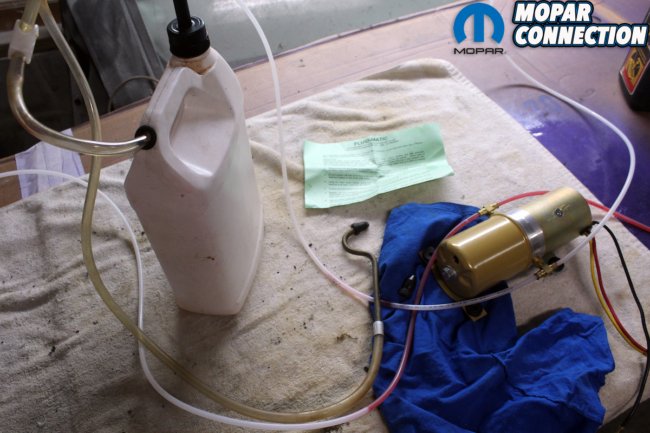

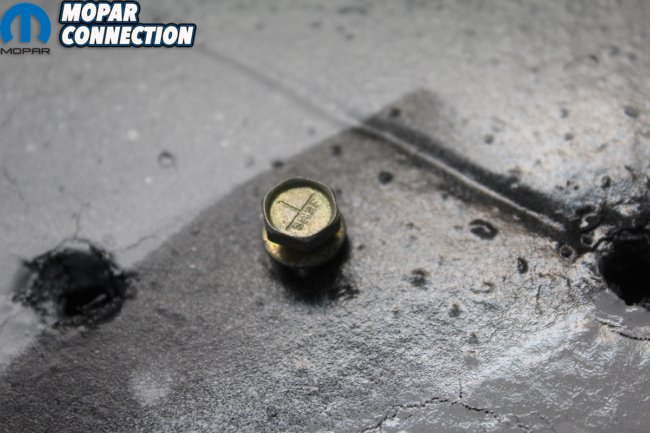
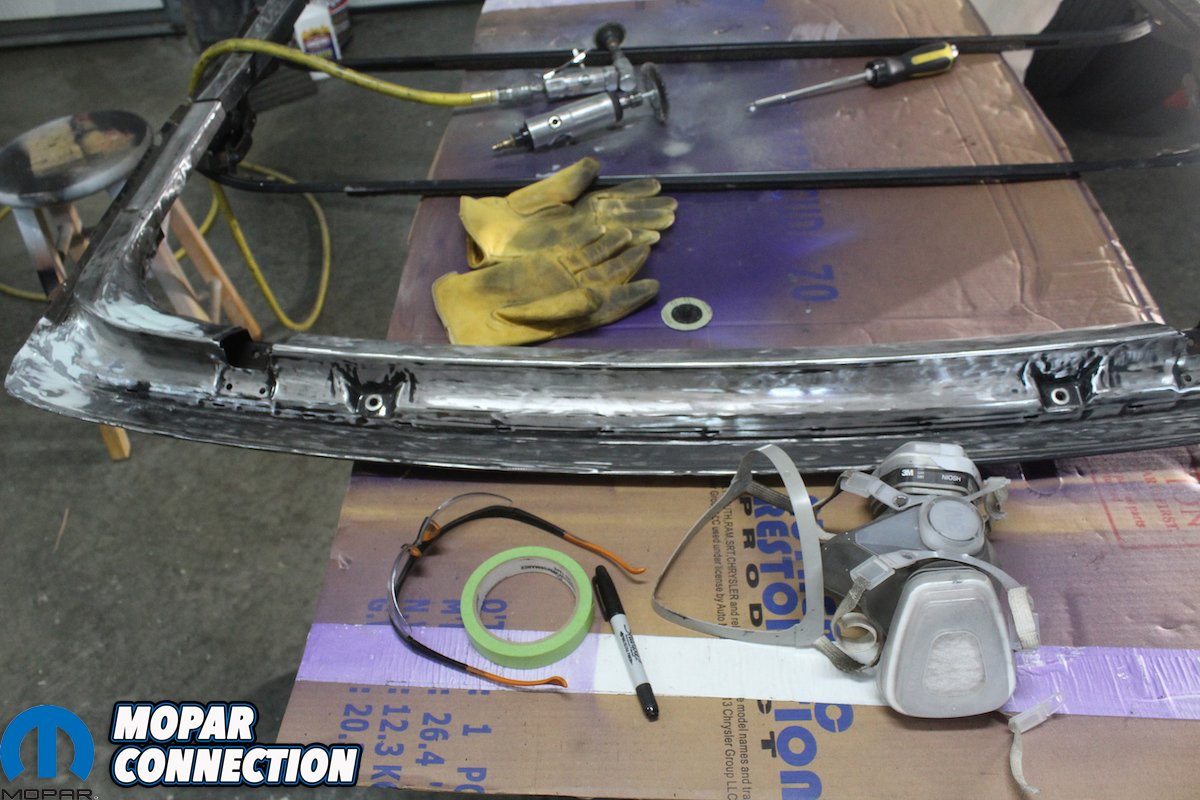
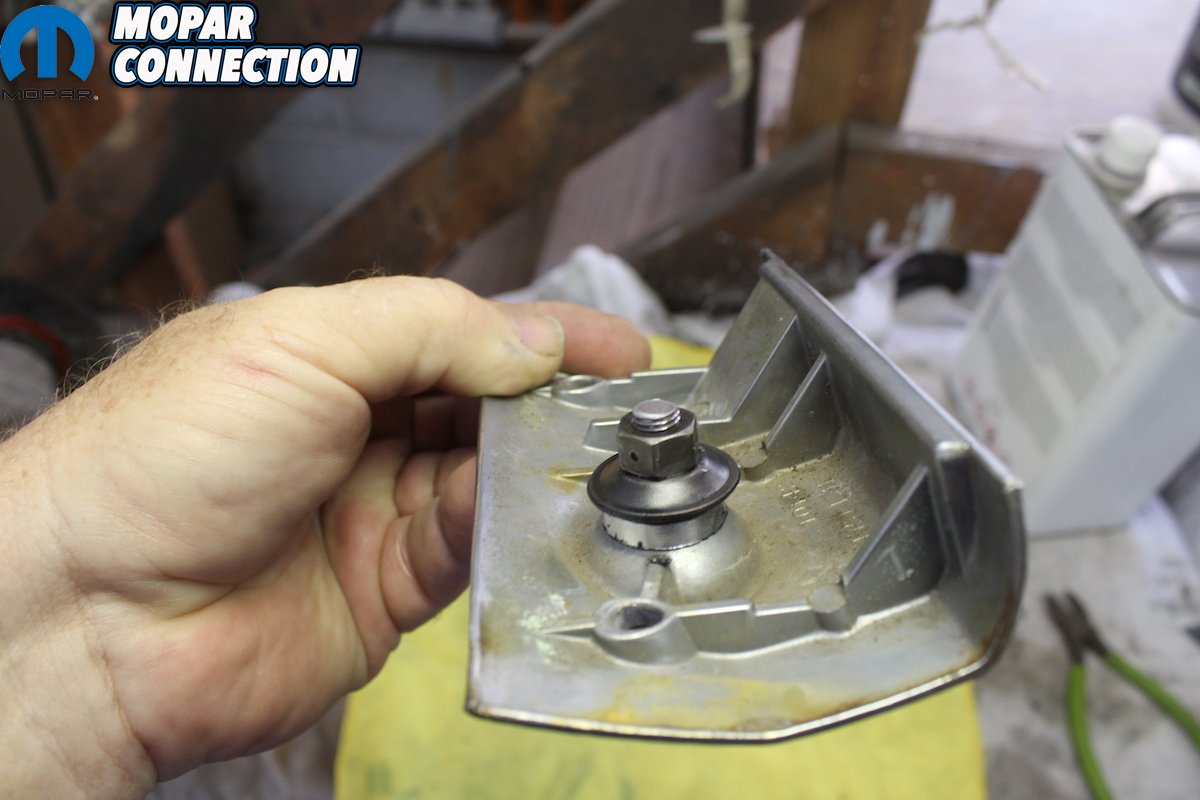
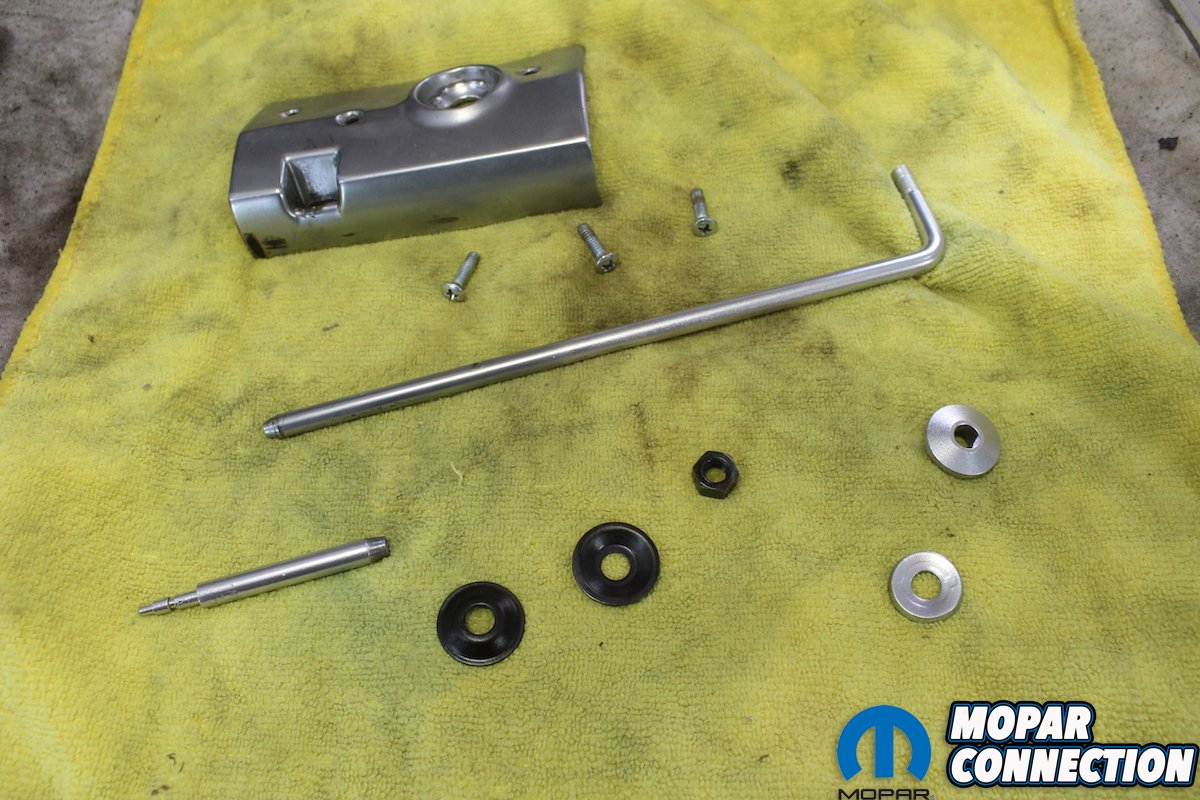
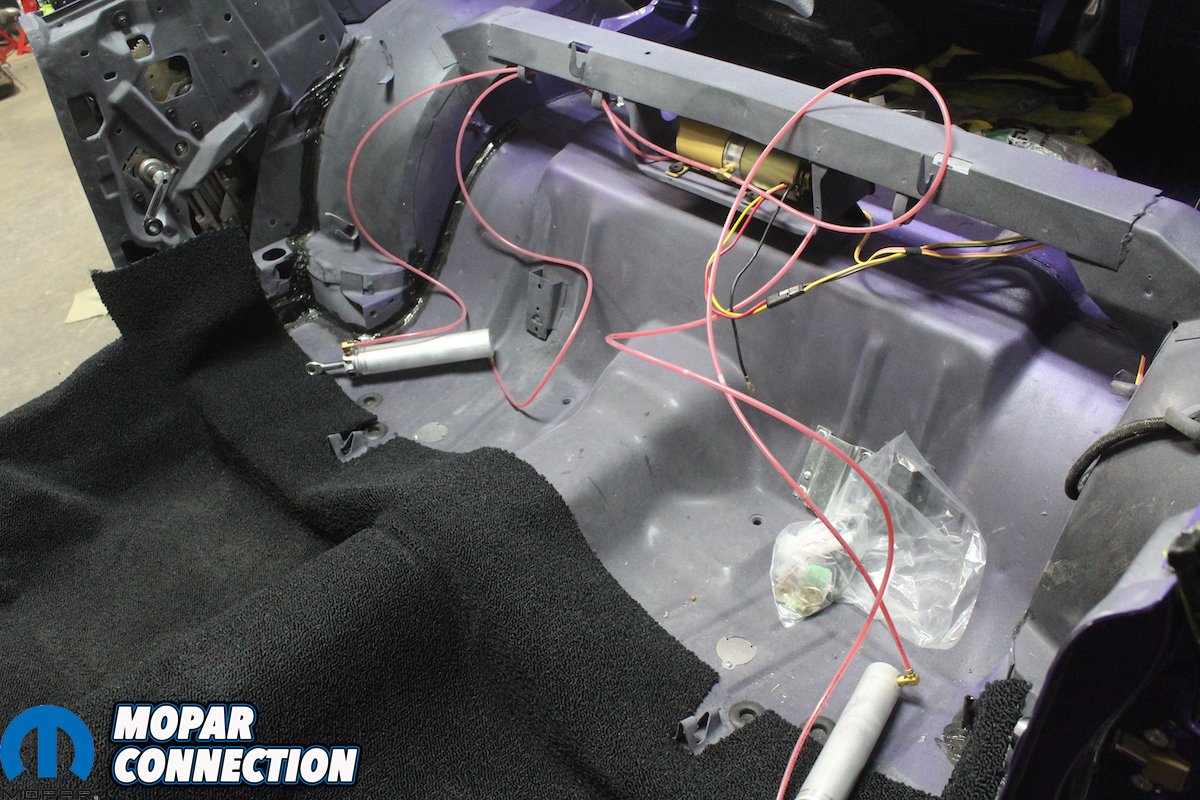
Above left: We unpack the new convertible top pump and fluid lines. It is recommended to use transmission fluid in this application. The reservoir is on the side of the pump with a small plug sealing the filler hole. We have a pump bottle with a special nozzle designed especially for this application. We strongly recommend you invest in one of these. It makes filling the pump much easier and a lot less messy. Above right: We lay out the lines, the pump, and the new “top rams” exactly the way they will be installed. You also need a 12-volt power supply to operate the pump and bleed the lines and get any air bubbles out of the system. Just reverse the positive and negative wire to the power source and make the rams move up and down until the lines are free from any air bubbles. Check all connections for any leaks.


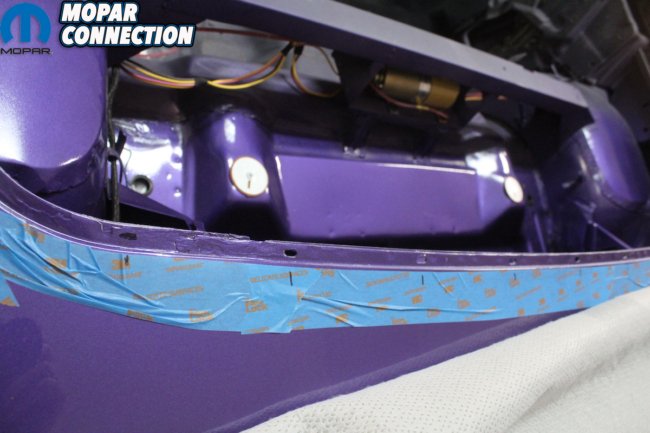
Above left: We then transfer the entire system into the car making sure the lines are routed so there will not be any kinks to inhibit the flow of the fluid. The pump is attached with two rubber grommets to the body to limit any vibration noise. Above right: Take your time at this point of the installation and route everything in a logical order. The front to rear wiring harness is already installed and will hook right up with one connection. There a several clips welded to the body to keep these lines in place. There are also two clips with screws that help route the lines from the pump. The rams will be attached to the top frame later. Leave them in the down position to help with the installation.
We have purchased everything new for the convertible top except for the top frame. New pump, lines, rams, latches, and seals. The last thing you need to do is to take a short cut on these and have a leak or malfunction after all the new white interior parts are installed.
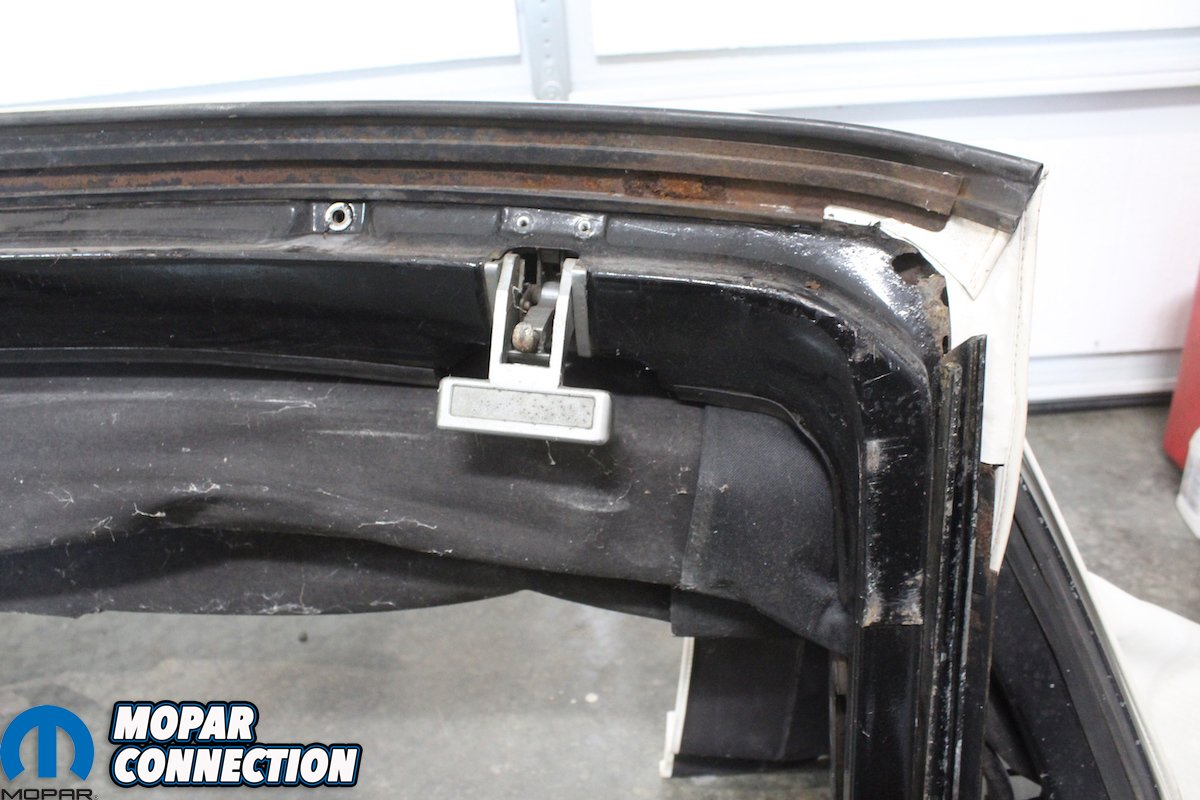
The frame will get stripped, blasted, and repainted. All foam and seal channels will be repaired and restored. There were a couple of rusted through areas in the front corners of the frame that will be cut out and replaced with metal and then finished with filler and then painted. This is a normal problem area for convertibles.


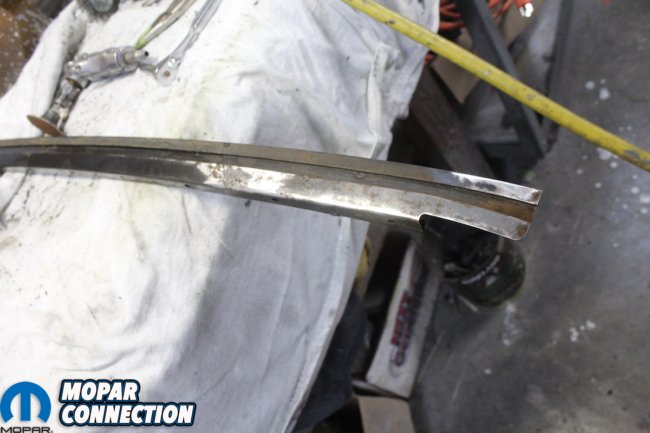
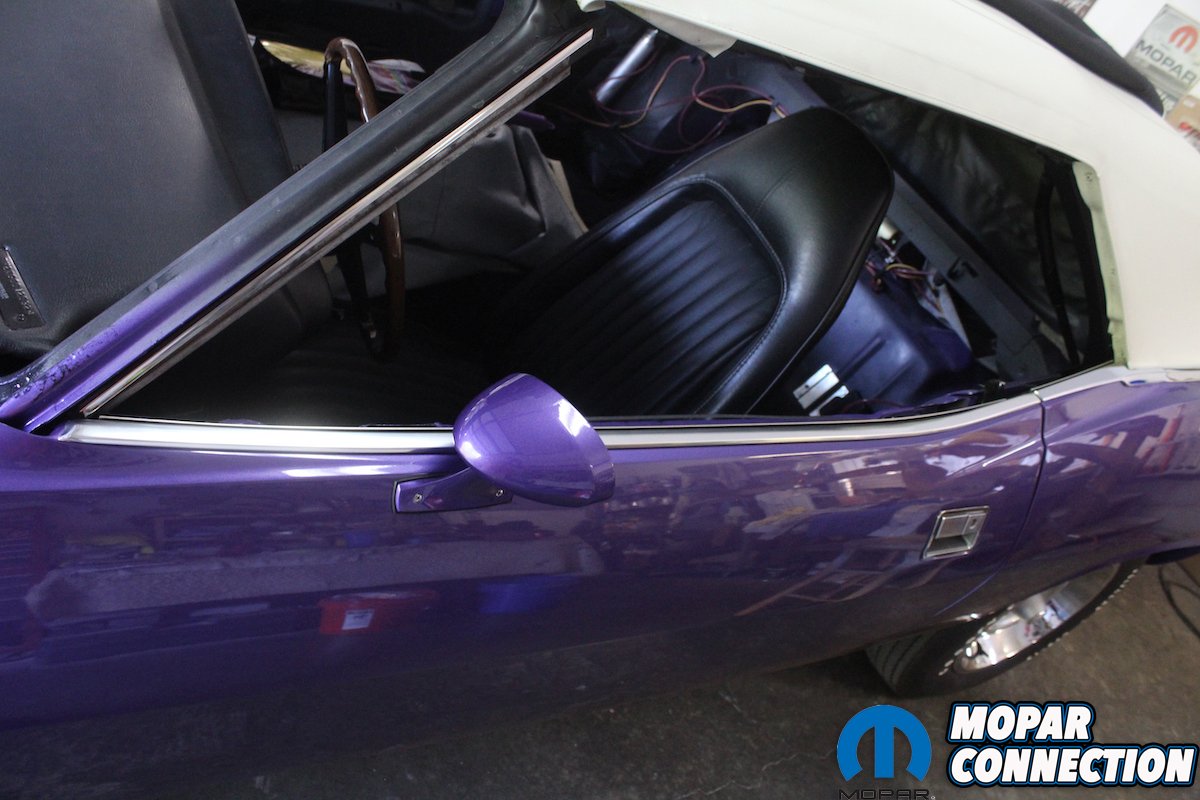
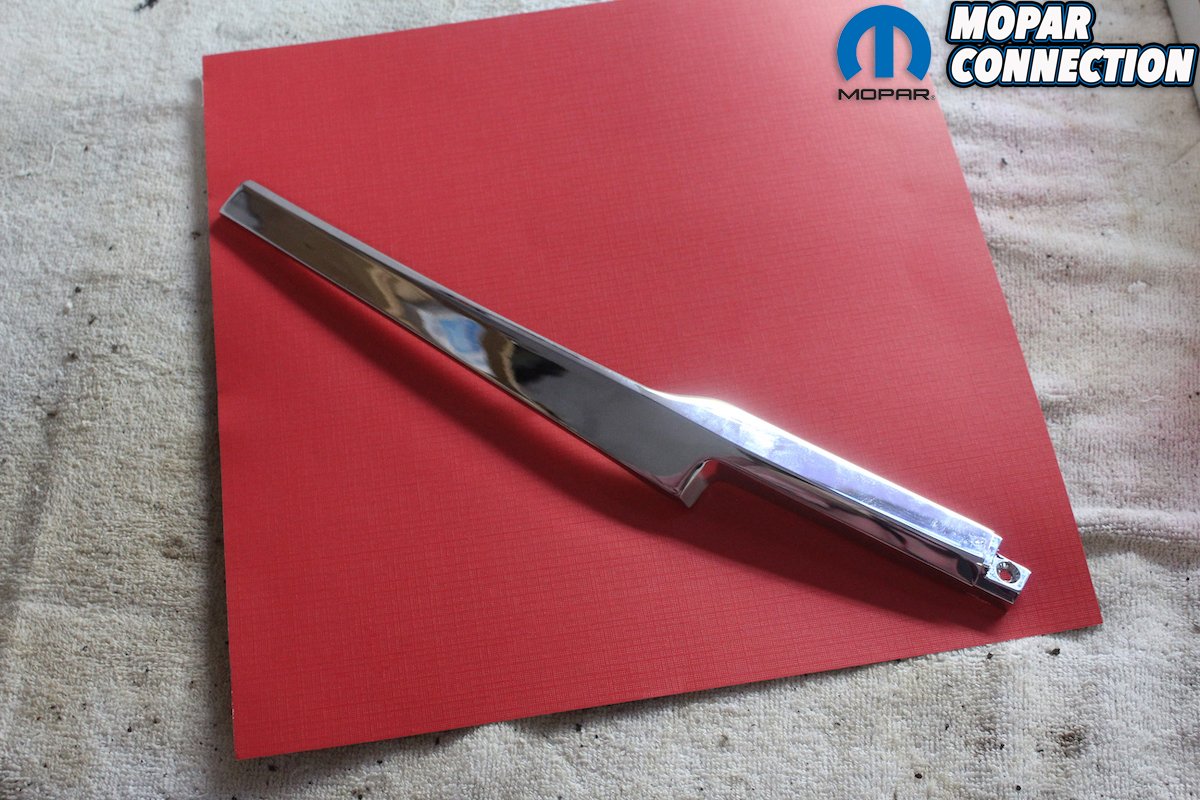
Above left: Before installing the top frame in the car, we turn our attention to installing the stainless and chrome trim around the convertible top opening. Since some of the trim was damaged in the accident, we acquired new trim from one of our sponsors, Classic Industries. The front corner pieces are chrome, and the rest of the trim is stainless. The front corner pieces have two posts that have speed nuts that attach them to the quarter. Above right: So how do we know where to drill the holes so that these trim pieces line up perfectly? We got a piece of card stock and pushed the trim posts through and then traced the outline of the trim piece. Cut it out and place the template on the car and mark the holes. We then put a couple of pieces of tape where we need to drill. This helps keep the paint from chipping.

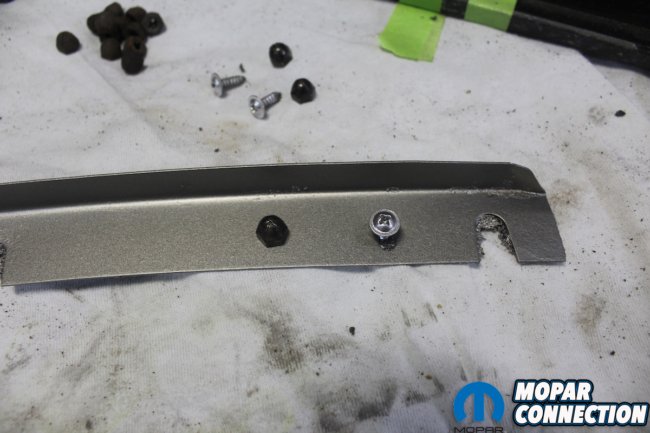
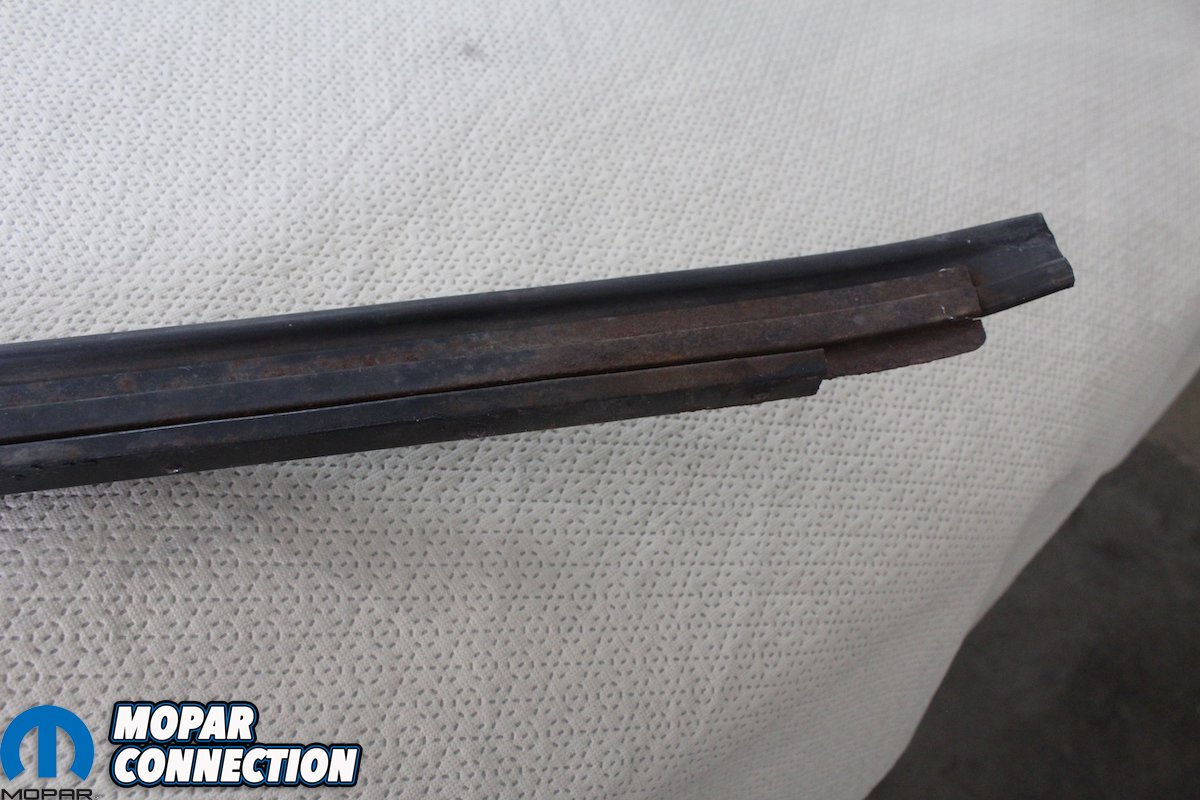
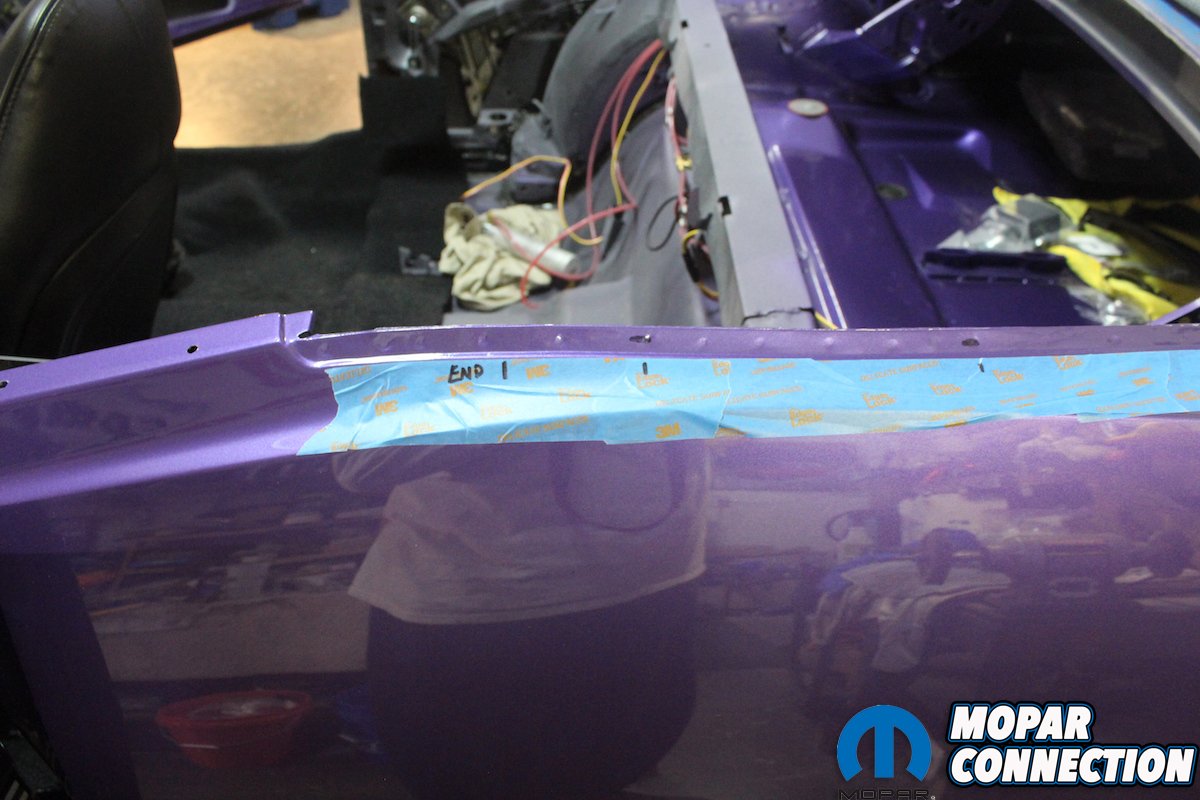
Above left: With the front corner position of the trim established we can lay out the side and dutchman panel trim. Since we were able to use the original dutchman panel those holes are correct. After taping off the area we test fit the trim and mark the position of the holes we need to drill. The positioning of this trim and the holes for the clips is critical. Measure, measure, and measure again. Above right: Unlike the holes we drilled for the front corner trim these holes need to be oblong so there is some room for slight variances in the location of the trim clips. Notice the original holes shape and location. It is important to not only get the holes the correct distance apart but also positioned correctly in the center of the flange. That will determine where the trim will fit in the recess when installed.
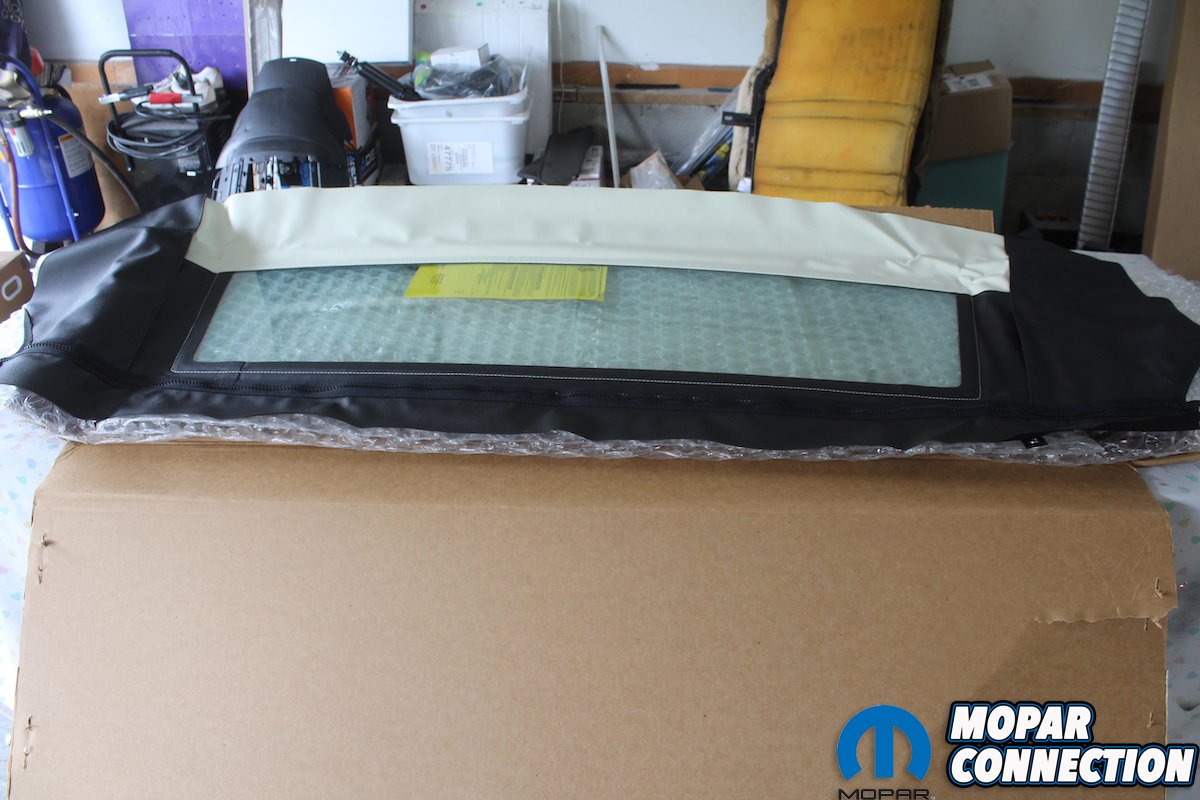
Once everything has been prepped for the installation of the new white top we will load the car onto a trailer and have a local upholstery shop we trust that has a guy who does hundreds of tops on all makes of cars on a regular basis. The shop wanted to order the top for us, but we insisted we knew the correct fabric for this car and that we would provide the top. They still insisted they knew what we needed.
So, we had them order a top and we brought in our top for a comparison. Good thing we did. Their top wasn’t even close to the correct grain. Thankfully, we knew what we needed and what was correct. The owner after seeing our top said he had never installed a top with this type of grain. Of course, he hasn’t. How many Mopar convertibles are there? Not many.


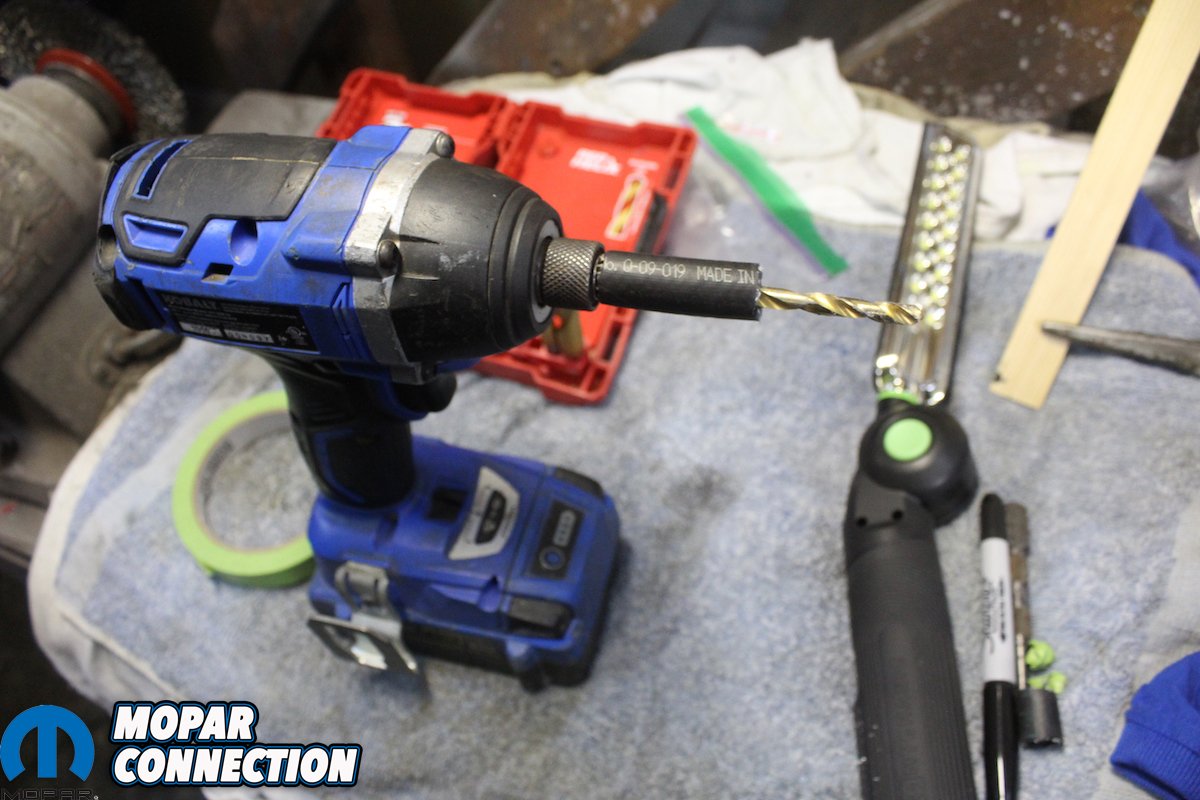
Above left: It is important to have a new quality drill bit and a good punch. You do not need a “wandering” bit in these areas. We use a piece of rubber hose to ensure that the bit will only go so deep and not mess up the paint. Above right: After the holes are drilled, we come back with the drill bit and slightly elongate the holes just like the originals. This should go without saying but use a blow gun attachment and plenty of air to clean off the shavings. One unintentional brush of your hand and there goes the paint.

Above left: We were able to purchase the correct stainless clips and screws from R/T Specialties. You might have to spend extra time looking through all the parts on their website, but it is worth it to get the original clips. Above right: Here is where it gets a little tricky. The front corners need to be already attached but not snugged down to allow the trim to slid under the edge. The sides and rear trim interlock with each other and insert under the front corner trim. With the help of extra hands assemble the side and rear trim and come in at an angle so you can slide the trim underneath the front corners. Once the trim is in place locate and position the clips with a small awl and install the screws.
After the top was installed, we brought the Comeback ‘Cuda home and installed the windshield stainless trim, followed by the glass windshield and its narrow stainless trim. You need to get plenty of help with this part of the installation. The glass is not a problem but the stainless is another story. We left the door stainless off until after the top was installed.
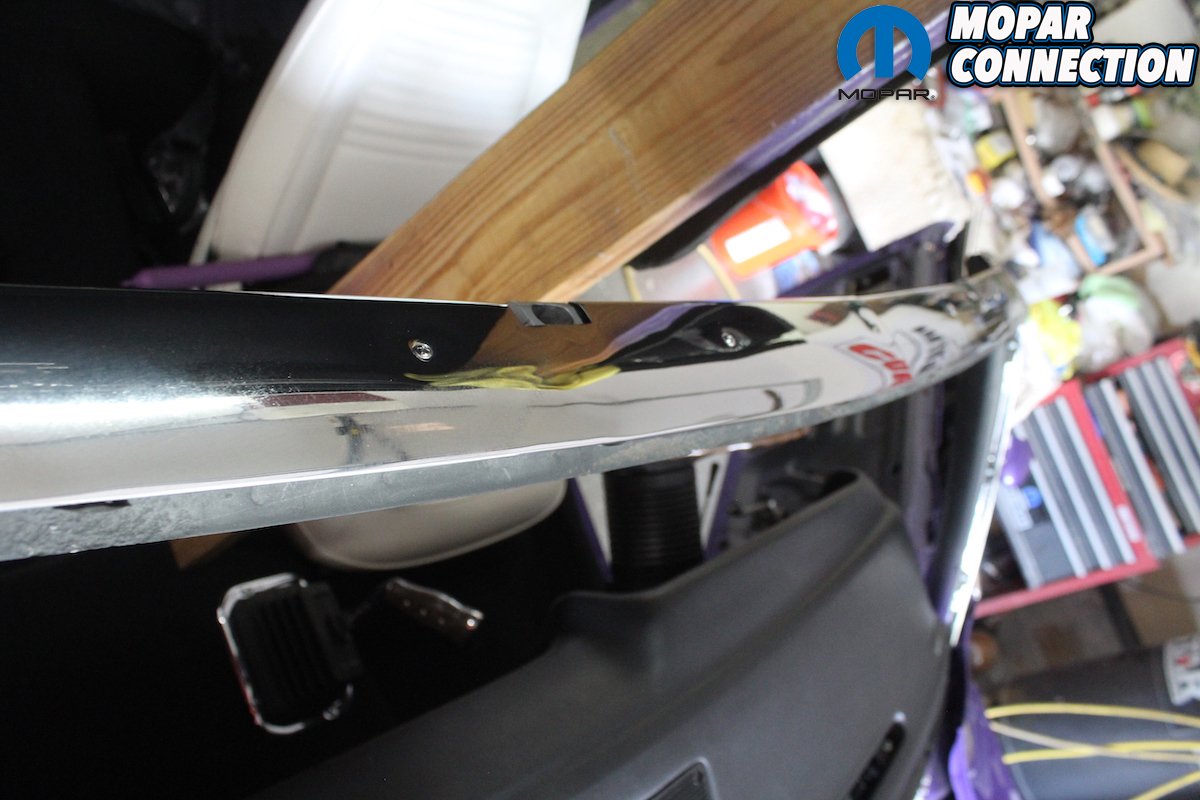
Even though the upholstery shop was super careful we didn’t want to take any chances with the stainless trim. After careful measurements and precise drilling, the “belt molding” was installed. Now that the top and interior are all in place and functional, we move on to installing the windshield, restoring the grill and “Shaker” breather, the lower rocker panel “gills”, and attaching the bumpers. We can definitely see the light at the end of the tunnel!

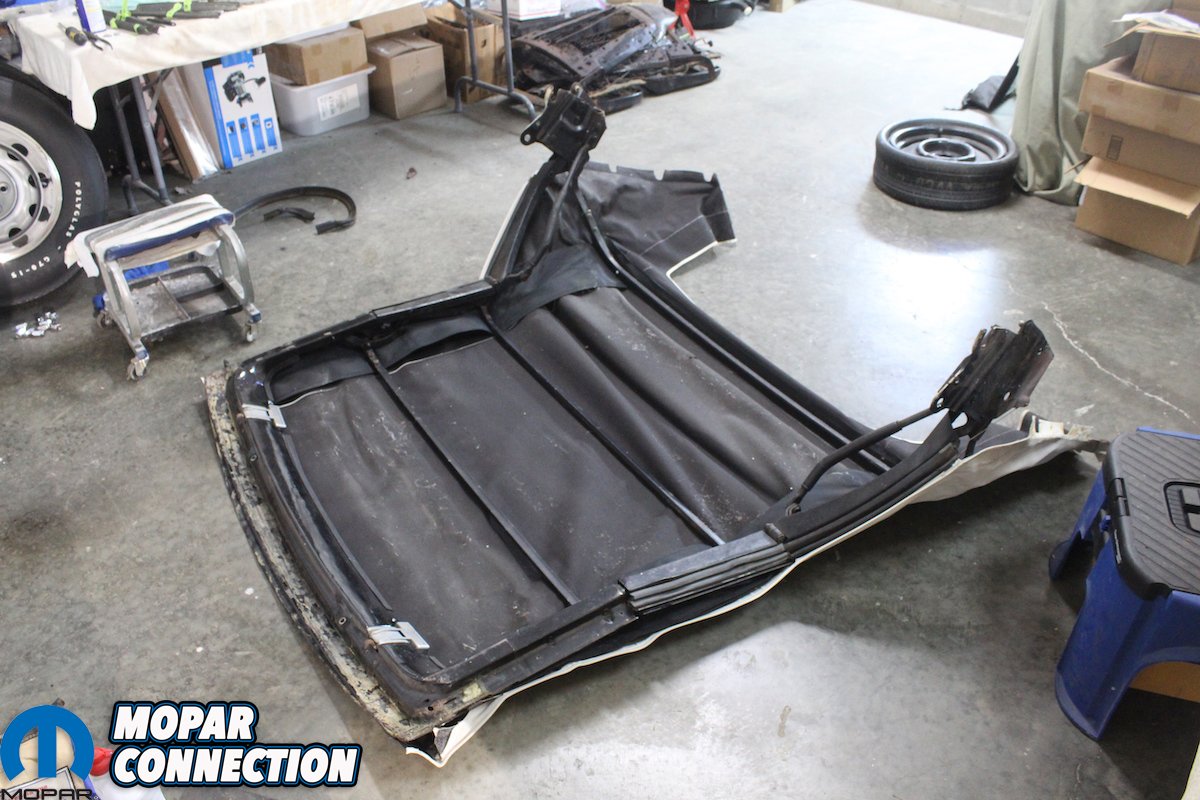
Above left: Blow everything off and tighten the screws and speed nuts. Remove the tape and blow it off again before wiping everything off with a microfiber cloth and Windex. The trim will only fit one way and since these quarters were really for a hardtop, and no one makes a convertible quarter, the extra money spent to get them correctly flanged is evident right here! Above right: Now that the stainless around the convertible opening is installed, we turn to the disassembly and restoration of the top frame. As you disassemble the top you need to document with pictures all details of the top. Even though the assembly looks simple, it is not. There are many parts and fine adjustments to make everything line up and seal correctly. Since this top is from this car and it fit well before the wreck, we want to make sure all the adjustment points stay the same.
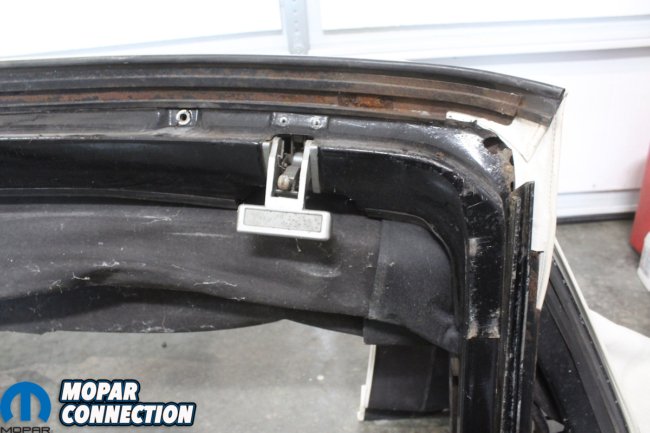

Above left: When we removed the top frame from the car we marked where the position points where the frame attached to the car. One of the most important orientation points that needs to be kept the same. We remove the header seal from its retainer. We also remove the chrome pins that align the top into the windshield frame. Above right: As expected, we found some rust through spots in the top frame. Thankfully, they are small and can be cut out and replaced with some metal patches. Also, there is only surface rust on the header seal retainer. We remove the retainer and the latches and save the bolts and screws.
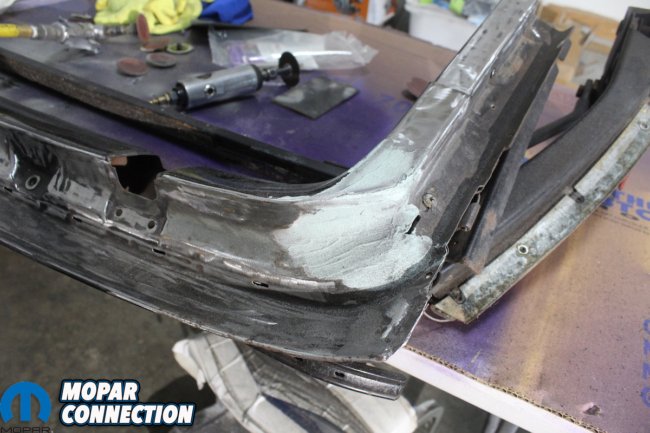

Above left: After cutting out the rust with a cut off wheel and a dye grinder we weld in some metal patches. We then grind everything smooth with an angle grinder and fill the patch with short strand fiber glass. This is smoothed with an 80-grit wheel and skimmed with filler for a final finish of the patch area. Above right: We continue to strip the top frame with an angle grinder and a wire wheel on a die grinder. We will follow up with a light bead blast. Always use the proper eye protection and face mask.
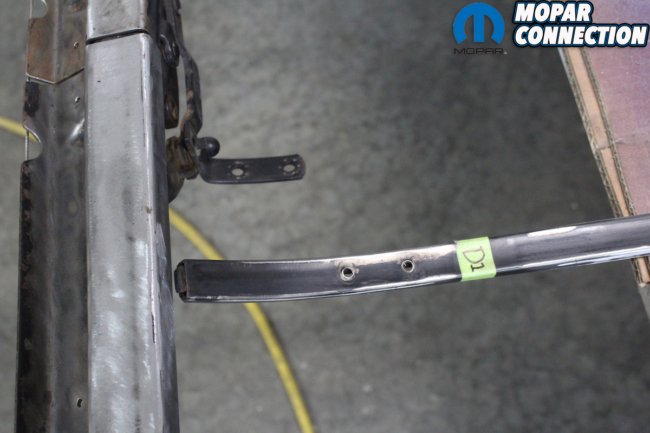

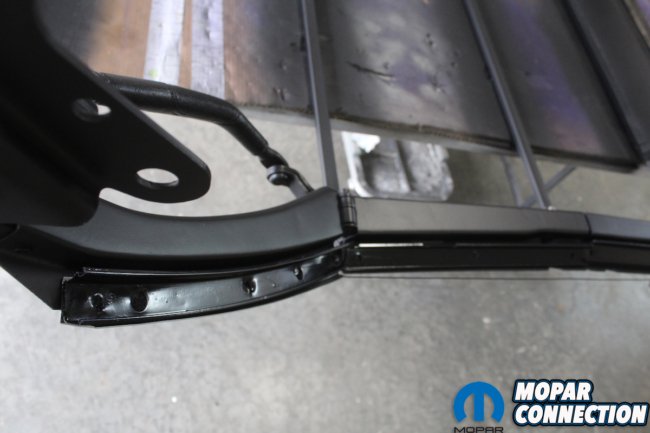
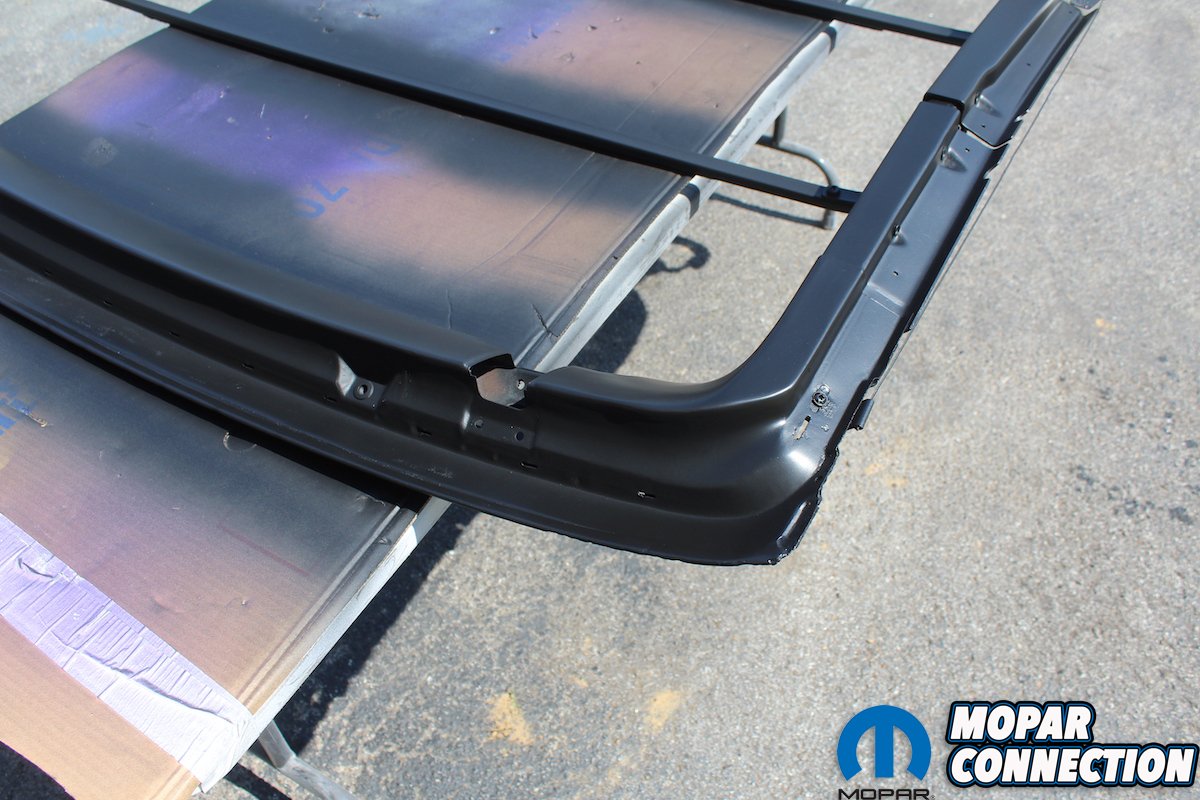
Above left: During disassembly it is very important to document every piece and its location. Everyone has their own system for marking the parts. We simply use D1. Meaning drivers side front bow. You can see the marks on the bow mount by the start washer used to attach the bow. Above right: After manually stripping the frame and hitting it with a light bead blast we thoroughly clean the frame. We then shoot the frame with an epoxy primer from a gun not a spray can. You need a good heavy coat to protect this frame after the fabric top is installed. We individually remove, clean and re-install little attachments so we can keep the adjustments as close to original as possible.


Above left: After scuffing the primer with a red scuff pad and wiping the top down we apply with a gun, several coats of single stage semi-gloss paint. Here you can see that the metal repair is invisible in the corner of the top frame. Above right: Both sides of the frame need to be painted. After paint, each hinge is disassembled, cleaned, lubricated, and reinstalled in its exact original position.
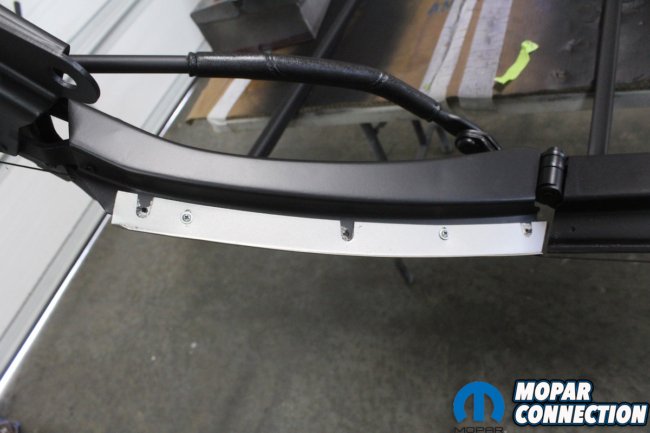
Above left: There is a hard foam pad on the rear strut. Since there isn’t any way to detach it or reproduce it, we clean it with lacquer thinner, mask it off, and shoot it with SEM Landau Black. This dye matches the original black interior color exactly. Above right: Acorn nuts and shoulder washer screws are used to attach the seal retainers onto the top frame. This rear bracket was natural and attaches to the frame. Then the seal retainer attaches to the frame over this bracket. Both have a thin foam seal between them.

Above left: The header rubber seal inserts into the header seal retainer. No one reproduces this part so if yours is missing you may have to buy and entire frame just to get one. If yours is slightly rusted or damaged, you need to repair it. Above right: We strip the header seal retainer with an angle grinder and a 180-grit disc. We then give the hard-to-reach areas a good coat of paint stripper followed by a rinse and a wire wheel to get any remaining paint. Best of all no rust or damage was found.

Above left: All the rubber seal metal retainers were stripped and painted the same as the top frame. We replaced the thin foam seal between the frame and the retainer. Above right: We replaced the convertible top latches with new reproduction ones from one of our great sponsors Classic Industries. They are exactly the same as the originals minus the wear and rust pitting.

Above left: We saved the original bolts that hold the convertible latches to the top frame. After cleaning them we had them plated with the original Zinc plating. Then we shot them with a protective coat of Cosmoline since we found traces of the sealant on the original bolts. Above right: Finally, we open the back- glass section of the convertible top. Some people think the back window is plastic but on Mopars they are all glass. The tops are lined with black material as well as the convertible “well” material.

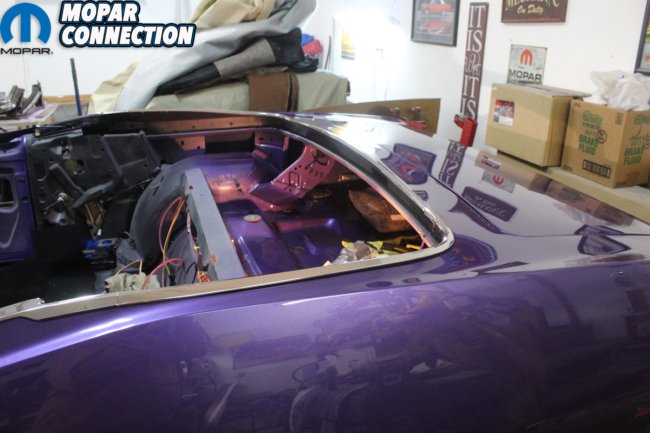
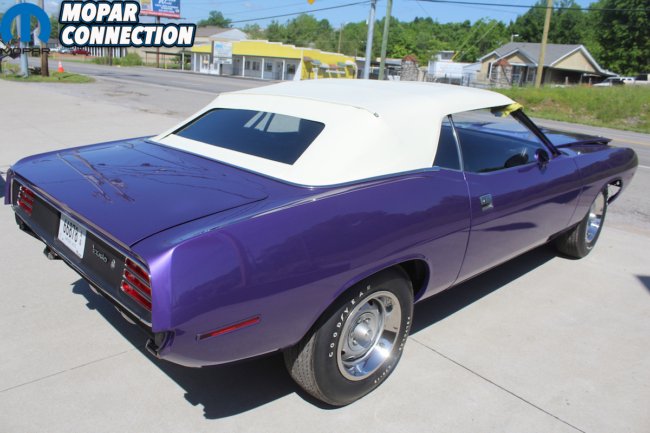
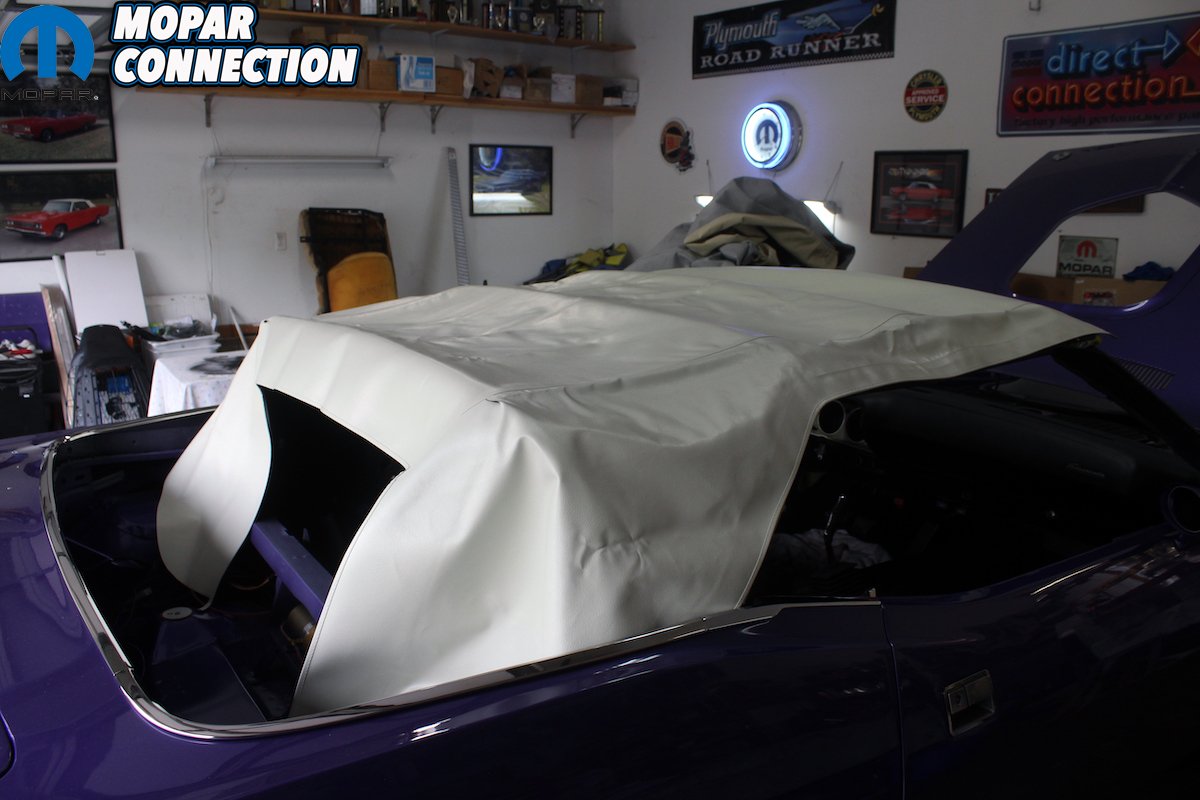
Above left: After fully assembling the top frame it was time to put it in the car. Besides the assembly being heavy, it must be lifted over the painted quarter with freshly polished belt molding installed. This is more than a one -man job and you must trust whoever you get to help you. So, I gave Kevin Shaw editor and chief of MCM and close friend a call. The install went perfect and since I marked the location of the frame to the body installing and tightening the bolts went amazingly well. Above right: With the top frame adjusted and in place we can now take the new top that has already been laying out to help relax the folds and creases from being in the shipping box and hang it on the car. Not only will this help the top install but, we can see how great this car is going to look with its In-violet exterior color and the contrasting white top!
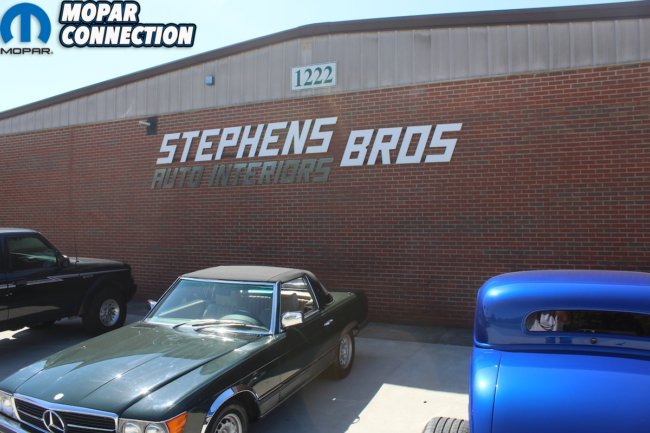

Above left: We can now fire up the Hemi and load the Comeback ‘Cuda onto our open trailer. We have an appointment with our trusted upholstery shop that is about 20 miles from home. Having an experienced convertible top installer that will be extremely careful to not scratch the paint and when finished, everything will fit and operate like new. We can fully recommend Stephens Brothers in Nashville, Tn for any upholstery work. Their specialty is complete interiors for street rods. If you want any work like this, you need to get in line. There is a waiting list! Above right: Three days later and the top is on and baking in the sun. It is important to have the door and ¼ glass installed and adjusted so the top and frame can be installed and adjusted exactly where it needs to be.

Above left: At this point the excitement factor is off the scale. It has taken over three years to get to this car here. However, it is important to carefully inspect all of the work, the orientation of all the seams, and make sure any problems can be addressed before taking the car home. Then and only then do you write the check. Above right:
Now that the top is installed and back home to the two-car garage, we open our latest package from our great sponsor YearOne. Right on time we get the all the convertible seals for the window channels and top header seal. After installing all the seals, we can move on to final adjustments.


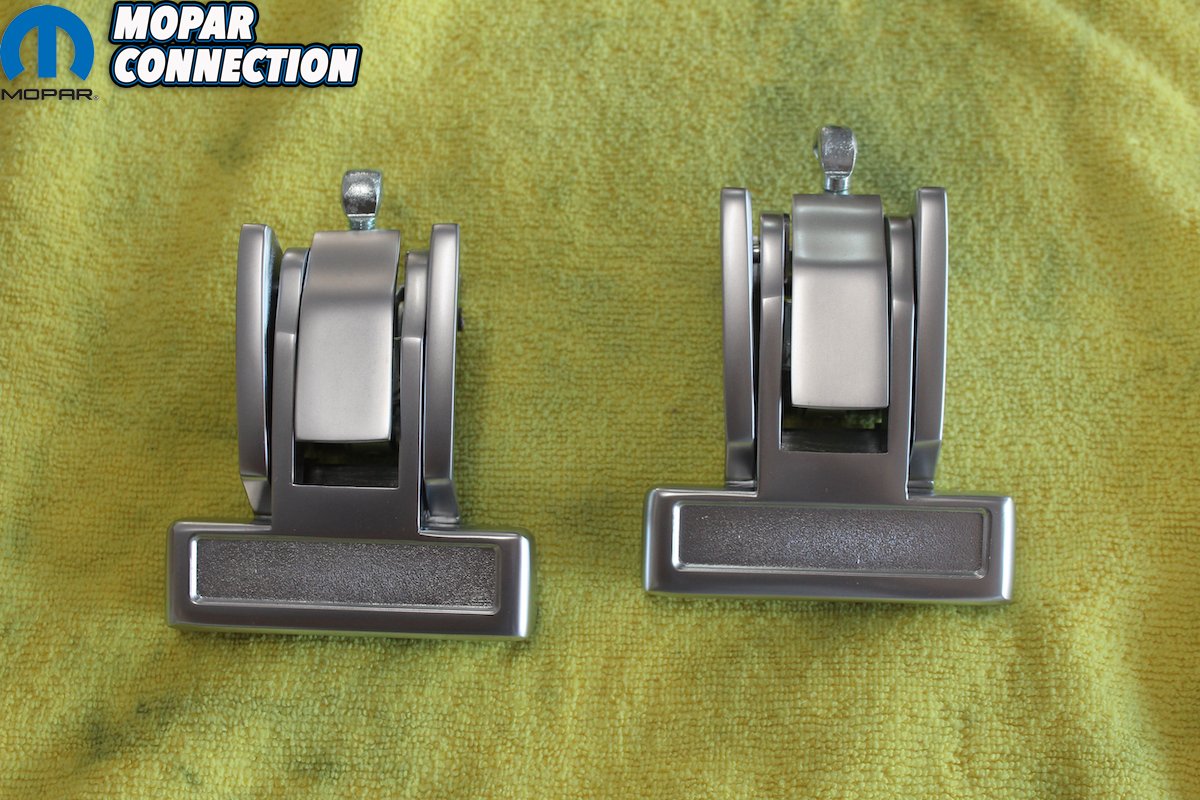
Above left: We now turn our attention to the visor, top latch, brackets. These are reproduced but they are chrome which is incorrect. So, we take our originals apart and clean and restore them. Fortunately, the brackets were in extremely good condition and complete. Above right: With all of the components plated and restored we lubricate and reassemble the brackets. The swing arm and visor hardware need to work freely. We also used brand new white visors and rubber tips.
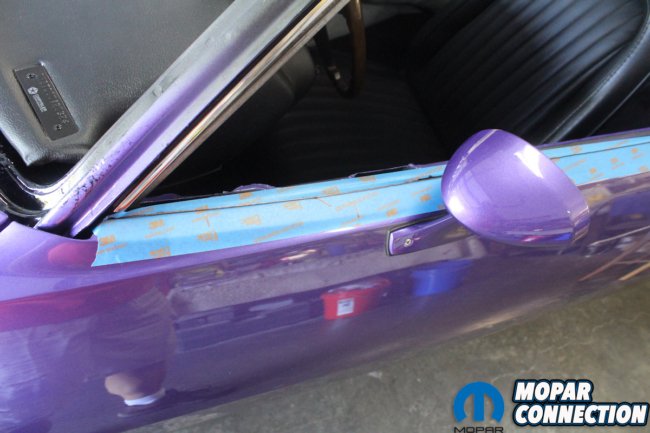

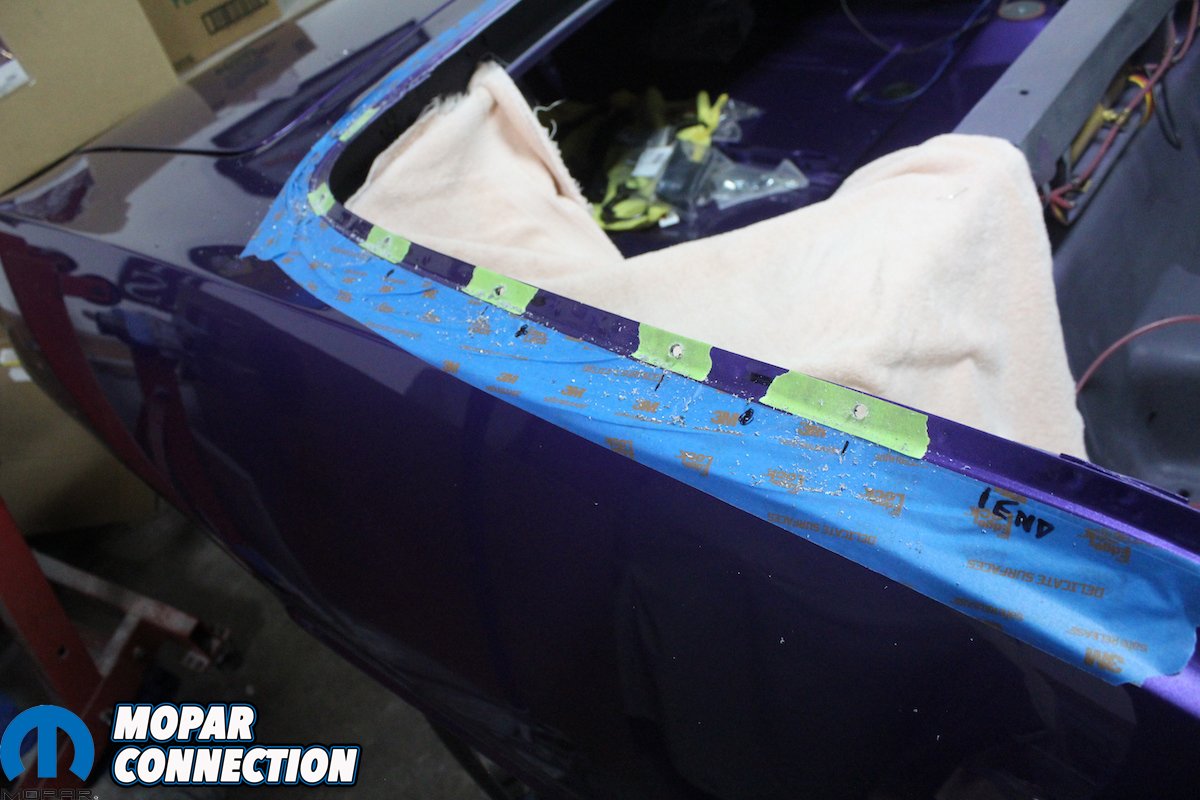
Above left: Next, we tape off the top of the door and mark where we will drill holes so we can install the stainless belt molding. This is new stainless and new clips. Everything new and looking awesome. Above right:
We then tape the stainless in place making sure it is exactly where we want it. You want to make sure the alignment in front and back are correct. Now take a fine line magic marker and trace around the trim. We can then remove the trim and mark where we will drill the holes for the trim clips.


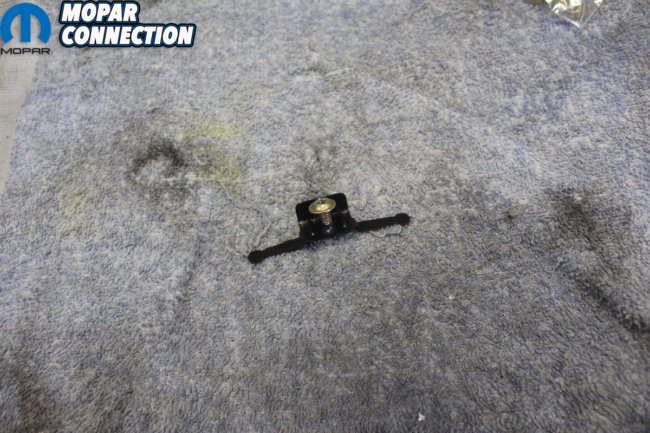
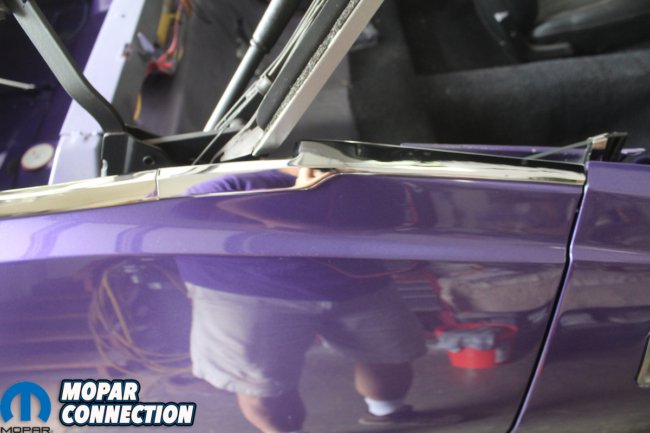
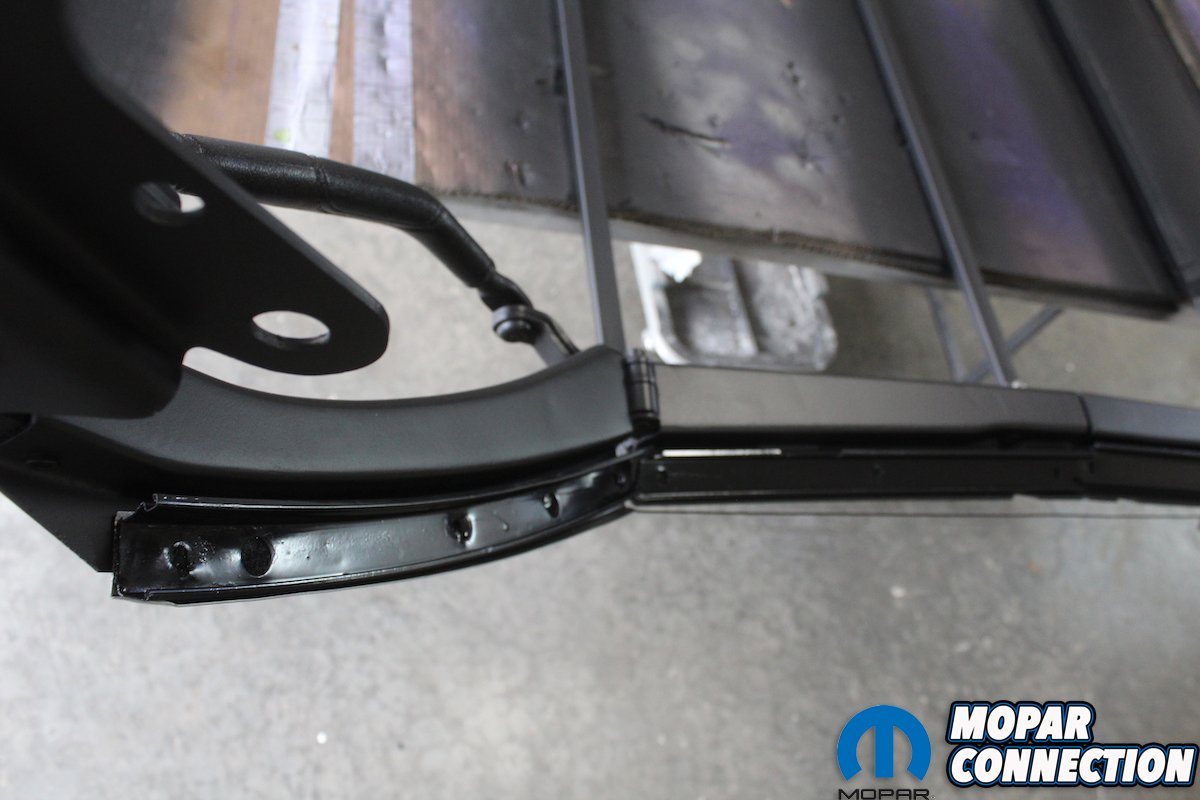
Above left: After drilling the holes in the top of the door, we slide the clips in the trim. They are all the same except for the rear clip. It is a clip with a stud that goes through the top of the door and has a lock washer and nut that holds it in place. Above right: All of the convertible windshield and header trim has already been polished and is ready to install. We use a 2×6 to hold the top up so we can work on the header. You may have to drill some new holes for the clips that hold the trim in place. Patience is the key to installing this trim correctly and making sure you don’t scratch any of the trim.
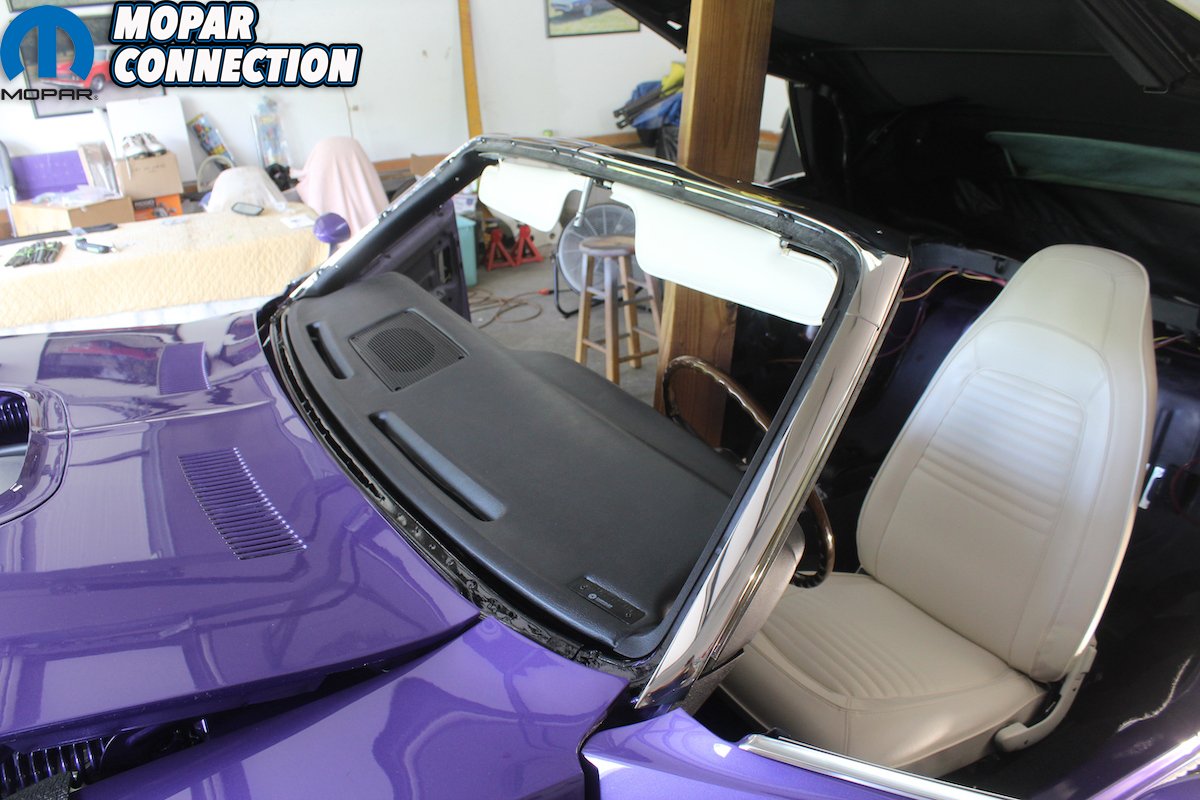
Above: The interior A-pillar trim and header inside trim are installed at the same time as the stainless trim. The visor/hold down brackets and the rear view mirror bracket is also installed. The interior trim is painted the same swede black as the dash while the plastic trim is sprayed with SEM Landau Black. All the trim around the windshield is installed prior to setting the glass except for the final narrow trim that mounts in the clips. The lower stainless trim that goes across the bottom of the windshield where the wipers park has two end clips that require it to be installed last.


