


When we purchased Rara Hemious Birdicus in March, one of our first priorities was to conduct a comprehensive mechanical inspection, starting with the braking system. After all, a car that stops as well as it goes is a safer and more enjoyable machine to drive.
The 1968 Road Runner left the factory with front and rear drum brakes and a manual master cylinder, a simple yet effective system. Our intent from the beginning was to preserve that original configuration.
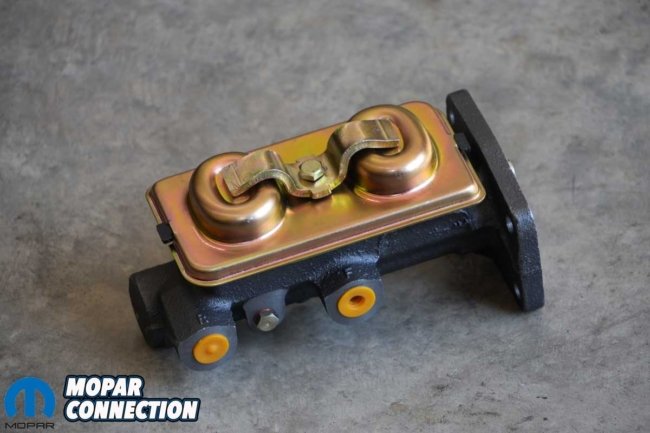
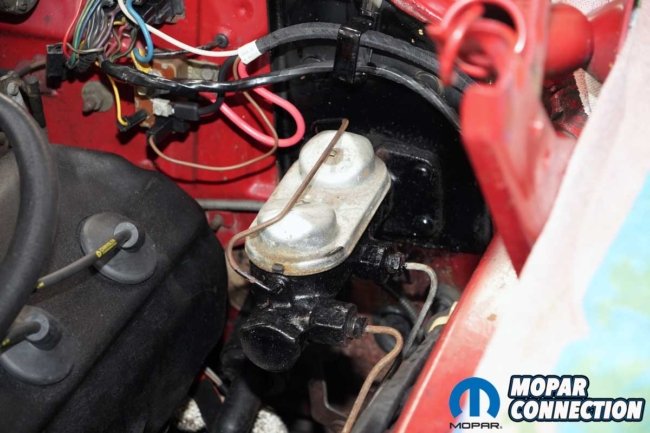
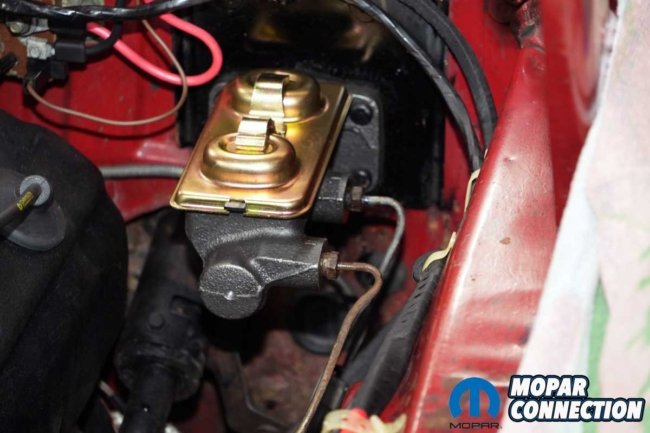
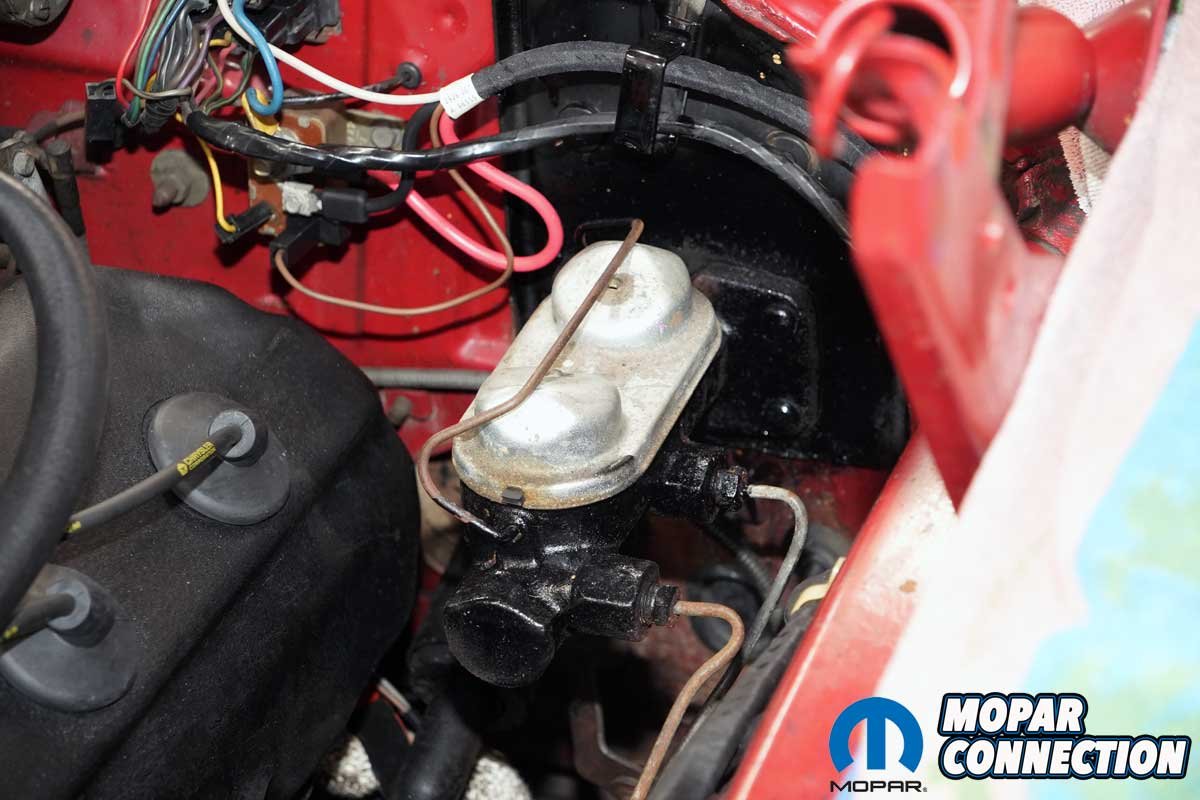
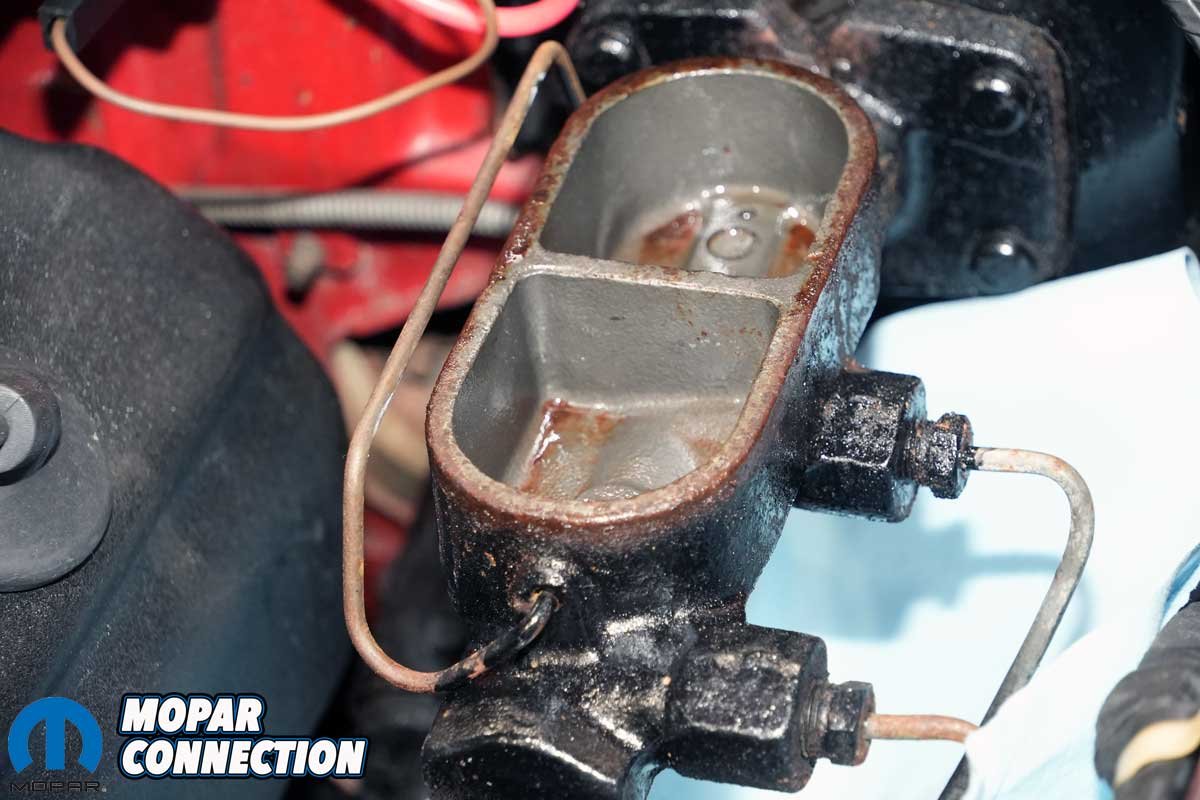
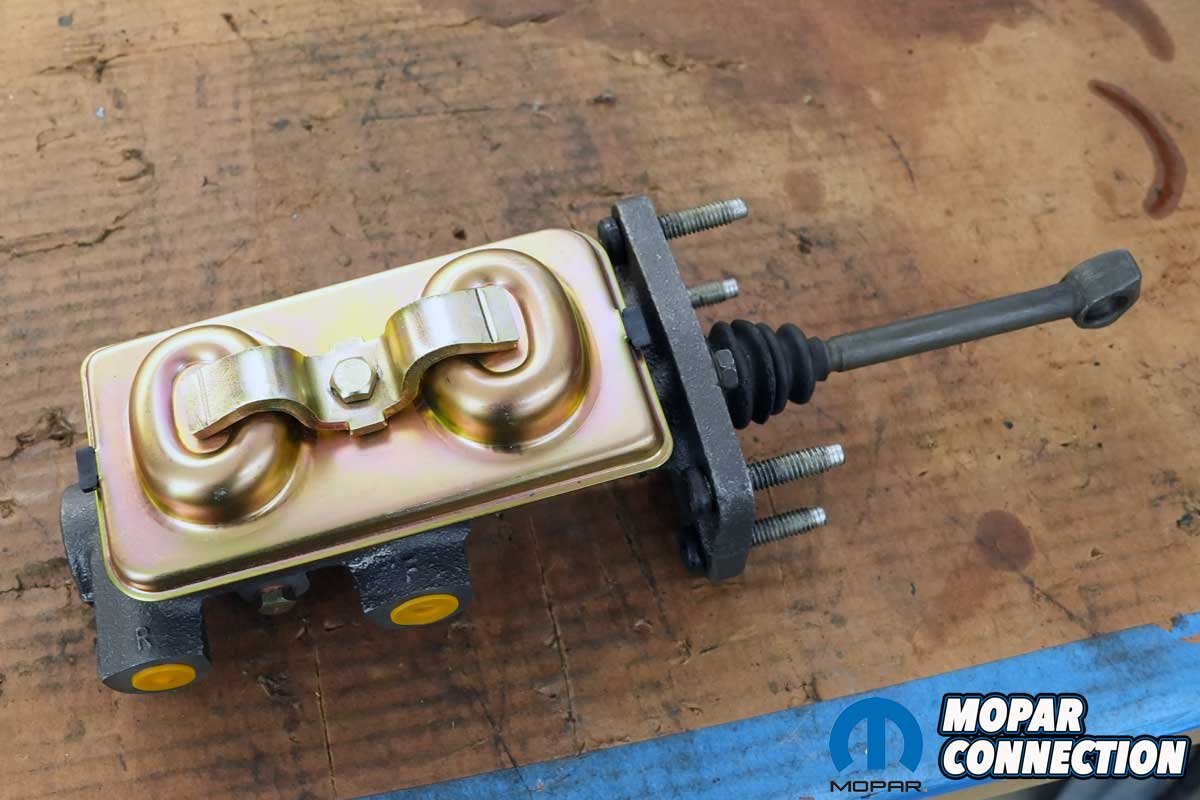
Above Left: We sourced a Bendix-style master cylinder from Mancini Racing to replace the existing unit. Above Right: The Road Runner’s master cylinder appeared incorrect; it was rusty, and both reservoirs were nearly empty when we acquired the car.
A closer inspection, however, revealed that time had not been entirely kind to the system. The master cylinder’s reservoirs were almost empty, and the component appeared to be a later replacement rather than an original piece.
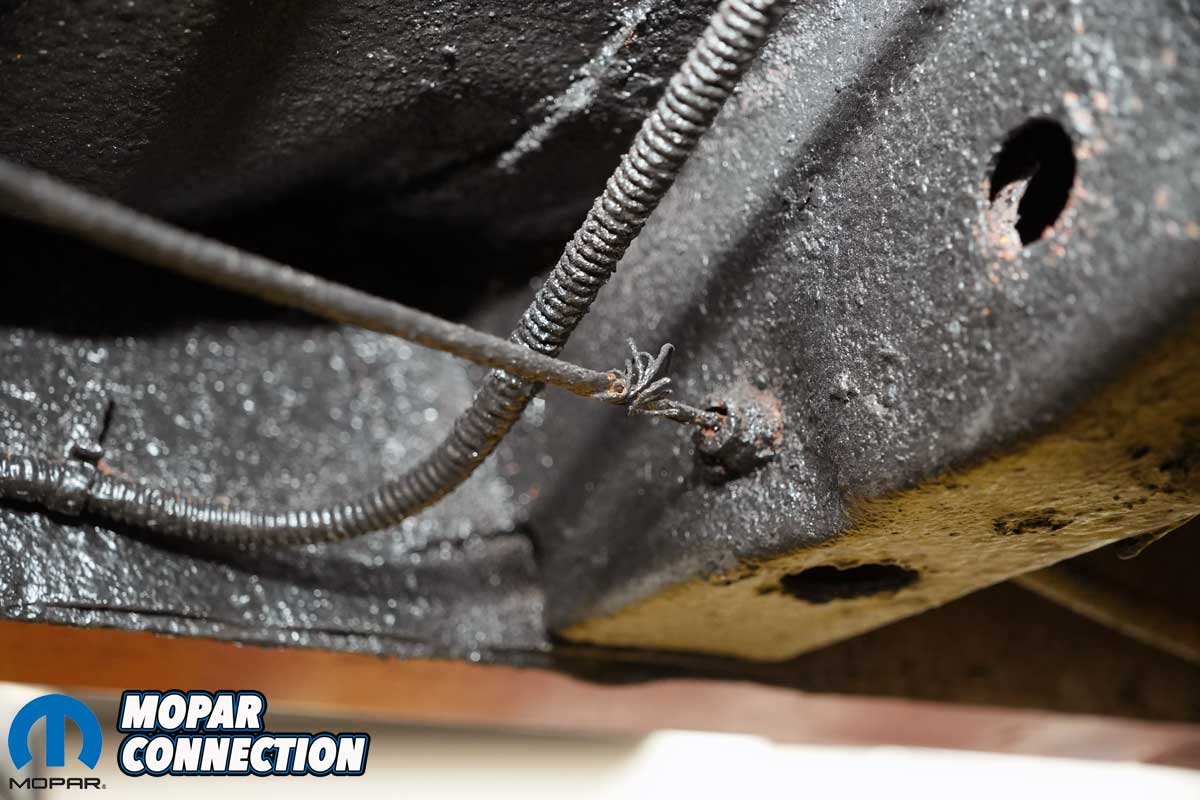
The rubber brake hoses, although visually intact, showed signs of age, and given their unknown history, replacement was a prudent precaution. We also discovered that the front parking brake cable was frayed, and the park brake pedal mechanism did not apply or release smoothly, indicating that attention was needed before the car saw any serious road time.
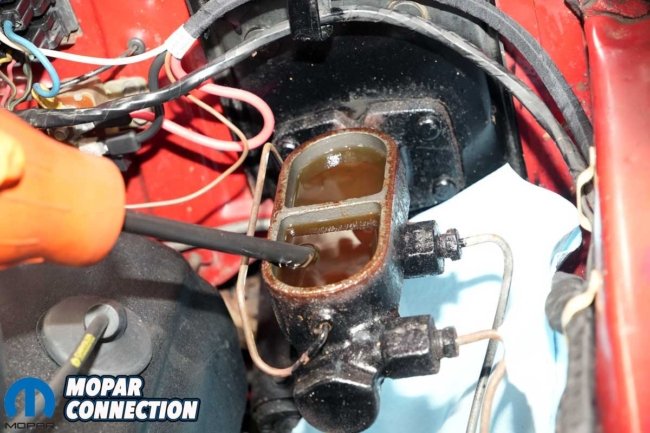
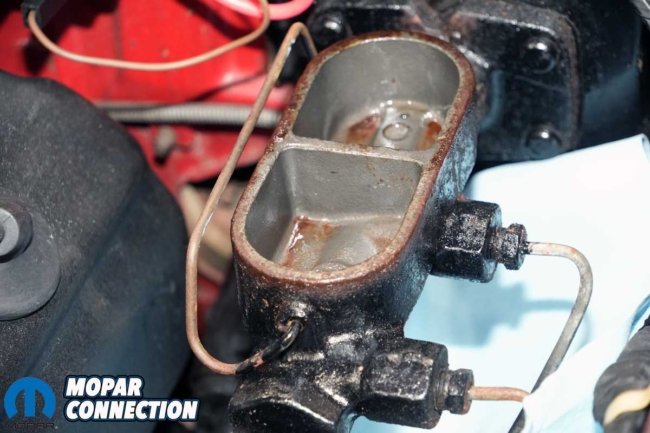
Above Left: During the inspection, we topped off the master cylinder with brake fluid, knowing a full service would be necessary soon. To remove the contaminated fluid, we used a turkey baster. Above Right: The master cylinder reservoirs showed extensive rust throughout.
Fortunately, not all the news was bad. Both the front 11×3-inch and rear 11×2.5-inch drums measured within factory service limits, and the brake linings appeared nearly new, indicating the car had seen minimal recent use. With that reassurance, we turned our attention to the front hubs, cleaning and repacking the wheel bearings before reinstalling the drums and torquing the spindle nuts to factory specifications.
The original dust caps showed some wear, but a little careful metal work and patience brought them back to a respectable finish. Once everything was in place, we properly adjusted the front brake shoes to achieve a firm, even pedal feel, an essential step for consistent braking performance.


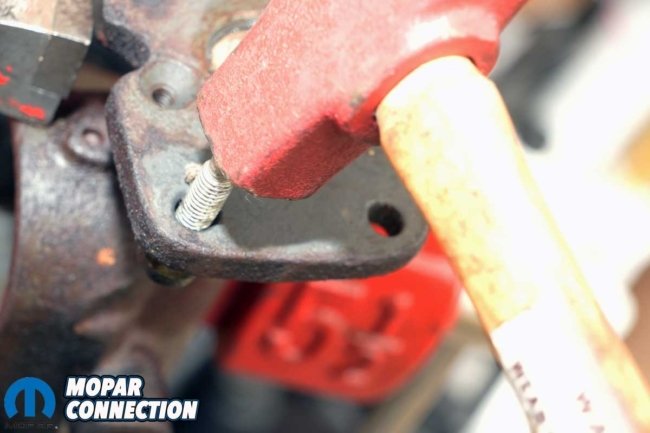
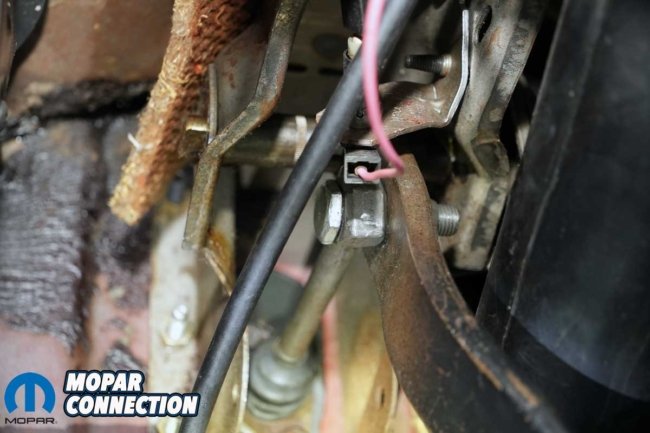
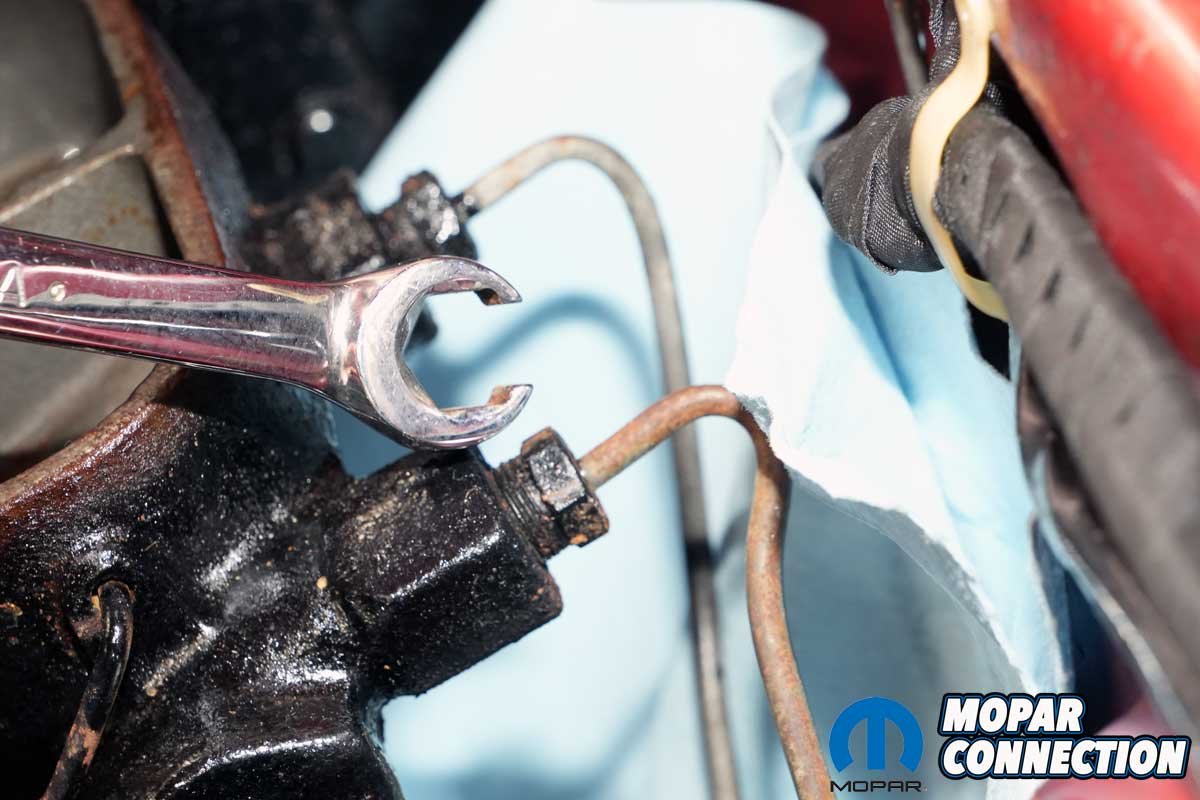
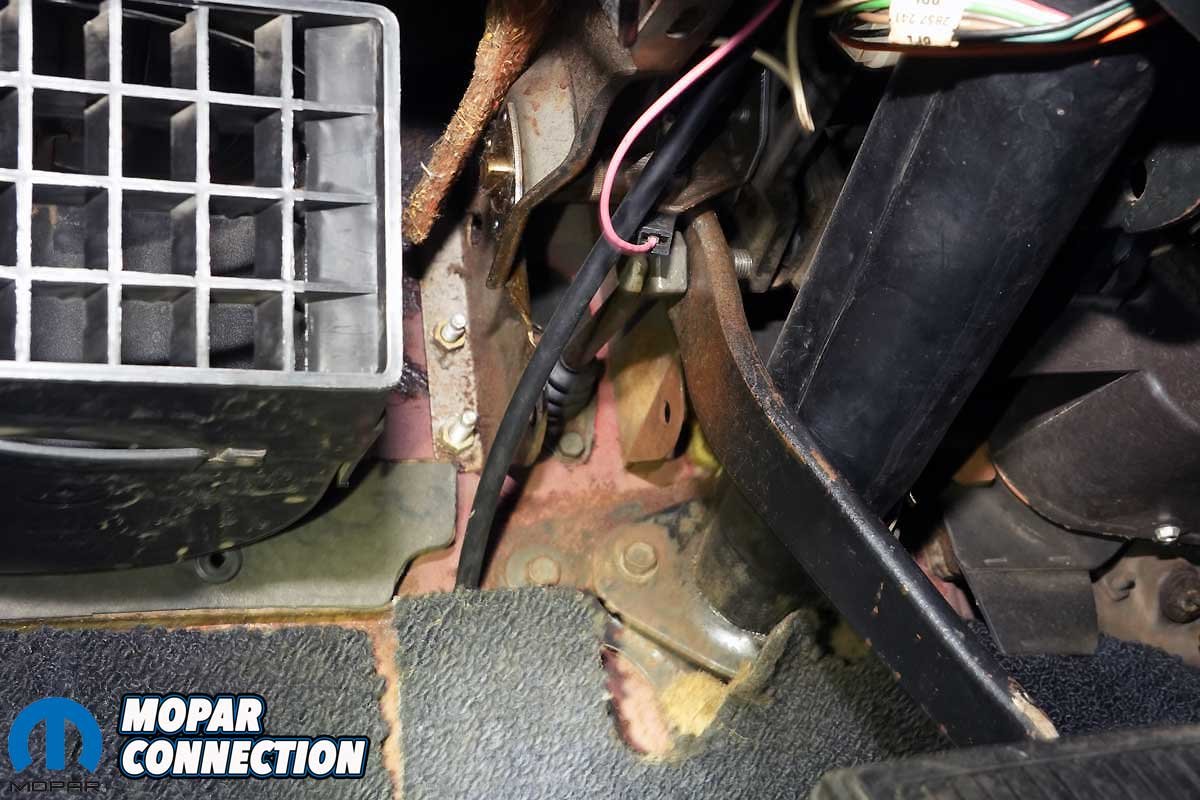
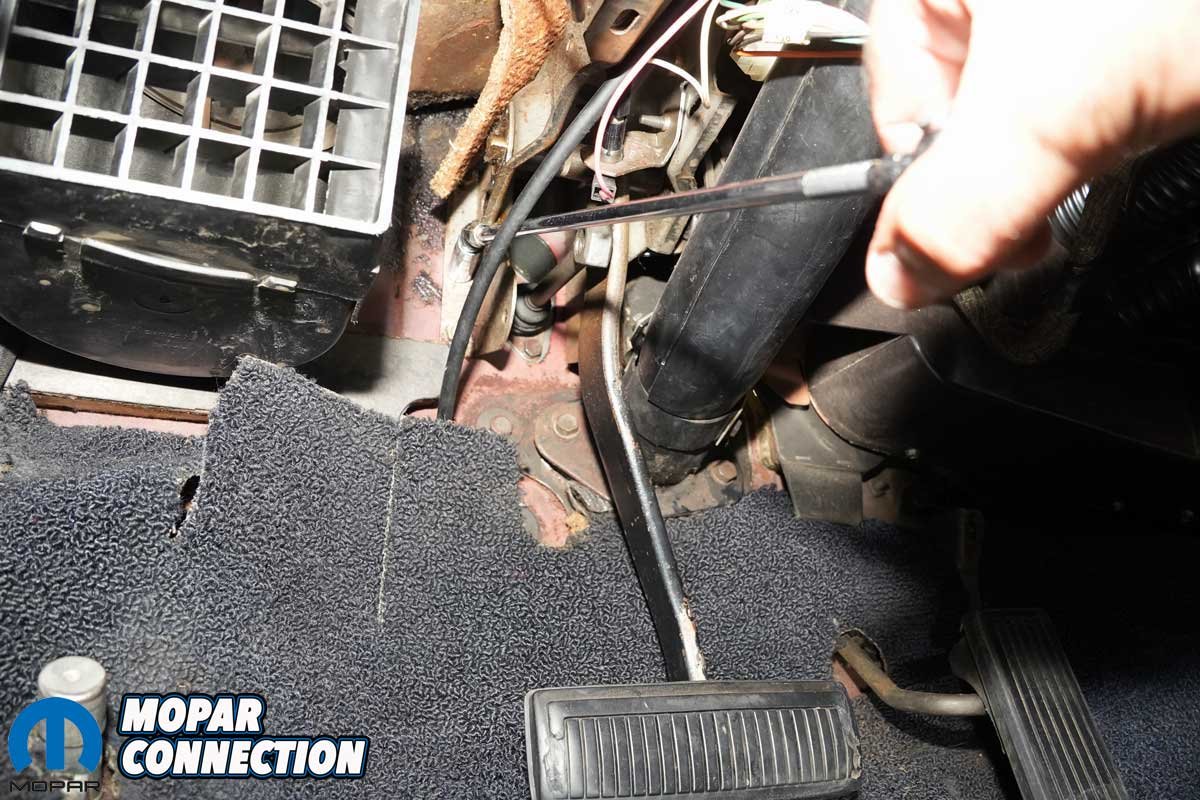
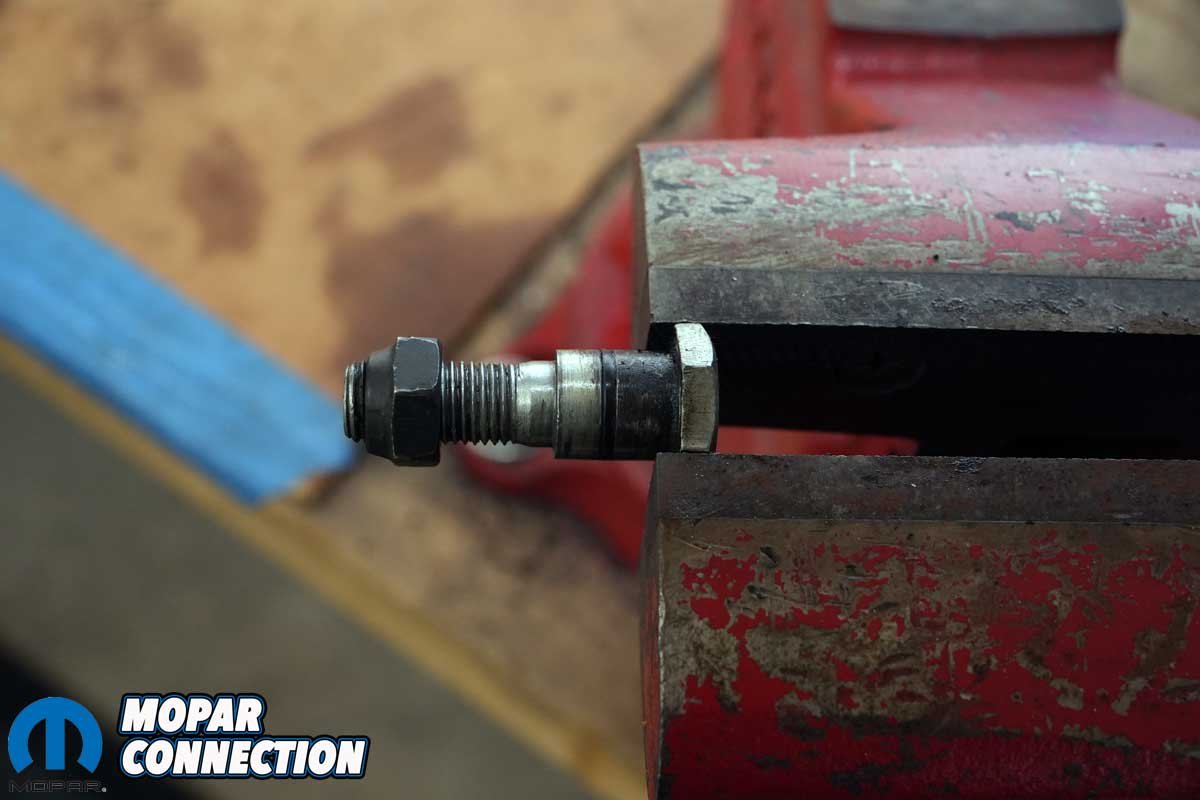
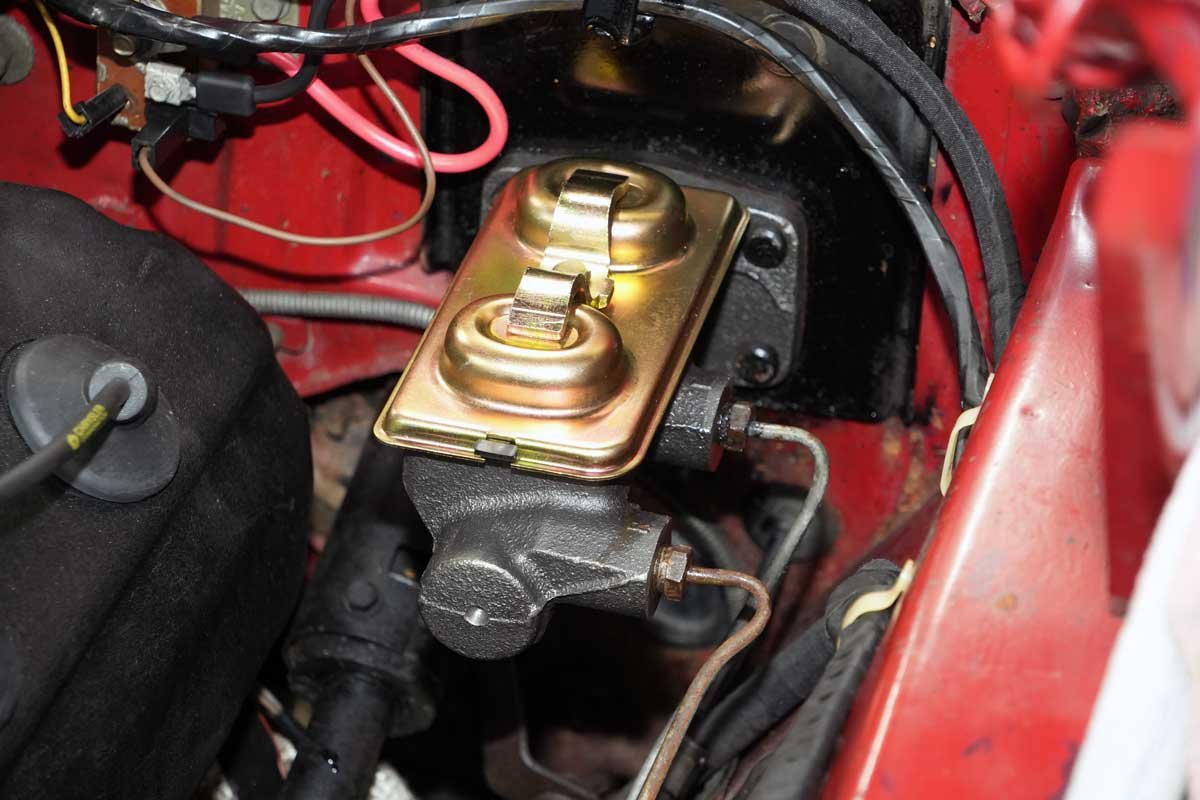
Above Left: To avoid rounding the brake line fittings, we used a flare wrench, allowing both lines to be removed easily. Above Center: The master cylinder’s mounting studs extended through the firewall; two of the four studs and nuts are visible to the right of the vent ducting. The brake pedal pushrod bolt and nut were removed from the pedal assembly, just behind the pink wire and connector. Above Right: With the master cylinder ports capped to prevent drippage, we pulled the unit from the firewall.
Moving to the rear of the car, we encountered a more serious issue. The passenger-side axle seal had started to leak, prompting us to pull the axle for service. Though it had evidently been replaced at some point in the past, it was once again allowing fluid to escape. Using a slide hammer, we removed the failed seal, then carefully drove in a new replacement. Interestingly, the driver’s side seal, still original to the car, remained dry and continued to perform flawlessly.
Both axles’ tapered roller bearings were thoroughly cleaned and repacked with fresh grease before being reinstalled. We adjusted the passenger-side tapered roller bearing by measuring the end play with a dial indicator, a critical step for ensuring long-term reliability and proper axle operation.
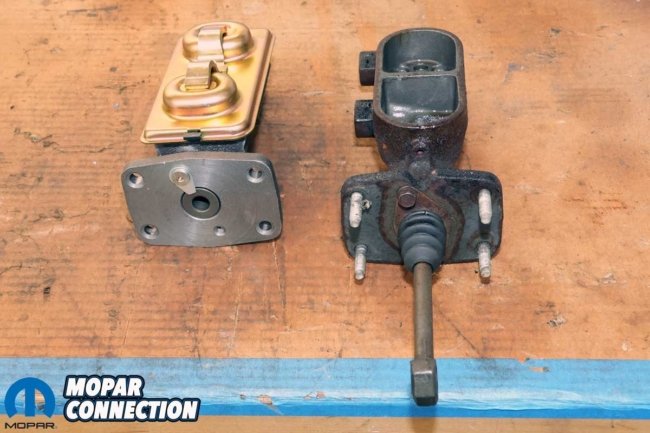
Above: The MBM master cylinder (left) is supplied without the pedal pushrod, retainer and boot, or the four mounting studs.
Once the axle assembly was set to factory specifications, we reinstalled the rear drums and adjusted the brake shoes for adequate engagement, following the same procedure as on the front. The bearing repacking and axle adjustment is clearly explained in the factory service manual.
Moving to the park brake assembly. When we applied the parking brake pedal to verify the system’s function, we discovered that the damaged cable was preventing full activation of the rear brakes. A new front section of the park brake cable assembly was ordered to correct the difficulty.
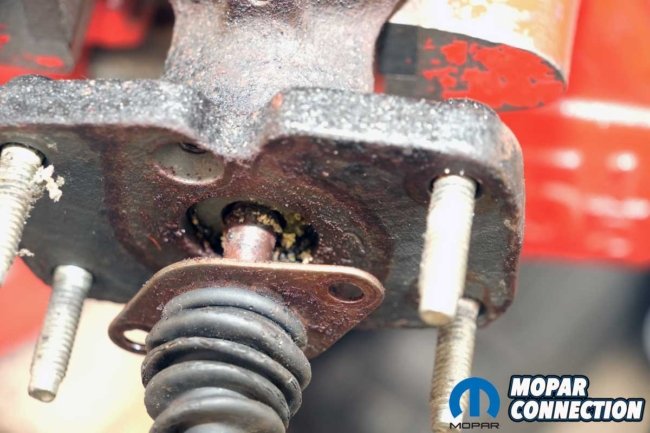
Above Left: When we pulled back the pushrod retainer bracket and boot, we discovered the source of the master cylinder leak. Above Center: To remove the studs, we gently tapped each out with a brass hammer. Had they been stuck, we would have either threaded a nut flush onto the end of the stud and tapped it more firmly or used a press to extract it. Above Right: With the studs in place, we removed the shipping retainer and screw to install the pushrod, retainer, and boot.
While awaiting that part, we shifted our focus to upgrading the heart of the system: the master cylinder. We installed an MBM Bendix-style drum brake master cylinder (reproduction of Chrysler part number 2660809) sourced from Mancini Racing (part no. MBMMC1323). The master cylinder is a replica of the original factory design, featuring a one-inch bore, 9/16-20″ and 1/2-20″ inverted flare ports, internal residual pressure valves, and the classic gold “S-Clamp Lid.”
To remove the existing master cylinder, we first used a turkey baster to extract the remaining brake fluid from the reservoir. Once emptied, we disconnected the two brake lines from the master cylinder, carefully plugging the cylinder ports and capping the lines. This step helped minimize fluid loss, which was crucial to preventing damage to the Road Runner’s paint.


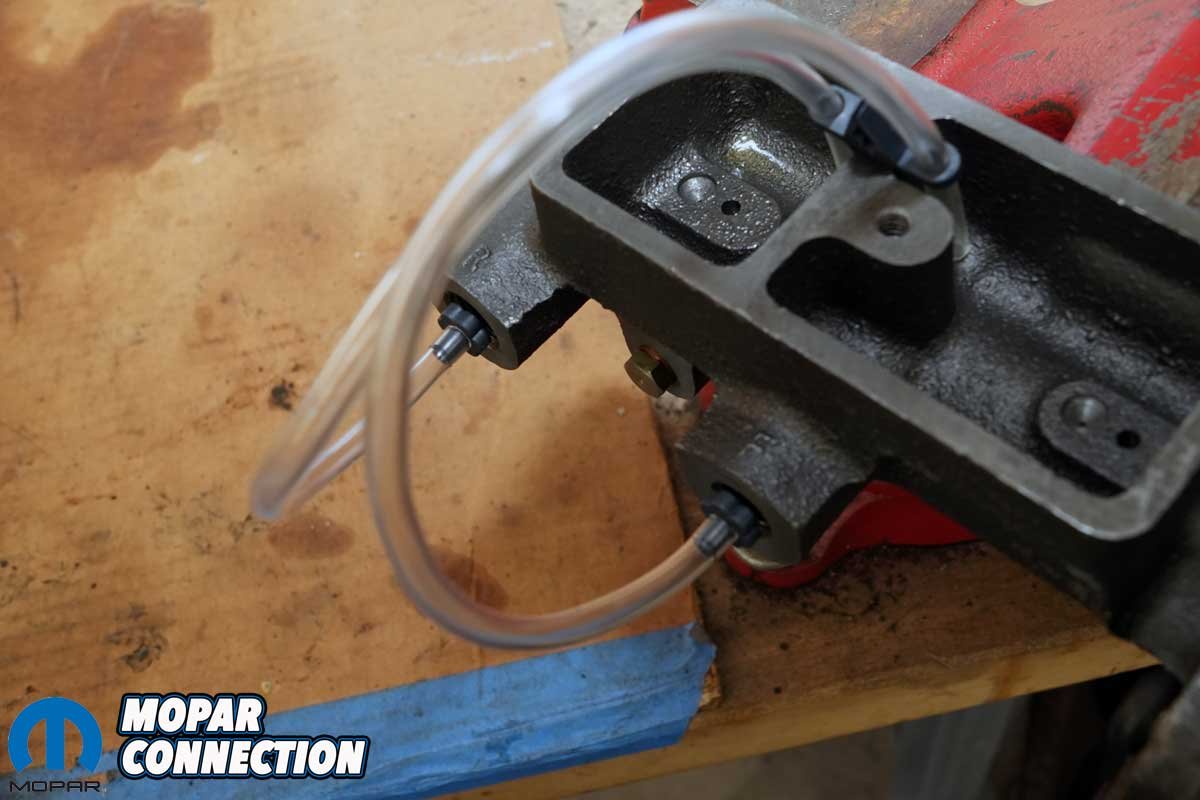
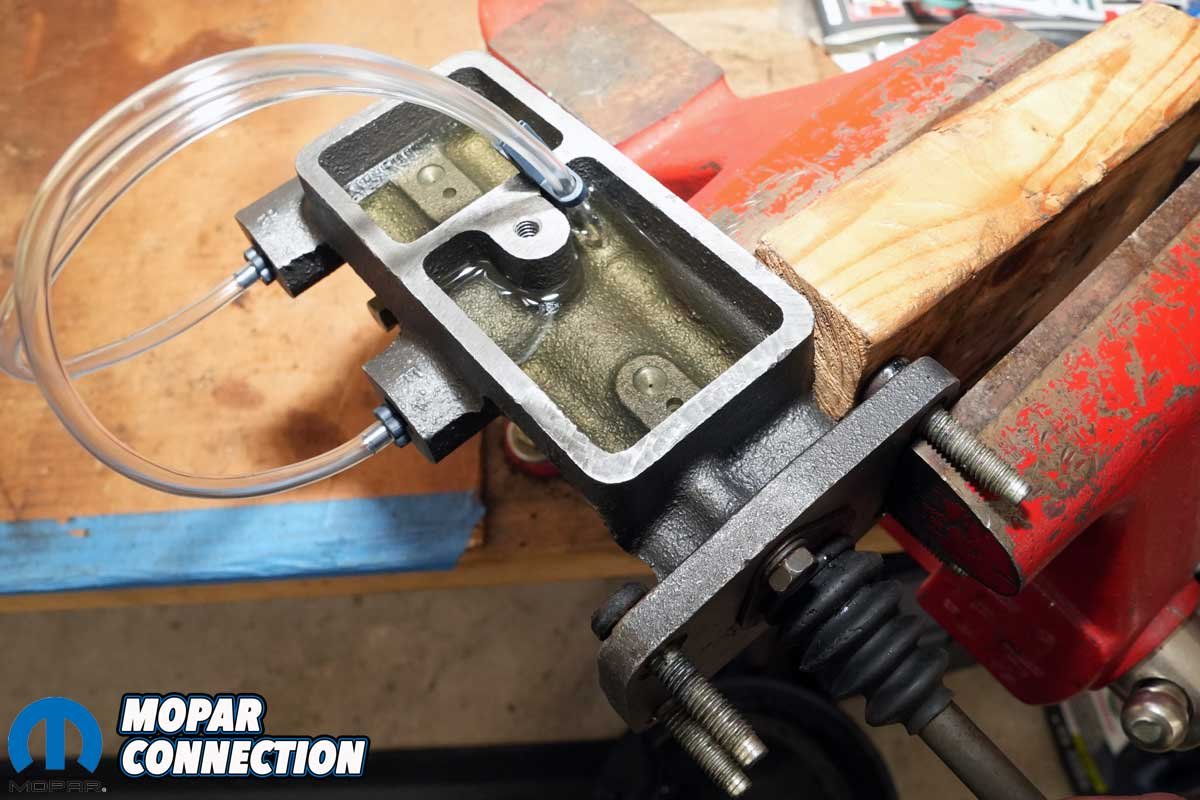
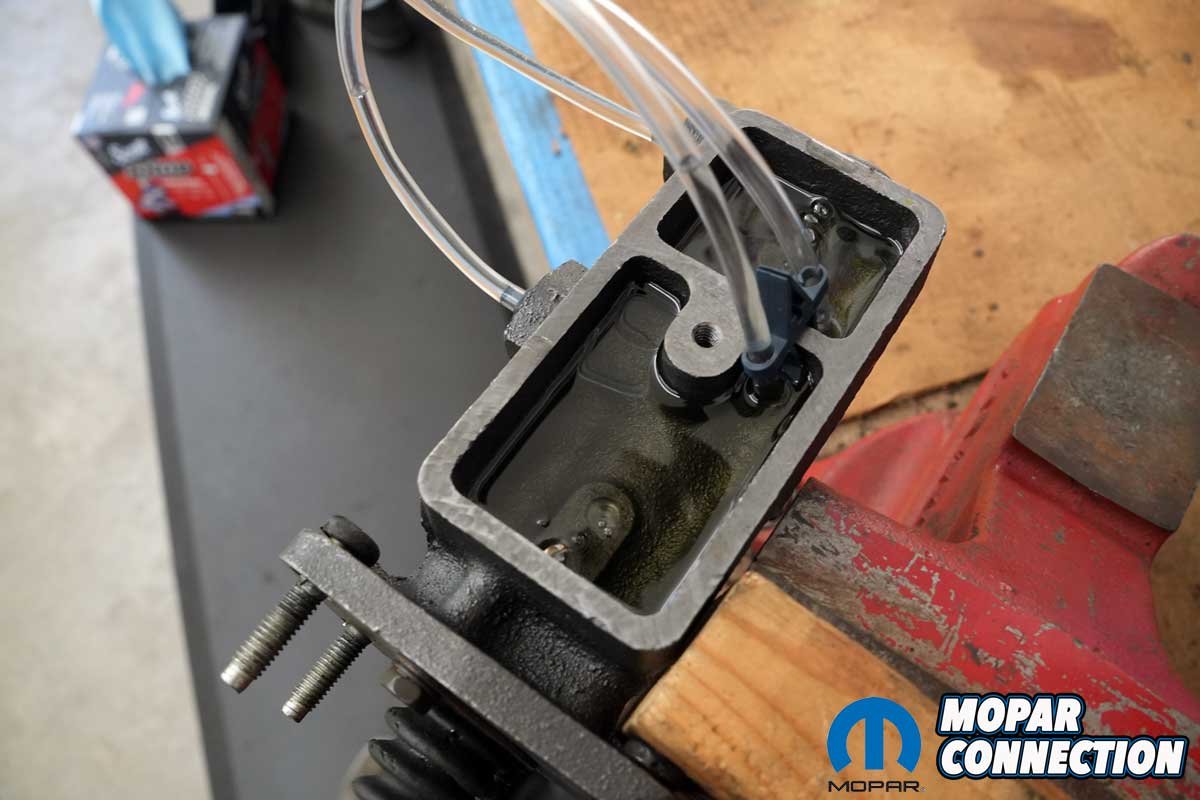
Above Left: The master cylinder included a bench bleeder kit, complete with port fittings, clear hoses, and clips to secure the hoses to each reservoir. Above Center: We filled the reservoirs with brake fluid and began slowly pressing and extending the pedal pushrod. Above Right: Bubbles can be seen moving through the hoses and escaping from the compensating and replenishing ports of each reservoir. Once the bubbles stopped during the pushrod movement, the bleeding process was complete.
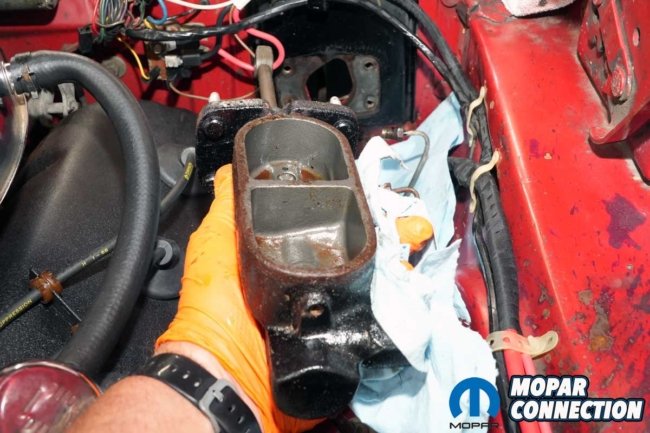
Next, we moved inside the car, crawling under the dash to disconnect the brake pedal pushrod, which extends to the master cylinder. Interestingly, unlike the A-body models with which we are more familiar, the Road Runner’s master cylinder is mounted to the firewall using studs that extend into the interior of the vehicle, rather than being secured from the engine bay side.
This unusual setup required us to remain under the dash and work around various brackets and defroster ducting to remove all four fasteners.

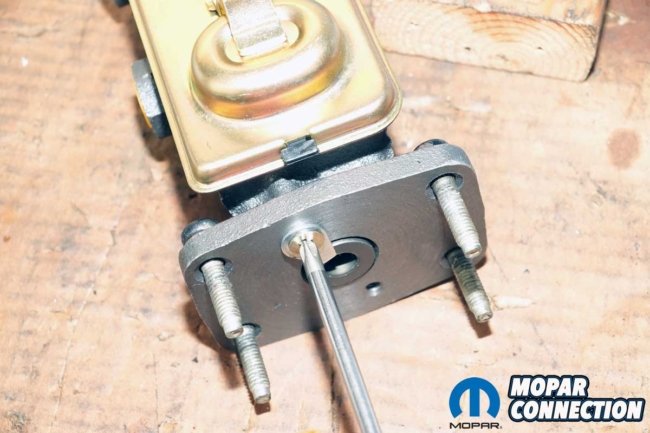
Above: With the studs installed, the pushrod, boot, and retainer in place, the plugs inserted, and with the lid lightly secured, the master cylinder was ready for installation.
With the nuts removed, we returned to the engine bay and carefully pulled the master cylinder away from the firewall. It was then secured in a bench vise by its firewall mounting flange, allowing us to begin the next phase of disassembly.
We started by removing the two fasteners that secured the brake pedal pushrod boot to the master cylinder. Pulling back the protective boot’s retainer revealed clear signs that the primary piston seal had been leaking for some time. Interestingly, this discovery aligned with the paint damage and light rust we had previously noticed on the driver’s side floor pan.


Above Left: We tightened the four fasteners onto the master cylinder’s mounting studs. Above Right: Before connecting the pedal pushrod to the brake pedal lever arm, we removed the plugs and installed both brake lines. Installing the lines first prevented brake fluid from accidentally spraying onto the paint when installing the push rod bolt.
When we attempted to separate the pushrod from the primary piston, the piston came out of the master cylinder, while the pushrod remained stubbornly stuck. After some effort, we were able to free the rod from the piston. Unfortunately, the rubber grommet that retained the pushrod inside the piston’s bore was damaged during removal. We replaced it with a new grommet (not included with the new master cylinder) and then installed the pushrod into the new master cylinder.

Above Left: The pedal pushrod bolt threads were cleaned before reinstallation. Above Right: A small amount of thread locker was applied before installing and torquing the assembly.
The MCM replacement master cylinder featured a piston stop installed in one of the two mounting holes intended for the pushrod boot and retainer assembly. We removed the piston stop and installed the two fasteners that secured the boot and retainer. With the pushrod now in place, we confirmed it was seated correctly by giving it a firm pull while the master cylinder remained clamped in the vise, ensuring it would not come loose from the piston.

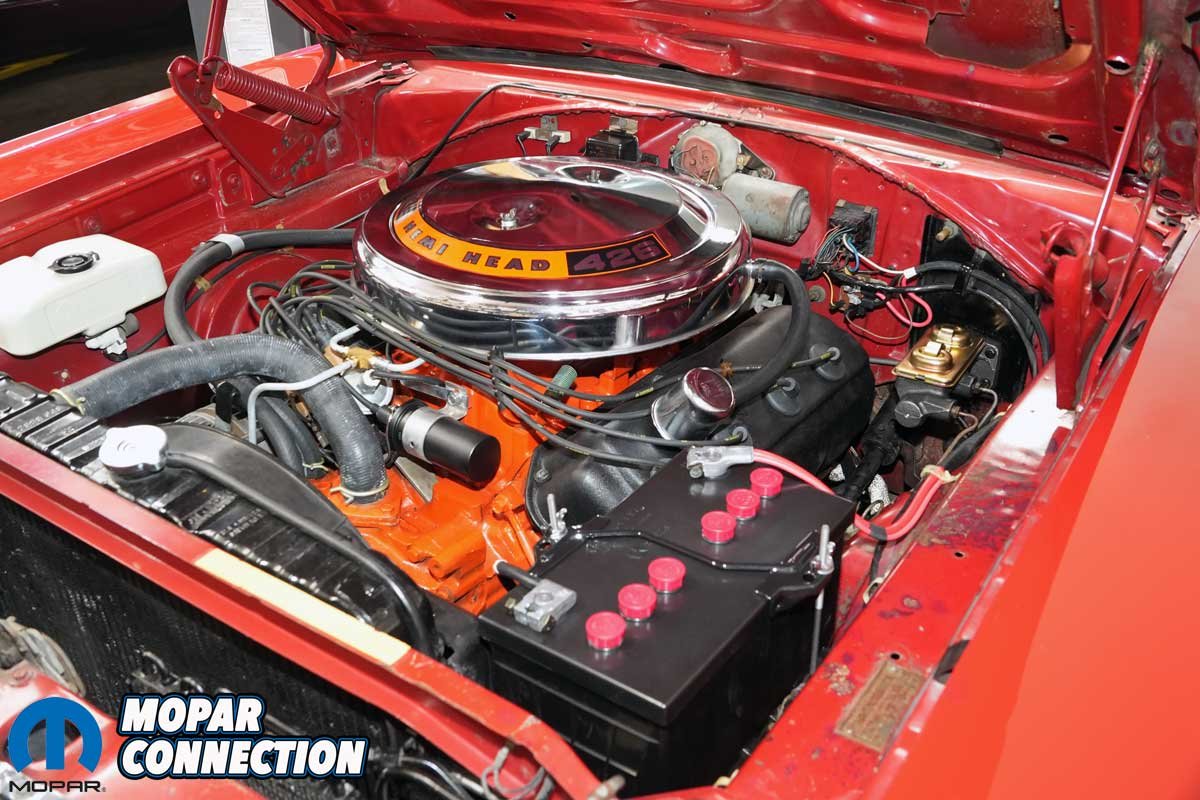
Above Left: The MBM master cylinder from Mancini Racing has a factory-installed appearance. Above Right: The zinc-plated lid enhances the engine bay’s original stock look. The Road Runner has made remarkable progress in a short time.
With the pushrod installation complete, we turned our attention to the firewall mounting studs, which needed to be transferred from the old master cylinder to the new one. We gently tapped out the studs with a brass hammer and pressed them into the new cylinder. One stud fit loosely, so we inserted a short length of 0.028-inch safety wire into the hole before pressing the stud in. The safety wire filled the gap, allowing the stud to seat securely in place.
Before we installed the master cylinder, we bench bled it. The master cylinder came with two fittings that threaded into the ports of the master cylinder. Each fitting had a nipple for a clear hose. Those hoses were attached to a clip that was secured to the master cylinder reservoir housing.

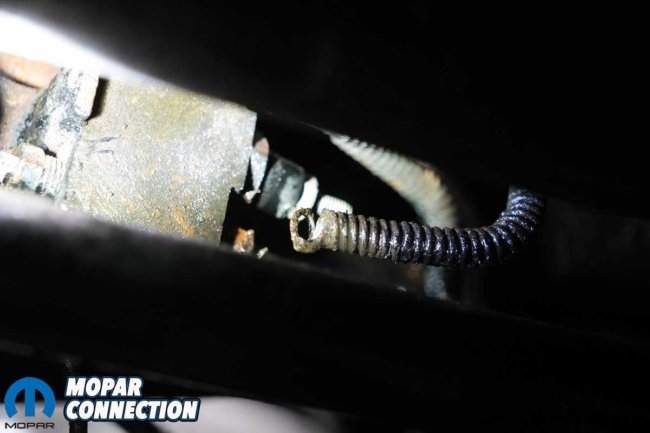
Above Left: We encountered a few problems during the repair process. The front section of the parking brake cable was frayed, preventing the park brake pedal from engaging or releasing fully. Above Right: The brake hoses were questionable, and we did not want to drive the car without ensuring they were new and in top condition.
We submerged the ends of the hoses into a reservoir (one to the front and one to the rear). With the reservoirs filled, we pushed the pedal pushrod and released it. We slowly repeated the process until only fluid was moving through the hoses and no bubbles were escaping from the compensating and replenishing ports in the master cylinder. After bleeding, we removed the fittings and reinstalled the plugs into the ports to minimize any brake fluid loss.


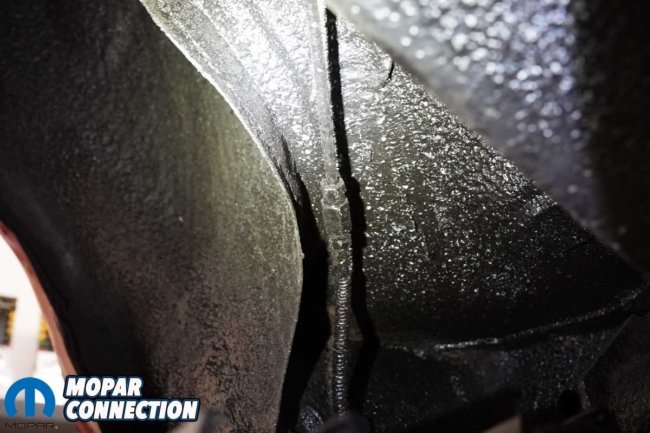
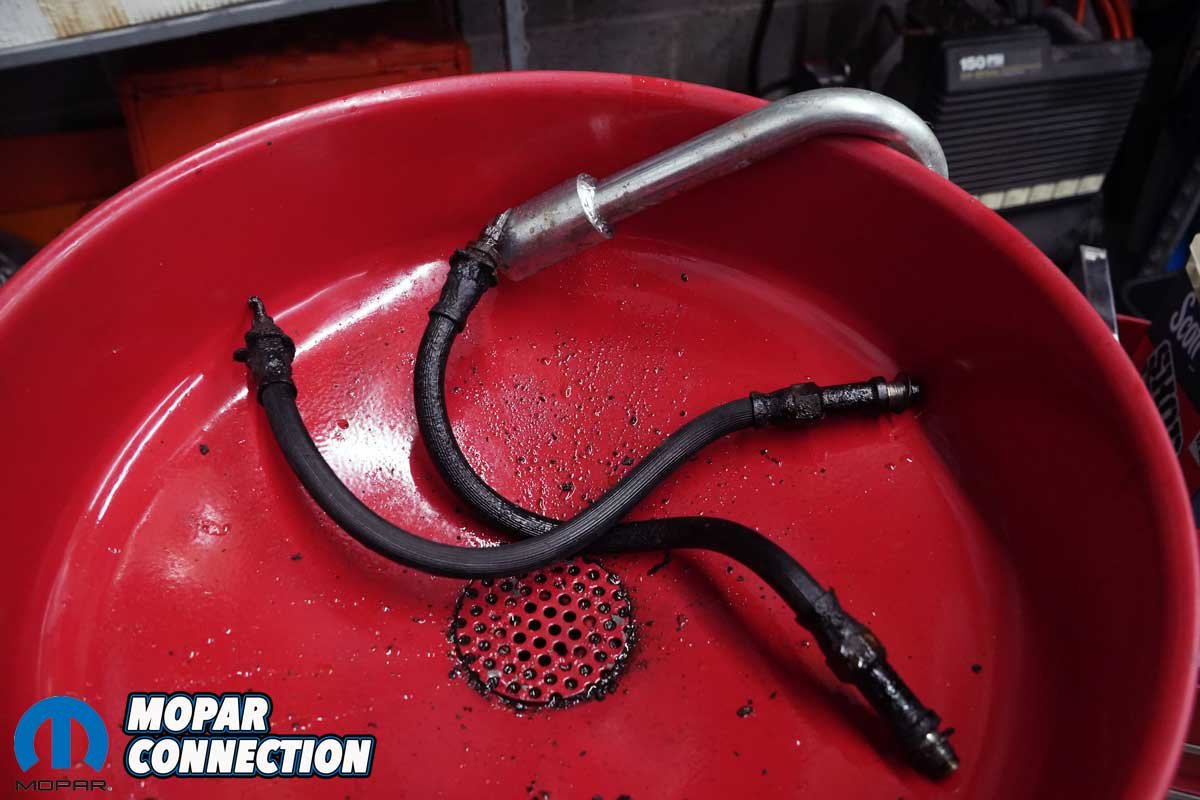
Above Left: Our attempt to remove the front brake hoses resulted in broken lines at both front wheels. Above Right: Additional breakage occurred at the pressure differential switch on the driver’s side frame rail when we tried to remove the brake lines.
Believing we had sufficiently bled the master cylinder, we slipped it through the opening in the Road Runner’s firewall, installed the mounting fasteners, the brake lines, and the pedal push rod bolt. We planned to remove the rubber hoses and install new hoses, so we did not bleed the system at that time. From a purely visual impact, the master cylinder’s fit and finish were spot-on, and it looked right at home under the hood.
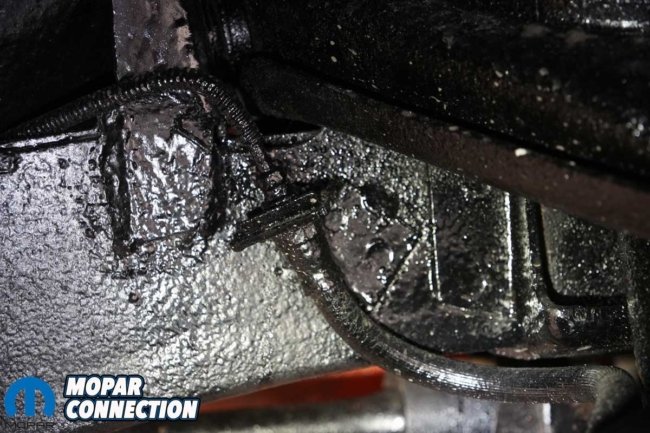
Above Left: Even more damage; almost every brake line snapped as we tried to remove them. Above Right: On the rear brake line, a union had been added between the factory line and a replacement section that extended to the center rear mount, connecting to the rubber brake hose.
It is amazing how a project can change its direction with the twist of a wrench. After achieving tremendous success in not breaking anything on the Road Runner for almost six months of ownership, our luck ran out when it came to removing the brake hoses from the metal lines. We broke every line we attempted to loosen from its hose.
At this point, we were dead in the water for a few days while we waited for the parts arrived. So, be sure to join us for part two of this installment, when we will install the new hoses, new hard lines, and replace the damaged section of the front park brake cable to match the brand-new Mancini Racing master cylinder.


