


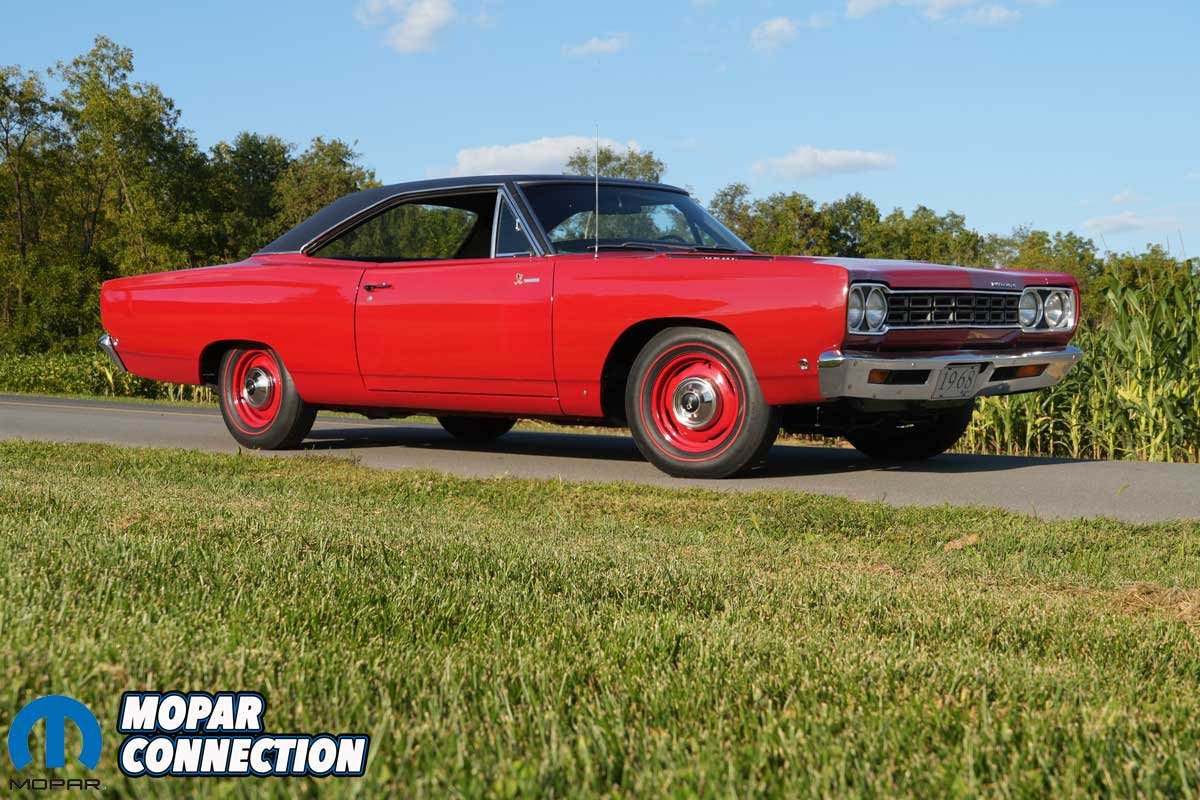
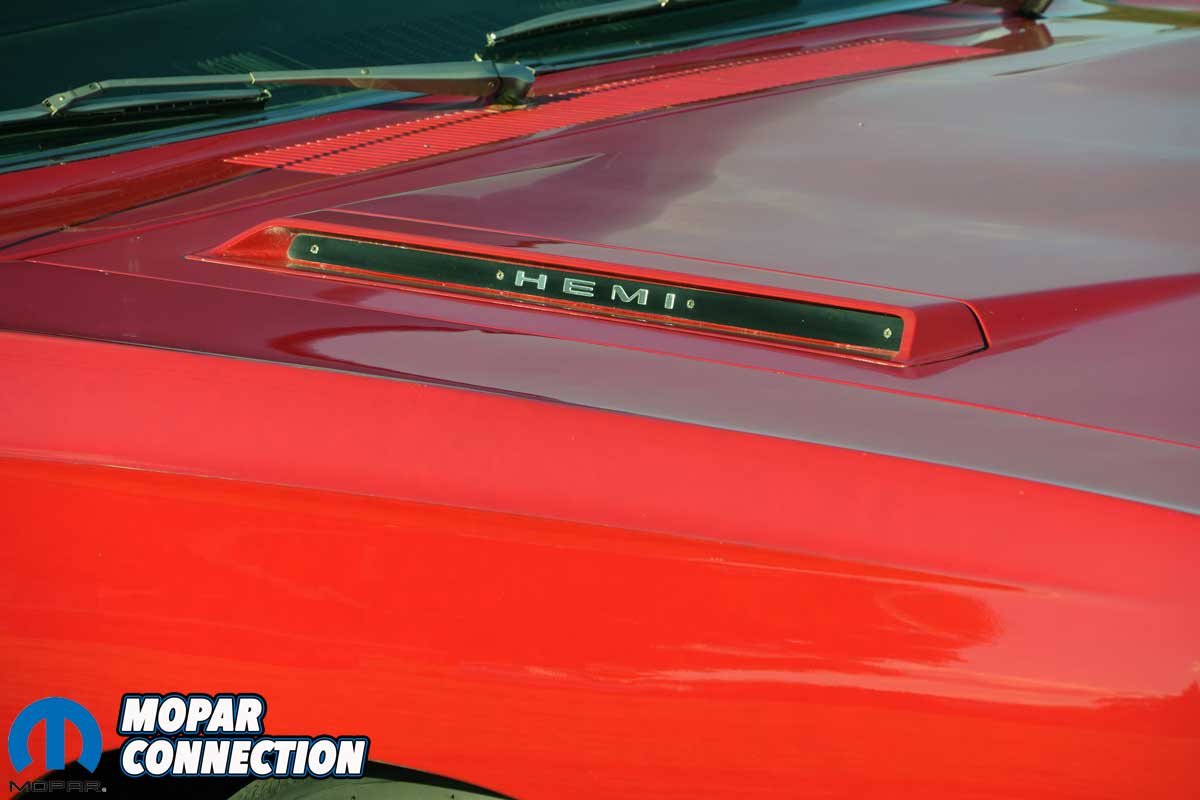
For nearly a year, we have documented the installation of several standout components on Project Rara Hemious Birdicus. Yet every restoration also involves a collection of smaller parts that do not, on their own, guarantee a full feature.
When grouped, however, each deserves its moment in the spotlight. Individually subtle but collectively meaningful, these components played a noteworthy role in the ongoing restoration and subtle modernization of our Road Runner.

Above: Project Rara Hemious Birdicus required many components, each of which led to an editorial. However, several smaller parts were just as significant. Yet they were unable to support an editorial on their own. Thus, our Road Runner is coming together with the help of multiple manufacturers.
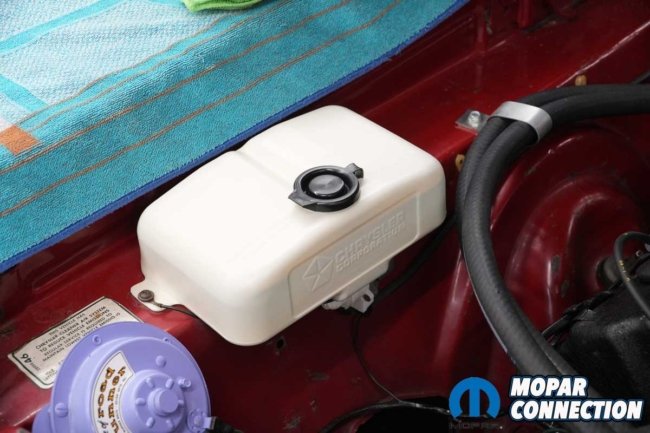
Windshield Washer Reservoir
When we acquired the Road Runner, the original windshield washer reservoir was still in place, but time had not been kind to it. Stress cracks blanketed much of the aging plastic, and the washer motor was completely nonfunctioning. Before ordering replacement parts, we needed to determine whether the failure was electrical or mechanical.
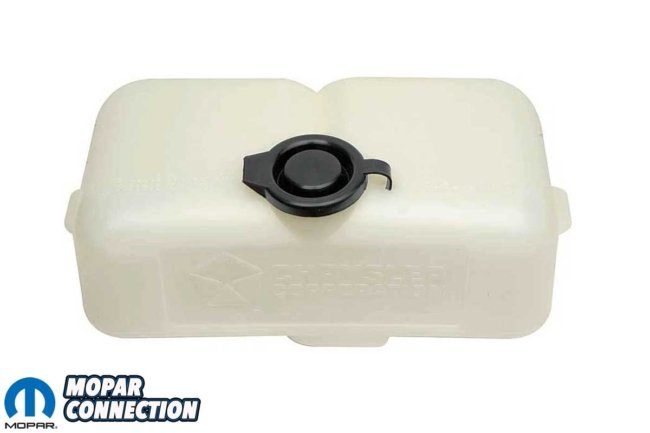
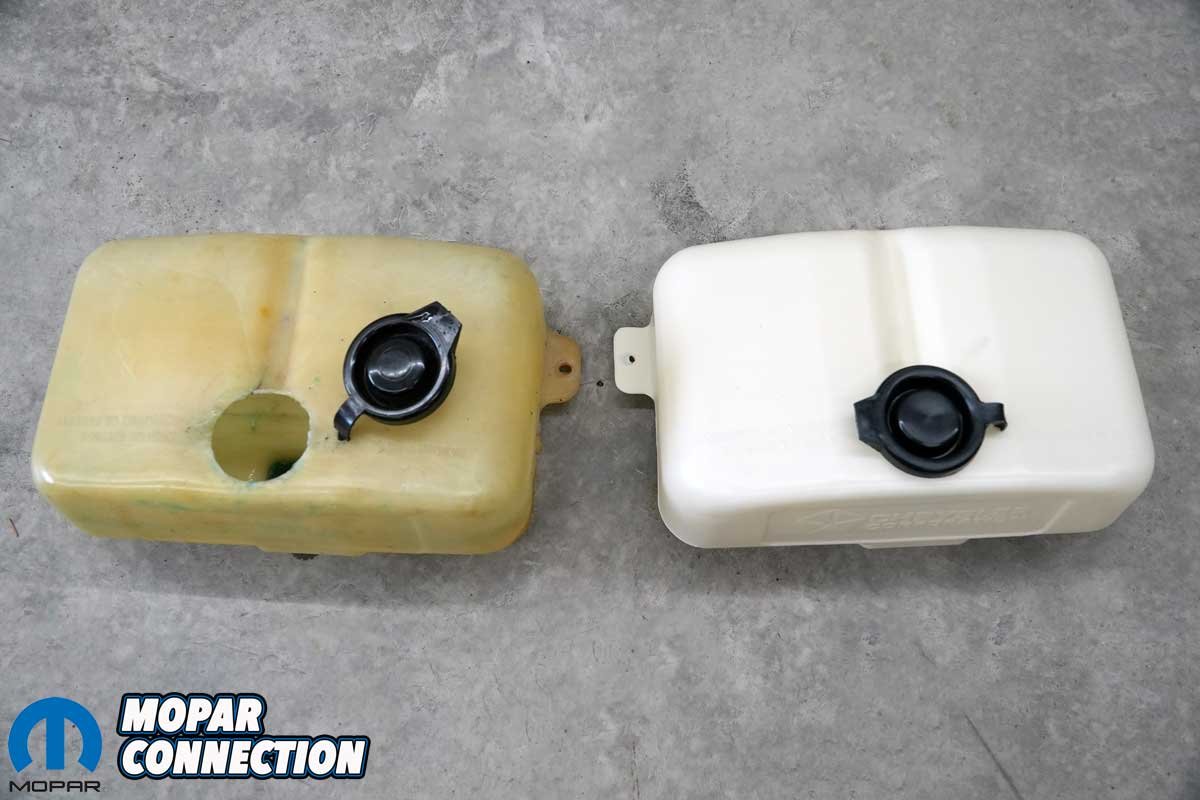
Above: Classic Industries had the reservoir (Jug and Cap) we needed to replace our original, weathered washer jug.
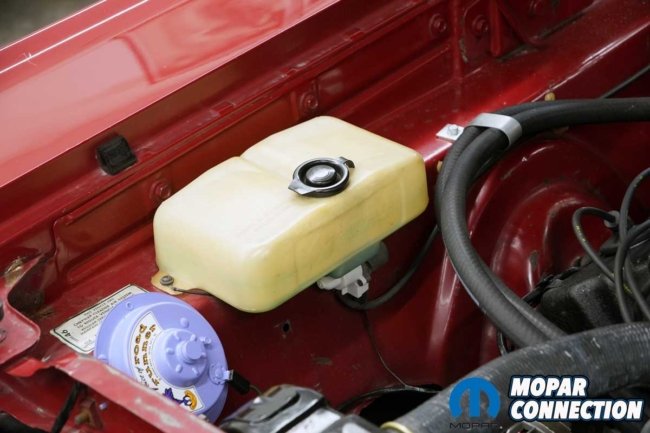
Above Left: The washer reservoir was fifty-seven years old. It held fluid but was cracked and brittle. Above Right: More hairline cracks can be seen in the reservoir. The cap was stuck in place, and we were concerned the jug would break apart if we attempted to open it.
Initial removal was straightforward. We disjoined the washer fluid hose from the pump, unplugged the power lead, and withdrew the two mounting screws securing the reservoir to the inner fender. The reservoir and pump assembly were then set aside for closer inspection.
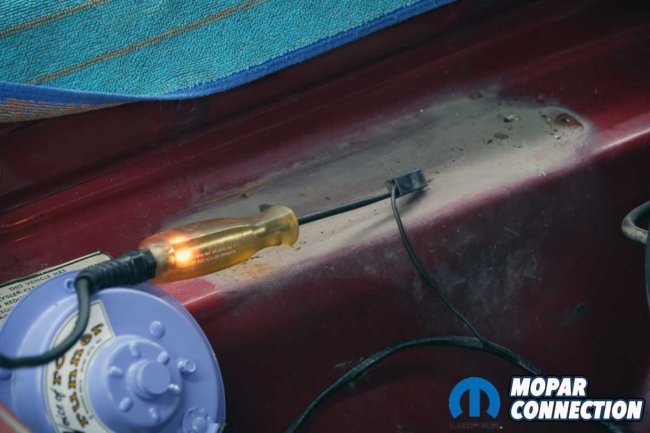
Before placing an order with Classic Industries, we verified the condition of the electrical circuit. A test light was attached to the washer motor harness connector, and the washer button on the dashboard was depressed. The test light illuminated, confirming that voltage was present and that the factory wiring was functioning correctly.
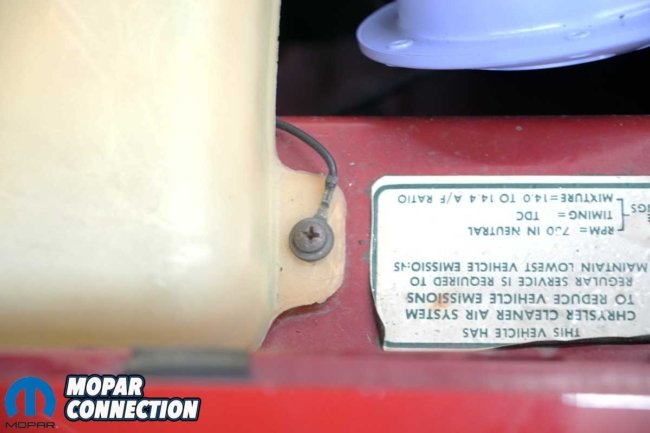
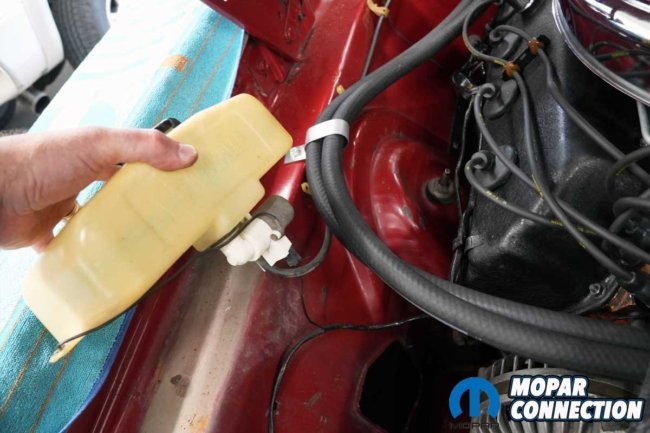
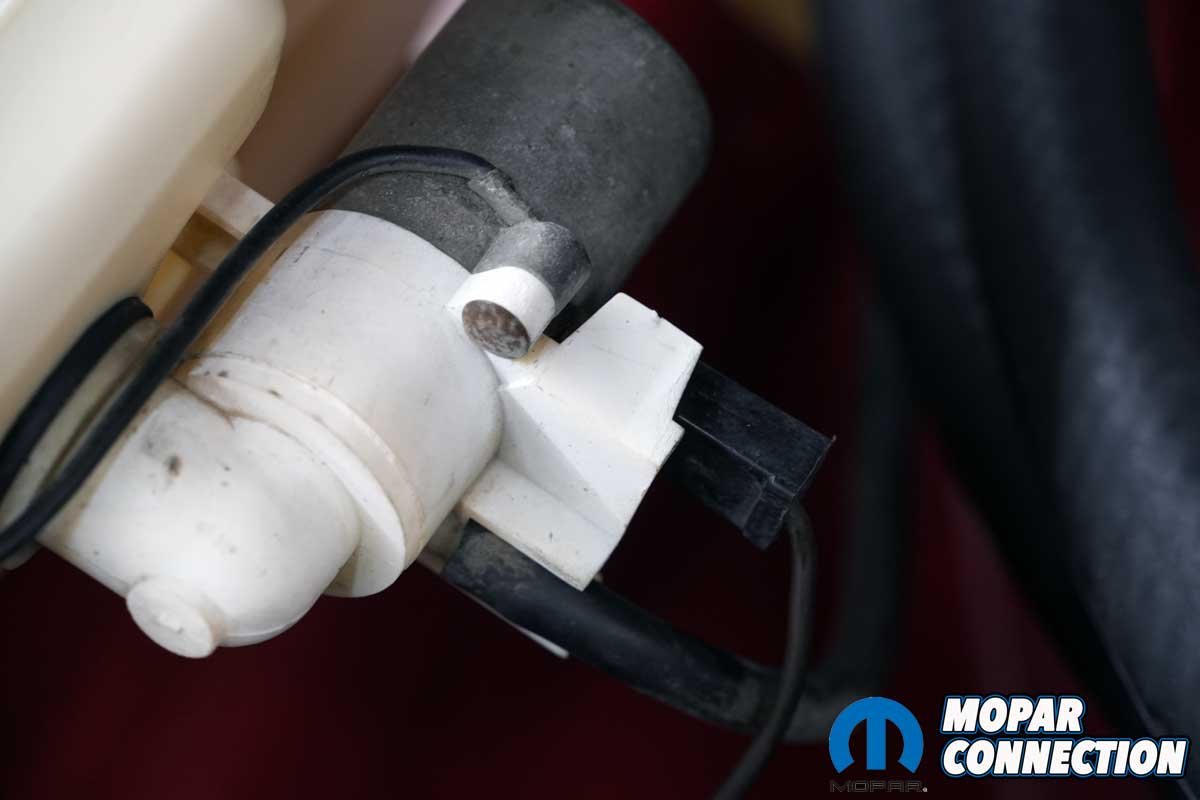
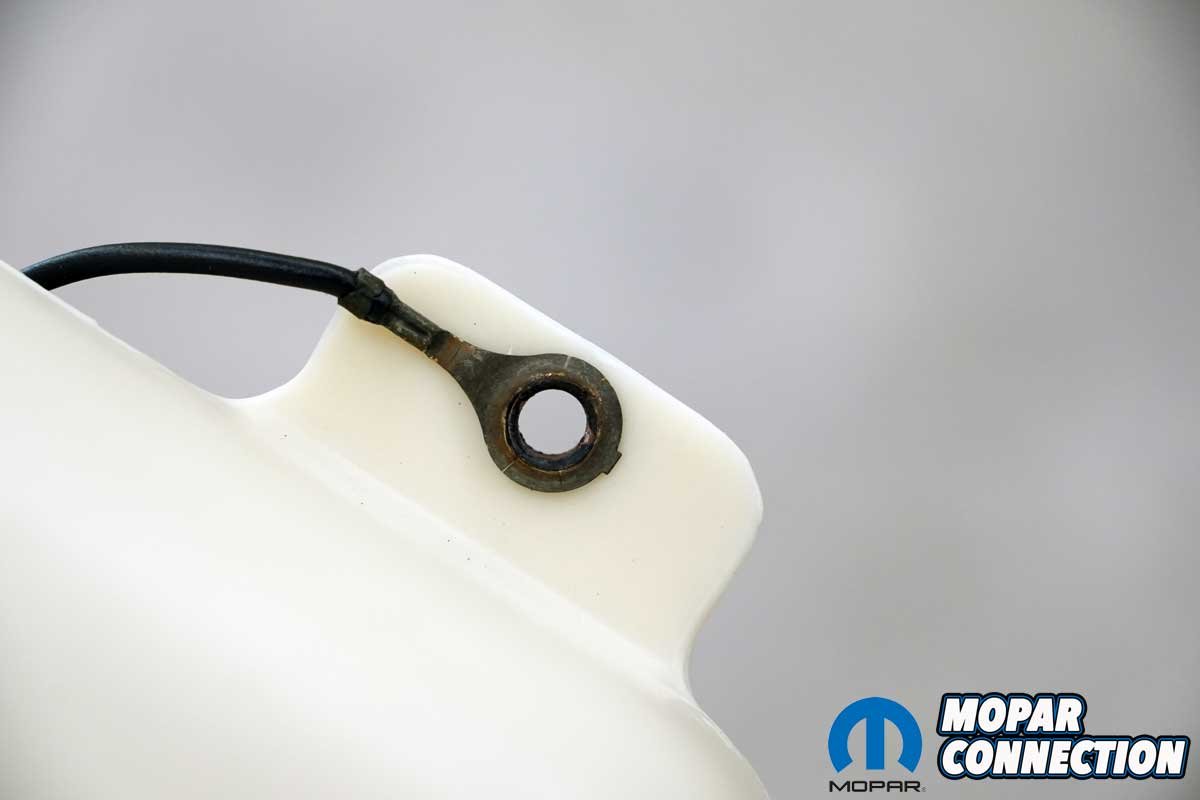
Above Left: The washer reservoir motor’s ground wire found its path to ground through the reservoir mounting screw. Above Right: We removed two mounting screws, followed by removing the rubber hose and the 12-volt power wire to free the reservoir from the engine bay.
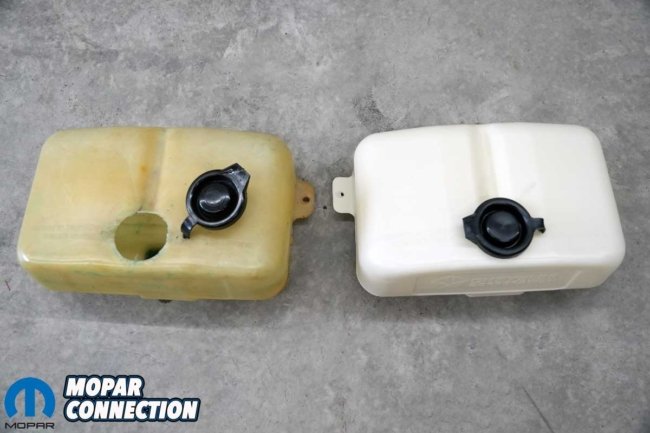
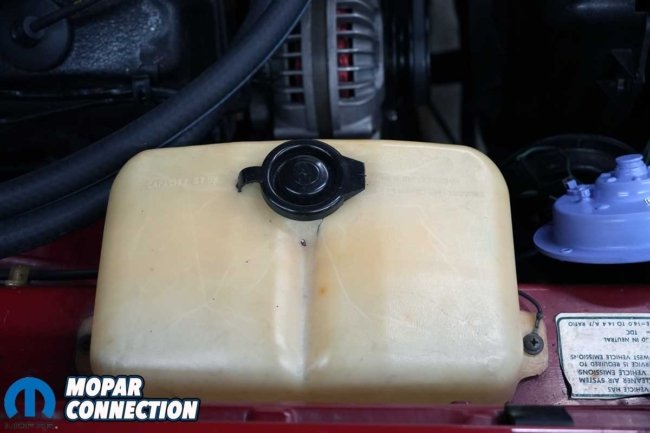
Above Left: The pump motor did not operate, but when we tested for supply voltage at the harness with the washer button depressed, we had voltage. Above Right: A comparison of the old and new reservoirs exhibited how nicely the new one matches the original.
Next, we unthreaded and removed the filter, allowing the pump to be separated from the reservoir. A positive battery voltage and ground were applied to the motor, but there was no reaction. Knowing the washer motor used a brush-style design, we switched polarity at the terminals. The technique produced a faint click.
After cycling the polarity several times, the motor began to rotate and soon spun freely, confirming the problem was internal motor contamination rather than an electrical fault. To verify operation, we connected a rubber hose to the pump outlet and immersed the pickup in a bucket of water. A steady stream of pressurized fluid exited the hose, confirming the motor was fully functional.


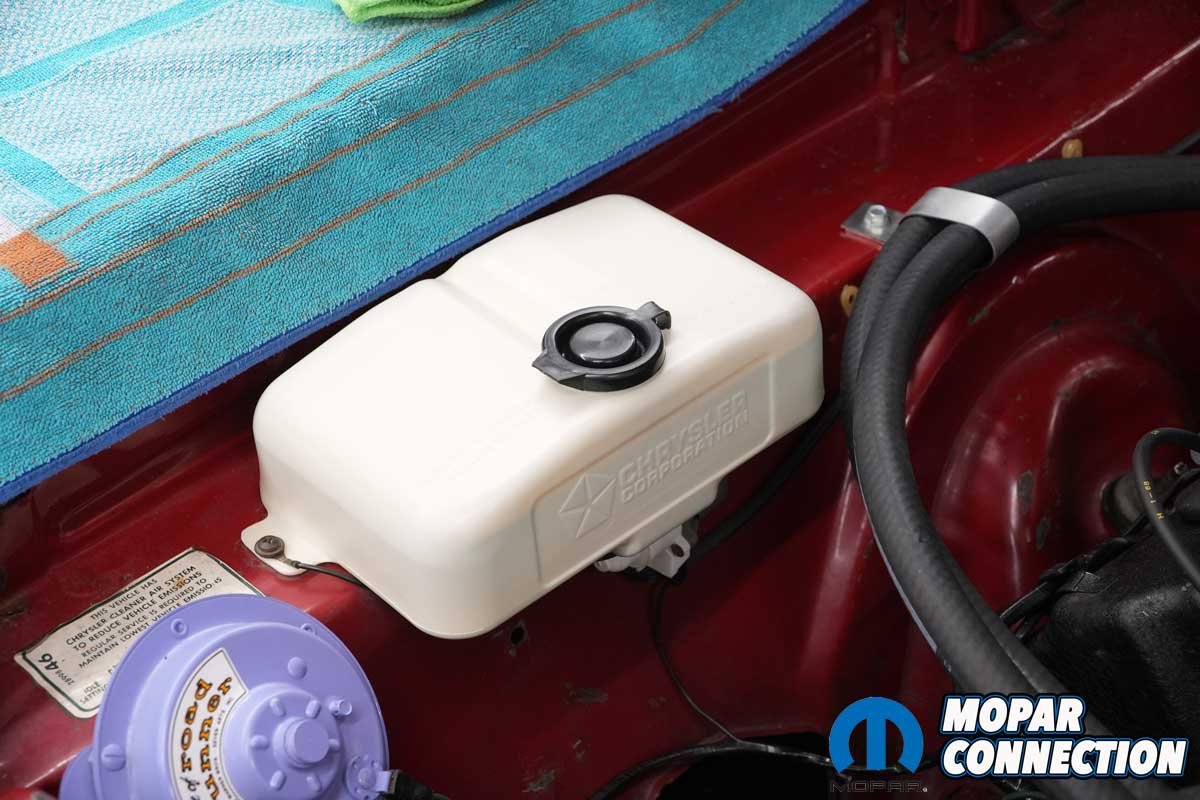
Above Left: The original pump was inoperative. However, after applying voltage and ground to the motor and changing the polarity, the motor broke free. We cleaned the motor and reused it. Above Center: After installing the motor in the new reservoir, we affixed the ground wire to the reservoir in the exact location as the original. Above Right: We reinstalled the power supply, rubber hose, and both screws. The new reservoir looked great.
Satisfied with the results, we thoroughly cleaned the motor and filter. We pushed the pump through the new gasket (pre-installed) opening in the new Classic Industries reservoir (jug and cap – Part No. MB2289). The filter was threaded through the reservoir opening to secure the pump. The ground wire was pressed into one of the two reservoir mounting points to ensure proper grounding.
Final installation was equally straightforward. We secured the reservoir using the two original mounting screws, reattached the electrical connector and fluid hose, and tested the system. Depressing the washer button produced a small amount of fluid at the nozzles. After scrubbing the nozzles and altering their spray pattern, the washer system operated as intended, completing the task.


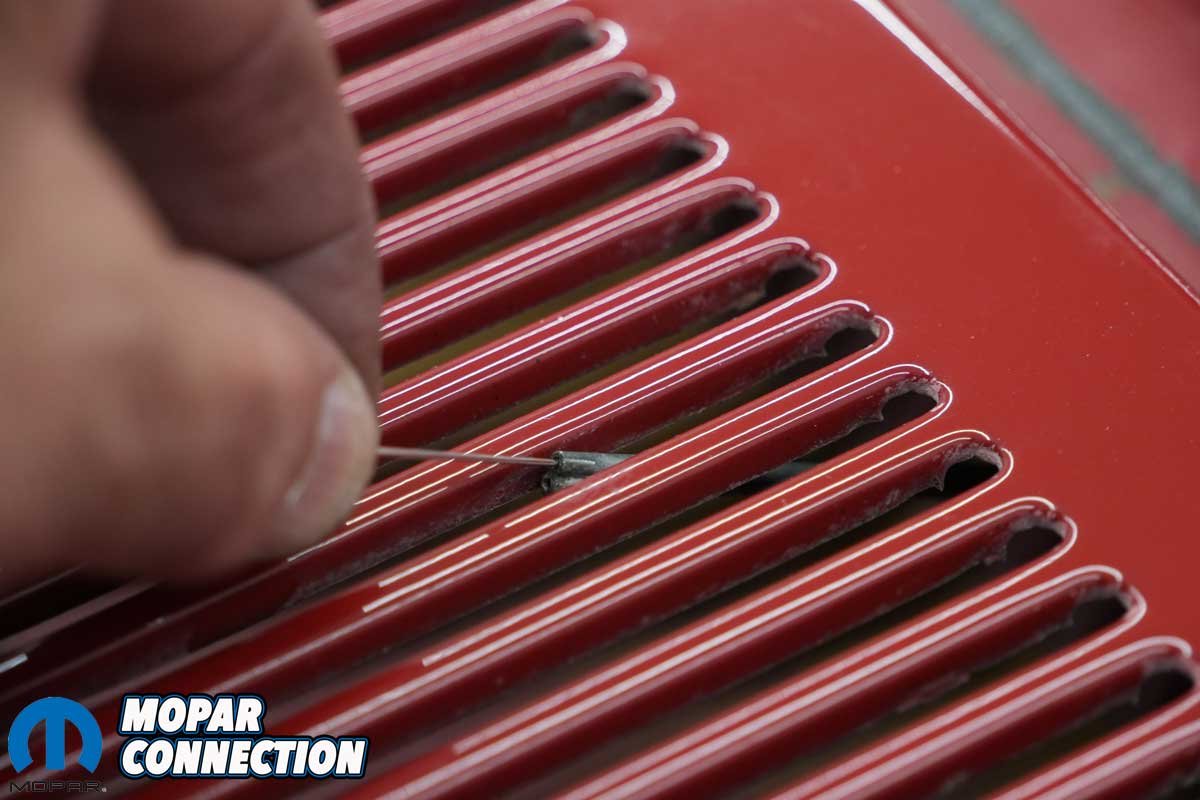
Above Left: The original rubber hoses, plastic diverter, and the squirters were reused. Above Center: The nozzles were blocked, so after working a T-pin into each discharge nozzle hole (two per squirter) on both squirters. Above Right: After extensive cleaning of the nozzles, we adjusted the fluid streams onto the windshield.
Voltage Regulator
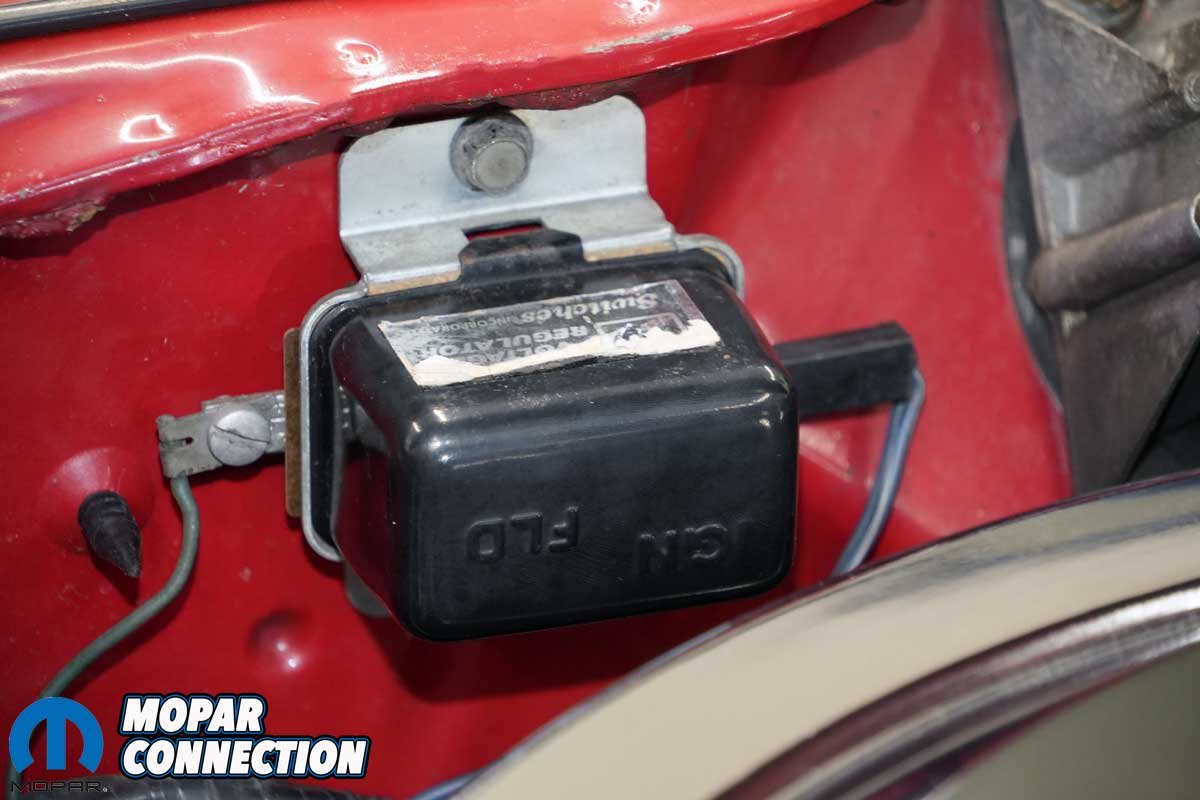
The voltage regulator on Project Rara Hemious Birdicus was fully operational, but it lacked the correct appearance and date coding for our restoration objectives. What we needed was a regulator with a black case and red lettering, carrying the proper factory part number 2098300 and a build date consistent with a June 1968 assembly.

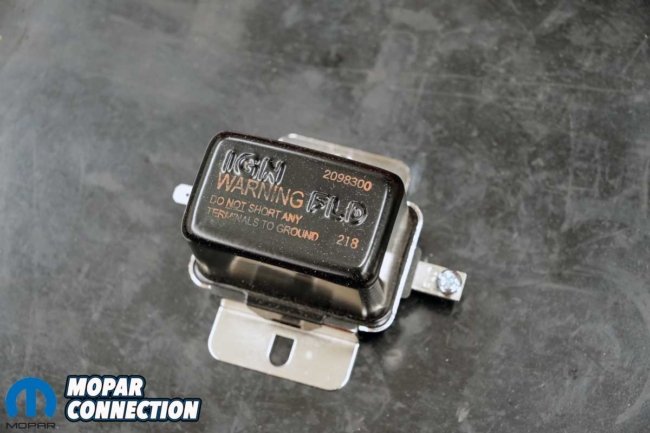
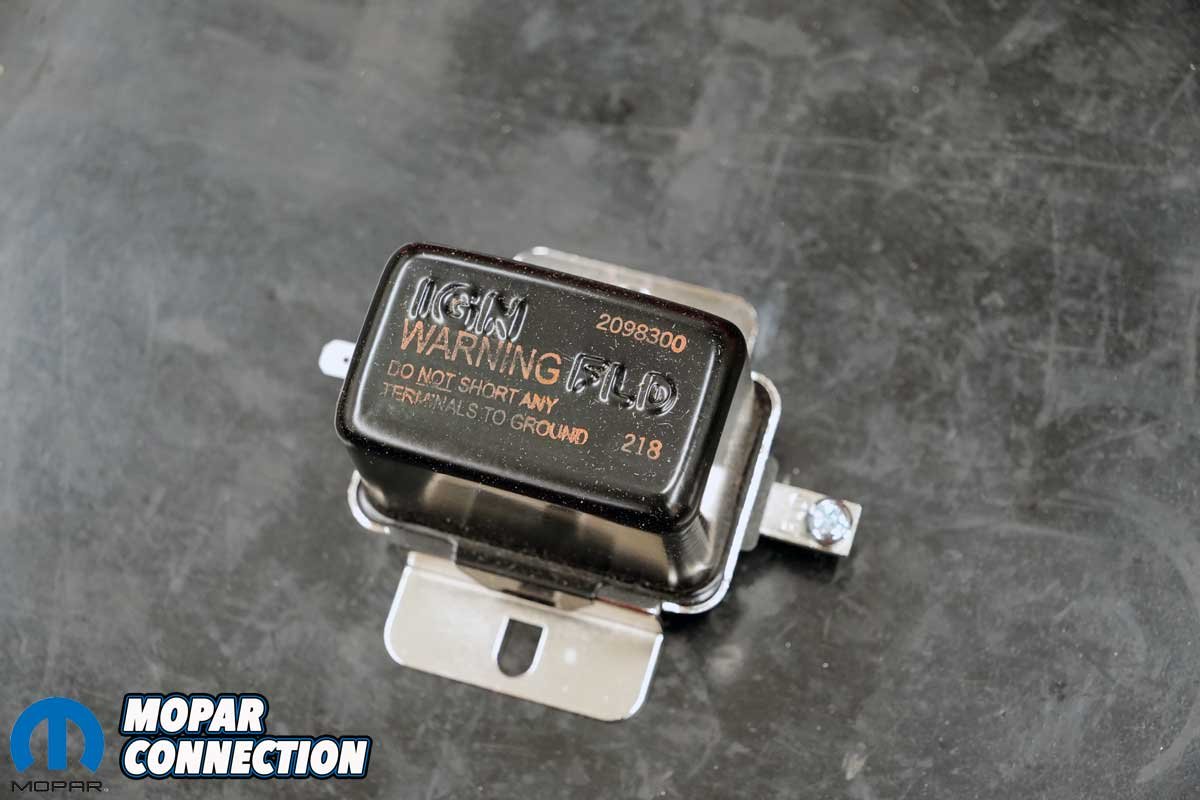
Above Left: The voltage regulator on the Road Runner was functioning to factory specs, but it did not have the original appearance. Above Right: We picked up a voltage regulator from YearOne that had the correct part number and date code, the 21st week of 1968 (218).
We contacted YearOne to source a date-coded regulator fitting our specifications (Part No. VR218). While the regulator features contemporary solid-state internals rather than a traditional point-style design, it maintains the factory appearance. An added benefit is that no adjustment is required to maintain proper charging voltage, which should remain within the target range of 13.5 to 15 volts.
Installation took only a minute. We disconnected the two wires attached to the original regulator and removed the two retaining fasteners. Installation of the replacement unit was simply the reverse of removal.

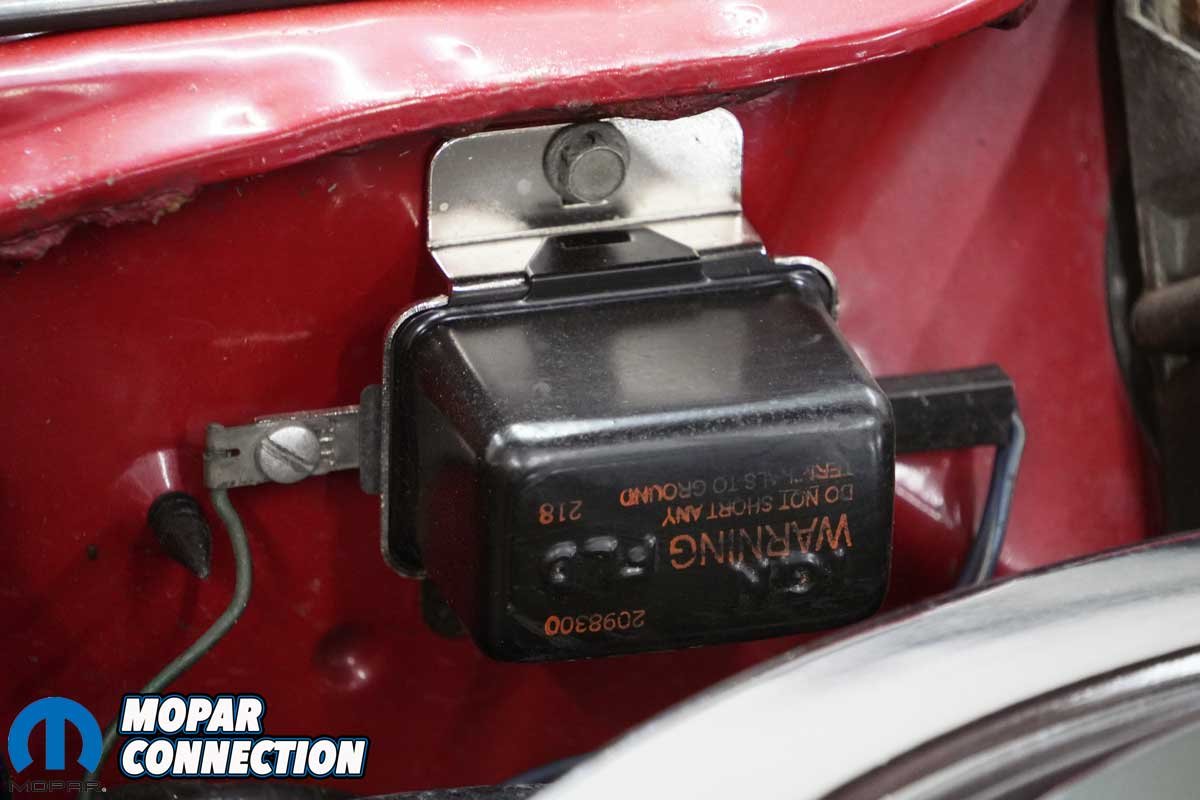
Above: The YearOne voltage regulator is an electronic unit rather than an original point style design. The charging voltage always remained around 14.5 volts with the engine running.
Once installed, we verified system operation with a voltmeter. With the engine running, the alternator output was regulated to roughly 14.5 volts, right where it should be. The regulator has operated flawlessly since installation, providing both period-correct appearance and modern electrical dependability.
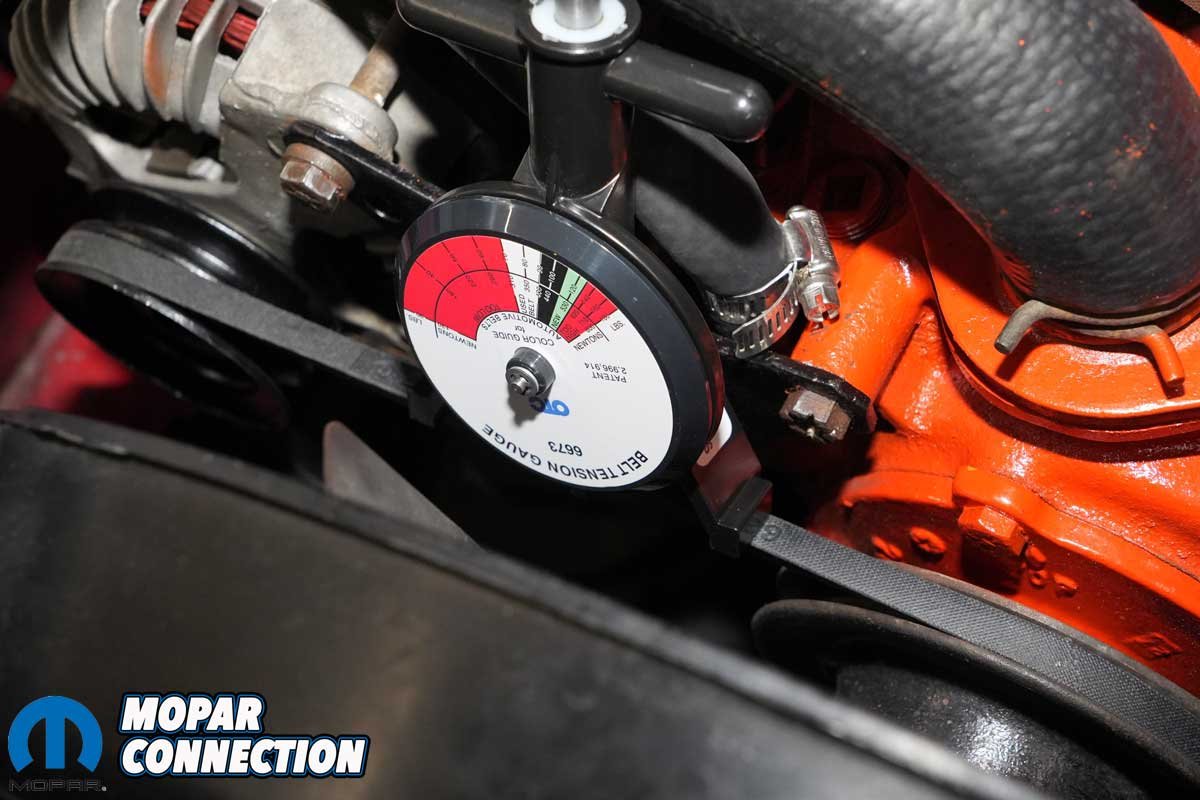
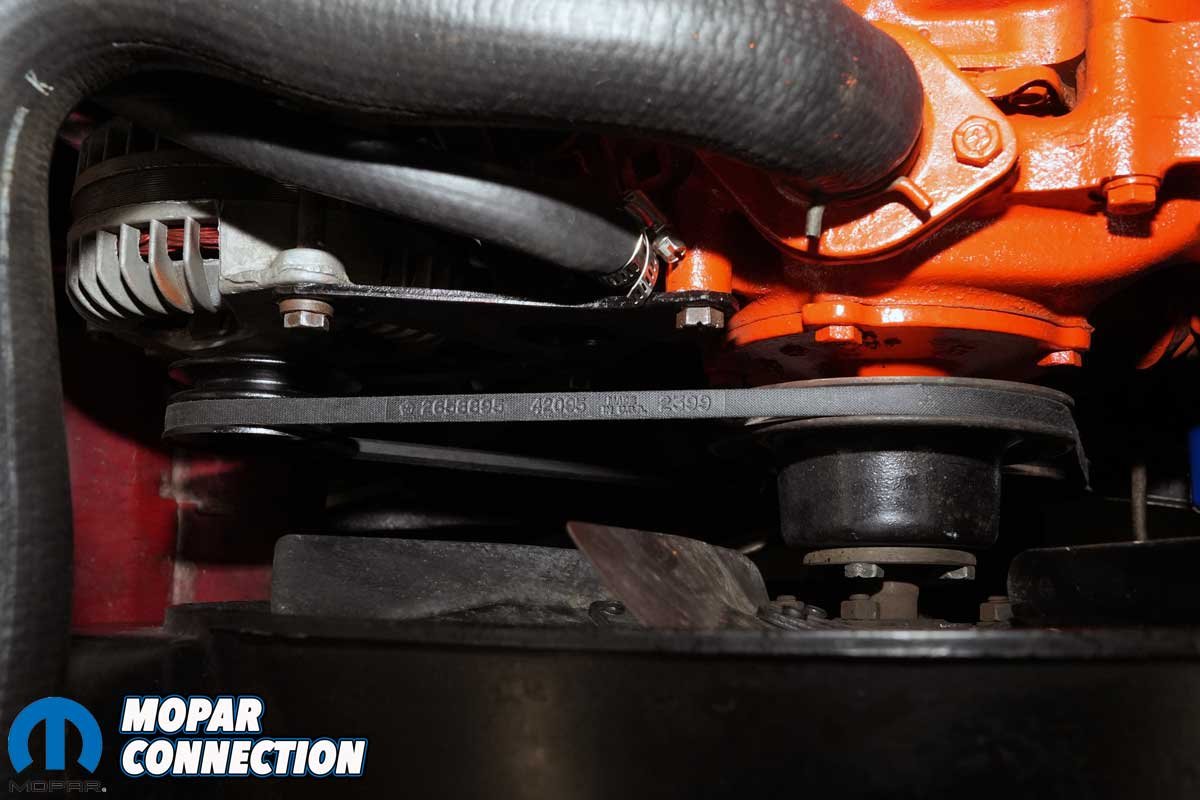
Alternator Spacers and Belt
The alternator belt on our Road Runner was excessively worn, so we prioritized replacing it. Ideally, we wanted a belt carrying the correct date-appropriate part number, 2658895. After some online searching, we located the proper belt through Herb’s Parts, which offers several internal listings for this application.


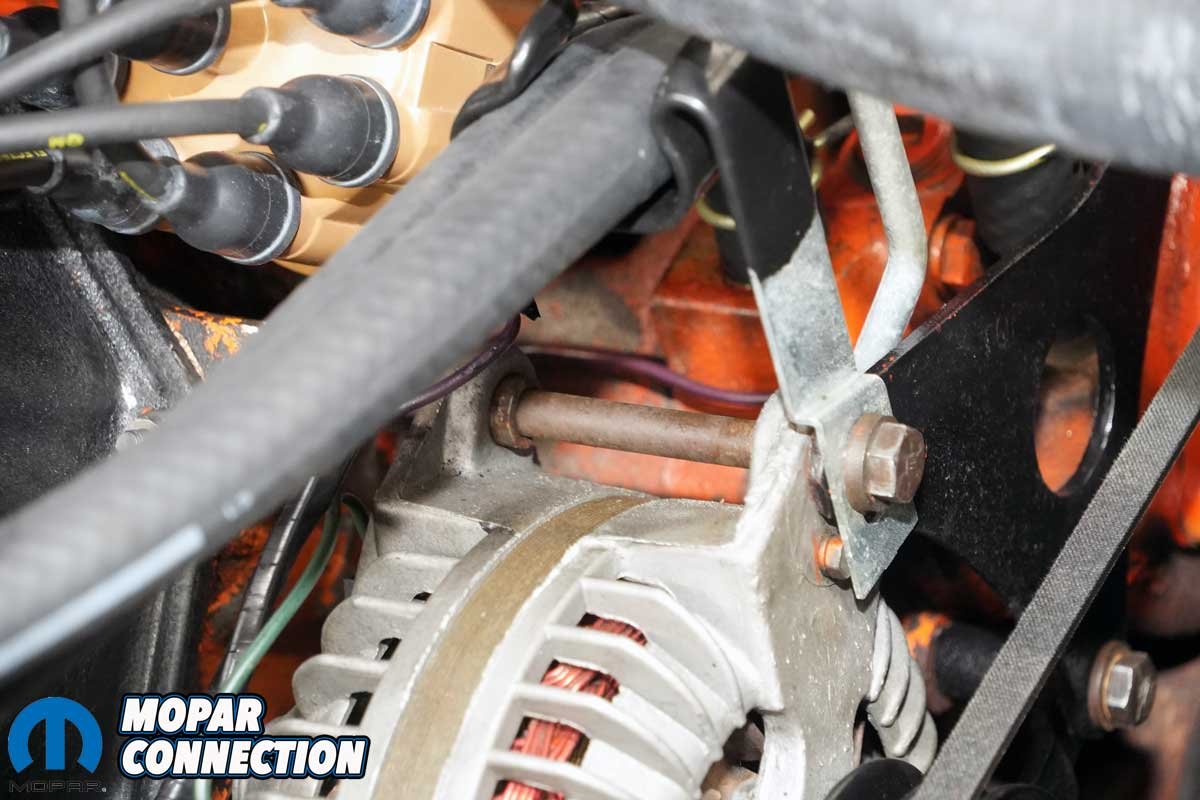
Above Left: The alternator was missing one of its spacers. Over-tightening the mounting bolt could have damaged the original, correct part-number alternator. Above Right: We picked up a 1964-71 426 spacer kit from Mega Parts. We only used the longest of the three spacers, along with the original spacer still on the alternator bolt.
While loosening the alternator mounting bolts, we discovered that the proper spacers were missing from the alternator bracket. To address this, we contacted Mega Parts and ordered a spacer kit (Part No. MP-ABSK987H). The spacer required for our installation fit between the two alternator mounting ears. Once installed, the alternator housing was supported precisely, eliminating the risk of cracking or breakage during belt adjustment.

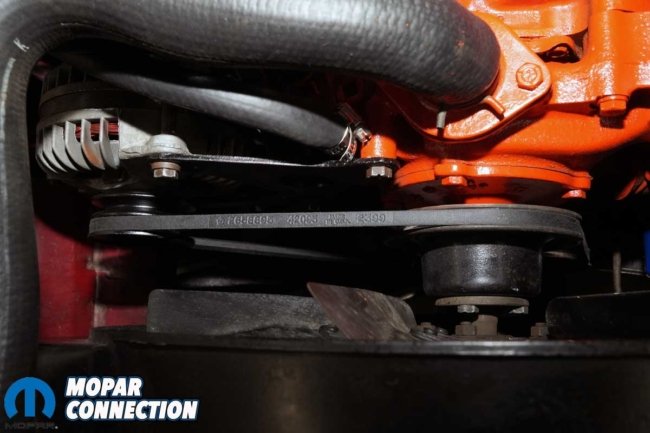
Above Left: We found the correct part number alternator belt from Herb’s Parts. We tensioned it with a belt tension gauge. Above Right: The belt was routed from the crankshaft pulley to the water pump pulley and to the outer groove of the alternator pulley.
The new alternator belt was installed and routed over the outer groove of the alternator pulley, which is the proper configuration. After routing the belt around all three pulleys, we used a belt tension gauge to set suitable tension before tightening the alternator mounting bolts.
With the belt tensioned and secured, we started the engine to verify proper operation. The belt tracked correctly and showed no signs of slipping, assuring the installation was successful.
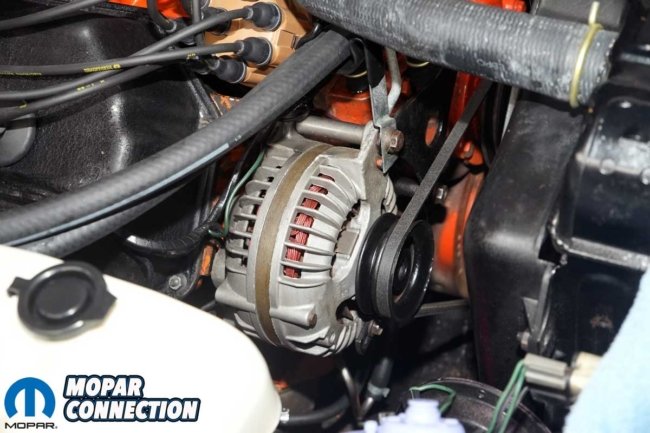
Above: The alternator spacers located the belt in its proper location; the belt rode smoothly in the alternator pulley.
Door Seals
The driver’s side quarter window seal and its retaining screws were missing entirely. We located a pair of NOS B-Body quarter window seals for the Road Runner (OEM Part Nos. 2848464 and 2848465). The driver’s side seal was installed using four leftover NOS screws from a previous project, restoring both proper fit and factory-correct appearance.

Above Left: The Road Runner was missing the driver’s side quarter window seal. Above Right: We found a correct NOS seal and installed it with leftover NOS screws.
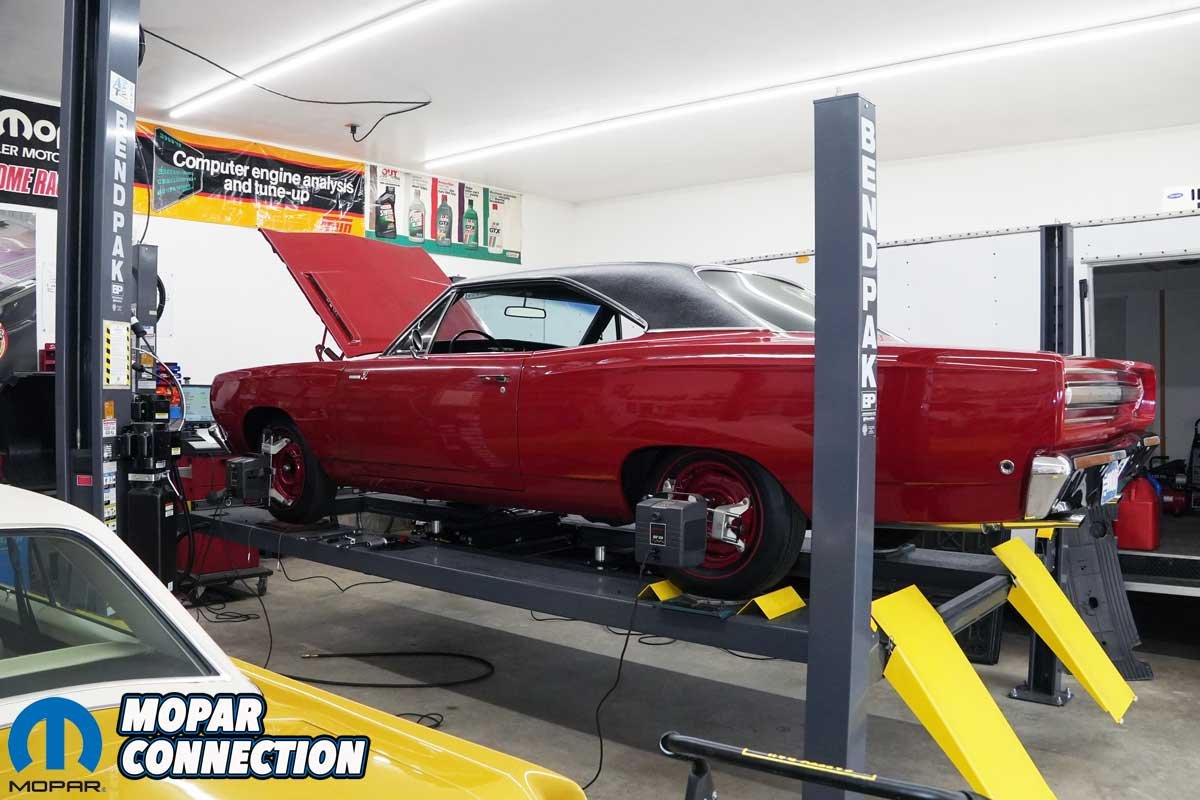
Alignment
The Road Runner’s alignment was in poor condition. The steering wheel was off-center, the car pulled to the left, and we wanted to ensure the new Coker tires would not experience abnormal wear. Correcting the alignment required the adjustment of both pairs of upper control arm eccentrics, one pair per upper control arm.


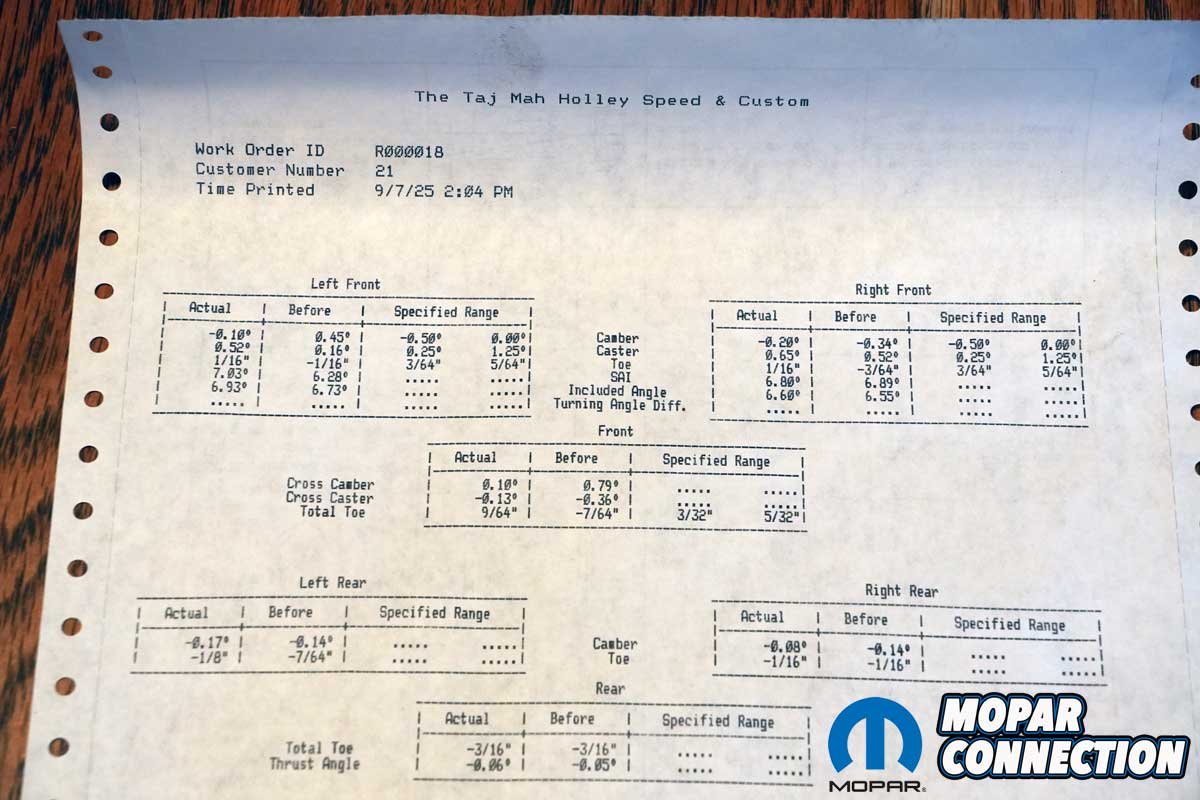
Above: We aligned the Road Runner with our Hunter P411 aligner. The front wheels were on turntables, and the rear slip plates under the rear tires. Although we had the factory specs from the Hunter machine, we adjusted the angles to our own specs to take advantage of the bias-ply appearing radial tires.
Working within the factory’s limited adjustment range, we set the caster to the maximum positive angle achievable while maintaining slightly negative camber. The front toe was then adjusted to a slight toe-in to promote straight-line stability. The non-adjustable solid rear axle exhibited a minor thrust angle, which was inconsequential and unlikely to affect overall alignment performance.
Once back on the road, the Road Runner tracked straight and true. Steering effort was light, the wheel returned to center after turns, and the car stopped cleanly without pulling or drifting in either direction, confirming the alignment corrections were successful.

Above: Although we are limited in our camber and caster adjustments due to the factory upper control arm eccentrics, we were able to achieve slight negative camber and more than 1/2-degree caster. The negative camber will promote excellent performance and tire wear, and the positive caster will provide directional stability and steering wheel returnability. The toe was set to a toe-in condition. There was nothing we could do with the rear angles because of the solid rear axle.
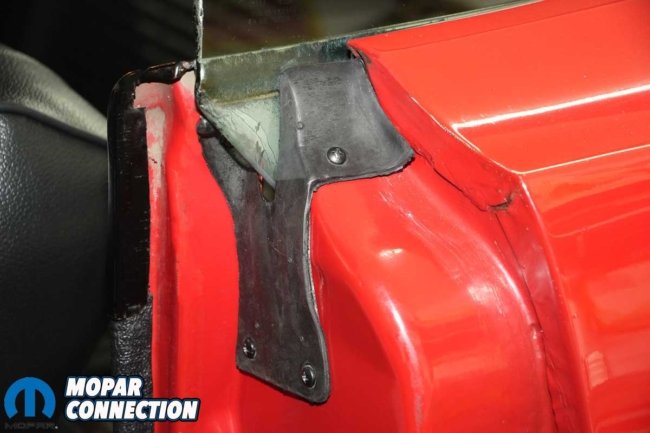
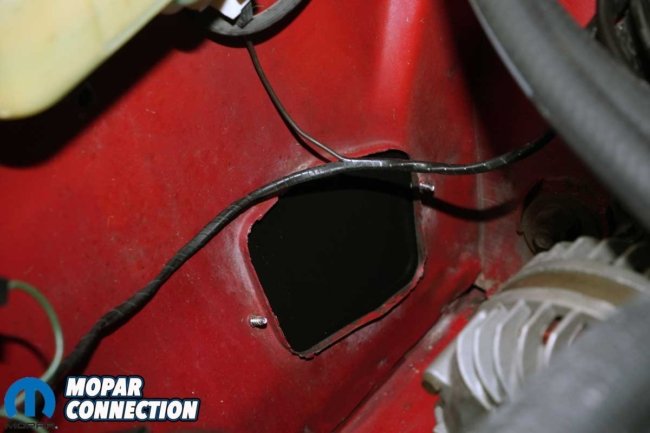
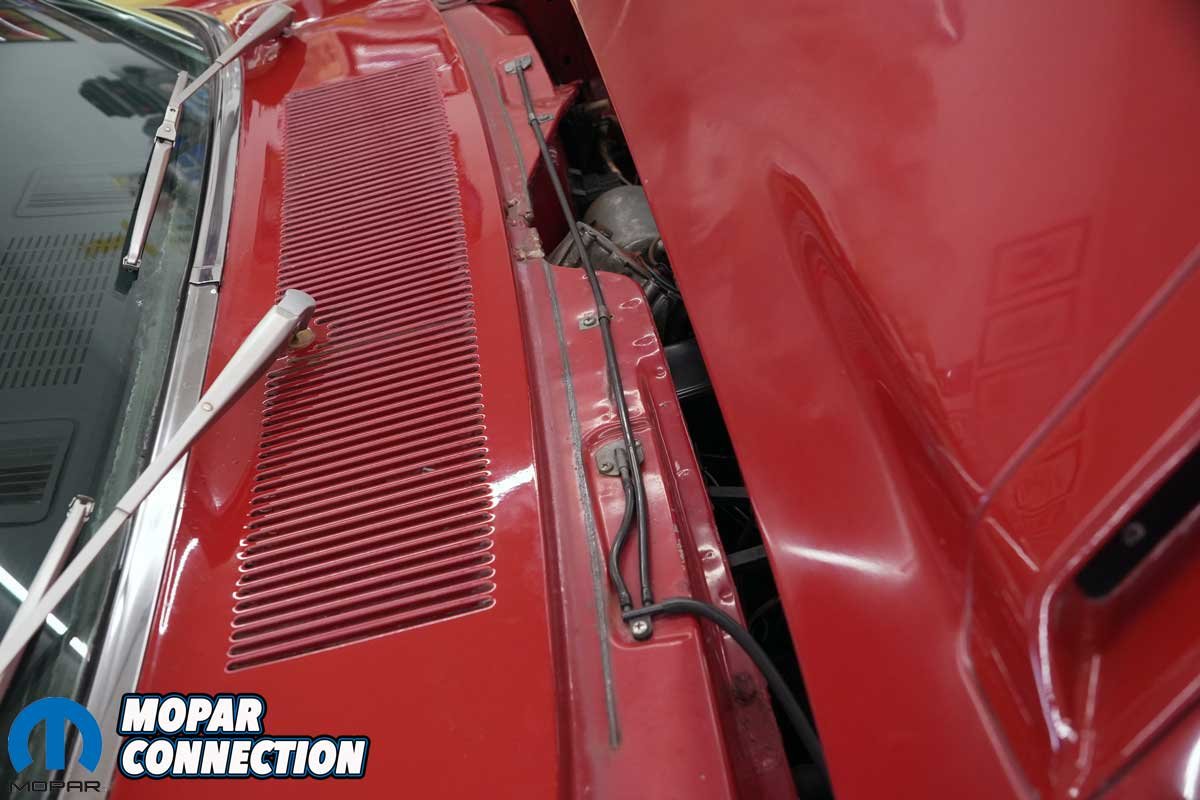
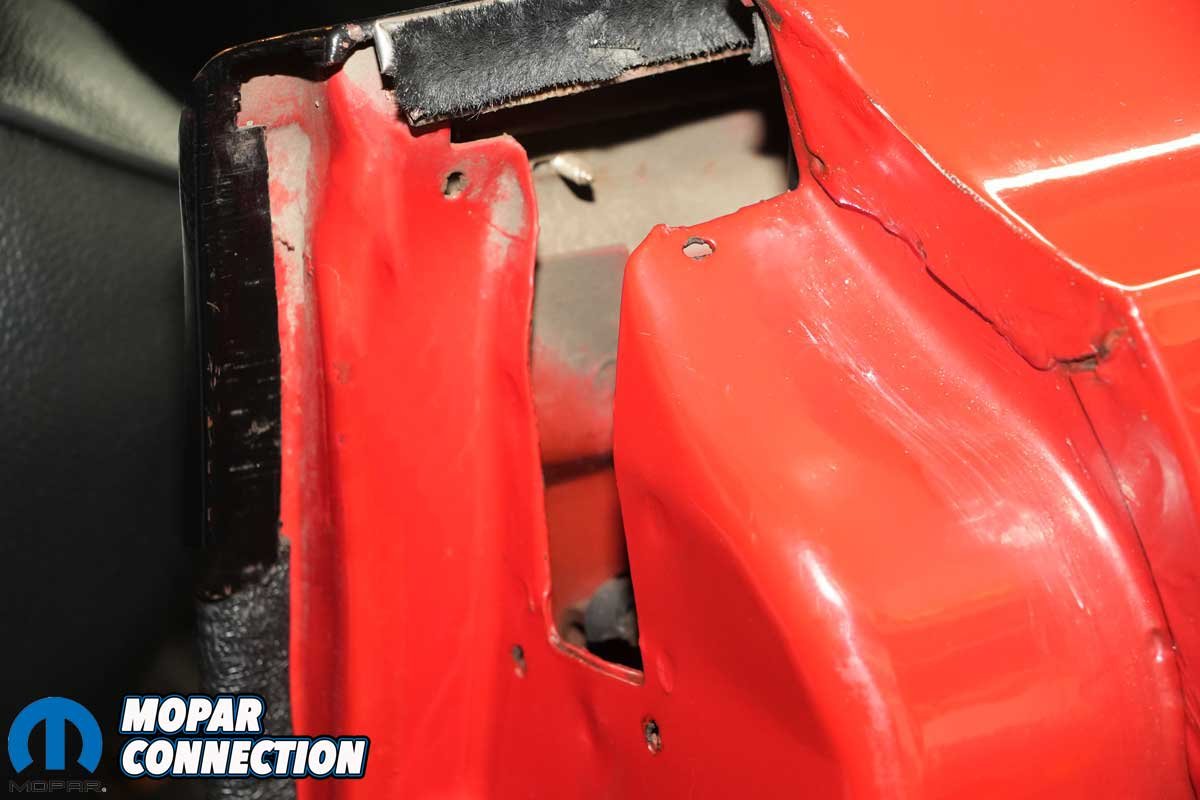
Apron Covers
Lastly, after completing the alignment, we installed a pair of lower apron covers from AMD (Part No. 255-1466-PK) to replace the missing factory pieces. The access openings in the inner aprons had allowed us to make the necessary alignment adjustments at the upper control arm eccentrics. Once all alignment settings were finalized and the fasteners retightened, the new covers were installed using two fasteners per side.
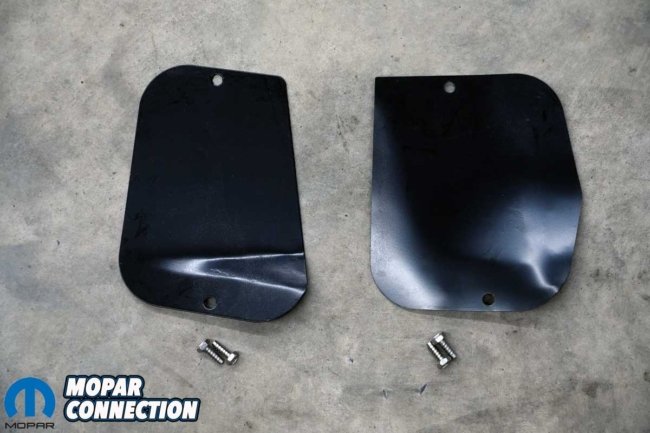
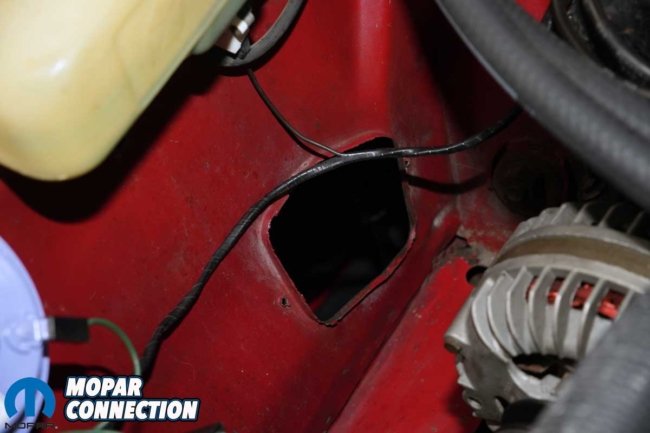
Above Left: The Road Runner was missing both lower apron covers. We found a pair from AMD, which came with the correct mounting screws. Above Right: Both aprons have openings (passenger side shown), so the upper control arm eccentrics can be accessed to make alignment adjustments. At some point, ours were never reinstalled.
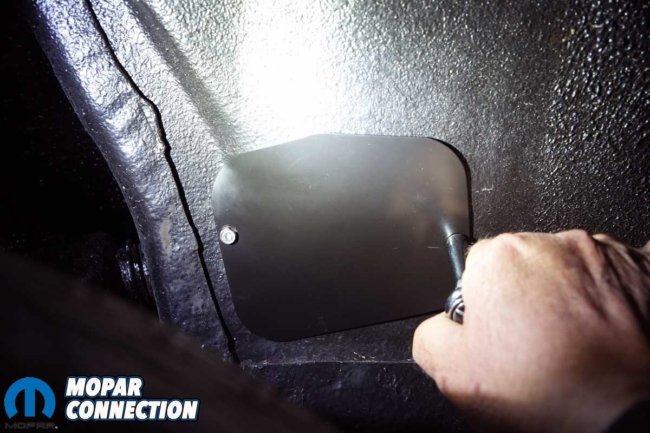
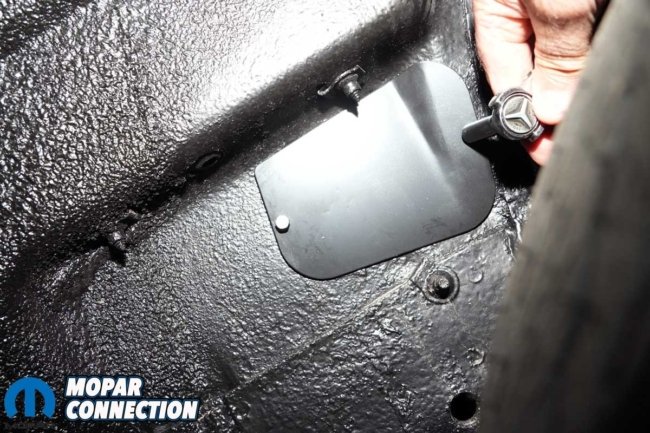
Above Left: We snugged both bolts. The cover does nothing more than keep excessive debris from entering the engine bay. Above Right: The cover’s screws extend into the engine bay, just like they did when the Road Runner left Lynch Road in 1968.
The covers are stamped sheet-metal panels, punched and contoured to follow the factory lines of the inner aprons. With only negligible hand manipulation, each panel fit snugly against the apron, restoring both proper function and original appearance.
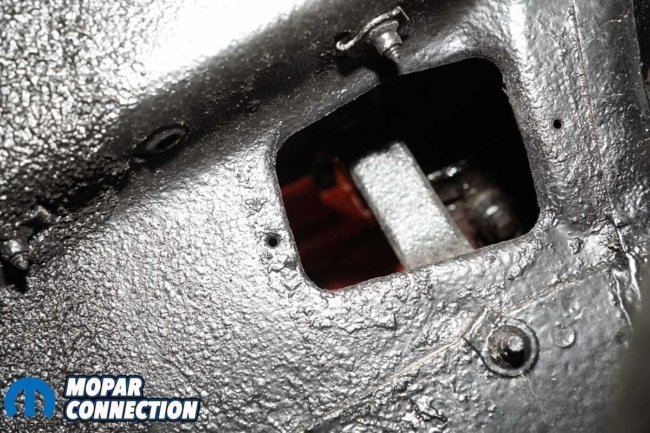
Above Left: The opening on the driver’s side exposed the battery tray brace. Above Right: The cover had the proper contours to fit the lower apron.
Conclusion
Individually, none of these components would stop the Road Runner from moving under its own power. Collectively, however, they define the difference between a car that merely runs and one that operates, looks, and feels the way it did when it left the assembly line.
Above: The Hemi Road Runner had been ignored for several years, but with the help of several aftermarket resellers, it has begun to take on the appearance of its heyday.
From electrical reliability and proper belt geometry to sealing, alignment, and overlooked factory details, these minor updates quietly elevate the entire driving experience. As Project Rara Hemious Birdicus continues to evolve, it is these finishing touches that bring the car closer to its original intent while ensuring it remains reliable and enjoyable on today’s roads.


