


A Chrysler 727 Torqueflite transmission is robust but requires an adequately adjusted kickdown system to operate correctly. Muscle car era Mopars had a series of steel linkage rods attached from the carburetor to the transmission kickdown lever. The linkages worked great on stock engine components. Still, in situations like our 1973 Charger with a tunnel ram-equipped small block, the upper linkage no longer suitably connects to the carburetor.
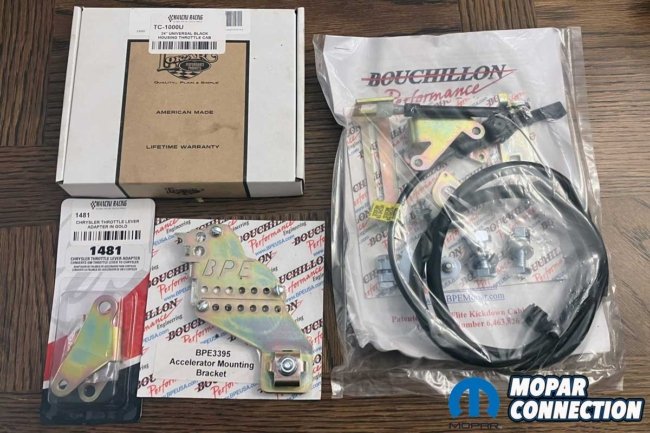
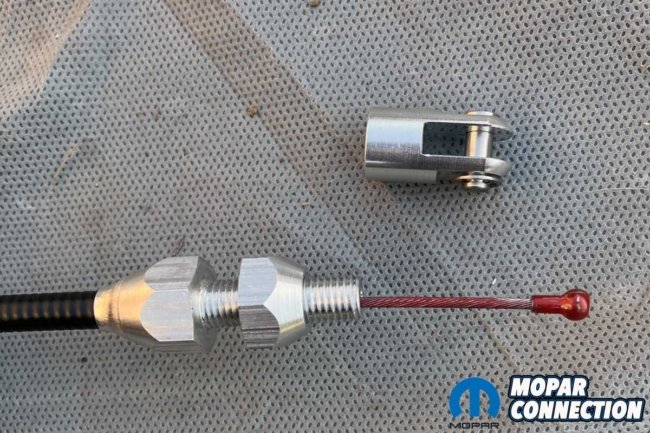
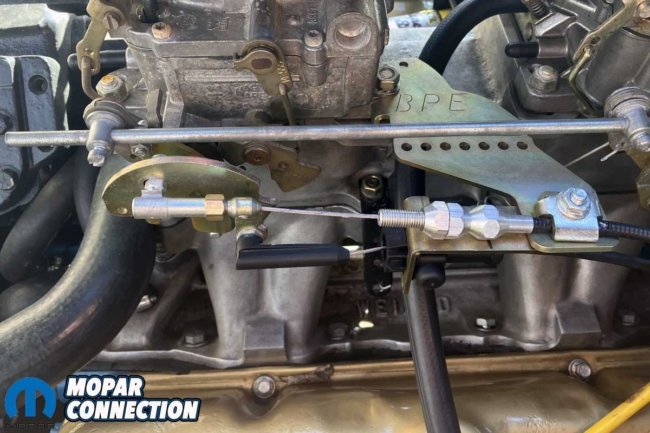
Above: Due to the tunnel ram added to our small block in our ’73 Charger, we needed to pick up a kickdown cable kit, a throttle cable, and several brackets to reestablish the proper kickdown operation of the Torqueflite transmission. Mancini Racing had everything we needed to complete the upgrade.
We picked up a Mancini Racing Kickdown Cable Kit to rectify the concern. The cable kit will satisfactorily unite any carburetor or throttle body to the transmission throttle lever, which will help maintain the proper throttle valve (TV) pressure. Adequate TV pressure permits correct shifting points and provides clutch and band friction material longevity.
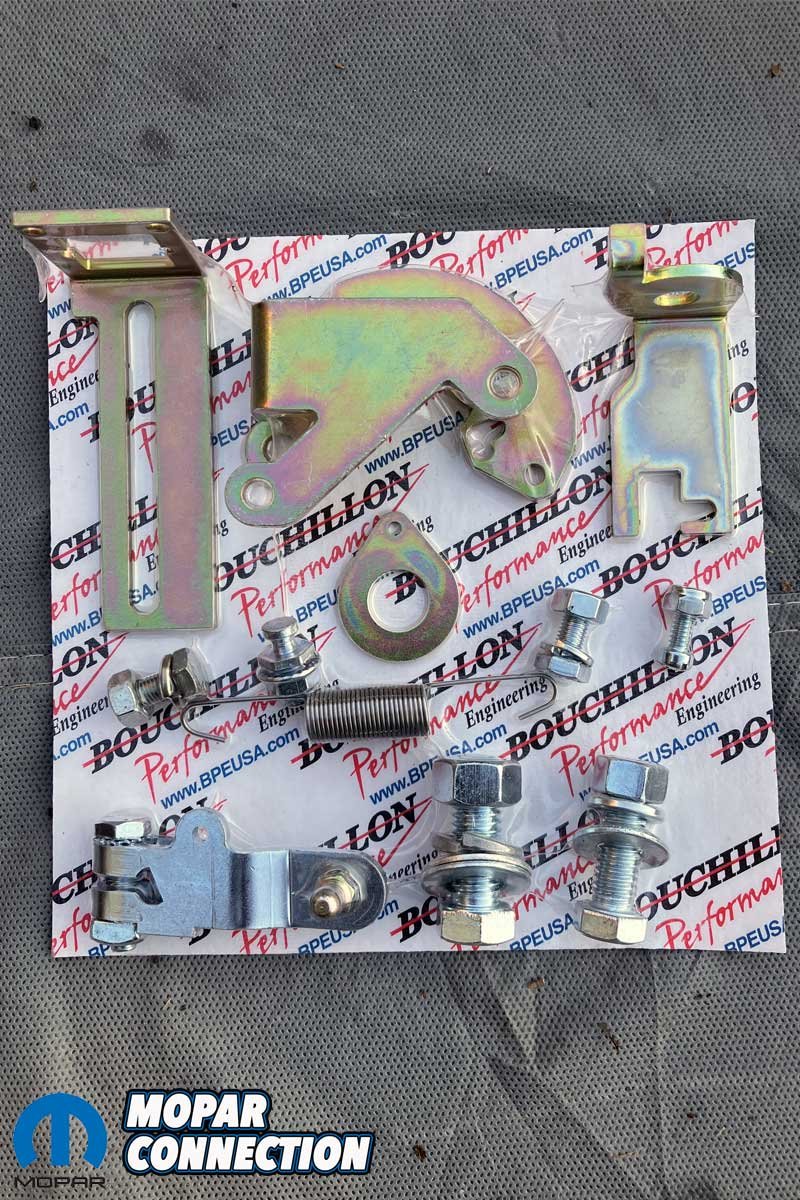
Above: The kickdown kit has plenty of levers, brackets, and installation hardware. A detailed instruction guide made the installation less complicated.
The kickdown cable kit operates with most Torqueflites. Along with the cable, the kit includes all the necessary hardware to attach and adjust the cable system to each transmission. A few additional components must be selected with some applications, such as our 1973 Charger. To use the kickdown cable, we had to pick up an Accelerator Cable Mounting Bracket and an Edelbrock Throttle Lever Adapter.
To install the kickdown cable, we mounted the Edelbrock Throttle Lever Adapter to the front Edelbrock carburetor. The bracket is unnecessary if the engine was equipped with a Holley-style carburetor. Next, we fitted the kickdown cable bracket to the carburetor base plate.

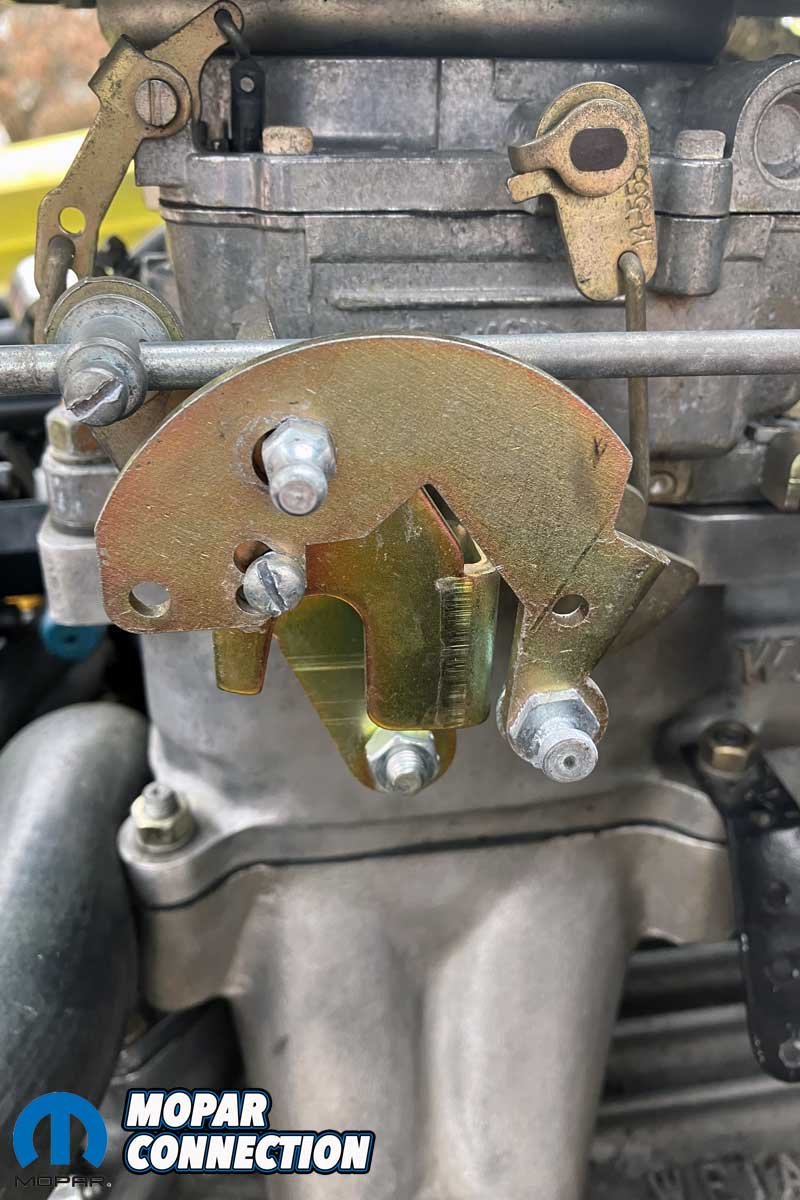
Above Left: Because the small block has Edelbrock carburetors, we needed to add an Edelbrock Throttle Lever Adapter, which we sourced from Mancini Racing. Above Right: After an initial minor interference concern, we trimmed the throttle stud to gain clearance for the kickdown lever arm.
Because we had Edelbrock carburetors, we needed to modify the bracket. Again, if Holley carburetors were used, the step could be omitted as the bracket attaches directly to the carburetor. In either case, the kickdown stud mounts in the bottom hole of the bracket, and the accelerator pedal stud mounts to the top.
Once the throttle lever adapter was mounted, we focused on installing the Accelerator Cable Mounting Bracket. The carburetor stud was too tall, which resulted in interference when the throttle blades opened. To fix the problem, we trimmed the carburetor stud. Once the stud was shortened, the bracket slid onto the carburetor stud, which we firmly secured.
Above: The accelerator cable mounting bracket fits neatly on the front Edelbrock carburetor’s baseplate mount. The bracket has an adjustable bracket to fine-tune the kickdown cable to achieve the optimum shift points.
With the bracket installed, we moved our attention to the transmission end of the kickdown cable. Following the detailed instructions, we mounted the new kickdown bracket and stud to the throttle valve lever. Next came the rear bracket for the kickdown cable and the front tab for the return spring. Once all the new tabs and brackets were installed, the kickdown cable slid into place.
Above: To fit the accelerator cable to the Charger’s gas pedal, we had to remove the cable end. With the cable end removed, the cable conforms appropriately to the notch of the pedal lever.
Upon completion of the installation on the car’s underside, we ran the cable along the top of the transmission, resting it on the engine. Next, we installed the new 24-inch Lokar Throttle Cable from Mancini Racing. After unscrewing the retaining nuts on the pedal side of the throttle cable, we discarded the end of the cable. We removed the old throttle cable and slipped the new cable through the firewall at the factory location. We secured the cable with the supplied nuts, a large washer, and a homemade rubber gasket.
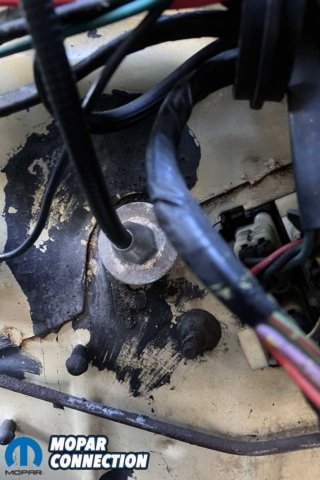
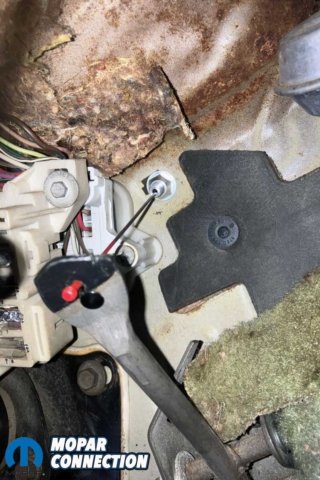

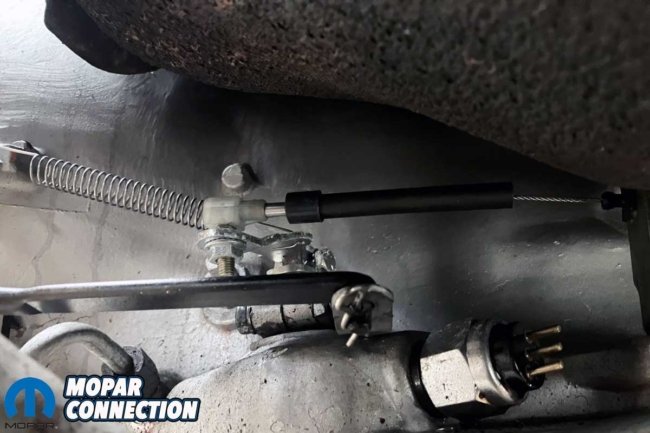
Above Left: The throttle cable was run through the factory hole in the firewall. A large washer provided a flat surface for the cable adjuster nut. Above Center: The cable end slipped into the gas pedal. Again, a large washer was placed against the firewall to allow us a flat surface against which we could tighten the cable properly. Above Right: A bracket was installed on the Torqueflite to facilitate the installation of the kickdown cable.
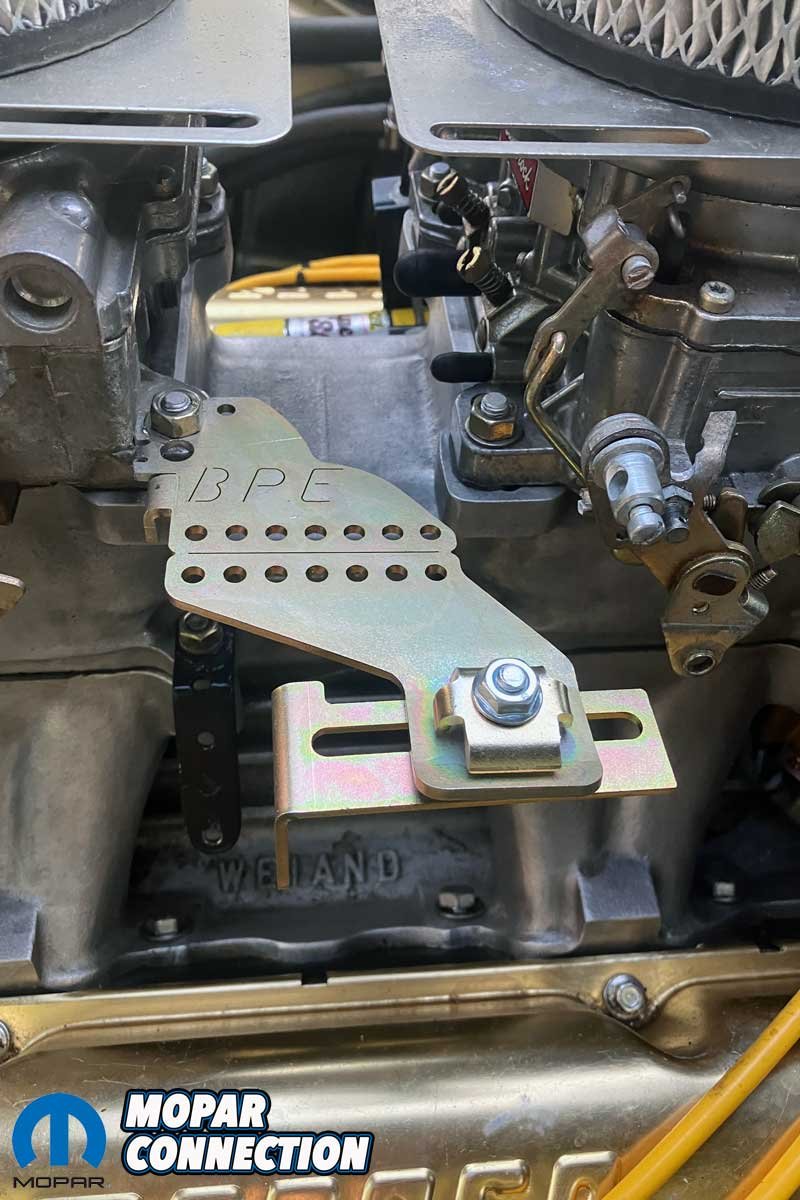
At this point in the installation, the only thing left was fitting the throttle and kickdown cables to the carburetor bracket. We mounted the Mancini Racing kickdown cable to the bottom of the bracket and adjusted the slider to optimal spacing. We followed by sliding the throttle cable into the top side of the bracket. Luckily, in our case, the throttle cable was a perfect length and did not require trimming.
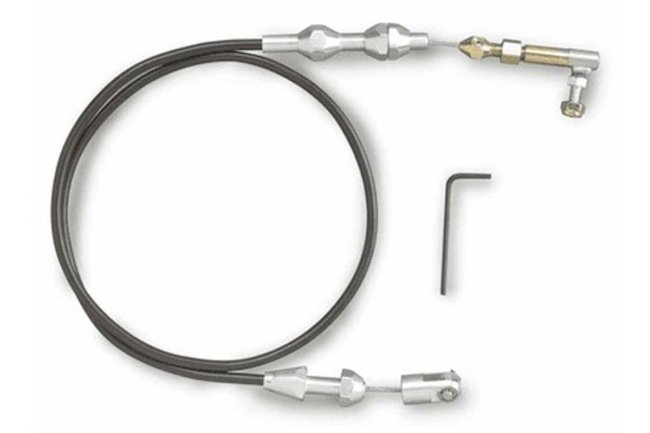
Above: The kickdown kit required a kickdown lever, return spring, and cable. Everything fit perfectly; installing the components was difficult due to the tight working area.
To set both our throttle and kickdown cables, we ensured that our carburetor linkage ratio (1:1) was correct. With both cables disconnected, the engine idled at 950 rpm. We shut off the engine and installed the cables to the carburetor adapter. After connecting the cables, they operated flawlessly.
Before the cable installation, the transmission would shift at 4000 rpm regardless of the vehicle speed. After fitting the cables, the transmission shifts at 4000 rpm during everyday driving, but when more spirited driving is demanded, the Torqueflite shifts at 6800 rpm. Also, the transmission temperature dropped from around 210°F before the upgrade to 180°F after the kickdown cable installation.
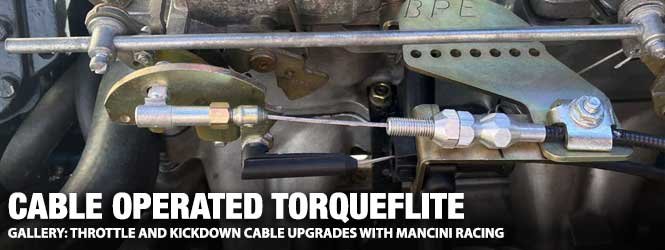
Above: We connected the throttle cable (top) and kickdown cable (bottom) to the kickdown bracket without interference. The accelerator cable bracket allowed for adjustment of the accelerator and kickdown cables. Once correctly adjusted, the Torqueflite shifted at a high rpm in our application, but lower rpm shift points can be dialed in as needed.
While 6800 rpm may be well beyond the realm of a street-driven vehicle, the addition of the kickdown cable allows the optimum adjustment to fine-tune the shift points for any Torqueflite. For more information about the Kickdown Cable Kit, the Accelerator Cable Mounting Bracket, the Edelbrock Throttle Lever Adapter, and the Lokar Throttle Cable, get in touch with Mancini Racing.


