


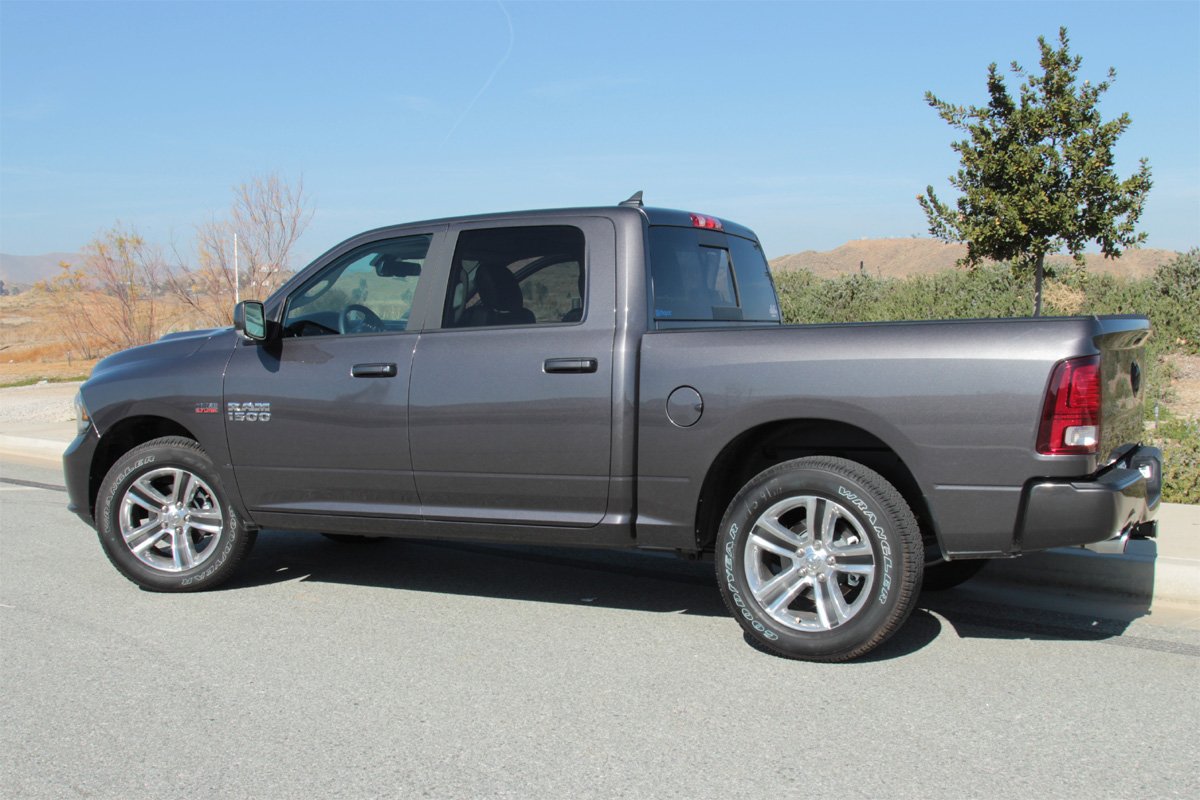
Having experienced what a good set of performance sway bars can do for a classic Mopar with regards to handling, it was blatantly obvious that our 2017 Ram 1500 Sport was lacking in that same arena. While the ride of the truck was nothing like any truck from the classic car era, it was very much like a truck when it came to dips, drain channels, and uneven terrain. There were times when the truck would bounce back and forth entering a parking lot at an angle – or just about any change in the road surface – and it’s enough to displace liquid from a cup in one of the oh-so-many cup holders in the Ram.
Because the truck is the Sport model, it does have a sizeable sway bar up front, and a rear bar as well. But body roll was enough to keep the cornering speeds closer to what the yellow sign suggests, which is not how most of us gearheads like to roll. We knew that there was room for improvement, and the first place we considered was a call to the team at Hellwig Products. Along with the thousands of applications on its website, the RAM 1500 was listed for front and rear bars – it was a good sign.
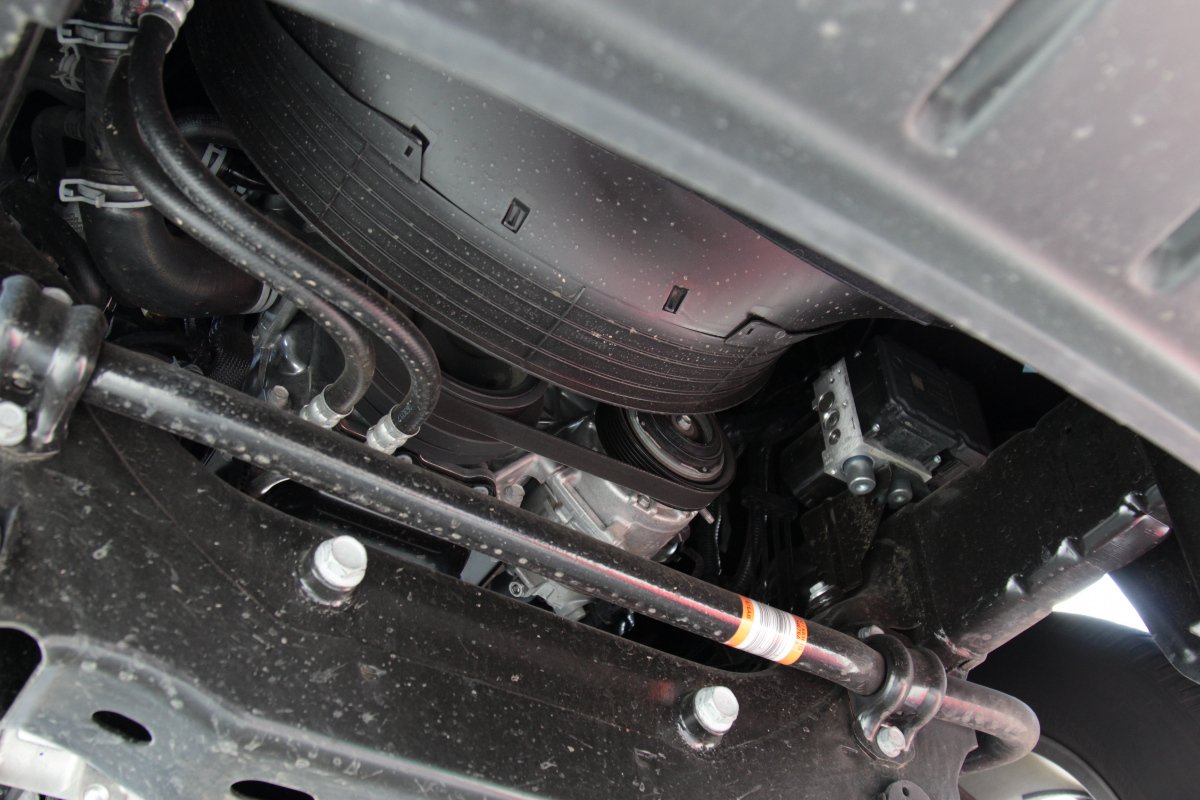
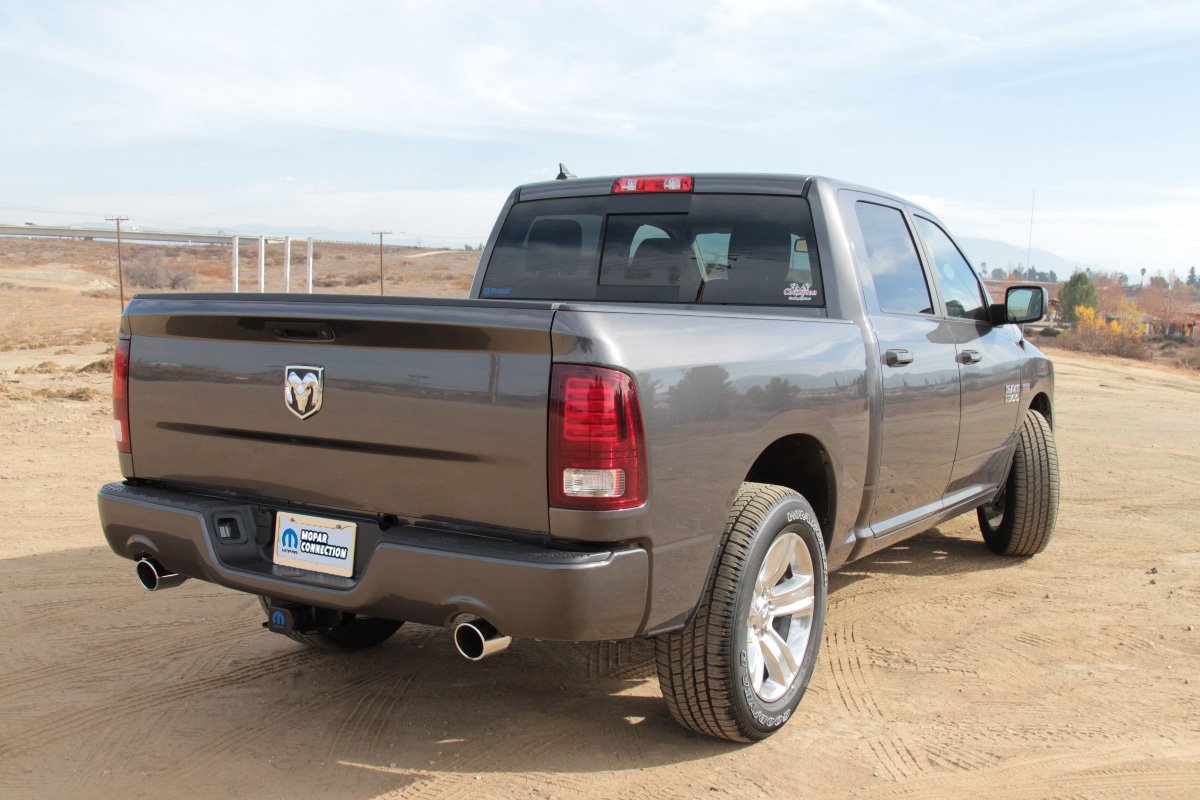 Above: The Ram 1500 Sport is a great all around truck, but the OE sway bars don’t eliminate body roll like you would expect them to.
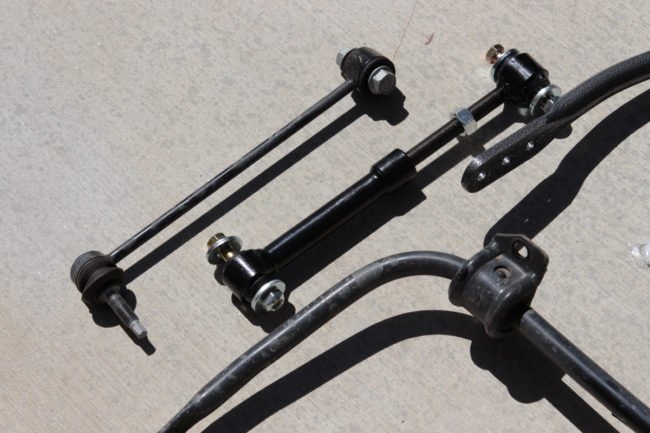
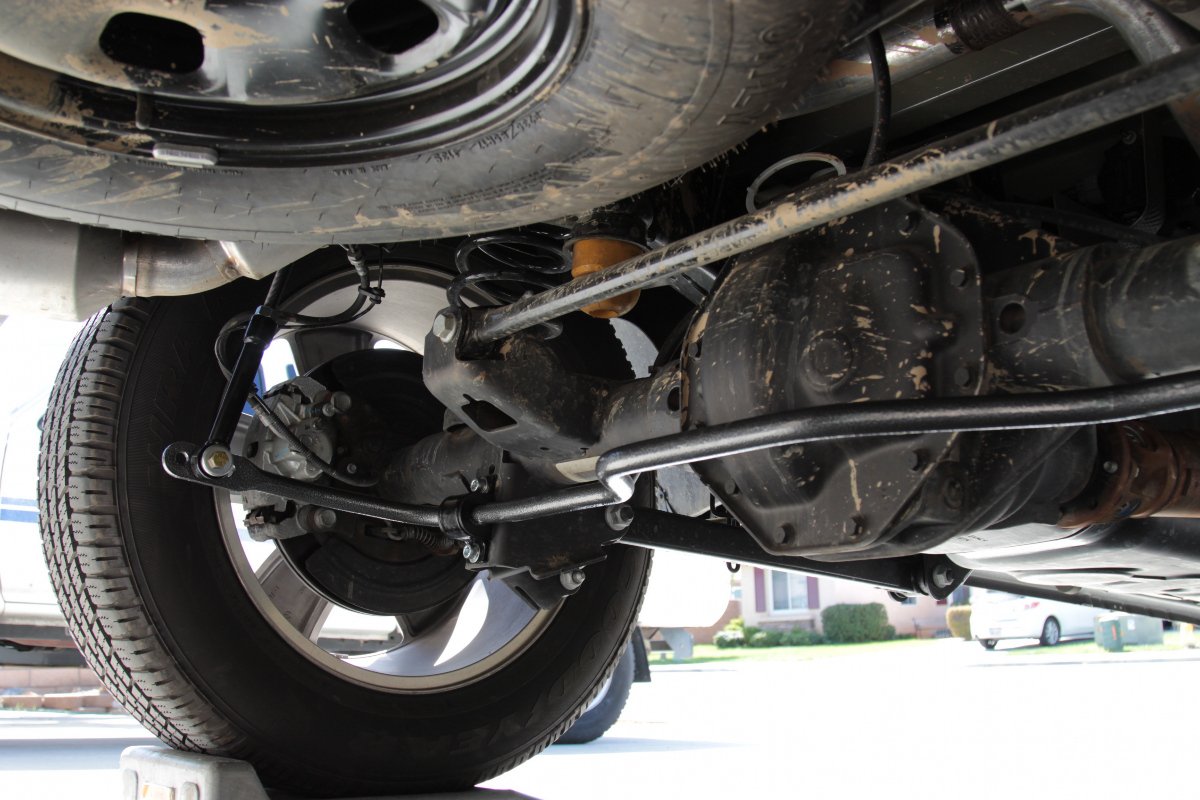
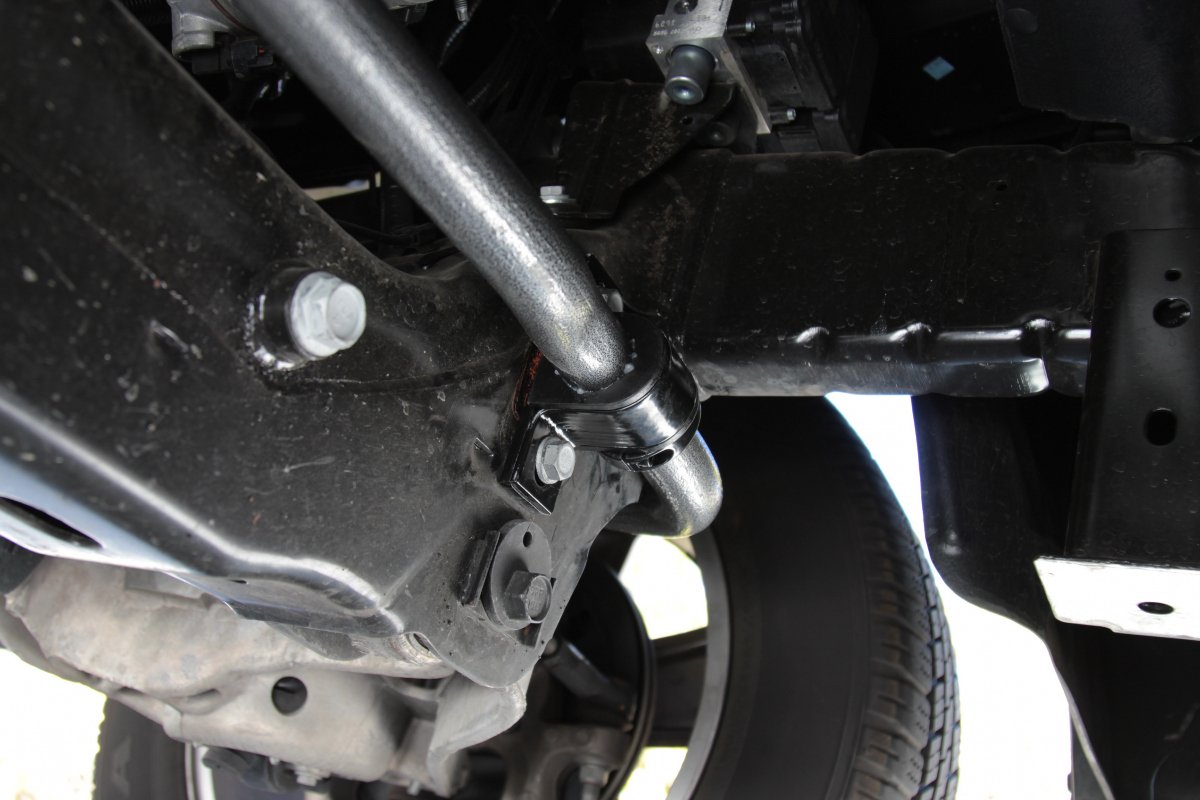
The bars arrived and we planned out our installation. While the truck is raised enough to crawl under it, we decided a pair of ramps was going to make it a little easier for both the installation and for photographs. With many modern vehicles there isn’t a need to drill new holes, especially for a rear sway bar – like you might encounter for a classic vehicle. Even if the Ram doesn’t have a rear bar, the provisions for a rear bar are on the frame and differential, and the only additional component would be an end link kit, which we acquired from Hellwig to complete the package.
It should be noted, however, that if you’re going to install a new kit on a vehicle that doesn’t have a rear bar, it’s important to have the suspension fully loaded if you’re drilling new holes to mount a sway bar. It’s paramount to line up the rear bar parallel to the ground, so using a lift with the rear suspension unloaded is not the best method; a drive-on lift where the suspension can remain loaded is better. Using ramps as we did is acceptable, we used the frame rail as a guide for alignment of the rear bar.
 Above: The Hellwig bar has the standard hammertone powder coating which serves two purposes: it protects the bar from the elements, and the ‘pockets’ in the finish help trap the bushing lube so it doesn’t all squish out when the clamps are tightened.
With regards to mounting the rear bar, Hellwig’s Director of Operations/Engineering, Ben Knaus, has this to say. “The bar is most effective with its arms parallel to the ground since all the forces are pushing the bar’s arms in the Y-axis; none of the forces act in the x-axis. If it’s off a little it won’t hurt anything, it just means you’ll lose a few lb/in of rate of the sway bar.” He also mentioned, “During driving conditions, your suspension is going up and down so it’s always passing back and forth through the best case install, and not riding there all of the time anyway.”
Beginning The Installation: Laying Out The Tools
Here’s where we need to stop you before you begin the installation of your Hellwig sway bars, and remind you that modern vehicles – even from FCA – have metric bolts. If your first thought is “no problem, my wife has an import and I have a set of tools for her car,” you’re going to be left scratching your head. Even with the five foot rollaway in the garage, and a pair tool kits in each import, we didn’t have any tools that would facilitate removal of the sway bars.
 Above: We started the install, then realized we didn’t have the metric sizes needed to swap the bars out.
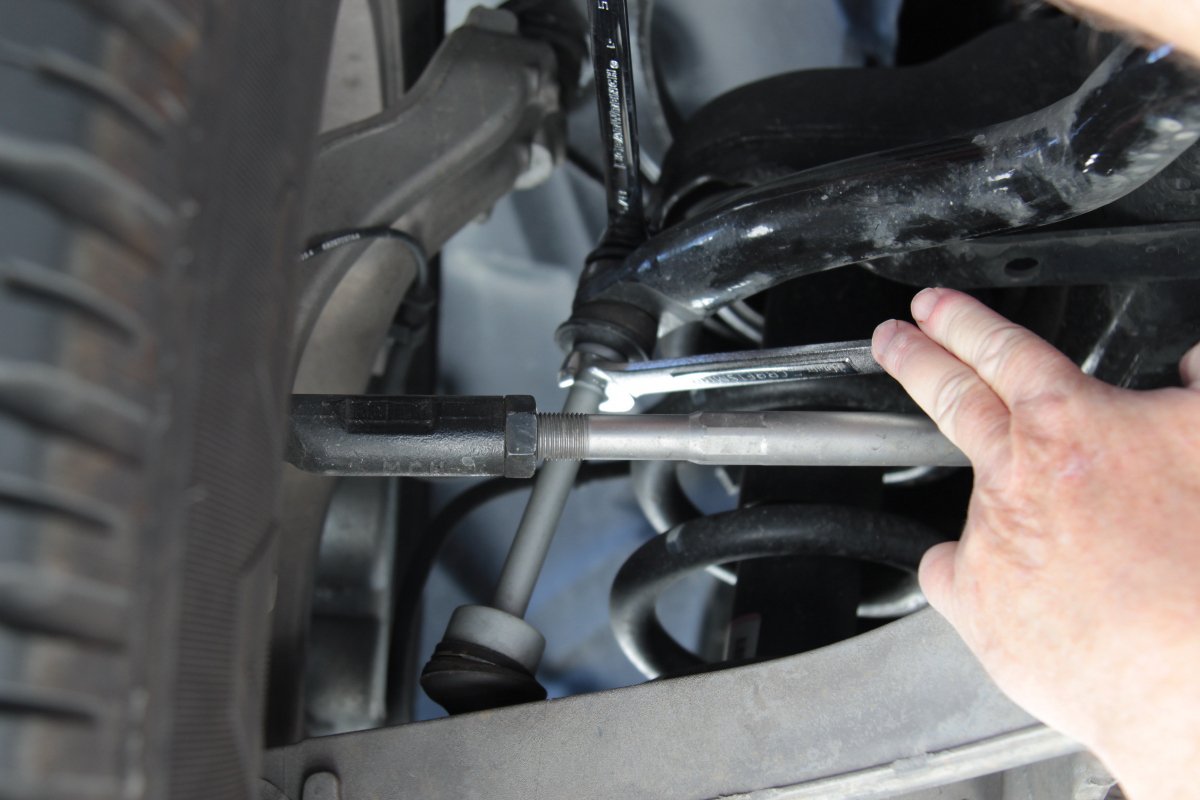
FCA threw us a curve, and you’ll need three sizes that previously weren’t included in any metric tool kit purchased 10-15 years ago. So off to the store to buy a new set of box end wrenches and a couple of sockets to include: 15mm, 16mm, and 18mm. If you already have wrenches and sockets in those sizes you’re good to go as they are the only sizes you’ll need for this installation. Note: a 5/8-inch wrench is very close to 16mm, but nothing matches up to the 15mm or the 18mm, so if you don’t have those sizes you’ll need them. Ratcheting wrenches are nice, as the lock nuts on the end link will take forever with a conventional box end wrench.

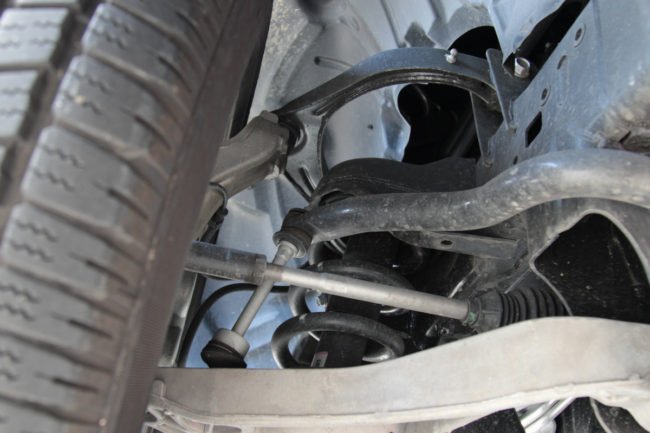
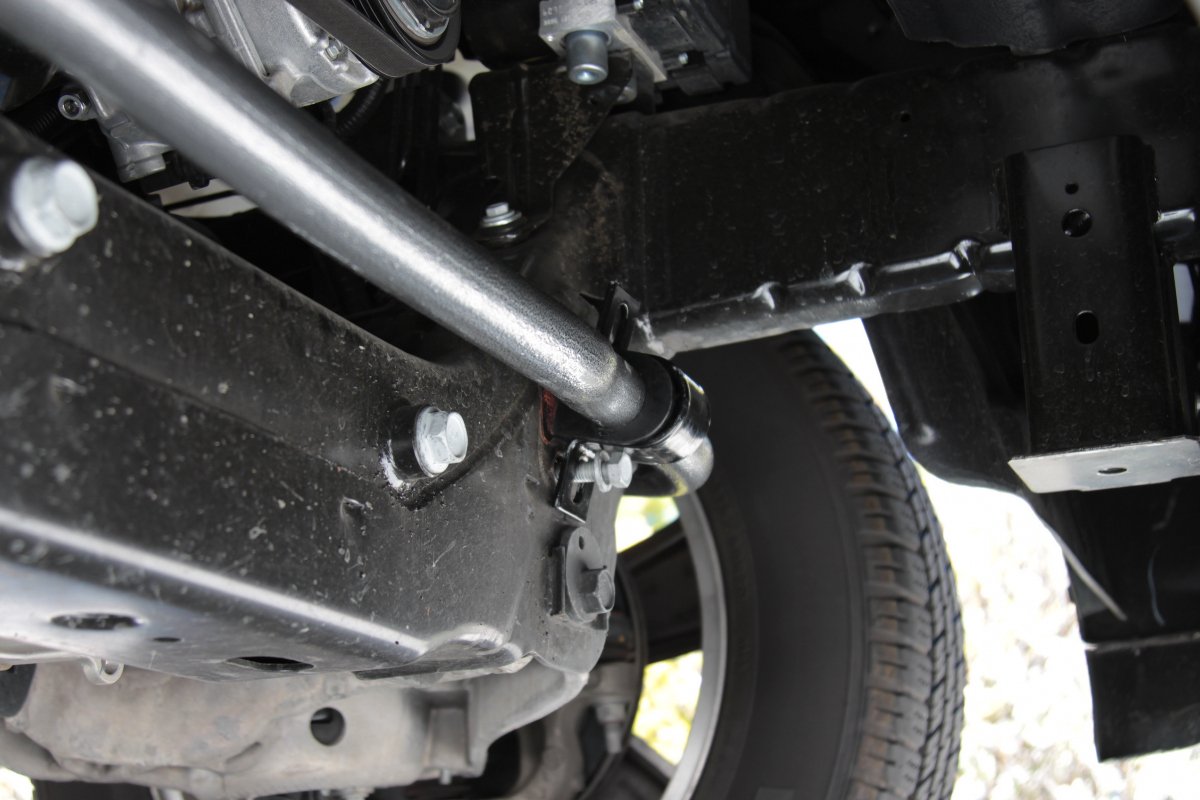
Above left: Note how the center of the bar drops down slightly. Above right: The OE end link stays, no need to remove the whole link.
Front Bar Installation
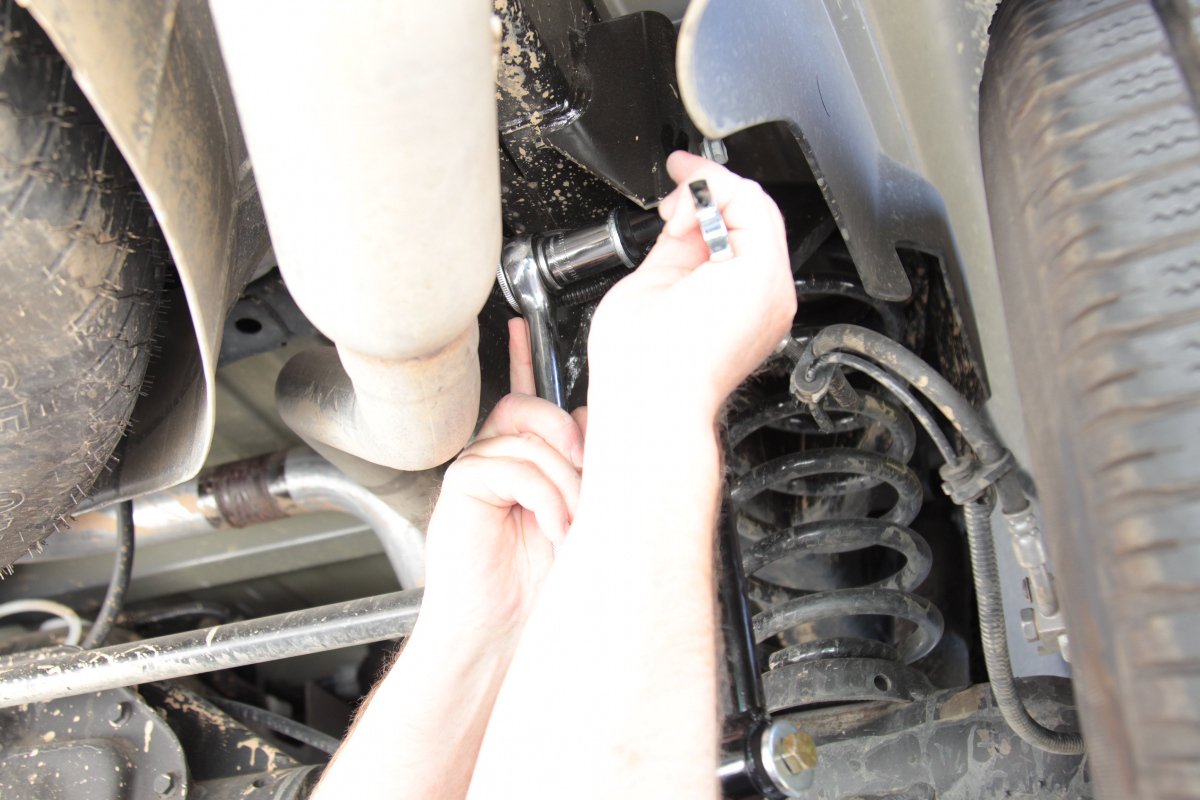
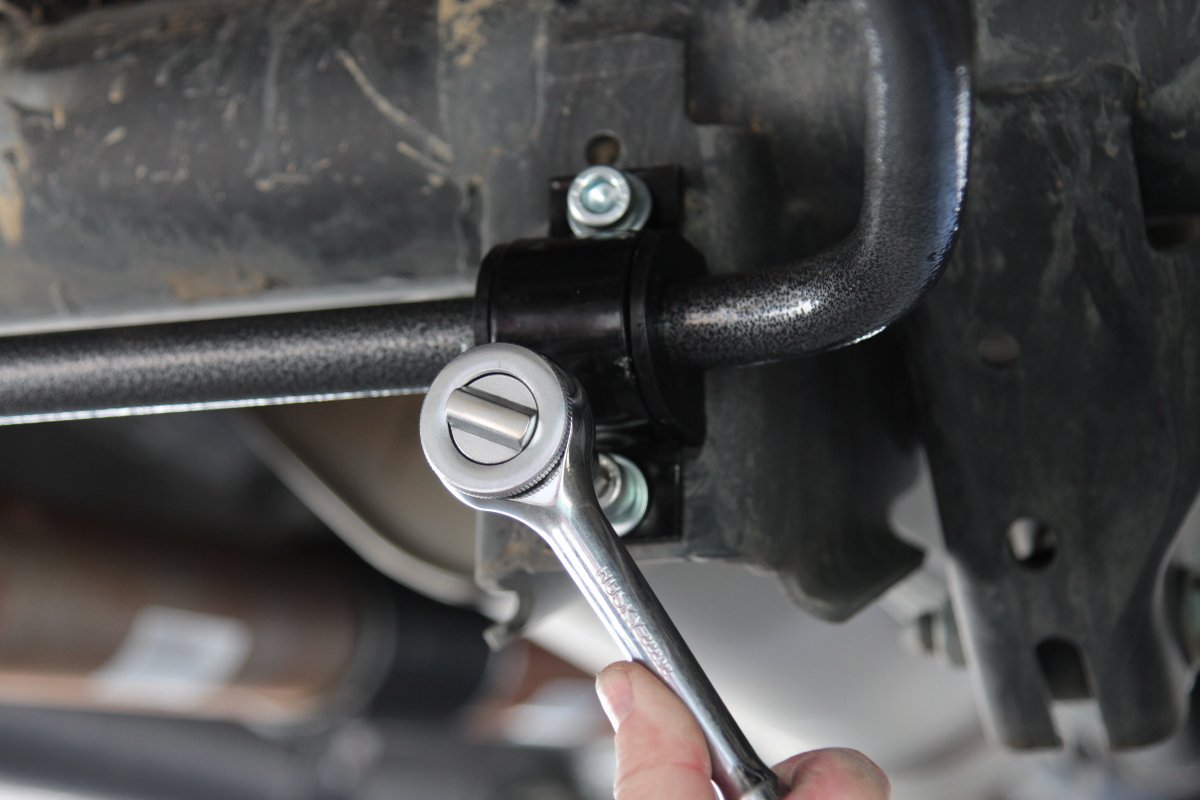
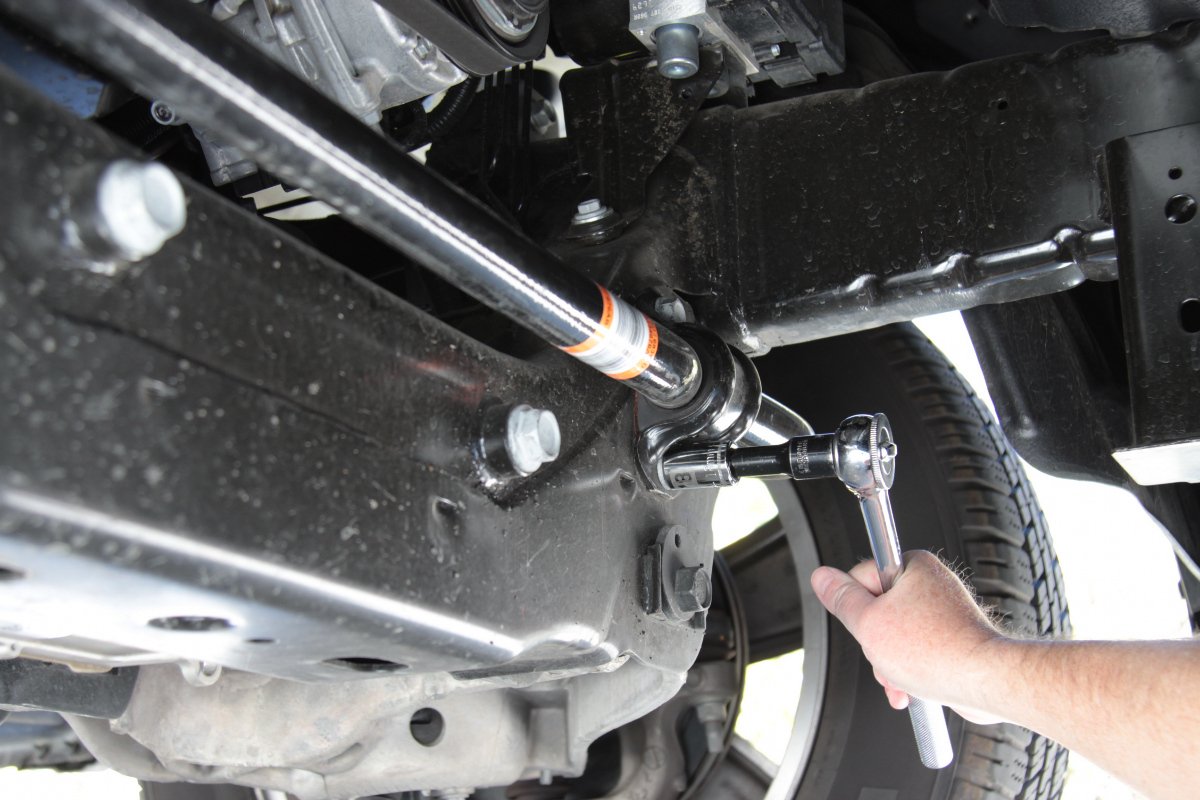
The removal of the front bar is pretty basic; four bolts at the two clamps, and a nut on each end link. An 18mm socket worked best for the clamp bolts, and for the end link a 15mm open end is needed to hold the link while a 16mm (or 5/8) ratcheting wrench is used to remove the lock nut at the top. The front bar is heavy, it is a solid bar so it’s best to leave a couple bolts in the clamps loosely as you remove the nut on the end links. Pay particular attention to how the factory bar is installed: it dips down in the center and the Hellwig bar needs to be installed the same way or there could be some interference.
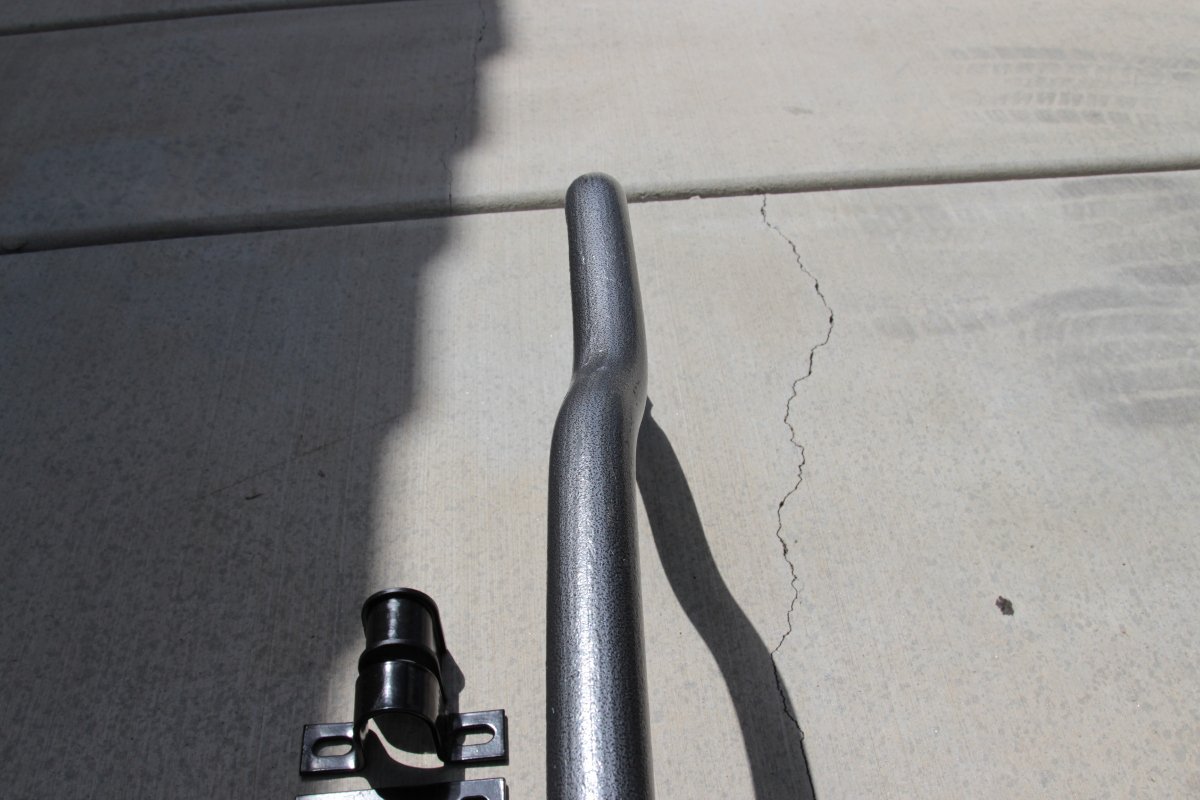
The OE front bar and the Hellwig front bar look very close in size, so initially it might not seem that there would be much improvement, but Knaus informs us, “Even a slight change in diameter changes the torsional rate significantly. The equation for torsional rate uses diameter to the 4th power. For example, going from a 1-inch diameter bar to a 1-1/8-inch diameter bar increases the rate roughly 60%.” We could tell the Hellwig bar was slightly larger, but didn’t realize that even 1/8 of an inch is going to make such a difference.


Above: The bars are similar in size, but Hellwig assures us that just a small increase will increase the strength significantly. Be sure to lube the bushings; use it sparingly, it will squeeze out and create a mess if you use too much.
The Hellwig bar is solid, and as such it is heavy like the OE bar. When prepping to install the bar, be sure to put some of the gooey lube on the bushings first and install the bushings on the bar; this is what keeps the bushings from squeaking and drying out. If you have disposable gloves, you night want to use them and dispose of them as soon as you’re done lubing the bushings. This stuff is sticky and almost as annoying as anti-seize compound. Speaking of which, you should use anti-seize on the four bolts when you reinstall the clamps, you’ll be glad you did.


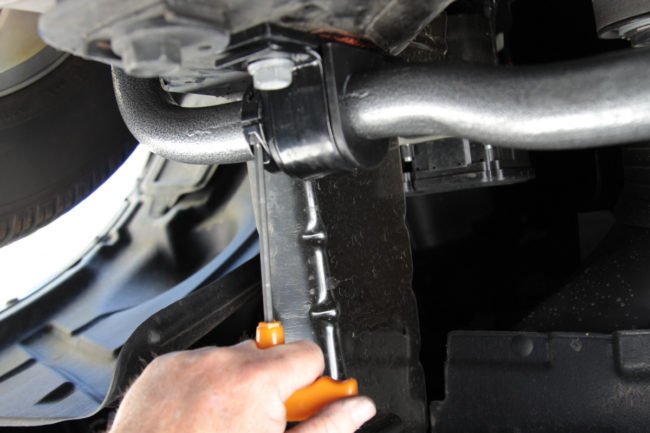
Above left: You’ll only need to use the 15mm wrench when loosening and tightening the link nut; a ratcheting wrench saves time. Above Center: Use anti-seize on the bolts, we had one that came out rather difficult so we chased the threads and coated the OE bolt, which is re-used. Above right: leave the clamp snug, but loose enough to shift the bar so it can be centered.
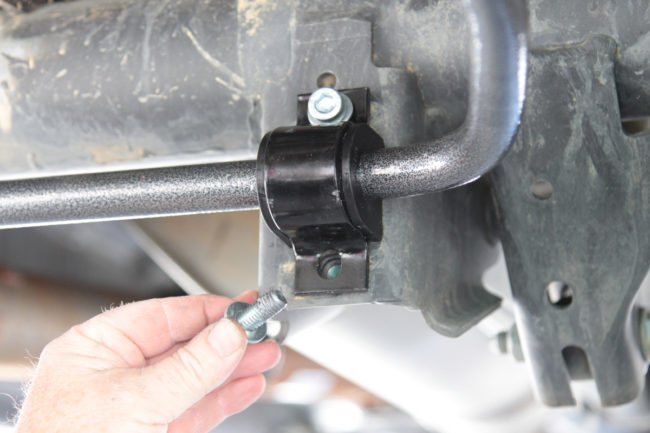
With the bar mounted loosely to the front crossmember, and the nut started on the end links, it’s important to remember to not tighten the clamps down just yet. Hellwig includes two spacer plates to allow installation of two collar clamps, which help keep the new bar centered. With everything snug, but still loose enough to make adjustments, we shifted the bar to center it on the crossmember before tightening the clamp bolts. Note: since the collar clamp is powder coated, it might make things a little difficult when it comes to tightening the allen head bolts. We chased all threads prior to installing to remove any excess material so that it would make final installation easier.


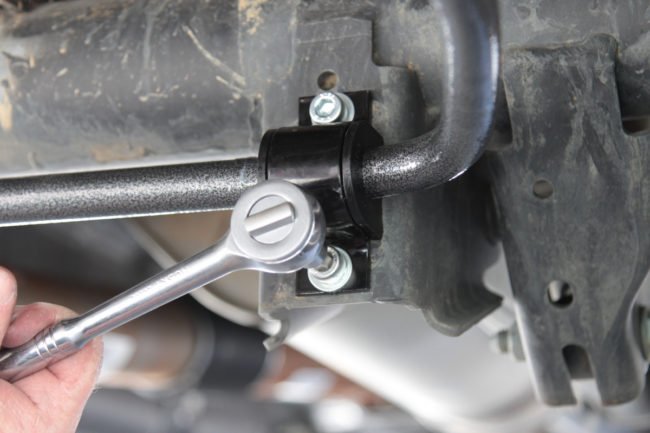
 Top: Centering the bar is necessary before the collar clamps are tightened, then the bar clamps can be tightened to about 25-30 ft-lbs. The collar clamps keep the bar from shifting during cornering. Bottom: The bar fits well, and you won’t have to snake the bar in or out of the chassis, making this a very simple install.
With the clamps attached to the bar and the bar centered, we first tightened the clamps, and then the collars. There is a little play with the clamps from side to side, so don’t tighten the collar clamps completely just yet. Once the bar is centered and the clamp bolts are tightened to 25-30 ft-lbs, and the nut is tightened on the end links, the collar clamp can be tightened. For the end links, Knaus says that when you see the rubber bushings begin to compress, that’s when you’ve tightened them enough; there are no torque specs for these.
 Above: A set of ramps is all that’s needed, it makes it much easier to crawl under. We replaced the end links on the rear, but they can be reused on the Hellwig bar.
Rear Bar Installation
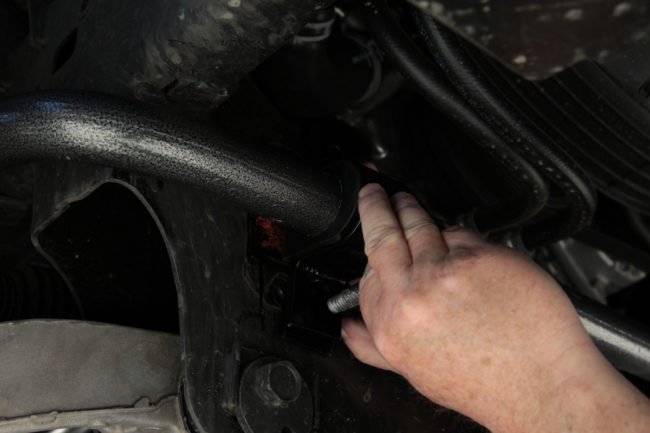
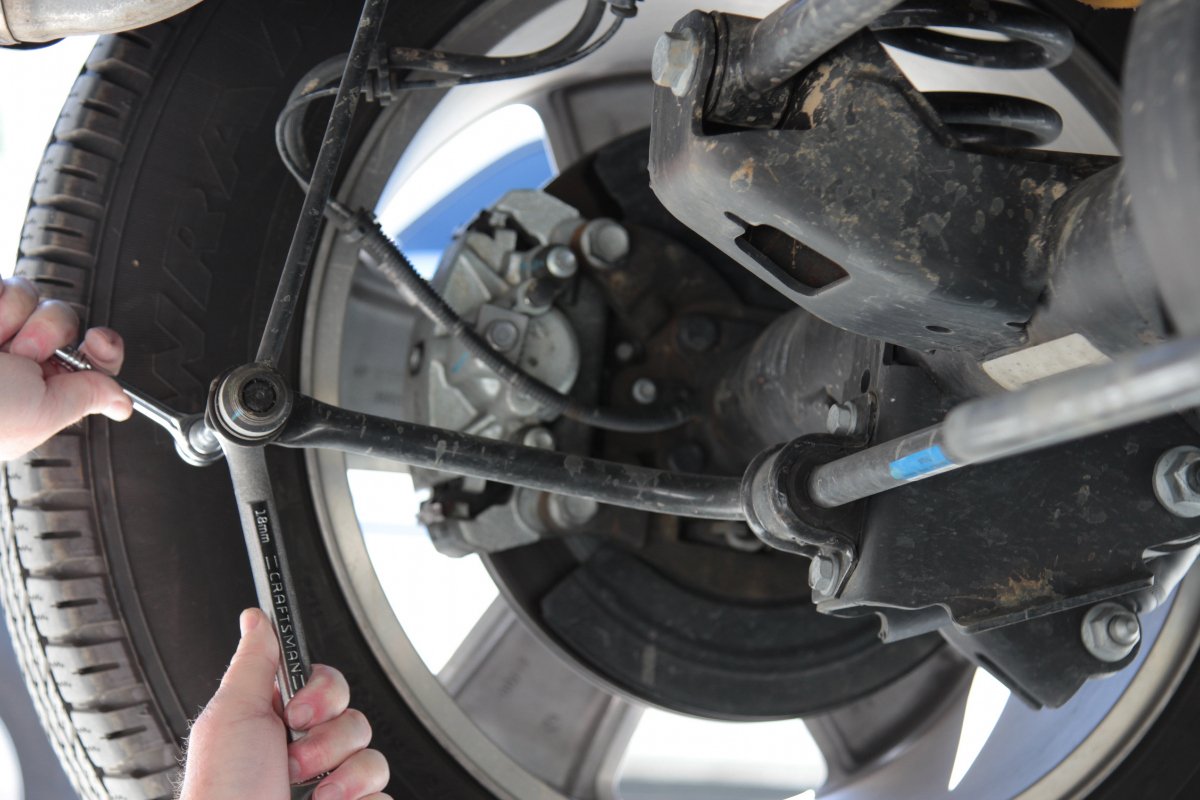
The rear bar is a bit unconventional, but works much in the same manner as the front. Instead of the ends reaching forward, like a typical rear bar, they reach towards the rear. If you don’t have a rear bar, Hellwig will provide the end link kit separately. If you do have a rear bar, you can use the factory end links, but we opted to use the Hellwig kit. The bar removes in similar fashion to the front bar, however, it’s far lighter and much easier to remove. We left one bolt on each clamp while detaching the end link at the bar end, and removed the end link once the bar was completely removed – it’s a little easier, and safer. If you detach the end link at the frame only, be aware that it could swing down like the pendulum from hell and clock you one. An 8mm socket was used to hold the lower bolt while we removed the nut on the end link.


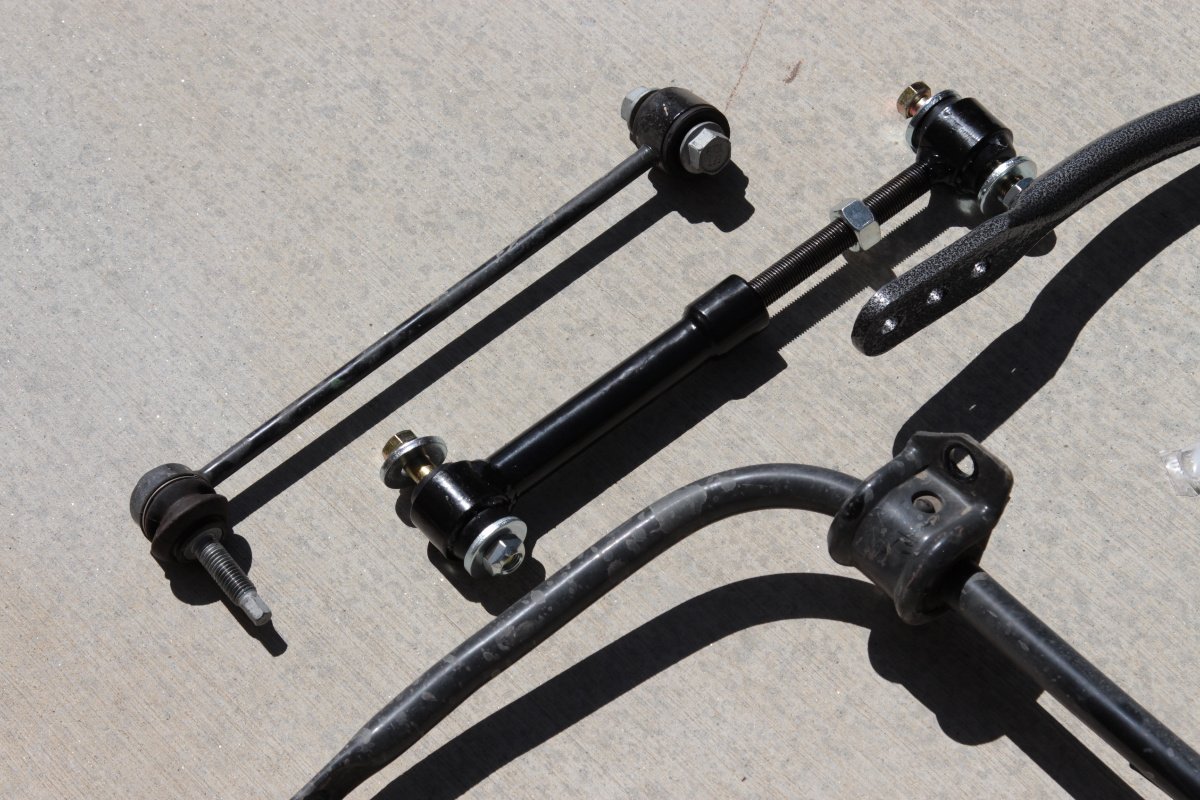
 Top Row: The Hellwig end links are a little beefier, and easy to assemble following the instructions. The bushings need to be lubed prior to installation; a deadblow hammer with a couple of medium taps inserted them without a mess. A vise can be used to press them in, but is more time consuming. The rear bar is where you will find a noticeable difference in diameter. Bottom: The end links have lock nuts, so a couple of ratcheting wrenches will save some energy. Having forearms like Popeye helps here.
We initially set up the end links to be similar in length to the OE links, leaving the jam nut loose for final adjustment. The assembly of the Hellwig end link is pretty simple, just remember to apply the gooey lube on the bushings first. You can press the bushings into the links with a vise, or use a deadblow mallet to persuade them into the links with a couple of medium whacks. No need to go mortal kombat on them, but lining them up and giving a couple firm strikes will pop them into place. Pressing them in by hand can be messy if the bushing slips, so we opted for the deadblow hammer.
We used anti-seize on the four mounting bolts that come with the rear bar. While the front bar reused the factory bolts, the allen head bolts for the rear will fit better than the factory bolts. The rear bar is slightly larger, making the bushing and clamp larger in diameter as well. This affects the mounting of the clamps and the bolt heads end up being too close and prohibits tightening them down. We left the clamp bolts slightly loose so we can easily center the bar. When we attached the bar to the end links, we left those bolts loose as well until we lined up the rear bar parallel with the ground (or the frame, in our case since we used ramps).
 Above: The end link kit is optional if you’re replacing the bar, necessary if you’re adding one. Like we did with the front bolts, anti-seize is recommended to keep from galling the threads. Hellwig supplies new bolts for the rear bar due to its larger diameter.
Adjust the end links so they both fit into the adjustment hole that you choose for the rear bar. If you have to force the bar to attach the links, you haven’t adjusted the end link properly. Once everything has been aligned, we tightened the four clamp bolts, then both end link bolts, and tightened the jamb nut on the end link. Double-check all bolts and hardware, and you’re ready to roll.
Final Thoughts And Impressions
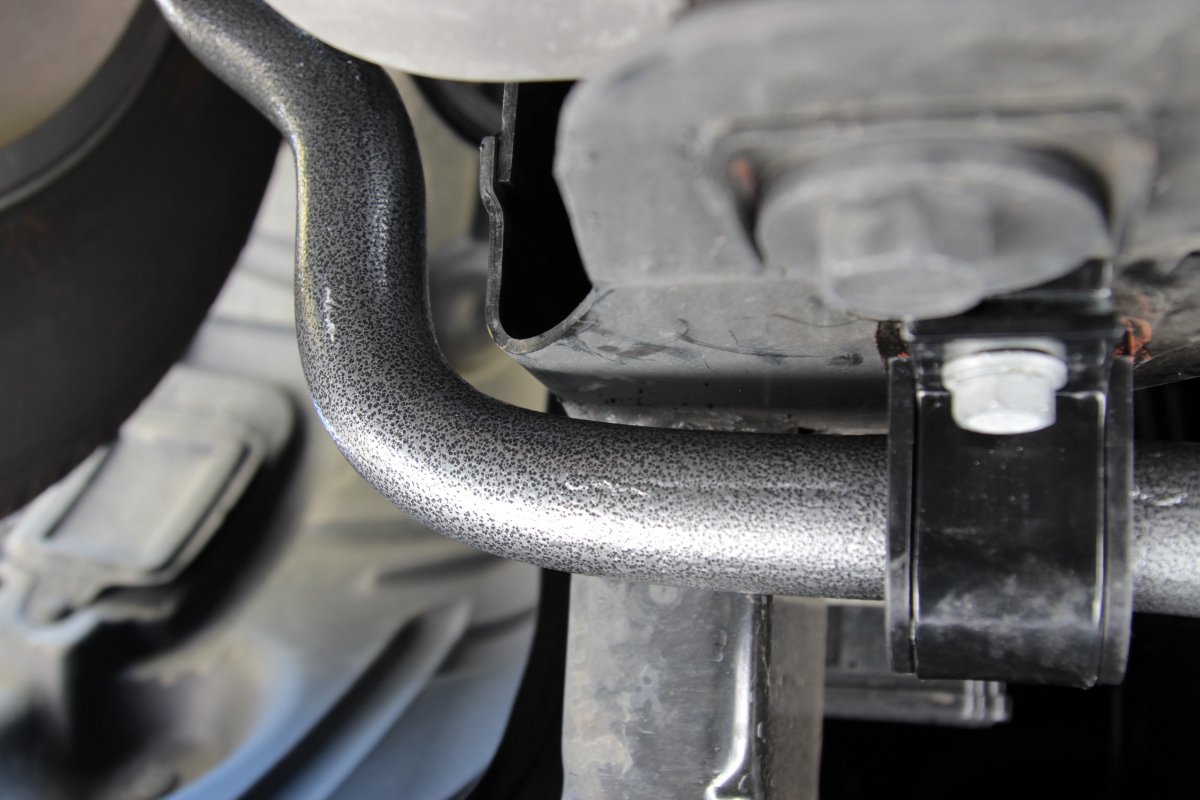
The difference between the OE bars and the Hellwig bars from a performance standpoint is truly night and day. Immediately after the install, a couple of freeway cloverleafs were attacked and the body roll was minimized drastically. Cornering stability is improved, and ride quality is completely unaffected. We were able to ignore those yellow ‘suggested speed’ signs, and felt more confident attacking the cloverleaf with a little more entry and exit speed. We also have a few back roads around town and prior to the install the truck rocked back and forth rather violently, requiring a lower speed. After installing the new bars, those roads seemed much more tame due to the strength of the Hellwig bars; we felt more comfortable raising the speed a little.
While you can’t avoid the back and forth rocking from uneven pavement or parking lot entryways, the truck has much better stability. It felt like the OE bar worked more like a spring, compressing and contracting until the truck stabilized completely, but the Hellwig bars keep body roll limited, and the truck returned to rest a little quicker – without the violent bouncing around that was present before.
 Above: The ride quality is unaffected with the new sway bars, but when cornering and on uneven terrain, the difference is noticeable.
We asked Knaus how they determine the best diameter for a replacement bar, and it was interesting to know that they don’t base it off an OE bar at all. “We usually find the best rate for the truck from our calculations and test drives; we don’t base anything on a certain increase of the factory bar diameter,” he said. “In some cases, we won’t even make a bar if we find the factory bar to be adequate already.” He stated that the Hellwig replacement polyurethane bushings are usually a higher quality than the softer factory bushings, which helps with the handling. He adds, “The final factor can be the material in the factory bar. Our bar is heat treated, 4140 chromoly steel for improved life and strength.” That offers a significant improvement over the factory sway bars.
The front bar is non-adjustable, but the rear bar has three settings, and the innermost setting will provide the firmest feel. Knaus recommends starting with the outermost setting and adjusting from there. “Using the inner hole on the rear bar will make it stiffer and move your handling in the oversteer direction,” he said. “There are a lot of other factors, especially in pickups, that determine whether it will push it over the neutral barrier into oversteer territory.”
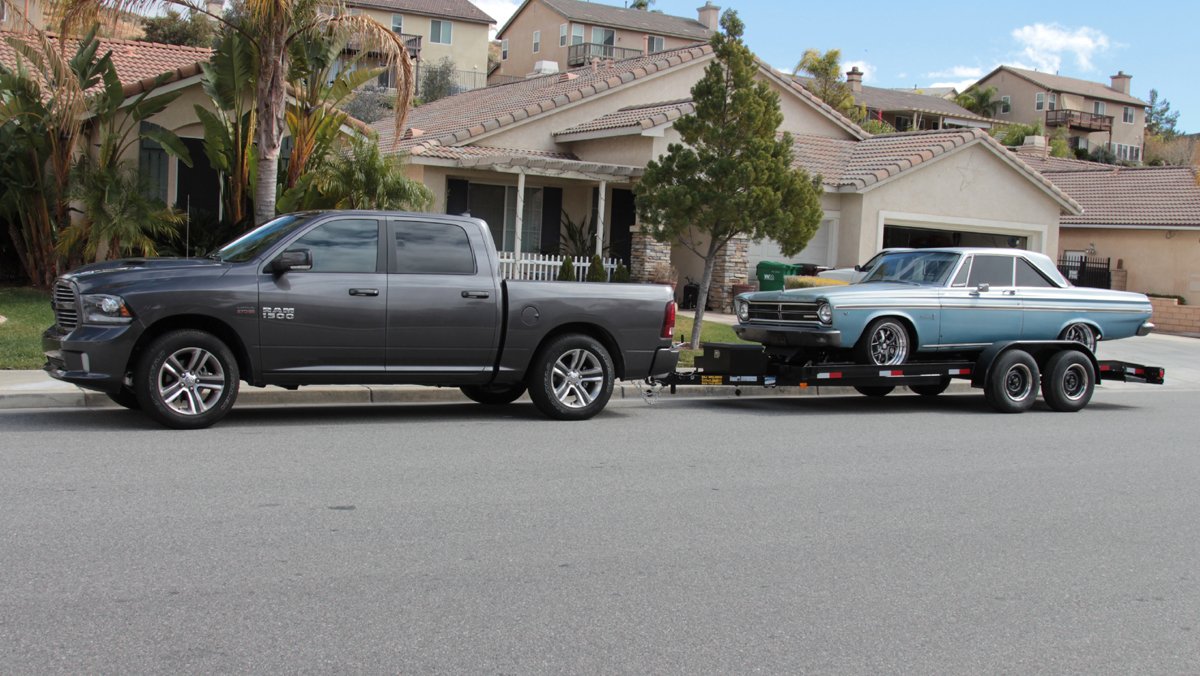 Above: Another duty for the Ram is to haul a car to the track. The new sway bars add stability when towing, as well, and that will provide just a little more confidence in traffic.
Knaus continued, “Everything from a lift, weight in the bed, tire brand, etc., can affect the oversteer/understeer characteristics. The truck from the factory is designed to understeer since that’s easier for the general customer to handle. We try not to go into oversteer territory, but the stiffer hole is designed more for heavy loads, which will change the center of gravity and vehicle weight, requiring more rear anti-roll rate to get closer to neutral steer again.”
While our initial impressions are positive, we have yet to add a load, or pull our race car on a trailer to see how stability is improved. But you can be sure that Hellwig Products has put the time and research into each of its products to provide a better solution to the factory setup. We’ll chalk this one up to Hellwigs decades of experience in stabilizing vehicles, from cars to trucks, and its dedication to performance. You can find sway bars and load leveling kits for trucks at Hellwig’s website, and sway bars for classic cars dating back to the 1950s.


Thank you for this well written and informative article. My 2015 Ram 1500 standard cab short bed was ordered with towing package but no rear bar. I plan on installing Hellwig front and rear now.
Thanks Scott, glad you liked it and that it will help you make the decision to go with Hellwig. I run their bars on my ’65 Plymouth and it makes the car handle far better than expected. I did notice with my RAM that the bars ‘settle’ the truck a lot quicker than the factory bars. The truck handles pretty well now with these bars on it, I’m very happy with them. Good people at Hellwig, too!