


With the engine installed and running, the interior done, and the convertible top installed and working we step into the final stages of completing this monumental task of documenting a completely original restoration of a 1970 Hemi ‘Cuda convertible! We have seen online and heard in person many people that thank us for the step-by-step how to articles with detailed pictures. No other print or online Mopar magazine has attempted such a challenge. The best part about us doing this in an online magazine is the pictures are all digital, so you can zoom in on details clearly, and you don’t have to search through stacks of paper magazines to find the article about the specific topic you need.
There has been much discussion and many myths about how exactly the “Shaker” engine breather was originally finished and whether it was light argent or dark argent or something in-between. We originally finished the Shaker in light argent just like the wheel centers on the ’70 Rallye wheels. After several discussions with respected experts at the OE judging tent at The Nats, we decided to research further. We always strive not to publish any data that we are not completely sure is correct.


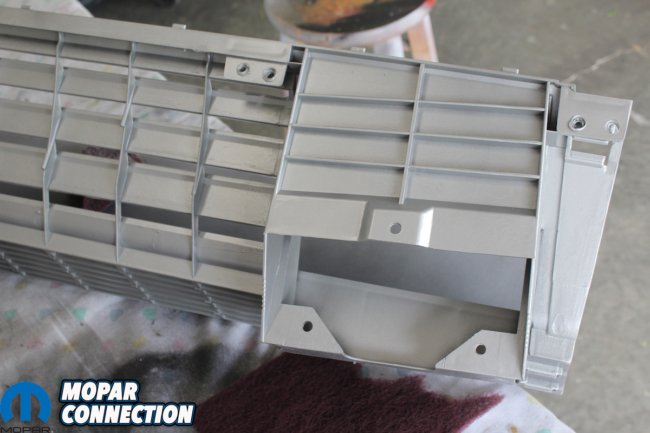
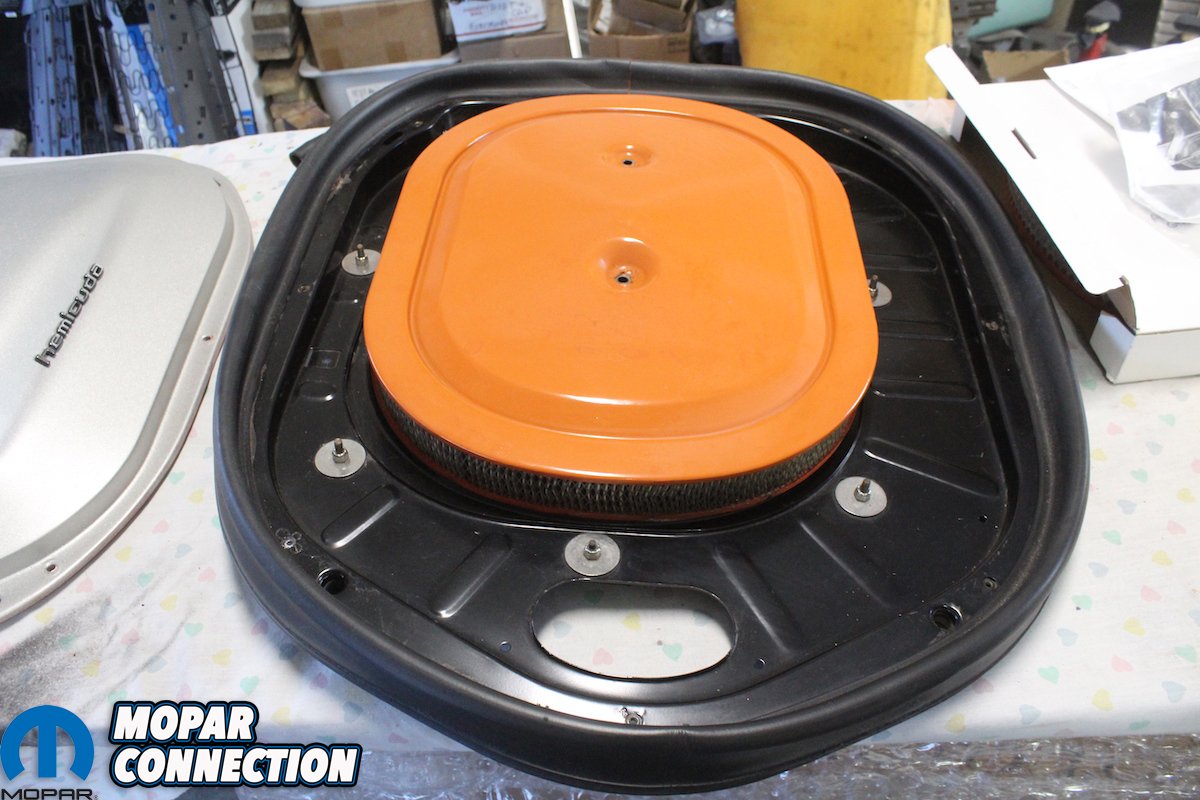
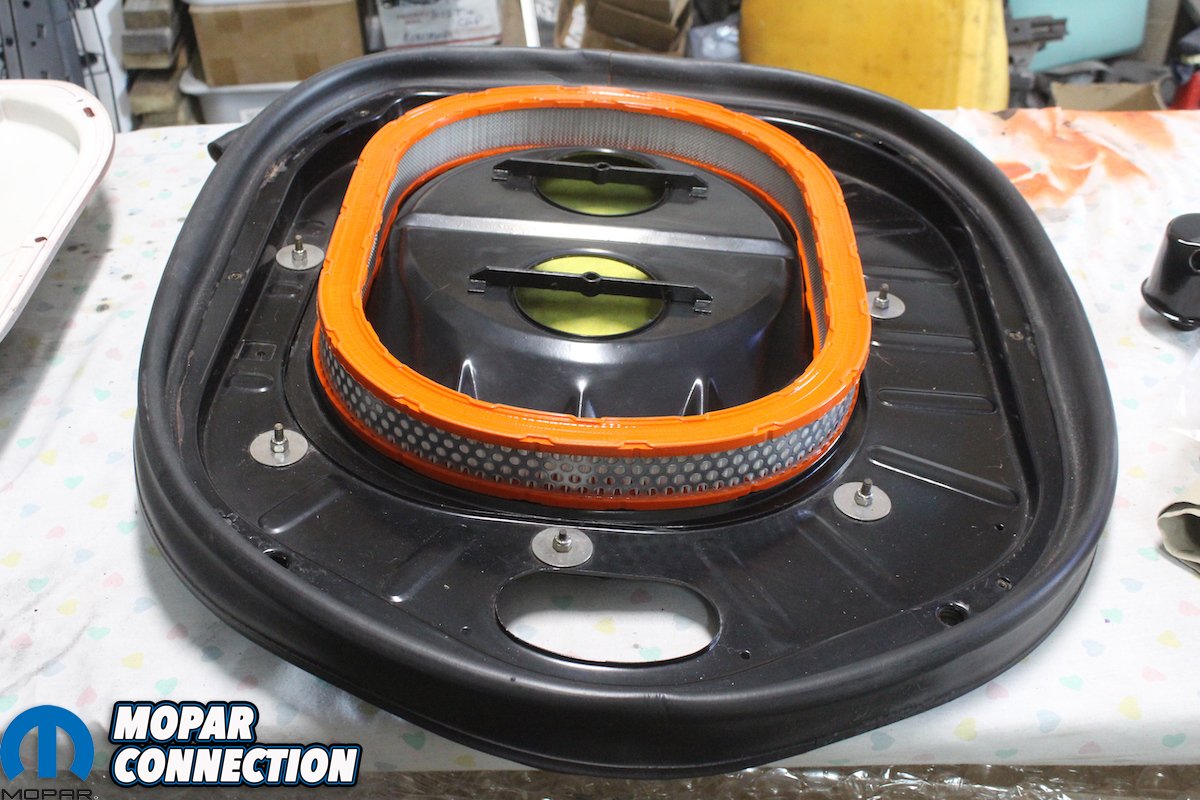
Above left: Here is a pic of the Shaker assembly from the Comeback ‘Cuda. Base, filter, cover, and bubble. Since this was our first experience with a real Hemi Shaker assembly, we had several things we needed to research to be able to restore the assembly correctly. Above right: The base and lid looked like they had been somewhat restored previously. The paint was fresh, the hardware looked good. The rubber seal had been replaced but the adjusting feet that go on the bottom of the base were missing and the filter for sure was incorrect and needed changing.


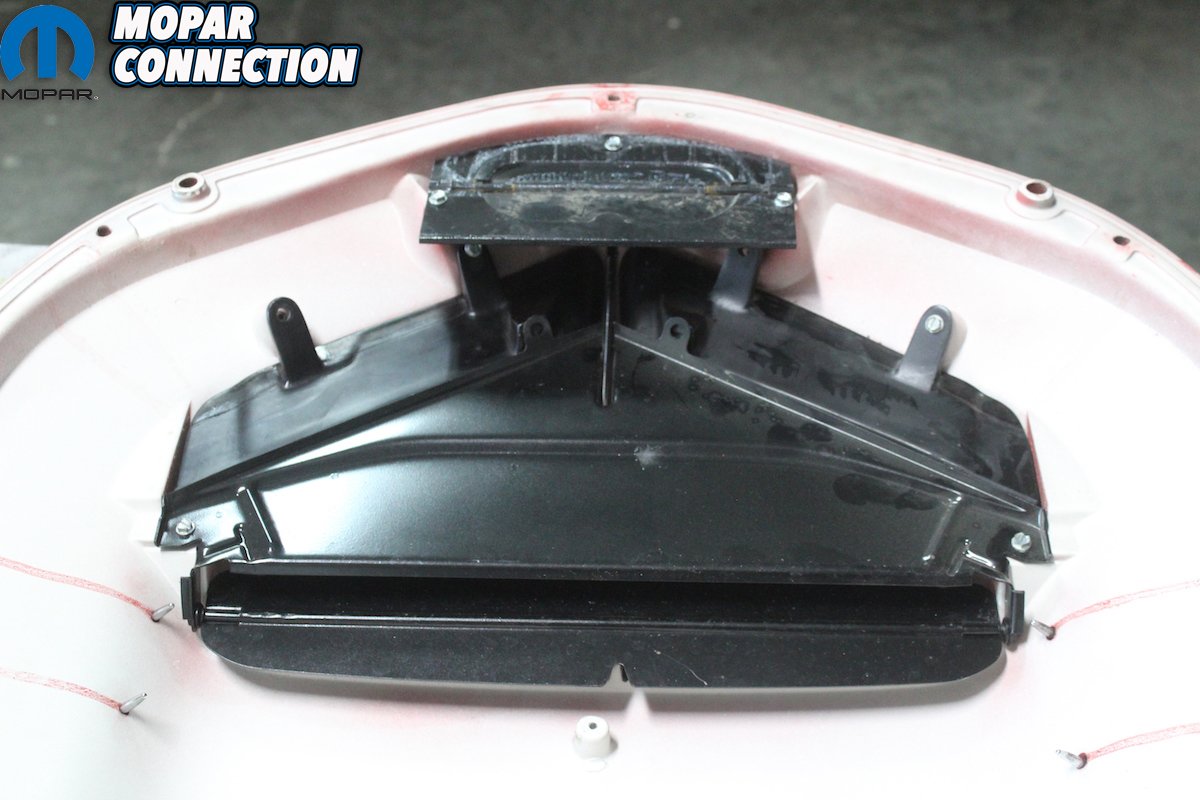
Above left: The fresh air assembly had been duct taped to the open position and it was missing the cable that controlled it opening and closing. The slotted Zinc screws were incorrect and the “hemi’cuda” emblem did not have and retaining hardware to keep the emblem in place. So, we immediately ordered the correct parts, cable, and stripped and painted the assembly semi-gloss black. Above right: That incorrect and dirty air filter element had to go. Thankfully, they still reproduce the correct filter with the correct metal retainer with the correct holes (not mesh) like so many repops have. This is the same filter that is used on the “Six-Pack” A12 cars. Except their filter shows and this one does not. But still, if it ain’t correct you gotta replace it.
After reading several online discussions and even finding several old magazine articles, we found an article where Roger Gibson was able to prove beyond a reasonable doubt that in fact the Shaker was finished with the same paint as the grille: Dark Argent! Citing the proof with an early picture of an original Shaker that clearly shows it in fact, is not light argent but dark argent completely matching the finish of the grille.
We contacted our “go to” source for completely original parts and products, Frank Badalson. The 2-step paint that correctly reproduces the finish on the Shaker and the grille is a lacquer-based paint that Frank can no longer get so we bought his last pint of both paints. Then, we had the challenge of finding the “slow” lacquer thinner. We tried several paint suppliers all looking at us like we were rubes.


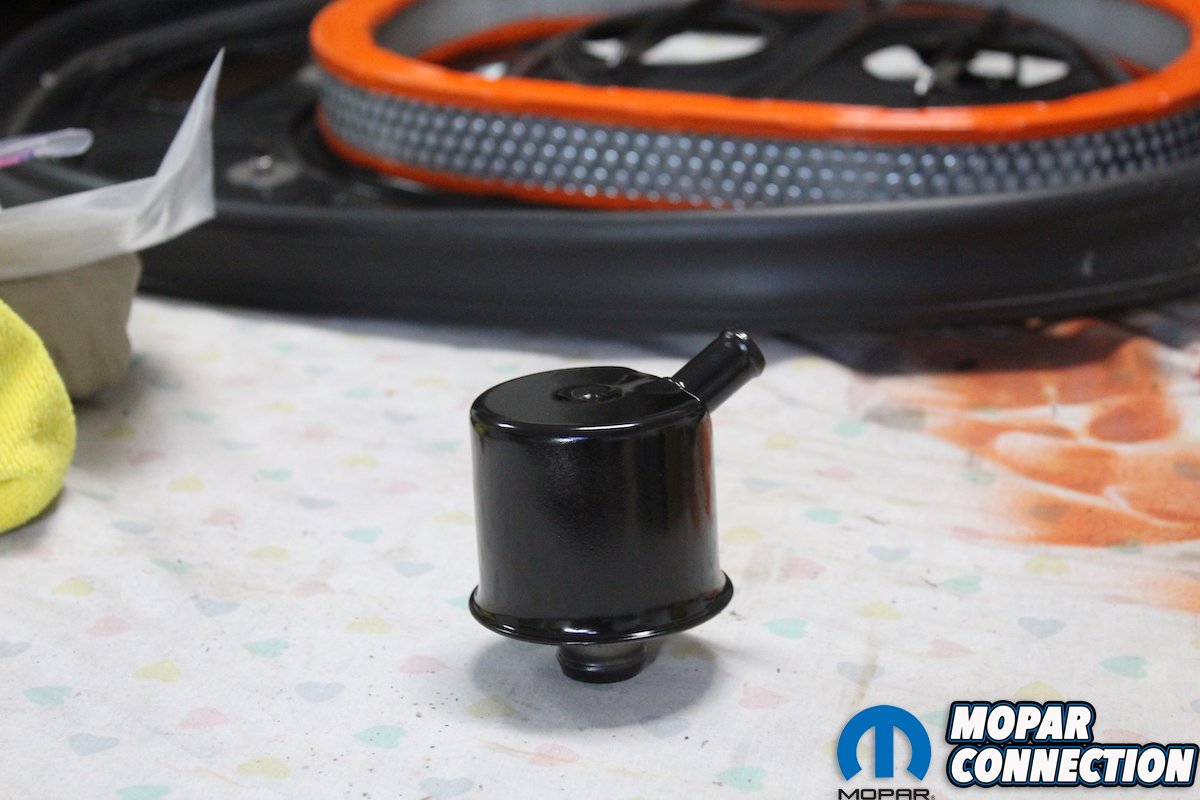
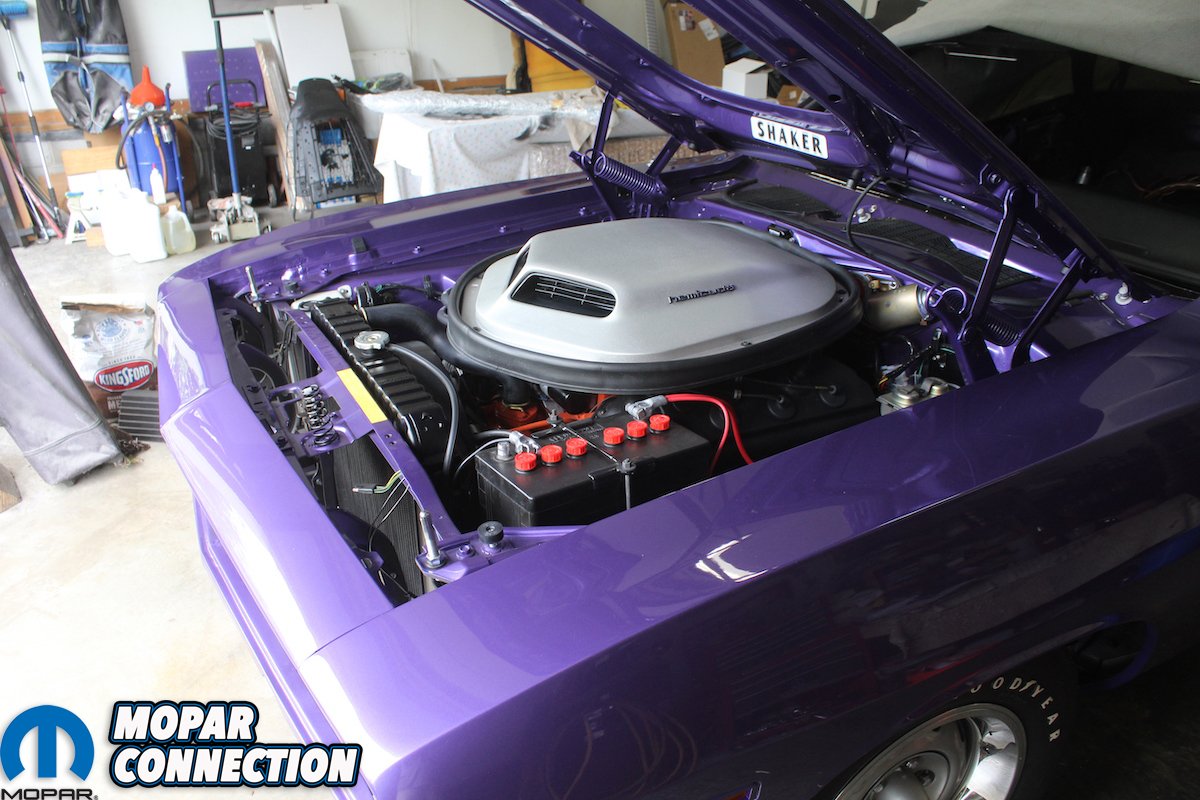
Above left: The single “nipple” oil breather was replaced with a new repop one. It is gloss black and has new internals to insure correct filtration. This attaches to the Shaker-base via a rubber ribbed hose with black squeeze clamp on both ends. Above right: The Shaker lid is not the same shade of paint as the engine. Just like the lid on the A12 6BBL it is a slightly different shade than the engine orange. We got the correct paint from Frank Badalson. Stripped and painted it to like new condition.


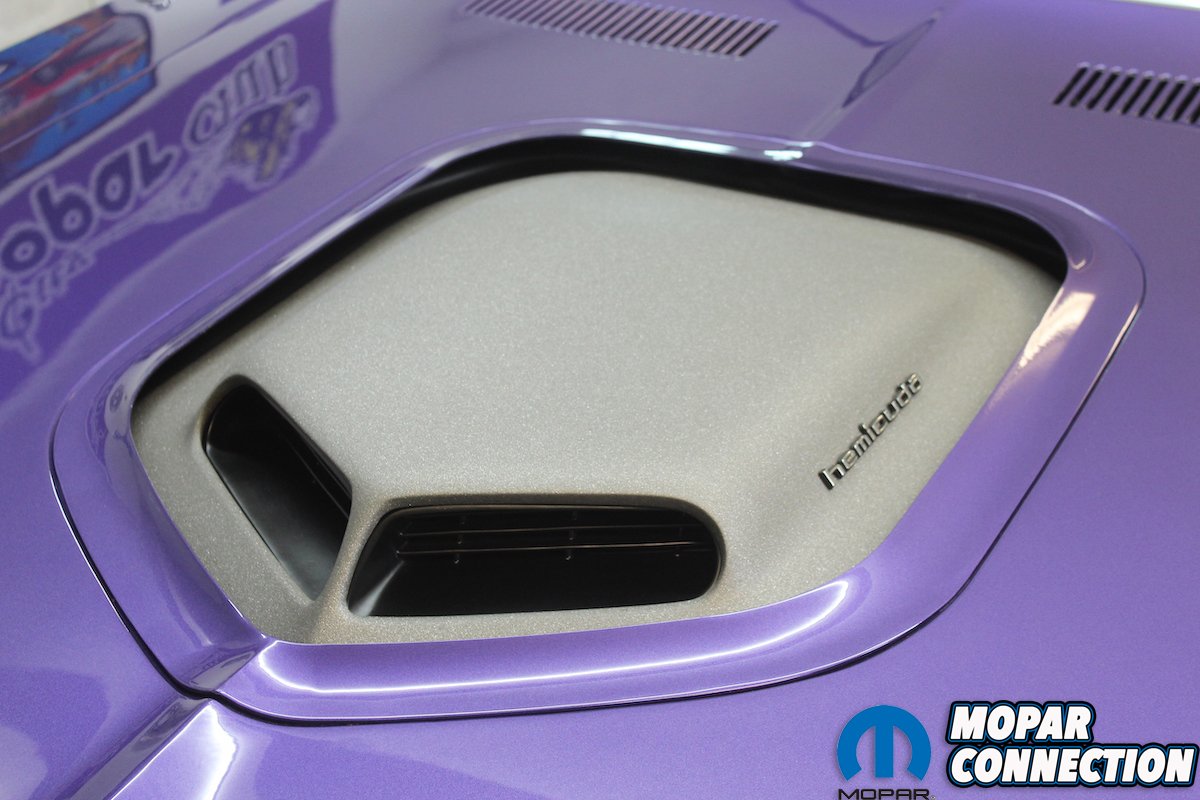
Above left: Thinking that we had correctly restored the entire Shaker assembly we installed it on the car. Installing and removing the Shaker assembly is not an easy process. The cable from the under-dash open and close handle and the control cable for the fresh air assembly attaches with two tiny clips, two small screws and a heater cable clip. The bubble attaches with 7 black phosphate coated bolts and the lid attaches with two wing nuts. We love the looks of the Shaker but what about the light argent finish. Above right: After many conversations with respected experts and much research, we finally were able to establish that in fact the finish on the Shaker was not light argent but dark argent just like the grille. Compare this correctly painted bubble in this picture with the light argent bubble in the previous picture. There is definitely a difference.
They would say, “There isn’t such a thing as ‘slow’ lacquer thinner. Slow enamel reducer only.” Knowing exactly what we needed we finally found a PPG supplier that was old school enough to know what we were seeking to buy. After several minutes he came back with a gallon that he said was pushed way back on the self and the only quantity he had. We only were going to need maybe a quart, but we jumped at the chance to buy it.
We have shot original lacquer-based Organisol and it is difficult to say the least. This 2-stage dark argent lacquer-based paint was just as challenging. The problem with only one pint each of the two-stage paint for the grille and the Shaker was that we couldn’t waste any of the precious paint to do any practice spray outs. Using the instructions Frank sent with the paint we were able to get a complete understanding of how to mix and shoot the paint to get the desired results.


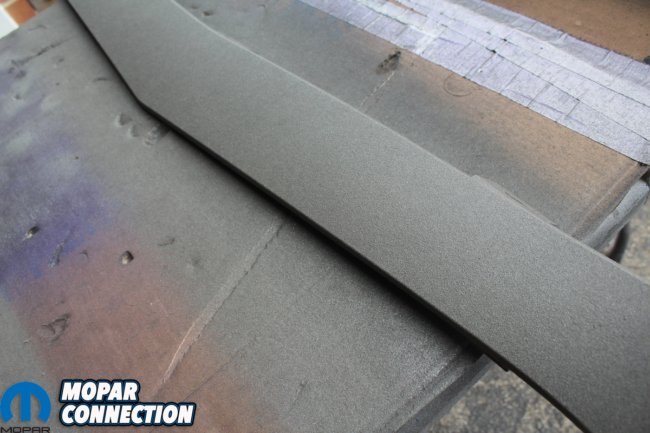
Above left: Here is a different angle and the hood closed. Notice the perfect texture and sparkle, the correct lacquer base 2-stage paint created. Considering we only had one chance to get this right we were completely satisfied with the results. Above right: We do not know who or even how many designers worked at the Plymouth division from 1968 – 1971 but they produced the coolest, most bad-to-the-bone hoods and breathers ever! From the 1968-69 “Air Grabber” B-bodies, the lift-off fiberglass hood with the bathtub breather on the A12’s, the vacuum powered “Air Grabber” on the 1970 -72 B-bodies, and this menacing Shaker hood and breather on the 1970 and 1971 E-bodies! WOW!


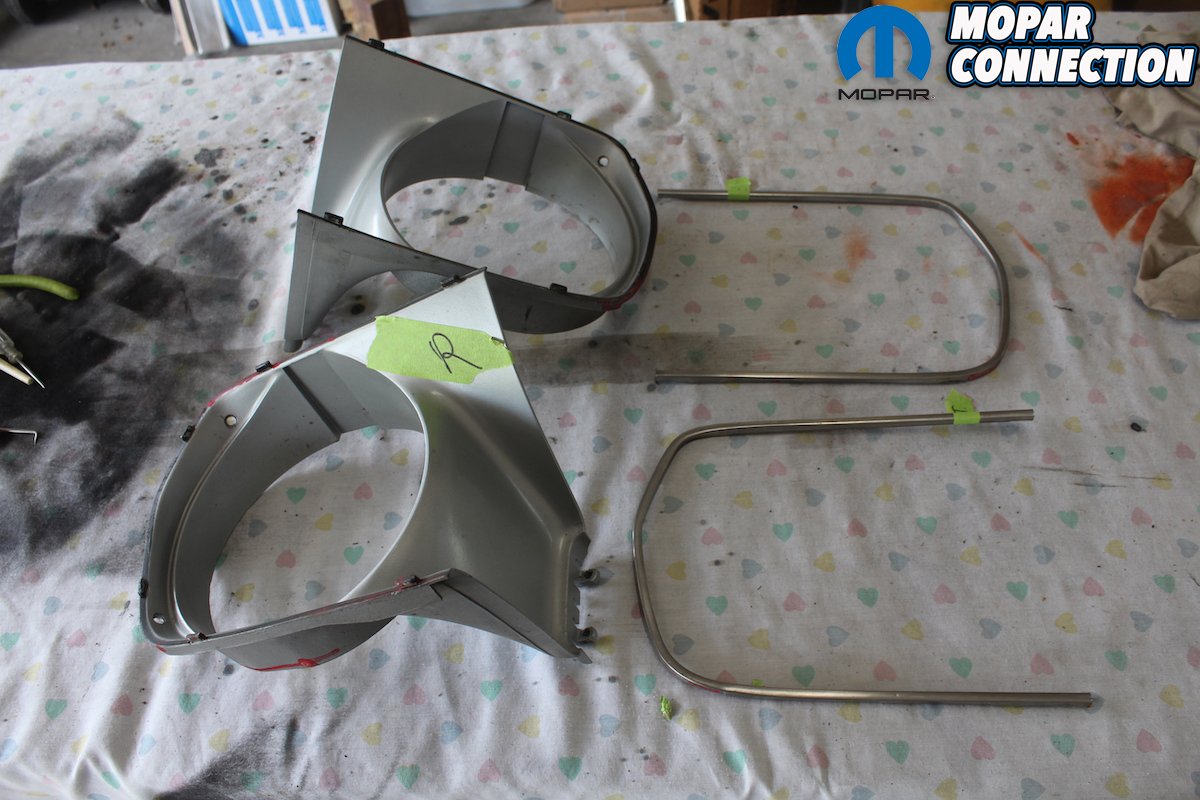
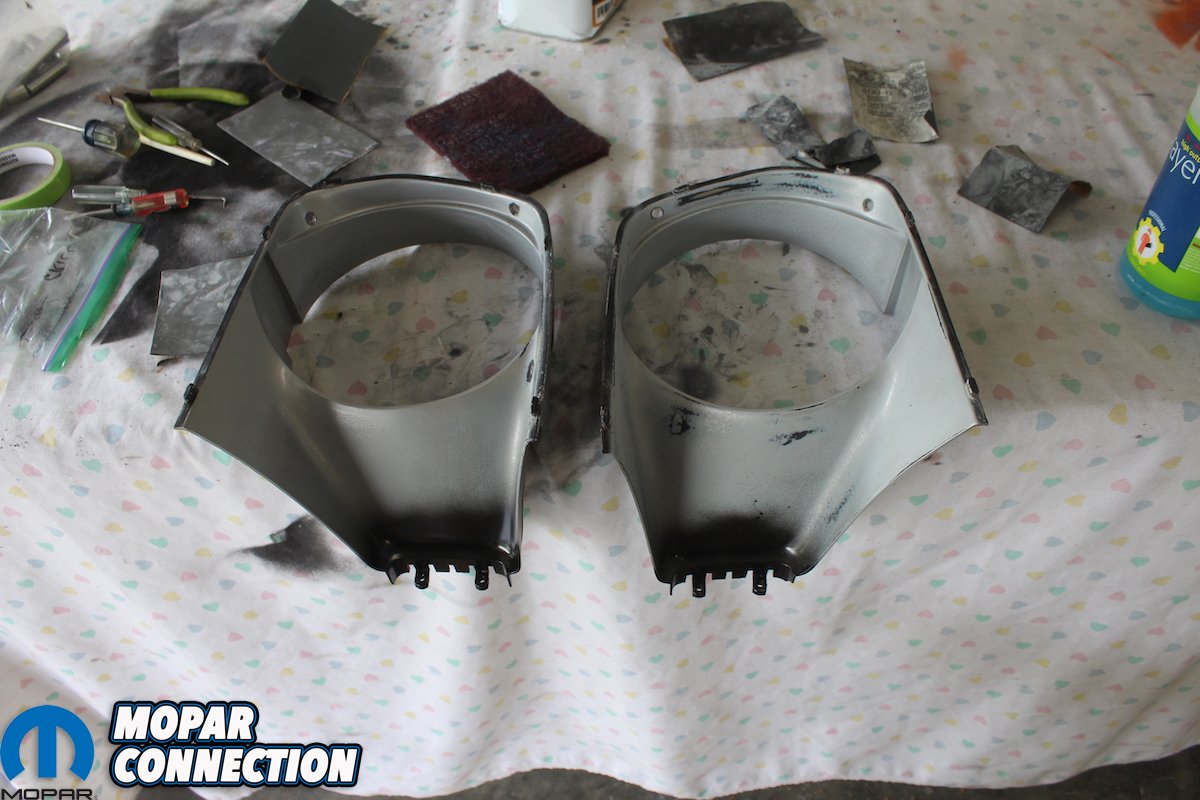
Above left: The grille that came on the Comeback ‘Cuda was an original one with all the correct hardware and trim. However, it did have broken pieces and the finish was not even close. After fully documenting the grille while assembled with plenty of pictures we carefully disassembled the grille and bezels. There are very thin and easily damaged the stainless trim around the grille and a black and red highlight bar and the Plymouth emblem. The trim attaches to the grille via little plastic studs that are a permanent part of the grille. Take your time taking the trim off or you will have to buy new ones. Above right: The headlight bezels were in great original condition and the trim was flawless. We were careful to label the right and left side and the corresponding trim. We chose to reuse the originals bezels, but we ordered a new grille from our friends over at Classic Industries. This grille is pretty complicated to reproduce and matching up original bezels with a repop grille should prove how good or not so good this reproduction grille will be.
The first step paint was very textured and dark grey in appearance. It must be shot uniformly and doing that with a grille was a true challenge. After the rough base of dark argent was applied the second stage paint was applied. It was clear that had a ton of the metallic particles added to create the “sparkle” of the original finish. Then to make things even more challenging the center of the grille is painted satin black. (We document the process step-by-step in the following pictures.)
We were able to get the grille, the lower grille insert, and the Shaker painted with just a tiny bit of paint left. Whew! That was close! Our next article will detail the correct way to reproduce the finish on the rocker “gills.” Then install the stainless trim, windshield, and a few odds and ends and the Comeback ‘Cuda will be completed!


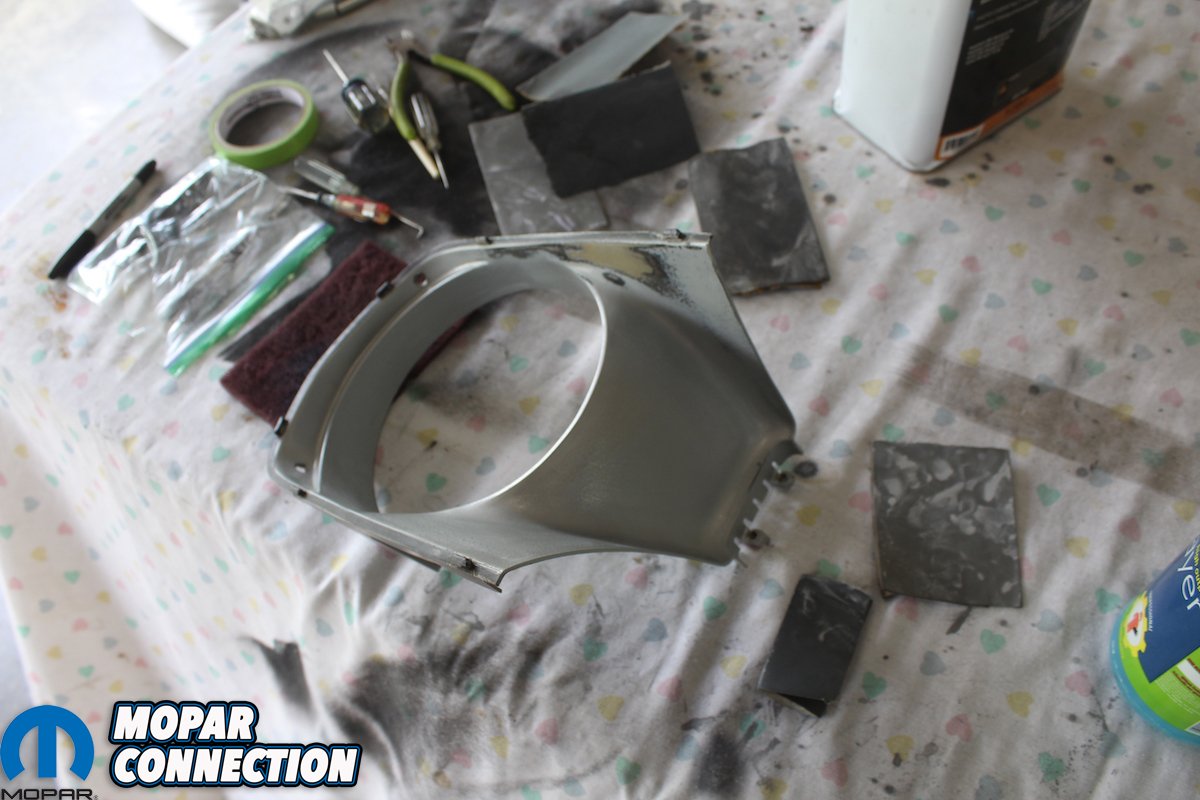
Above left: We wet sanded the incorrect finish off each bezel. Someone had painted the grille and bezels a slick, no texture silver. It was not a good look. We made sure to get any leftover texture off so we could start from scratch with the new paint. Above right: We painted the ends of each bezel with satin black. The inner bars of the grille are black, and these will attach to the black part of the grille.


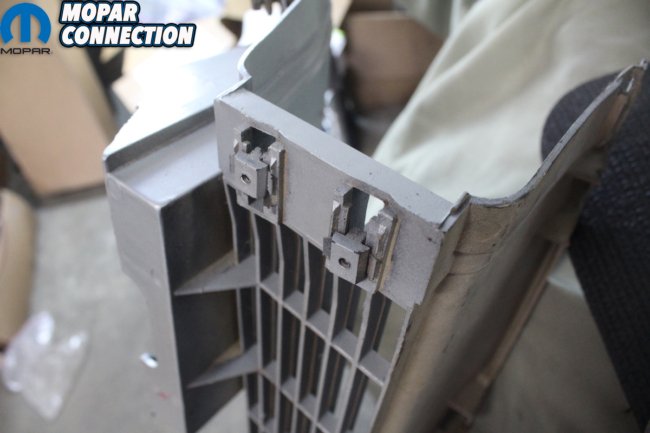
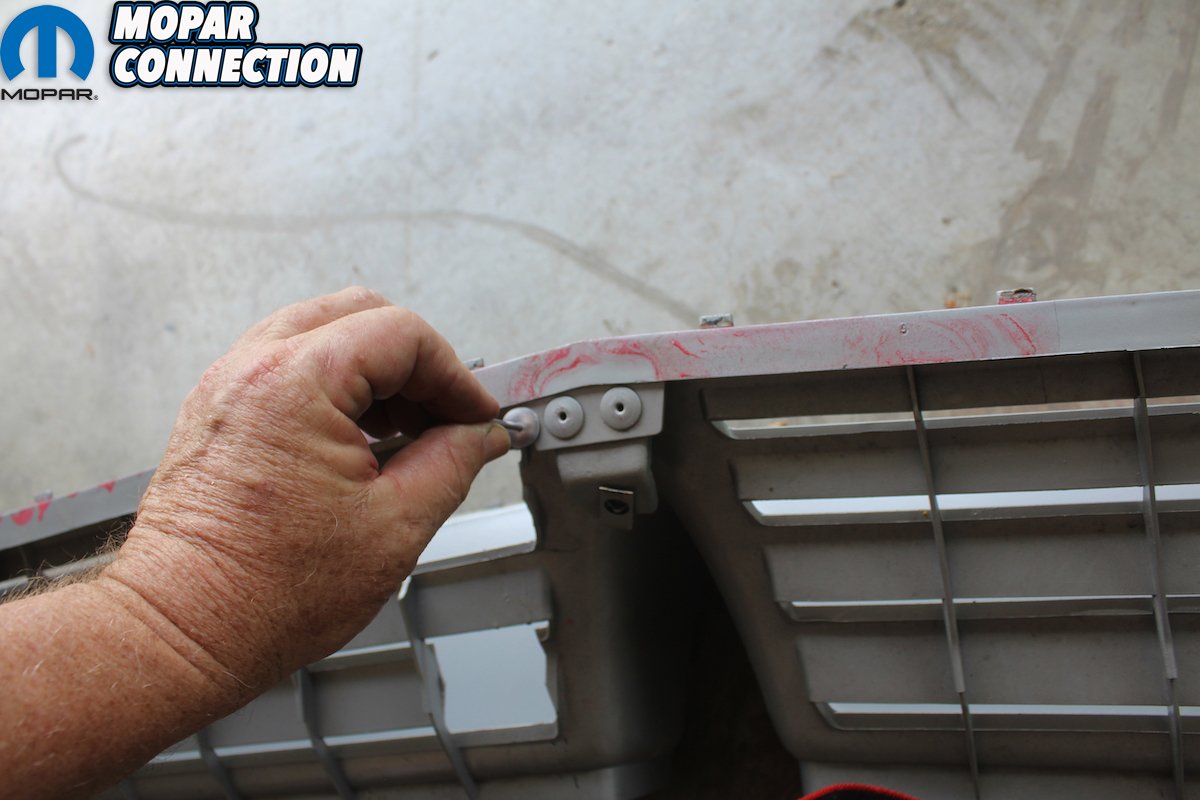
Above left: When we received the grille from Classic Industries (PT# ME175948), we immediately compared the grille with the original one. Everything matched very close to the original except the attaching tabs where the grille attaches to the body. The original washers were larger in diameter than the replacement grille. So, we matched up the pop rivet with the correct size. Above right: The tabs were correct in size and style they were just attached with the incorrect pop rivets. Always be sure to examine any reproduction part you buy for the correct everything. It seems to never fail that even the best parts are just not exact.


Above left: We get out our trusty cordless drill and try to match up the best size bit to drill out these rivets. We make sure to label which one goes where since they are slightly different. Even though we are really careful drilling these out any pop rivet will spin when you almost have it drilled through. Above right: Even with using extreme caution some of the plastic got slightly damaged. If someone wasn’t careful, they could easily destroy the new grille and have to get another one. Some people would just use the grille with the incorrect rivets, but we won’t.

Above left: The grille was a real quality item. It matched up very well with the original. However, the color of the plastic was too grey to match the original. Since we will be painting the grille, we scuffed it entirely with a red scotch pad. This step is very painstakingly long and requires much patience. As with any new plastic cast piece, new paint has a tendency to fish-eye or peel off, because the surface is too slick. So, take your time and get every inch roughed up to accept the new paint. Above right: We matched the original silver color of the grille and sprayed the back side so it would match the backside of the original grille. This way just like the original process the grille would have over spray from the painting of the front side of the grille on the back side of the silver grille.


Above right: The center ribs of the grille are painted a satin black. A non-textured satin black. Since the rest of the grille will be painted with a texture grey paint, we decided to shoot the entire front of the grille with the satin black. Then we came back and carefully masked off the area of the grille that needs to be non-textured black. This way the back side of the grille will be silver with slight black over spray. Above right: Man, did we get lucky! We were able to score the last pints of the 2-stage lacquer paint for the grille, lower grille insert, and the “shaker” from Frank Badalson. Then we were able to score the last gallon of “slow” lacquer thinner from our “go to” PPG supplier. There wasn’t enough paint for any practice runs so it was all or nothing.


Above left: We chose to shoot the easiest piece first with the texture gray lacquer paint that is the base of the two-stage process. The challenge is to shoot it so that the texture is even and consistent. There are a lot of solids in this paint, so you need to open up your paint feed on your gun. Otherwise, it will not get the desired textured finish. Above center: Next, we tackled the grille. Unless you have painted a wheel or some kind of concave part you haven’t experienced how difficult it is to paint something concave. Getting the paint to go on evenly with minimal over spray is a real challenge. Add to that trying to get even texture and you have a daunting task. Focus on the center rib and the lower part of the grille. It all has to be uniform, but these areas are more visible when it is on the car. Above right: After you get stage one paint applied let it dry about 20 minutes. Enough to let it flash but not so long that the paints won’t meld together. Next is the stage 2 paint which looks like a satin clear with a truck load of metallic added. Keep shaking you gun to keep the metallic agitated. Spraying the “sparkles” even and consistently is vital. Unlike the stage 1 paint where you are applying a heavy coat to build texture here you are applying a medium wet coat for an even dispersion of “sparkles.” Both stage 1 and stage 2 paints are a one shot, one coat deal. There isn’t a go back and shoot again chance.

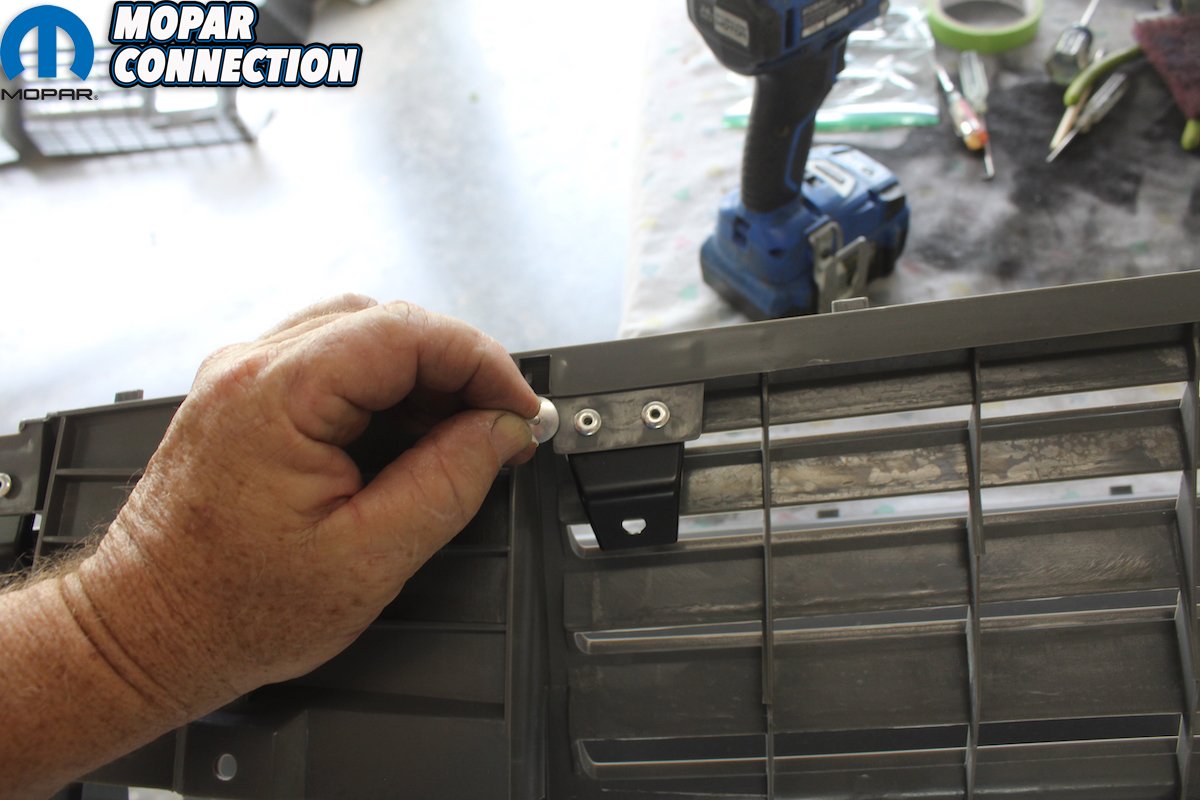
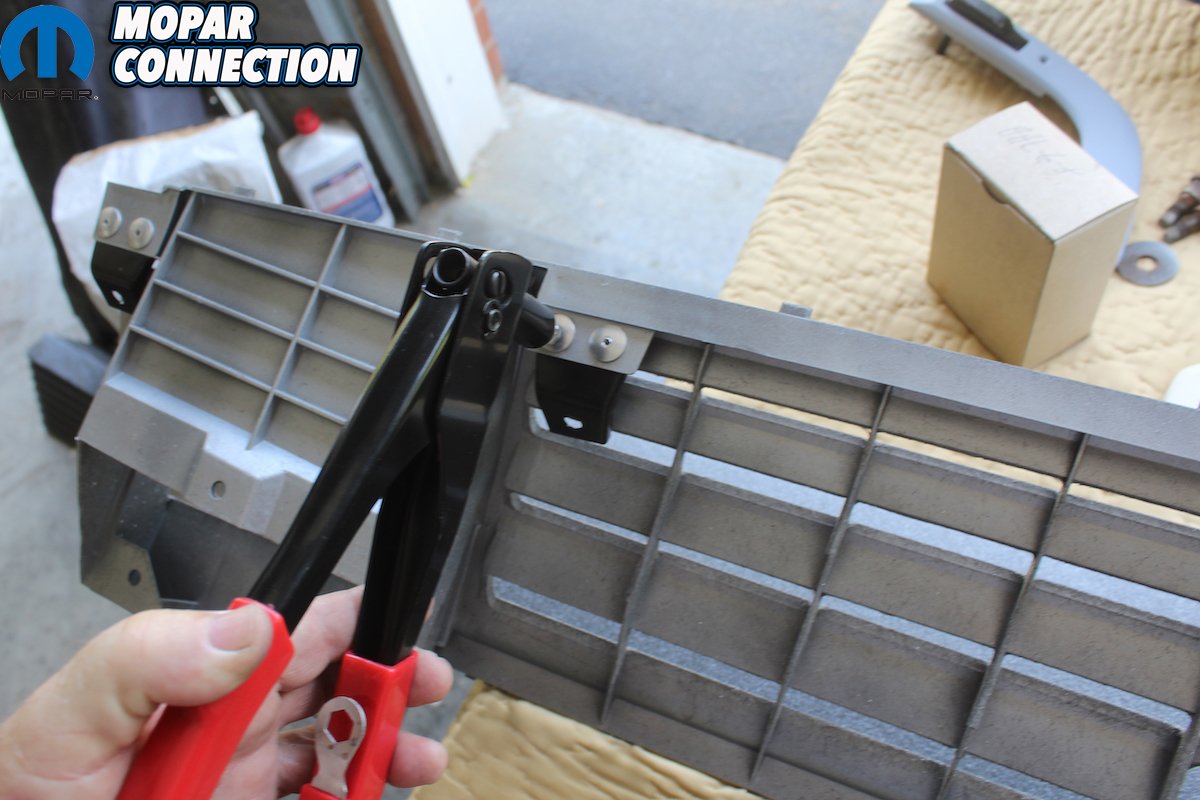
Above left: After all the parts have cured over night you can attach the tabs to the grille with the correct size pop rivets. Since we labeled them in order it is a straightforward process. The tabs are semi-gloss black. These are the new tabs from the reproduction grille. Above right: Carefully position each tab before using the pop rivet gun to re-attach the tabs to the grille. You are attaching these tabs with a pop rivet gun to a plastic grille. Take your time. One false move and you can snap off a piece of the grille.

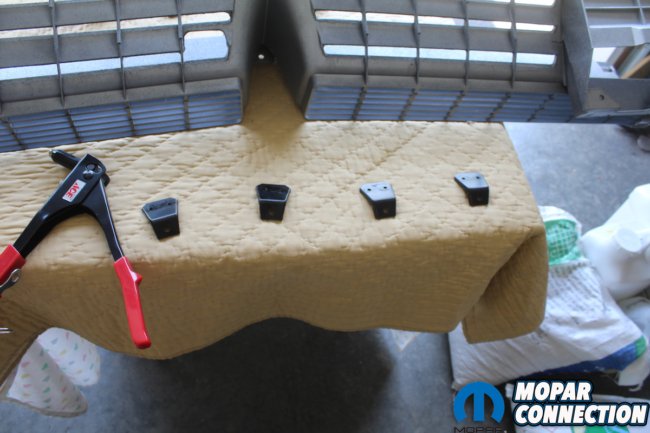
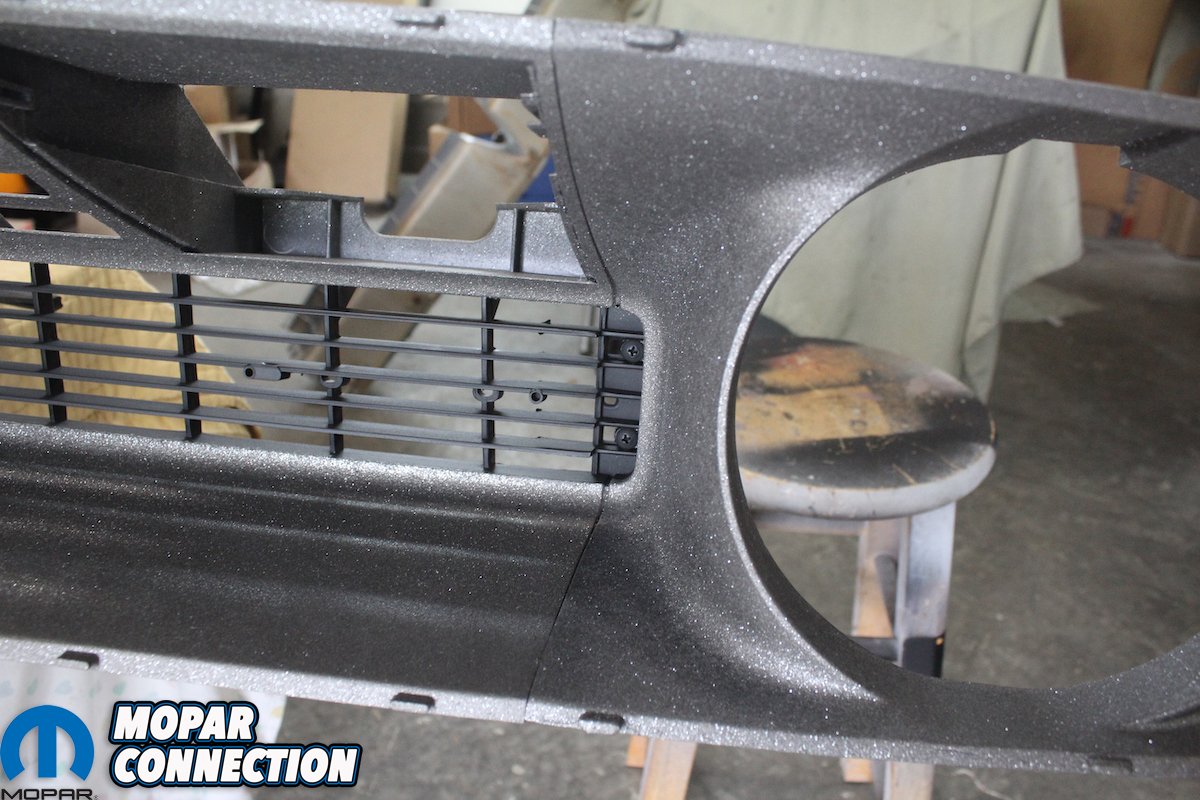
Above left: There are 4 sliding plastic retainers used on the grille to attach the headlight bezels to the grille. We had the originals, so we cleaned them up and sprayed them silver. We used a small amount of lube so they will slide in the channel so the bezels can be attached correctly. Above right: Now the moment of truth. We wanted to use the original entire grille and headlight bezels. But the original grille was broken in too many places to repair. So, we kept our original bezels and ordered a new grille. The bezels are attached with two screws on each side. Remember we painted the ends of the bezels black. Here you can see why since the ends of the bezels, the attaching screws and the center of the grille are all satin black. Check out the fit. This repop grille is the bomb!


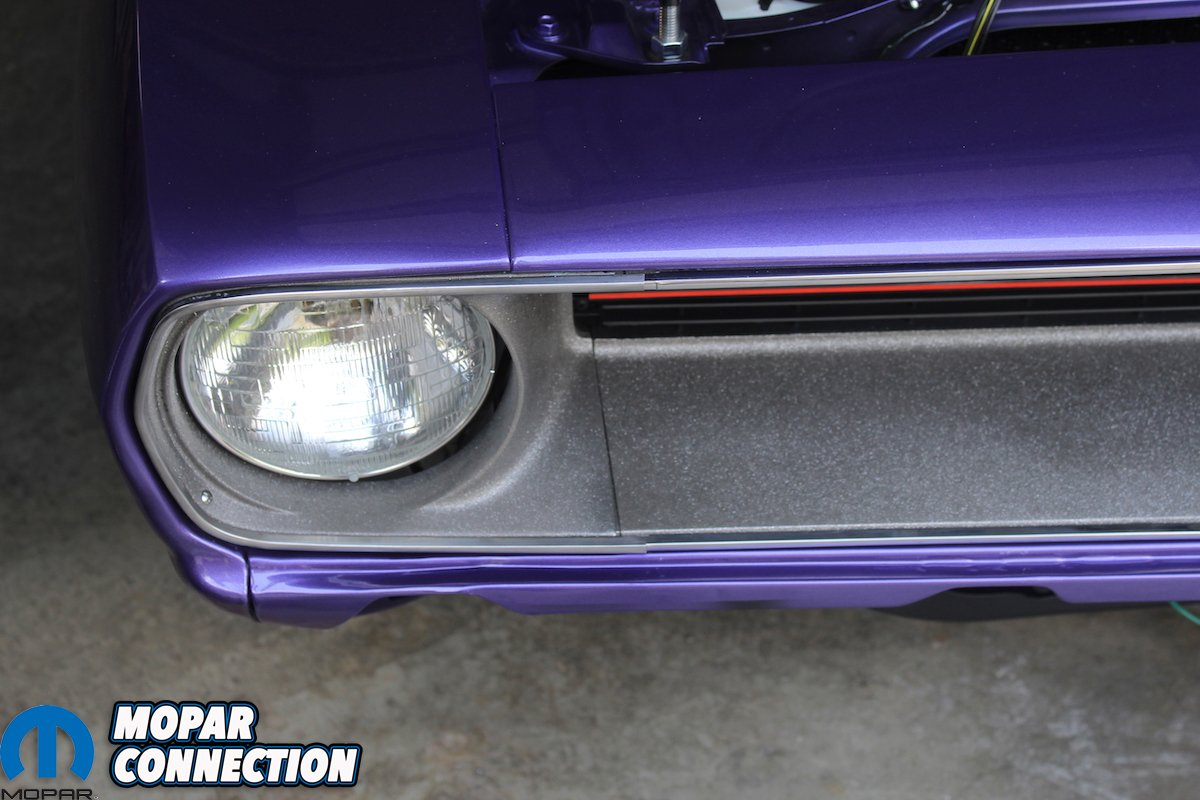
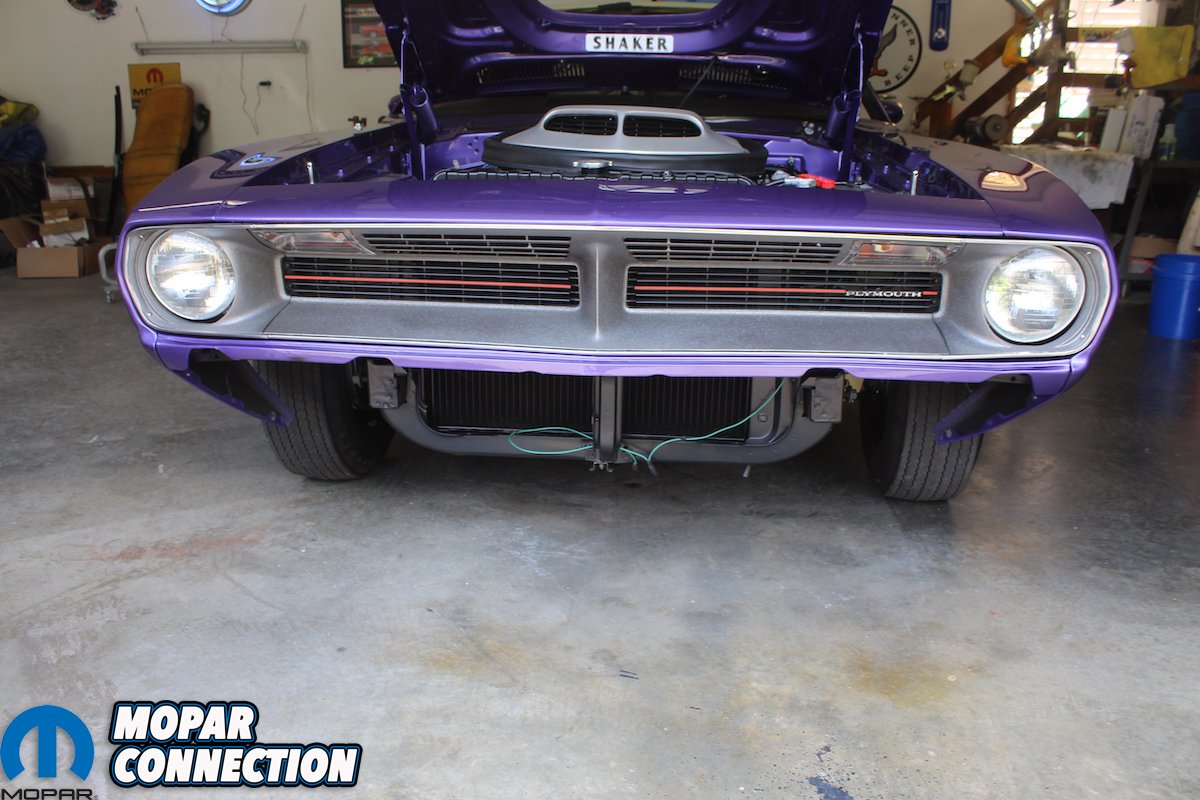
Above left: Now you have to reassemble the entire grille and bezels. The surround stainless trim is attached, the center red bar is attached, the Plymouth script is attached, and the assemblies are all installed on the Comeback ‘Cuda. The fit and finish is amazing. We score some original sealed beam headlights because halogen just won’t do. Above center: OK time to get all up in your face close and personal. Were we able with the help of Classic Industries, Frank Badalson, and a whole lot of attention to detail, reproduce the original finish of the Comeback ‘Cuda grille? We think that is a big 10-4! Above right: Fully assembled with some original sealed beam headlights, some brand new turn signal light assemblies, with the correct plating on the housings, correct black out behind the grille, and you have a beautiful, original, example of what Plymouth was able to bring to market that changed the Barracuda “A-body” into the icon E-body 70 Hemi ‘Cuda convertible with a stunning front grille.


Great article and tech, as always. Appreciate your work for this site.
Now, since the paint and reducer are no longer available, what can use that is available to replicate the dark argent? Preferably not a spray can. Thanks