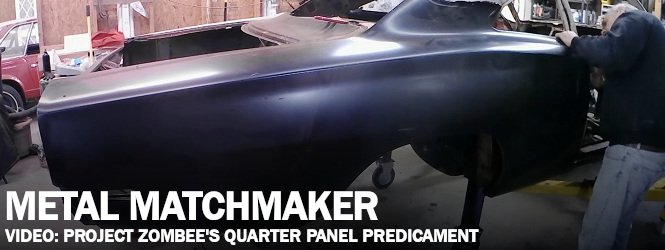
The owners of 1970 Dodge Coronets and Super Bees are presented with a unique set of challenges when restoring one of these “love it or hate it” bodies. Aftermarket support for 1968 and 1969 b-bodies isn’t exactly breathtaking, but the lack of available body panels is even more exacerbated when it comes to 1970 models.
Mopar Connection Magazine’s Project ZomBEE found all of this out the hard way when it really needed a new pair of quarter panels which are woefully unavailable new. Unfortunately, options are few and far between in a case like this.
Many would start down the path of sourcing used sheet steel, a route that is likely to lead to more rust than recuperation. Another route might be a complete donor body, but those all seem to be $10,000 project cars now. And there’s no guarantee that the metal on one fifty-year-old automobile would be any better than another.
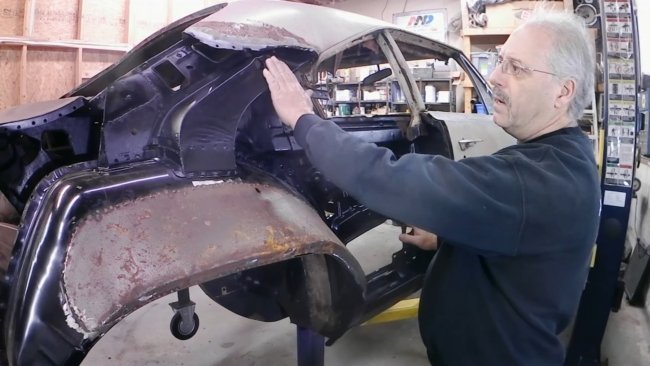
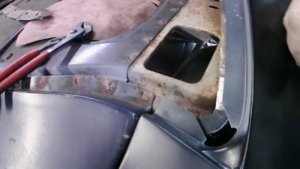
Above: Basic prep work included cleaning then coating the interior structure with POR-15.
As luck would have it, Dave Chamberlain at All Classics Restoration had a few tricks up his sleeve for the flanks on this Bee and his quarter panel trickery was really something to see. Efforts started with a pair of Auto Metal Direct (AMD) full quarters (P/N 700-2469-L and 700-2469-R) which were intended for 1969 Dodge Coronets or Super Bees.
As Dave helped to explain in his latest update video, there are three primary differences between ‘69 and ‘70 bodies, all of which can be overcome with careful planning. The front cove detail might be the most noticeable aspect. Two small separate indentations mark ‘68 and ’69 cars while ‘70 models have but a single forward-facing scallop.

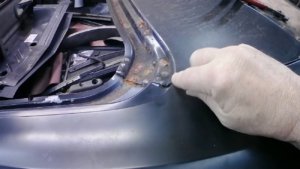
Above: This support bracket was removed from the body and attached to the new quarter to ease installation.
This is where the prep work started. When the old steel was cut away, Dave was careful to leave the original ’70 cove attached. Rather than measure its exact placement, cut it out, then try to reattach it to the new metal, it was much easier and more precise to just leave it and use his super slick method of drilling locating holes for positioning.
Three eighth-inch holes were drilled through both the cove and lock pillar flanges. With a new quarter on, those holes in the pillar flange could be transferred and drilled in the new metal. Then, the cove could be relocated with the holes that would exist in the lock pillar, cove flange, and new quarter. While it might sound complicated, it’s actually the easiest way to put it in the proper position without a bunch of imprecise measuring and marking.
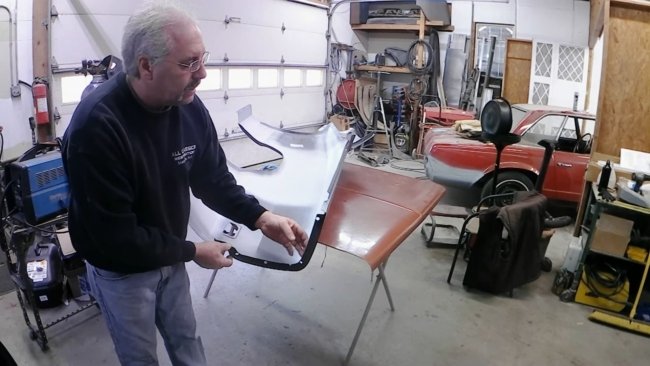
Above: The rear flange on the new quarter was removed since it was specific to ’69 and would no longer be necessary.
On the rear portion of the quarter, there are two more differences between ’69 and ’70. One is the side marker. For 1969, rear markers were simply small rectangular reflectors that clipped in to a bezel (P/N MD2057). In 1970, the change was made across the board to go to lighted side markers (P/N MB2104). These versions were a bit larger to make space for both the reflecting portion and a lamp socket. Therefore, the rear marker stampings in the quarters are unique between the years.
The other aft difference is the meetup between side and tail at the rear. “The last four or five inches or so of the quarter panel has a different profile to it so that has to be changed out also,” says Dave. The ’69 quarter panels are about two inches longer than ’70 versions and, while the ’69 panels swoop upward to meet the tail panel, the rear portion of the ’70 noses down. “The bolt-on end cap that goes on the quarters on the ’70 is much larger than the ’68 and ’69. That’s another difference between them and why that ’69 quarter is so much longer.”
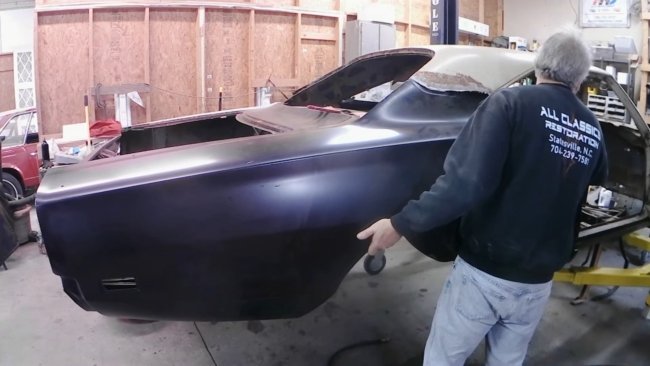
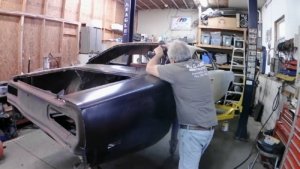
Above: Hanging the new panel was a one-person job once everything was prepared.
In this case, it was actually a benefit to have a secondhand tail panel in place because it also included a short section of original ’70 quarters still attached. “With the tail panel that [Kevin] brought me, it worked out good because there was enough left of the original quarters on there that it gave me the profile needed that makes up the difference between the two quarters,” Dave explains.
Now, the marker cutout mismatch could be fixed at almost any time, but that back flange on the new quarters had to be adjusted before fitting to the car. It would have been in the way for fitment, so Dave carefully cut it off while still leaving the new panel plenty long.
That’s about all the prep work the AMD quarter needed. The Bee body, on the other hand, garnered the bulk of the pre-fit fun. Inner and outer wheelhouses, also sourced from AMD, were already installed while the area was opened up. And USCT Motorsports had already supplied a set of growth rings (P/N USCTAM2049) to take the hump out of the outer house, a big factor for fat tires.
Above left: Rear window corner alignment was as expected. Above center: Good height and curvature alignment on the trunk gutter proved it was ready to tack in to place. Above right: Screws along the rear window frame, lock pillar, and wheel house would hold it all together for now.
Internal metal got coated with POR-15 rust encapsulator after a wire brush cleaning knocked off dirt and scale. All fresh metal was left uncoated since it was not yet bitten by the rust bug. The primary pain was the rear side window frame support bracket which ended up being removed from the body and attached to the quarter ahead of trial fitting. Doing this saved Dave the headache of trying to navigate one big piece of steel over the bracket, under the roof structure, and over the lock pillar lip.
That little detail allowed the big B-body flank to slide into position with some finesse. A bit of trimming in the upper sail panel and front window channel areas put it almost perfect. After that, three things were checked to verify placement: door gap, rear window corner, and trunk gutter corner.

Above: The original quarter cover was put back into place via three locating holes that were drilled before its removal.
Door gap analysis revealed a big space at the top and a smaller one at the bottom. This told Dave that the back end up the car needed to go before pinning the new panel. A little light pressure from a hydraulic jack remedied the situation succinctly.
Rear windshield corner alignment, height in relation to the Dutchman panel, and trunk gutter curvature all checked out, so Dave started in with the screws. Beginning at the front and working to the back, several dozen were applied to make the panel solid enough for travel.
And travel it did, as Editor-in-Chief Kevin Shaw scooped it up shortly after this and shuttled it some 1,100 miles to Finale Speed. From here, they’ll take the body work the rest of the way before installing a big, fat Hellcrate Hemi. Thanks in part to All Classics Restoration’s efforts in rust recuperation and sheet steel therapy, this Bee is on its way to buzzing again.





 Mopar Connection Magazine – The ONLY Daily Mopar Magazine © 2022. All Rights Reserved. Mopar Connection Magazine is the ONLY daily Mopar Magazine bringing you the latest Mopar news, technology, breaking news, and Mopar related events and articles. Find out the latest information about Mopar, Mopar products and services, stay up to date on Mopar enthusiast news, dealership information and the latest Mopar social media buzz! Sign up for the Mopar Connection Magazine newsletter for the latest information about new products, services and industry chatter. Mopar Connection Magazine is the best and only source you need to be a Mopar industry insider!
 by
by