


Since we rescued our neglected Hemi Road Runner, Project Rara Hemious Birdicus, back in March, we have been working diligently to bring the 426 back to life. With the help of YearOne, we completed a comprehensive fuel system overhaul, including the installation of a new pump, filter, and fuel lines, which significantly improved drivability. Before that, we had rebuilt both AFB carburetors. Still, the ignition system was a weak link in the chain.
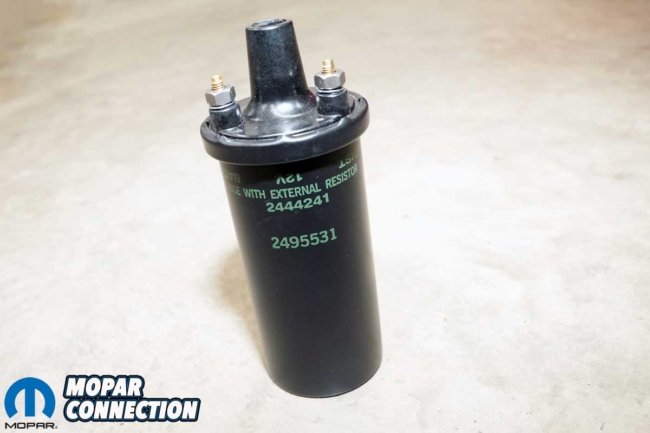

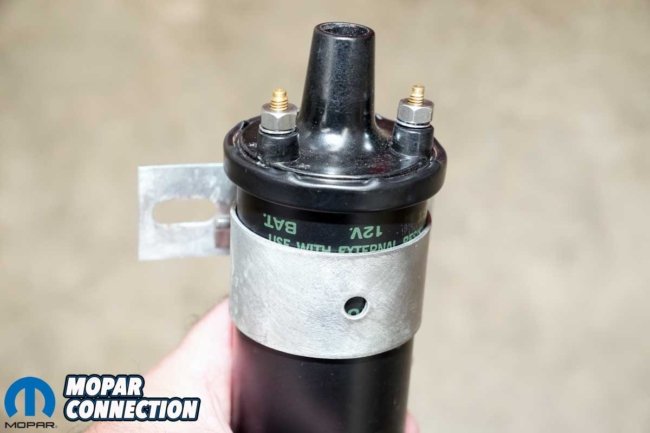
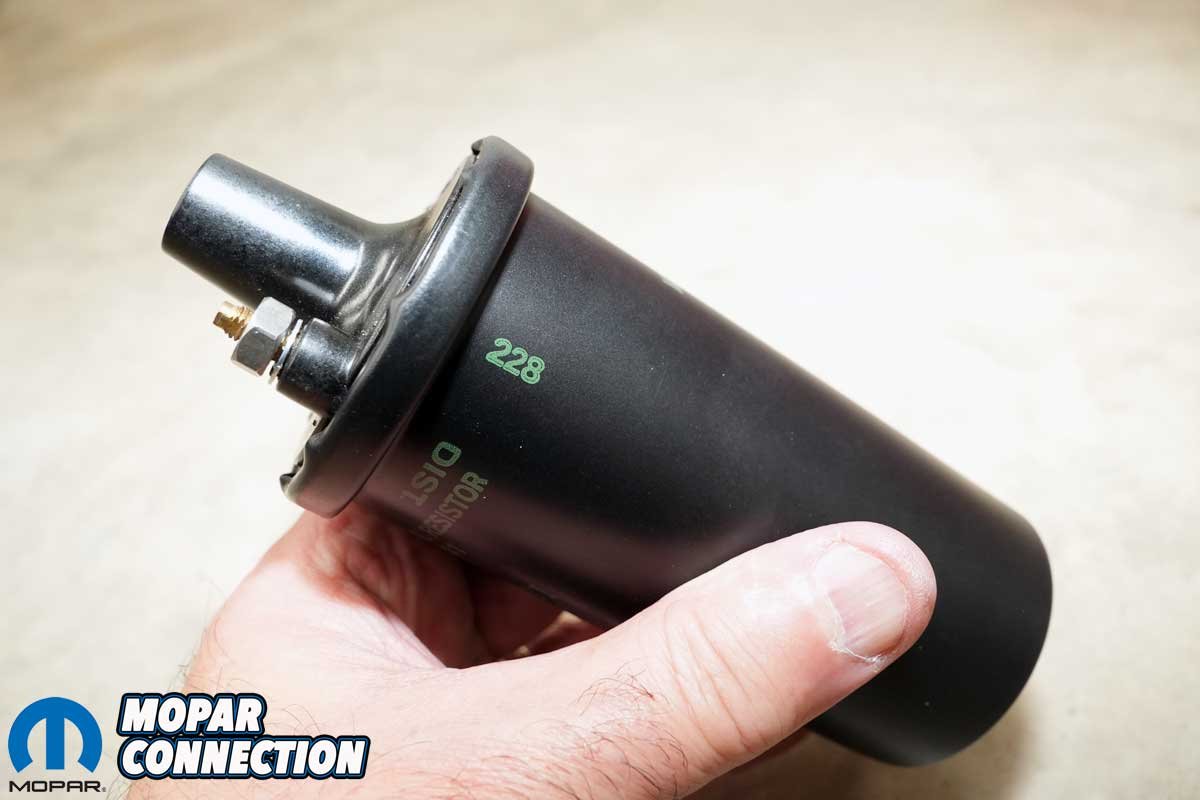
Above Left: To restore the Road Runner’s ignition system to its original factory look and function, we sourced a correctly labeled ignition coil from YearOne. The coil features authentic green lettering that matches the original equipment style used in 1968. Above Center: The coil we chose was date-coded “228,” indicating it was manufactured during the 22nd week of 1968, an ideal match for our car’s production timeline. YearOne offers a wide selection of date-coded coils to suit various years and applications, making it easy to find the right fit for your restoration. Above Right: The factory-style coil bracket secured the new coil perfectly, confirming both the visual and functional accuracy of the installation.
Once again, YearOne stepped up and provided us with the critical ignition components needed to bring the system up to spec and possibly exceed factory standards.
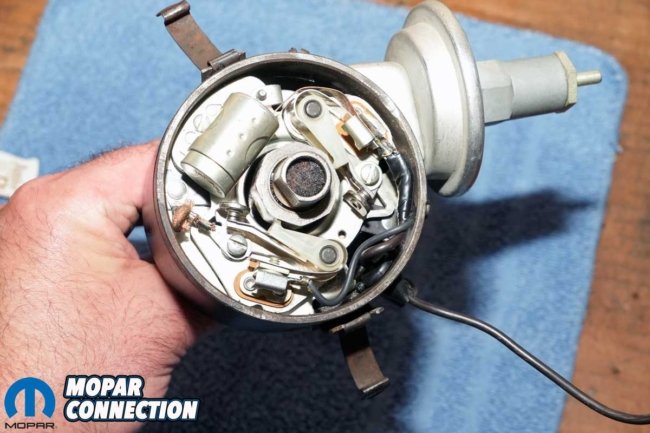
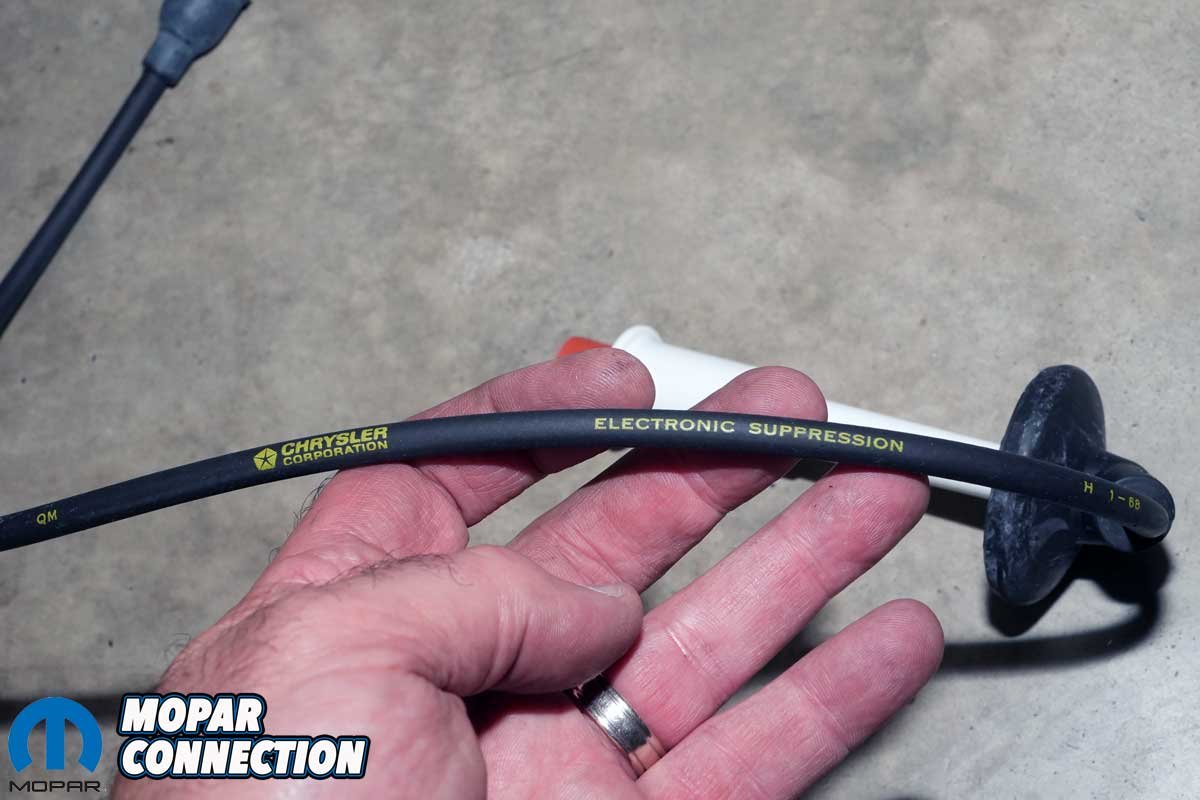
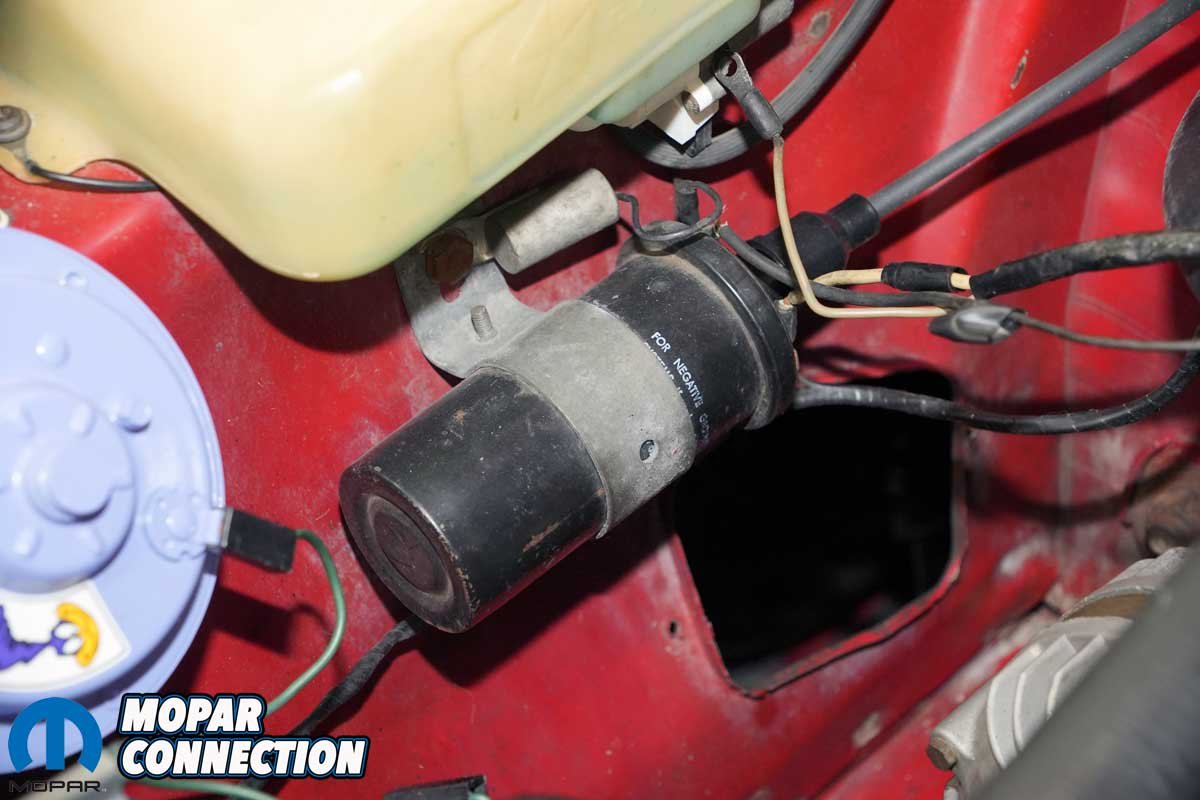
There were numerous concerns with the ignition that we almost did not know where to begin. The coil had been relocated from its original position on the intake manifold to the inner passenger-side fender, mounted under the windshield washer reservoir. The coil-to-distributor wire was cobbled together from three different sections of wire, one of which was soldered and the other joined with a slip-on connector.
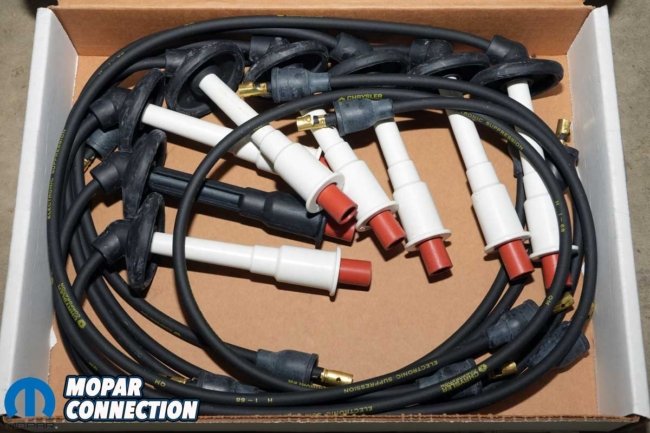
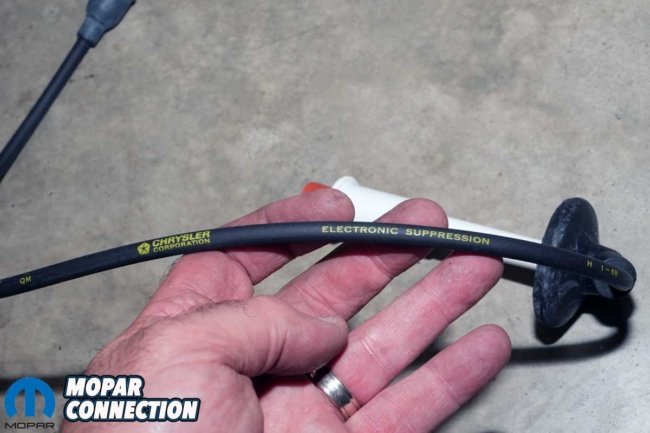
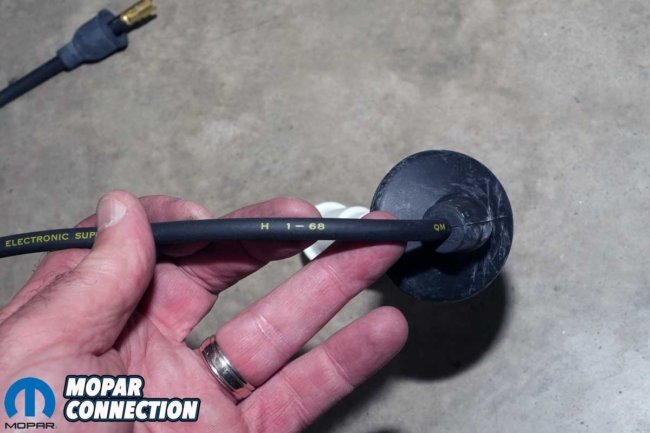
Above Left: To complement our updated ignition system, we picked up a reproduction spark plug wire set from YearOne designed specifically for 1968 Mopars. Above Center: The wires are an exact match to the originals, featuring the correct yellow factory-style labeling along with the iconic Chrysler Pentastar logo, perfect for a detail-oriented restoration. Above Right: Just like the originals, these wires are date coded. Our set was marked for the first quarter of 1968, which aligns well with our Road Runner’s late-June assembly date, helping maintain authenticity under the hood.
That was not the only red flag. The vacuum advance canister had been completely disconnected, with its port on the rear AFB sealed off. When we applied a handheld vacuum pump to the canister, it failed to hold a vacuum, meaning it was essentially nonfunctional. On a street-driven car, vacuum advance is critical, not just for improving throttle response but also for better fuel economy and cruising efficiency.

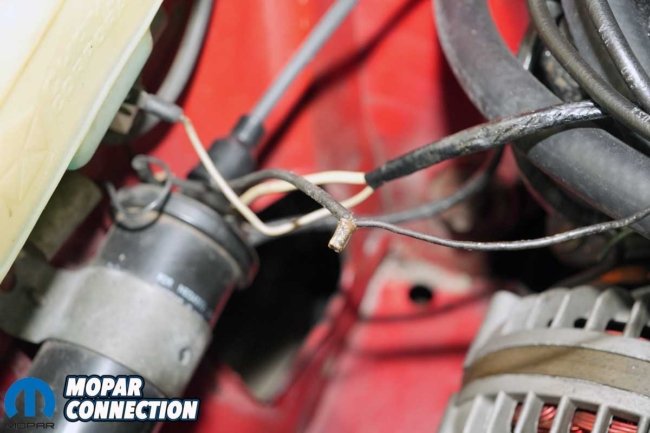
Above Left: For reasons unknown, the ignition coil had been relocated from its original mounting position on the intake manifold to a spot beneath the washer reservoir, an unusual and unnecessary modification. Above Right: The coil’s negative (-) lead wire was cobbled together from three separate wire segments. Some connections were soldered, while others were simply twisted or slipped together without proper insulation. It was a tangled, unsafe mess that clearly needed to be corrected.
Then there were the spark plug wires, over 40 years old and showing their age. When we clamped our Snap-On inductive timing light to plug wire #1, the strobe would reset and flash erratically. We tested the light on another car, and it worked perfectly, confirming that something in the Road Runner’s ignition system was breaking down.

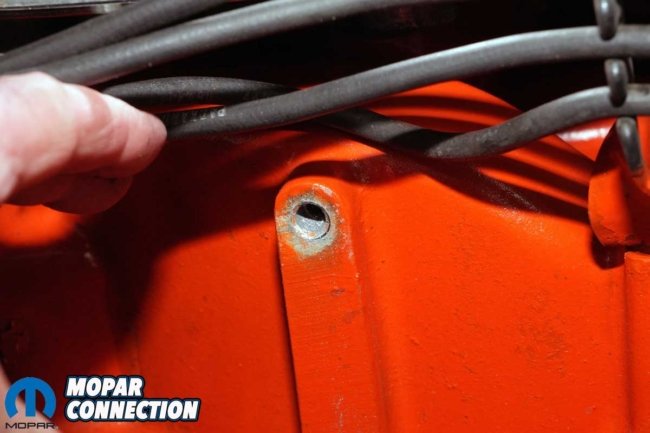
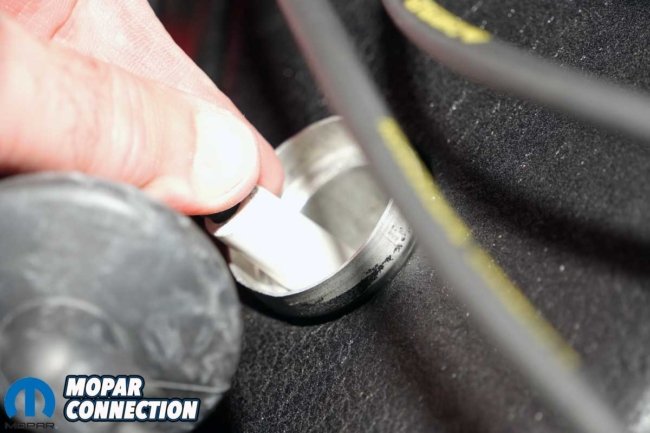
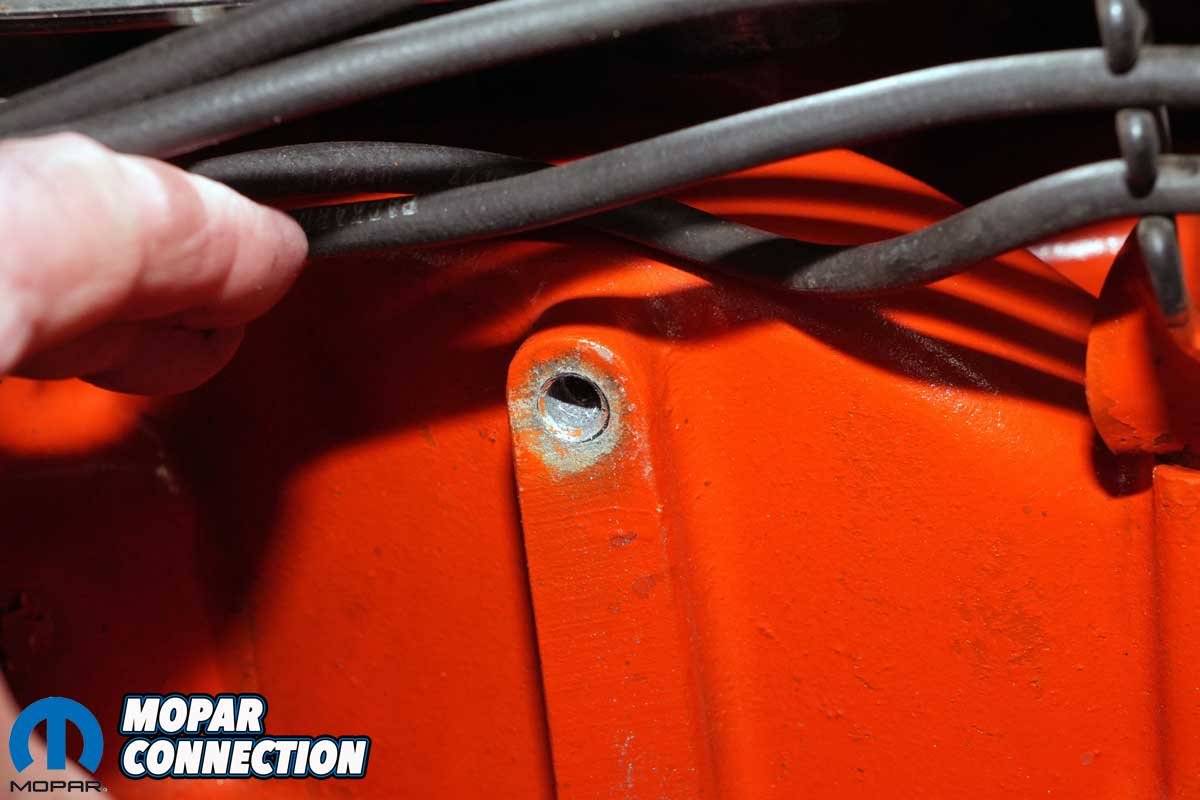
Above Left: The original coil bracket bolts were still in place on the intake manifold, though the upper bolt is partially obscured by a plug wire in the photo. Above Right: When we removed the bolts, it became clear why the coil may have been relocated. The aluminum threads in the intake manifold were completely stripped. It is likely this problem prompted a previous owner to move the coil rather than repair the mounting point.
Despite the chaos, we eventually managed to get a timing baseline. The initial (base) timing measured 4° before top dead center (BTDC), and the total timing (base plus centrifugal advance) reached a maximum of just 22° BTDC. That was too much initial (according to the service manual) for a stock ’68 setup but nowhere near enough total advance. Worse yet, when touching the spark plug wires with the engine running, we felt a tingling sensation, not a good sign. The cables were clearly leaking voltage.
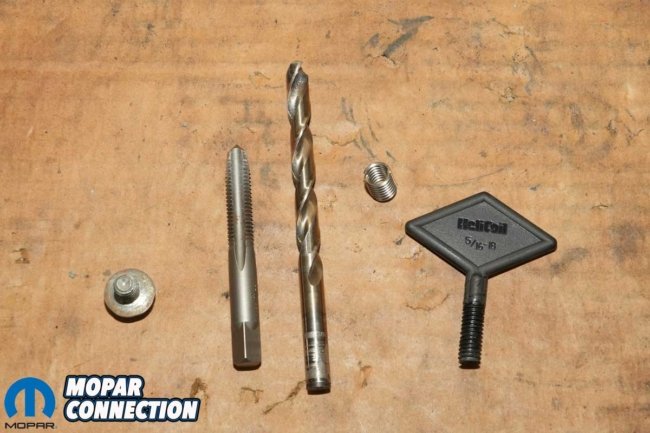

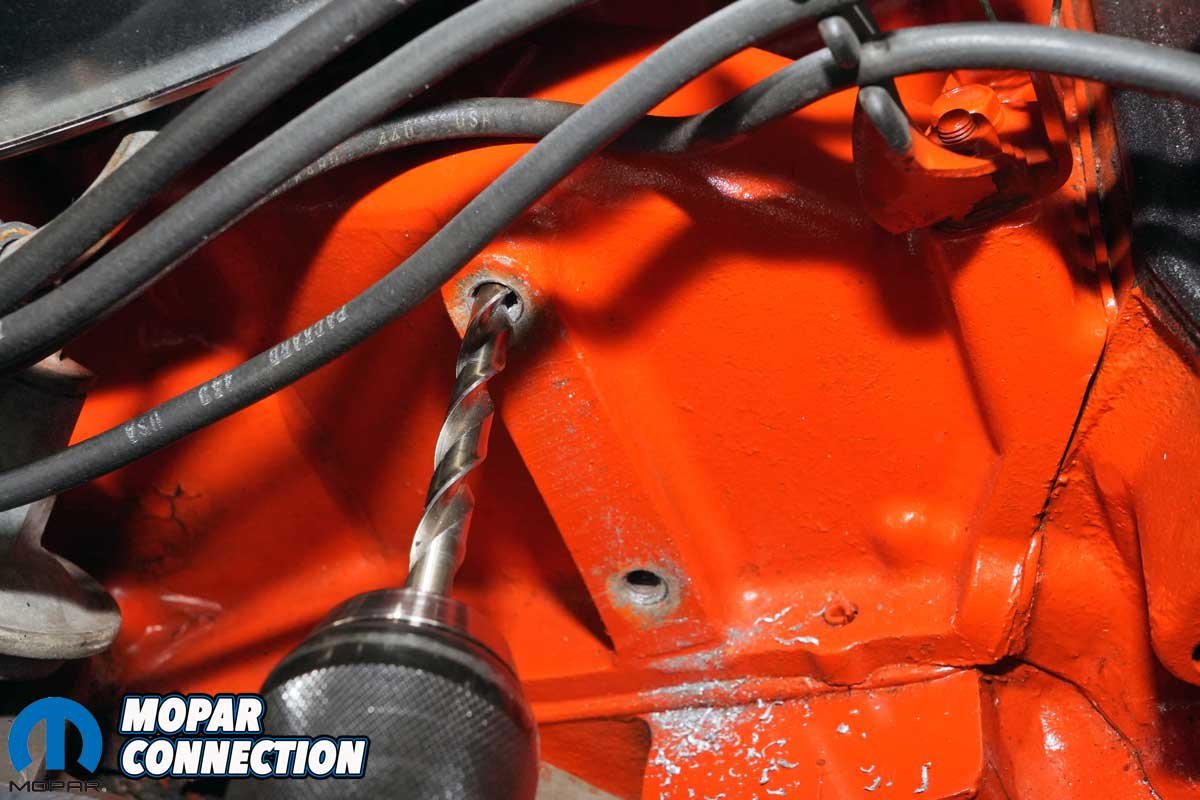
Above Left: To repair the stripped threads in the intake manifold, we used a 5/16-18 Heli-Coil kit. The kit came complete with the appropriately sized drill bit, tap, and installation tool, everything needed to restore the original thread size and strength. Above Right: We carefully drilled out the damaged holes to the larger size required for the Heli-Coil inserts, making sure not to go too deep and risk compromising the manifold. Precision was key to ensure a clean, secure repair.

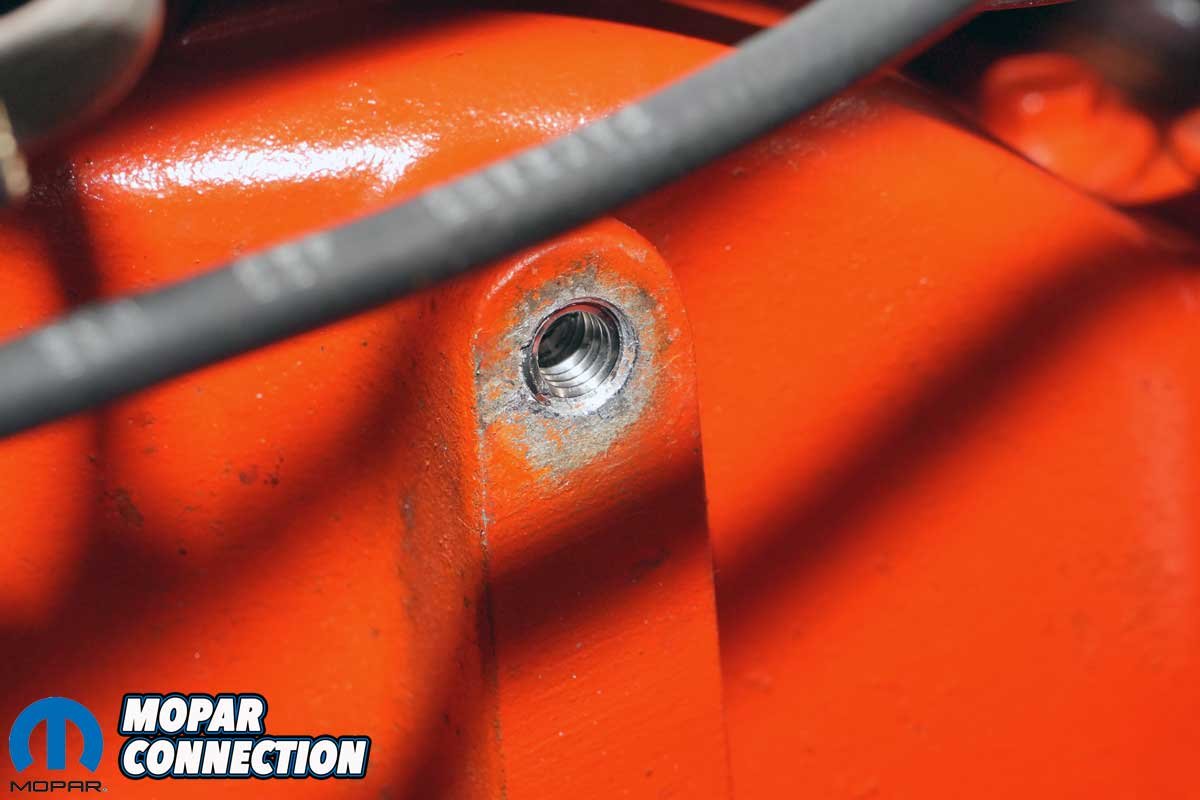
Above Left: We carefully threaded the tap into the freshly drilled hole, turning it in gradually and backing it out frequently to clear away the aluminum shavings. This step-by-step approach helped prevent binding and ensured clean, well-formed threads for the insert. Above Right: After applying a small amount of thread locker to the Heli-Coil insert, we threaded it in until it sat flush with the surface of the intake manifold. Once the insert was fully seated, we snapped off the installation tang to complete the repair. The coil would be secured to the restored mounting holes later in the installation process, as shown in upcoming photos.
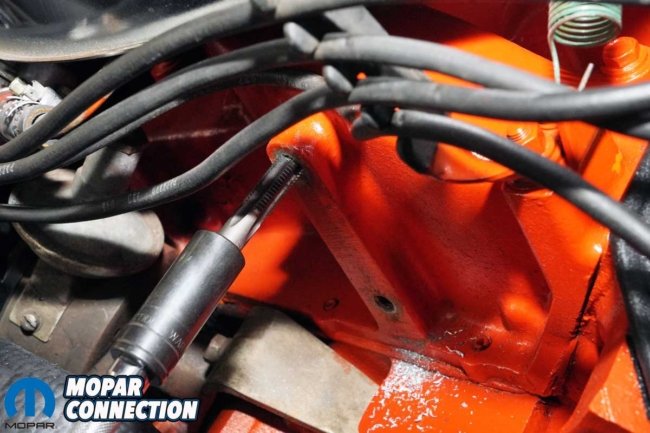
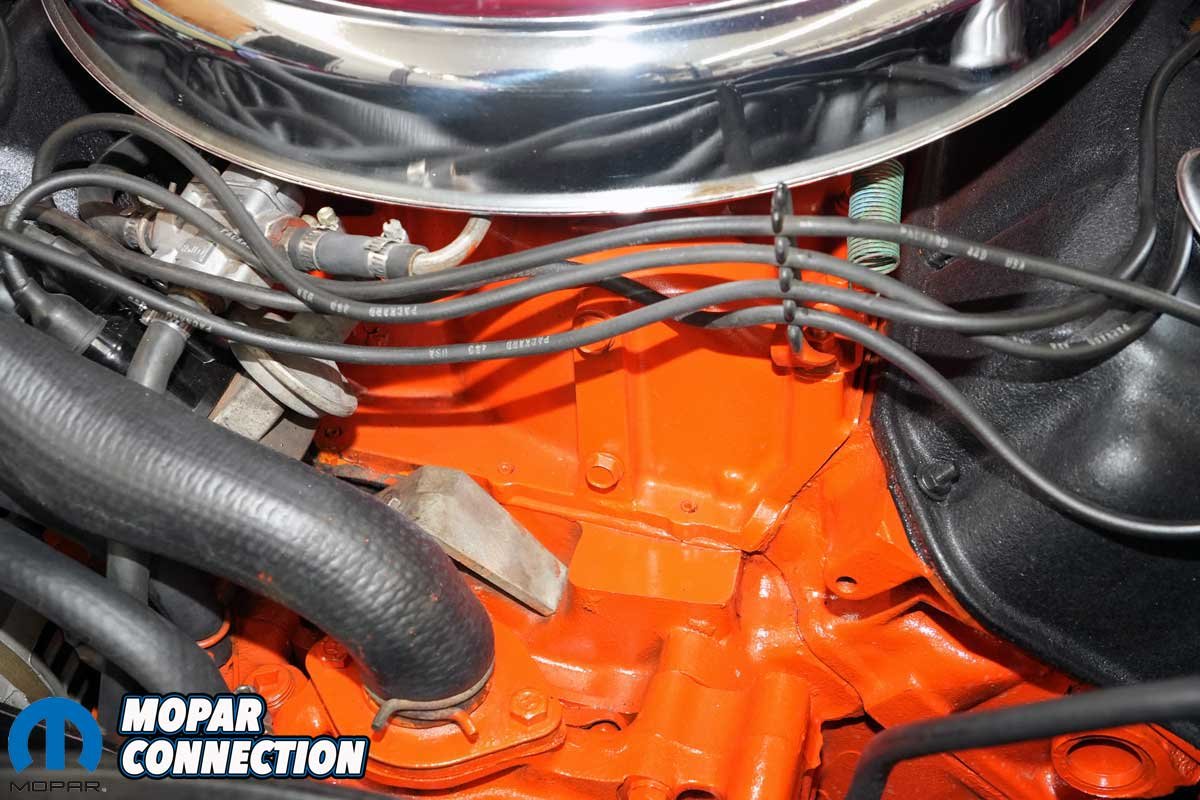
We began by removing all eight plug wires, as well as the coil wire. On cylinders 5 through 8, the cables pass through small grommets in the valve covers. We carefully pulled and cleaned these grommets. Despite being stained and aged, they were original and intact, good enough to salvage.
Next, we planned to return the ignition coil to its proper location on the intake manifold. When we removed the old coil bracket bolts on the manifold, we discovered that both of the mounting holes had stripped threads. We drilled, tapped, and installed a Heli-Coil to restore the threads, ensuring the coil would be securely mounted.
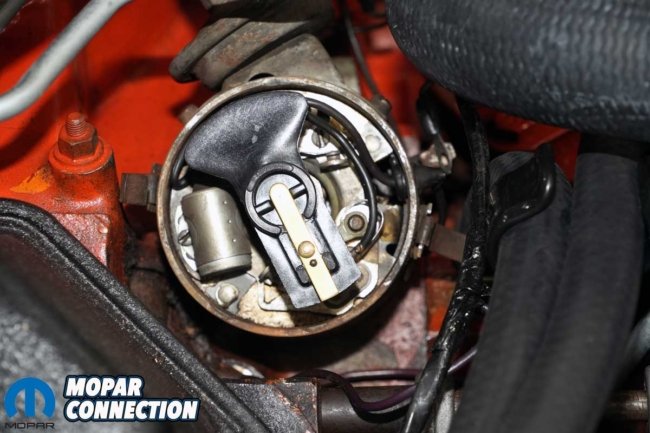

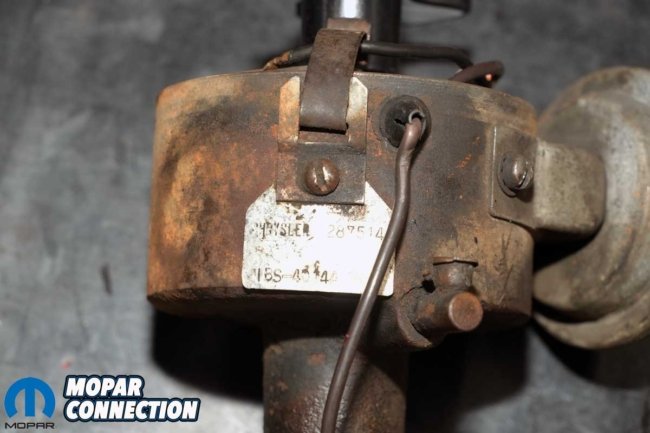
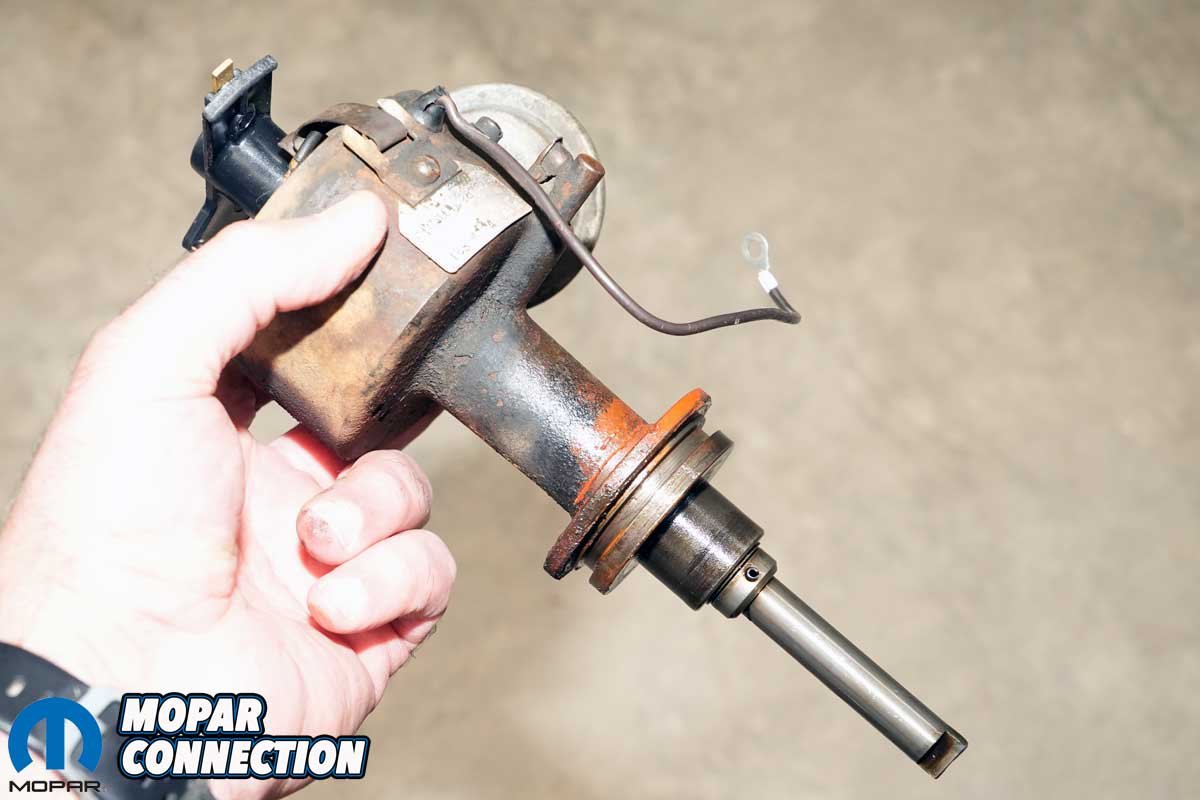
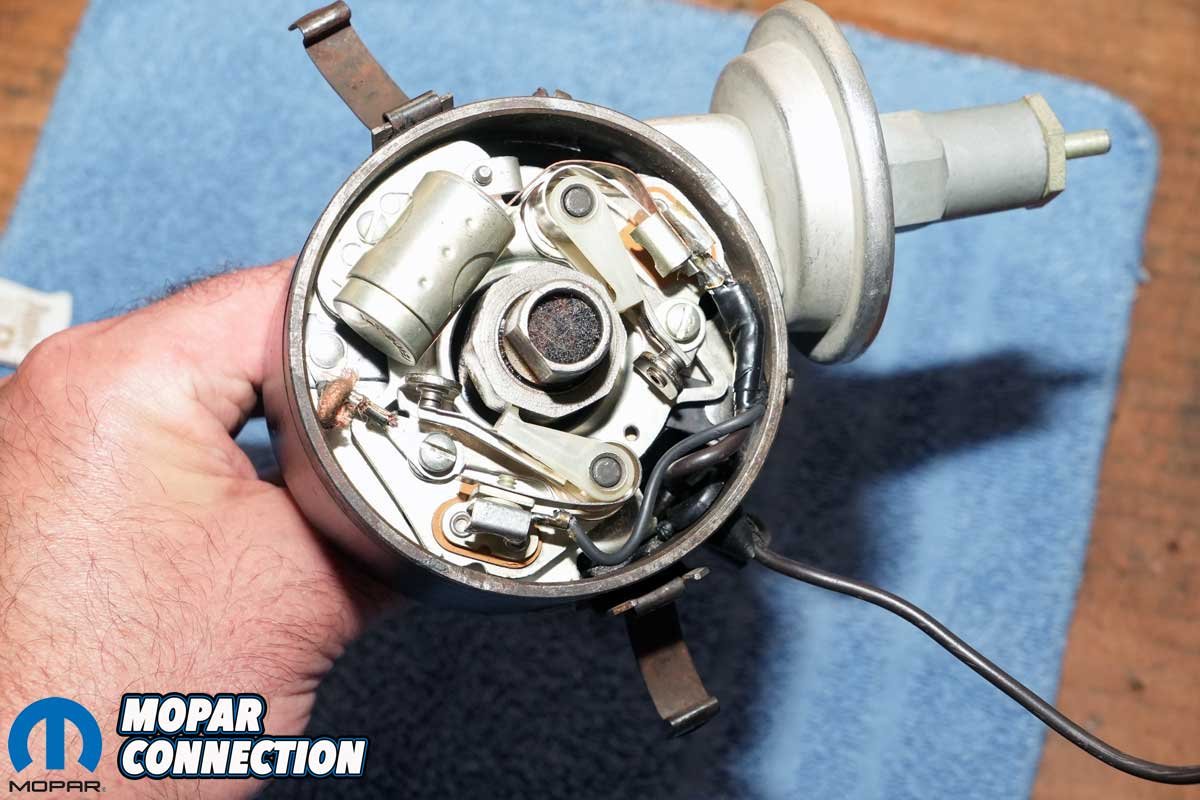
Above Left: The dual-point distributor raised several concerns during our inspection. We tested the base timing, centrifugal advance, and vacuum advance functions. The base timing was out of spec, the centrifugal advance provided far less movement than factory specifications called for, and the vacuum advance unit failed to hold any vacuum, rendering it inoperative. Above Center: Removing the distributor followed the typical Mopar procedure for the era. We first rotated the engine until the harmonic balancer mark aligned with top dead center (TDC) of cylinder one, then noted the position of the rotor to ensure proper reinstallation. With that done, the distributor came out smoothly. Above Right: Despite the internal issues, the distributor carried the correct factory part number for a 1968 Hemi, an encouraging sign for a numbers-matching restoration.
With the mounting points repaired, we disconnected the 12V (+) and distributor (-) leads from the coil. The negative wire was so brittle it nearly crumbled in our hands. After removing the mismatched fasteners holding the coil bracket to the fender, we cleaned the bracket for reuse.
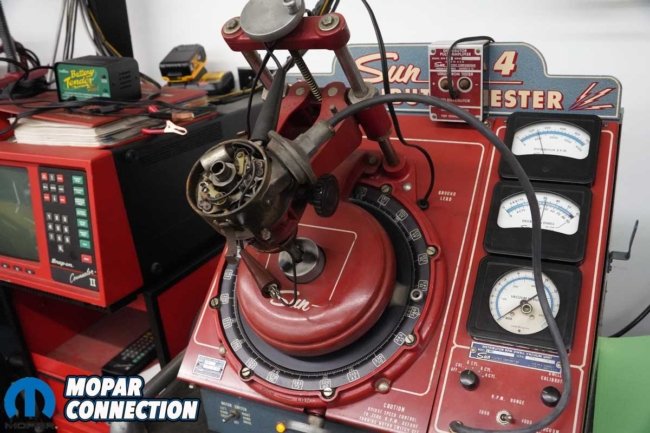
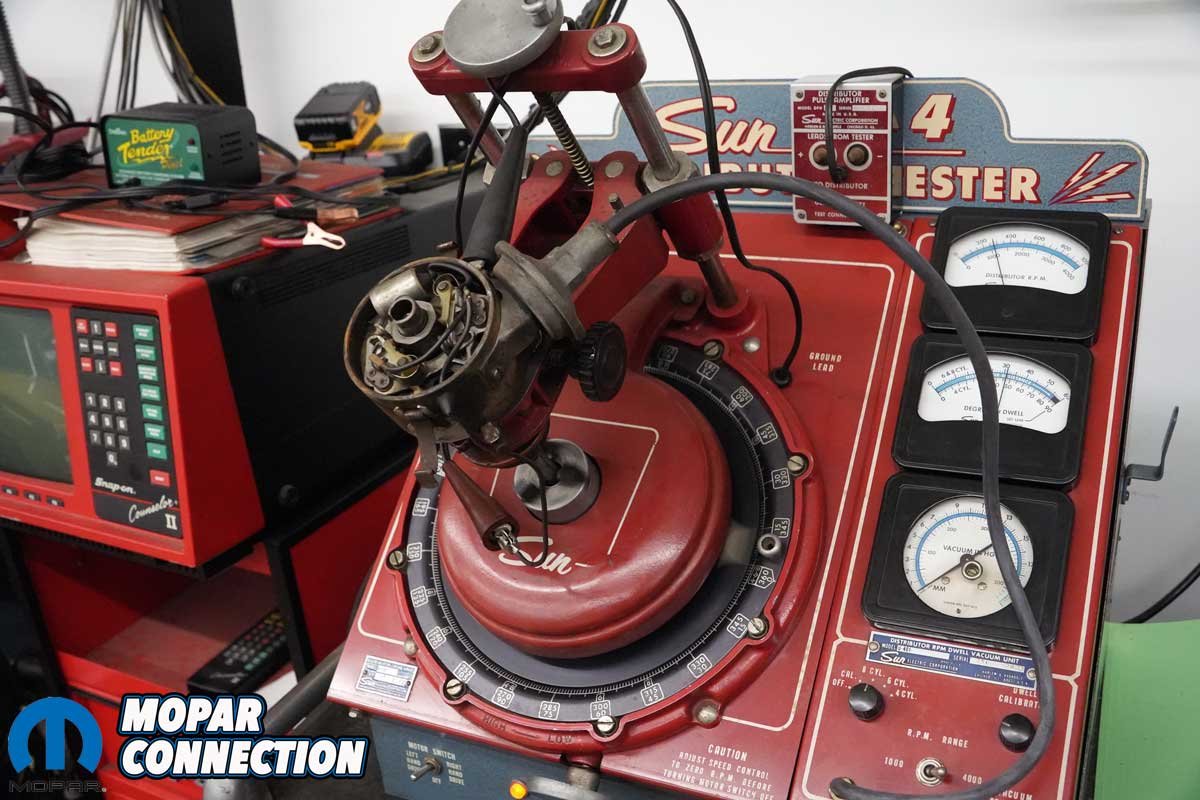
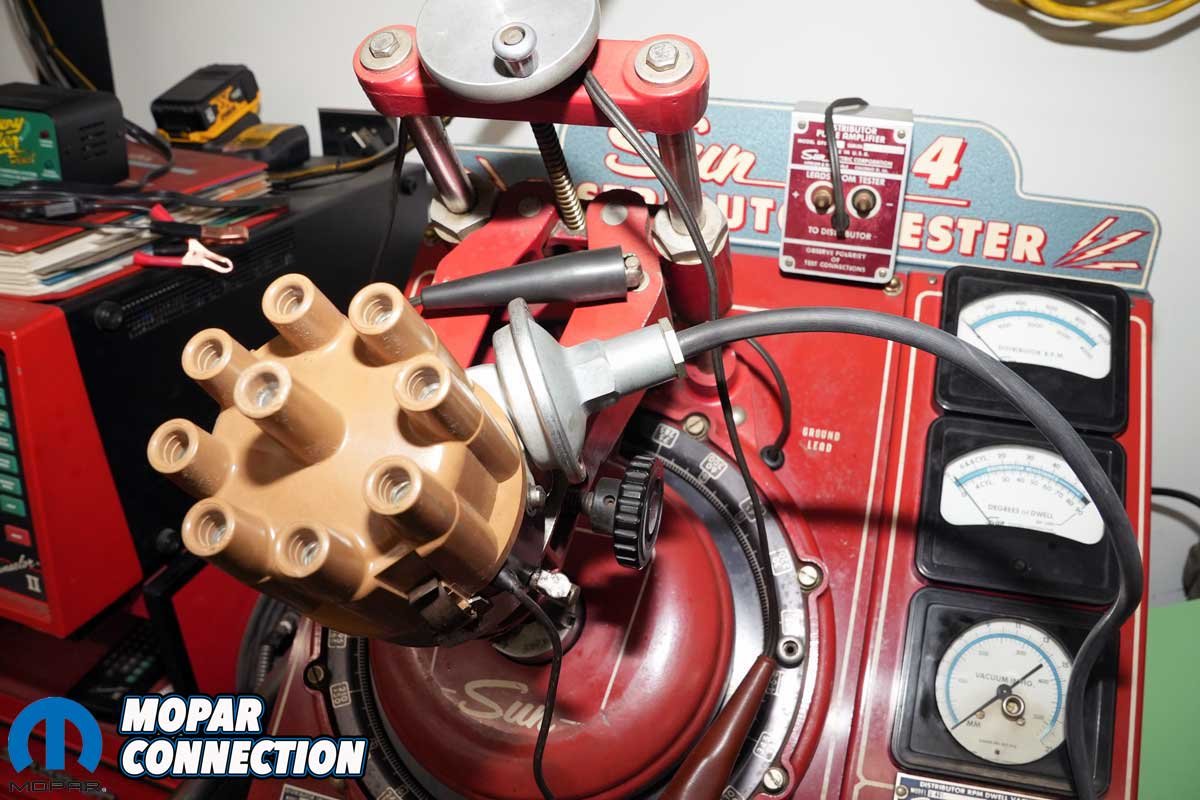
Above: We picked up a Sun 404 distributor machine about 15 years ago, thinking it might come in handy for setting up distributors on our old Mopars. It turned out to be one of the most valuable tools in the garage. Interestingly, this was the first time we used it to test a points-style distributor. As expected, the results confirmed our suspicions: the centrifugal advance curve was too short, and the vacuum advance unit was not functioning at all. On top of that, the ignition dwell was well below the factory specification of 37 to 42°, another concern that needed correction.
Instead of reusing the old coil, we turned to YearOne, who supplied a correct reproduction canister-style coil, complete with the original part number, markings, and an accurate 1968 date code. Our Road Runner was built on or around June 26th, and the new coil (Part no. MDC68228) was date-stamped “228,” indicating production in the 22nd week of 1968, which falls between late May and early June, a nearly perfect date for our car.
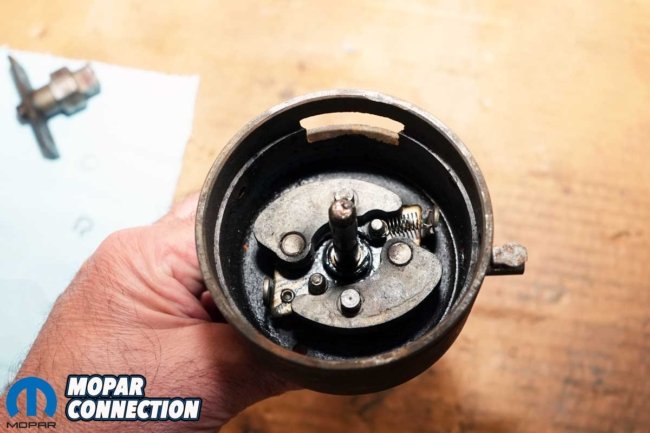
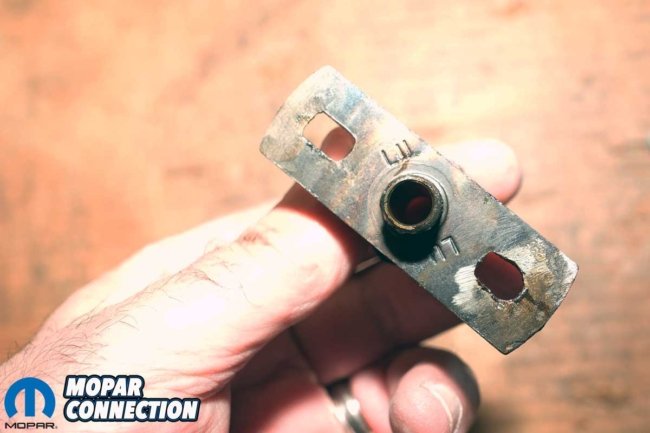
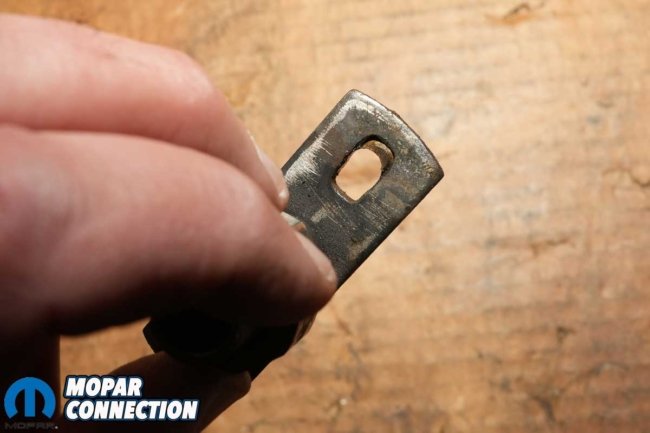
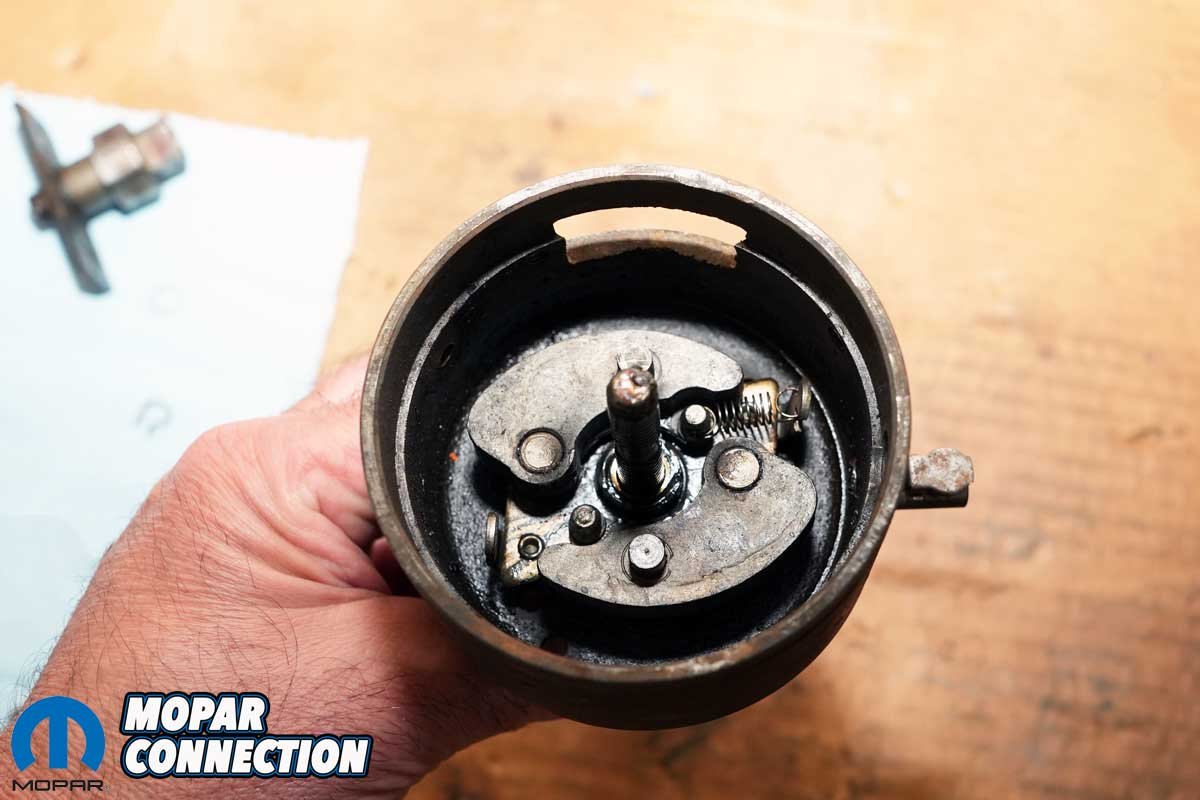
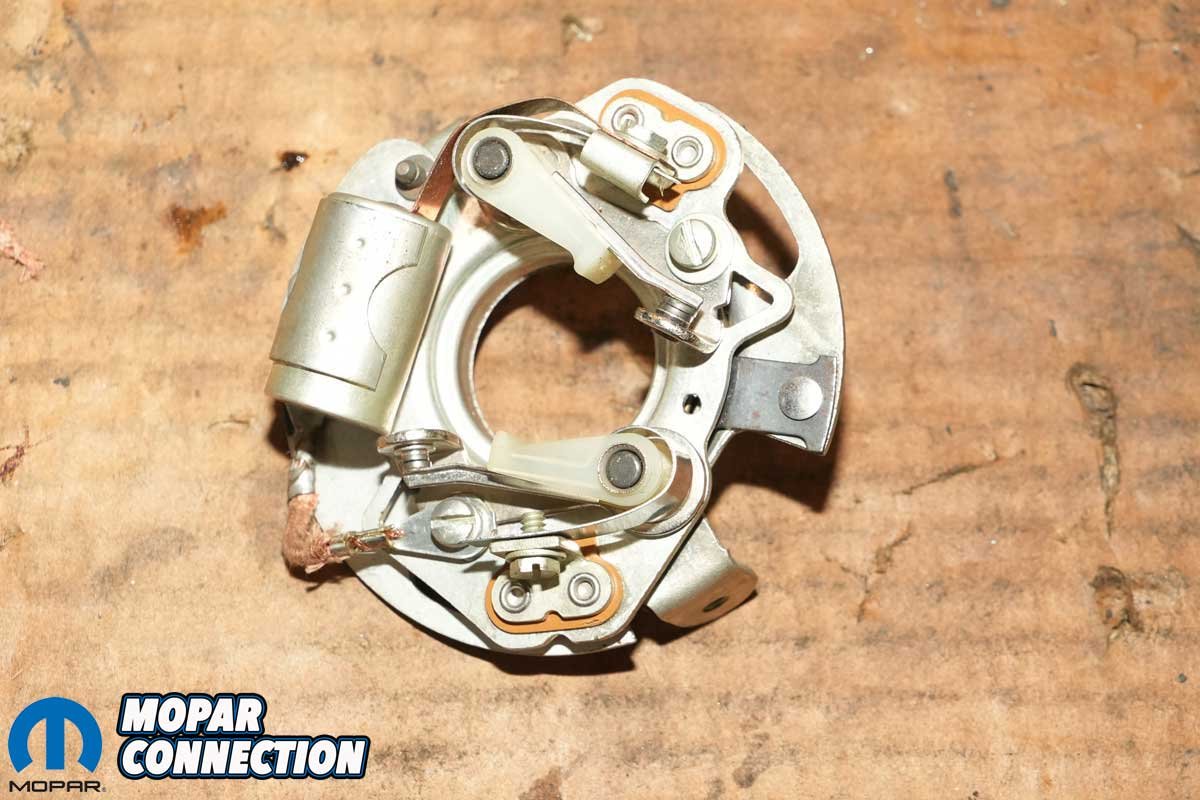
Above Left: It was clear someone had been inside this distributor before. Only one centrifugal advance spring was present instead of the usual two, a common modification used to bring in advance more quickly at lower RPM. Above Center: The governor plate had also been altered; its slots were shortened to restrict the total amount of centrifugal advance. Above Right: From the underside, the modification is even more visible. Material had been added, likely through brazing or welding, to reduce the slot length. This change limits total mechanical advance, allowing for a higher initial (base) timing setting. After adding material, the slots are typically reshaped with a file to fine-tune the mechanical advance.
We set the engine to TDC on cylinder #1, removed the hold-down clamp, and pulled the distributor. After removing the cap and rotor, we cleaned the housing and mounted the distributor in our Sun 404 distributor machine to verify mechanical advance. As expected, the centrifugal advance matched what we had seen with the timing light, 18°. However, we then checked dwell, and that is where things got worse.


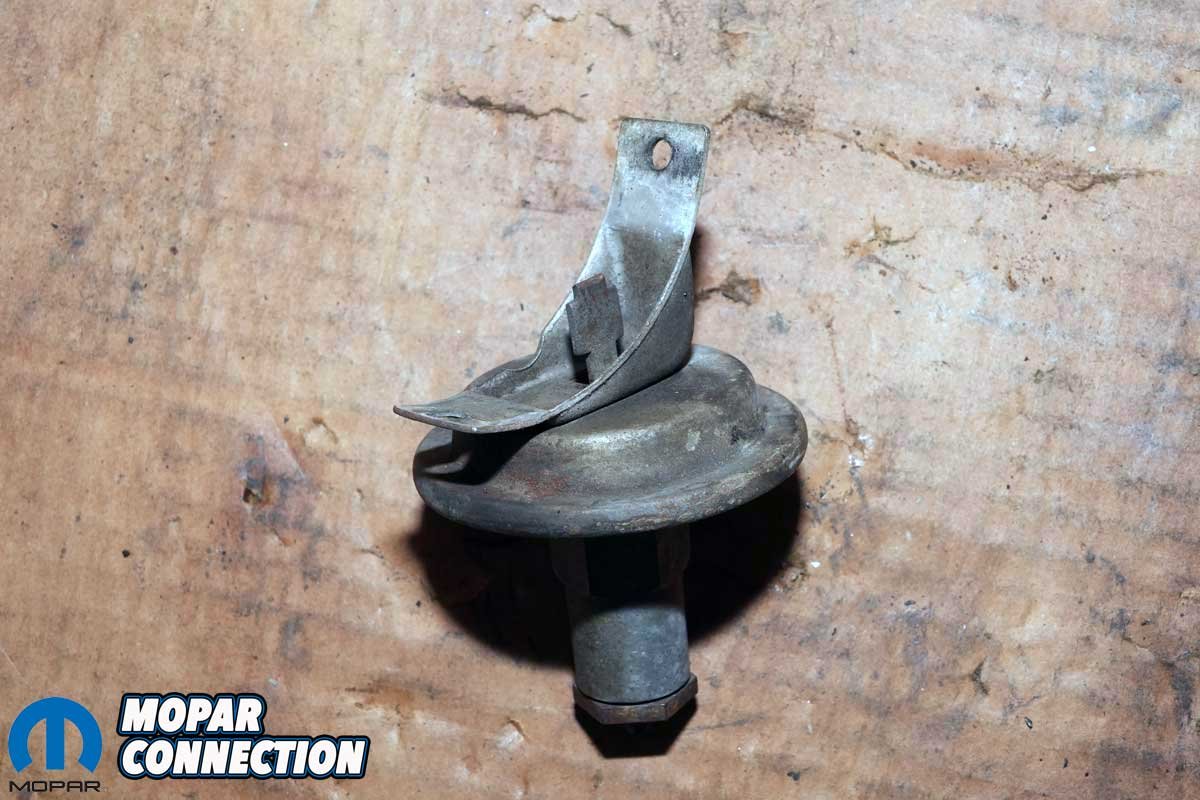
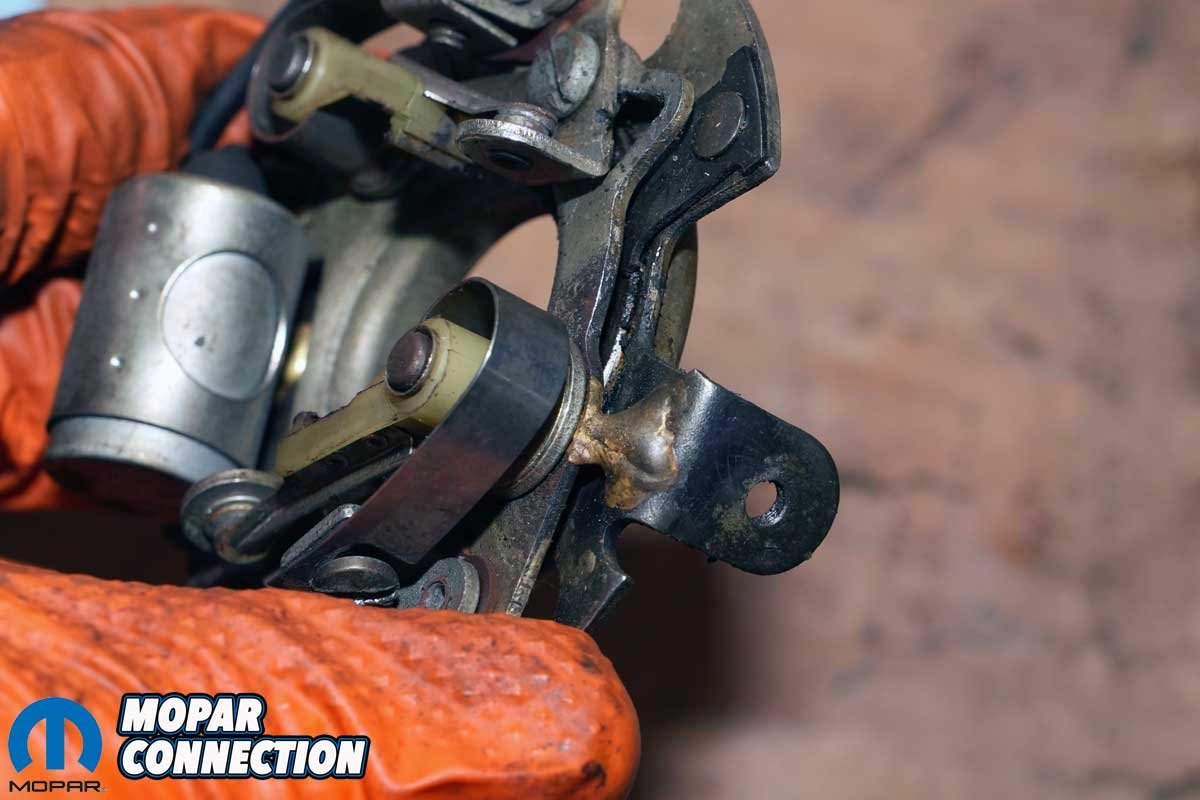
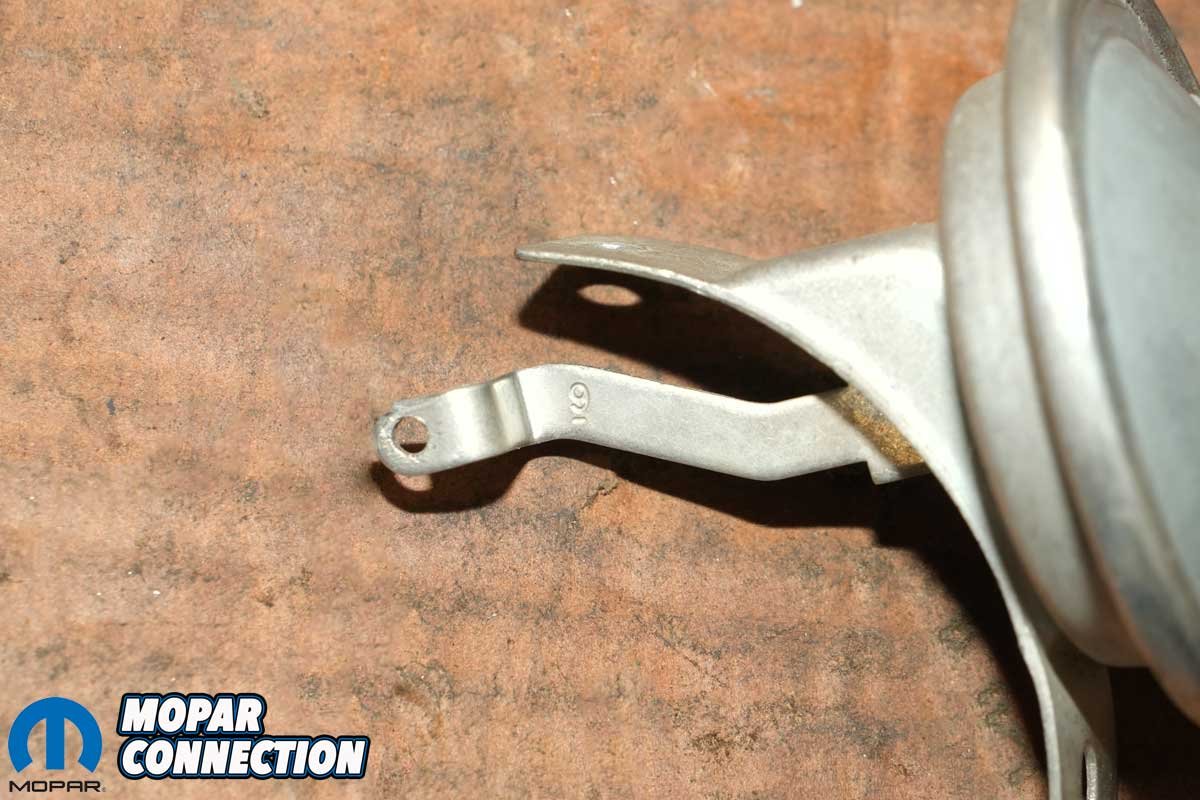
Above Left: Not only was the vacuum advance canister completely non-functional, it could not hold vacuum at all, but its actuator arm, which connects to the breaker plate, had been cut off entirely. Above Right: Even more surprising, the breaker plate that should have moved in response to vacuum advance was permanently brazed together. This modification eliminated any possibility of vacuum-operated timing adjustment and pointed to a crude, likely performance-oriented workaround.
The dual-point setup had only 29° of dwell. That is significantly below the ideal range of 37–42° for this application. Low dwell results in a weaker spark and retarded timing, causing hard starts and rough running. Generally speaking, for every 1° change in dwell, the ignition timing can shift about 0.5–1° at the crankshaft. In our case, the dwell was 8° out of spec, resulting in a loss of between 4–8° of initial timing.
On the other hand, too much dwell leads to overheating the coil and prematurely wearing out the points. In our case, we needed to raise dwell, but first, we had to dig deeper.


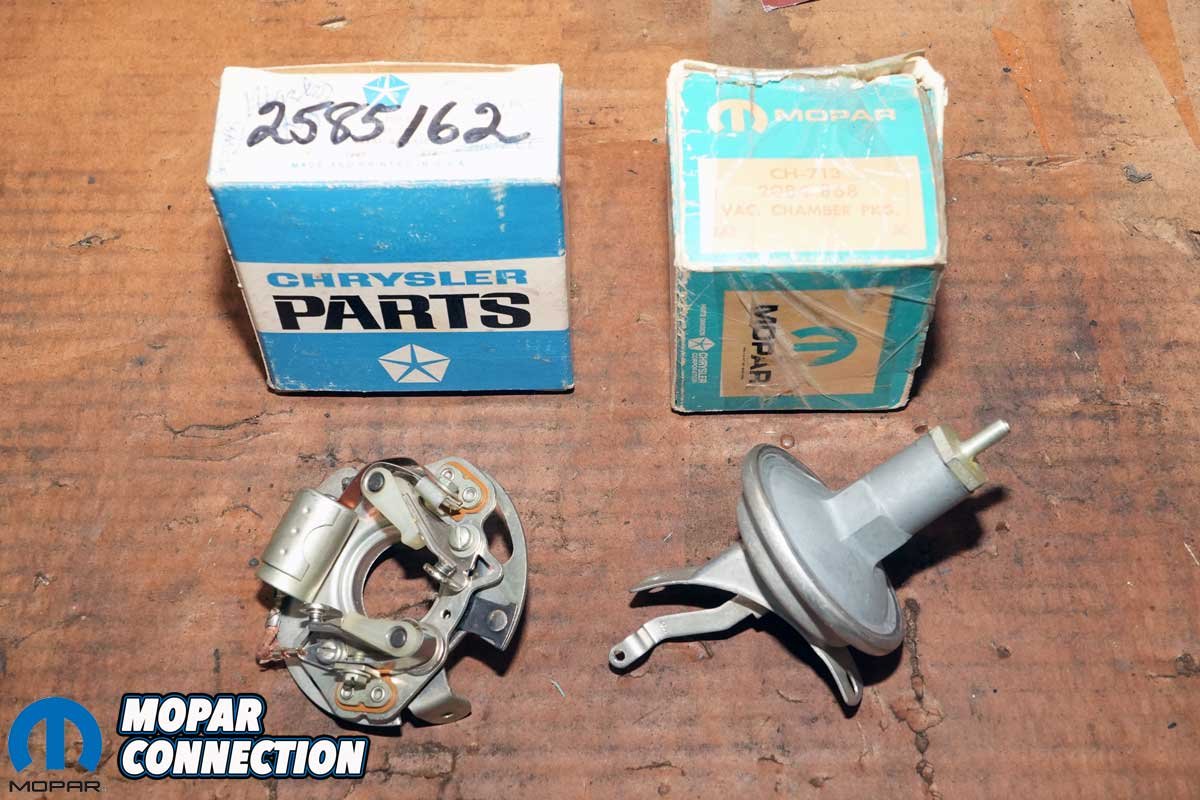
Above Left: After uncovering a series of questionable modifications inside the distributor, we decided it was best to start fresh. A quick online search turned up a correct part number breaker plate and vacuum advance unit. Fortunately, both were available as new-old stock (NOS). While they were not cheap, they were the correct, factory-original components, and most importantly, completely unmodified. Above Right: The NOS breaker plate was a perfect match and ready to install right out of the box. Without the internet, tracking down a part like this could have taken weeks or months. Instead, we had it in hand within three days.
Inside the distributor, we discovered the vacuum advance canister had been cut, its actuator arm completely removed. Whoever had last worked on this distributor had also made other modifications: only one of the centrifugal advance springs was present (the other was missing), and the governor plate’s two advance slots had been brazed (smaller) to reduce the mechanical advance. The movable section mounted on a bushing, controlled by the vacuum advance, had also been brazed, preventing movement.


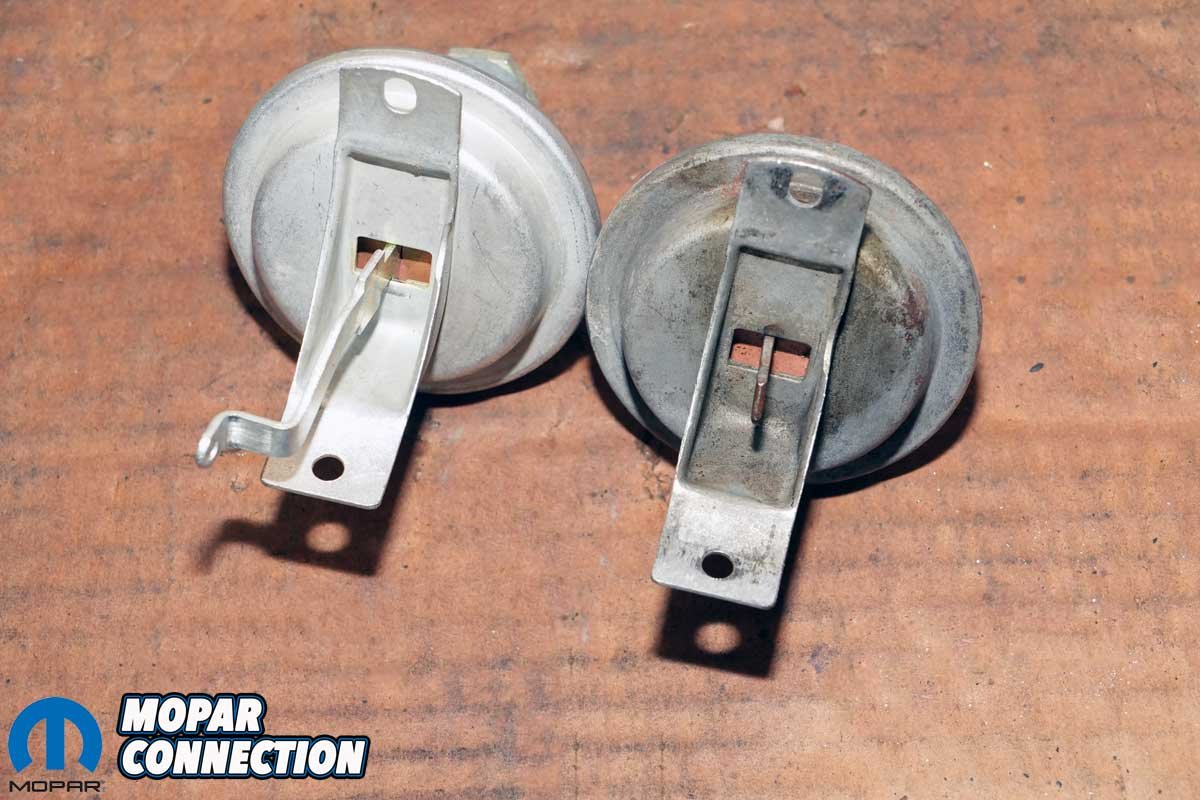
Above Left: Unlike many other Mopar vacuum units that are adjustable with an Allen wrench through the vacuum port, this Hemi-specific unit uses shims to fine-tune the advance curve. Above Center: The vacuum advance arm is uniquely shaped for the Hemi application, different from the arms found on most other Mopar distributors. Ours had a “9” stamped into the linkage, indicating a total vacuum advance of up to 18°. Above Right: Physically, the new vacuum advance unit (left) is identical to the original, but unlike the old one, it functions as it should, holding vacuum and delivering proper timing adjustment.
At this point, it was clear the distributor needed a serious rebuild. We sourced a new-old-stock (NOS) vacuum advance canister and breaker plate. With the right parts in hand, we cleaned and painted the distributor body and re-lubed the shaft. The bushings were tight, and there was no play between the shaft and housing.

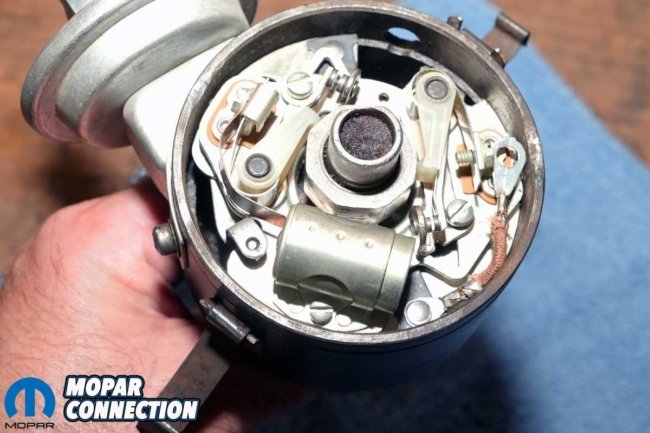
Above Left: We carefully slipped the breaker plate into the freshly painted distributor housing. Prior to installation, we had already lubricated the centrifugal advance weights and governor plate to ensure smooth operation. Above Center: The vacuum advance canister was gently guided into position within the distributor housing, aligning neatly with the mounting points. Above Right: With the vacuum advance arm properly engaged to the breaker plate, the distributor reassembly was complete. For now, we made a new distributor wire. However, we are currently on the lookout for a suitable replacement to finish the restoration.
We reinstalled the centrifugal weights and the lone spring, for now. We understood that missing spring was allowing a quicker advance at a lower RPM; until later, we would leave it alone. The NOS vacuum canister was marked with a “9,” which usually indicates 18° of vacuum advance if unmodified. We installed the breaker plate, mounted the vacuum canister, and returned the distributor to the Sun machine.
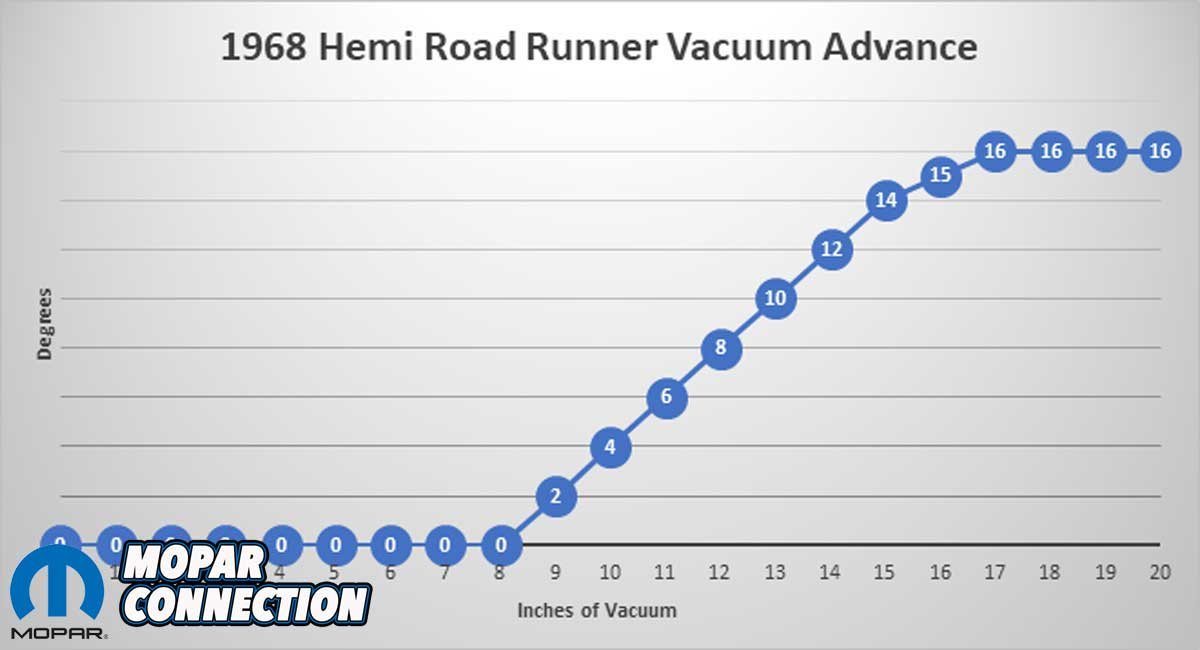
We adjusted the dwell to 40°, giving us a stronger spark. Centrifugal advance remained at 18°, and vacuum advance measured 16°, slightly less than expected due to the original spring and shim pack we had reused from the original canister. For now, 16° would do.
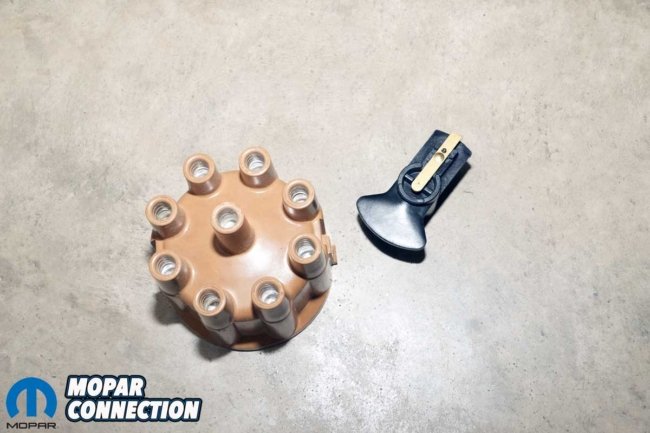


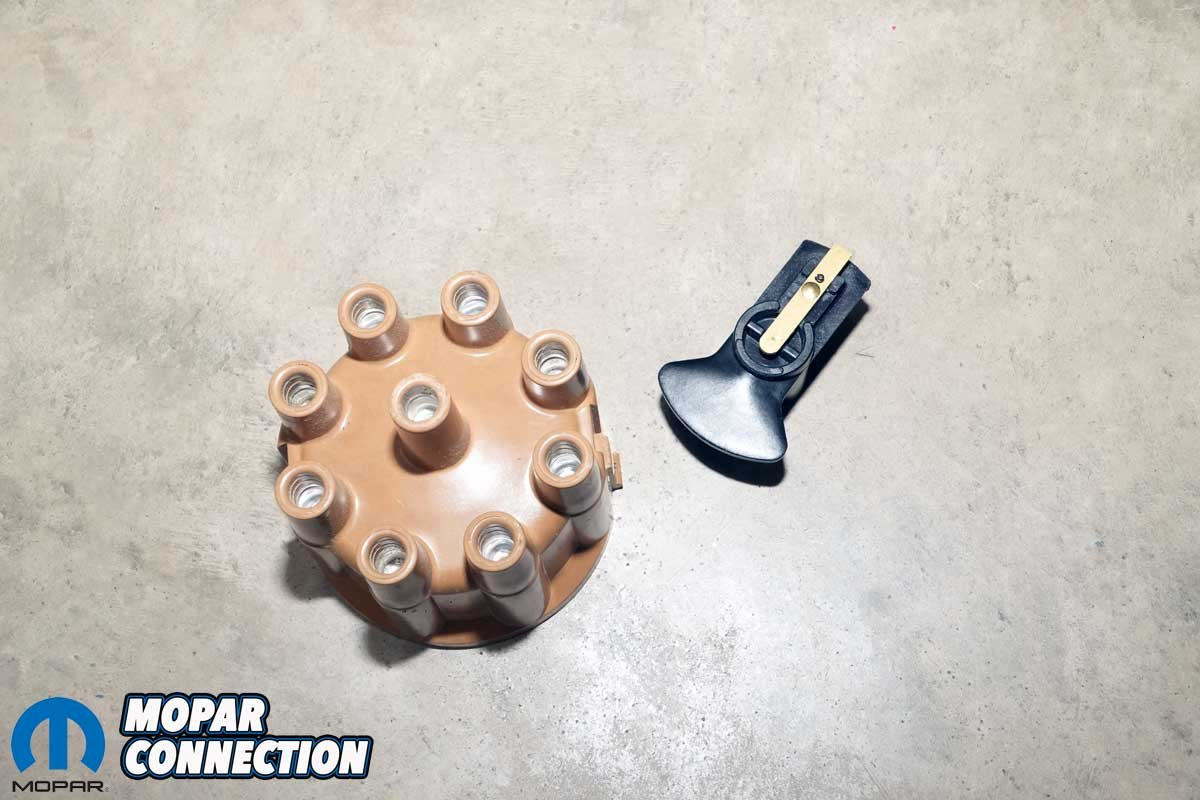
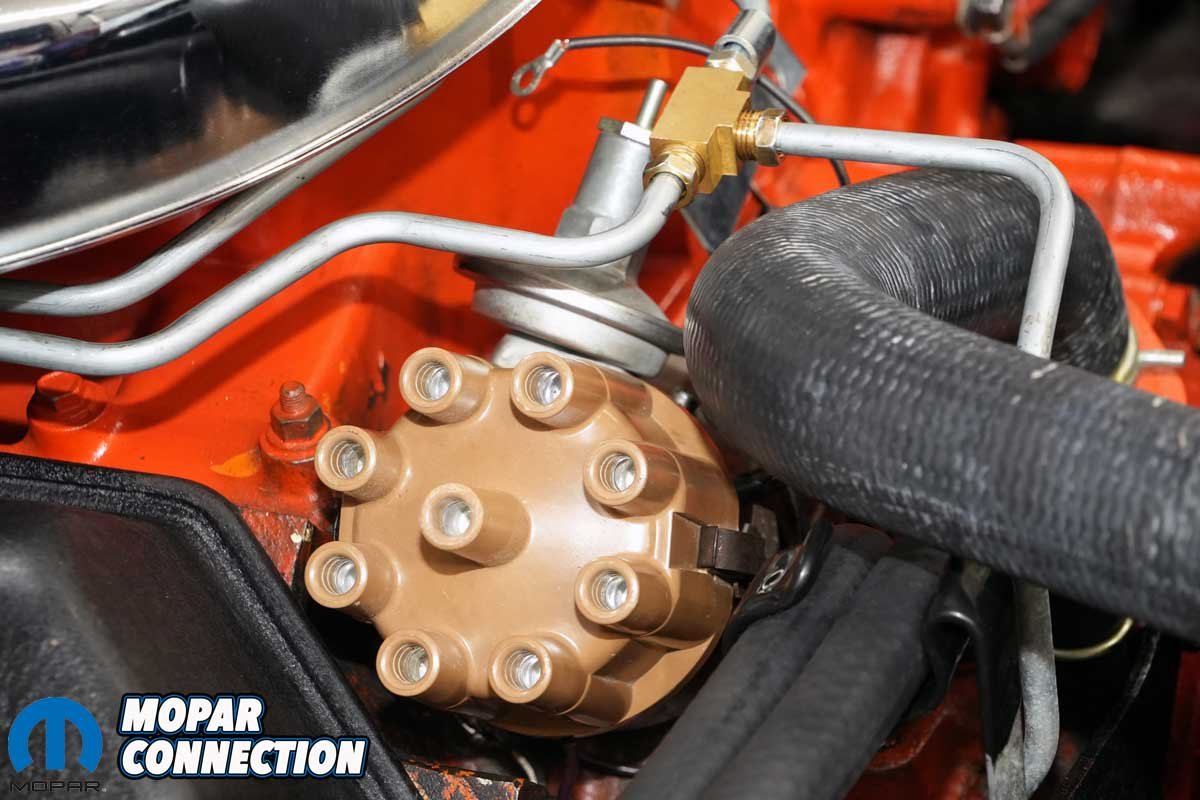
Above Left: We sourced a correct tan distributor cap and a new rotor from Megaparts.com, both period-correct pieces to match our restoration. Above Center: With the distributor fully rebuilt, we reinstalled it into the distributor testing machine. There, we verified the centrifugal advance curve, measured total advance, checked the rate of advance, and tested vacuum advance function. All test data was carefully recorded for reference. Above Right: The restored distributor was then installed into the Hemi. We aligned the rotor with the appropriate cylinder terminal on the cap and snugged the hold-down bolt, leaving room for final timing adjustments.
Back in the engine bay, we reinstalled the refreshed distributor and snugged the hold-down bolt. A fresh tan cap and rotor from Megaparts.com went on next, followed by a beautiful new set of YearOne date-coded spark plug wires (Part no. RJ9).
These wires are accurate reproductions of the originals, featuring black cables with correct yellow lettering, a Chrysler Pentastar logo, and first-quarter 1968 date codes. Each wire features proper black boots, including one special rubber connector on cylinder #7 to replicate the factory setup. The first-quarter build date covered the cars produced from March 1968 to August 1968.

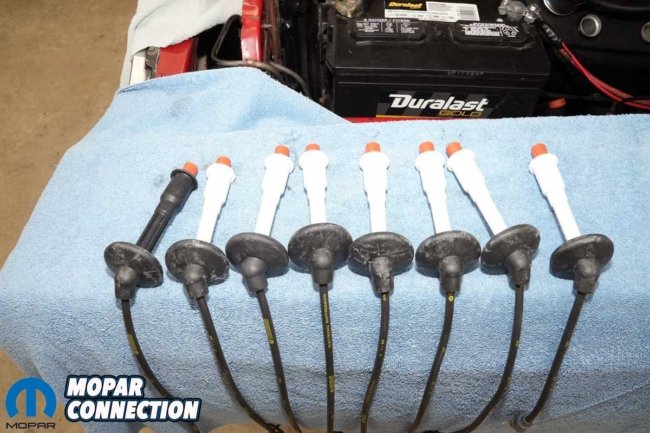
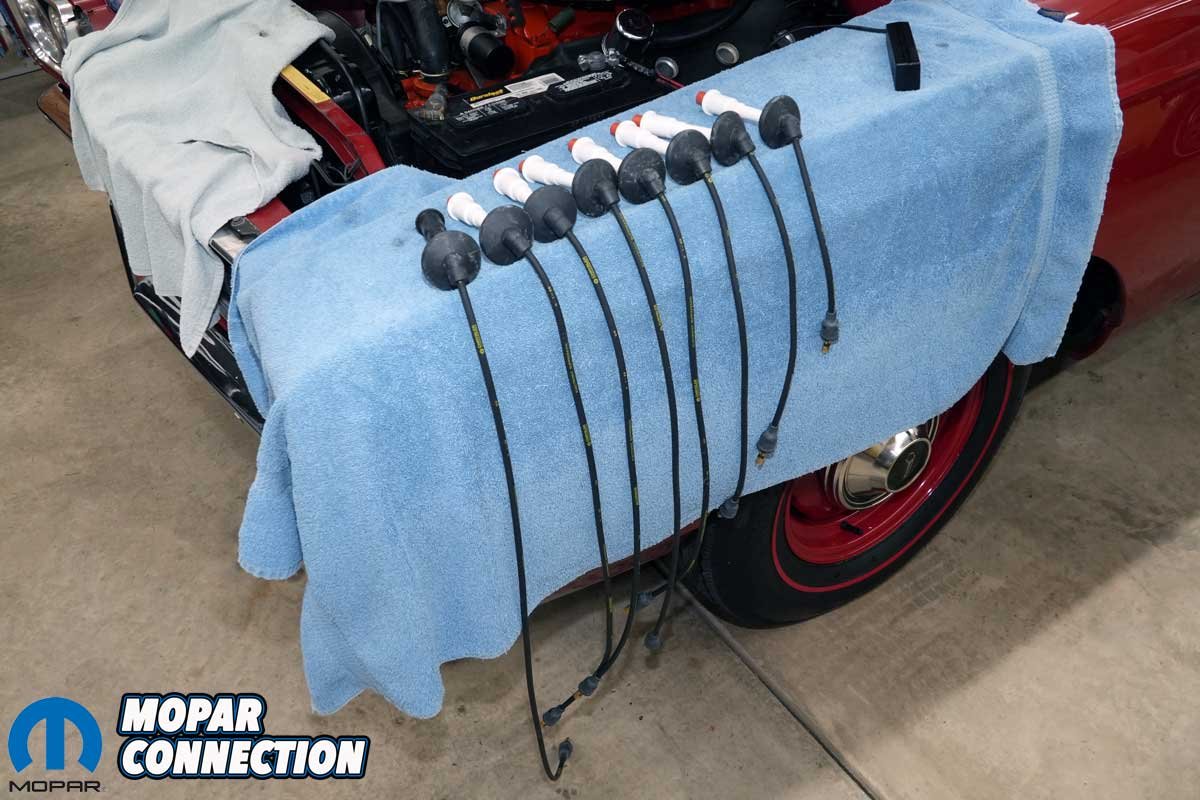
Above Left: We laid out the spark plug wires from longest to shortest to ensure proper selection for cylinder assignment. Organizing them this way helped prevent incorrect routing. Above Right: All the plug wires matched the correct design for our application, including the unique wire for cylinder #7, which features a flexible extension to reach the recessed spark plug while not requiring an overly long plug wire.

Above Left: We applied a small dab of dielectric grease into the spark plug wire socket to ensure a clean connection and make future removal easier. With the boot pulled back, we carefully aligned the terminal and pressed the wire onto the spark plug, listening for the reassuring click that confirmed a secure fit. Above Right: Once the wire was properly seated, we slid the boot forward, guiding it over the ceramic portion of the spark plug wire until it was fully seated and sealed, providing both protection and a factory-fresh appearance.
We carefully routed the wires, using the cleaned original grommets to anchor plug wires 5 to 8 to the valve covers. To install each plug wire, we pulled back the boot, added a dab of included lubricant, pressed the ceramic onto the plug until we felt it click, and then slid the boot back into place.
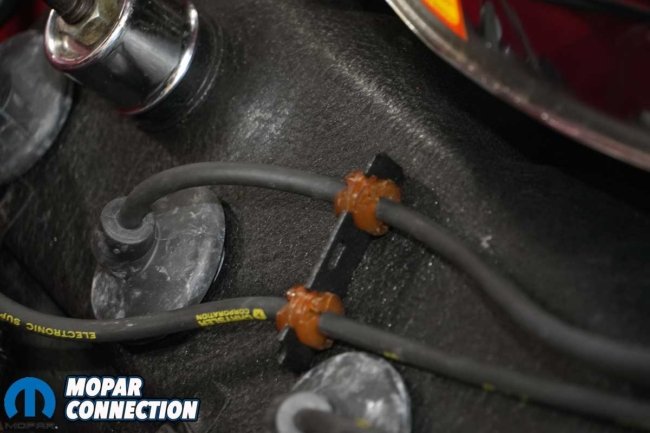
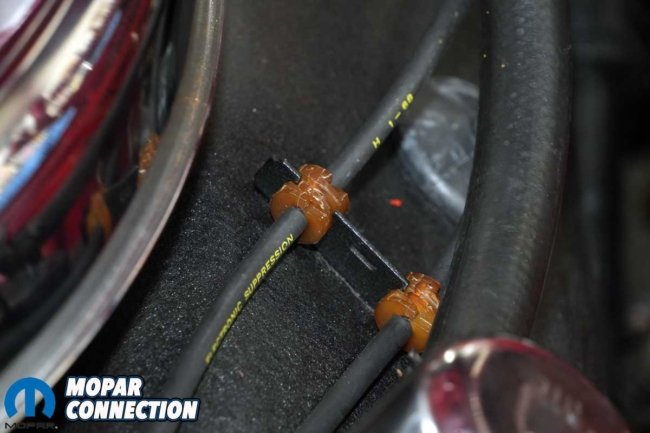
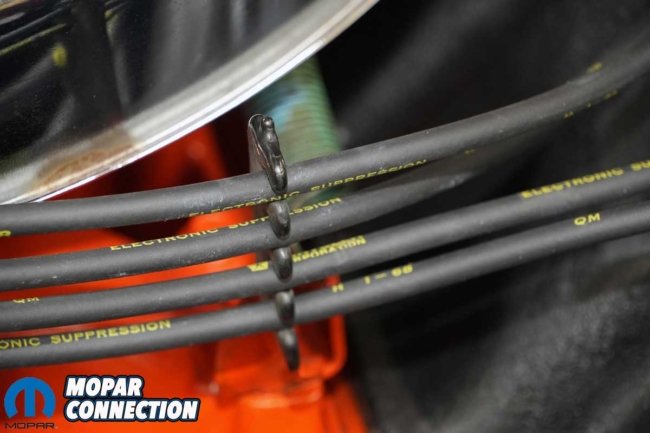
Above: We reused the original grommets (retainer clips) to secure the spark plug wires for cylinders 5, 7, 6, and 8 along the valve covers, maintaining the correct factory routing. On the driver’s side, the plug wires were carefully routed around the air cleaner and held in place with the original wire loom bracket mounted to the intake manifold, preserving both function and authenticity.
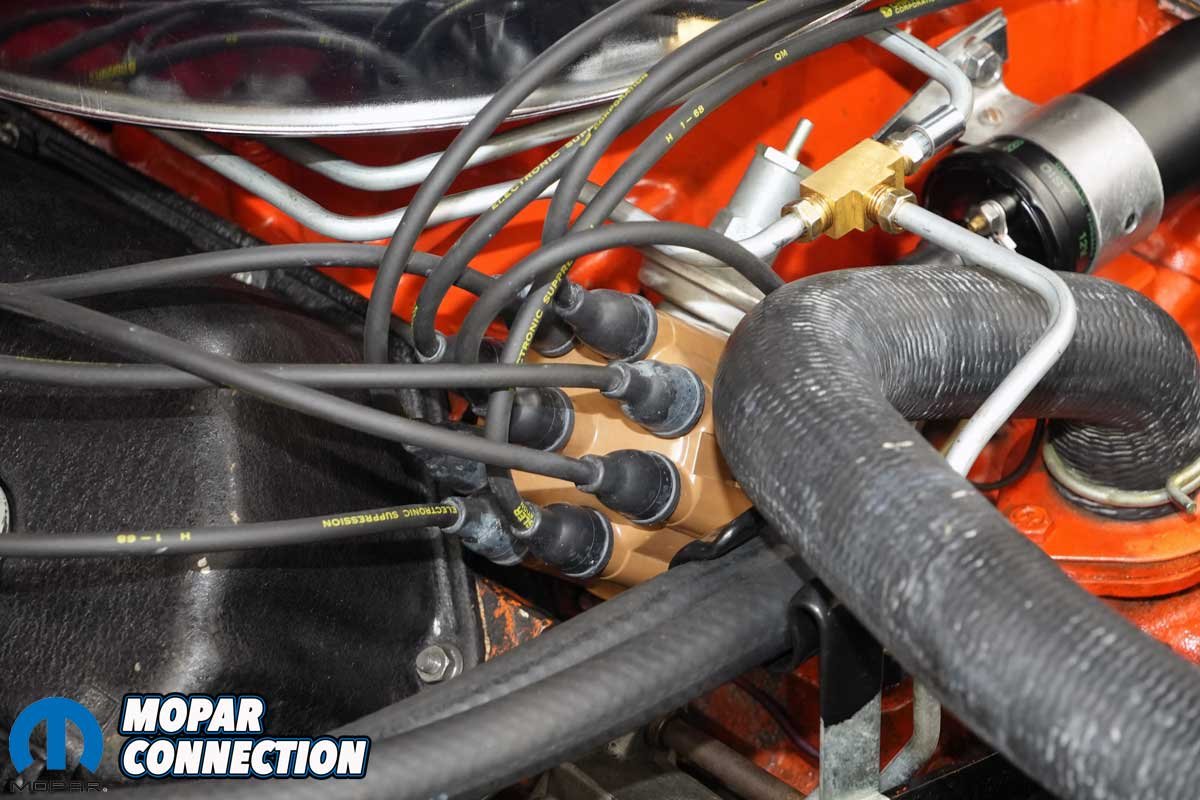
With the plug wires routed and installed, we mounted the coil and bracket back onto the intake. We connected the new (-) wire and the original 12V (+) wire to the coil, then attached the secondary coil wire to the distributor cap.
Rather than setting initial timing at the factory-specified TDC, we opted to shoot for 16° BTDC. That is closer to what was used in 1967, which takes better advantage of engine torque, and provides better acceleration. Combined with the reduced 18° centrifugal advance, we should have achieved a total mechanical advance of 34°, right where we wanted it to work with today’s fuels.

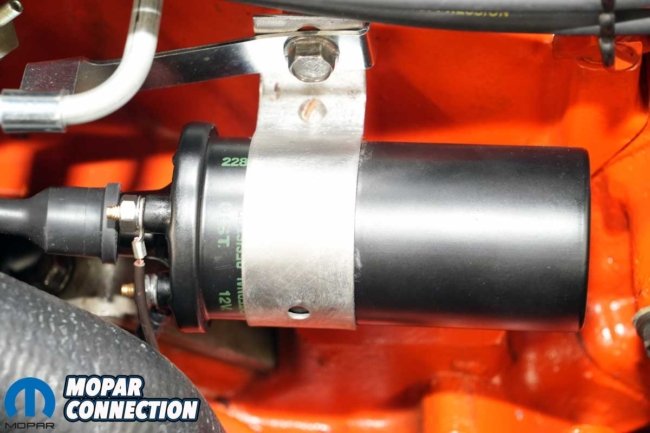
Above Left: We connected the spark plug wires to the distributor cap, making sure each one slipped firmly into place. The date-coded plug wires from YearOne fit perfectly, offering an authentic look and a precise fit. Above Right: The ignition coil was mounted in its original factory location. We secured the bracket, attached the positive and negative leads, and installed the high-tension coil wire, completing the ignition system hookup with a clean, stock-appearing finish.
We fired up the Hemi, set the timing, and verified the total advance with the engine revved to 2500 rpm. Everything was spot-on. With the timing locked in, we removed the plug from the rear AFB vacuum port and ran a hose to the distributor’s vacuum canister. With the engine running, we opened the throttle and confirmed the vacuum advance was contributing an additional 16°, for a total of 50° BTDC under cruise conditions.

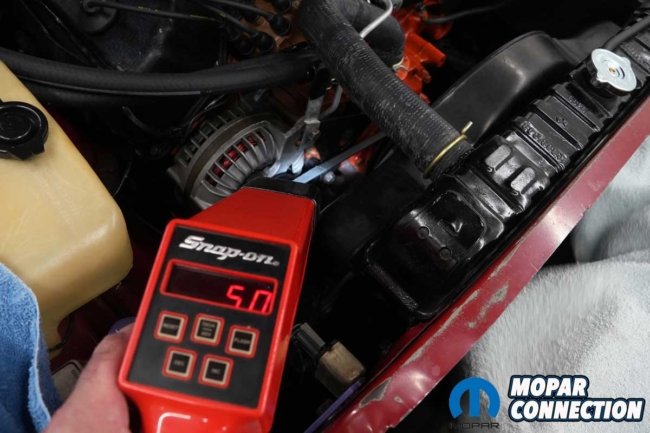
Above Left: With the Hemi warmed up to operating temperature and the transmission in drive, we set the initial ignition timing at 16° before top dead center (BTDC), ensuring a stable idle and crisp throttle response. Above Center: Shifting the transmission into neutral, we brought the RPM up to observe total mechanical advance. The timing mark settled at 34°, combining the 16° of initial timing with 18° of centrifugal advance. Above Right: After reconnecting the vacuum advance, we saw an additional 16° added to the total timing, bringing the grand total to 50° under light throttle conditions, ideal for part-throttle cruising and improved fuel efficiency.
That might sound high, but based on previous experience with small blocks and slant sixes, we have found that running more initial timing, limited centrifugal, and substantial vacuum advance often results in snappier throttle response, smoother idle, and better fuel efficiency.
We were extremely pleased with the outcome of the ignition system. The combination of carefully restored original components and high-quality reproduction parts from YearOne made this job possible. Everything not only functions beautifully but looks correct for a June ’68 Hemi Road Runner.

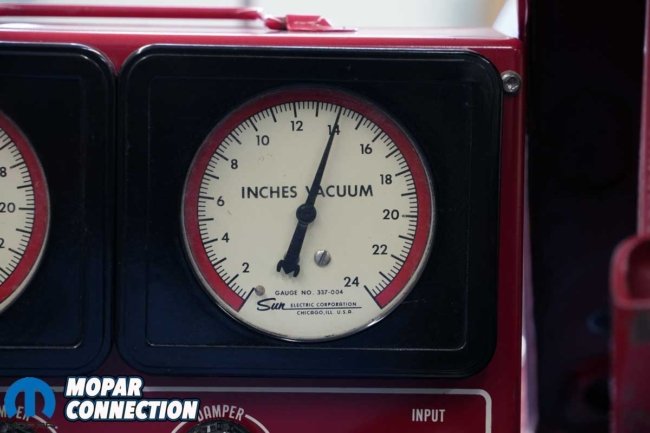
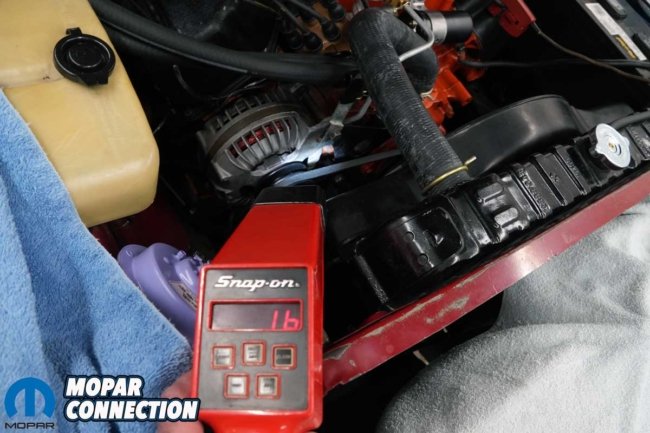
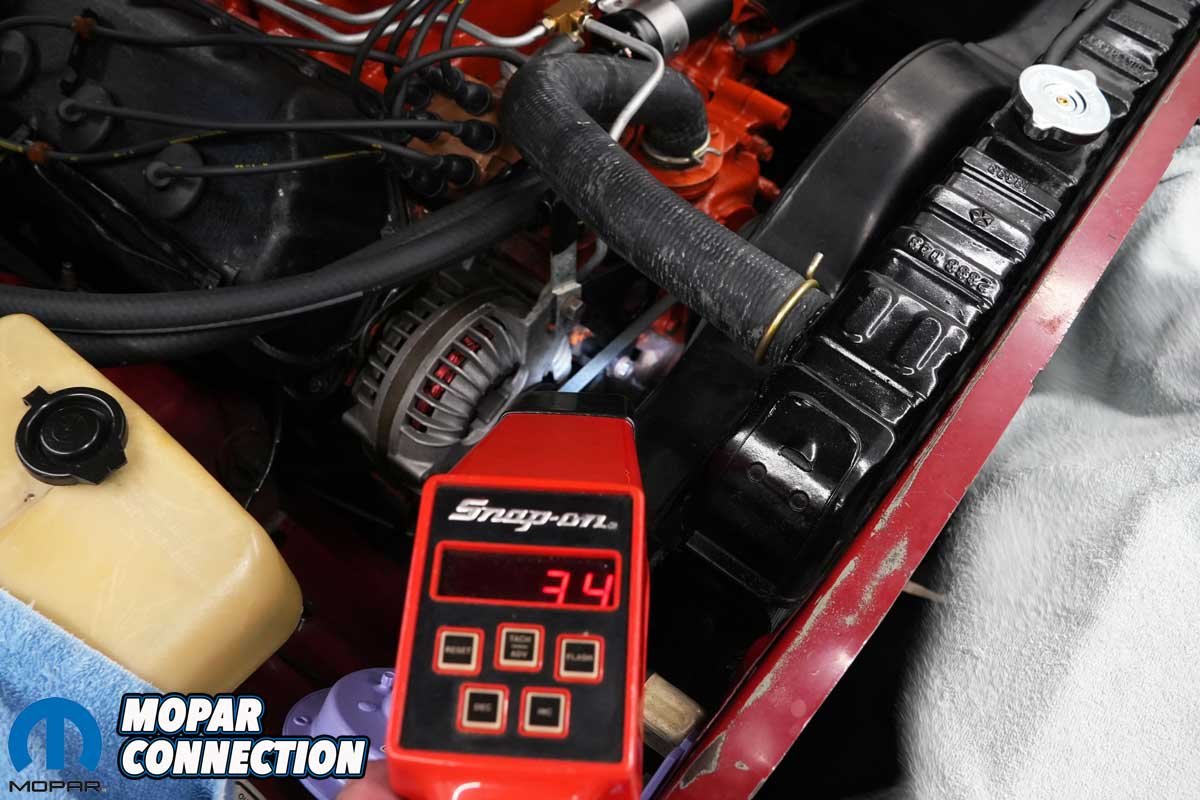
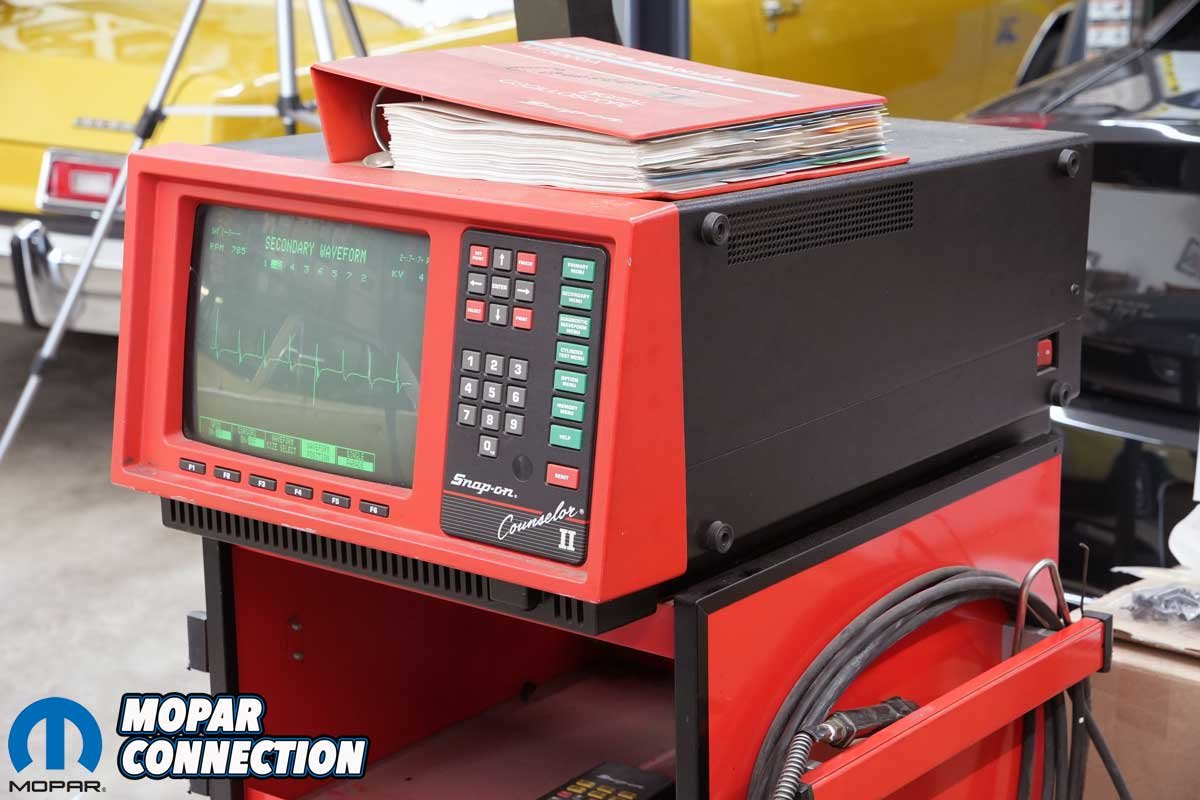
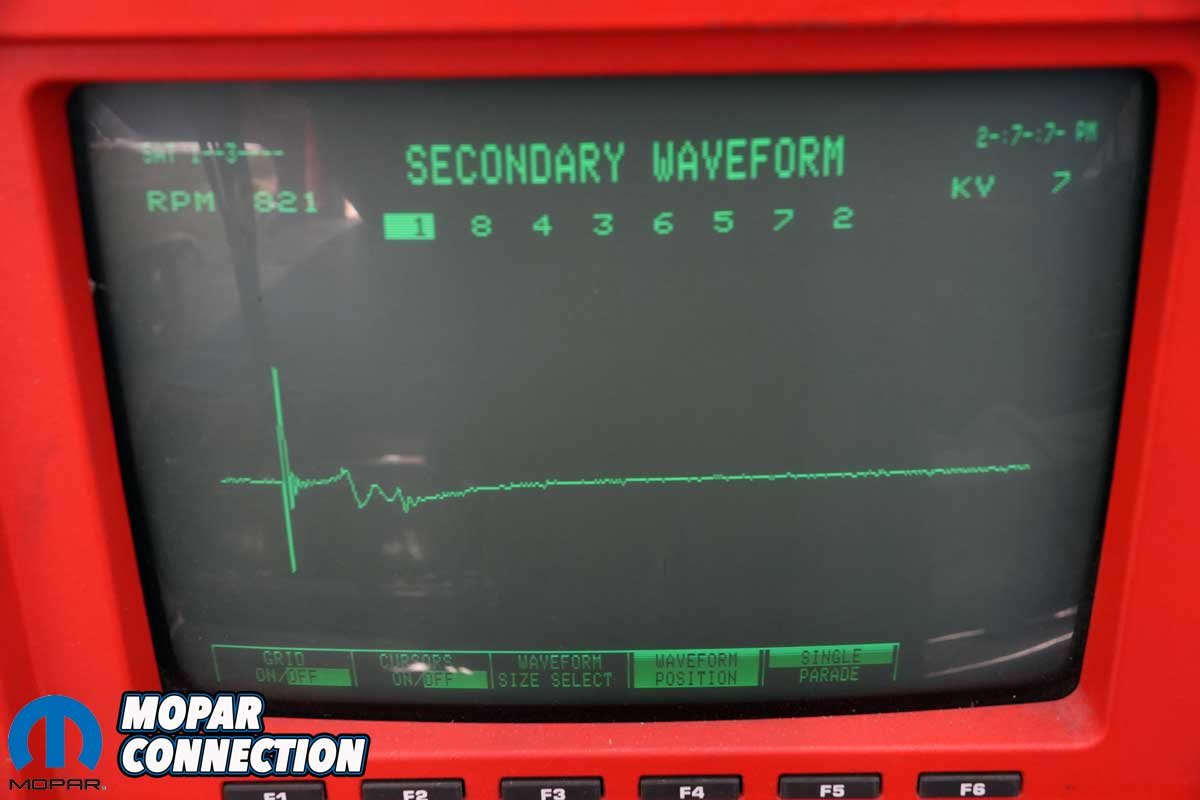
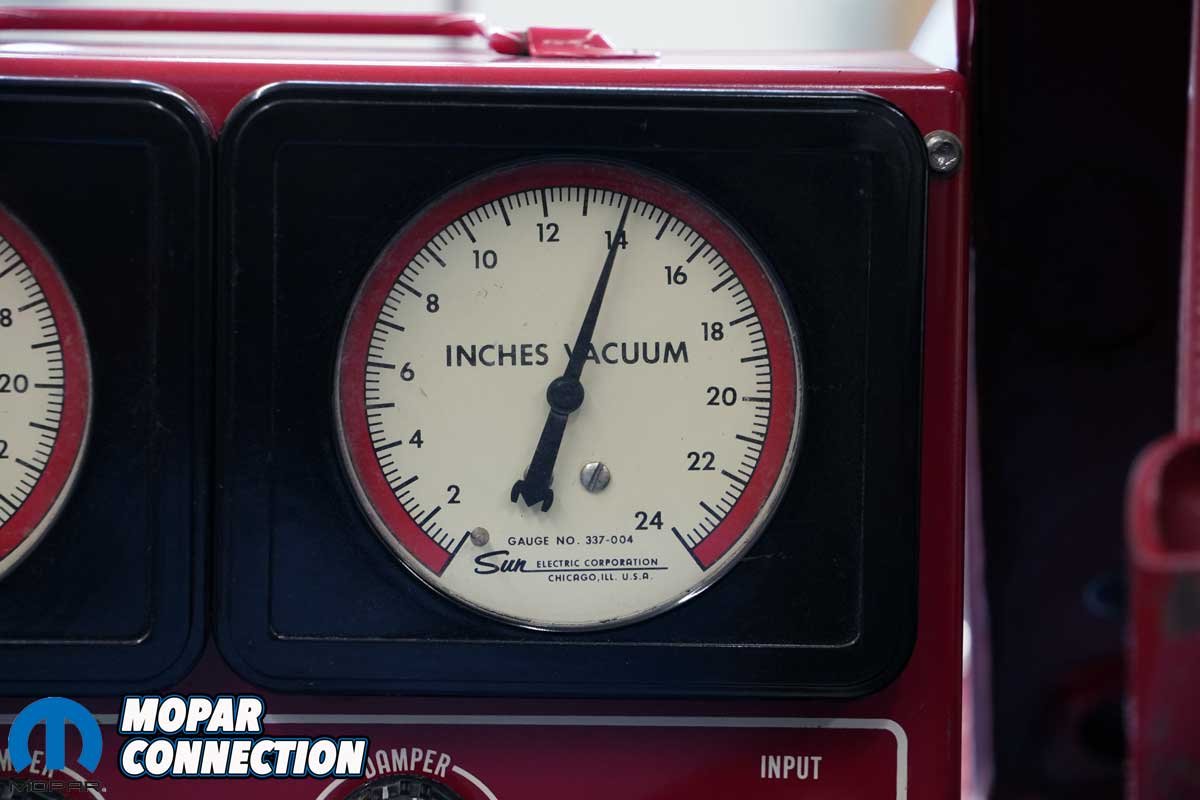
Above Left: We brought out the trusty Sun Counselor II scope to evaluate the ignition system. This classic diagnostic tool allowed us to visually inspect spark patterns, cylinder balance, and coil performance in real time. Above Right: With the transmission in gear and the Hemi idling smoothly, the vacuum gauge showed a steady 14 inches of mercury (inHg), indicating healthy engine vacuum and proper tuning at idle.
We now have a solid baseline to start driving the car and logging some real-world data. Using the Sun distributor machine, we charted the advance curve and dwell from 600 to 2500 rpm in 100-rpm increments and plotted the vacuum advance from 0 to 20 inHg. This info will help us fine-tune things later, if needed.
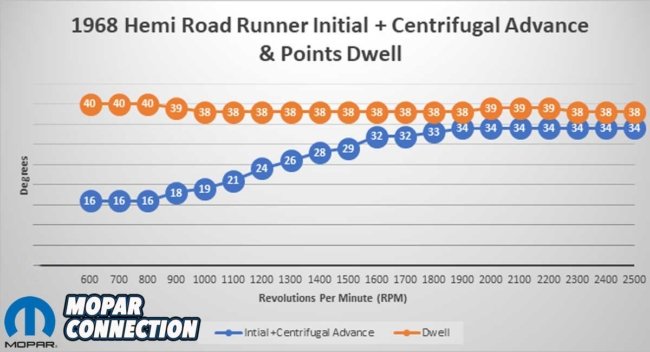

Above Left: Using the Sun distributor machine, we charted ignition timing against engine RPM to verify the centrifugal advance curve. At the same time, we monitored the dual-point distributor’s dwell angle to ensure consistent operation across the RPM range. Above Right: We also plotted vacuum advance in degrees relative to inches of vacuum. This helped confirm that the vacuum advance unit was functioning correctly, delivering timing precisely as engine load and throttle conditions changed.
But for now, the Road Runner is running stronger than ever. Thanks to YearOne, our ignition system is not only restored but also optimized for improved performance. For more details about ignition components for your Mopar, visit YearOne or contact one of their sales representatives at 800-932-7663 (Monday through Friday, 9:00 AM – 6:00 PM EST).


