


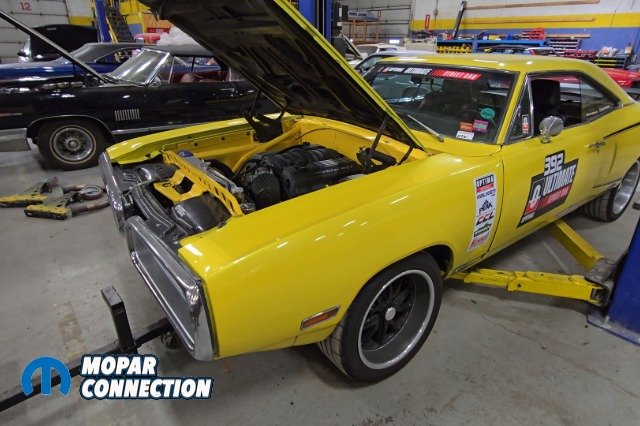
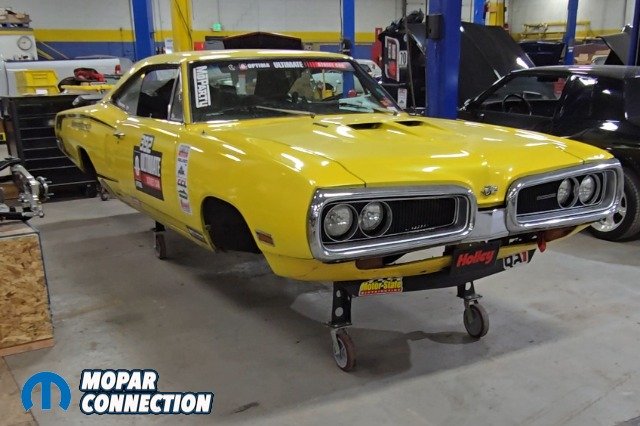
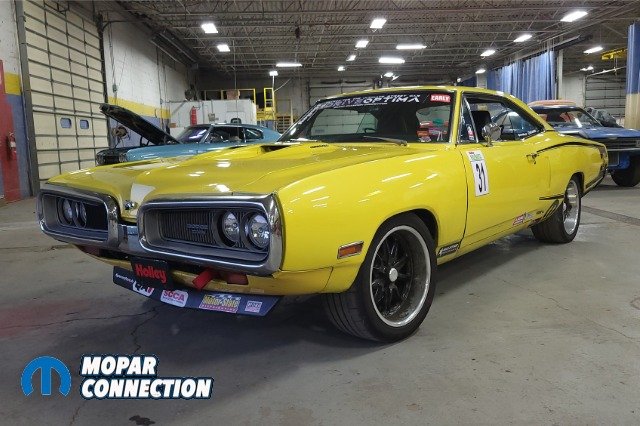
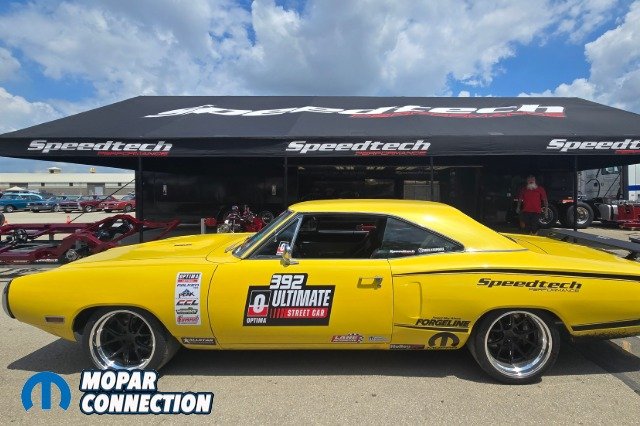
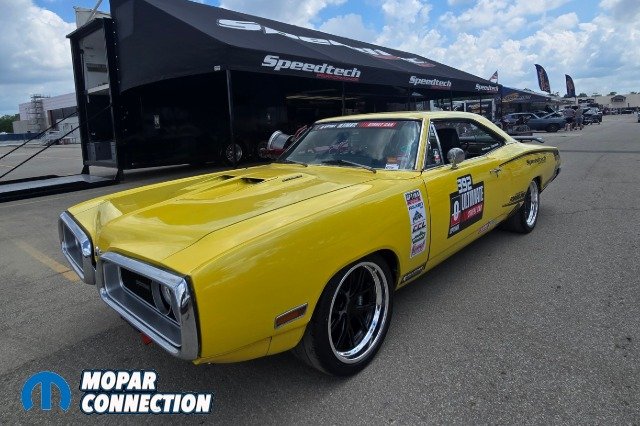
If you’ve followed Mopar Connection Magazine for any length of time, you already know “Project Buzzkill” the 1970 Dodge Super Bee owned and raced by this author, David Kruk. Over the past few years, this B-body has carved its name into the Pro-Touring world with a QA1 coil-over suspension system, racking up wins at events like Holley’s MoParty, the Motor State Challenge, and even competing at SEMA with the Ultimate Street Car Association series. The combination of classic Mopar power and modern handling has made it a fan favorite.
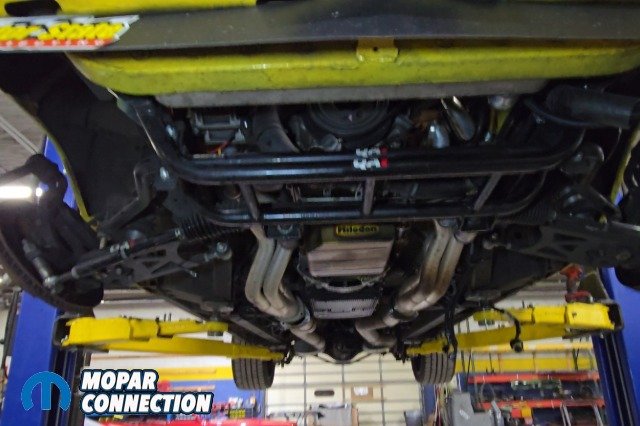
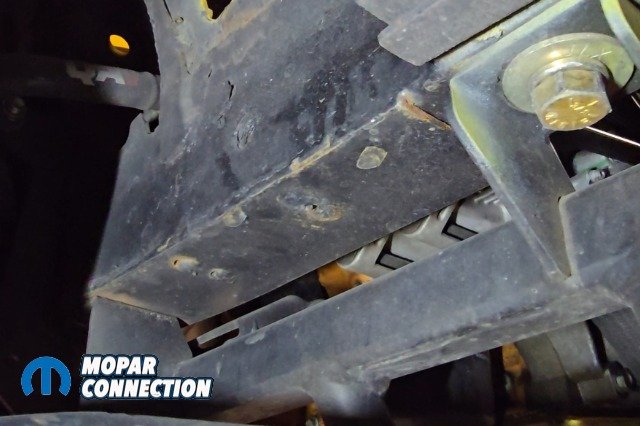
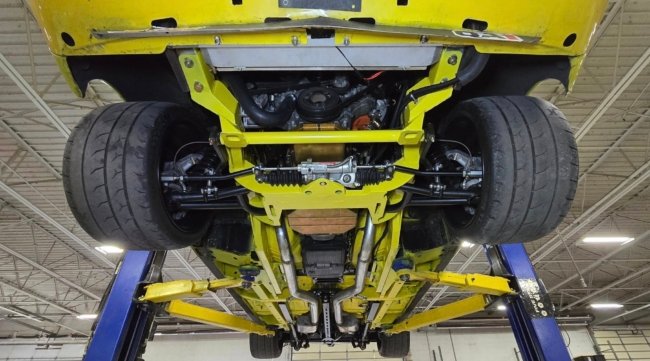
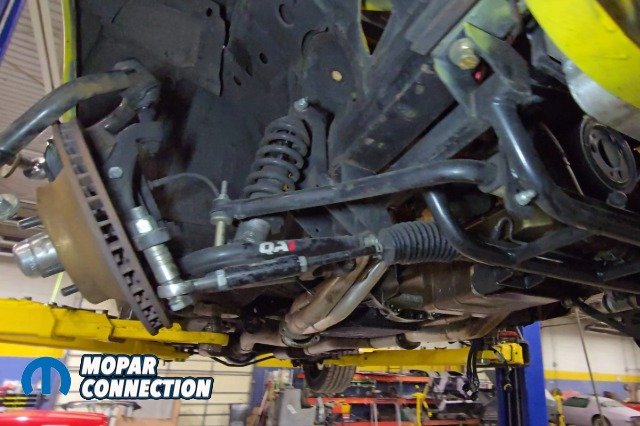
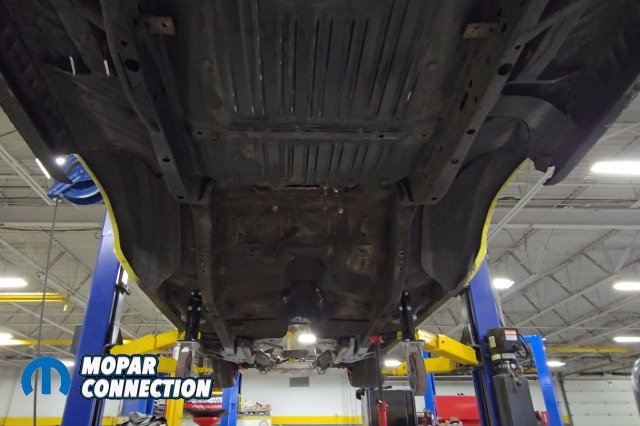
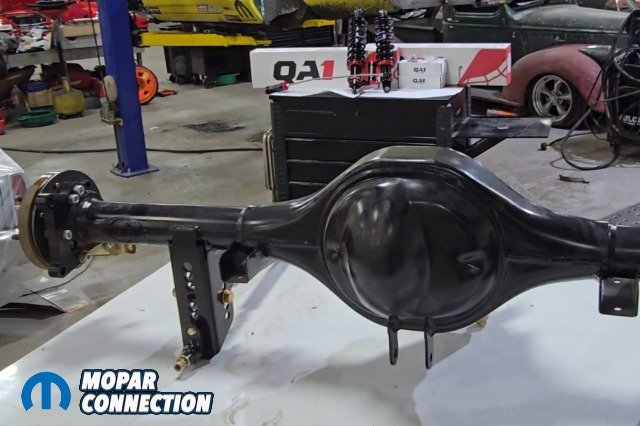
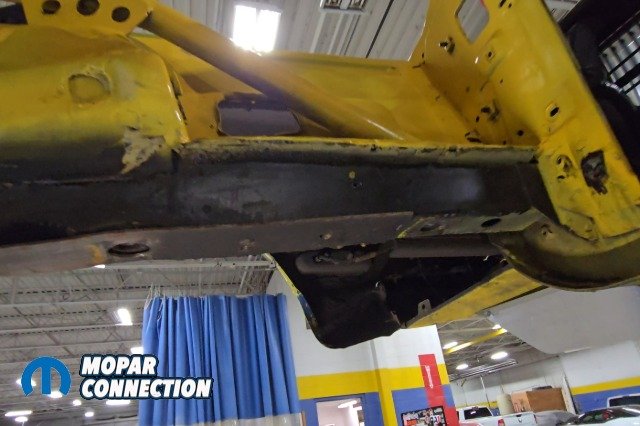
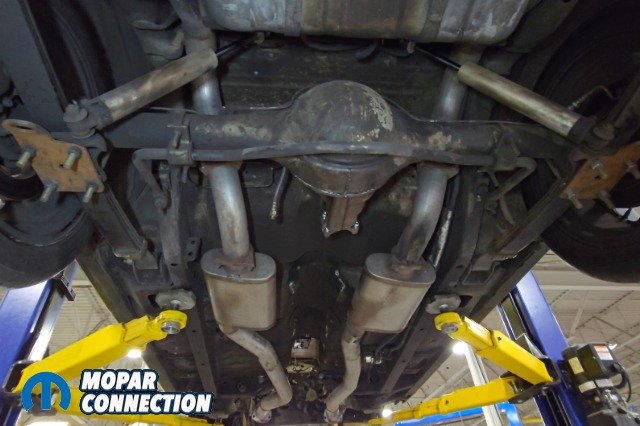
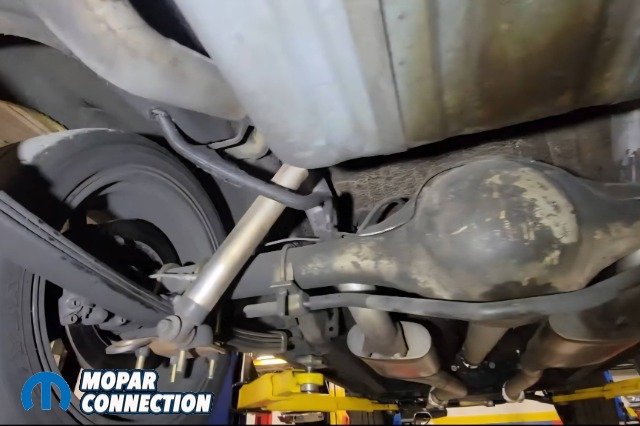
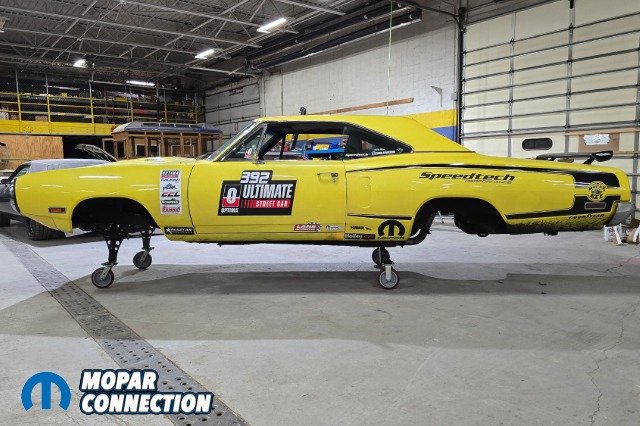
Above: The underside of Kruk’s ’70 Super Bee still wearing its QA1 coil-over suspension soon to be retired in favor of a full Speedtech chassis.
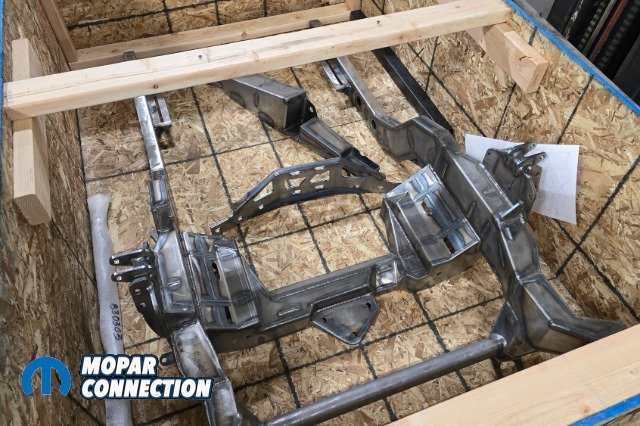
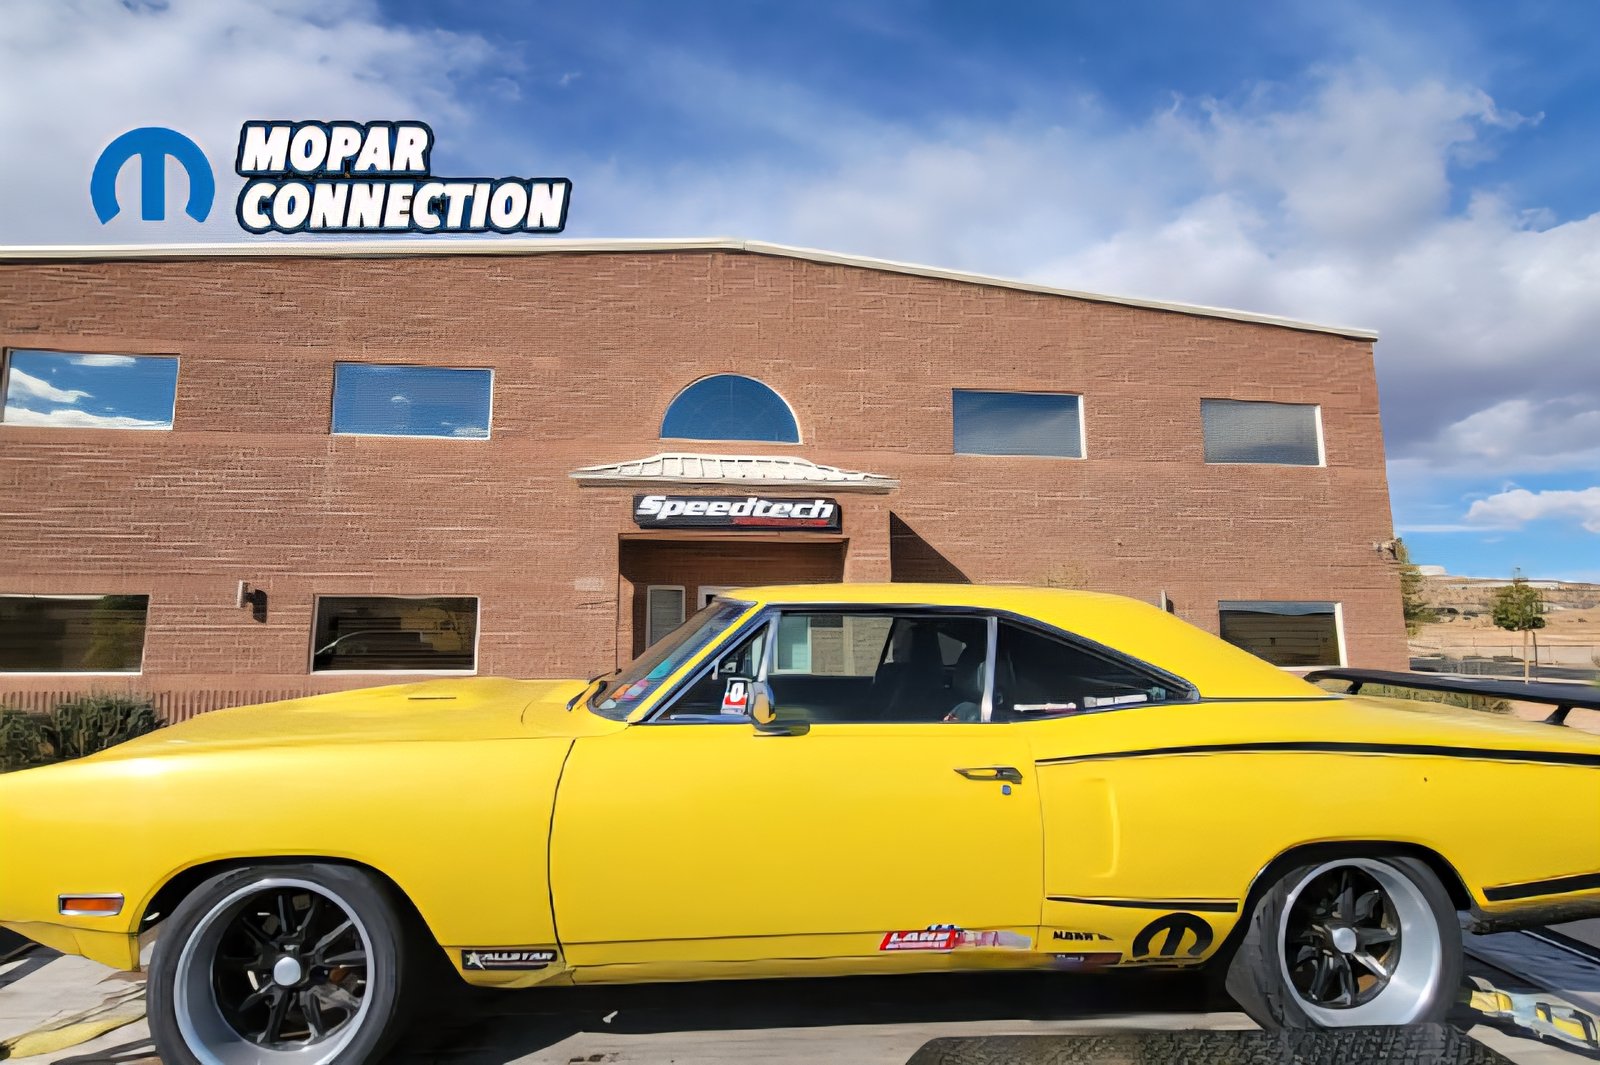
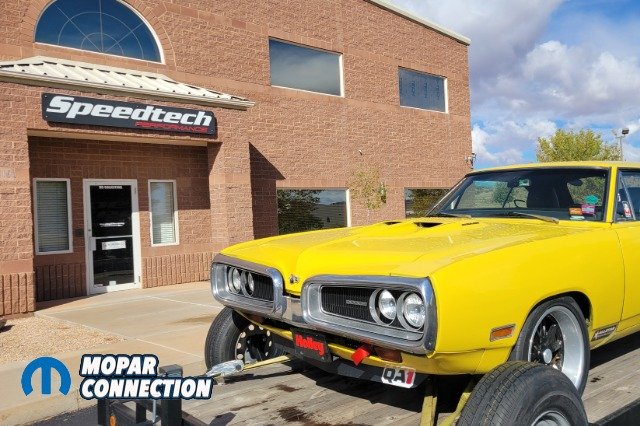
But even the best builds evolve, sometimes out of ambition, and sometimes out of necessity. In Buzzkill’s case, it’s both. Recently, the Super Bee started showing its age in one of the worst ways possible: rust! The front frame rails were rotting away, threatening the car’s performance.
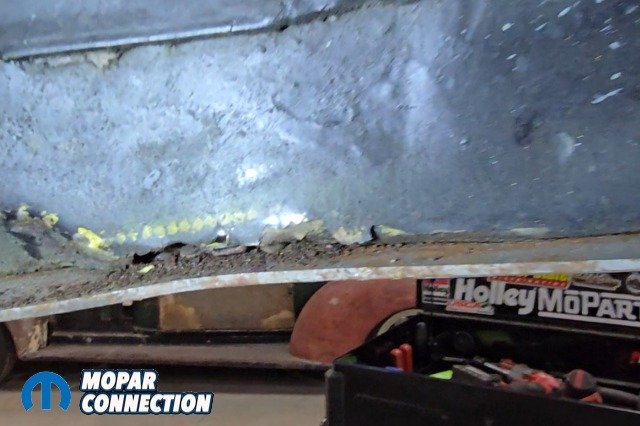
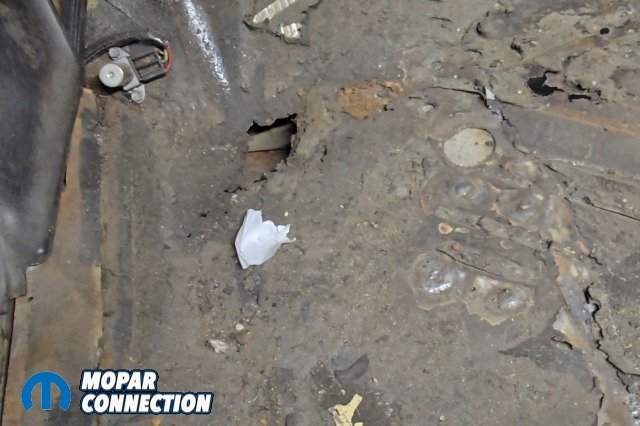
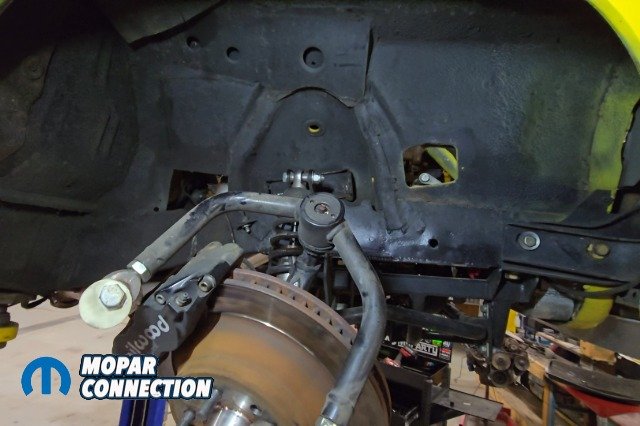
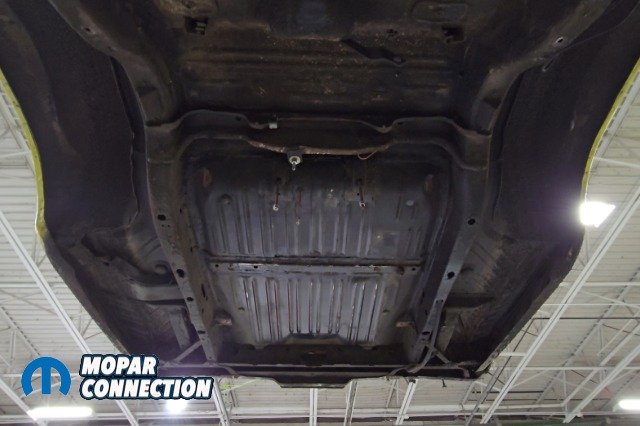
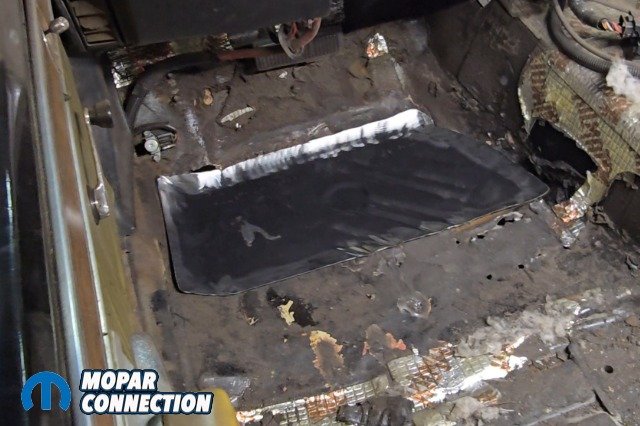
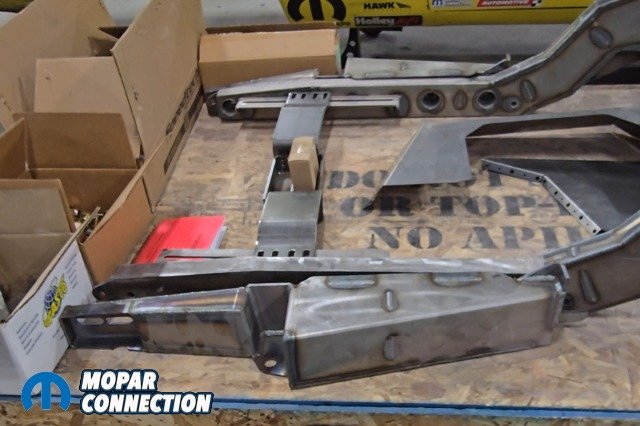
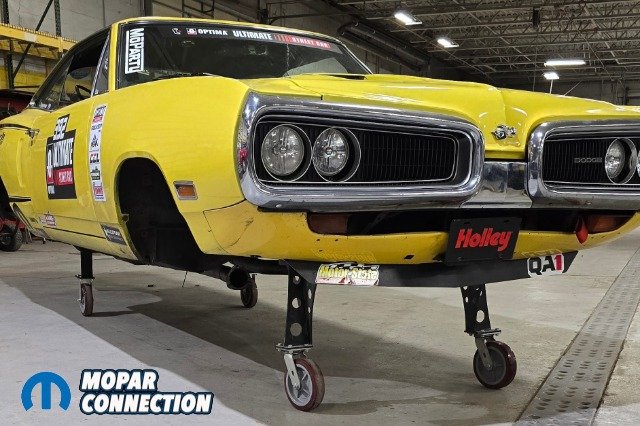
Above left & right: The front frame rails show extensive rust issues along with an old patch repair. Since this section has to be cut out anyway, it makes Speedtech’s extreme front clip chassis the perfect upgrade. Above middle: Rust didn’t stop at the rails, the floor pan was equally tired, requiring repair before the new chassis could be installed.
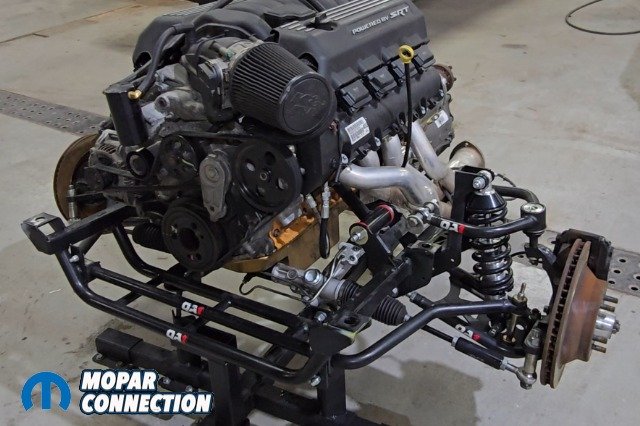
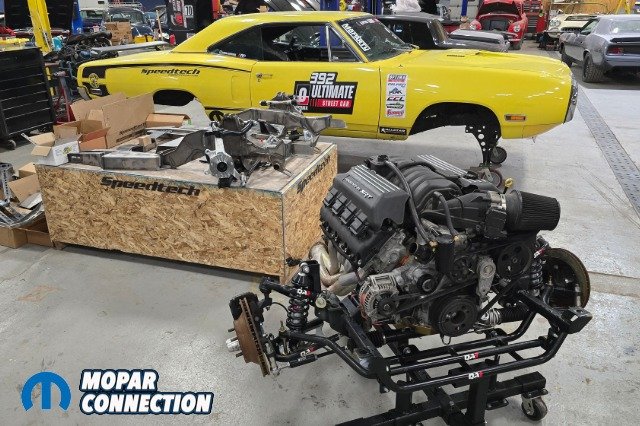
QA1, the brand behind Buzzkill’s current suspension, recently acquired Speedtech Performance and Detroit Speed. That opened the door for David to take the build to the next level with a complete Speedtech Performance extreme front suspension system and their rear Torque Arm setup both paired with QA1’s Mod Shocks.
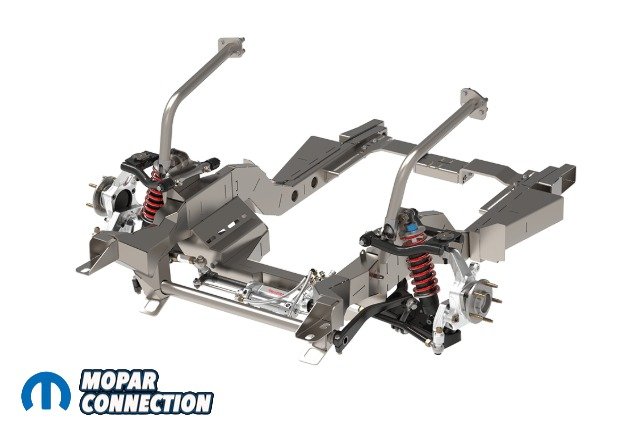
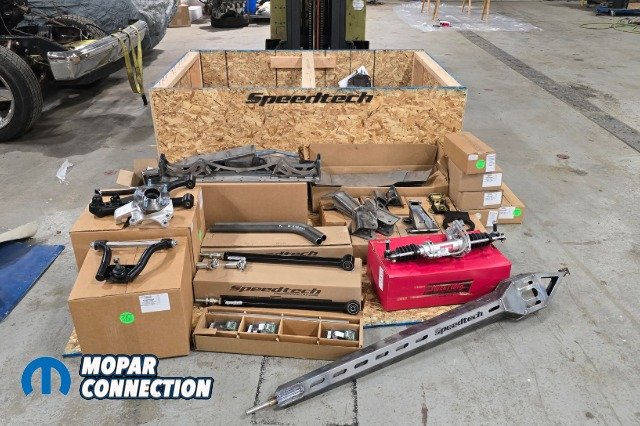
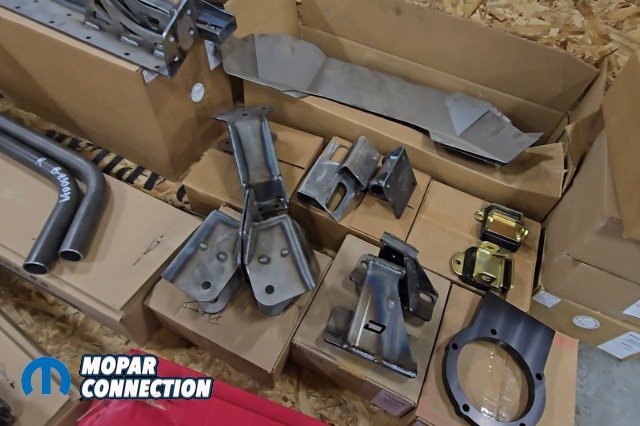
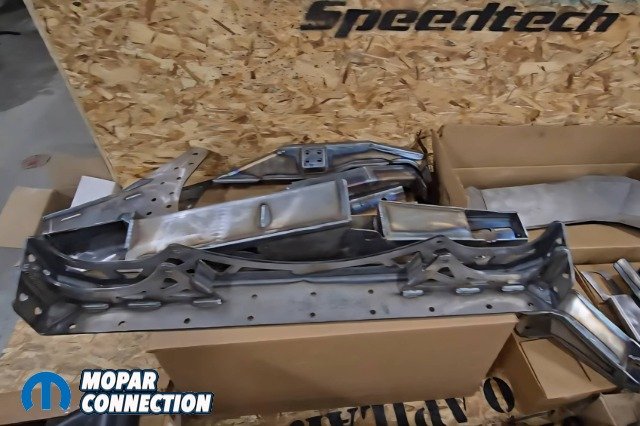
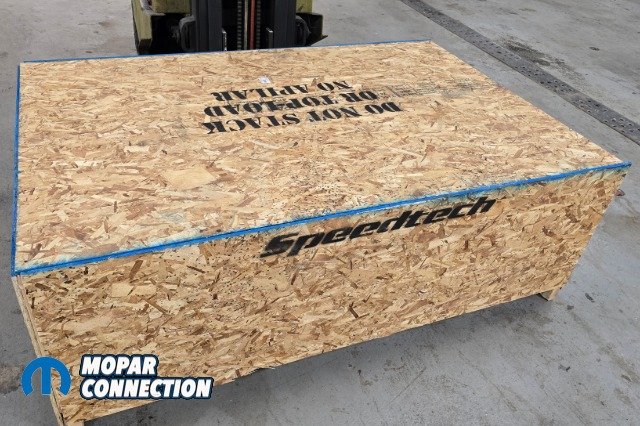
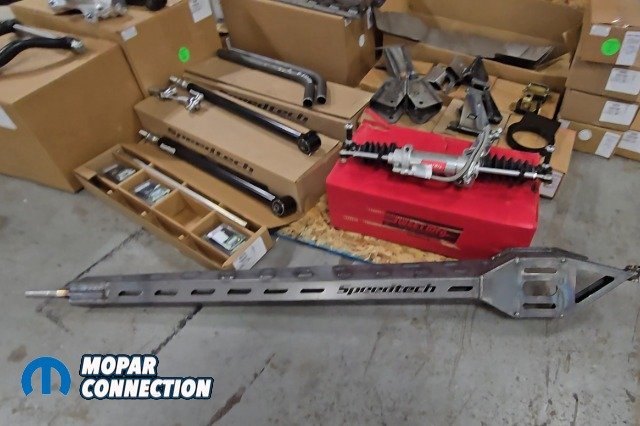
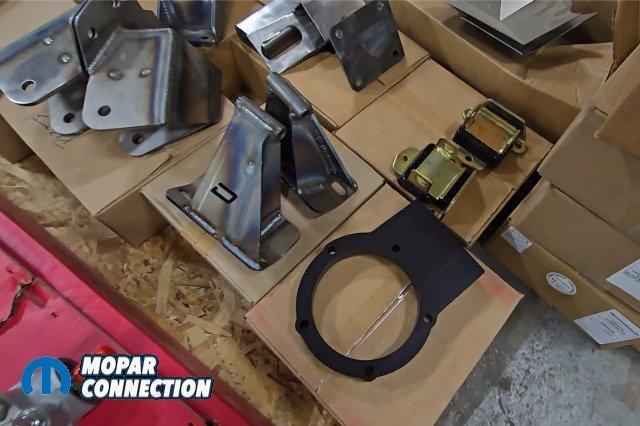
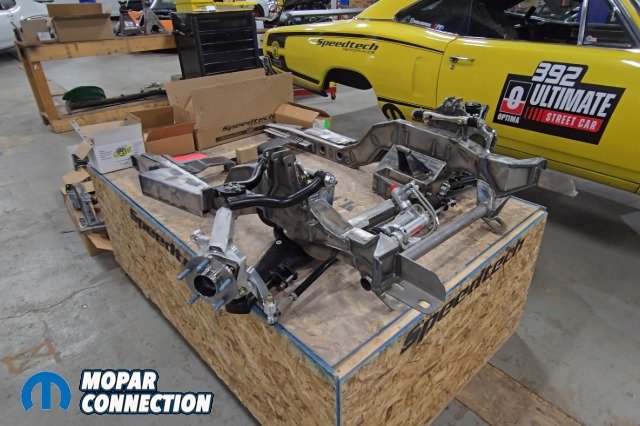
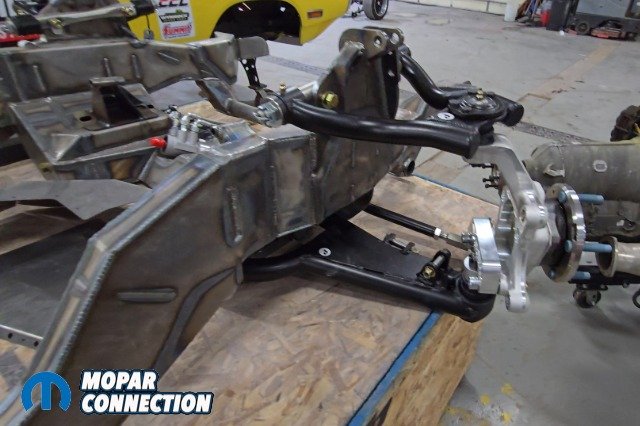
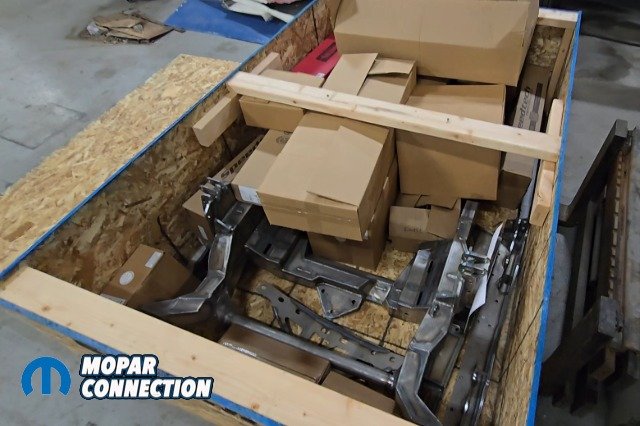
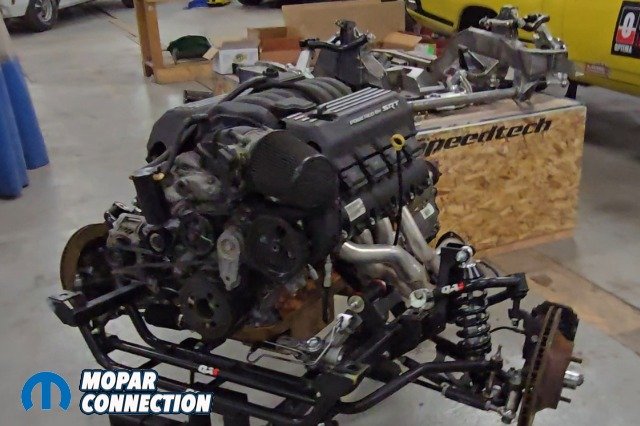
Above left: Speedtech Performance’s Extreme front suspension system shown fully assembled. This complete clip replaces the factory front frame rails, steering, and suspension in one package. Above middle: Speedtech’s rear torque arm suspension system displayed in full. Paired with the extreme front clip, it transforms a classic Mopar into a true Pro-Touring machine. Both systems are also available together as Speedtech’s track time package for those wanting the full upgrade. Above right: All of Speedtech Performance’s components arrive in one large crate, Shown here unpacked, the parts are laid out ready for assembly, with certain pieces requiring paint before use.
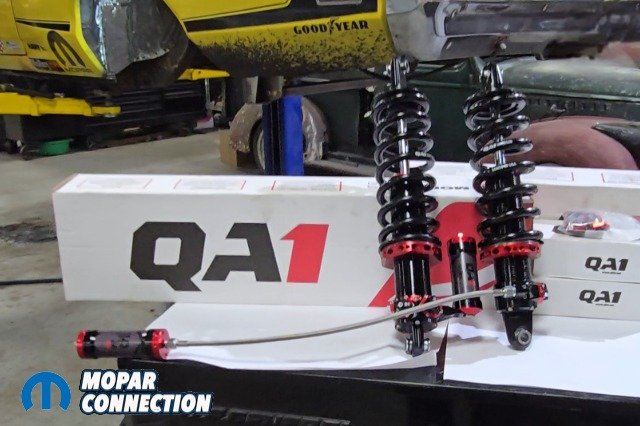
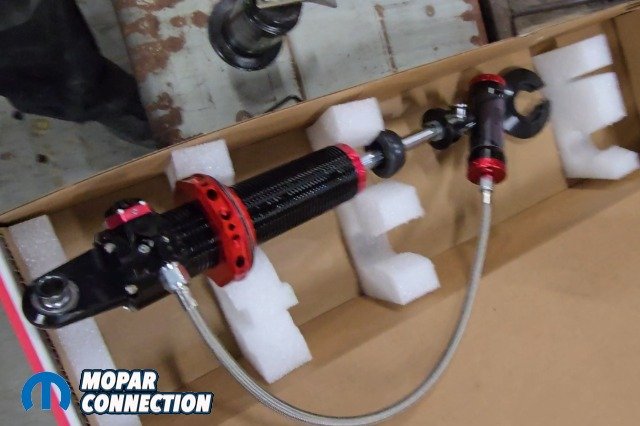
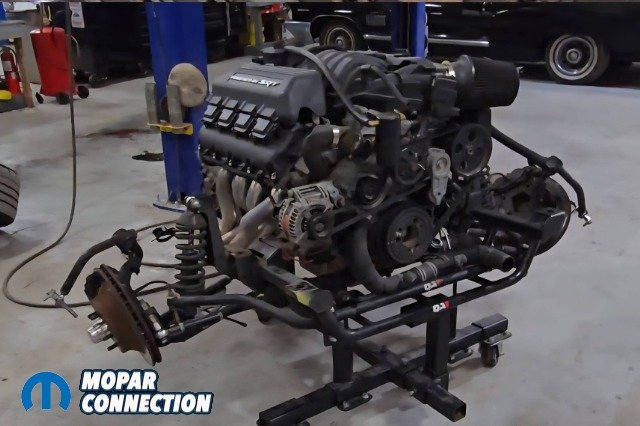
Above: A look at the QA1 MOD Shocks we’ll be using on the Super Bee. Already assembled, each shock includes interchangeable valving and remote reservoirs details we’ll dive into later in the build.
The Speedtech Extreme front suspension kit Mopar platform isn’t just a “bolt-on” upgrade it is a complete front chassis solution that replaces most of the factory front frame rails, crossmember, and suspension with a purpose built, high-performance setup, that can also be used on the street.
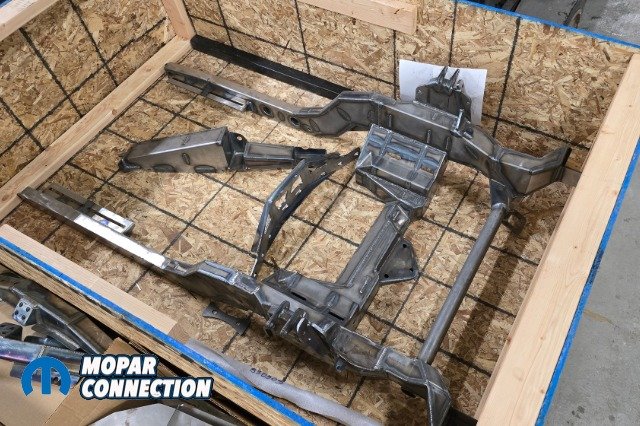
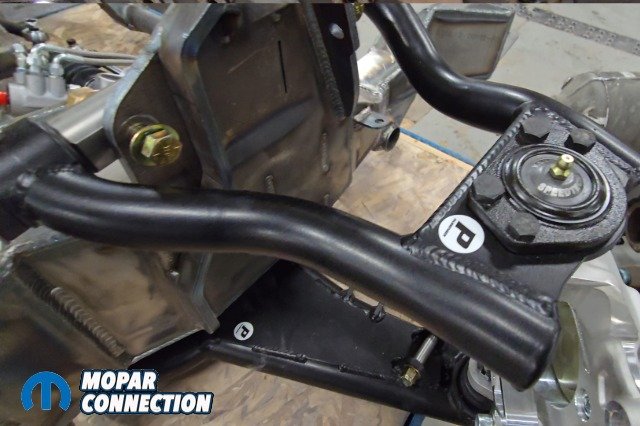
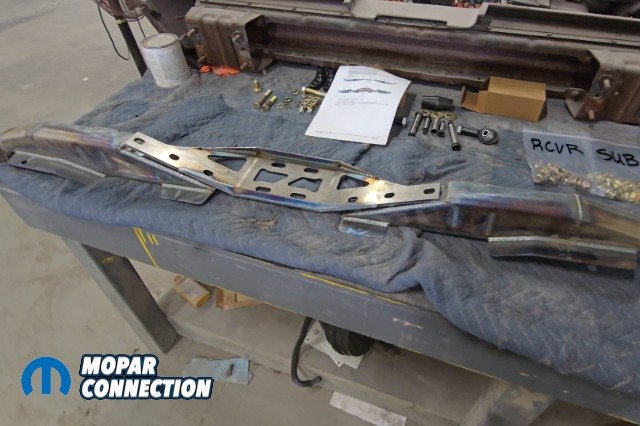
Above left & right: The Speedtech Extreme sub-frame shown here in bare metal alongside the replacement torque boxes it mounts to. This section will be tied into the car’s structure and painted body color to blend seamlessly with the Super Bee’s undercarriage. With this setup, the car can fit tires wider than 315s up front.
Full sub-frame assembly includes new structural components replacing most of the frame rails and the factory member. Whats cool is this system can still drop out the bottom of the car. This sub-frame came bare metal so we can paint it the same as body color. Tubular upper and lower control arms optimized geometry for increased caster, camber control, and reduced bump steer. Speedtech’s system has .005 bump steer with suspension travel.
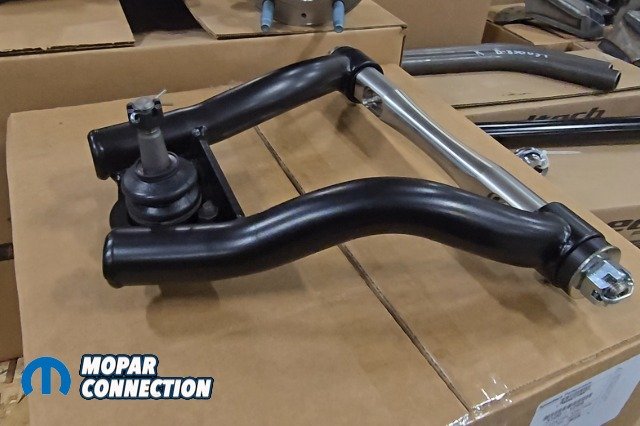

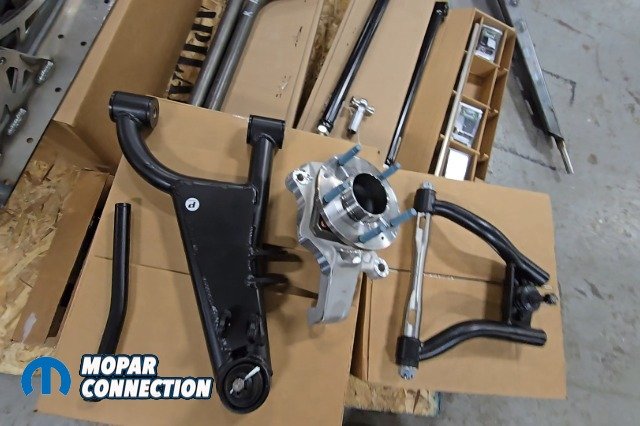
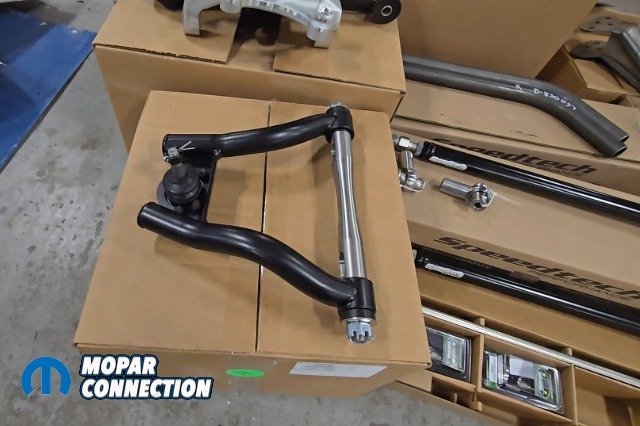
Above left & right: The upper and lower control arms, powder coated and labeled left and right.
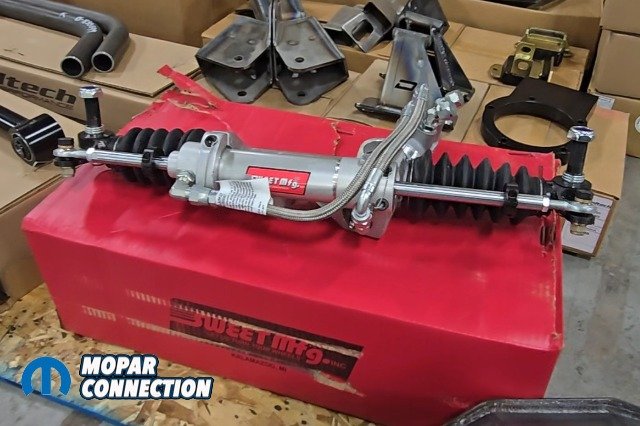
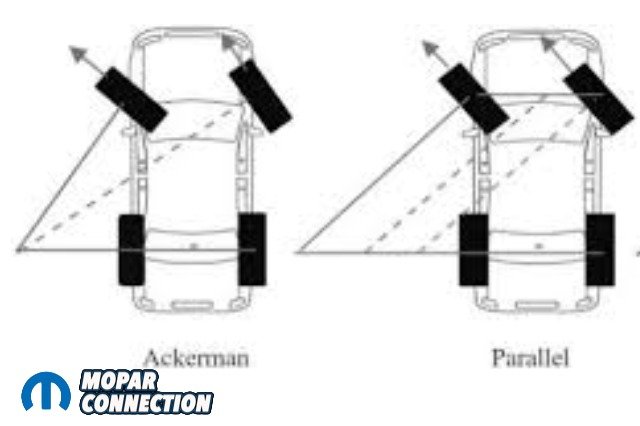
Above left: Sweet Manufacturing’s rack and pinion delivers a direct steering feel with added ackerman geometry for smoother cornering. Above right: A side by side look at steering with ackerman versus without. With ackerman, the inside front wheel turns sharper than the outside.
Sweet Manufacturing rack and pinion steering system replaces the old steering for a direct, modern steering feel. The rack improves geometry to add ackerman. Ackerman is the steering geometry that makes the inside front wheel turn sharper than the outside wheel in a corner, so both roll smoothly without scrubbing.
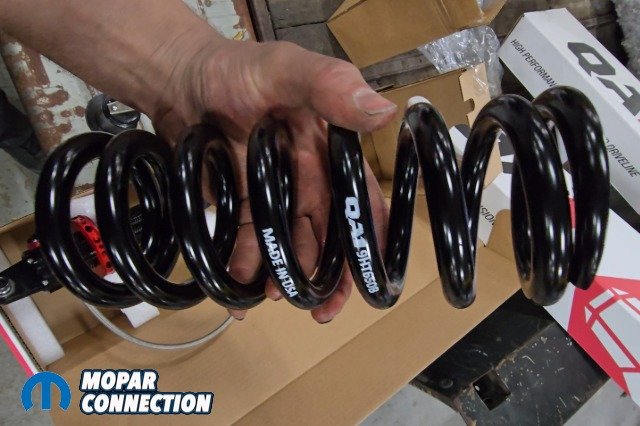
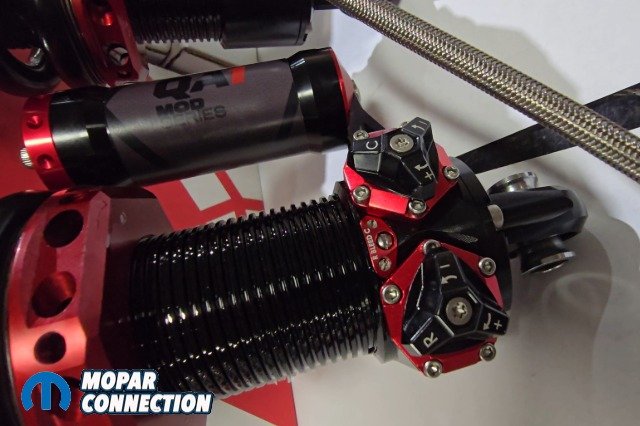
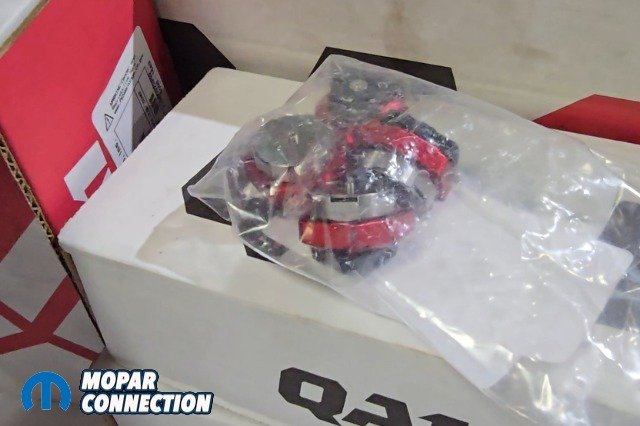
Top left: QA1 MOD Shock with remote reservoirs, ready to handle serious street and track duty. Top right: The kit includes 400 lb. springs for the rear and 600 lb. springs for the front. Bottom left: Close up of the MOD Shock’s adjustability compression, rebound, and bleed-off settings allow fine-tuning. Bottom right: QA1 supplies additional valve packs for compression and rebound to dial in performance.
QA1 Mod Series coilovers for infinite adjustability. Kit comes with extra valving for adjustability. Some cool features with the Mod Shock is not only performance but the way that you can mount these. There are endless ways to adjust them for fitment. On the front we’re going to run a remote reservoir and on the rear it is mounted to the shock.
We’re going to experiment with springs, 600lbs in the front and 400lbs in the rear. Spoiler alert we end up changing the rear 400lbs springs to 500lbs springs to try and keep all tires on the ground.
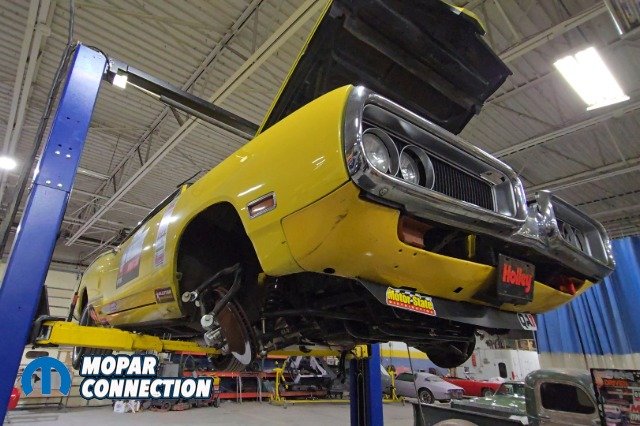
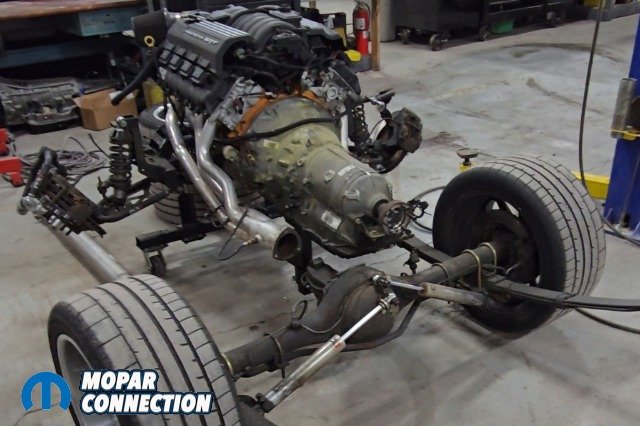
Above: Sneak peek of the Super Bee with Speedtech Extreme chassis and 315 front tires.
High clearance design allows fitment of massive 325-335 front tires depending on the wheel specs, giving this B-body insane levels of grip; an adjustable sway bar; tunable for street or track use, improving cornering stability; a splined bar that has greaseable bushings.
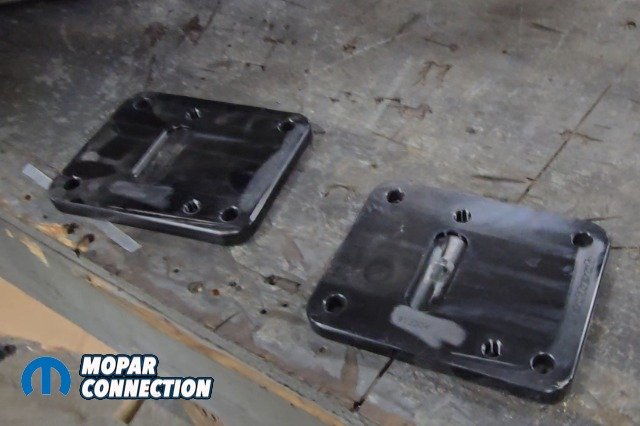
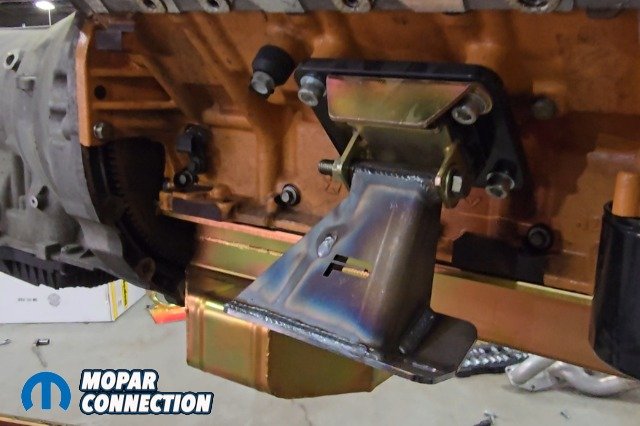
Above left to right: All brackets and mounts included, designed to fit the 8HP70 transmission and Gen III Hemi.
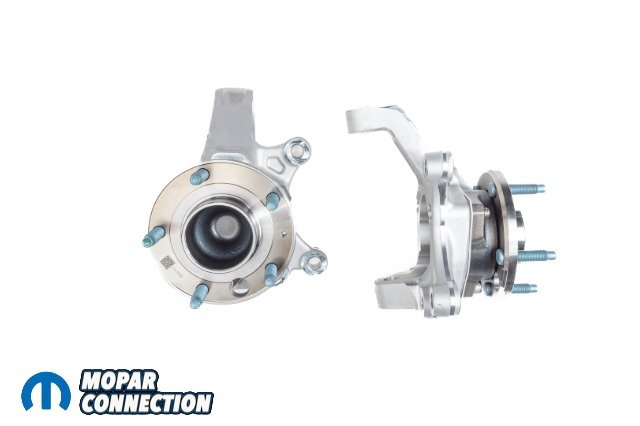
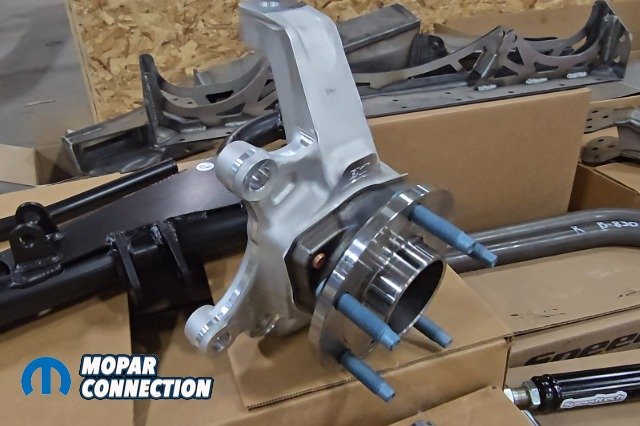
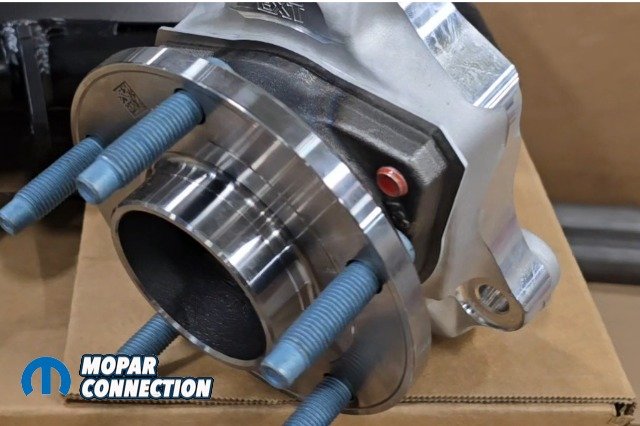
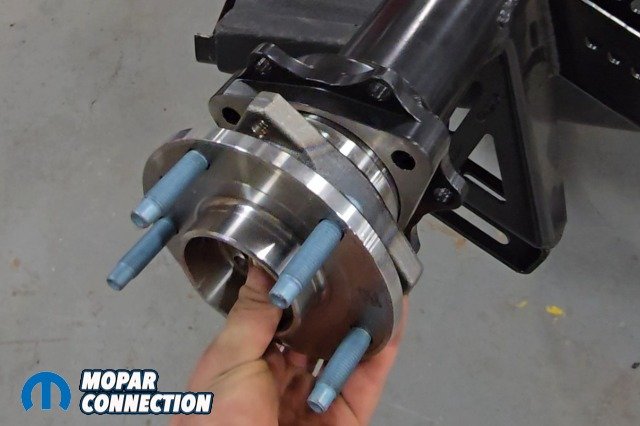
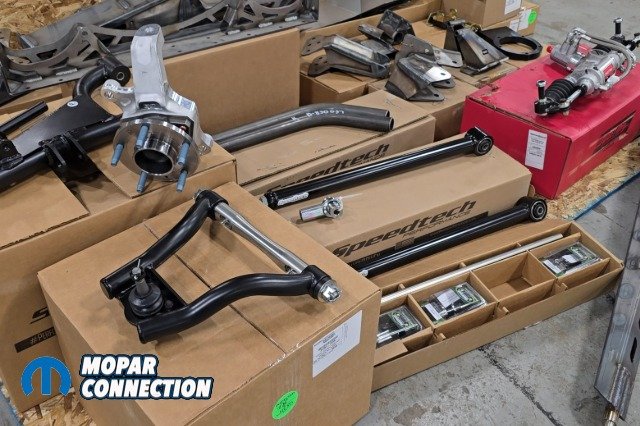
Above left to right: Speedtech’s forged aluminum spindles with C7 Corvette hubs and improved geometry for maximum grip.
Engine mount options multiple configurations for various Mopar and modern engine swaps, including Gen III Hemi. Extreme forged spindle 7075 aluminum, optimized geometry, better grip, reduced scrub radius, C5/C6 brake fit, C7 hub built to turn and drive better on street or track. With that the lug pattern will be GM based.
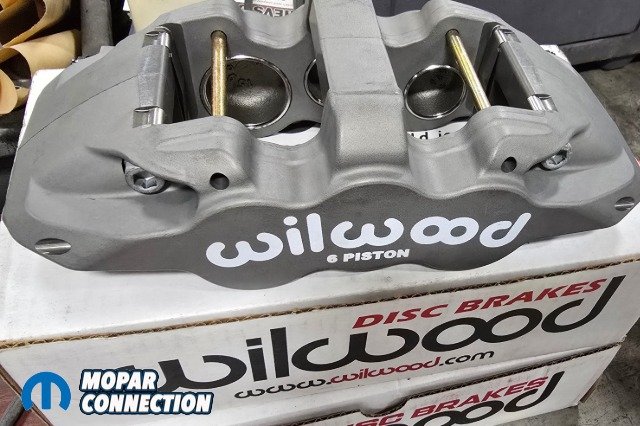
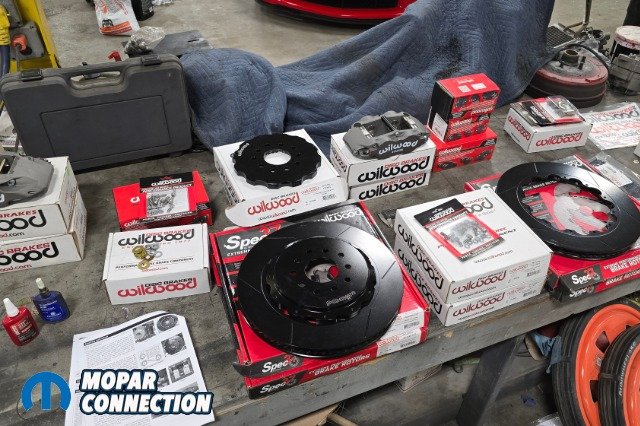
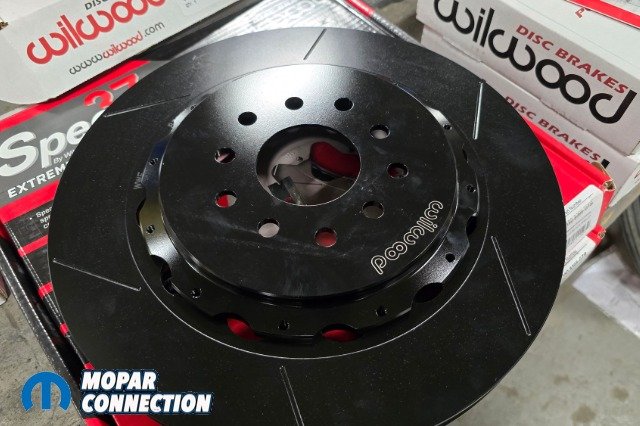
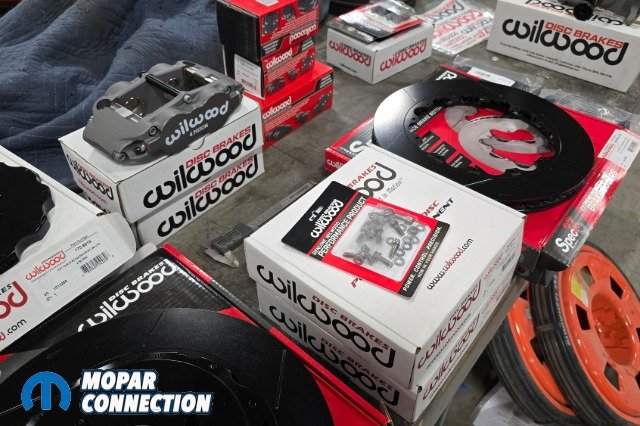
Above: Wilwood disc brakes six-piston calipers up front, four-piston in the rear, with multi-piece rotors and powder-coated finish.
Speedtech’s system is compatible with many brake companies. We chose Wilwood brake kits part numbers (140-15705) front and (140-9119) rears. Wilwood upgraded the piston size to handle the weight and performance demands of our build, supplied a brake bias (#340-16920) mounted to two 3/4 master cylinders remote reservoirs, (#260-10372) and helped us convert from power to manual brakes for more precise control. They also finished the calipers in a custom gray for a unique look.
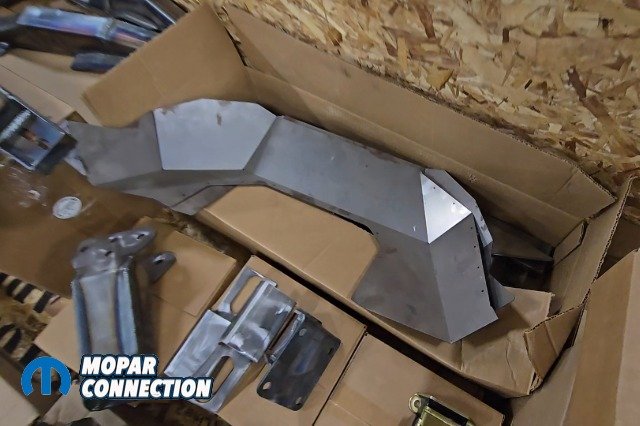
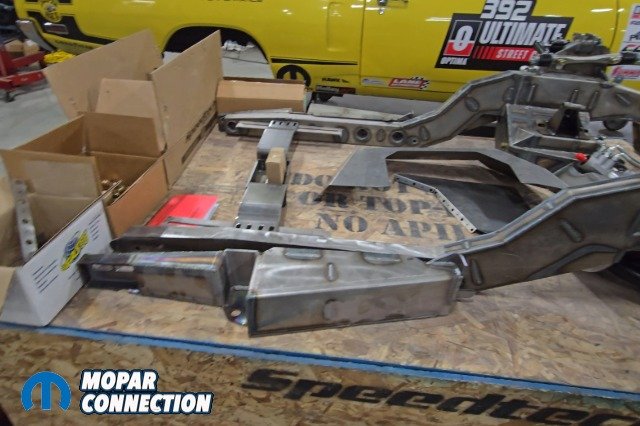
Above left: Speedtech supplies new front inner fenders, as the factory pieces will need to be cut out for the extreme chassis. Above right: Speedtech also provides down bars that run from the firewall to the new chassis, adding triangulation and strength to the front end.
When you order the Speedtech kit it comes with inner front fender wells to fit large tires and down bars to triangulate the front end. Other parts that Speedtech can supply is custom fit headers and steering shafts. This system doesn’t just fix Buzzkill’s rust problem it fundamentally changes the car’s handling potential.
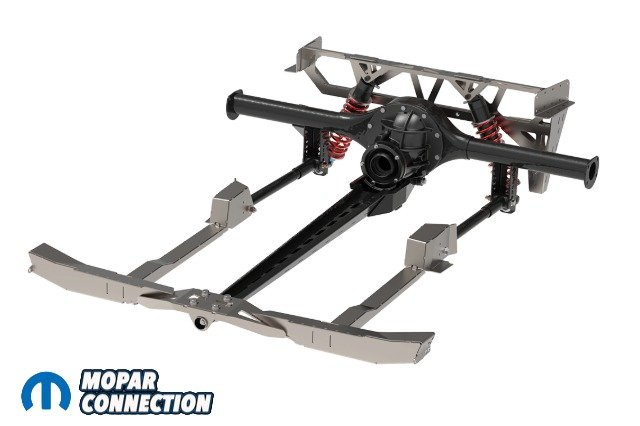
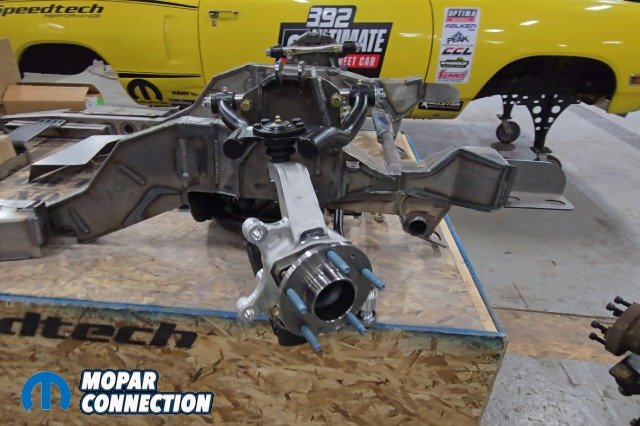
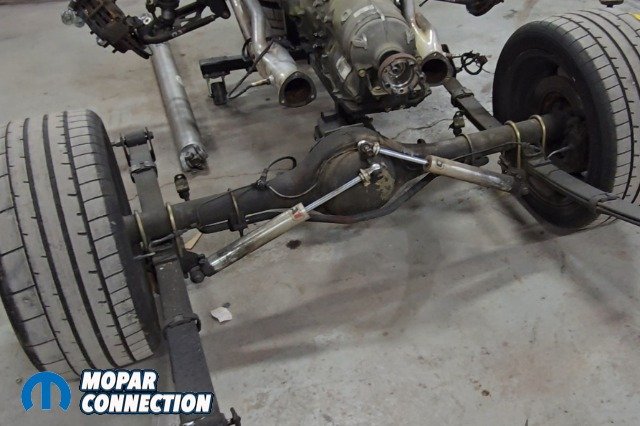
Speedtech rear torque arm system Mopar platform. In the rear, the factory leaf springs are retired in favor of a three link style torque arm setup. This is designed to keep the rear axle firmly planted under power while improving ride quality and traction.
Above: Speedtech Performance’s rear torque arm system laid out in bare metal, to be painted before assembly.
Torque Arm Assembly provides a central link between the axle and chassis, controlling pinion angle through suspension travel. Speedtech offers a powder coating option but we decided to paint ours.
Above: All necessary brackets and mounts for the rear torque arm, shown in bare metal before paint.
Coilover shock mounts replace the factory shock mounts that’s designed for QA1 Mod series shocks, giving adjustable ride height and damping in the rear. Panhard bar controls lateral movement of the rear axle, keeping it centered under the car at all times.
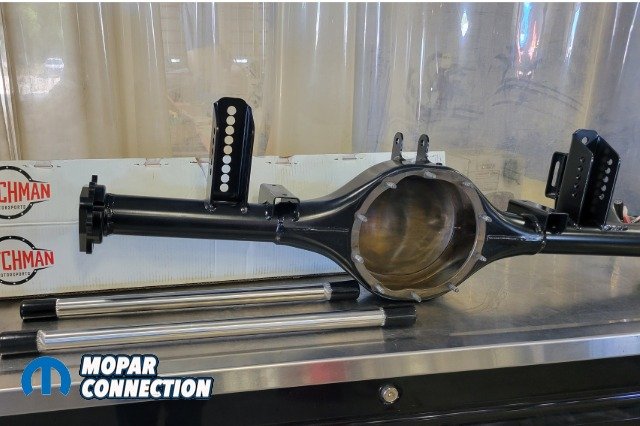
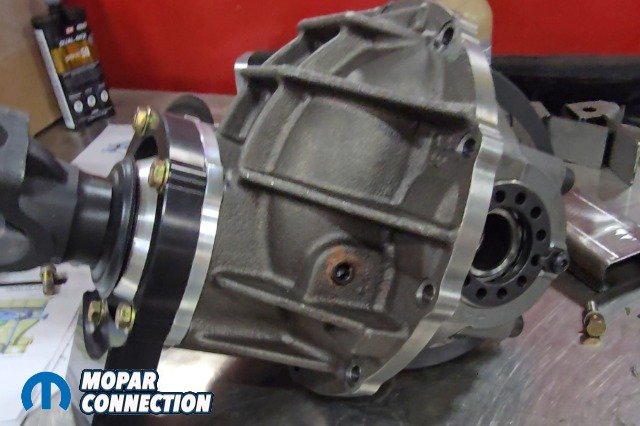
With the Speedtech torque arm, a new 9-inch axle is supplied from Dutchman Motorsports with rear axle brackets weld-on mounts for the torque arm, shocks, and sway bar. The axle ends also will allow the C7 Corvette hubs to be bolted on. A new third member is supplied with a Eaton Truetrac in stalled. Also a gear change was made going from a 3;23 to a 3;08.
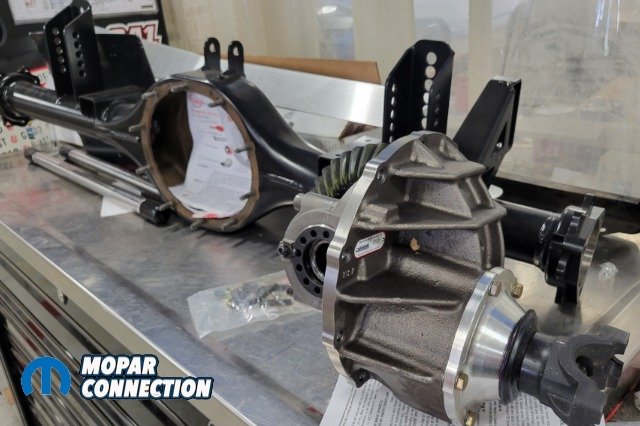
Top left: Dutchman Motorsports builds the new 9-inch axle designed to work with Speedtech’s torque arm system. Top right: The new axle housing with 3rd member ready for assembly. Bottom left: Axle housing shown with all brackets pre-mounted, taking the guesswork out of installation. Bottom right: This axle housing is also designed to accept C7 Corvette hubs.
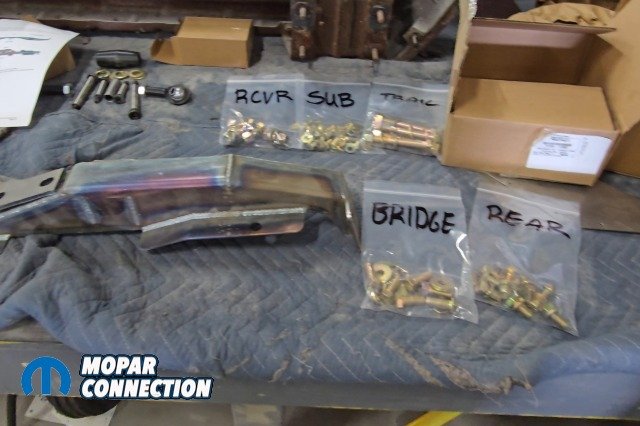
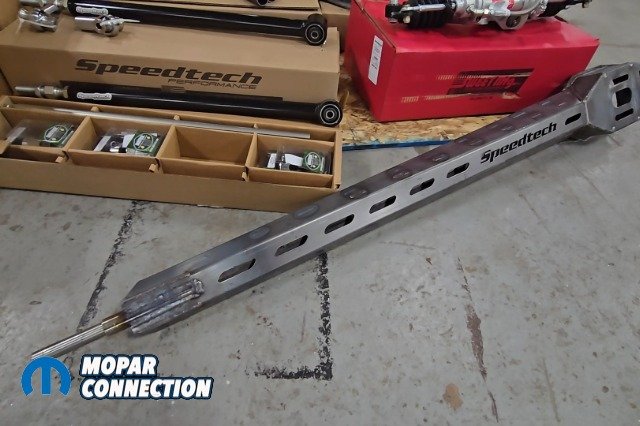
Above left to right: The ‘bridge’ crossmember for mounting the torque arm, shown with all included hardware.
Chassis crossmember provides mounting points for the torque arm and adds chassis rigidity. The big advantage under hard acceleration or cornering is that the torque arm design keeps weight transfer smooth and predictable, making it easier to put power down without breaking traction.
STEP ONE: TEAR DOWN
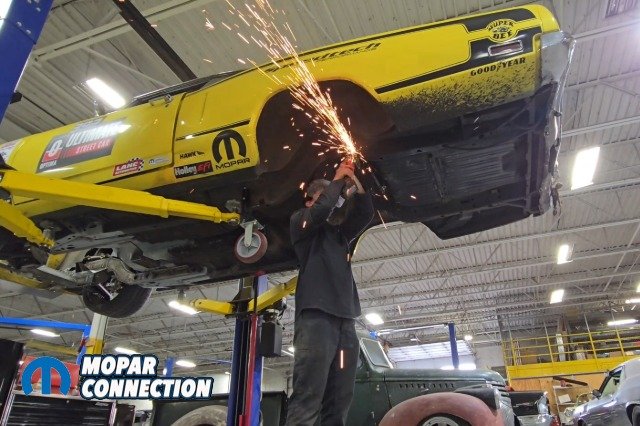
Above: With the Super Bee on the lift, the suspension is loosened to prepare for dropping the entire drivetrain at once with the QA1 suspension still attached.
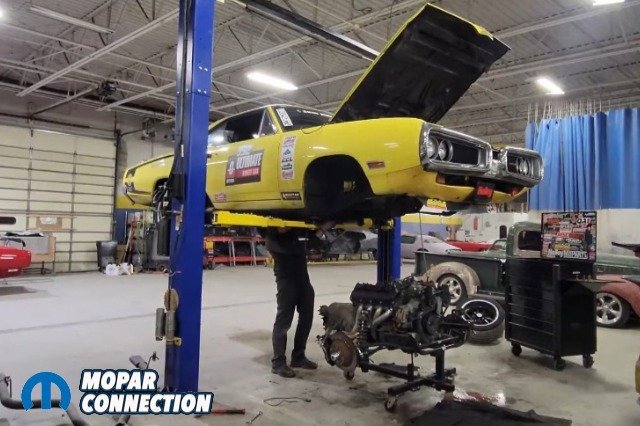
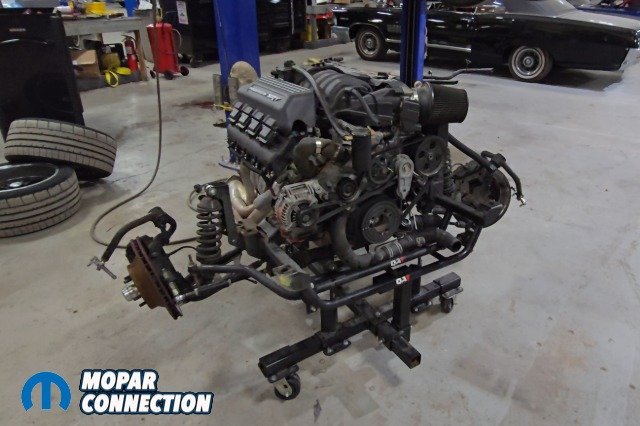
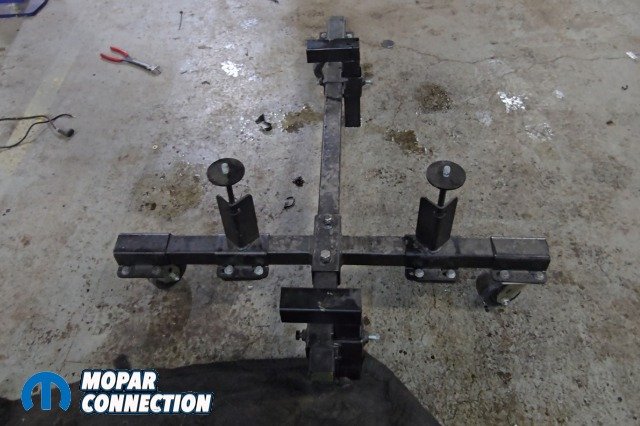
Above: Using US Car Tool’s dropout dolly, the drivetrain was lowered and rolled out from under the Superbee.
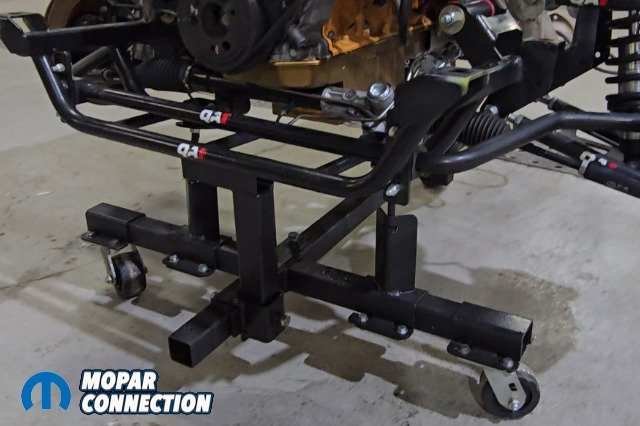
Before anything new could be installed, Buzzkill had to come apart. The drivetrain was removed using US Car Tool’s drop out dolly, (#usct7m2081) which made it easy to remove the engine, transmission, and K-member as one complete unit. From there, the body was mounted on a US Car Tool body dolly (#usct4m1001) so it could be rolled around the shop during the build process.
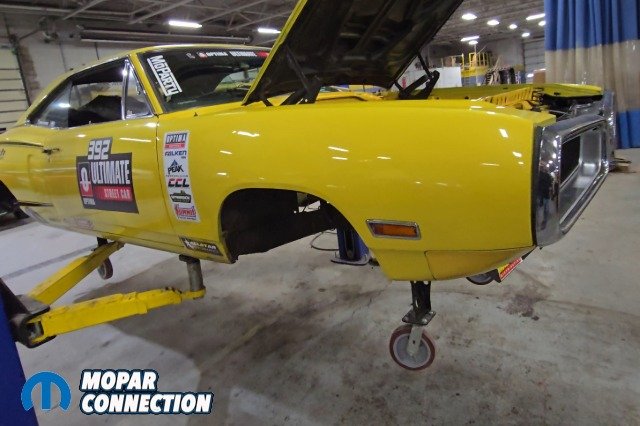
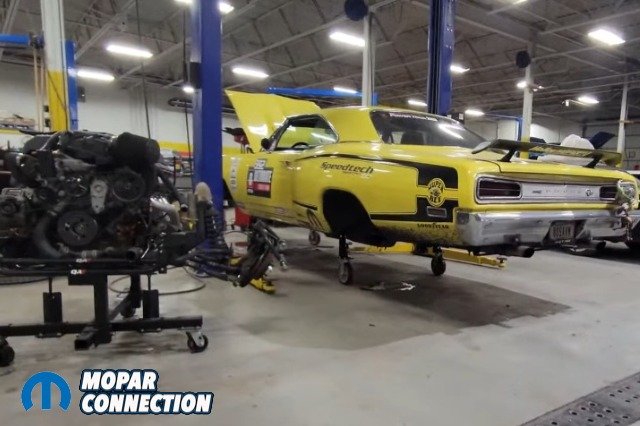
Above: US Car Tool body dollies bolt directly to the shell, allowing the Super Bee body to be rolled easily around the shop.
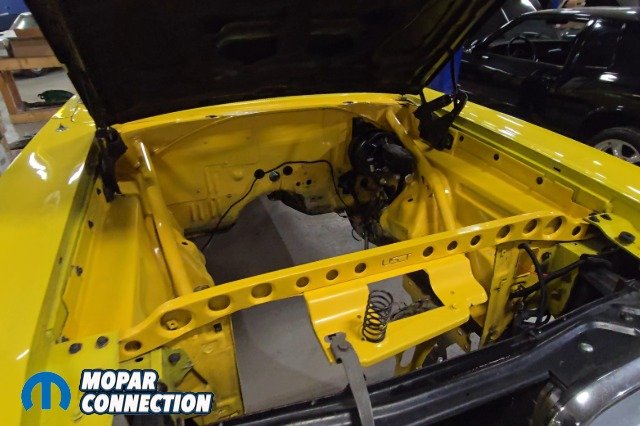
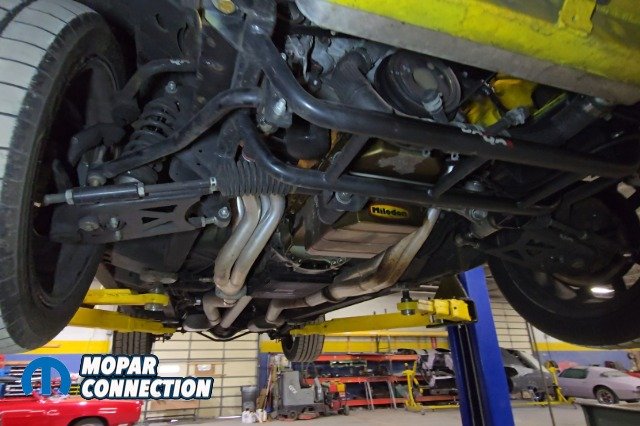
Above: The Super Bee’s empty engine bay and fully stripped undercarriage, ready for the next phase of the build.
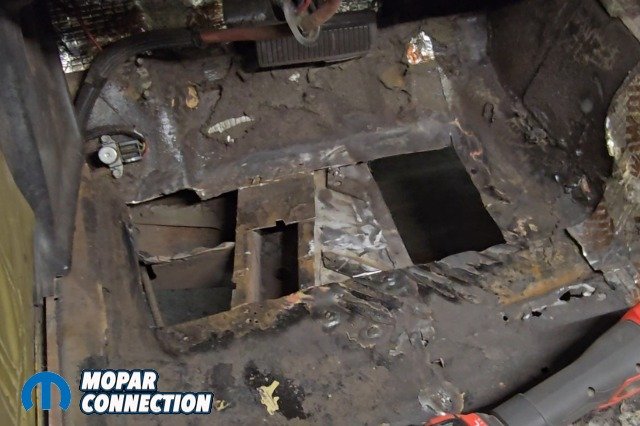
While inspecting the underbody, rust was discovered in the driver’s side floor pan. The damaged section was cut out and replaced with a partial Auto Metal Direct floor pan. This was also the perfect time to strip away the old rubberized undercoating, ensuring a clean, solid foundation for the new components that needed to be welded in.
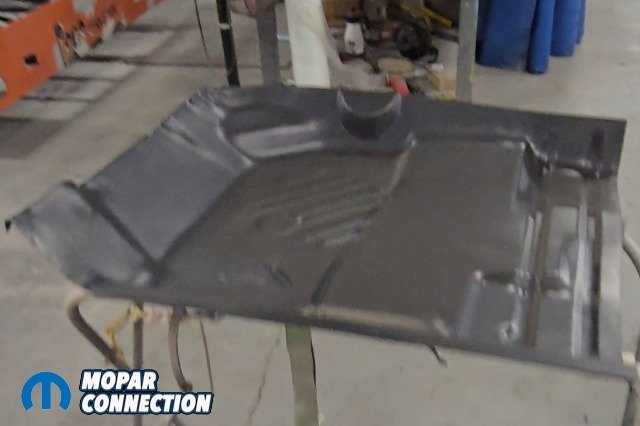
Above left: Half of a replacement floor pan from Auto Metal Direct was used to repair the rusted driver-side section. Above middle: The rusty floor pan was traced and cut out to prepare for the new panel. Above right: The new patch panel welded in place, finishing the repair with a clean, factory style look.
By the time you’re reading this, some of you may have already seen Buzzkill on display at the Good Guys show in Columbus, Ohio. But that was just the calm before the storm. In the next two installments, we’ll walk you through the installation of the Speedtech rear torque arm system and extreme front suspension kit on a B-body Mopar with step-by-step detail, tech insights, hiccups, and the performance results you can expect.


