


When we picked up Project Rara Hemious Birdicus, our 1968 Hemi Road Runner, in March 2025, it was immediately apparent that the car had a great story to tell, yet a long list of concerns to resolve before it could safely return to the road. The most evident problem sat right up front, the upholstery.

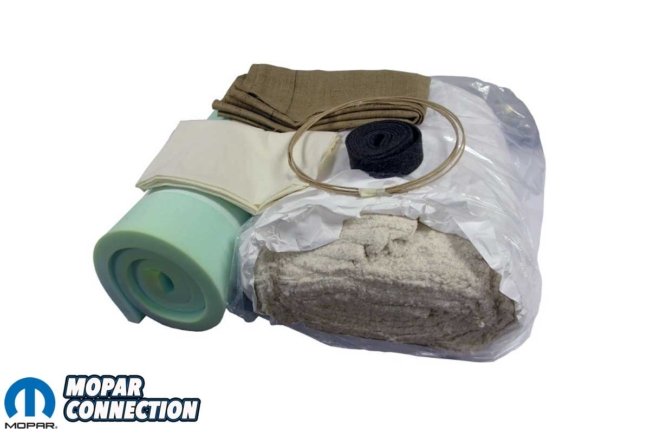
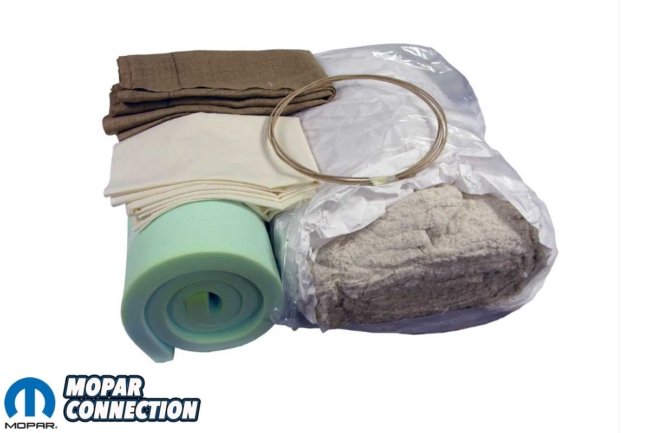
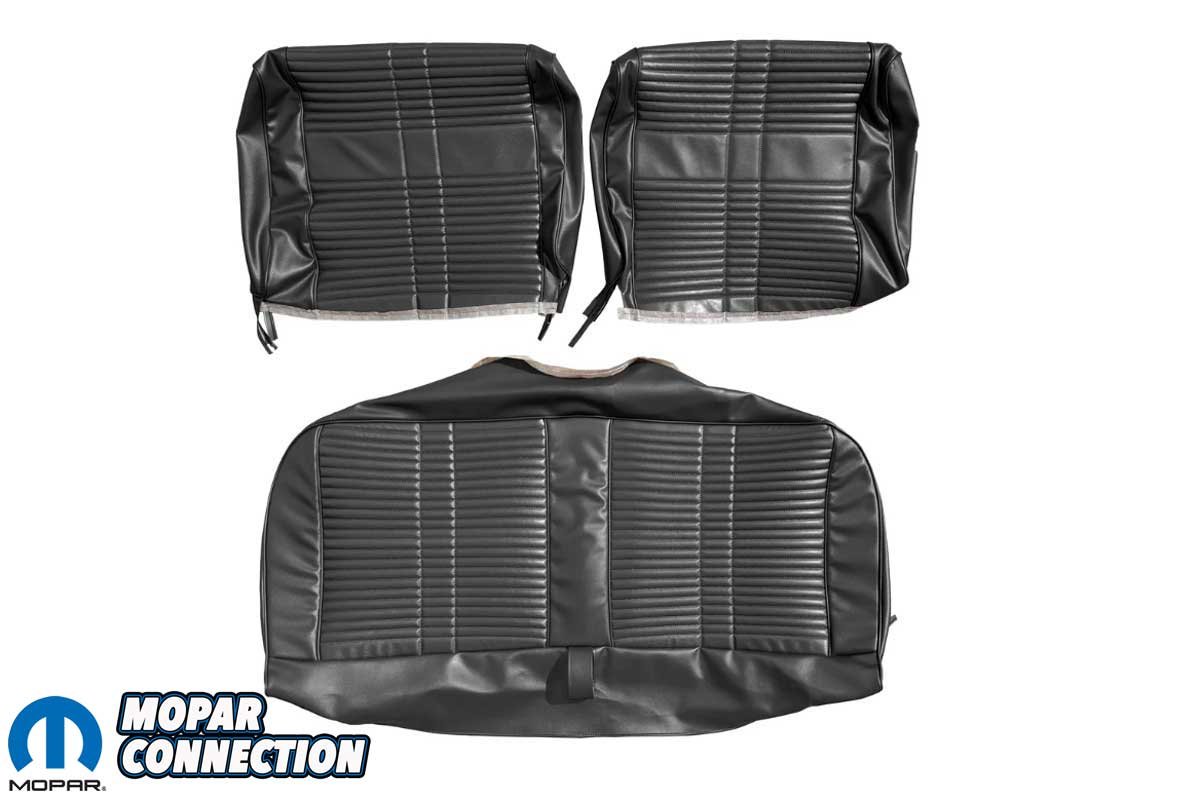
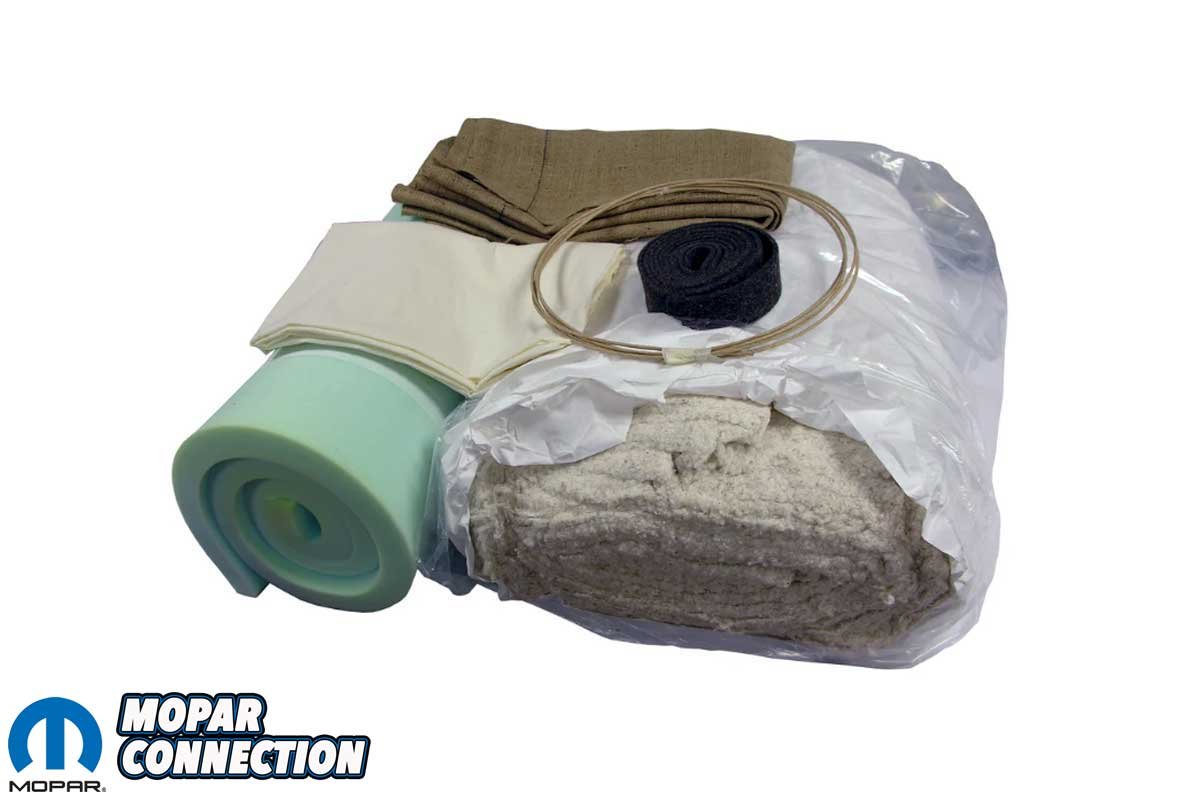
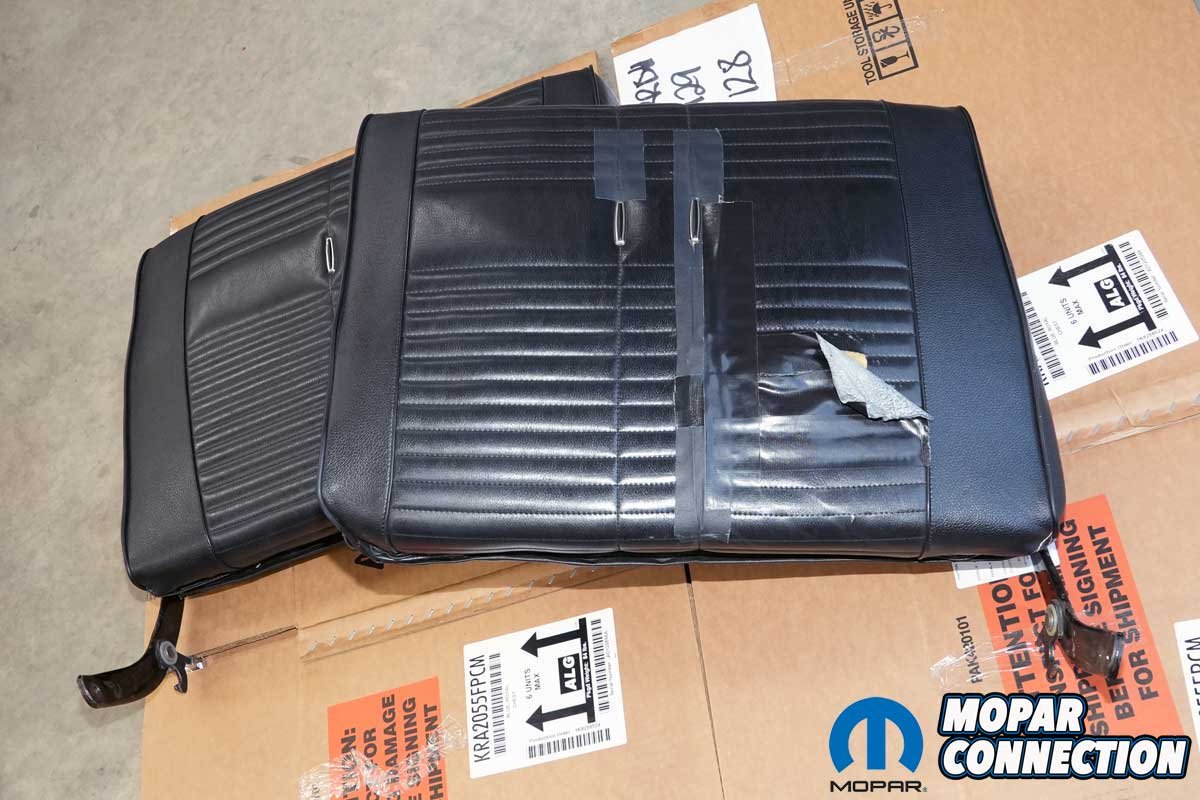
Above Left: We picked up new Décor interior upholstery from Legendary Auto Interiors to replace our original and weathered front seat covers. Above Right: We also picked up the split-bench installation kit, which included burlap, muslin, foam, cotton batting, and other installation materials.
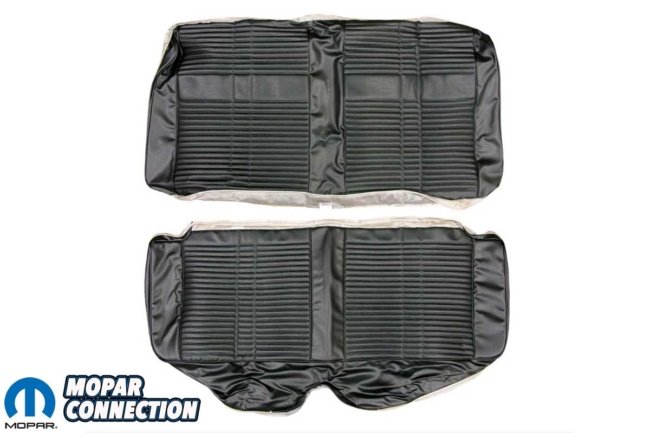
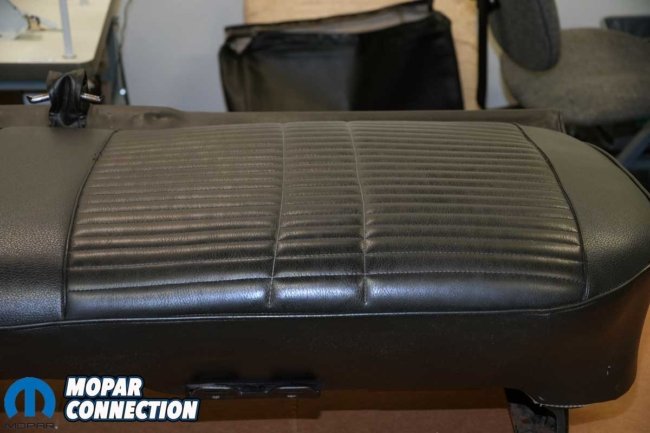
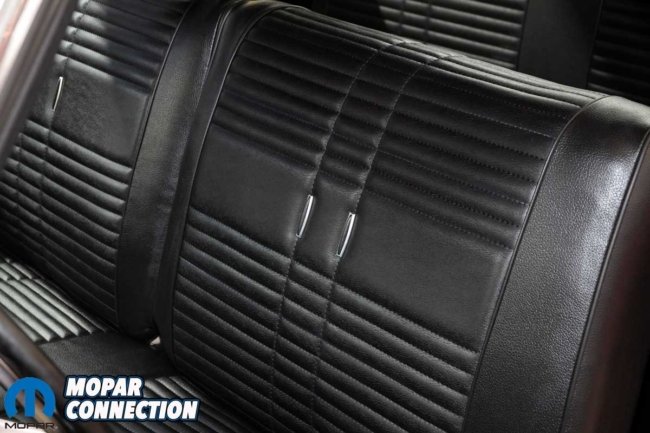
Above Left: The rear seat covers were the same Décor trim to match the front seat covers. Above Right: The rear seat installation kit was similar to the front kit.
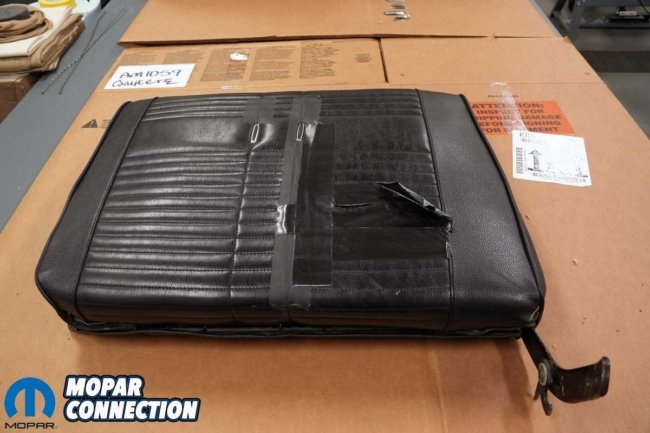
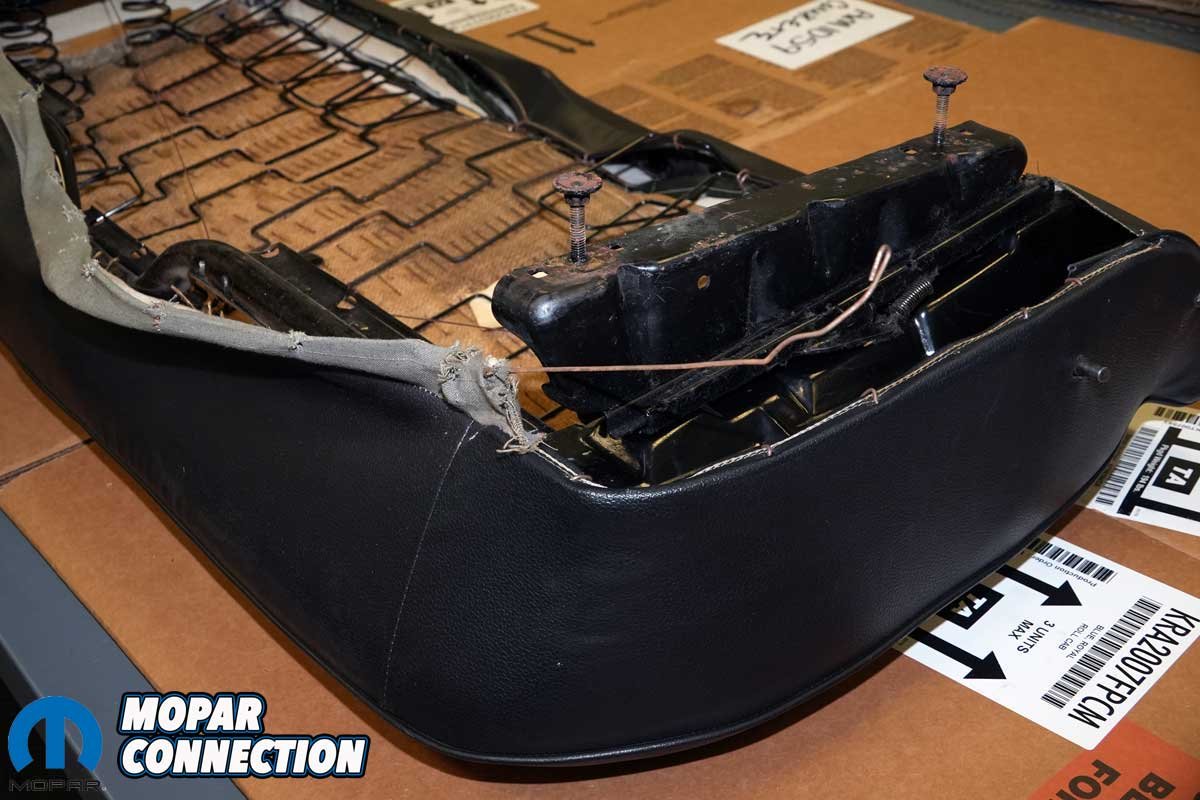
The front seat bottom and backrest were held together with black duct tape, a quick fix that had long since given up the ghost. We added more tape to keep the covers from completely falling apart. Another curious, non-OEM trait appeared on the passenger-side backrest. When tilted forward for rear-seat access, it often detached from the hinge when returned to position, turning a simple movement into a full wrestling match.
Behind the front seats, the picture changed. The rear seat was pristine, no splits, tears, or loose stitching, a small reminder of the Road Runner’s original glory. Removing all the seats would give us an accurate assessment of every cover and set the stage for a proper restoration.
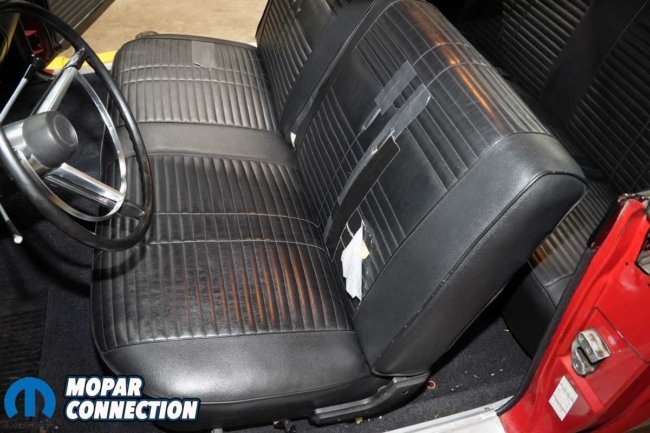

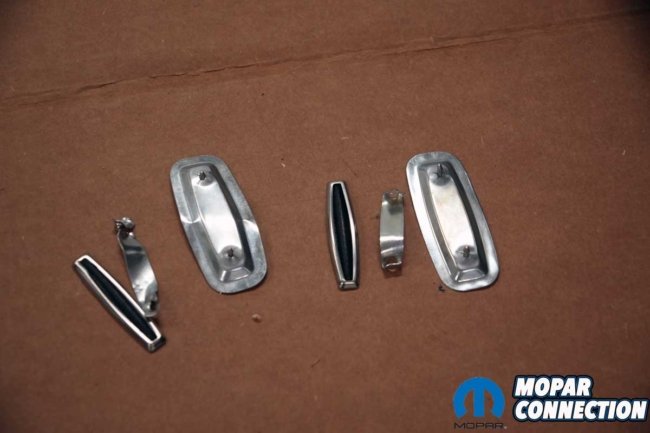
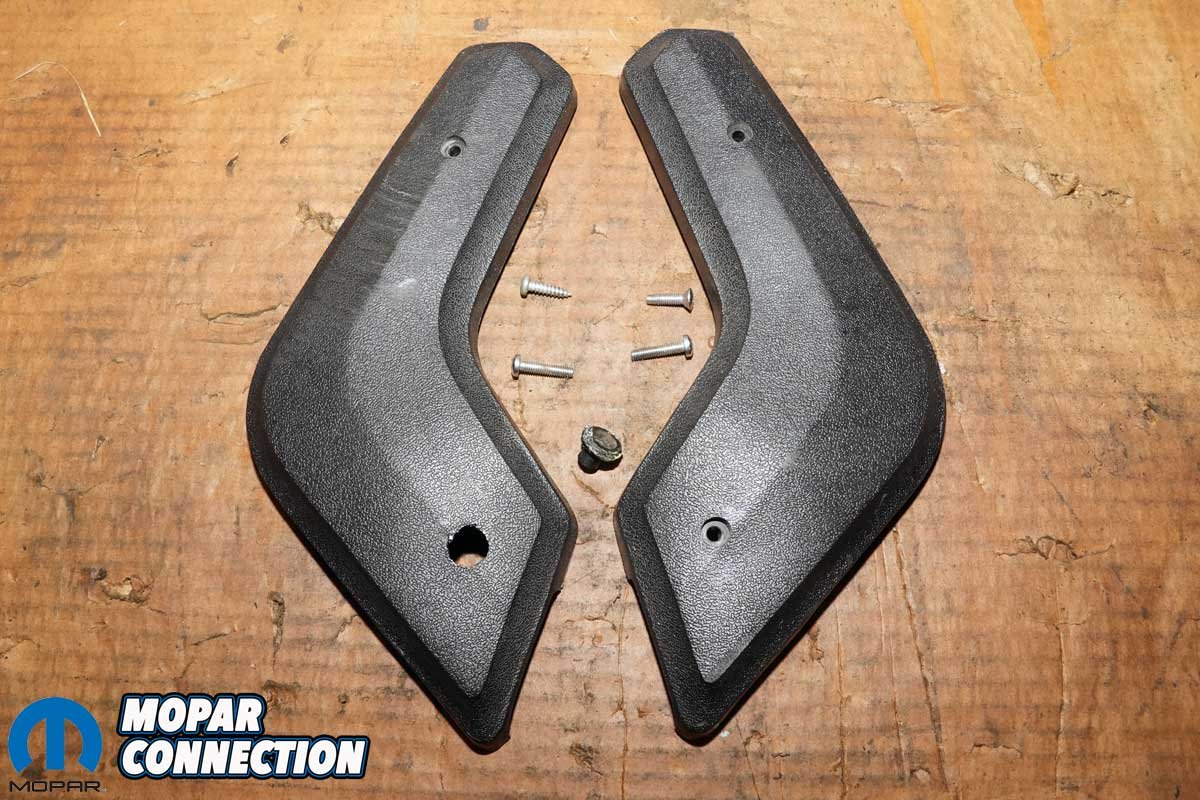
Above Left: The front backrest cover was in terrible shape. Several layers of black tape held much of the cover together. The seat bottom was damaged on the passenger side. Above Right: The hinge covers had mismatched screws, and the driver’s side (left) cover had been damaged and glued at the lower screw hole. We planned to replace both after the new upholstery installation.


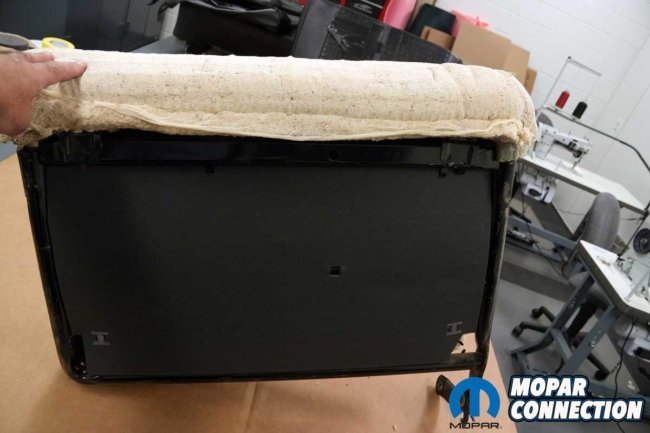
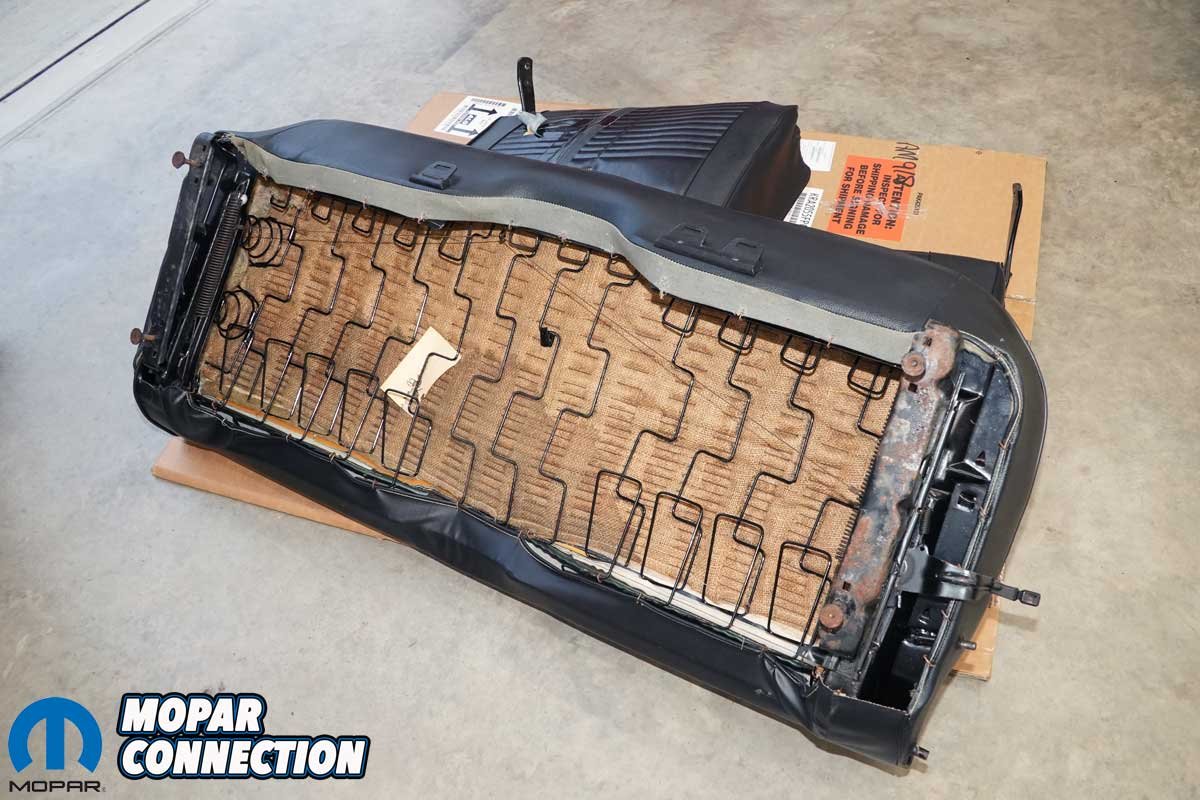
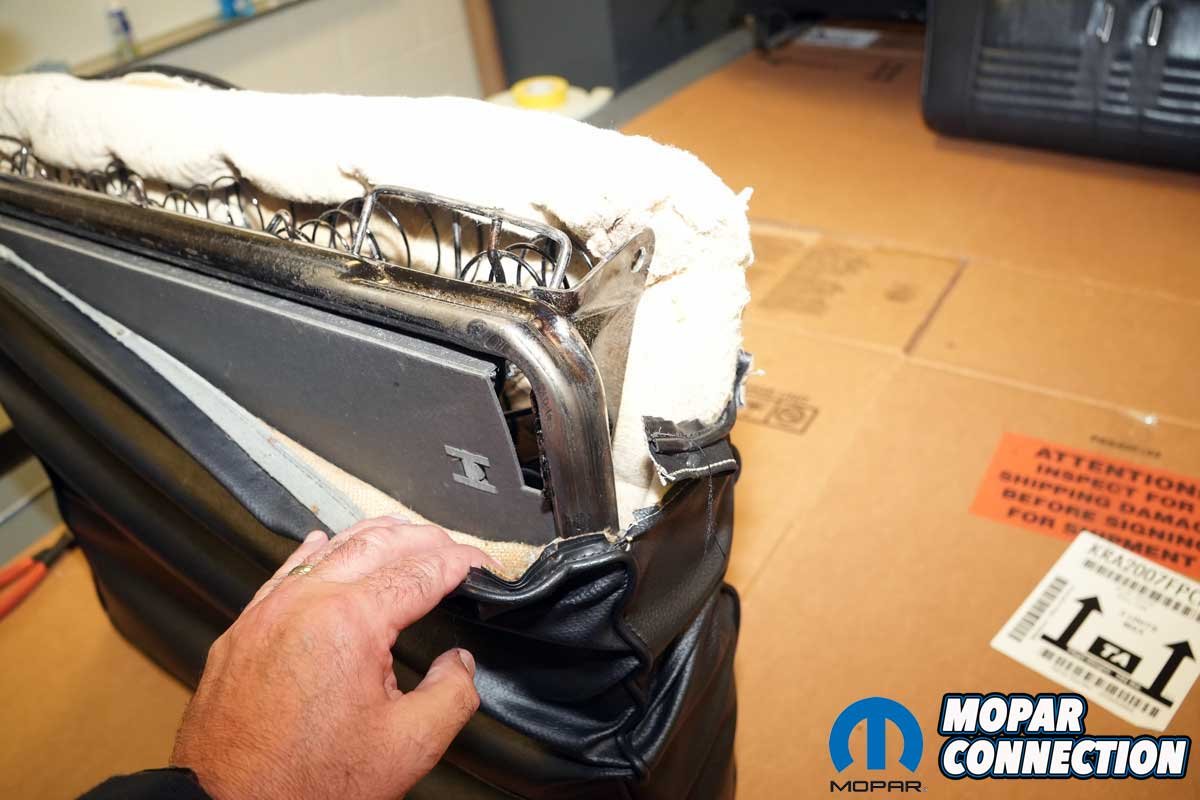
Above Left: A better look at the front seat backrests was encouraging. Except for minor cover damage at the passenger’s side inner pivot point, the covers appeared to have kept all the padding in place. Above Right: The front seat bottom overall seemed to be in good shape. The frame had minimal rust on the lower tracks. On the underside, interlaced into the springs was an index card with the number “413” on it.
Expecting to replace everything except the frames, we contacted Legendary Auto Interiors for:
• Part No. AA68CRP0020100 ’68 Vinyl Bench – Black
• Part No. Installation-Kit4 Bench Seat Installation Kit
• Part No. AA68CRP0080100 ’68 Vinyl Hardtop/Coupe Rear – Black
• Part No. Installation-Kit2 Hardtop/Convertible Rear Seat Installation Kit
Because our Road Runner is an RM23 hardtop, it came factory with Décor trim. We planned to remove and transfer the decorative seat emblems to the new covers. If they refused to come off cleanly, we would have to source replacements.
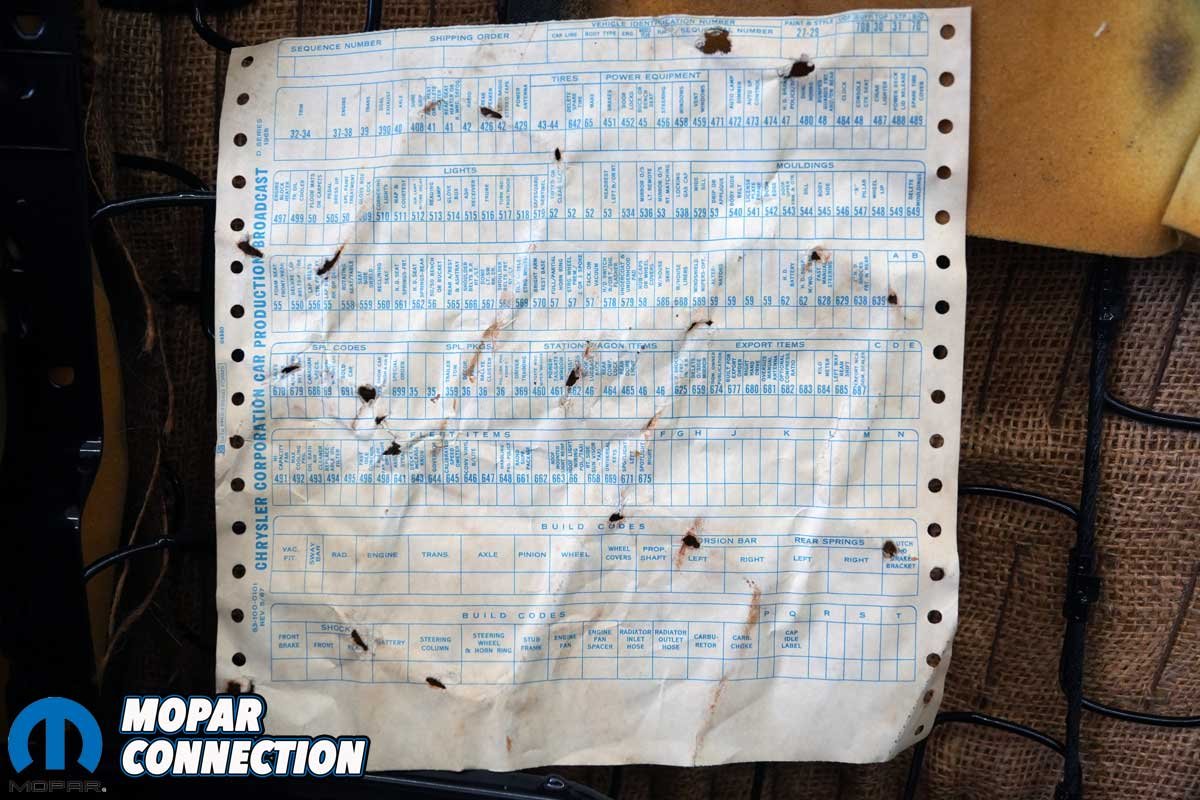
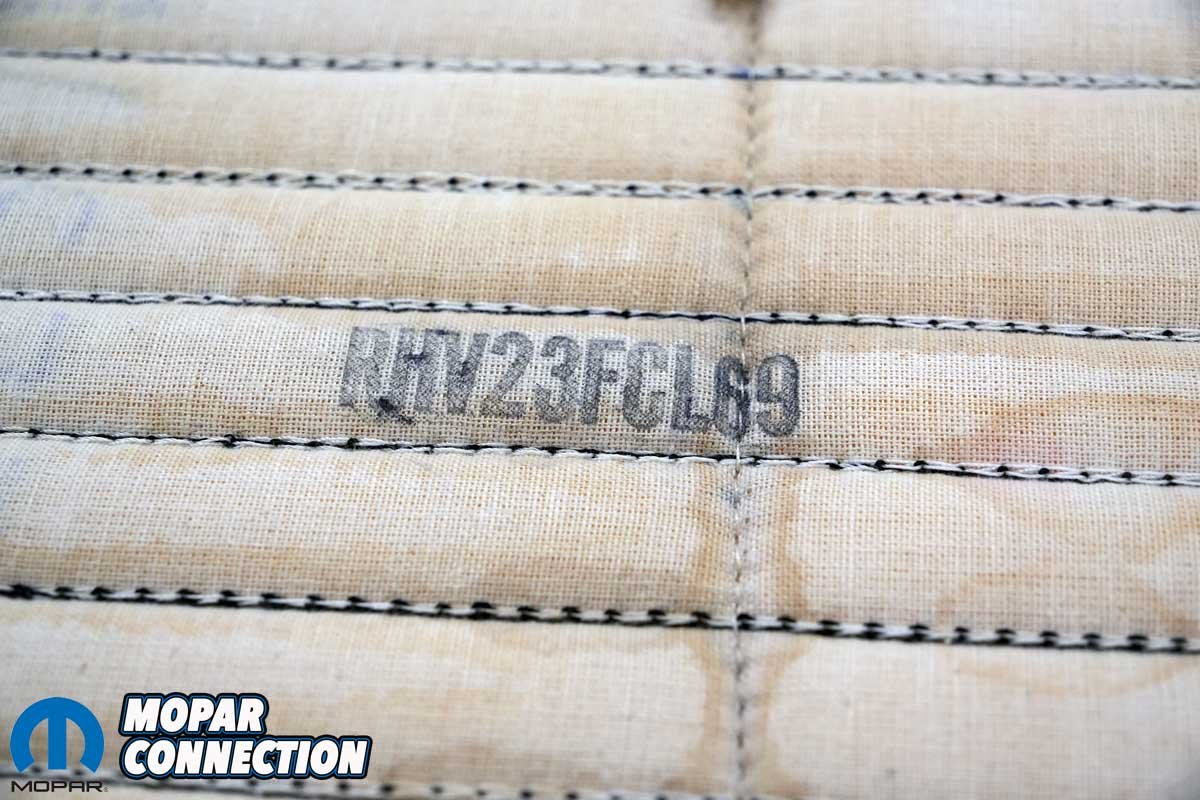
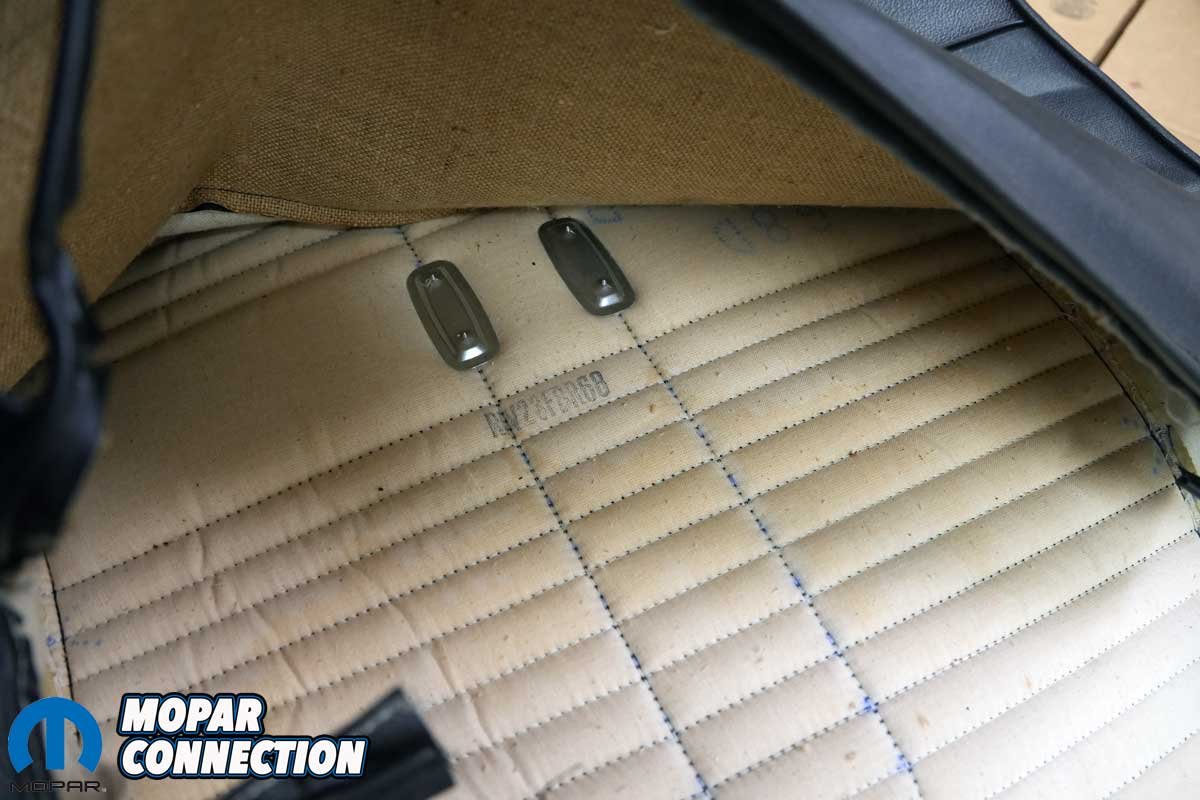
Above Left: Our original plan was to recover the rear seat as well. After we took it out and looked it over more closely, we decided to thoroughly clean and reinstall it. If we need to exchange the covers in the future, we already have them. Above Center: While the seat bottom was out, we found a broadcast sheet interlaced in the springs. It had the same “413” number, RM23 (hardtop), and H4X (black interior). Above Right: When we flipped over the sheet to see our data, it was blank. We went from ecstasy to disillusionment in a matter of seconds.
Above Left: When we removed the front seat, there were two spacers, one between the frame and floor at the front studs. The spacers tilted the seat slightly rearward for a more comfortable seating position. Above Center: The passenger’s side front seat bottom insert, although somewhat damaged, had nice straight seams, and the thread color was black. Above Right: On the driver’s side seat bottom insert, the two center seams were curved, did not finish at the piping, and, although difficult to see in the photo, had white thread rather than black. We wondered why.
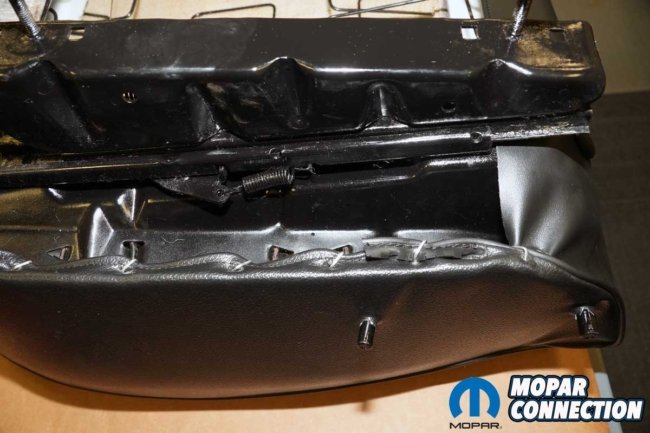
To begin disassembly, we separated the front backrests from the seat bottom while the assembly was still in the car. As expected, the passenger’s backrest practically fell off and was removed first. The driver’s side required a bit more finesse: we removed the hinge cover, then the clip securing the hinge to a stud. Once the clip was freed, the backrest came off without protest.
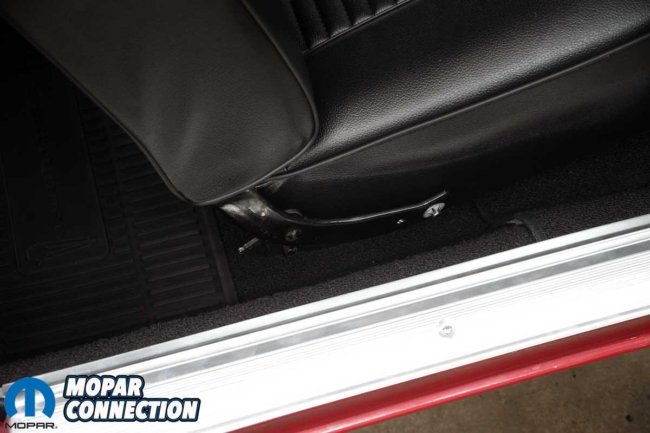
The seat bottom was secured to the floor by four threaded studs with nuts. After removing the hardware and moving the seat belts aside, each bottom lifted out cleanly. Underneath the front frame at the studs, laying on the carpet, we found round plastic spacers. We saved them for cleaning and reinstallation.

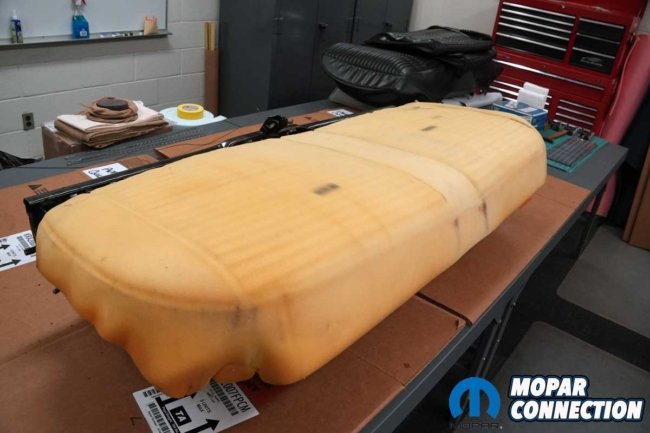
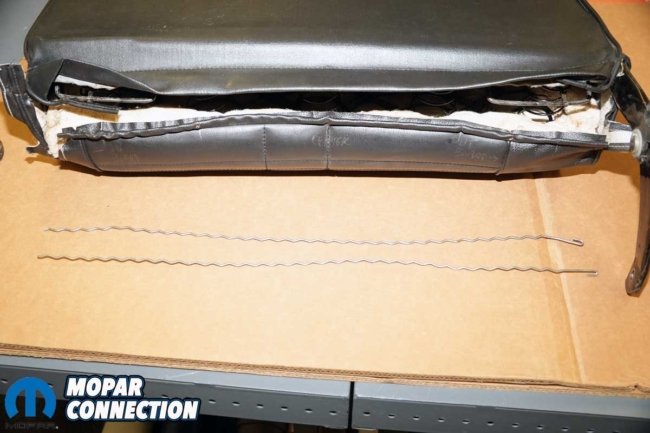
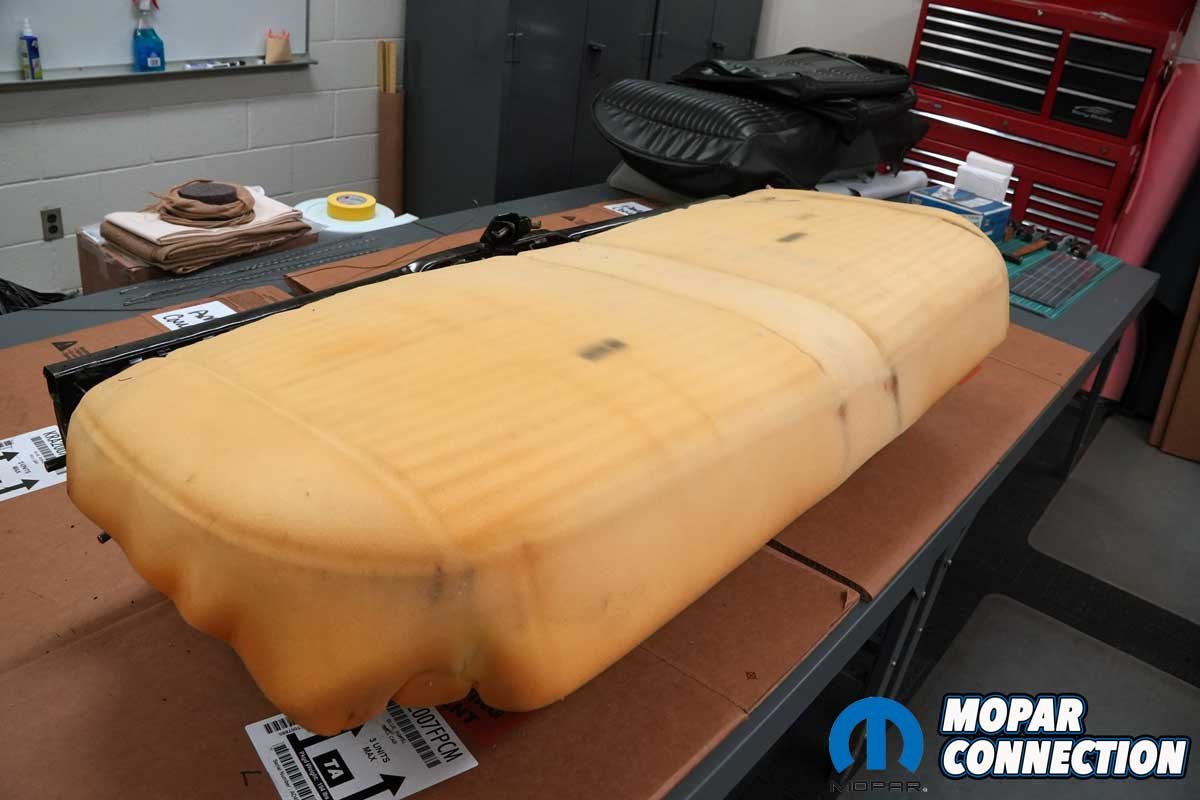
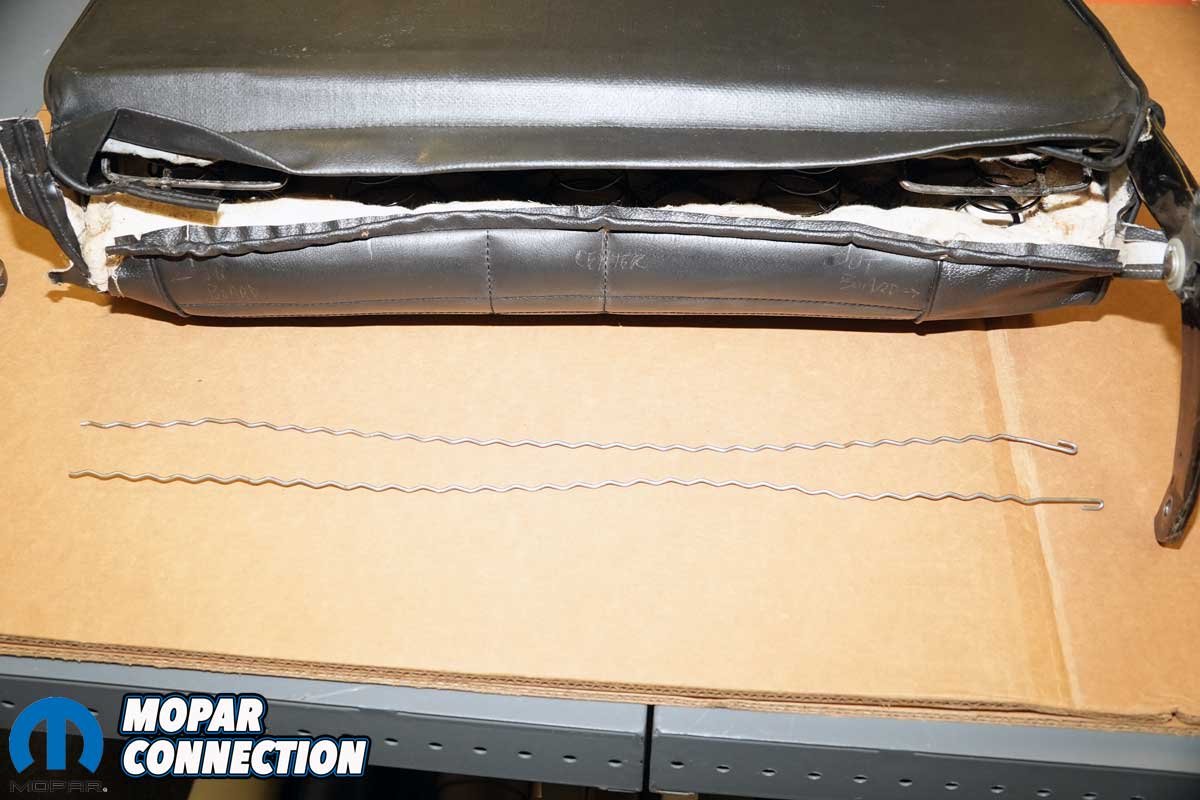
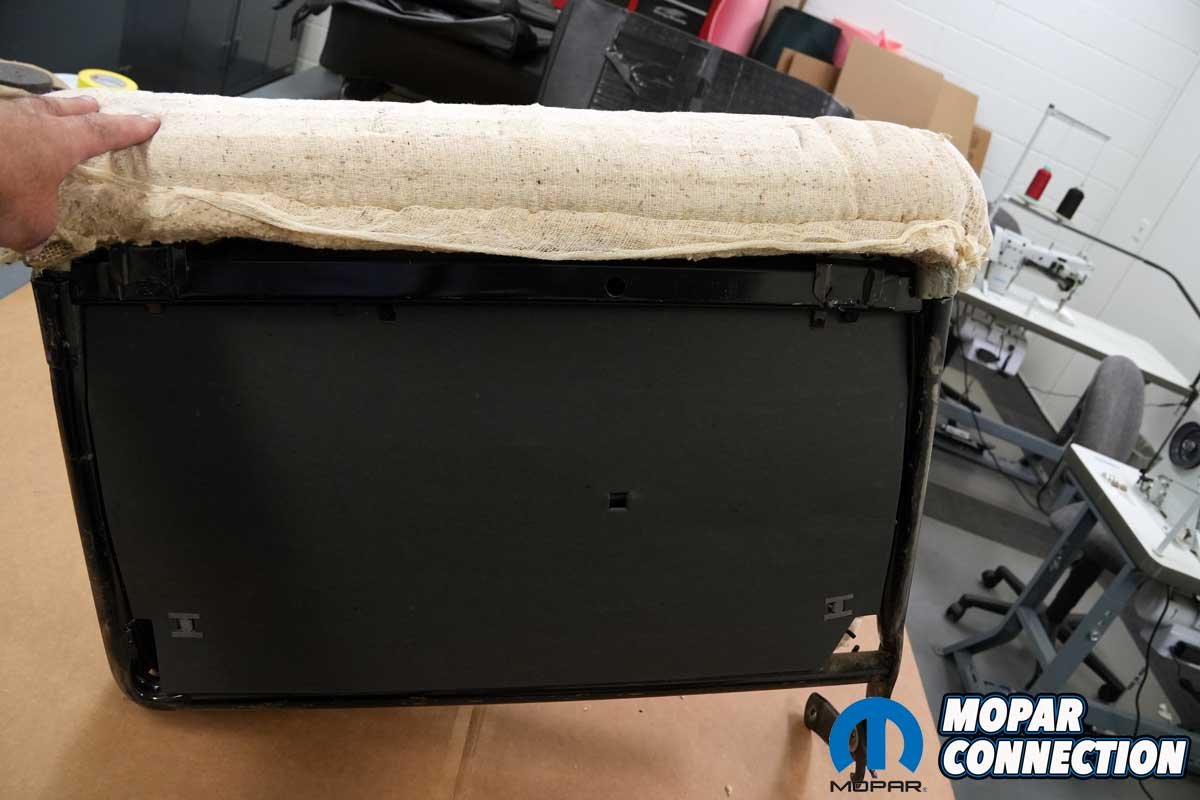
Above Left: After taking multiple photos, we started the disassembly by removing the hog rings. As we removed the hog rings, we were able to slip out one of the two listing rods. Above Center: The foam under the seat cover was in good shape. It was not torn or damaged; however, it appeared somewhat flattened. Above Right: With the cover removed, we were able to slip out the second listing rod.

Above Left: The part number on the passenger’s side insert had an assembly date of 1968. Above Right: The driver’s side insert part number was 1969. After some investigation, it appears the driver’s side insert was damaged. It was cut out and replaced with a later insert. After speaking with a previous owner, it was likely done in 1969 or early 1970 under warranty.
Removing the rear seat began with the armrests and window crank handles. With those cleared, we reached under the rear seat bottom, pushed it toward the back of the car (behind the outboard rider locations), and lifted. The frame popped free of the welded retainers on both sides, and the seat bottom slipped right out.
The rear seat backrest was retained by two bent metal tabs near the wheel wells. We straightened them just enough to slide the frame loose, then lifted the backrest to unhook it from the pair of upper hangers. It came out without a fight.
With all the seats laid out on cardboard across the shop floor, we began our inspection. We removed the passenger’s side hinge cover and release knob from the front backrest. The driver’s side hinge cover had an old, cracked repair, and the release knob was missing entirely.


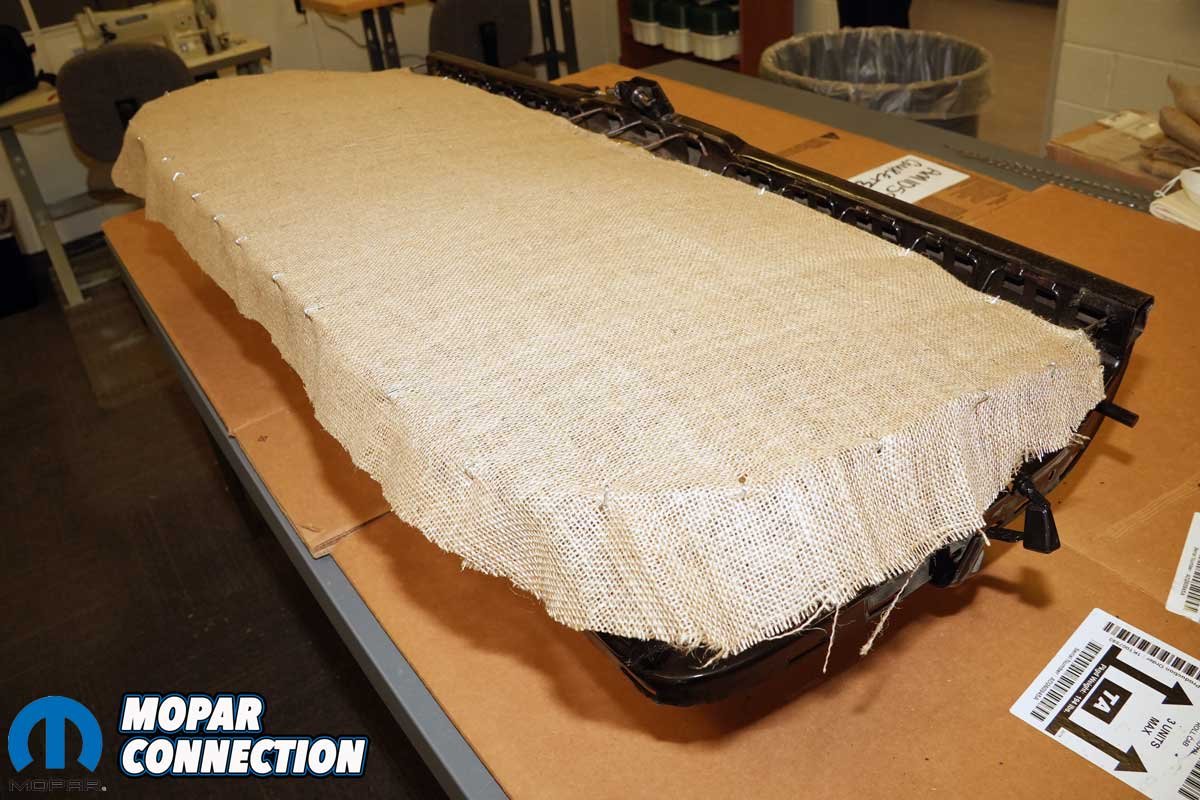
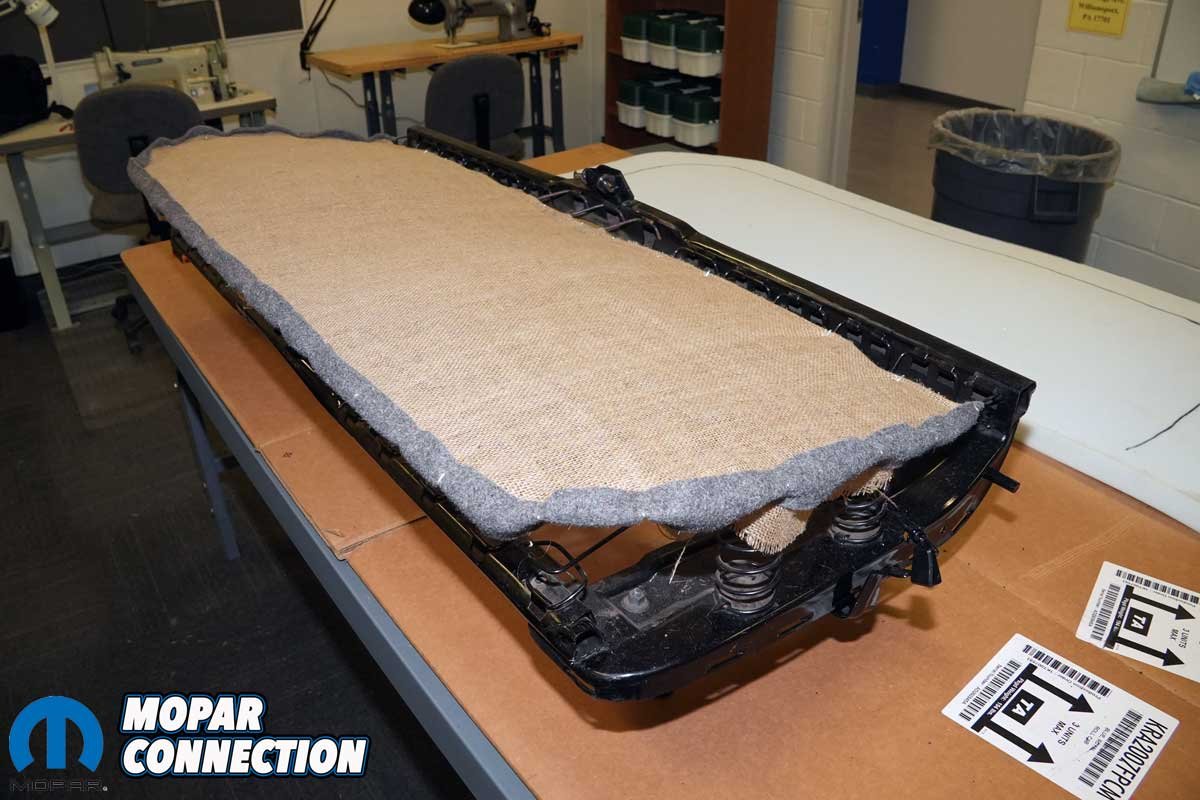
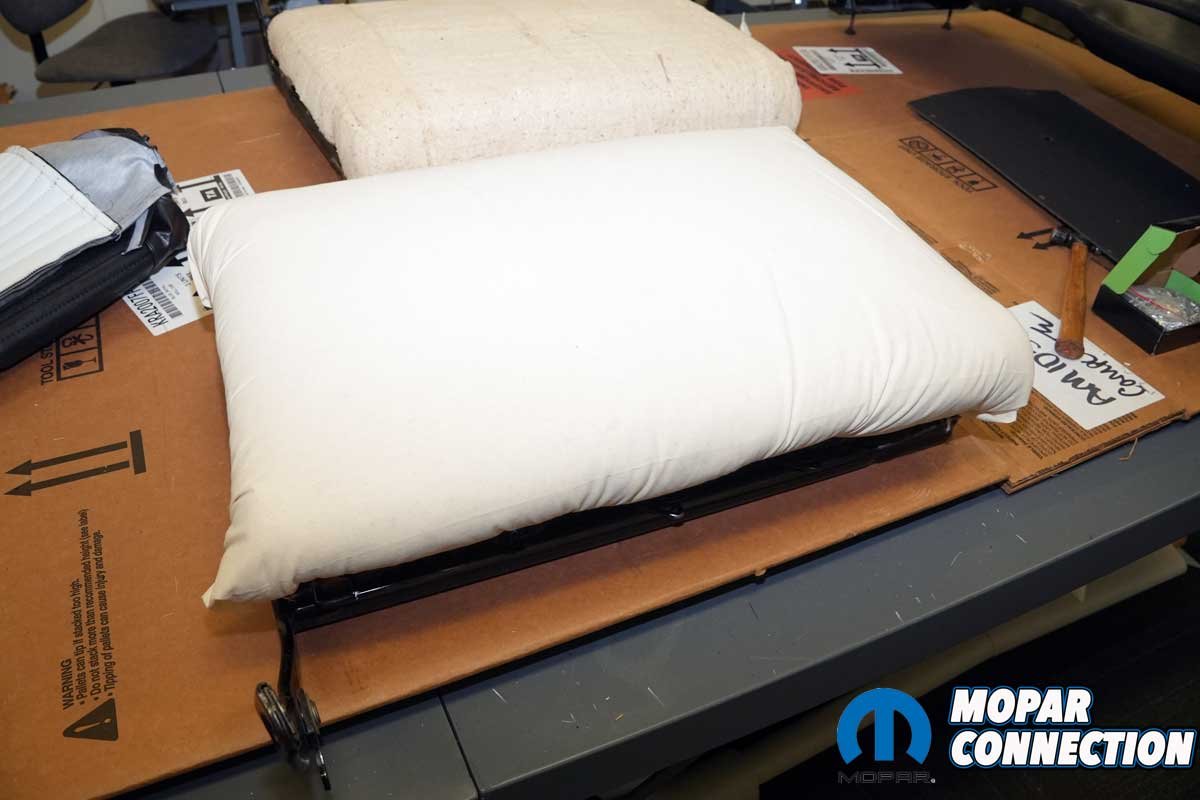
Above Left: After we painted the frame, we laid the burlap over the springs and trimmed it to the desired size. Above Center: We used hog rings to secure the burlap. Then we added reinforcement wrap around the parameter, which was also secured with hog rings. Above Right: We trimmed the foam and attached it to the frame with hog rings.


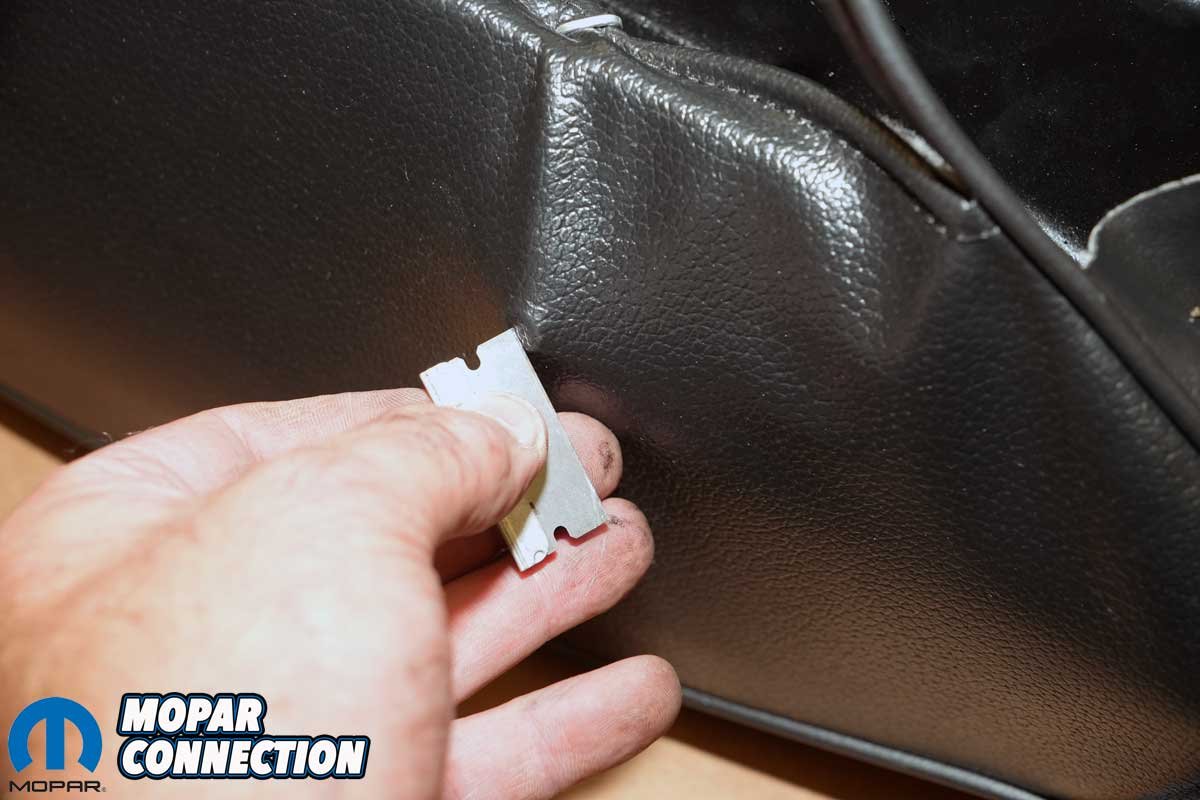
Above Left: Before installation of the cover, we installed the listing rods. We worked the seat cover over the foam and secured it with hog rings. We started at the front of the cover and worked around the sides. After the photo, we secured the rear portion of the cover to the frame and springs. Above Right: On each side of the covers, we had to relieve the cover material at the striker and the hinge lock pins. We used a razor to make shallow cuts (in an X pattern) to allow the pins to slip through the material.
Overall, the front seats were structurally sound but heavily worn, the duct tape doing most of the heavy lifting. Under the driver’s seat bottom, we found an index card marked “413,” likely an inspector’s number or quality-control identifier from decades past.
The rear seat looked exceptional, tight, clean, and undamaged. Even though we had new Legendary covers, we decided to thoroughly clean and reinstall the rear seat components along with the armrests and crank handles.
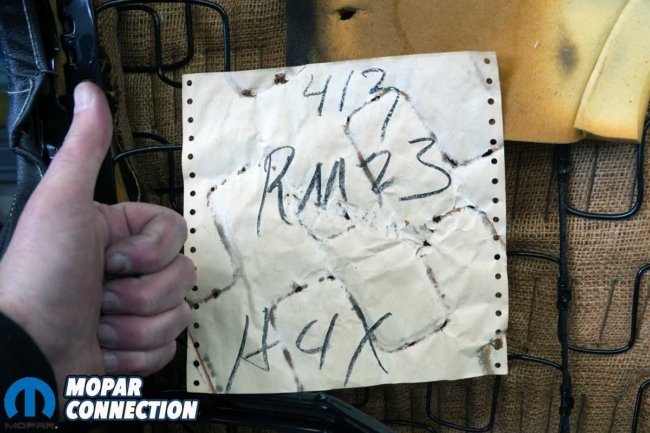
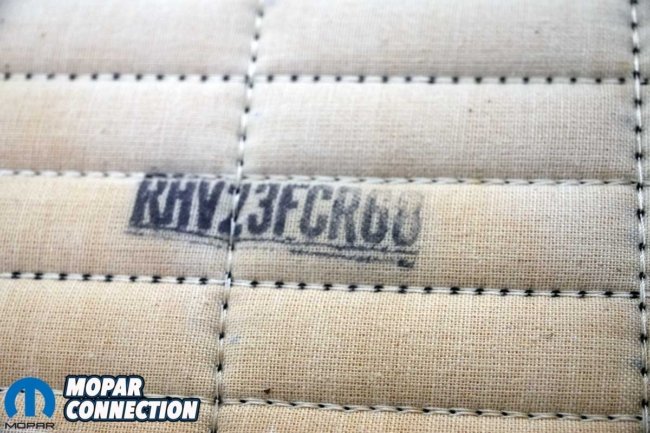
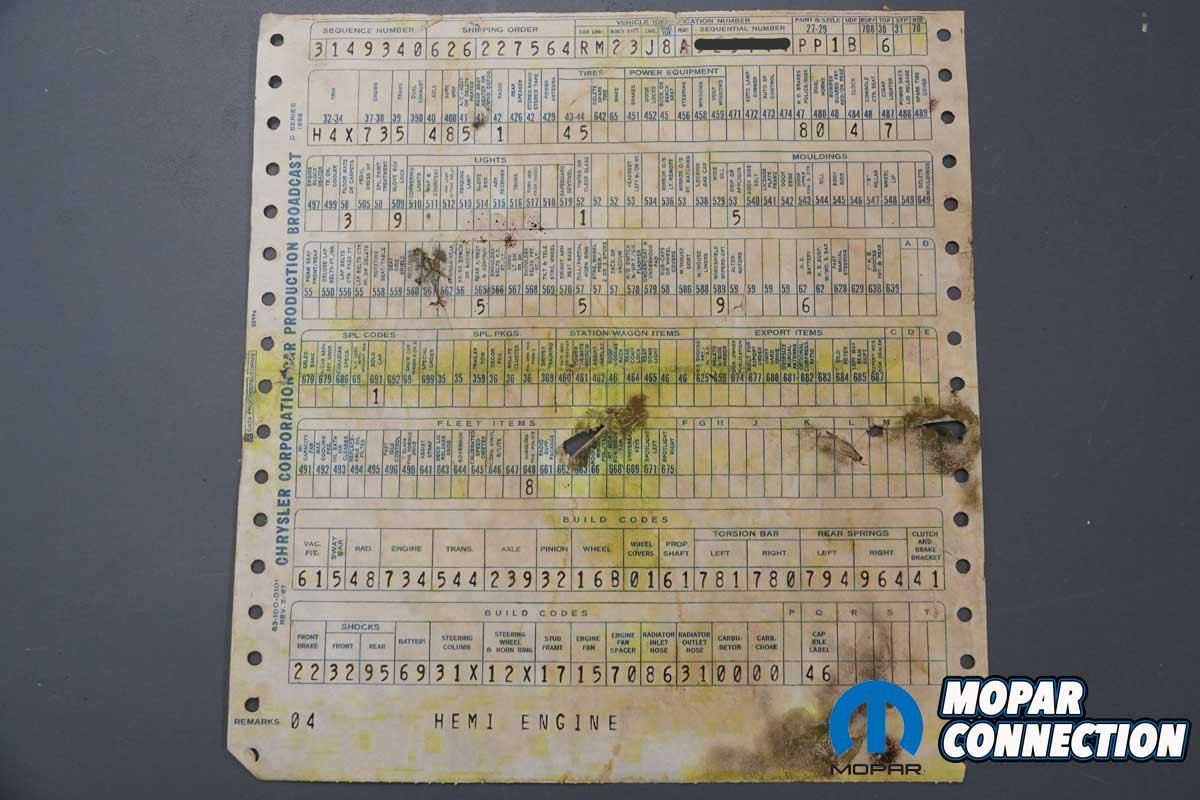
Before reinstalling anything, the project took an exciting turn: we found an intact broadcast sheet tucked under the rear seat bottom. The back side faced up and was marked in crayon with “413,” “RM23,” and “H4X.” The codes confirmed the inspector, body style, and black interior trim.
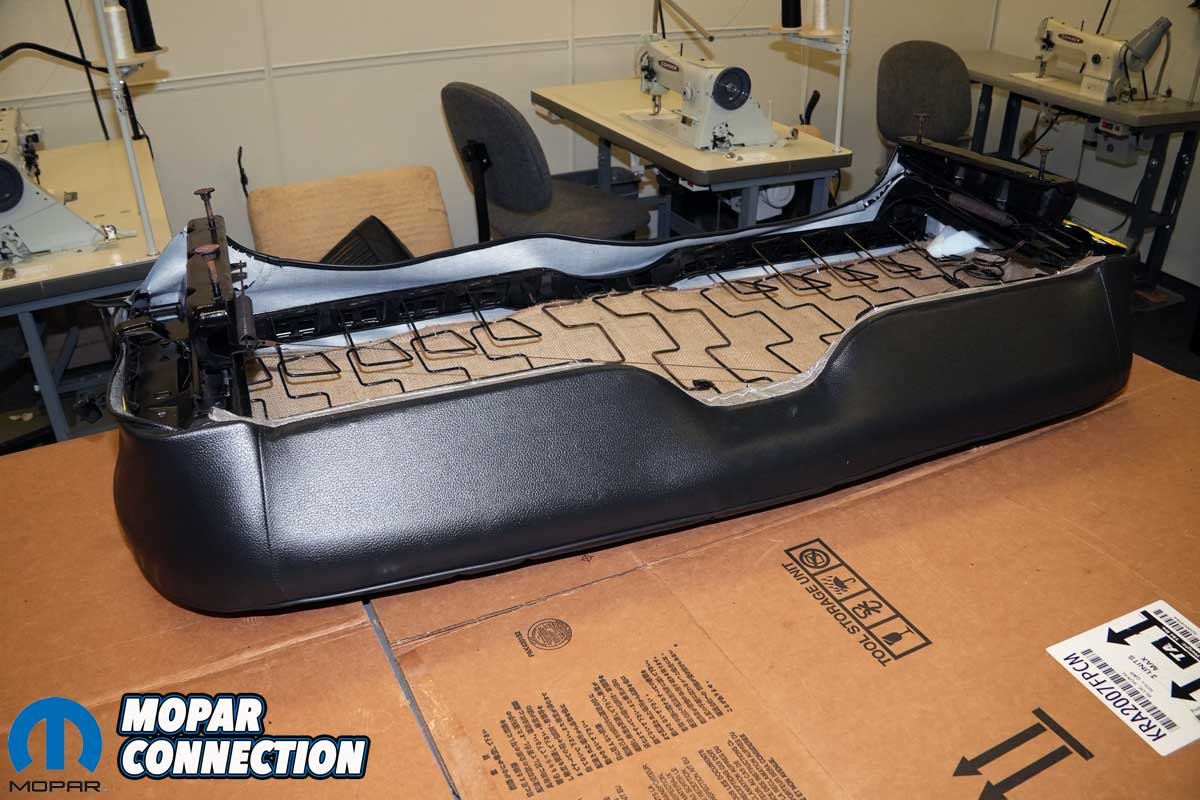
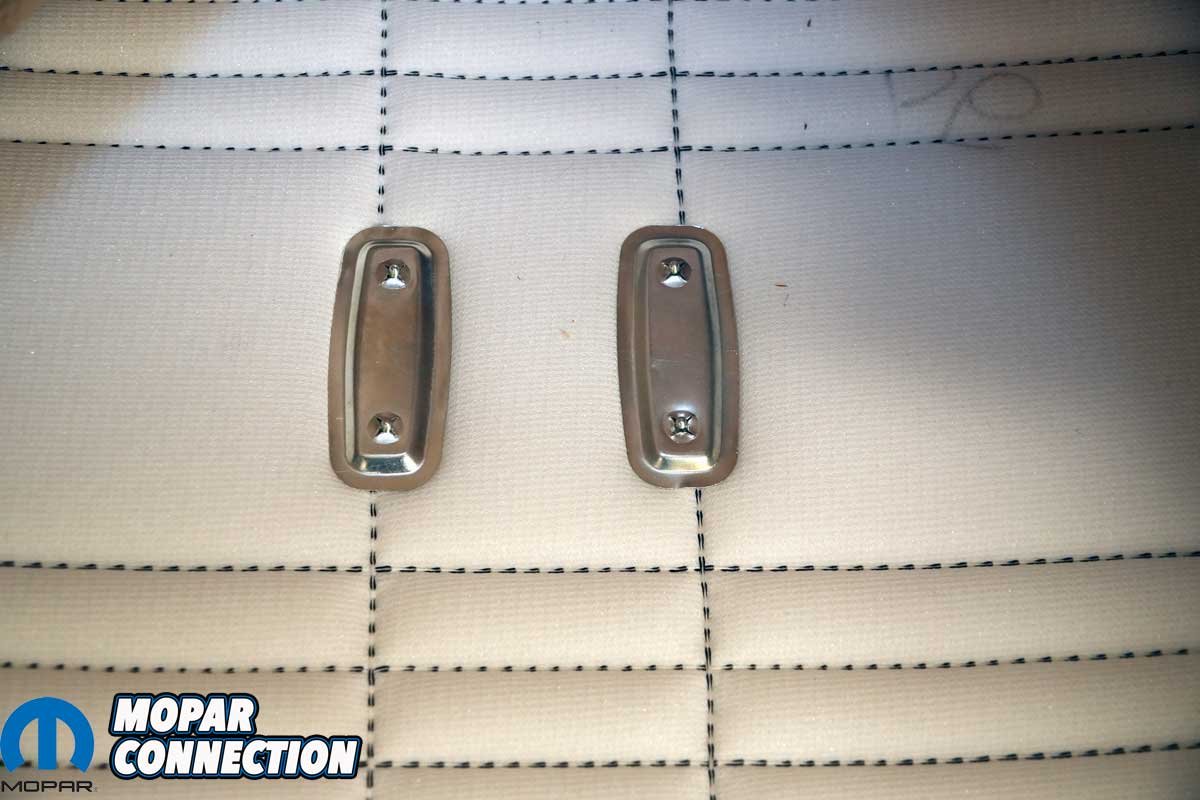
Above Left: The photo provides a better view of the two pins that extend through the new seat cover upholstery. Above Right: We completed the seat by reinstalling the plastic seat belt retainer clips.
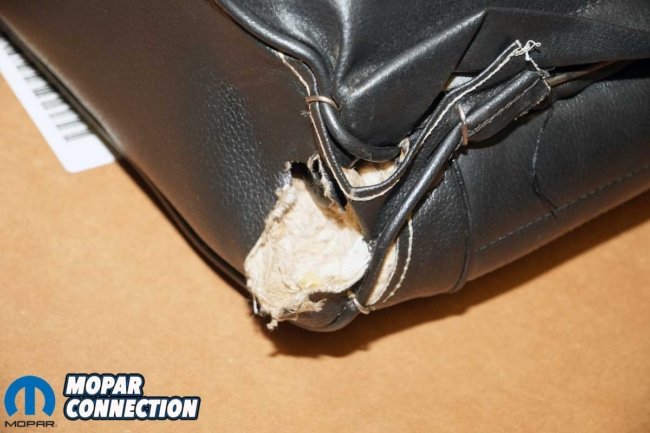

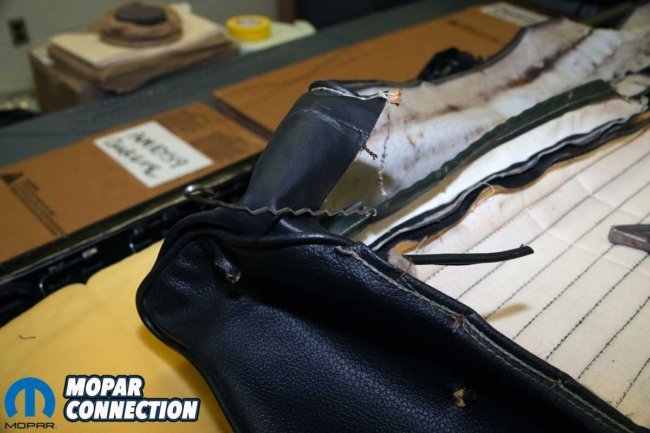
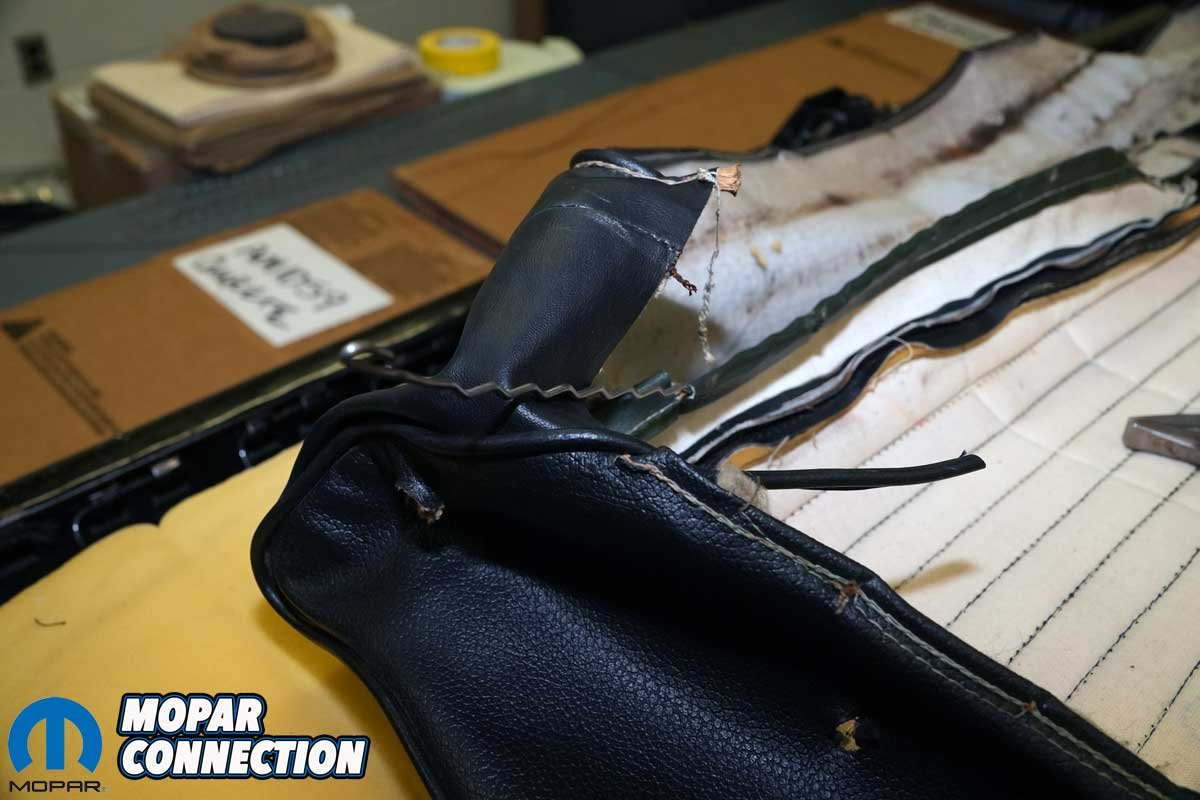
Above Left: Because the passenger’s side backrest continued to fall off the seat bottom, the engagement pin on the seat bottom ended up digging into the upholstery, causing damage to the cover and the padding. Above Center: We started removing hog rings and then two listing rods from the cover. Above Right: Removing the cover was a wrestling match, but we won.
However, once we removed the sheet and flipped it over, our excitement faded. The front, the side that should have contained all the printed codes, was completely blank except for faint spring impressions. It was a disappointment, and it left us doubtful that another sheet still existed.
We moved on to the Legendary upholstery installation. We photographed the front seats thoroughly before removing any hog rings. Starting with the seat bottom, we peeled away the original material, and the foam and burlap were discarded.
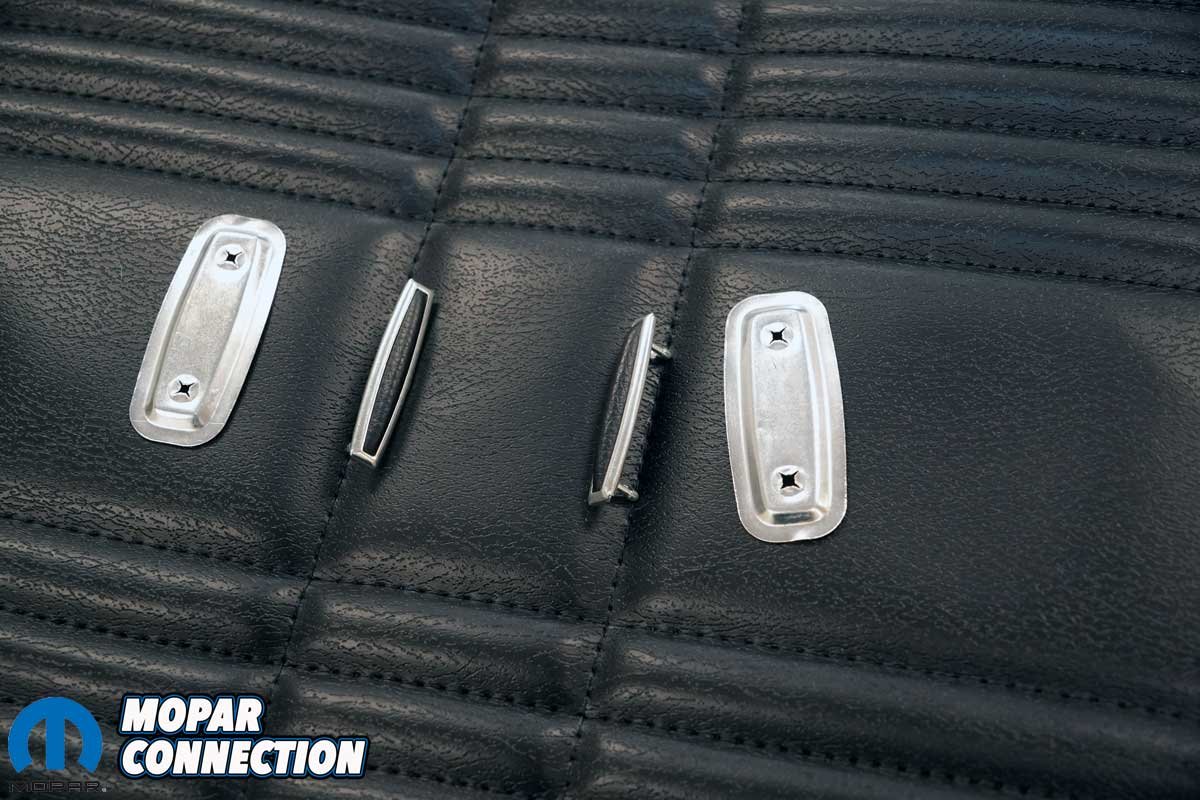
Above Left: With the cover off, we gained access to the Décor trim backer clips. Above Center: We attempted to remove the backer clips without damaging the emblems. Well, even with great care, we mangled the emblems. Above Right: To finish the disassembly, we removed the cotton batting retained with a cheesecloth-type material.


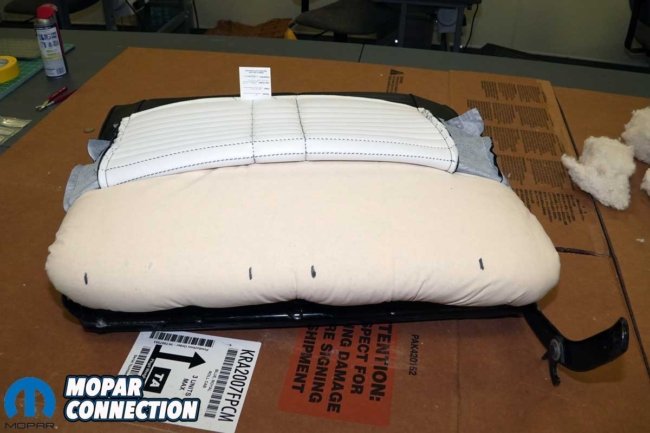
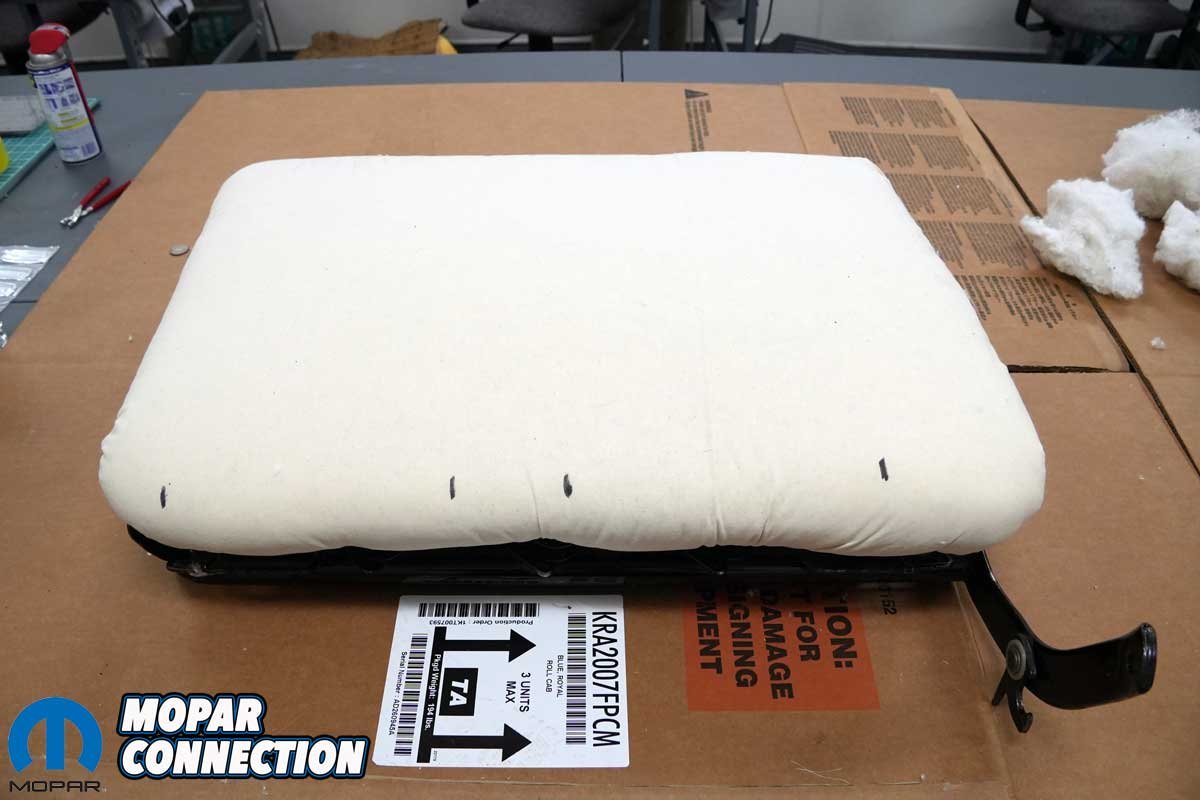
Above Left: We installed burlap on the freshly painted frame. Then, we filled the muslin with cotton batting, and after stuffing, we secured it with hog rings. Above Center: We picked up eight emblems and backer clips (enough for the front and rear seats). We transferred the emblems’ locations from measurements of the original seat cover. Above Right: We punched four holes through the cover for both emblems. Once we pushed the emblem pins through the material, we secured the emblems by tapping the clips over the pins.
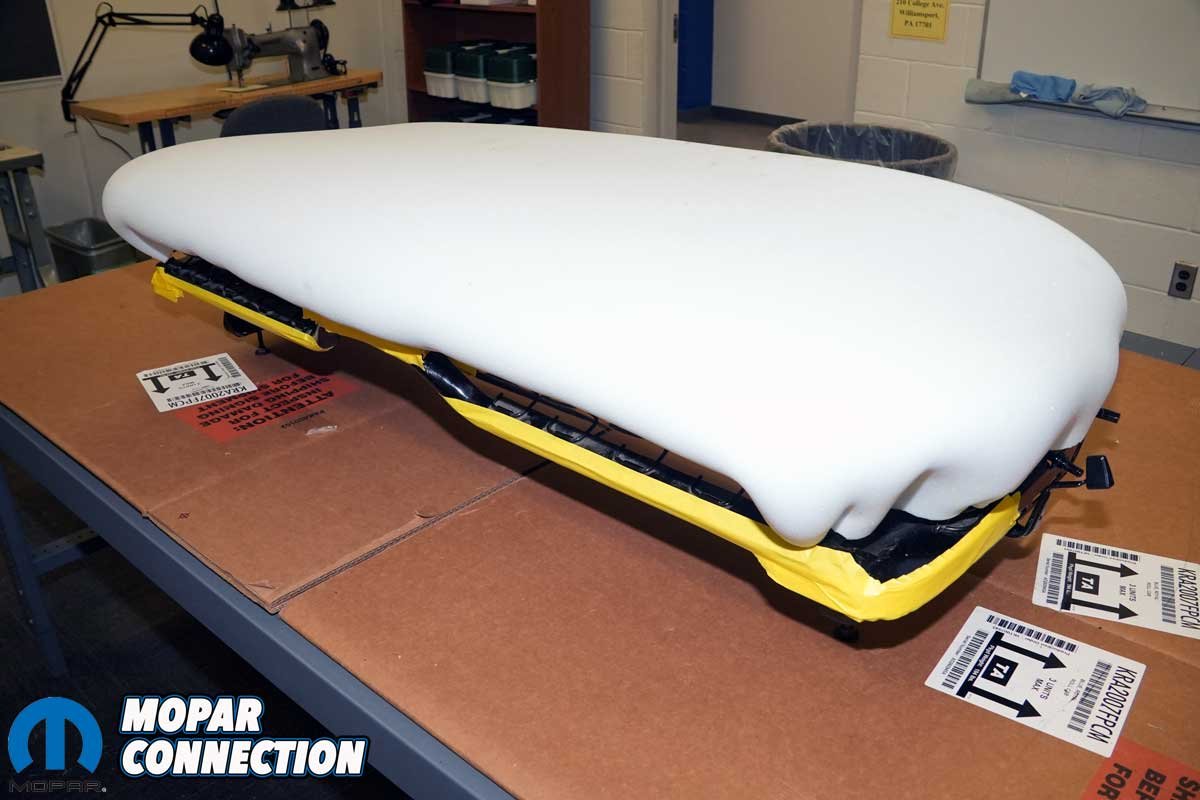
After cleaning and repainting the frame, we installed the new burlap and trimmed the new foam to fit. With the cover warmed in the sun for flexibility, starting from the front side and working to the rear, we stretched it over the frame and secured it with hog rings. The most challenging part was working the material over the hinge and striker pins, which required small “X” cuts and careful stretching.

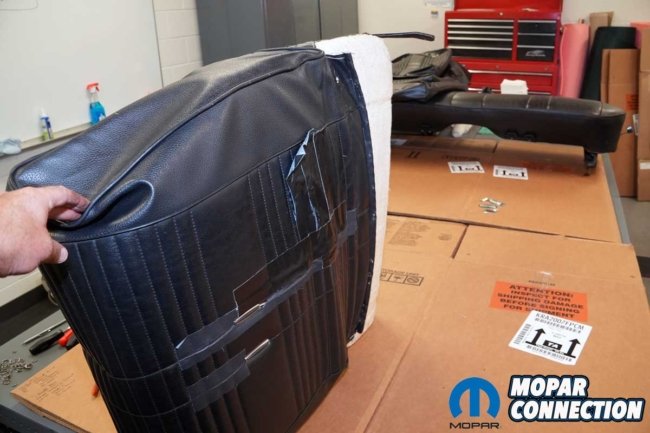
Above Left: After installing the listing rods and hog-ringing the assembly together, we test-fitted the backrest onto the seat bottom. It looked good, and all the seams lined up well. Above Center: The driver’s side backrest was in the worst shape of all the components. Above Right: Just like the passenger’s side cover, after removing the hog rings, we pulled the listing rods and then fought to remove it from the frame.
Next came the passenger backrest. After documenting everything, we removed the hog rings, foam, and backer board, then painted the frame. Once the paint had cured, we added new foam, wrapped in muslin, and hog-ringed the material in place.
When we attempted to remove the Décor emblems from the front backrest covers, we destroyed each one, so we purchased a set of eight from eBay. After they arrived, we measured the location of the original emblems and transferred them to the new materials. After punching two holes for each emblems’ installation pins, we installed each emblem backer securing the emblems.

Above Left: We temporarily installed each backrest (one at a time), which allowed us the opportunity to make notations of the seat bottom seams. Above Right: We used the marks as guides to pull the cover onto the seat frame. This ensured the marks lined up with the cover, which would result in seams that aligned from the bottom to the backrest.
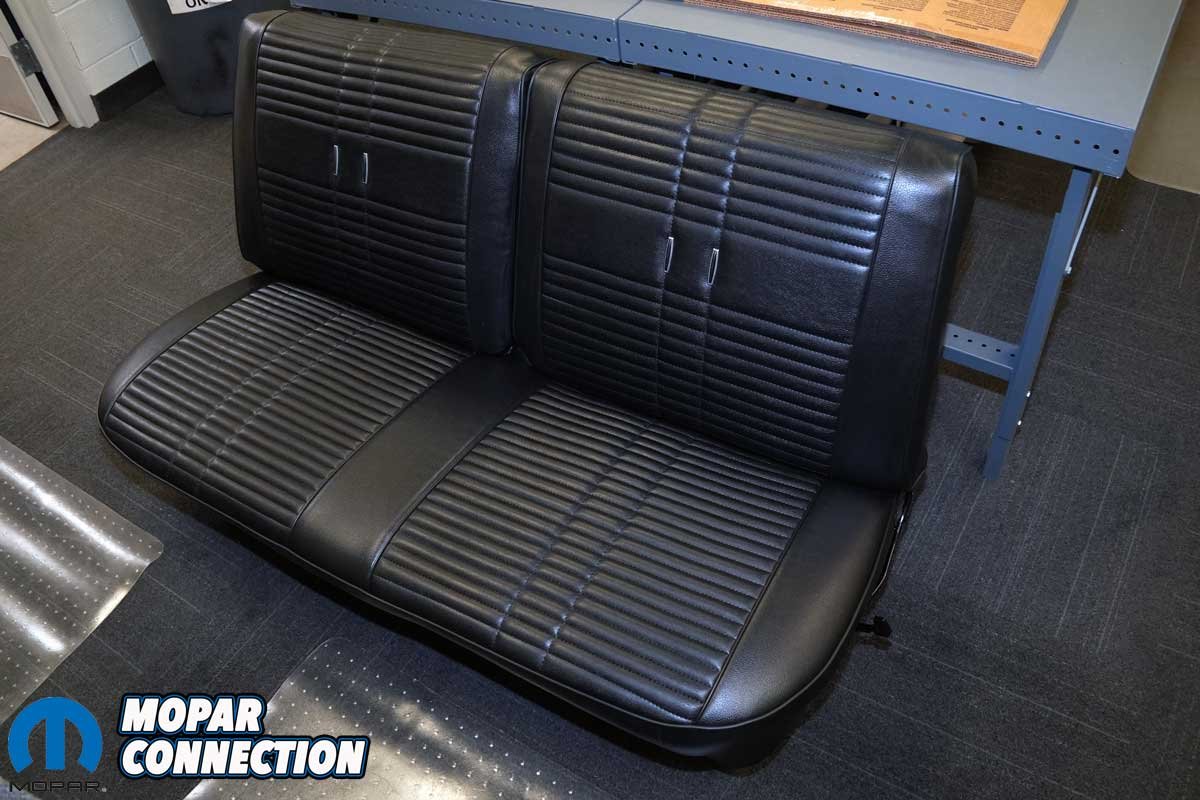
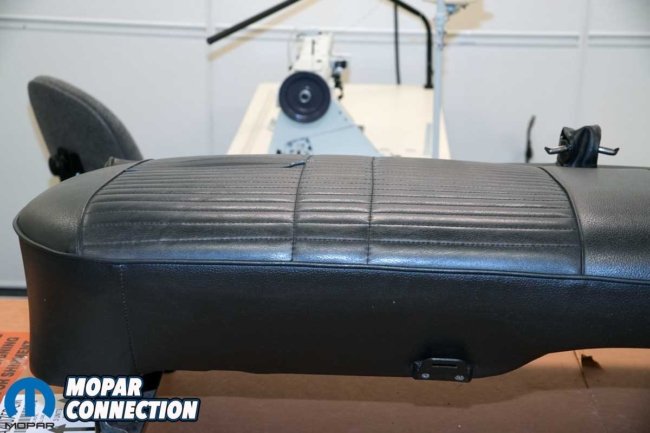
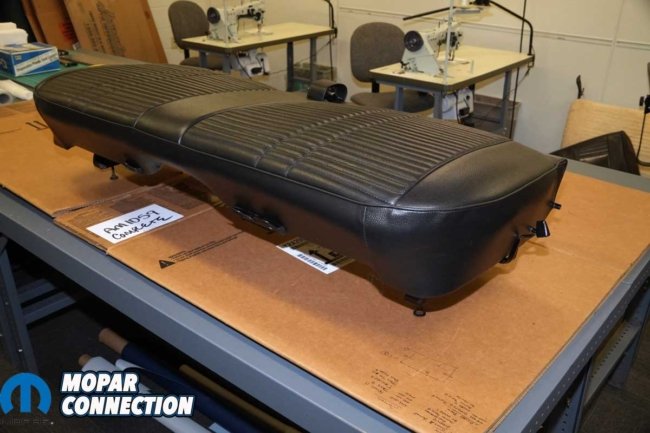
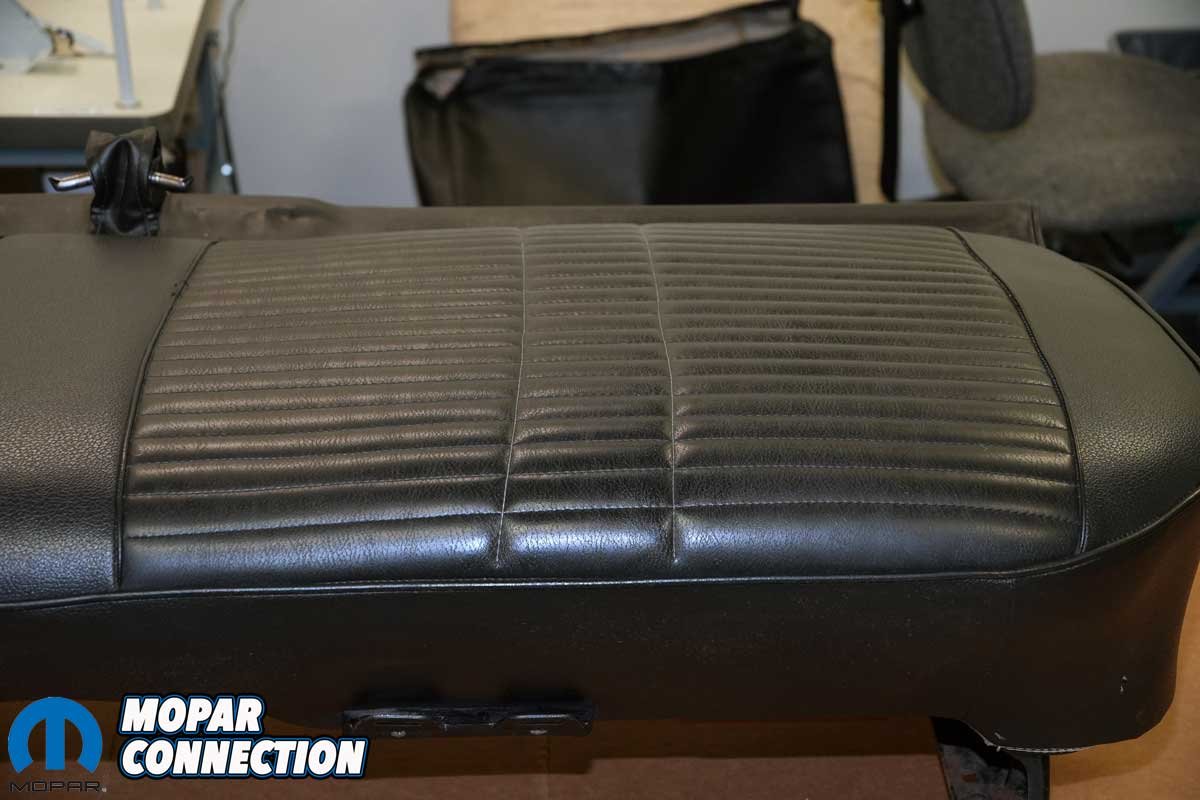
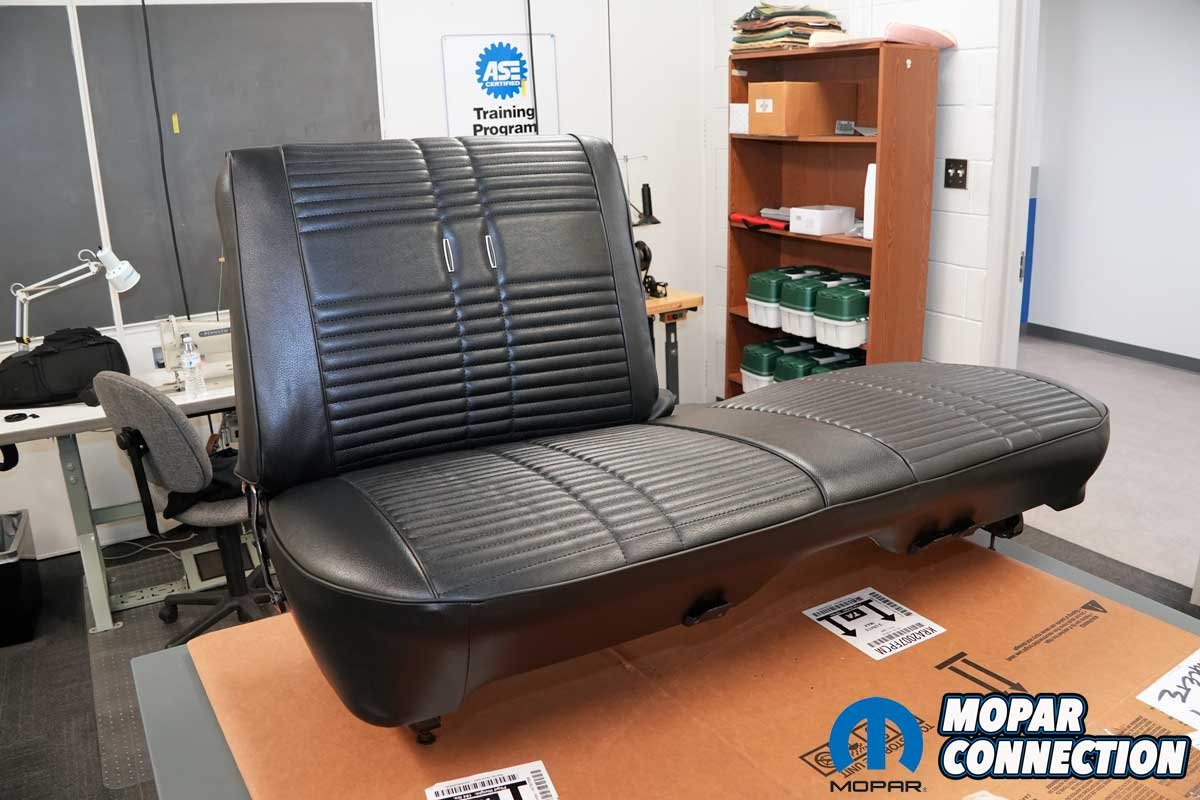
Above: The Legendary seat covers fit beautifully. We are always impressed with how the covers fit and how closely they mimic the original factory material look and feel.
To ensure flawless alignment between the insert and collars, we temporarily installed the backrest onto the seat bottom and marked the muslin accordingly with a marker. With the new cover turned inside out, we stretched it over the seat assembly, aligned it to the marks, and secured it with the same number of hog rings as the original. We repeated the process for the driver’s backrest, and both units lined up beautifully with the seat bottom.

Above Left: When we permanently installed the backrests, we installed new retainer clips to hold the hinges in place. Above Right: We installed new hinge covers and release knobs to finish the front seats.
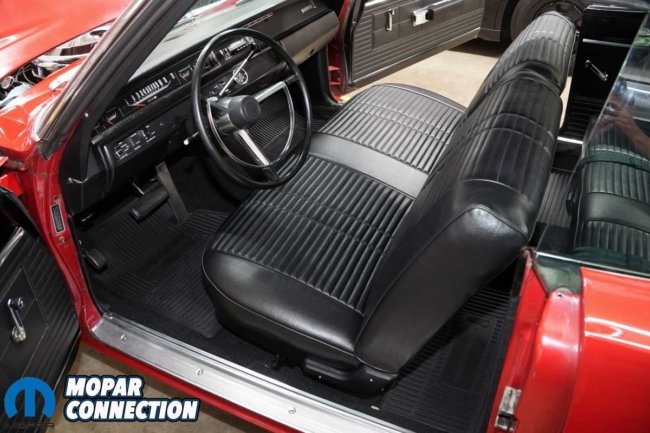
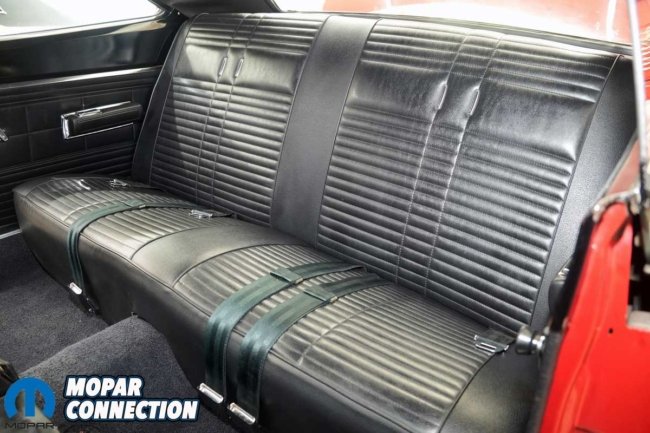
Above Left: The Road Runner’s new Legendary Auto Interiors seat covers restored the interior to the factory-new appearance. Above Right: The Décor emblems set off the fresh interior material. The seat has not looked this good in decades.
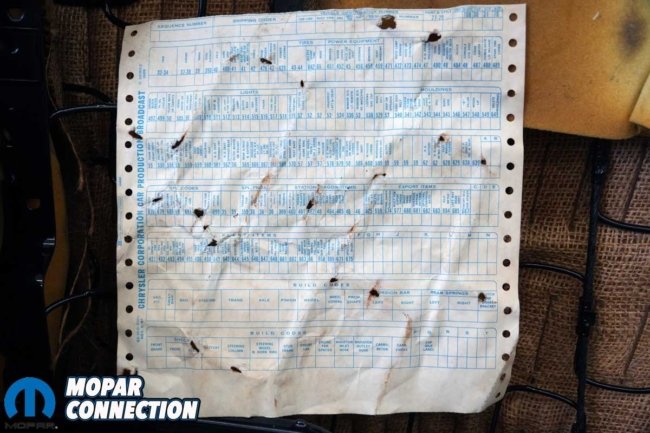
While cleaning up our work area and preparing for seat reinstallation, we spotted something inside the driver’s backrest upholstery. A paper with tractor-feed edges. We pulled it free, and this time, we were rewarded. It was a second broadcast sheet, fully printed, and after checking the VIN, we confirmed it belonged to our Road Runner.
After safely tucking away our exhilarating discovery, we completed the seat installation. The seat bottom was returned to the car, and the backrests were secured with new push-on retaining clips. New hinge covers and release knobs sourced from eBay, finished the job.
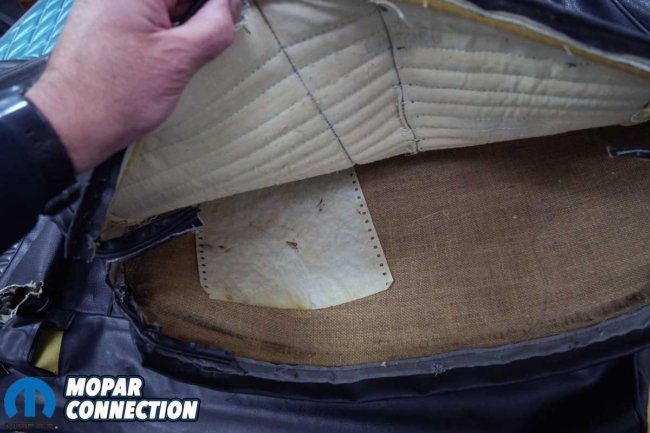
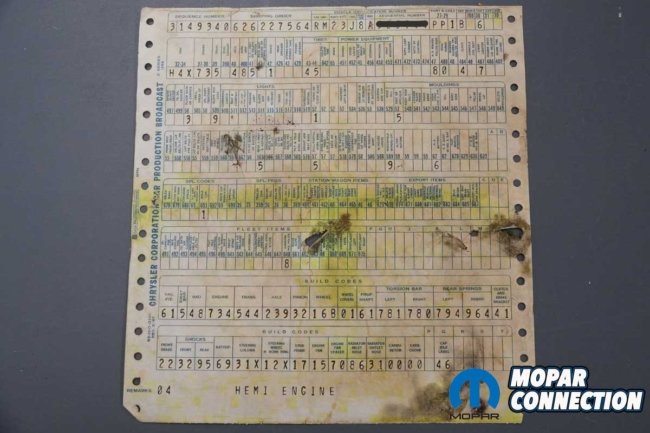
Above Left: While tidying up our work area, we spotted a piece of paper tucked deep inside the driver’s side backrest. The old tractor-feed perforations immediately caught our attention, and for a moment we wondered if we had stumbled onto something rare from the original upholstery supplier. Above Right: What we uncovered was even better, a pristine, fully completed broadcast sheet for our Road Runner. Finding one in this condition is unusual. Discovering two, both nearly perfect, is far beyond anything we imagined.
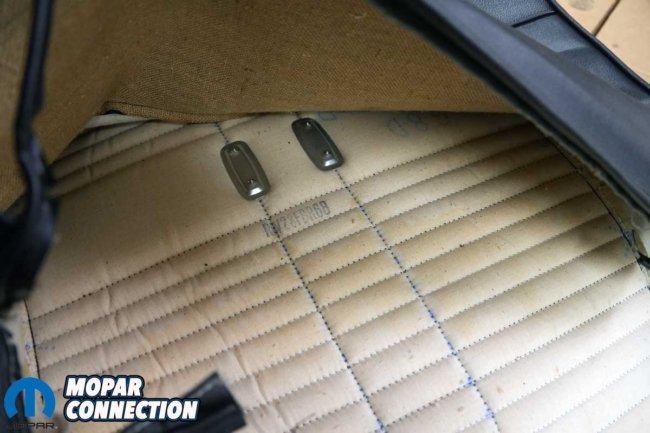
With the Legendary front seat covers installed, our interior refresh achieved a noteworthy juncture. We had already rebuilt the front doors and fitted new door panels, armrests, and door hardware, along with carpet and floor mats, all from Legendary, each piece returning a segment of the car’s originality.
Only a few details remain unfinished, yet the transformation is indisputable. Project Rara Hemious Birdicus now stands reborn, its interior mirroring the precise moment in late June 1968 when our Hemi Road Runner first emerged from Lynch Road, an icon rejuvenated, and a promise of what comes next.


