


As engine technology developed from the earliest one- and two-cylinder designs of horseless carriages to the powerful V8s of the 1950s, vehicle speeds increased significantly. However, occupant safety, in the form of seat belts, was barely a concern for most automakers. The prevailing belief of the era held that it was safer to be thrown clear of a crashing vehicle than to remain inside it.
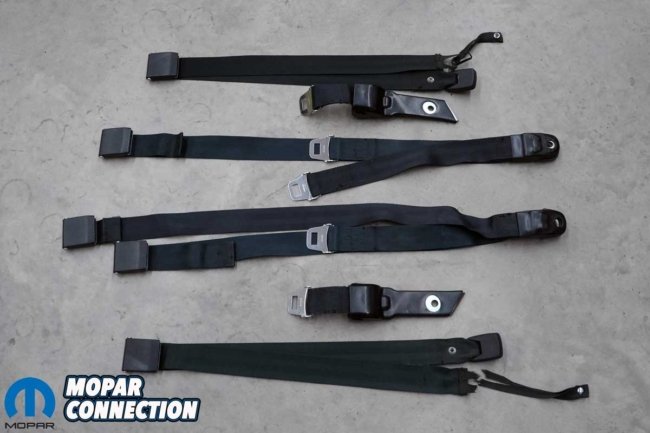
Above Left: The Road Runner’s front seat belts survived in relatively good shape during their 57 years of service. Above Right: The chrome latches and ratchet housings were in great shape. Likely, we could have pressed the seat belts into service, but with the age and wear, we decided against taking a chance.
That assumption was eventually proven wrong, yet throughout the 1950s, only a handful of manufacturers offered front seat outboard lap belts, and even then, they were optional and rarely ordered. Interestingly, when buyers opted for seat belts at an additional charge, usage rates were nearly 100 percent.
Depending on the model year of your Mopar, you may find it equipped with no belts at all, simple front outboard lap belts, the addition of rear outboard lap belts, or, on later vehicles, a combination of lap and sash belts or full three-point restraints up front paired with lap belts in the rear.
Above Left: The chrome on the latches was in such good shape that we elected to forgo the re-chroming process during the re-webbing of the belts. Above Right: The buckles were in excellent shape. All they would need is a good cleaning, and they would be ready to reuse.
Project Rara Hemious Birdicus, our 1968 Plymouth Hemi Road Runner, represents a classic Mopar muscle car of the era. It left the factory equipped with front outboard lap and sash belts, a center front lap belt, and rear lap belts for all three seating positions. Remarkably, those original belts remained installed when we purchased the Road Runner in March 2025.
If you enjoy cruising your classic on today’s congested roads, seat belt safety must be a top priority. Replacing aged or missing belts or adding new ones provides essential protection. Modern restraint technology increases safety, making seat belt upgrades vital for you and your passengers.

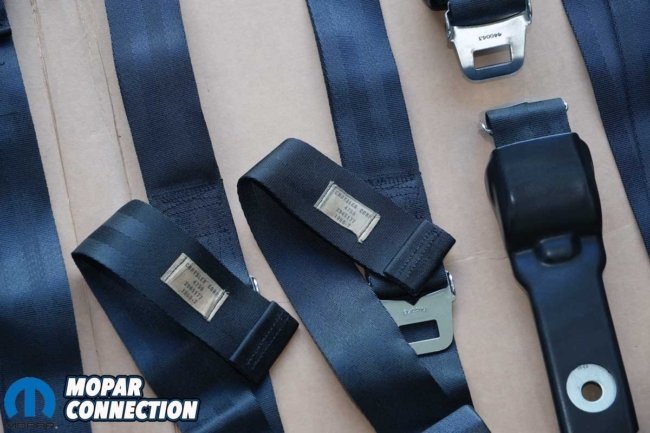
Above Left: The belts returned from Sharon’s Web in unbelievable condition. The new webbing looked outstanding, and the newly recolored plastic and rubber parts appeared factory fresh. Above Right: The belts had the correct stitching on the webbing. There are specific stitch patterns, stitch lengths, and thread sizes required to recreate factory stitch patterns exactly, so the rebuilt belts maintain both factory appearance and crashworthiness.
Our Road Runner’s front seat belts were worn, faded, and in some cases, tattered and abused. To restore the safety of anyone riding in the Road Runner, we contacted Sharon’s Web to update our belts.
Before discussing the installation, it is helpful to review the major seat belt regulations enacted between 1960 and 1975. Most states began requiring front seat outboard lap belts in the early 1960s. By 1965, all new vehicles were mandated to have front seat lap belts.
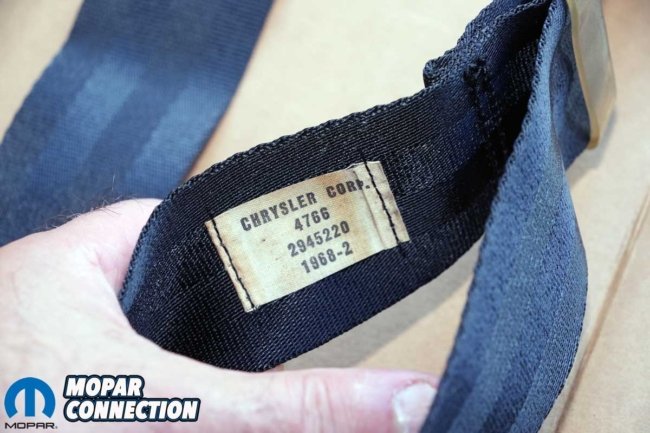
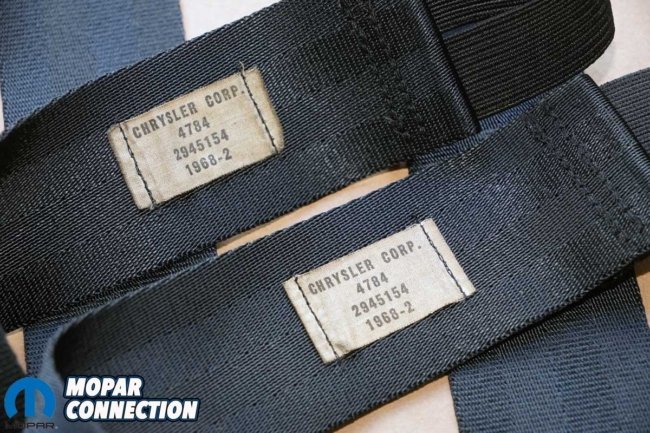
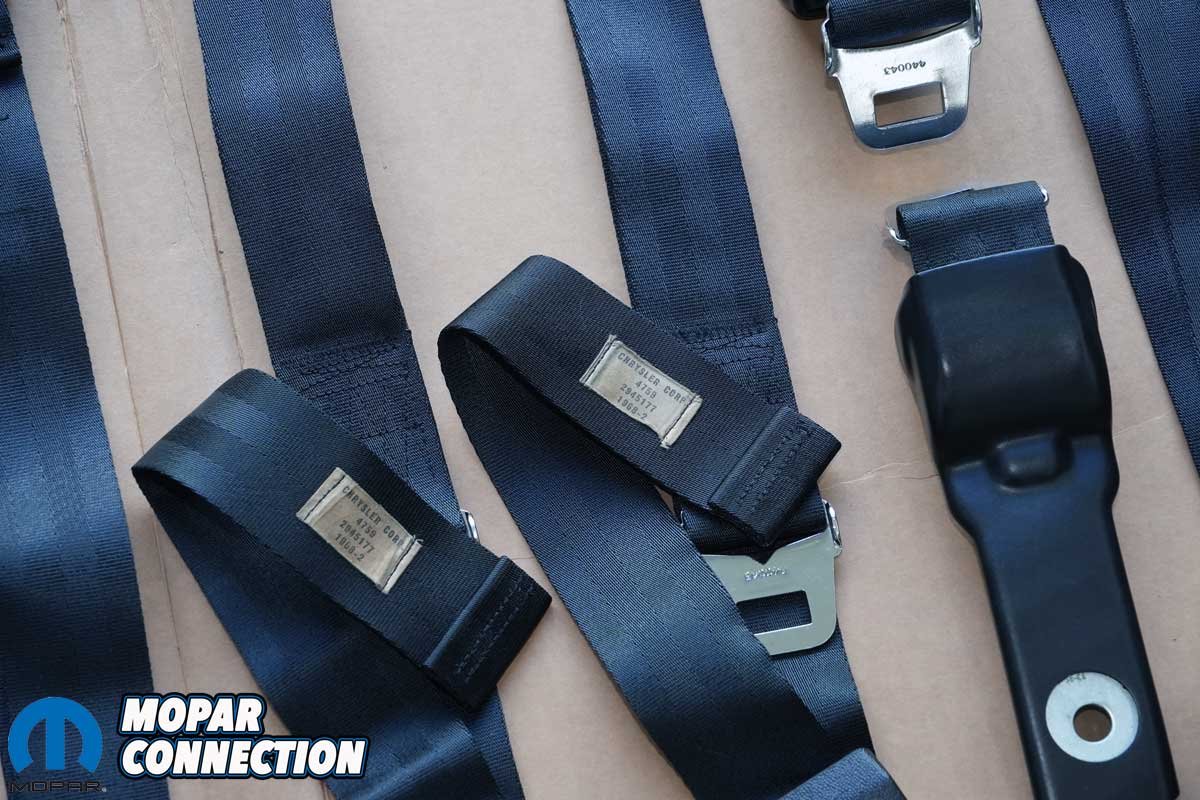
Above: We had the factory labels transferred to the new belts. All the belts in the car, except one rear seat belt, had labels, and they were in good shape.
However, it was not until 1968 that comprehensive federal oversight of seat belt requirements for all new cars initiated. The Federal Motor Vehicle Safety Standard 208 required front seats to have lap and separate shoulder belts, plus rear outboard lap belts, launching a nationwide standard. Although many manufacturers had already implemented collapsible steering columns, they became compulsory in January 1968.
By January 1969, head restraints were required for whiplash prevention. In the early 1970s, seat belt warning buzzers became standard, energy-absorbing bumpers arrived for 1973 models, and side-impact bars, although implemented by most manufacturers in 1970, became required in 1973.
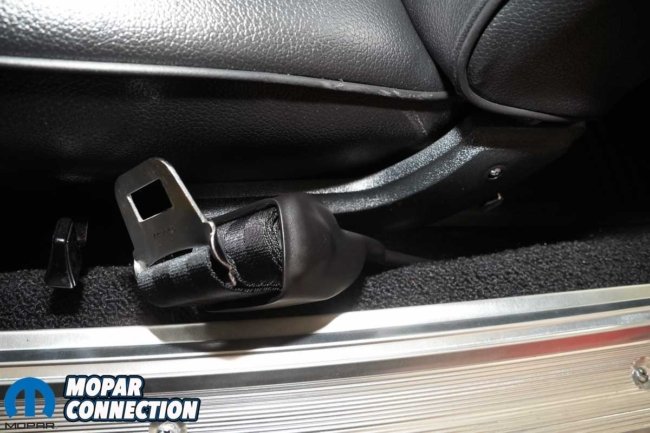
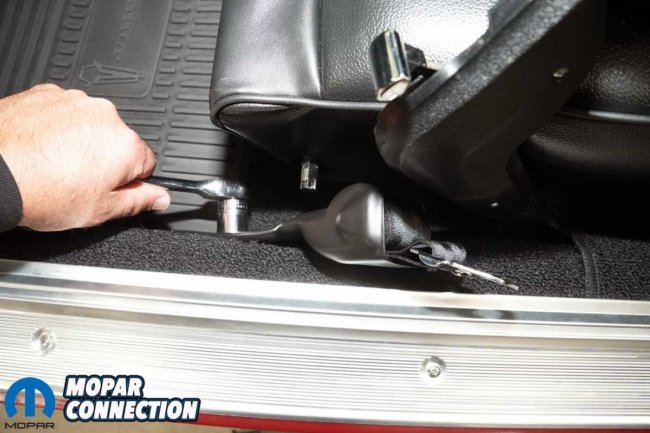
Above Left: We installed the driver’s side ratchet assembly with the factory anchor bolt. Above Right: The passenger’s side assembly was bolted in place with the factory bolt. The ratchet housings are a bit bulky, but they clear every component in their vicinity.
In a grand attempt to increase belt usage, the seat belt interlock system was enacted in August 1973, which prevented the engine from starting if a front occupant was unbuckled in 1974 model-year cars. Belt usage increased, but the system’s finickiness, resulting in no start conditions, led to its unpopularity. The interlock system was quickly rescinded by Congress in October 1974 due to malfunctions, although early 1975 model year cars were equipped with it.

Above Left: The driver’s side center belts consisted of a belt with a buckle and latch for the driver and a second belt and buckle for the center seat occupant. Above Right: Both belts were secured to the floor with the factory bolt. The rubber cover hides the bolt and belt ends from view. Sharon’s Web recolored the cover.
With the interlock system requirements rescinded by law, the system could be legally disconnected by owners or dealership technicians. It was replaced with a warning system that, like the 1973 system, had an indicator light on the cluster and a buzzer or chime. In 1974, federal law required unified three-point front seat belts, replacing separate lap and sash belts with a single three-point design.
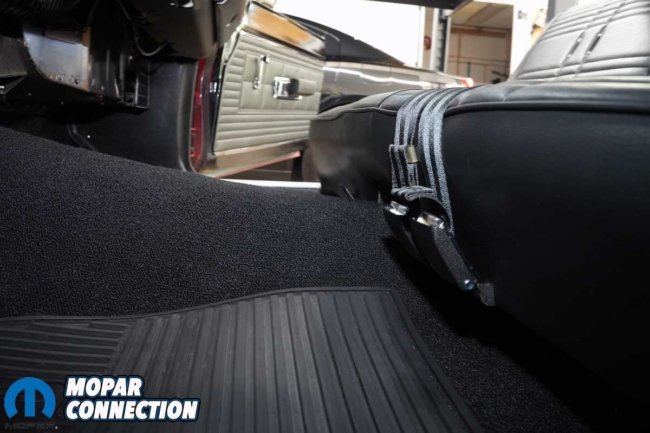
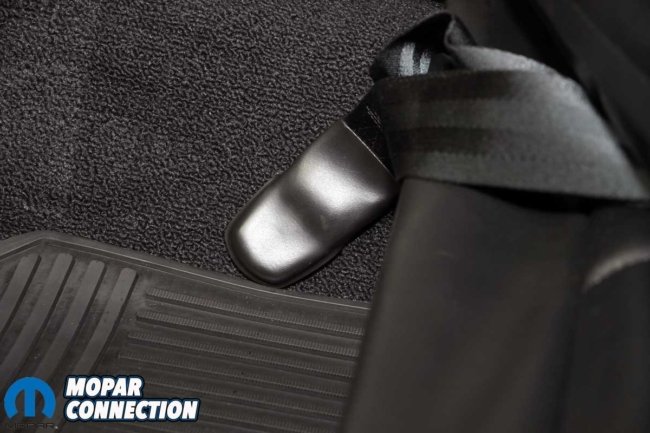
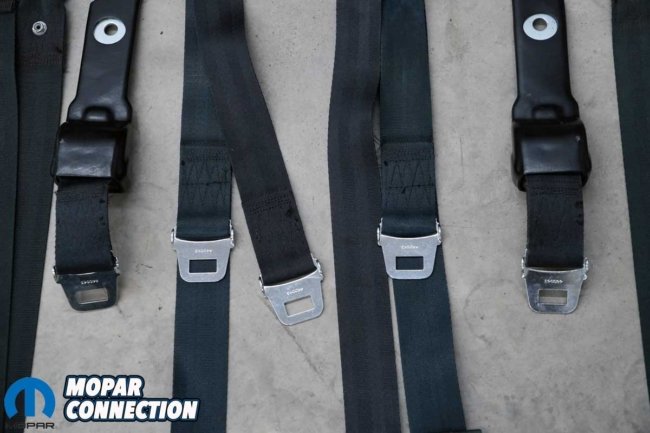
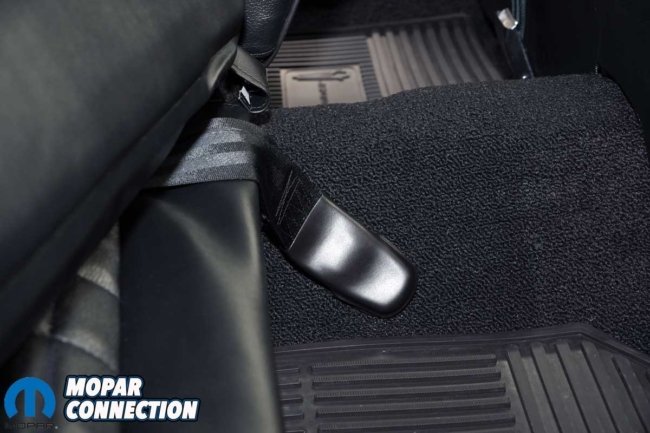
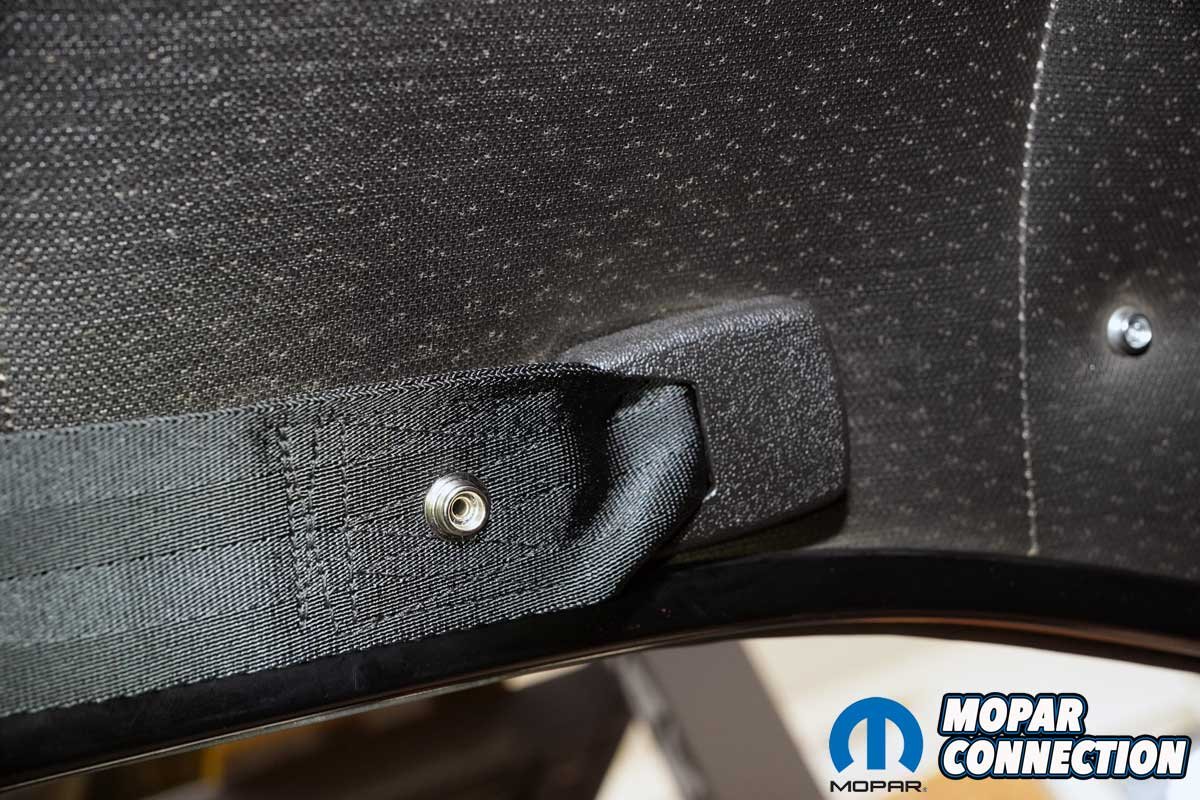
Above Left: Both driver’s side seat belts are stored nicely on the plastic latches attached to the seat frame. Above Right: Just like the driver’s side center seat belts, the passenger side had two belts; one chrome latch for the center passenger belt and a buckle and latch for the passenger’s side.
Returning to our project, we decided to send only the eight front seat belts out for re-webbing and servicing of the retractors, buckles, and latch plates. We reasoned that the rear belts had an acceptable appearance, and the odds of rear passengers were extremely low. By updating only the front belts, we increased occupant safety while reducing the overall cost of the refurbishment.
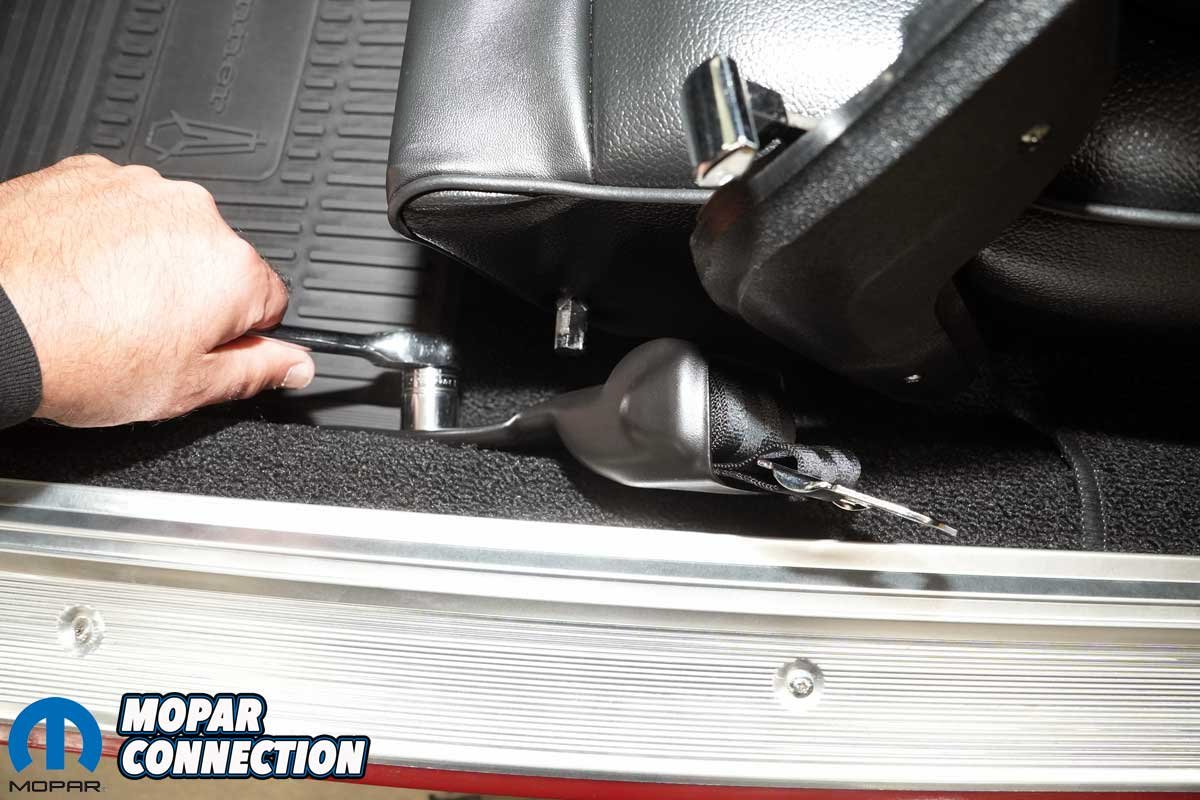
Removing the belts was straightforward. We unthreaded one bolt for each of the two retractors, then removed two additional bolts from the driveshaft tunnel that secured the belts for the outboard occupants and the center seat rider.
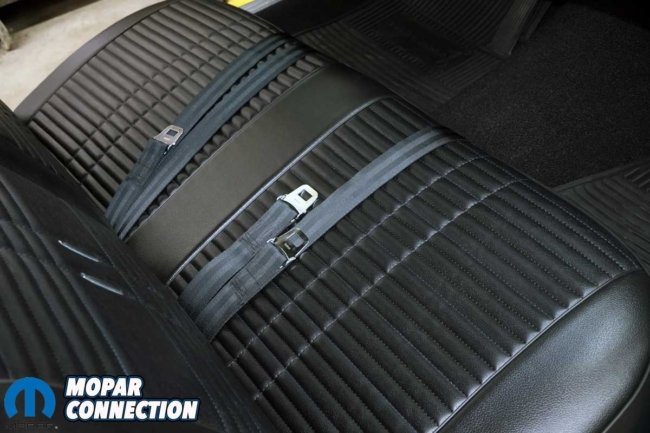
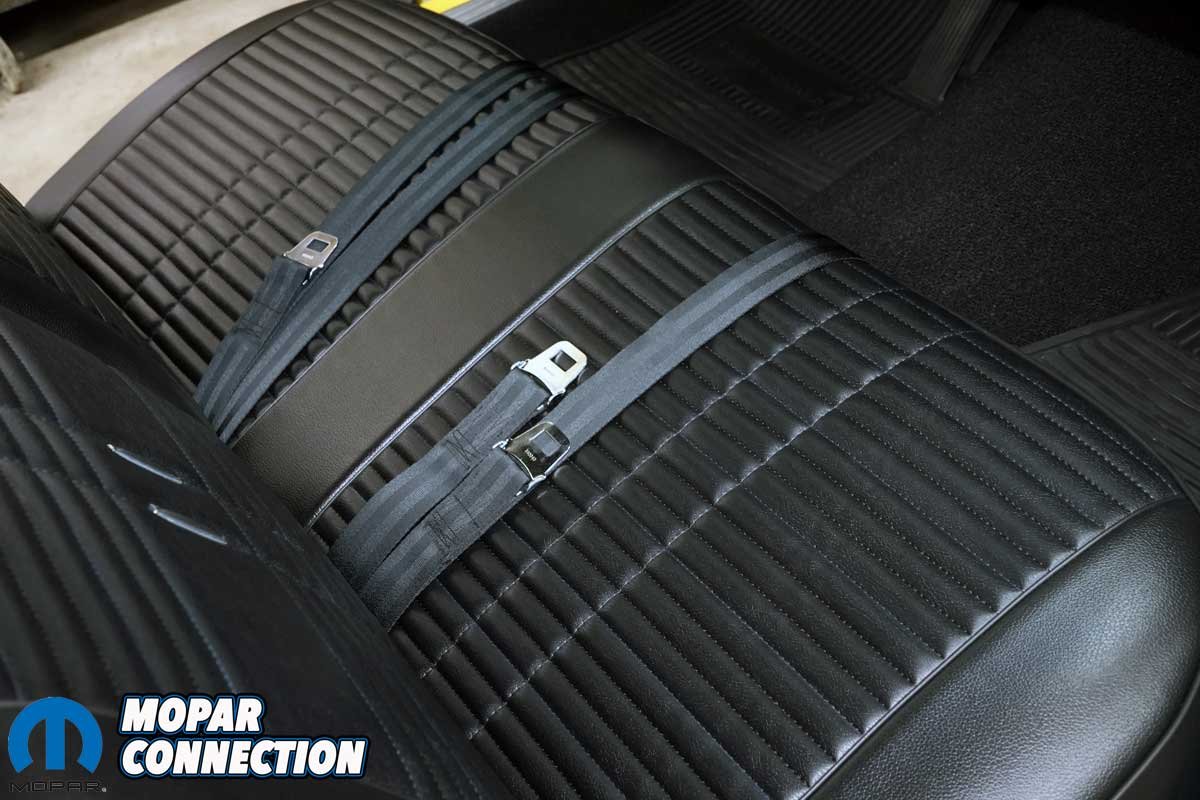
Above: The belts lay nicely on the new Legendary Auto Interiors upholstery. The new webbing had a sheen that the old, worn belts had not had in years.
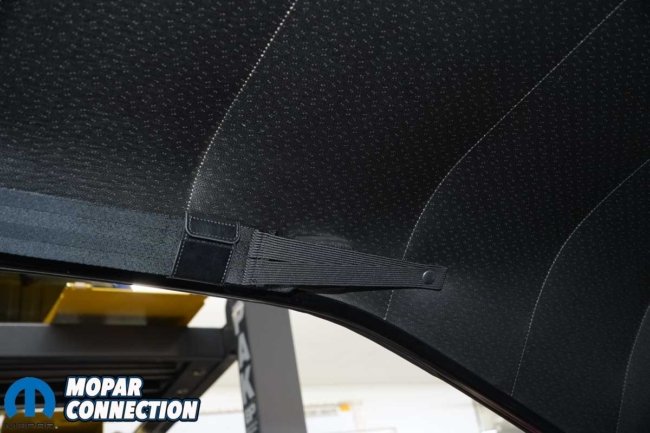
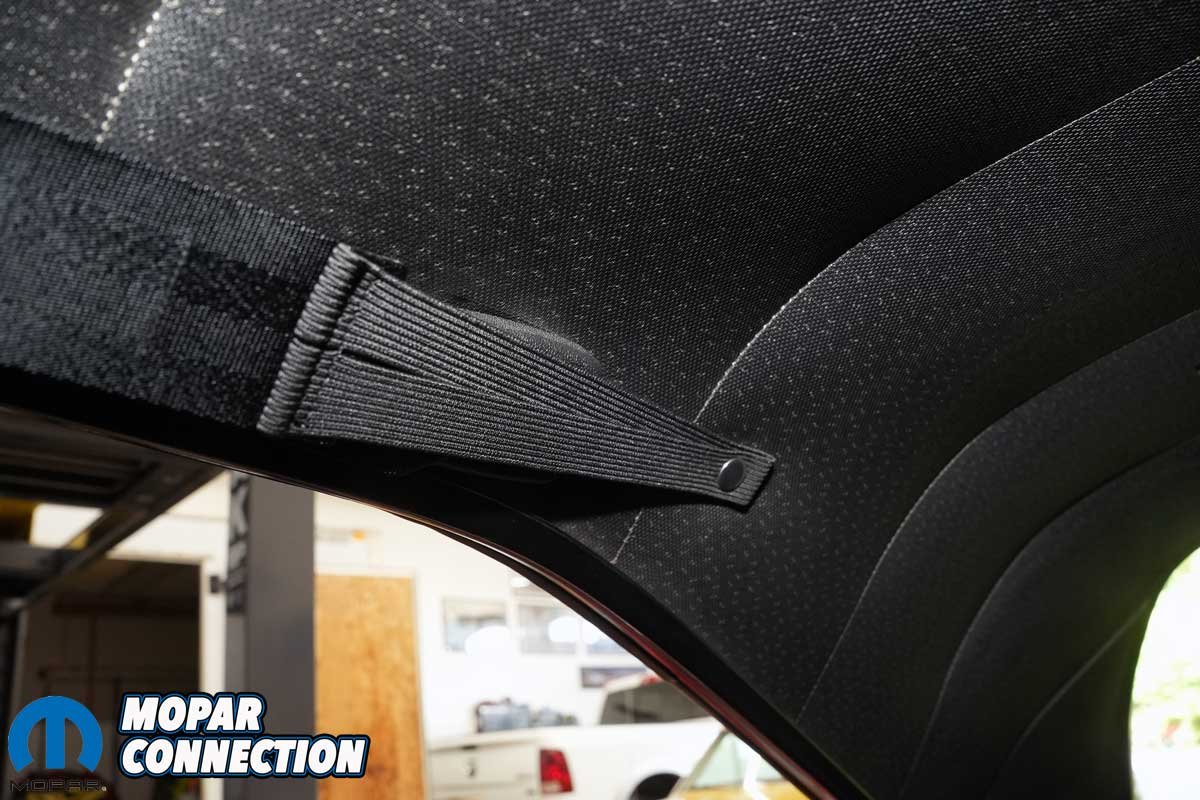
Lastly, we unthreaded the bolts for the sash belts, located at the roof area above where the Road Runner’s B-pillar would have been (no post – ours is a hardtop car). With the bolts removed, we unclasped the buckles from their storage clips near the sun visors.
With all the hardware removed, we laid the belts out on the floor. The sash belts had retaining elastic designed to hold the free end of the belt up and out of the way when stored. Both elastic pieces were stretched and damaged. To keep the belts neatly stored, a previous owner had used zip ties to secure them permanently.

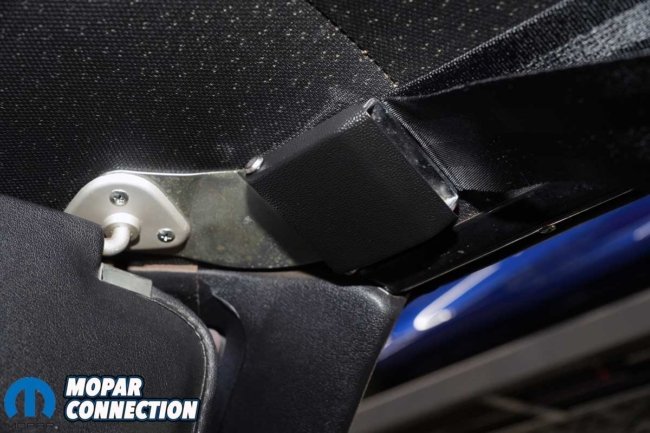
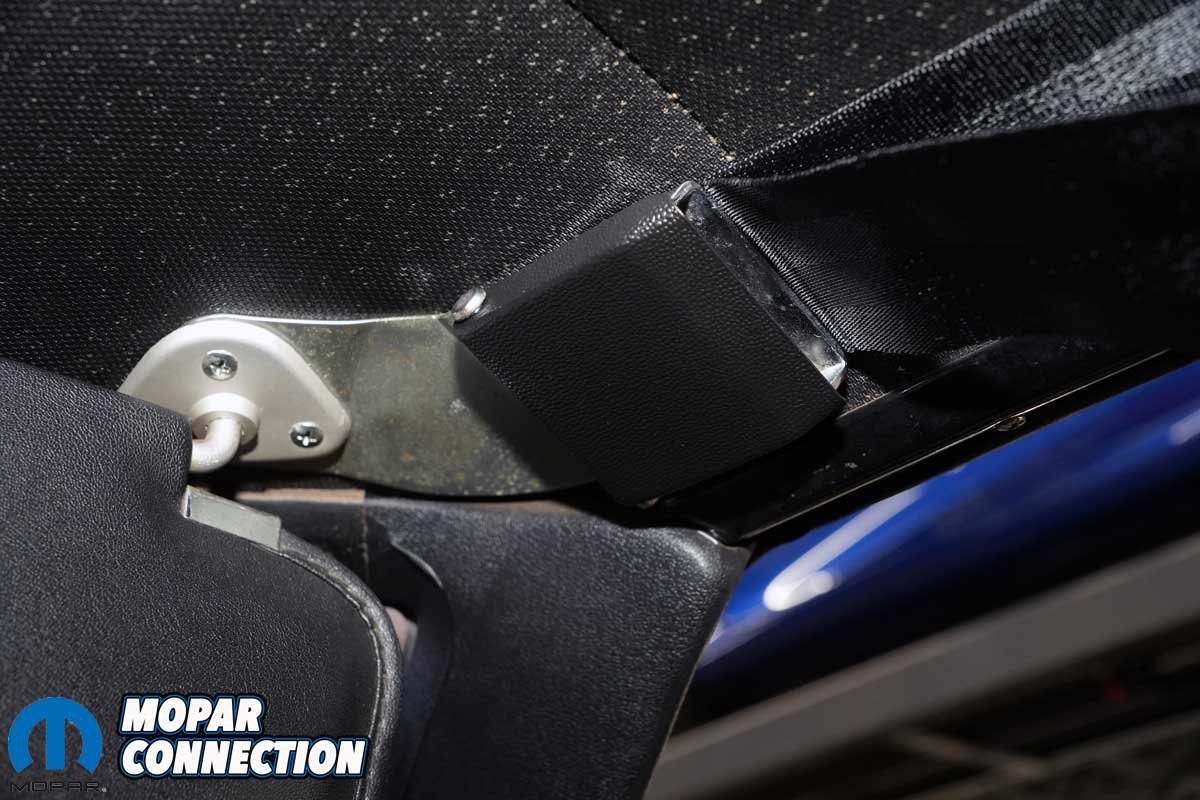
Above Left: The passenger side sash belt was connected to the roof of the Road Runner. The plastic cover was in excellent shape. We had it recolored, and it was ready for reuse. Above Right: The other end of the sash belt had a buckle, which clinches to a latch affixed to the sun visor when the belt is being stored. The driver’s side sash assembly was installed in the same manner.
The most worn belt was the driver’s side lap belt, which had frayed along the edges. The remaining belts appeared to be in below-average to average condition for their age but were deemed unusable for safety’s sake. Additionally, the ratchet mechanisms operated properly and retained their original paint. The chromed latch plates, buckle finishes, and rubber covers over the center belts’ bolts were also in excellent shape.


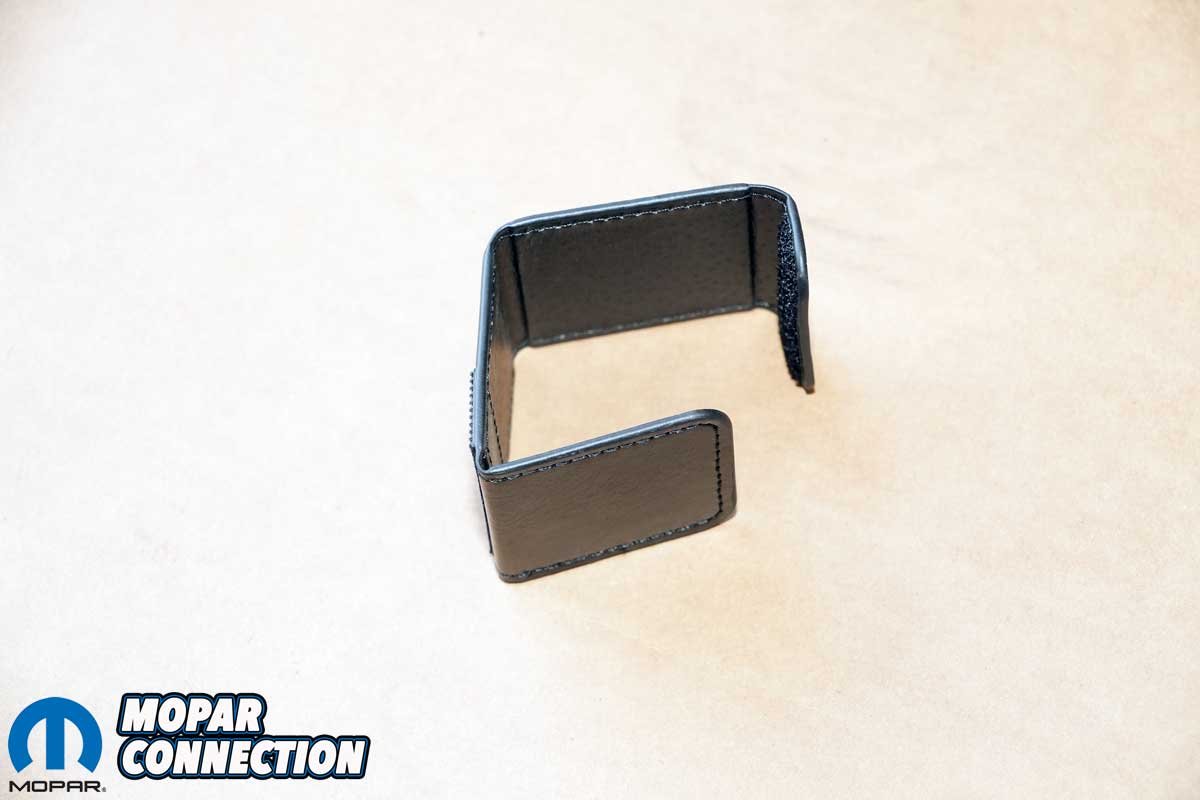
Above Left: On both sash belts, the factory installed an elastic extension to the end of the webbing. It holds the loose belt end from hanging when the belt is stored. However, the elastic is under constant tension, which eventually breaks down its ability to do its job. Above Right: On Amazon, we found 2-inch seat belt keepers that wrap around the belt and Velcro to lock in place, helping support the elastic extension.
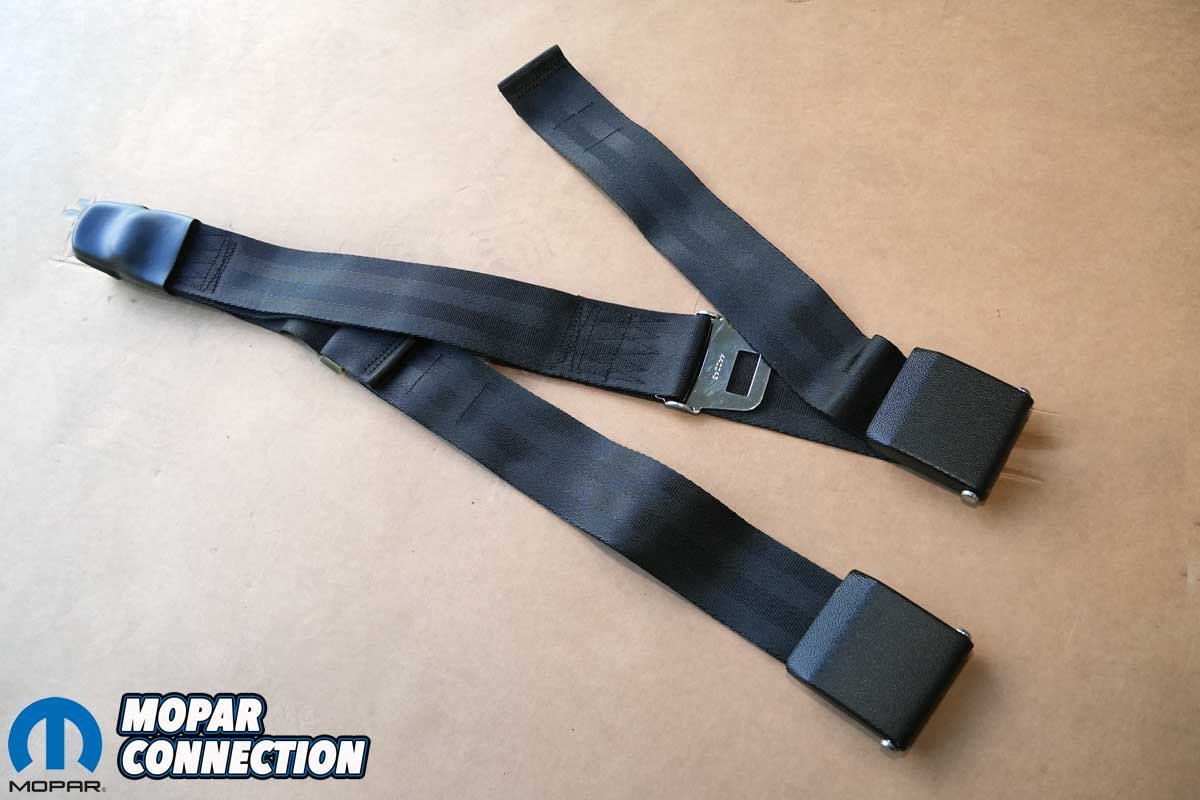
After exchanging several photos with the representatives at Sharon’s Web, we decided to have the ratchets, buckles, and latches cleaned and fitted with new webbing. Fortunately, none of our components required re-chroming, which shortened the turnaround time to approximately eight weeks.
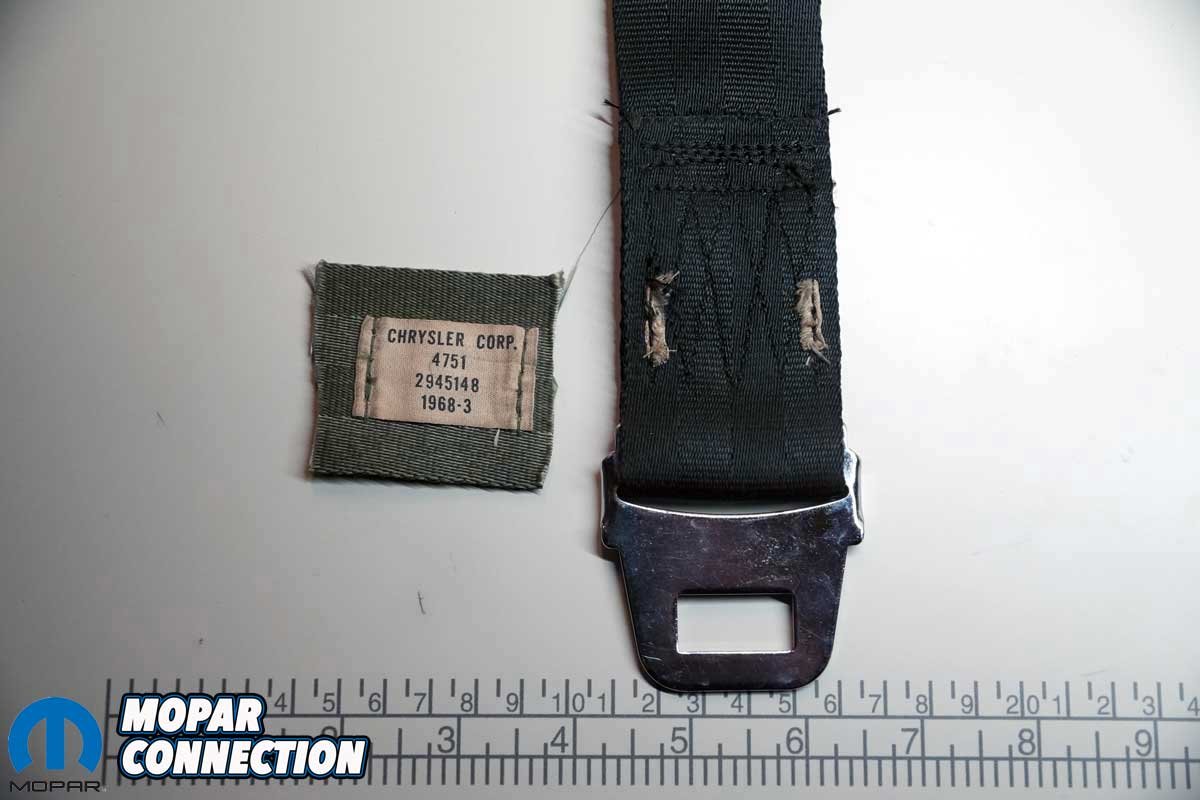
We were also missing the factory tag on one of our rear seat belts. Sharon’s Web had a used tag with the correct part number available, so we purchased it as well. With the plan finalized, we carefully boxed up the belts and shipped them to Texas.
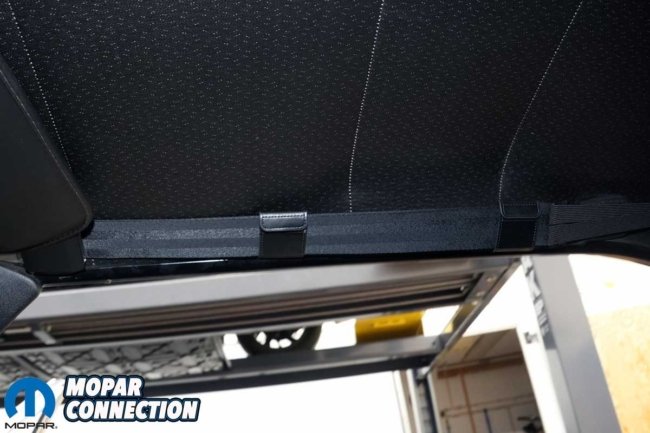
Above Left: The belt keeper was slipped against the sown end of the belt. Even with the elastic disconnected, the belt would stay in its stored position. Above Right: We ended up adding a second belt keeper, installing it in the middle portion of the belt. Again, it was there to support the sash belt.
The belts returned sooner than anticipated and were in excellent condition. Sharon’s Web stitched the new webbing flawlessly, giving the belts a factory-correct appearance. The buckles and chrome were cleaned to a bright luster, and the rebuilt ratchets operated smoothly and positively. All plastic and rubber components had been re-colored to a deep, rich black, completing the restoration.

Above: Except for replacing the headliner and repainting the metalwork, the interior’s appearance has improved tremendously in the last nine months. Not only is the interior cleaner and nicer, but the Road Runner is also a safer car to drive, thanks to the updated belts.
Reinstallation was succinct and involved reversing our disassembly steps. Everything fit precisely as it should. On the sash belts, the new elastic effectively kept them out of the way during storage; however, to reduce long-term strain on the elastic, we added 2-inch seat belt keepers sourced from Amazon to better support the belts.
Included with our restored belts was the replacement tag for the rear seat belt. Installing it required pulling the rear seat bottom to access the belt anchor. At our sewing machine, we carefully removed the remnants of the original tag and detached the new tag from the donor belt section. After setting up our Consew sewing machine to replicate the factory stitch length, we sewed the tag onto the belt in its original factory location.
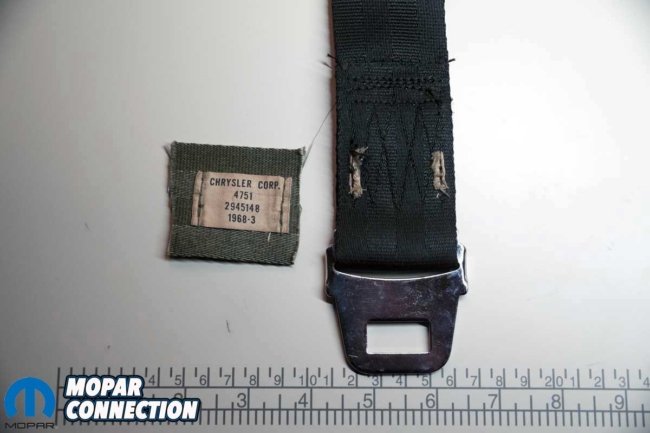
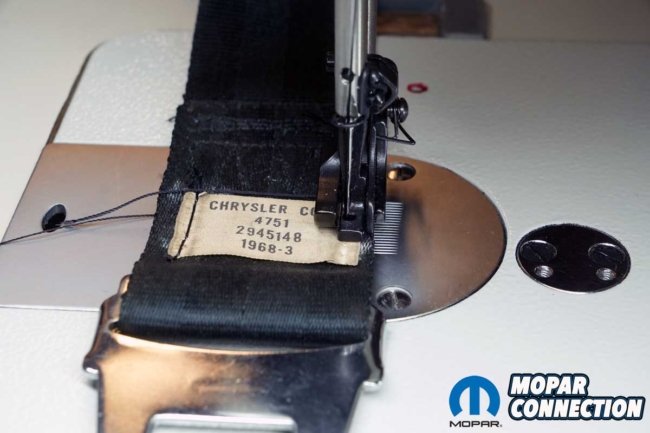
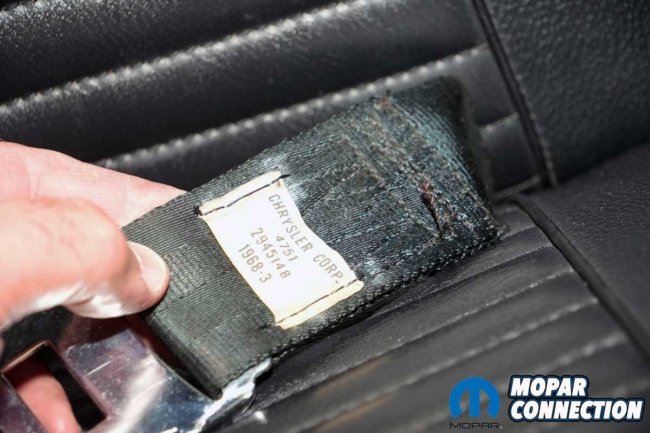
Above Left: The driver’s side rear seat belt was missing its label. Sharon’s Web had the correct label from a previous customer’s belt. We purchased it. Above Center: After removing the label from the donor belt and removing the remaining portions of the label from our belt, we sewed on the new label. Above Right: With the addition of the new label, each belt in the Road Runner has the correct factory label.
Once satisfied with the result, we reinstalled the belt, anchor bolt, and rear seat bottom. We wished the label faced upward to show it off, but unfortunately, the tag faces downward when the belt is installed correctly. At least we know every belt now carries the correct factory identification.
Restoring and contemporizing seat belts is a simple but necessary safety measure. For any vehicle driven on the road, a properly functioning restraint system is vital. Each belt update increases confidence that we are protecting ourselves and others. Seat belts save lives, and one day, that life may be yours.


