


Our continuous quest to reduce ETs at the track and generally improve our street/strip 1973 ‘Cuda led us down the path of upgrading the front brakes. The original disc brakes have served us well but shaving unsprung weight off of the car was awfully enticing.
And we would never say no to better braking performance since we use the car for Drag and Drive competitions covering curvy roads all over the country towing a trailer. (Not to mention the heavy braking slowing down at the big end of the track after a rip.)
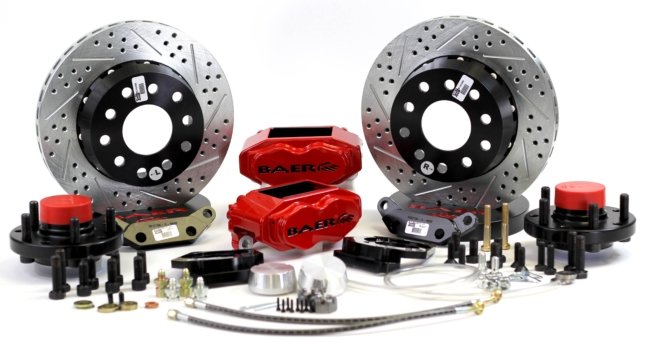
After some research the Baer Brakes 11” SS4+ Front Brake Kit caught our eye. Lightweight 4 piston aluminum calipers, drilled and slotted rotors, and designed to work with 15” wheels – perfect! We opted for the black powder-coated option as we weren’t looking to make a statement with flashy brakes on our black on black ‘Cuda.
Installation was straight forward for the most part. The most challenging part was having to swap your spindles from the driver’s side to passenger’s side and vice versa. Baer wants their brake located to the rear of the wheel hub versus the OEM location on the forward side. As long as you’re prepared to pop some ball joints, this upgrade is a breeze!
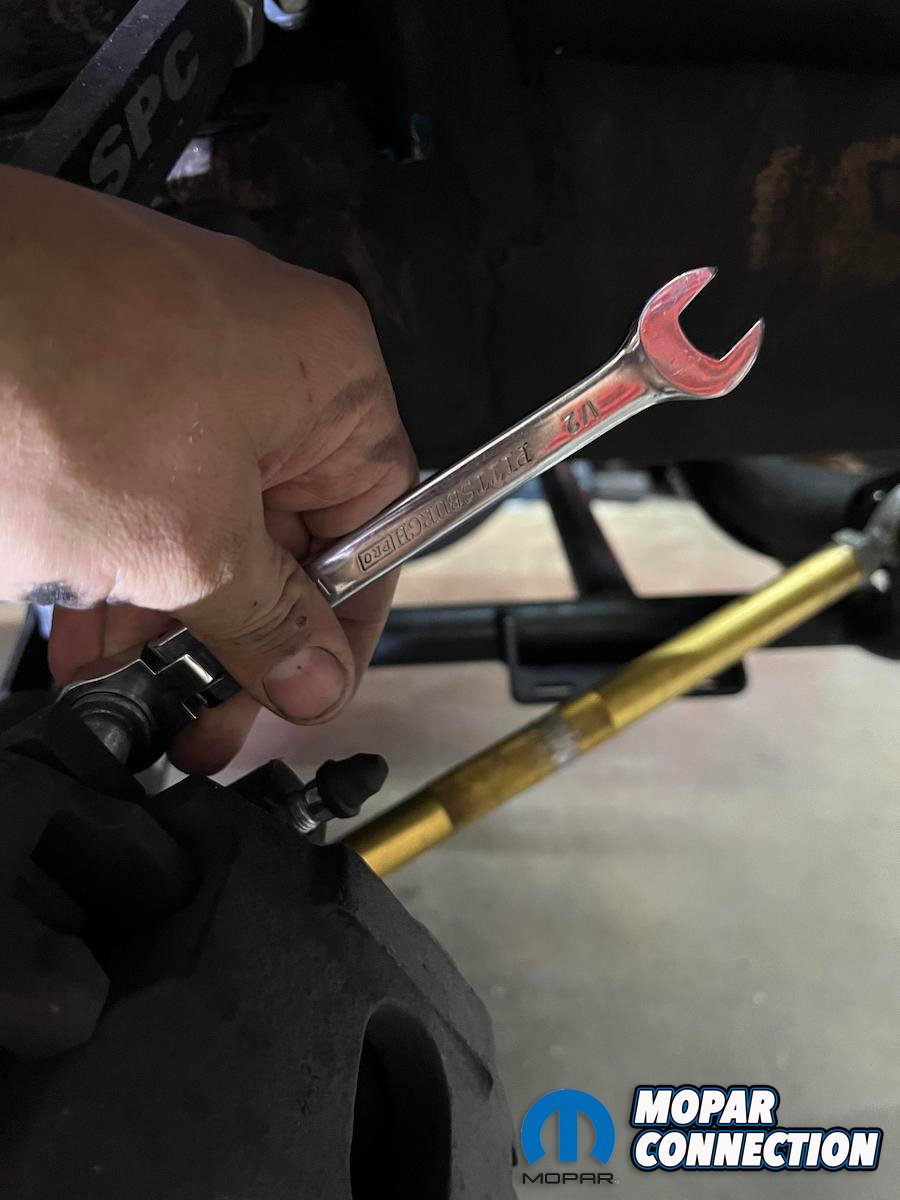
This job of course starts with getting the car off the ground and removing the front wheels. It doesn’t matter which side you start with since it’s all coming apart, so pick your favorite spot and use a ½” wrench to remove the two caliper bolts and slide the caliper off of the rotor.
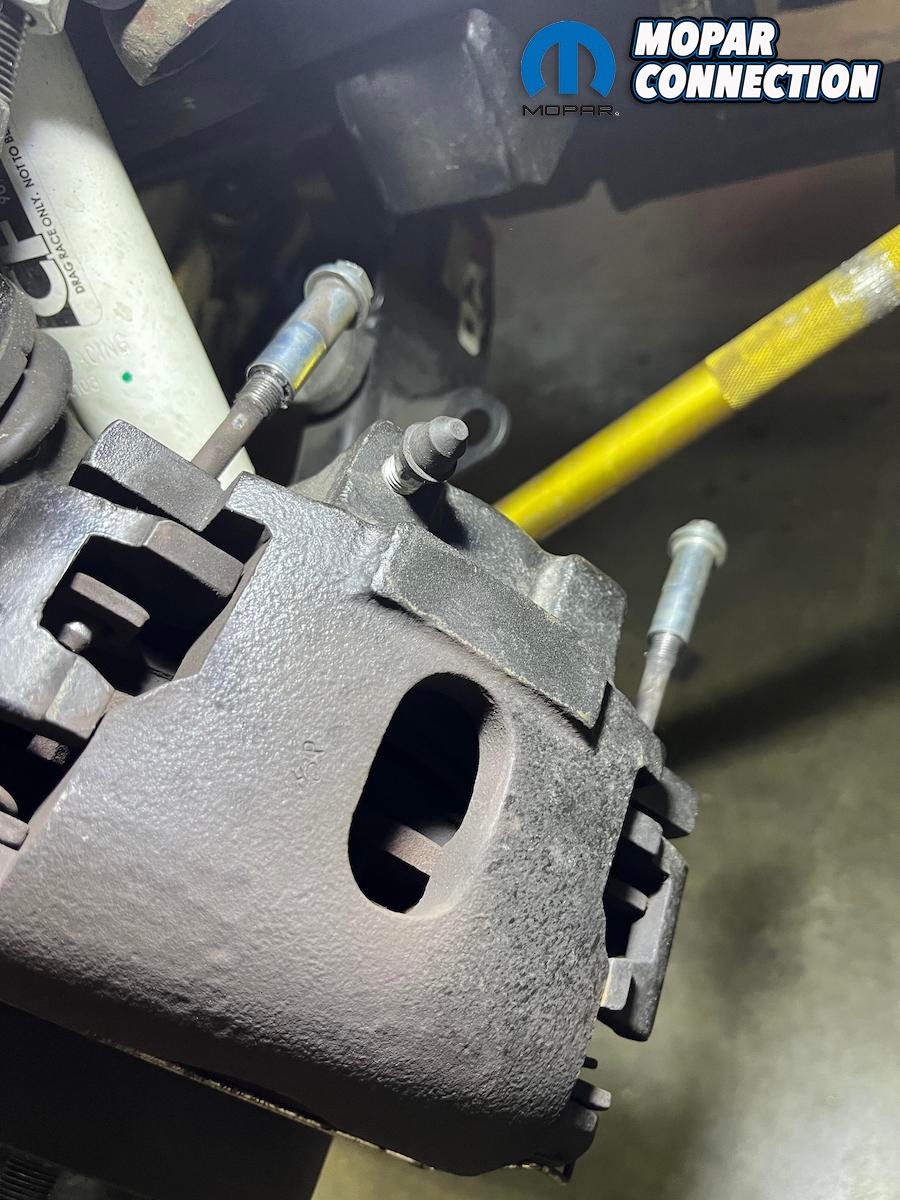
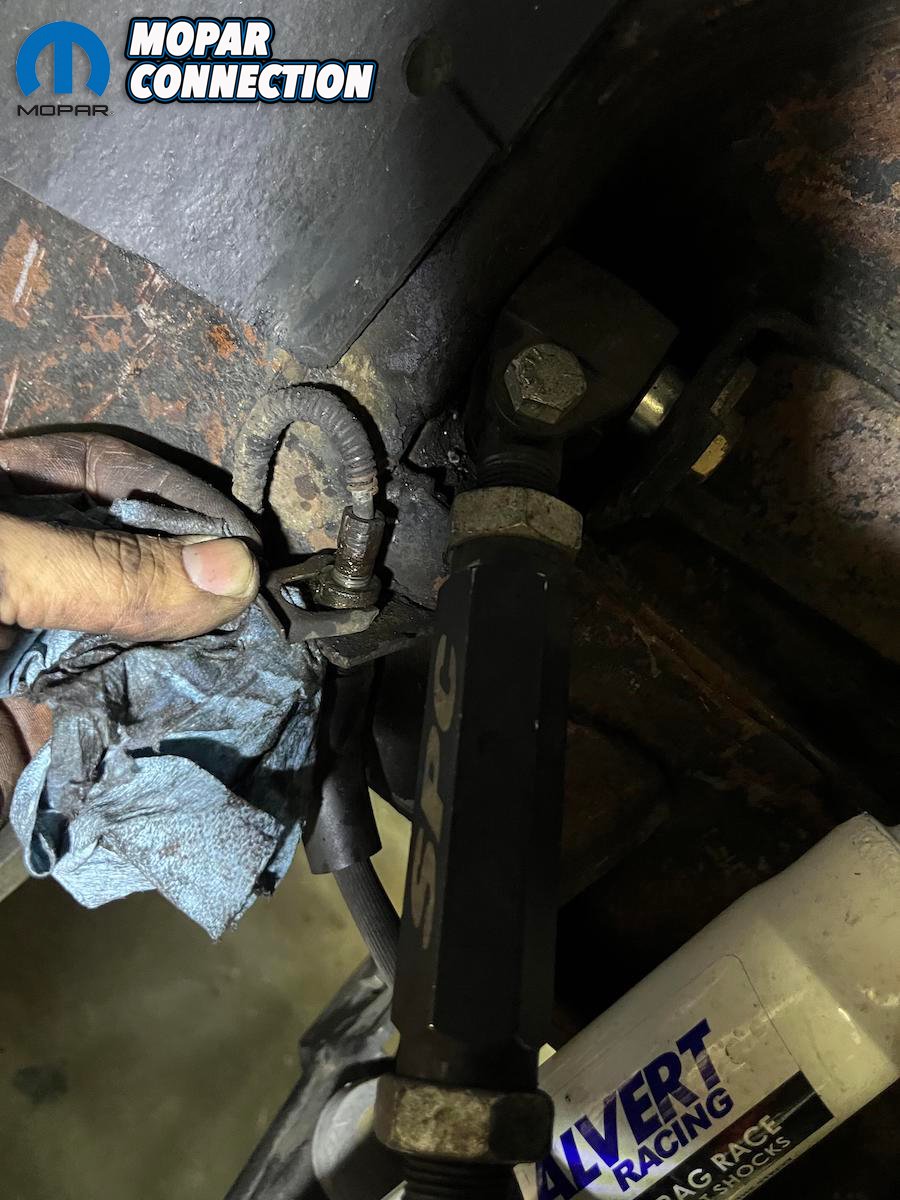
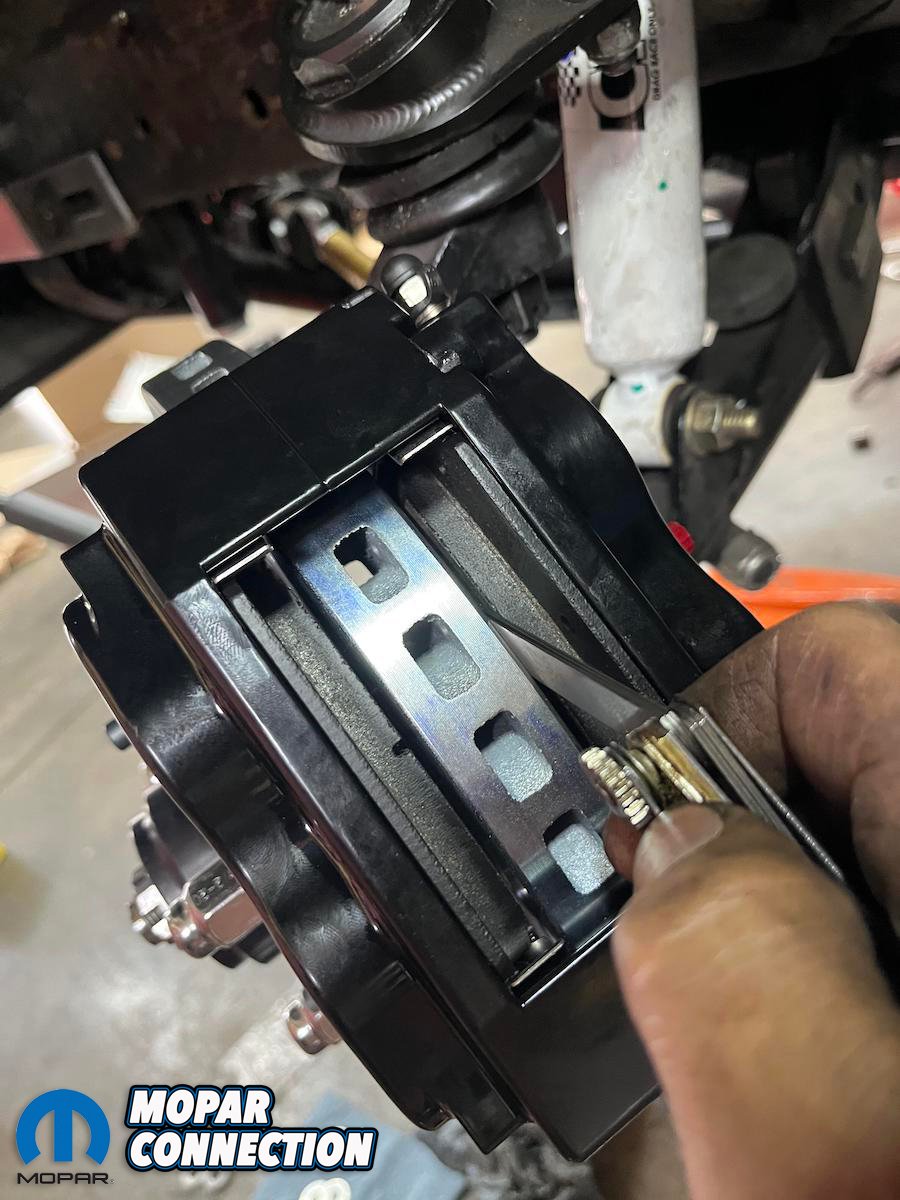
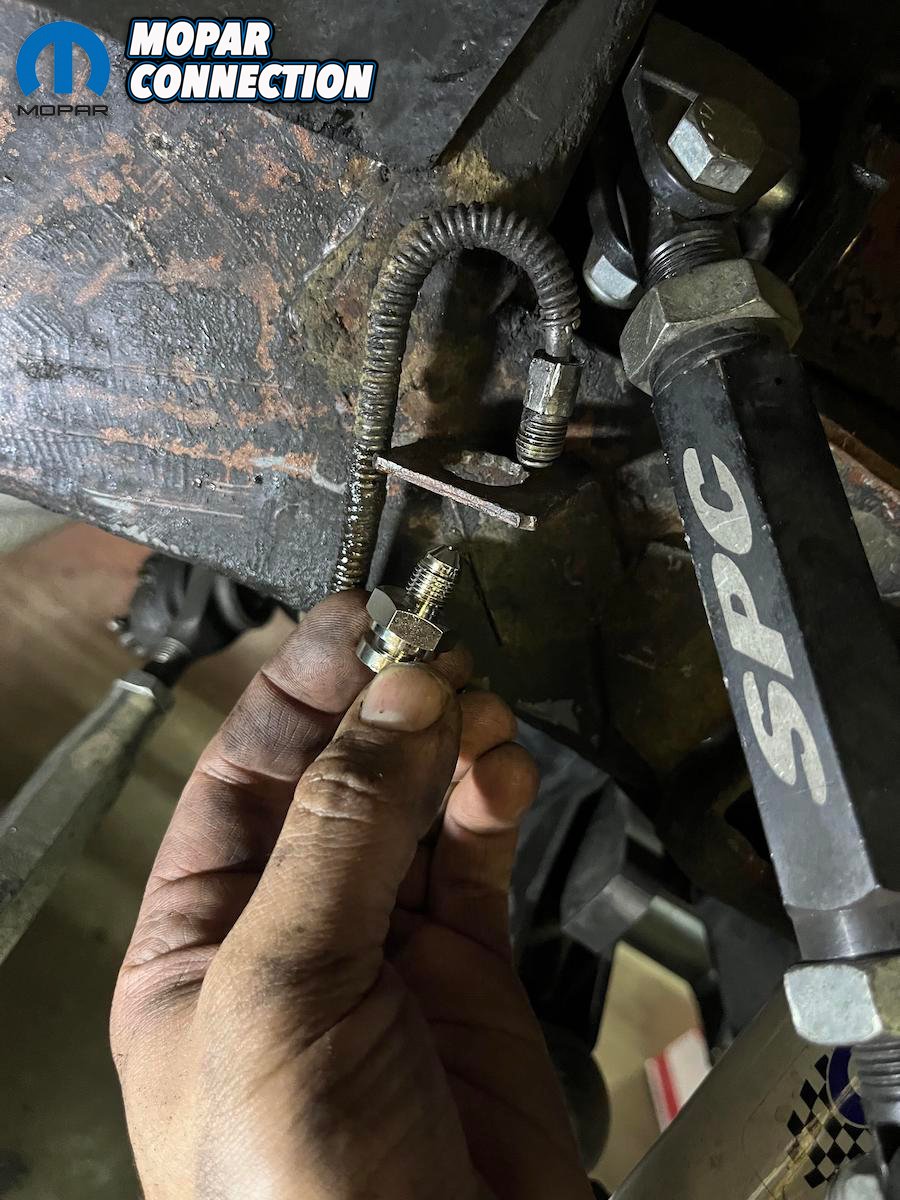
Disconnect the flexible brake line from the hard line at the frame rail using a 3/8” line wrench and a flathead screwdriver and pick to remove the clip holding it in place. The caliper can now be removed set aside. Cap the lines to avoid a a dripping mess while working through the swap.
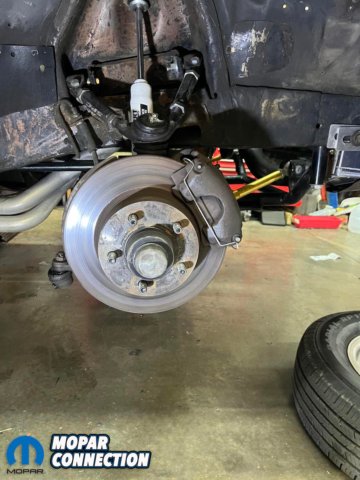

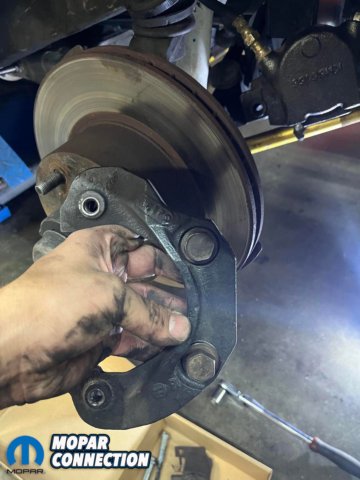
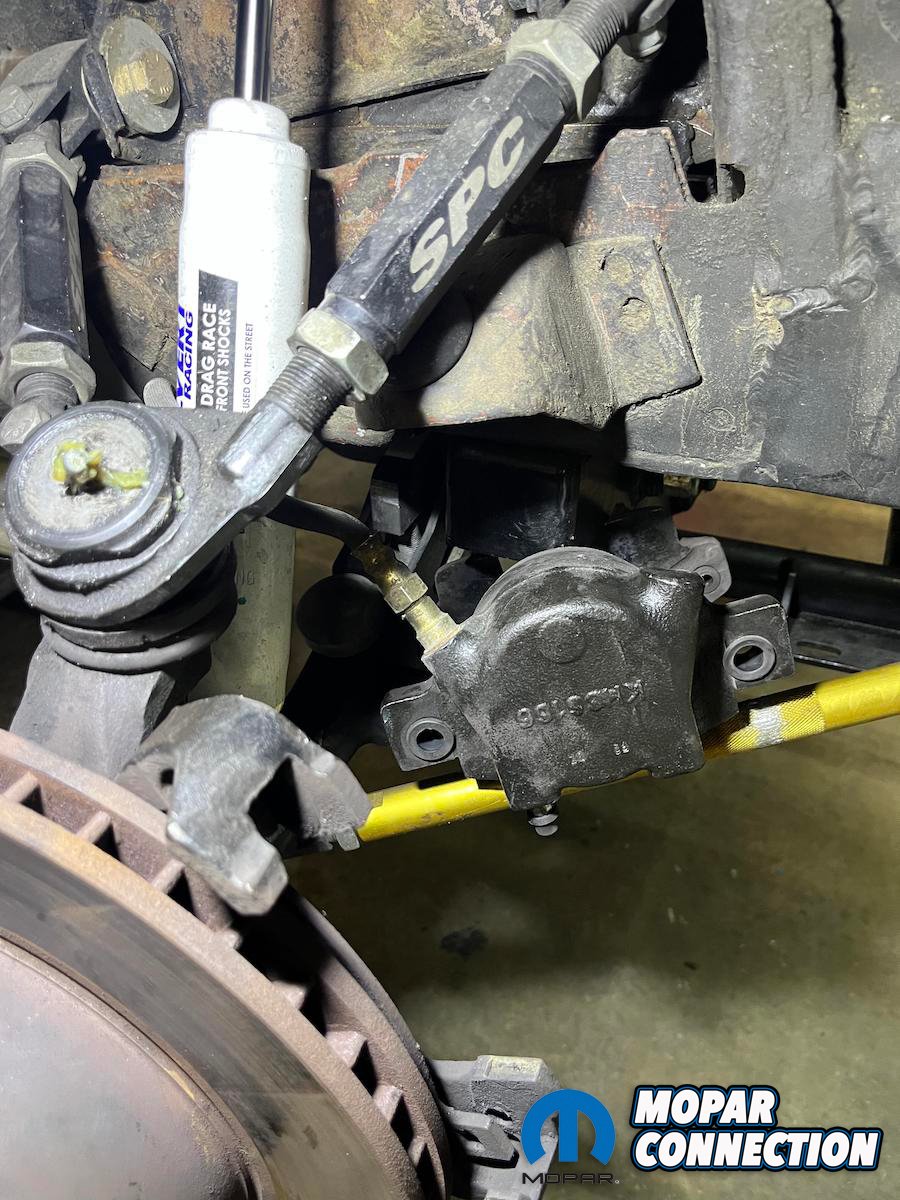
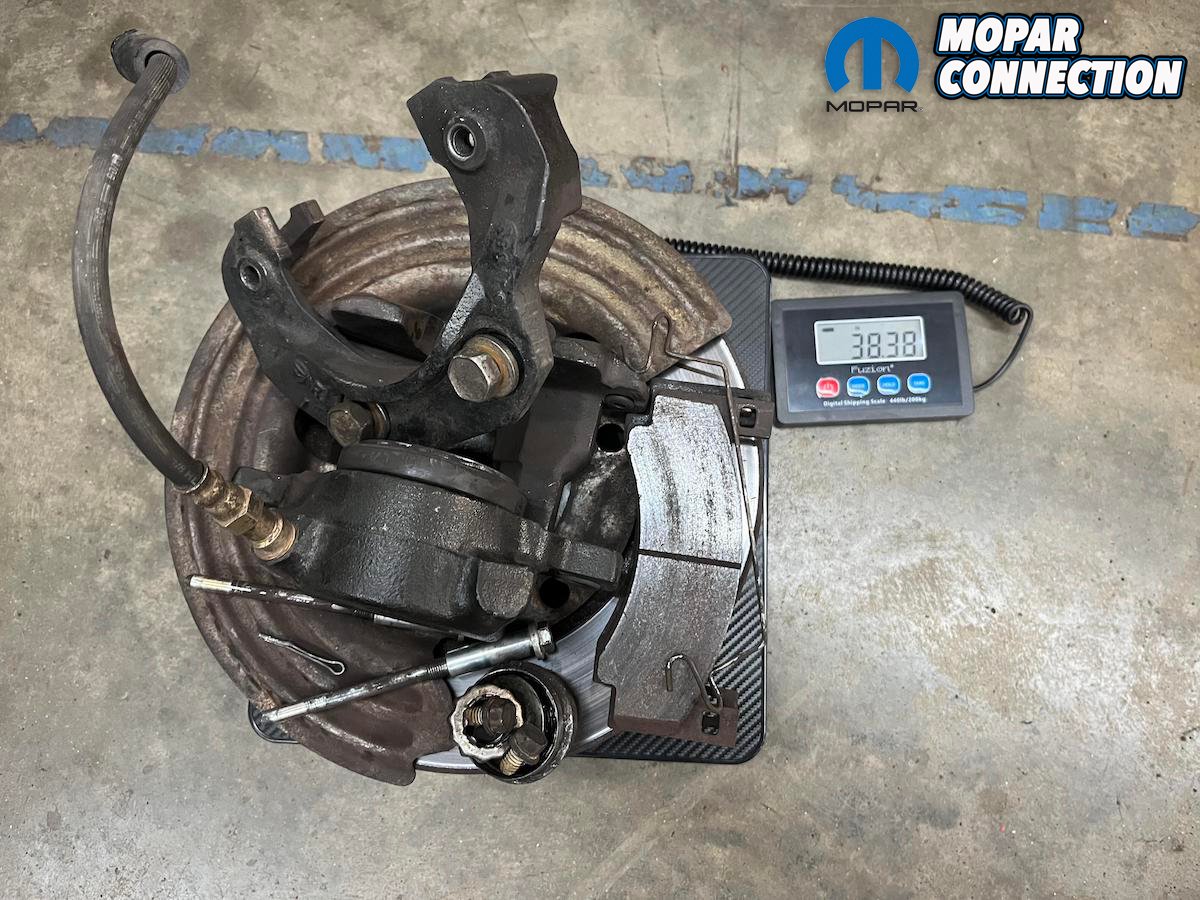
Above left: Notice how the factory disc brakes are arranged with the caliper in stock position to forward of the wheel hub. Above right: Removing caliper bolts.

Above left: Caliper bolts loose and ready for removal. Above right: Caliper removed and placed out of the way.
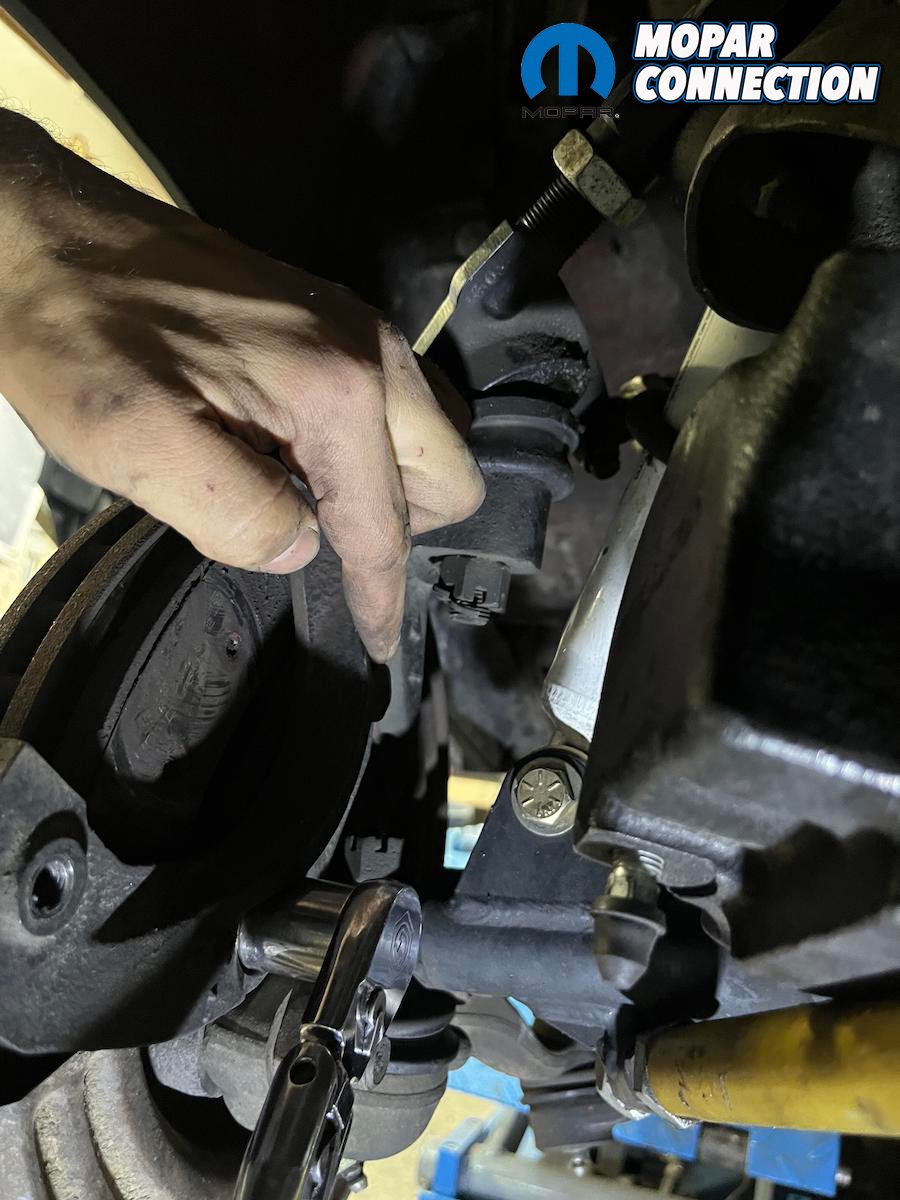
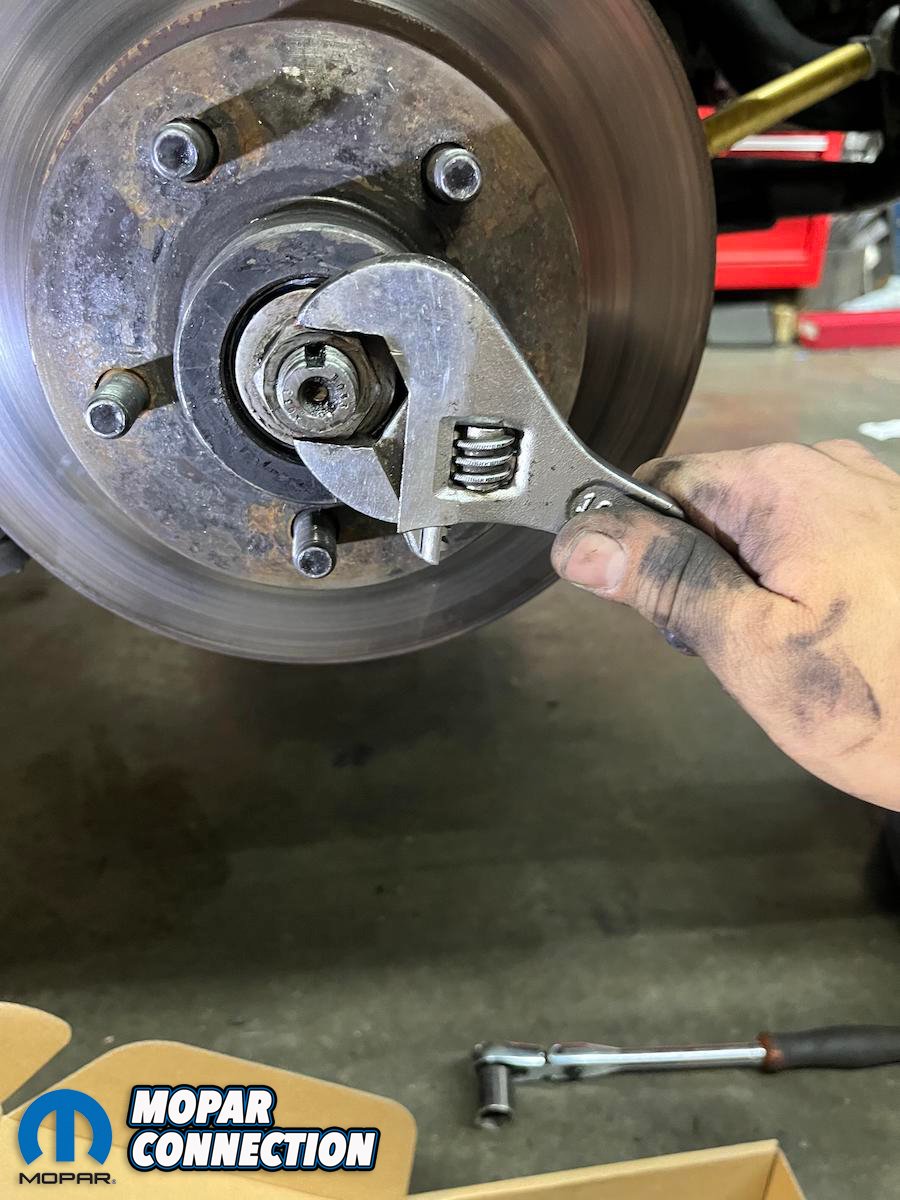
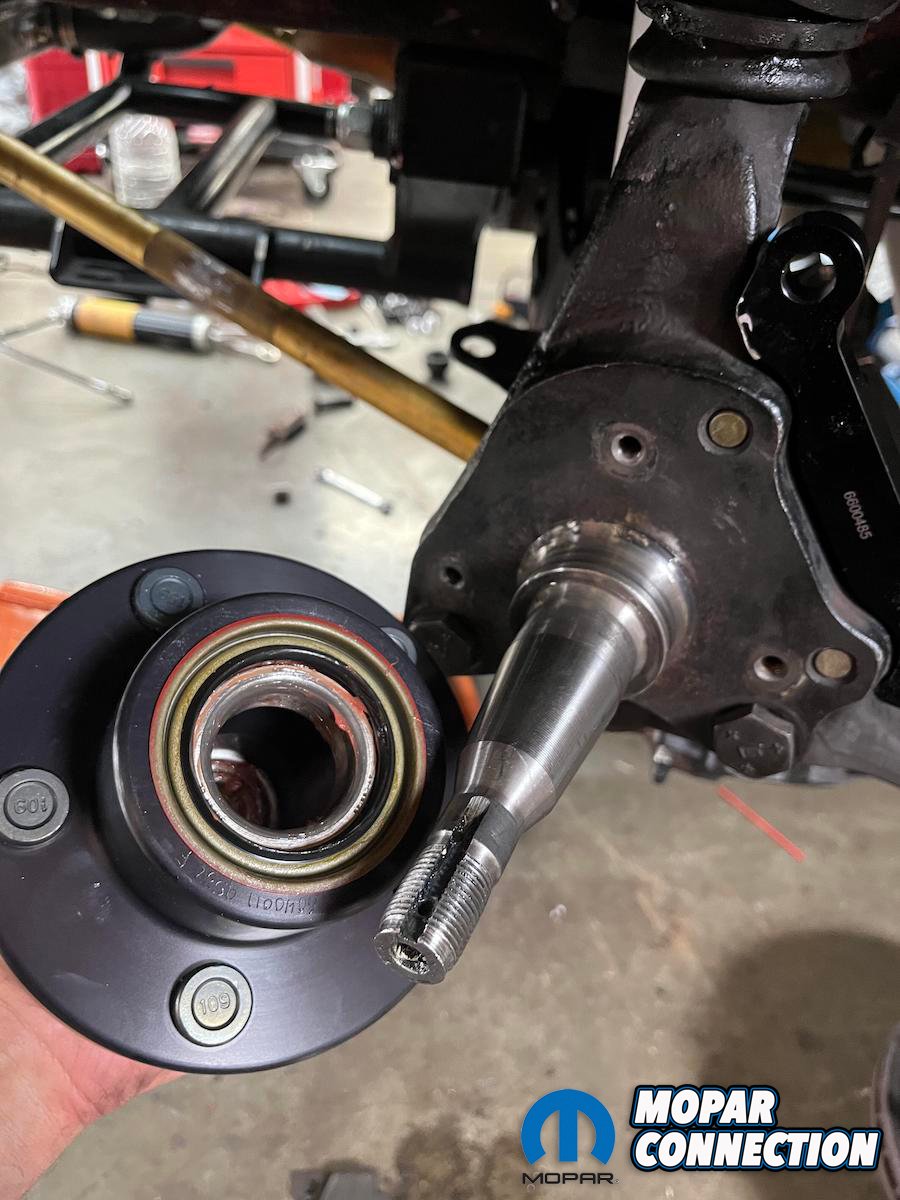
Next, remove the caliper mounting bracket with a ¾” socket – these guys are snug so you’ll need some muscle. To remove the rotor a flat head screwdriver helps pry the wheel bearing cap off, some needle nose pliers for the cotter pin keeping the wheel bearing castle nut in place and a bump with a crescent wrench on the nut to break it free. With those parts removed the rotor slides off of the spindle. The three ½” bolts holding the dust shield can be removed next so it can be added to the “old parts” pile.
With these parts removed we were able to see what all of this trouble was going to be worth it in terms of weight savings. The removed original parts weighed in at 38.4 lbs. The new Baer parts tip the scales at 23 lbs resulting in a savings of 15.4 lbs per side and 30.8 lbs total! That is a pretty substantial difference and provided plenty of motivation to finish the install.
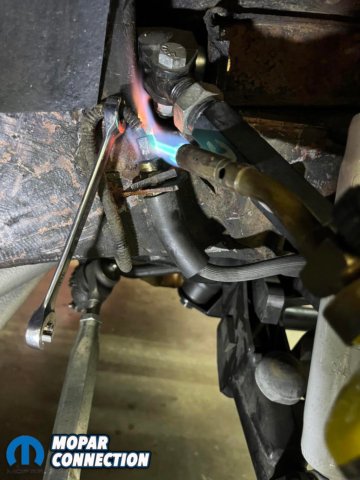
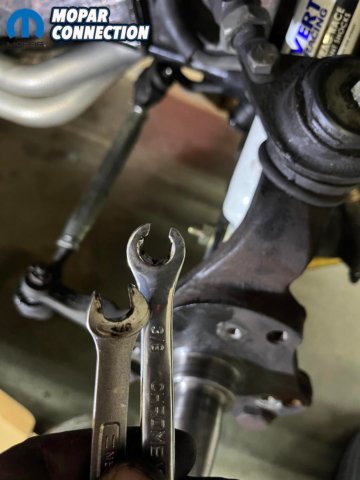
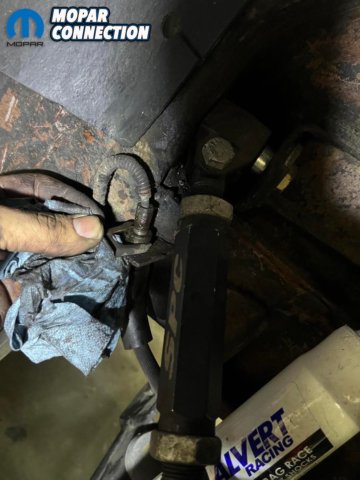
Above left: Using some hot persuasion to free up the brake line. Above center: 3/8 line wrench and brake line wrench for brake line removal. Above right: Removal of the brake line clip.

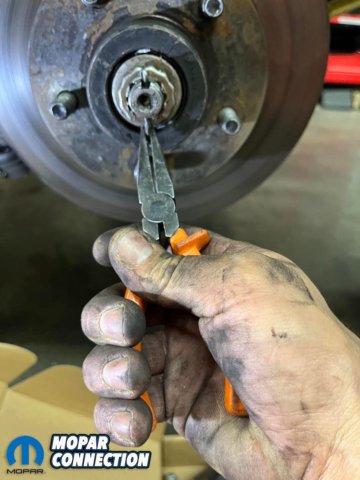
Above left: ¾” wrench used for removal of the caliper mounting bracket. Above center: Caliper bracket removed. Above right: Removal of cutter pin from castle nut on the wheel hub.
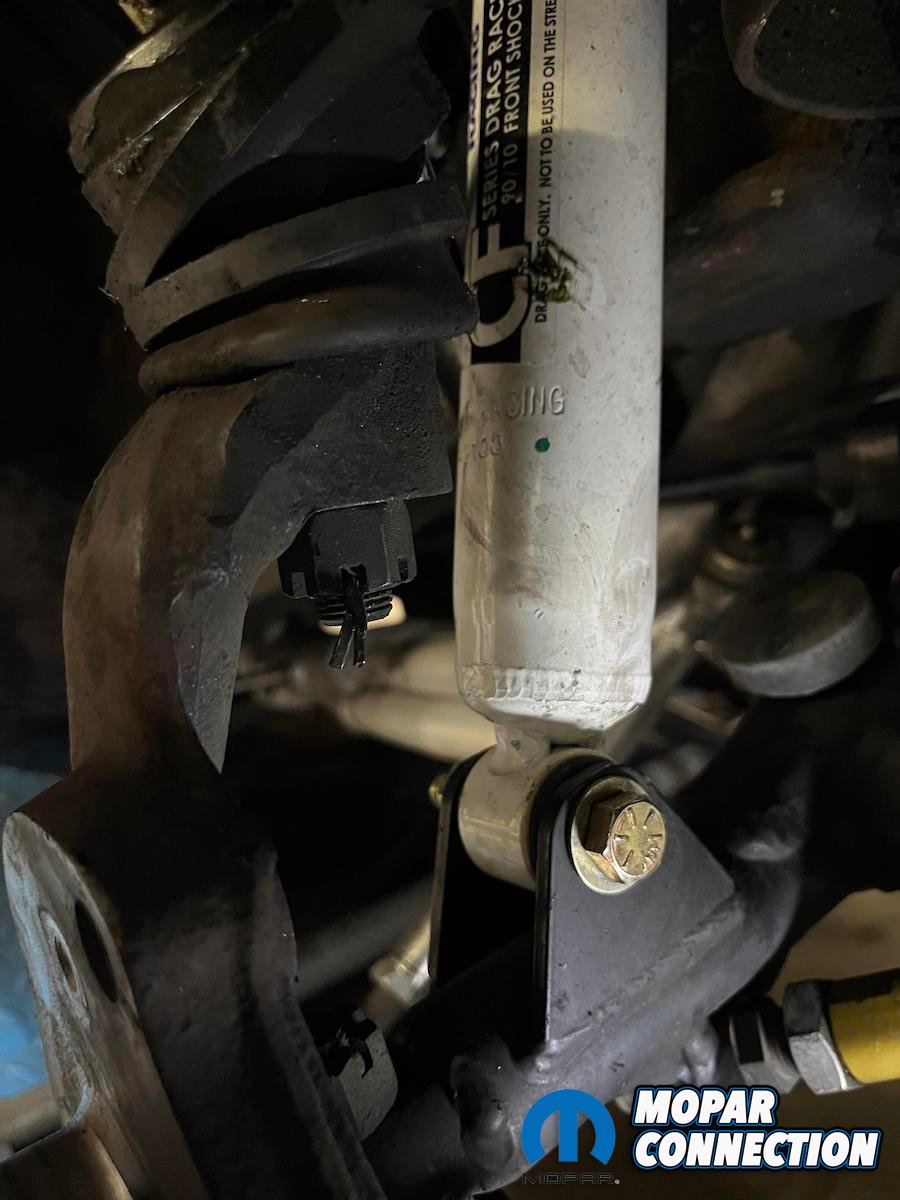
The tougher part of the job, braking the upper ball joint free comes next. Again, use your needle nose pliers to take the cotter pin out of the castle nut and then loosen the castle nut with a 7/8” wrench. Our preference is to leave the nut on but loose so the spindle doesn’t completely fall once the ball joint brakes free.
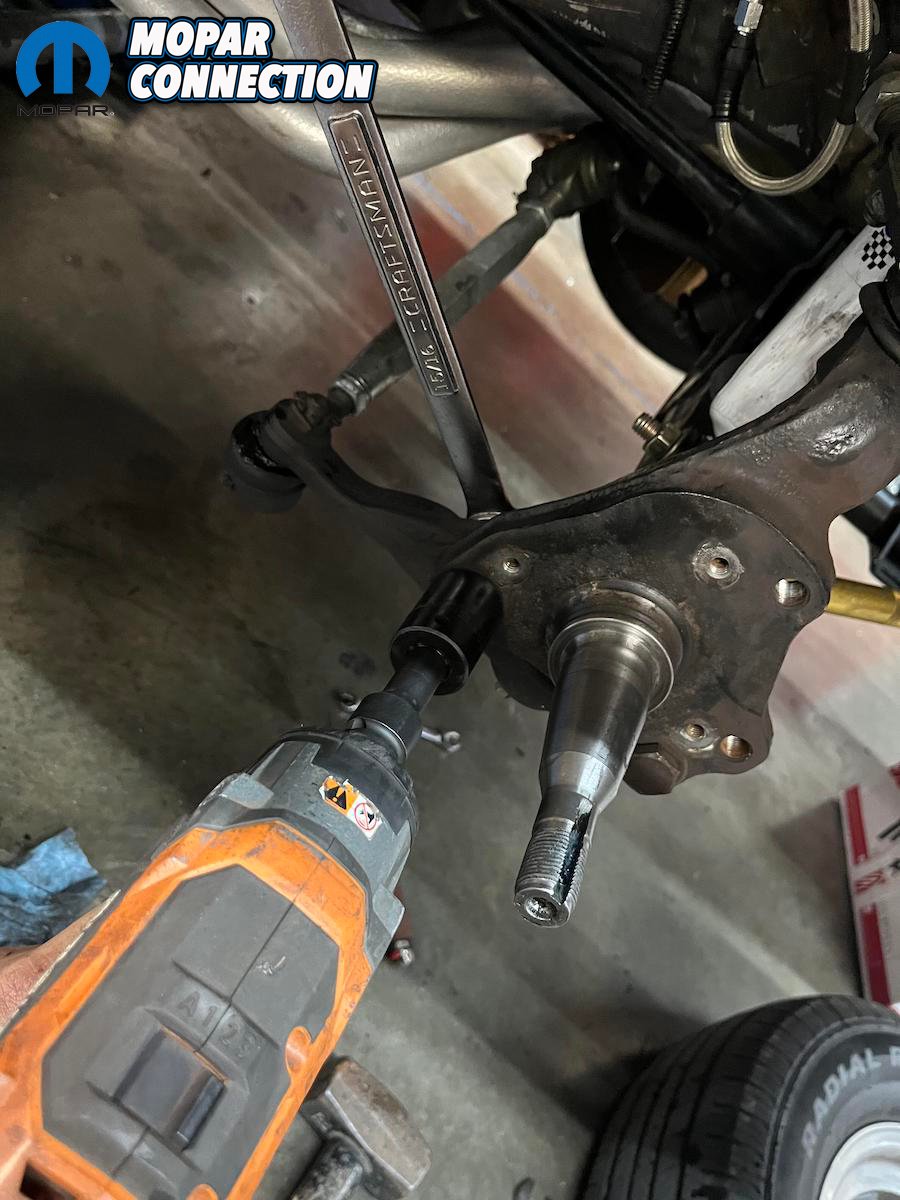
Before popping the ball joint we also removed the two bolts fastening the steering knuckle to the spindle with an impact gun sporting a 15/16” socket. A pickle fork and a 3lbs. sledge hammer was our weapon of choice for separating ball joints and it worked as expected here freeing up the spindle. Remove the upper ball joint castle nut and you are done with disassembly!
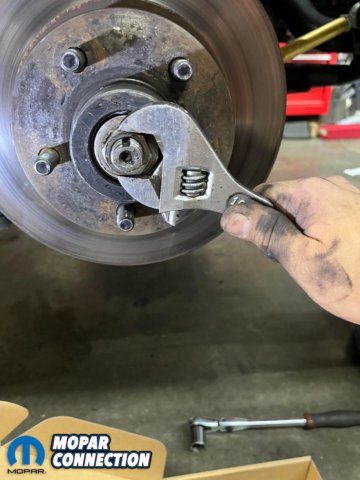
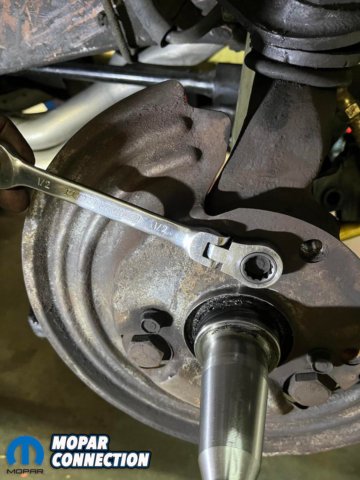
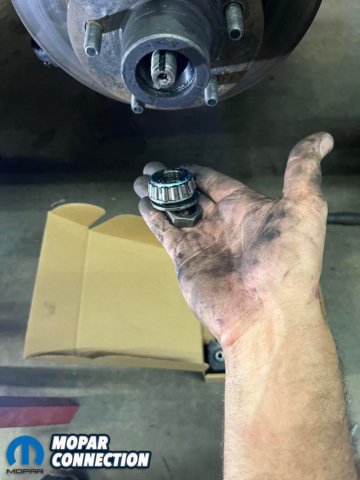
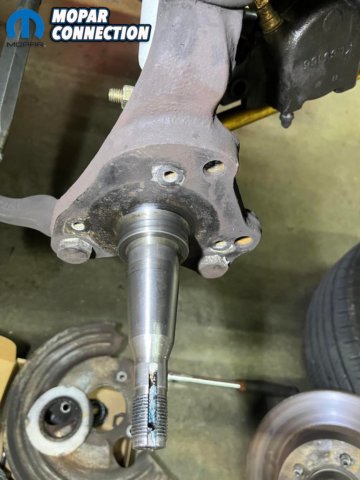
Above left: Removal of wheel hub nut. Above center left: Removal of outer wheel bearing inner race. Above center right: Dust shield removal via ½” wrench. Above right: Stripped down spindle.

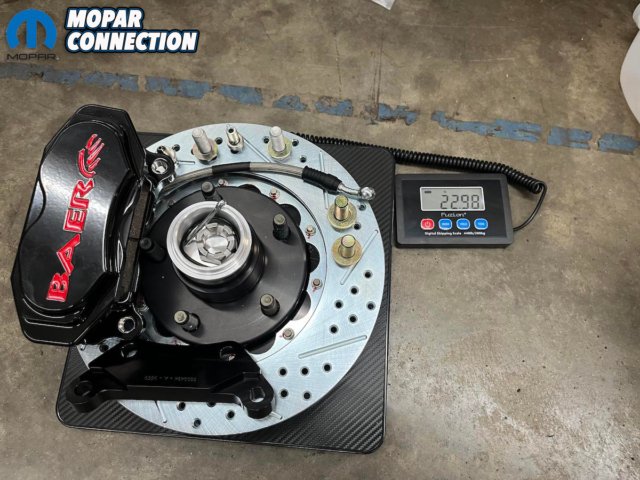
Above left: Factory brake components weighing in at 38.38 lbs. each. Above right: Baer brake components weighing in at 22.98 lbs for a 15.4 lbs savings (per side)!
Now swap sides and tear everything down again so you can bring that spindle over to the opposing side. Reassembly of the spindle was straight forward on the opposing side. Reattach the steering knuckles and upper ball joints. Torque upper ball joint nuts to 85 ft-lbs and the two lower steering knuckles to 120 ft-lbs and now it’s time to install the new stuff!
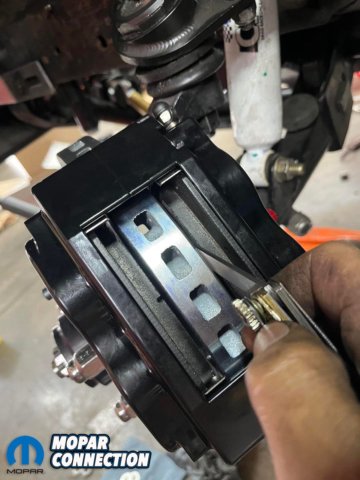
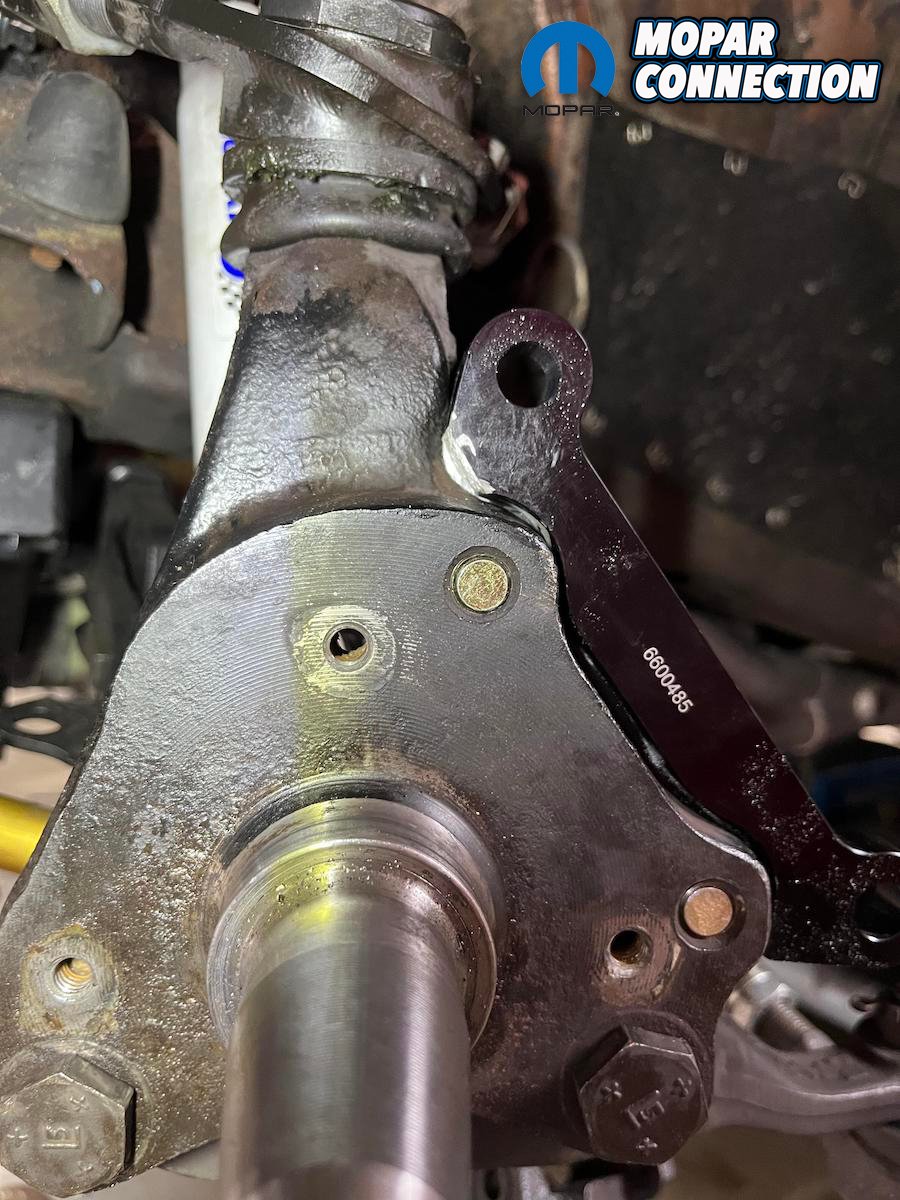
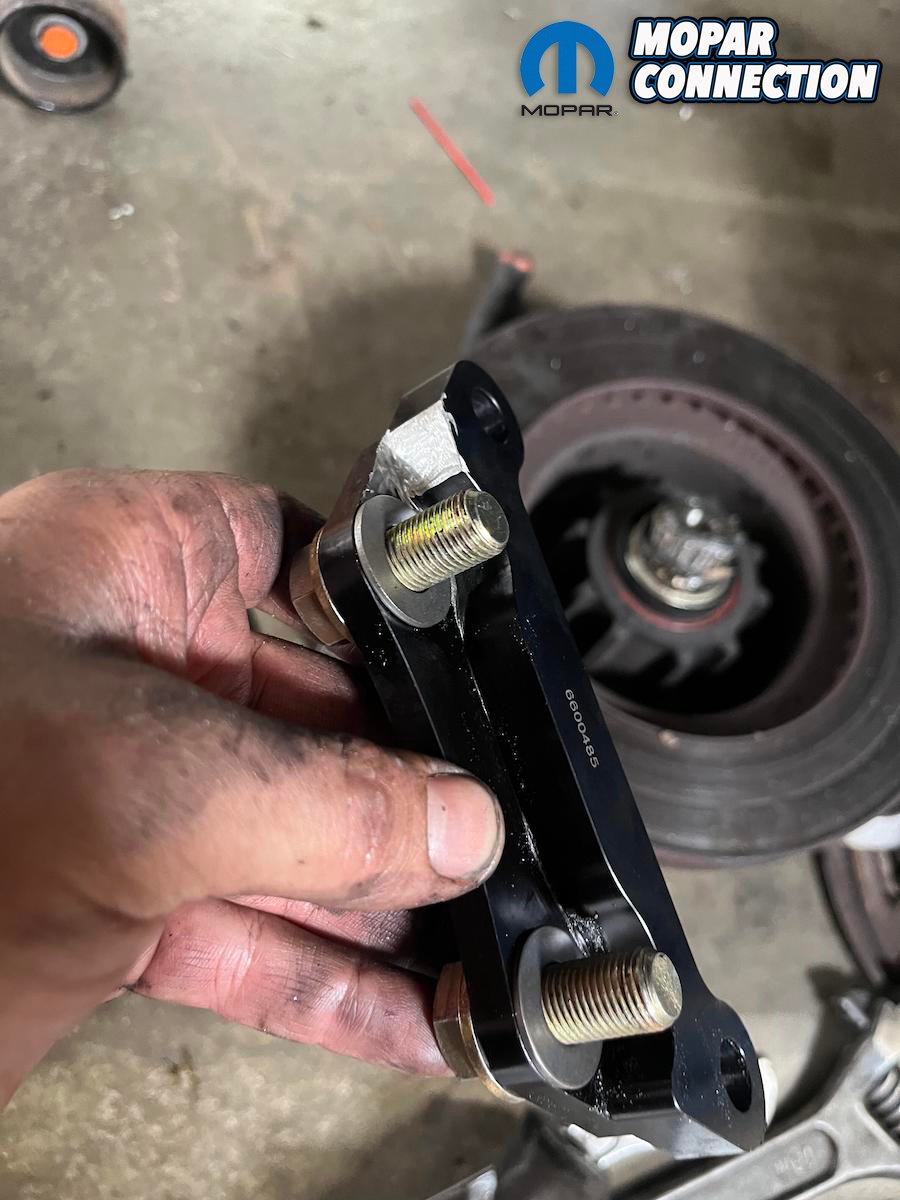
You’ll start with the caliper mounting brackets. For our car there was a small amount of interference that required some grinding – we used a Dremel with various attachments to make easy work of it. Baer does mention that there may be interference on certain year cars and advises to grind the spindle for clearance, we just opted to grind the bracket instead. Install the brackets with the provided ½”-20 bolts and get them snug, they may need shims later and will be torqued at final assembly.
Install the new billet aluminum hub next. The new bearings are pre-packed with synthetic grease so additional greasing is not required. You should apply a small amount of grease to the hub seal surface before sliding the hub on so everything seats smoothly without sticking. Per Baer they advise to install the spindle nut and tighten the nut to 5-10 ft·lbs and spin the hub to seat the bearings.
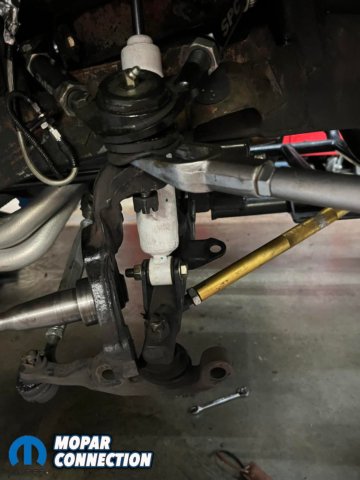

Above left: Upper ball joint castle nut to be removed with a 7/8” wrench (after extracting cotter pin). Above center: Steering knuckle removal via 15/16” wrench and 7/8” impact. Above right: Separating upper ball joint from spindle with pickle fork.
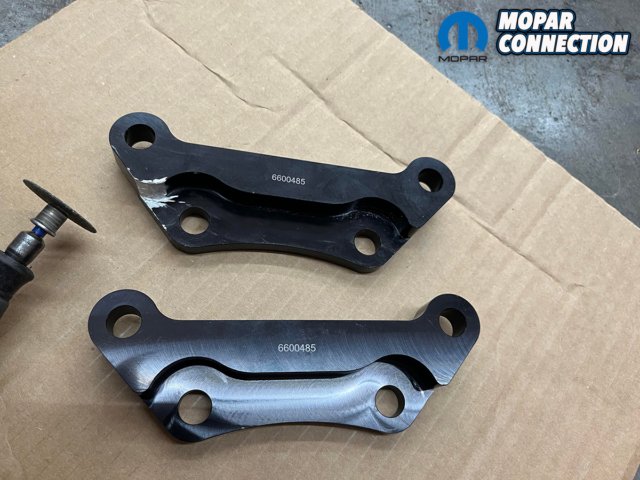
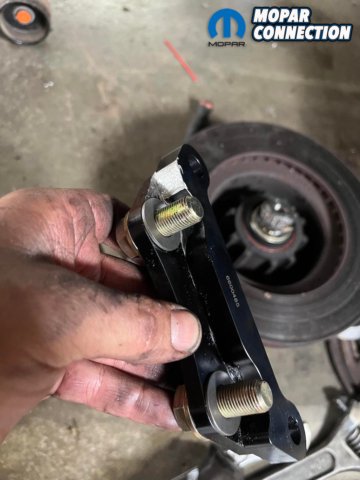
Above: Minor modification to the Baer caliper mounting bracket (left bracket modified, right bracket unmodified)
Loosen and re-tighten the nut while spinning the hub several times. Loosen the nut again and tighten to remove all play, tighten approximately 1/16th turn or more to align cotter pin holes. This process is so the assembly ends up with a small amount of pre-load. Install the nut retainer and secure it with the provided cotter pin and the spindle / hub assembly is complete.
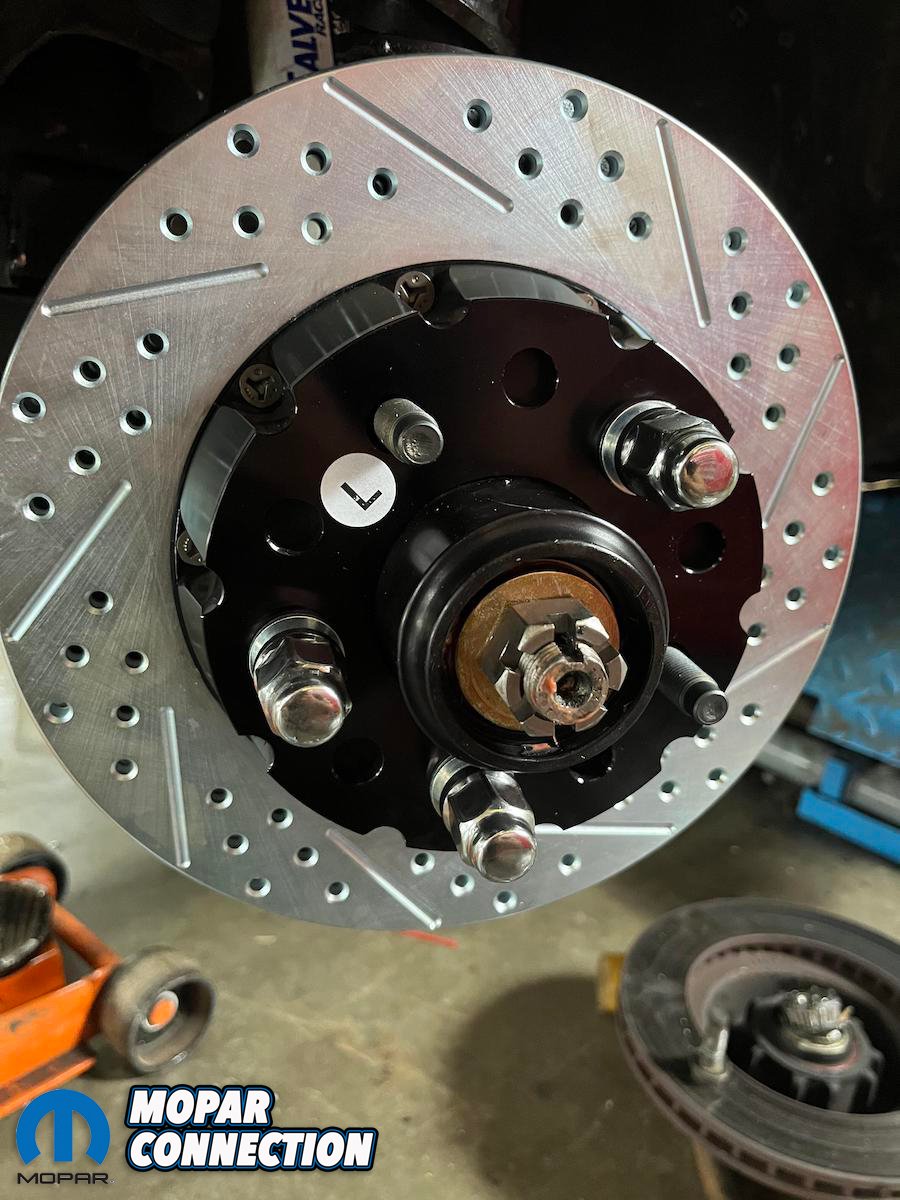
Next up identify the correct side rotor for whichever side of the car you’re working on, slide it onto the new hub and use some lug nuts to cinch it down so you can begin the scientific part of the installation. The goal is to have your caliper centered on the rotor; you’ll use the provided shims between the spindle and caliper mounting bracket as needed to achieve this. Some patience, precise measurements and math will help you get it all set correctly.
We started the process by making sure the pistons were compressed into the caliper body and then installed them with no pads. We tried to use dial caliper to measure the distance between rotor surface and the caliper surface, but our jaws were not deep enough.

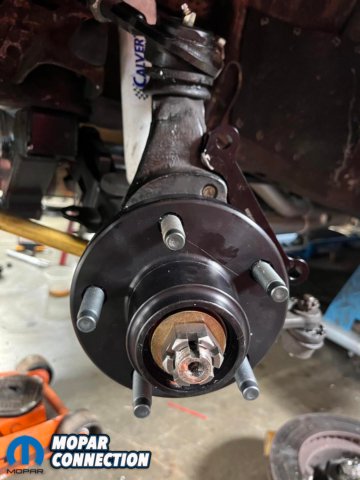
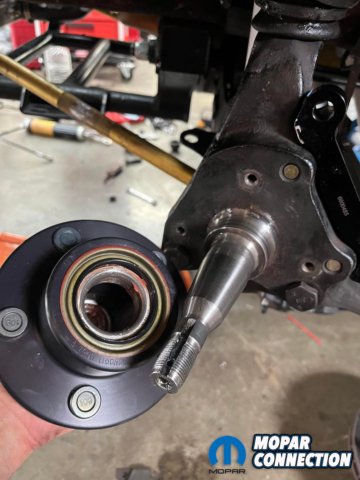
Above left: Modified bracket mounted on the reinstalled spindle (notice where the clearance was required). Above center: Baer wheel hub ready for installation. Above right: Baer wheel hub installed with castle nut holding it in place.
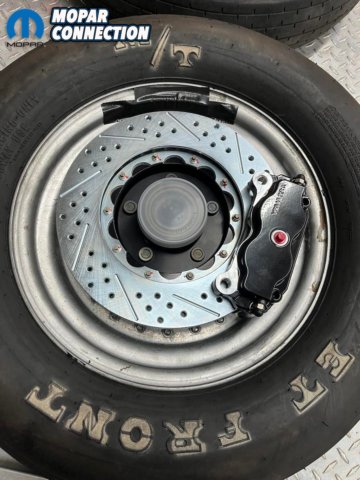

Above left: Baer caliper and rotor mocked up on the back side of our drag wheels, just to check! Above right: Baer brake rotor installed and held in place with lugnuts for caliper fitment next.
We opted for some small telescoping gauges which spring out to the width and then lock. Slide them out and measure them with the calipers. We measured in a few spots and then did the math to add shims. With the shims added we reinstalled the caliper but with brake pads this time and then double checked the gap on each side with feeler gauges.
Satisfied with our results we went ahead and torqued the ½-20×1.50” bracket bolts to 95 ft-lbs. and the caliper bolts to 85 ft-lbs. Take your time here and get it right so you do not end up with abnormal brake pad wear or compromised performance.
To wrap up the install (on this side) finger tighten the steel braid banjo hose end with one copper washer on each side of the banjo fitting into the inside of the caliper. Connect the hose to the hardline at the frame and install the hose lock clip. Be sure to position the hose to avoid interference with the wheel and suspension components through the entire range of motion and tighten fitting and banjo bolt to 15-20 ft-lbs.
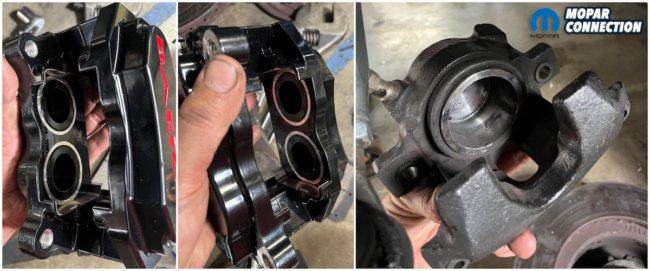
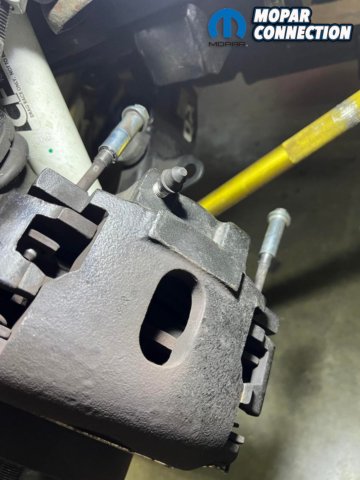
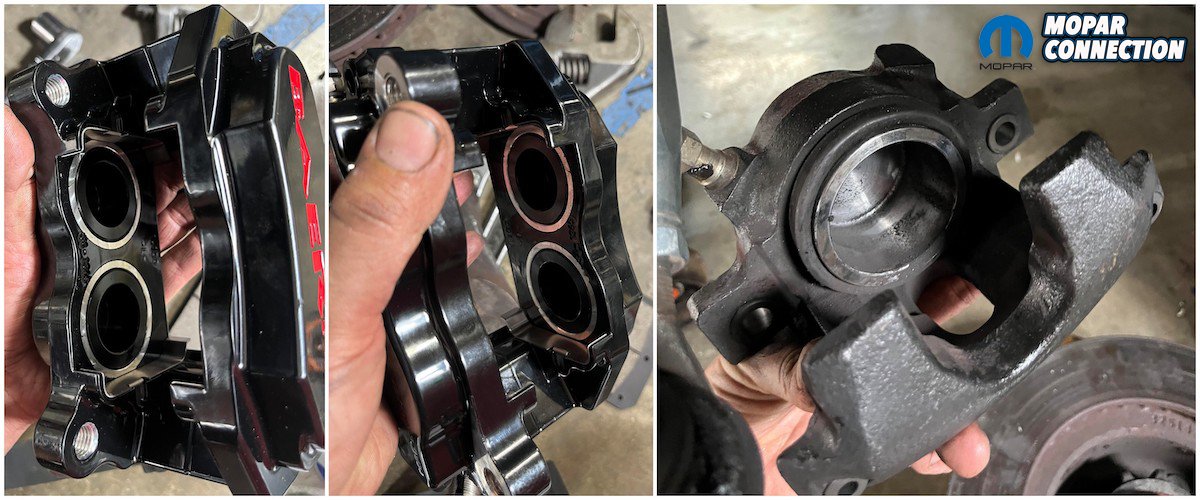
Above: Comparison of the Baer 4-piston calipers to the factory caliper
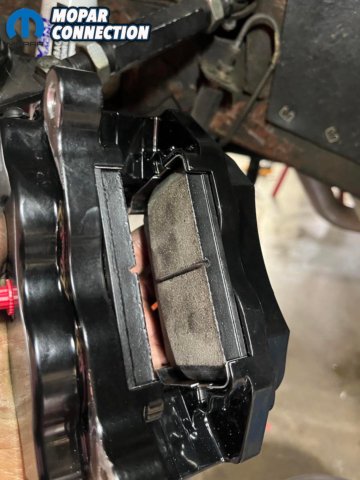
Above left: Caliper bracket with hardware and shims mocked up. Above center: Measuring the gap between caliper and rotor face with a telescoping gauge. Above right: Brake pads installed into the Baer caliper.
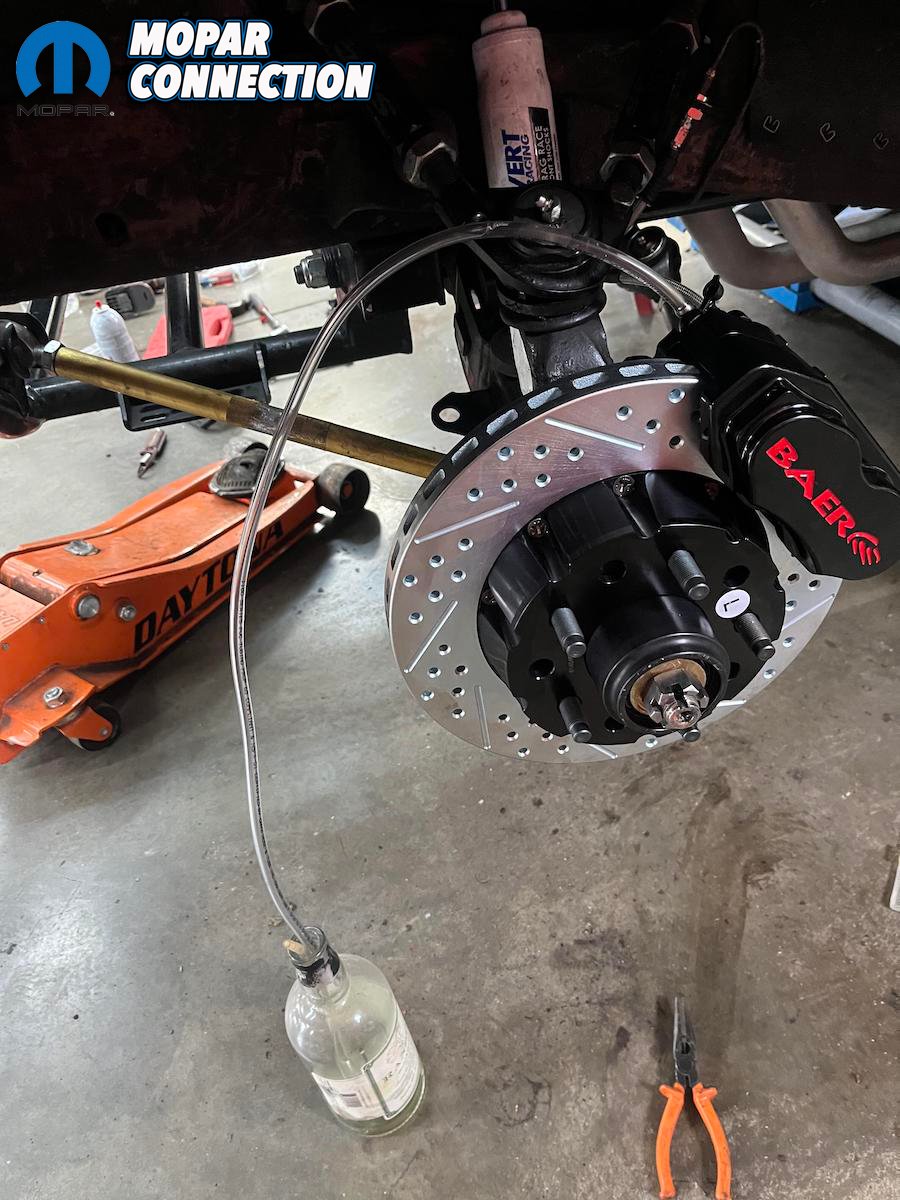
And now …. Do it all again on the opposite side and bleed the brakes and you’re done!
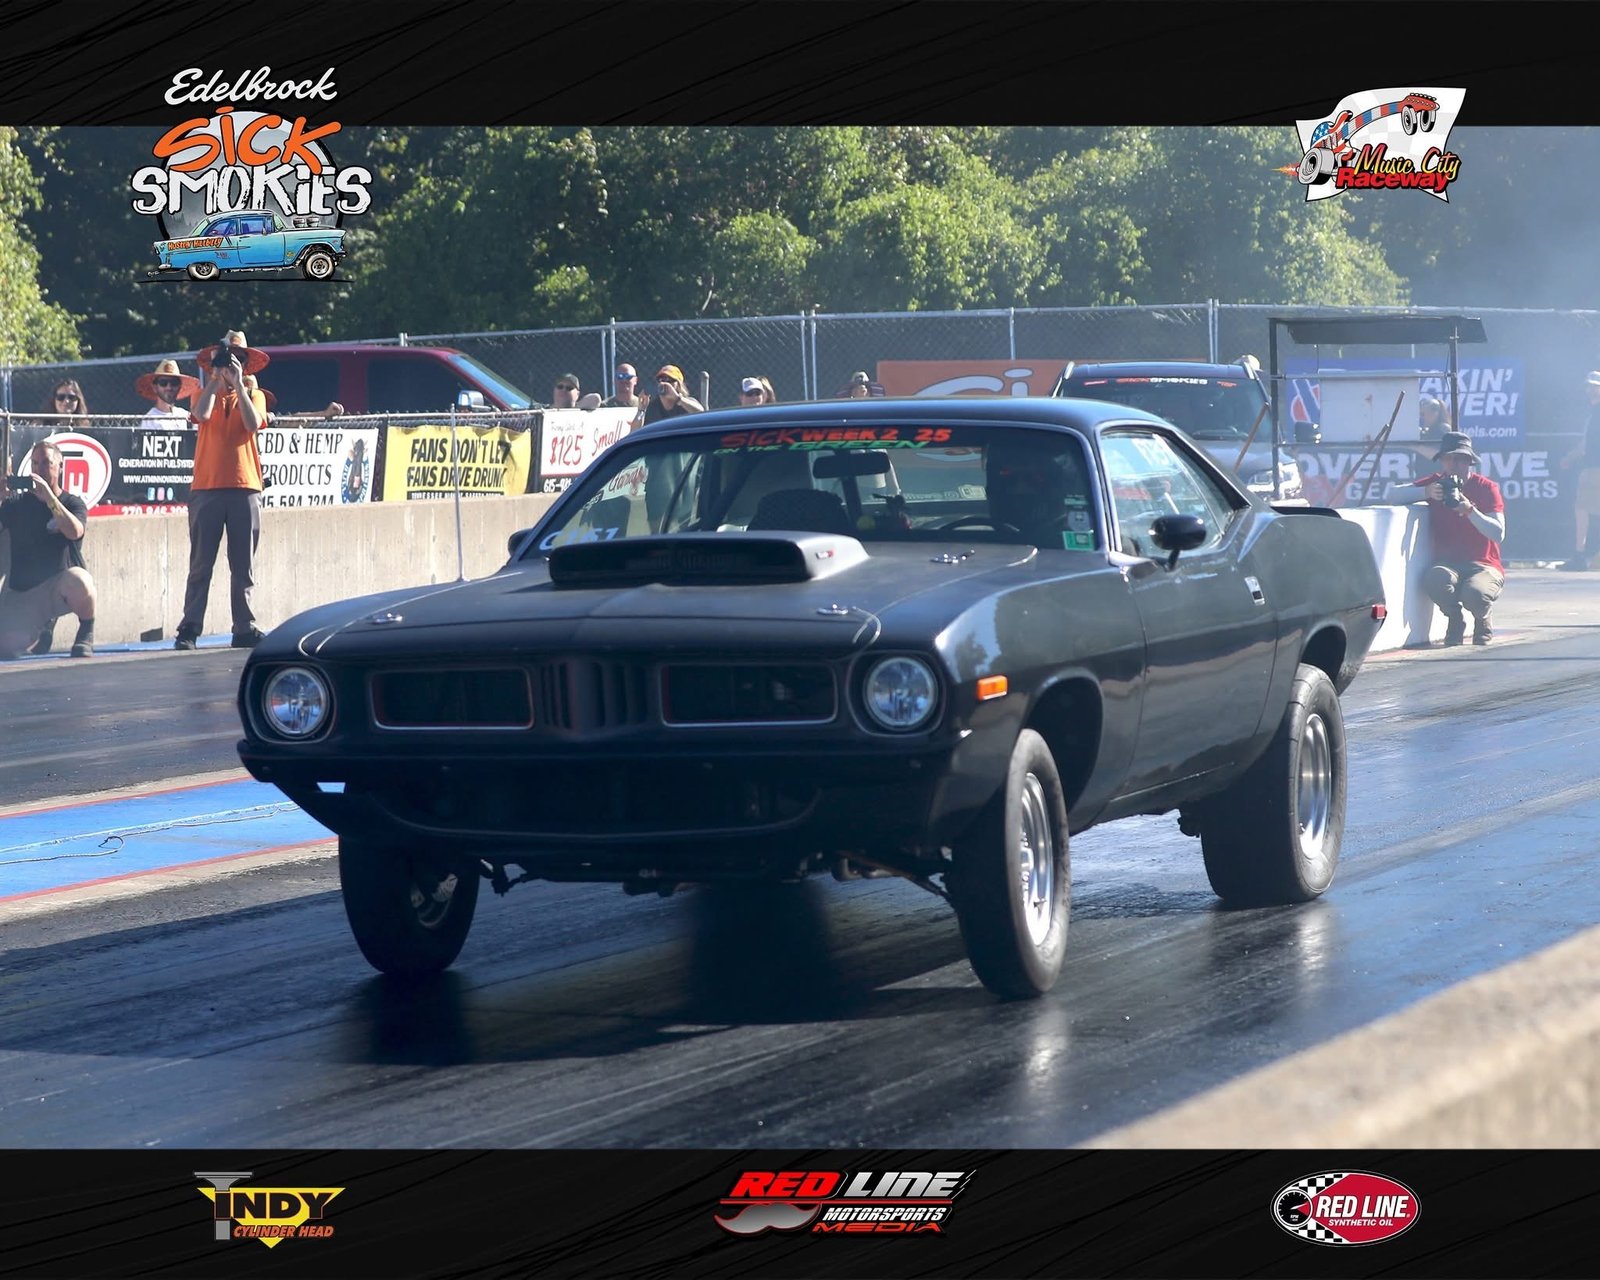
We were of course stoked about shaving 30.8 lbs of unsprung weight off of the nose of the car … buts let’s talk performance. Our ‘Cuda has manual brakes and a fairly loose converter. We foot brake it for launches at the track and the factory disc brakes would struggle to hold the car at 3200 rpm, 3000 rpm was its comfortable spot. With the bite of the Baer brakes 3600-3800 is no problem and if you really pump the brakes you can eek out a 4000 rpm launch.
If the track will hold it our car really likes a 3600 rpm launch for the best 60ft times; so for us the better brakes helped us with consistently lower 60 foot times. If your car has a trans brake this may be a moot point but for us it was a great improvement.
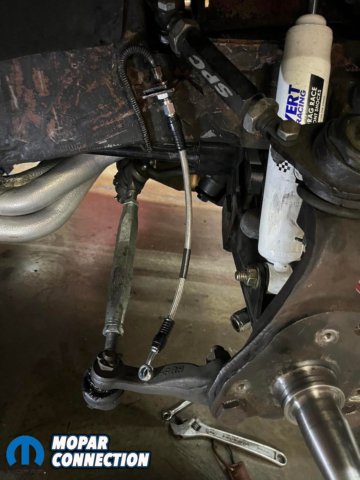
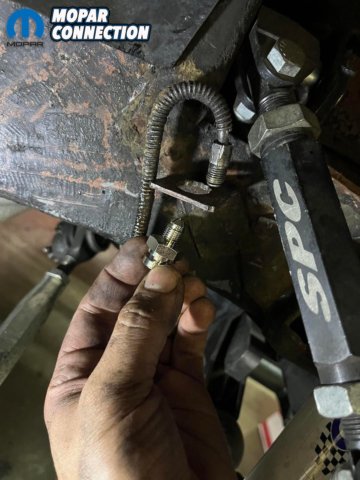
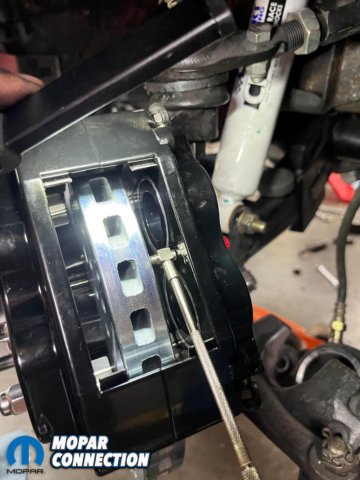
Above left: Verifying pad to rotor gap with feeler gauges. Above center: Installation of the new flexible brake line. Above right: Baer flexible brake line installed and ready to connect to caliper.
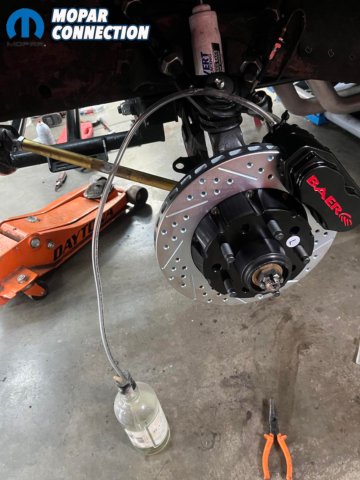
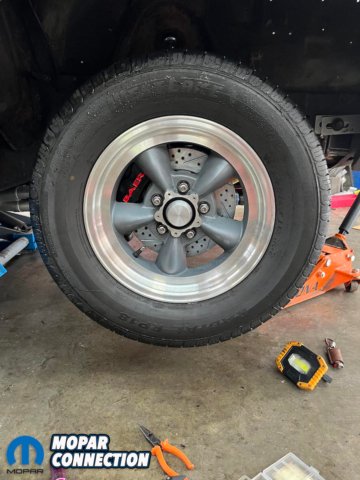
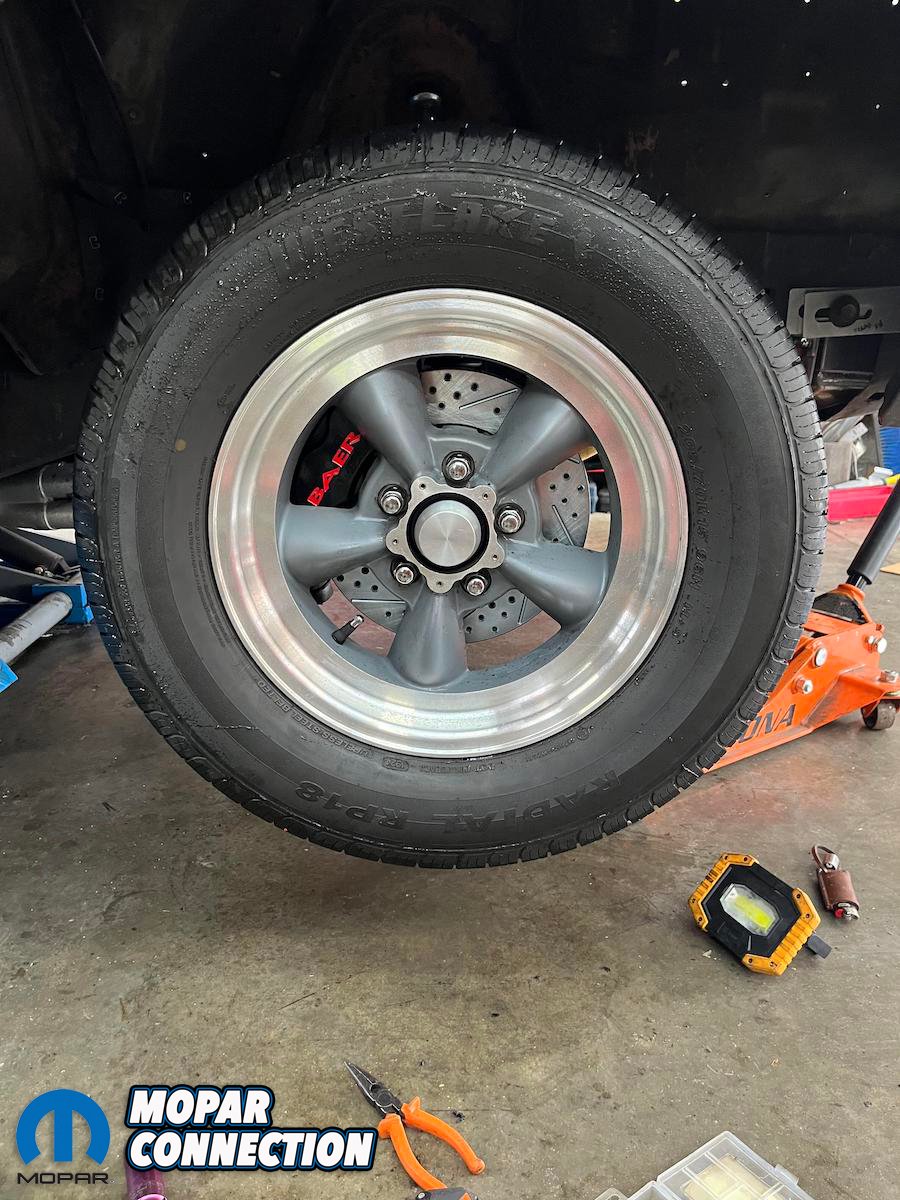
Above left: Baer caliper installed and hooked up for bleeding the brake fluid. Above right: The new Baer brakes tucked up nicely behind our 15 in. Torque Thrust wheels.
At the big end of the trap our car crosses the traps at roughly 120 mph. The factory disc brakes never made us feel uneasy slowing down from that speed but the Baer just feel better. We often hot lap our car and have not experienced any fade with the Baers after repeated rips. Smooth brakes with a good bits and no pull left or right.
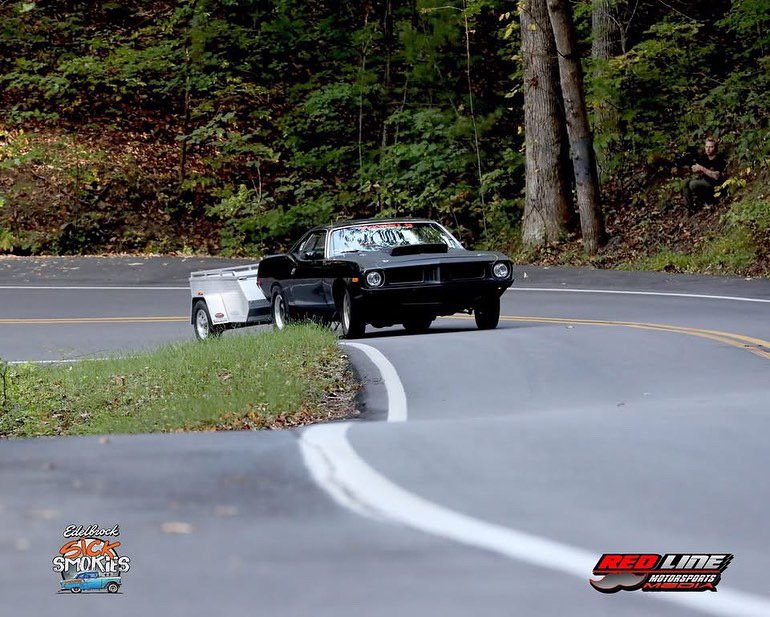
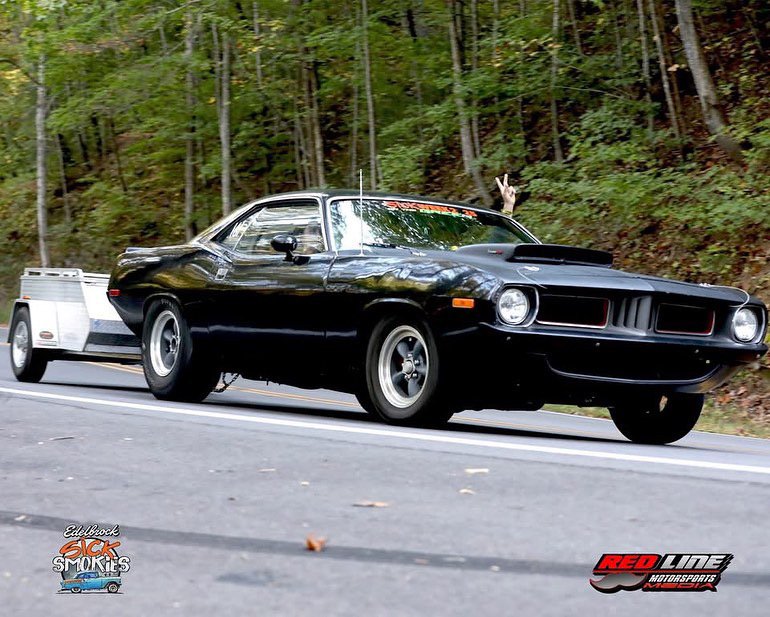
And now for the real test: how about braking performance on curvy roads all over the country towing our loaded Drag and Drive trailer? The Baer units didn’t mind one bit with another 700-800 lbs strapped to the back of the car! Being from Tennessee we jumped at the opportunity to race in the Sick Smokies Drag and Drive in the fall of 2025.
One of the drive days took us down the Tail of Dragon, and being no stranger to this strip of road we pushed our car hard through the twisties. The car handled great and slowed down in the curves with no problems, other racers and a few cruisers that day moved out of our way on pull offs so we could rip (and we were very thankful for that).
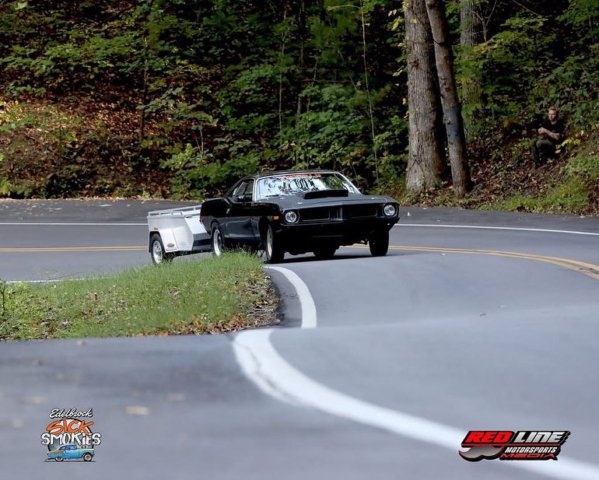

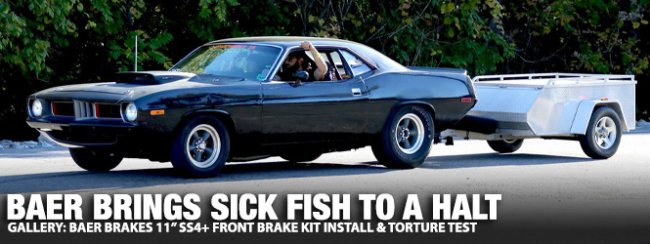
Above: Our ‘Cuda and trailer rig for Drag and Drives tackling the Tail of the Dragon during Sick Smokies.
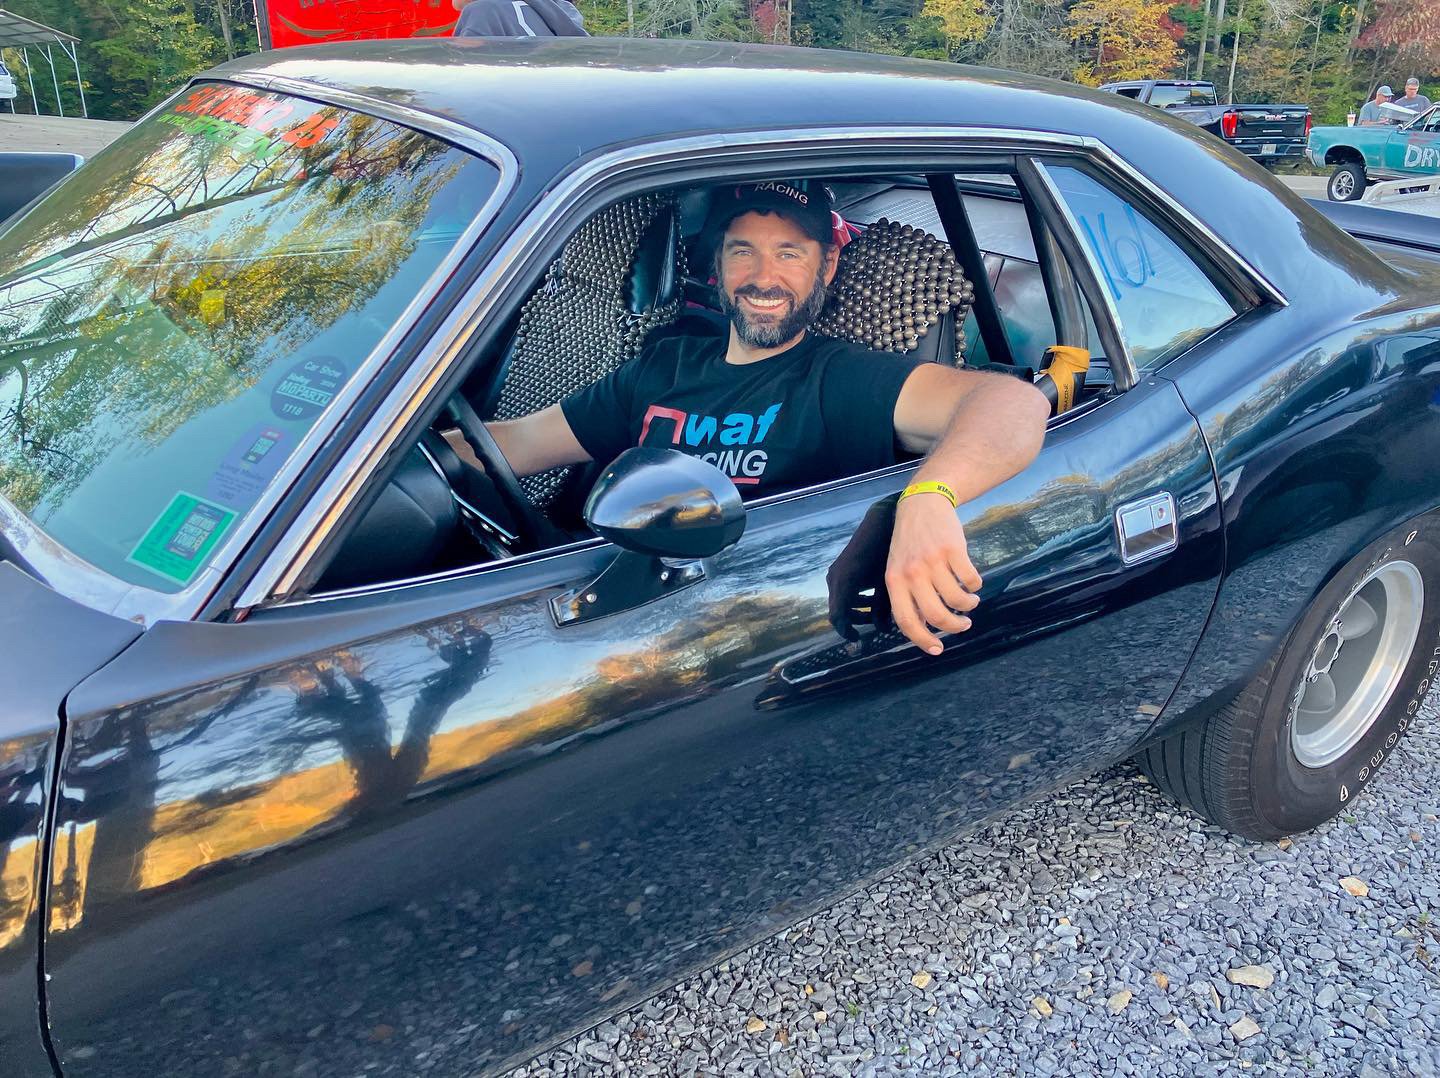
My co-pilot and I were laughing the whole time as we rolled; it was just a sight to see, and I would have never thought I’d be talking one of my dream cars – which is a drag car – towing a trailer down the Tail of the Dragon and burying it into the corners like we were in some sort of sports car. Manual steering, manual brakes, no front sway bar and a trailer in tow. Why not?!
The car handled great and the brakes remained unphased with no brake fade throughout. An honorable mention should go out to our QA1 Double Adjustable Shocks as well for helping get the car set up for street and track with a few turns of a dial. The entire event tested the brakes at the track and on curvy Tennessee roads and we were very pleased with the performance for a set of squeezers that fit under 15 in. wheels.
So if you’re considering a brake system upgrade for your car don’t overlook the offerings from Baer – we highly recommend them!


