


Sammy Hagar’s “I Can’t Drive 55” is an ’80s staple for all gearheads, as we tend to have a need for speed. Unfortunately, that need for speed comes with drawbacks, such as living with a high-revving engine when cruising and the inability to pass many gas stations before a fill-up is necessary. Because of our need for speed and an enjoyable cruise RPM, we decided to install a Gear Vendors overdrive unit in our ’73 Plymouth ‘Cuda.
We use the ‘Cuda for local cruising and drag-and-drive events like Sick Week, Hot Rod Drag Week, and The Circuit. Cruising “slow” on the “drive” portion of these events is just no fun, and it is even worse if all your friends have overdrives.
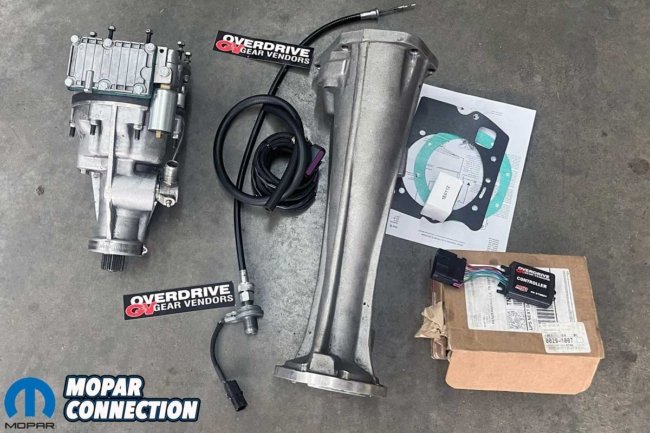
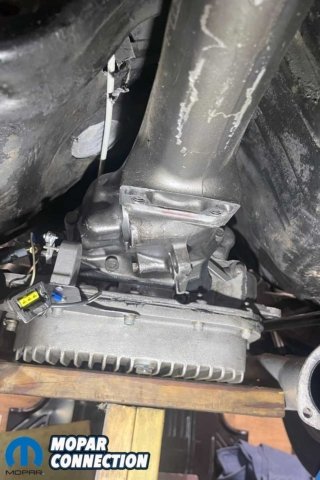
Above: The Gear Vendors kit for our ‘Cuda came with the overdrive unit, tail shaft extension, gaskets, cables, and electronics to work with the ‘Cudas speedometer.
Our ‘73 has a Moser 8.75 Muscle Pak rear end sporting a 3.91:1 gear. The steeper gear helps us get the car out of the hole at the track, but it does not create the most enjoyable cruising experience on the highway.
Based on the math, with our 28-inch tall rear tire, we would be turning 3,500 RPM to cruise at 75 mph. With some converter slip (our car has an ATI brand 8” converter with an approximate 3,500 RPM stall), the reality is we see around 3,600 RPM. Our bolt-on Gear Vendors overdrive unit, with its 0.778:1 overdrive, would drop the RPM significantly with the push of a button.
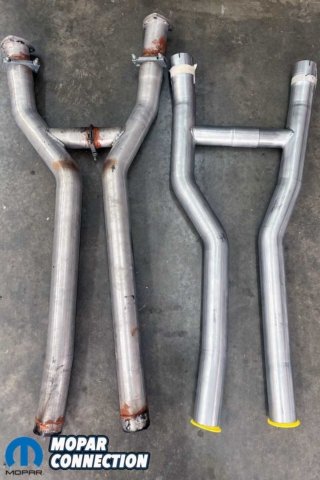
Above Left: The TTI exhaust on the ‘Cuda (left) would not fit with the Gear Vendors unit. TTI does make a mid-pipe that clears the unit and still attaches to the header pipes and the mufflers without additional modifications. Above Right: We decided to weld the header pipe adapters to the mid-pipe and use band clamps on the mufflers.
That means we could run around 2,750 RPM to achieve that same 75 mph cruising speed. However, with converter slip, it would probably end up closer to 2,900 RPM.
We finally decided on the Gear Vendors after signing up for the Sick 66 event, which would take us on a 3,000-mile journey in the ‘Cuda. Although the 0.778 overdrive ratio is a great improvement, we wanted more, so we installed a pair of Firestone Destination 265/75R15 (30.65” diameter) tires under the rear of the ‘Cuda.
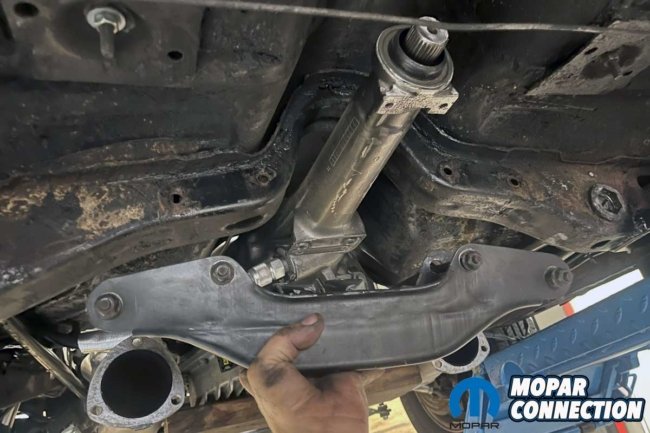
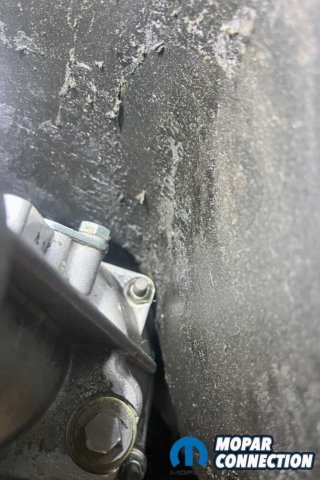
Above: The transmission support member (crossmember) had to be removed to access the transmission. The tail shaft housing would be removed and set aside as it would not be reused with the Gear Vendors installation.
The larger diameter reduced the theoretical RPM at 75 mph by approximately 250 RPM, dropping it to around 2500 RPM at 75 mph. Again, with the converter slip, we would likely end up around 2700 RPM.
The installation of the Gear Vendors overdrive unit was straightforward. Our first step was to order the kit. We recommend discussing your combination with one of the Gear Vendors’ specialists to ensure the kit ordered will fit and operate correctly.
Above Left: We used a few blocks of wood to support the transmission with the cross member removed. Above Right: With the speedometer cable and gear removed, we accessed the snap ring, which held the output shaft bearing to the tail shaft housing.
Our kit was for a 3-speed 727 with an 18” tail housing and a 3.91 rear gear ratio. It included the Gear Vendors unit, replacement tail housing, gaskets, electrical controller, wiring, floor dimmer switch, speedometer cable extension, and a new yoke.
Based on proactive research, we determined that our TTI exhaust system would need to be modified to work with the Gear Vendors unit. When we installed our exhaust system two years ago, we had not considered installing a Gear Vendors unit, so we did not concern ourselves with the two different versions of the TTI mid-pipe section.
Above: To slip the tail shaft from the Torqueflite, we removed the bolts that secured it to the transmission housing. The governor, park pawl, speedometer gear drive, and bearing looked good.
We acquired the correct mid-pipe section and changed the exhaust system before installing the overdrive unit. For easier exhaust removal, we fitted and welded the pipes from the mid-pipe section that extended to the header collectors and used band clamps at the mufflers. This modification would make installation and removal of the exhaust less difficult.
The Gear Vendors installation can be performed with the car on jack stands, but we were thankful for our small scissor lift. To start the installation, we removed the mid-pipe and the driveshaft (we had a drain pan available to collect any ATF drips) and disconnected our speedometer cable (or electronic speed sensor, in our case).
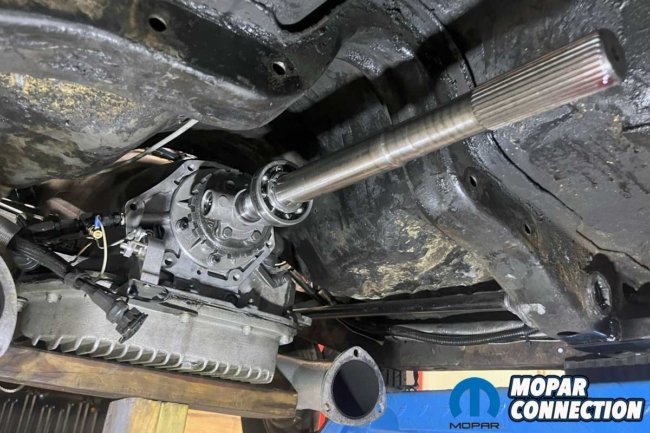
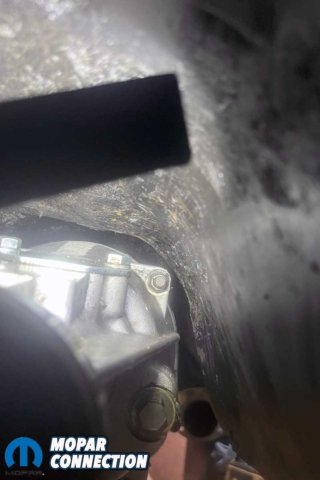
Above: We pulled back to provide a better view of what must be removed before installing the Gear Vendors tail shaft and overdrive unit.
We placed a jack under the transmission to support it while removing the cross member. Next, we removed the bolts holding the tail housing to the transmission case. With the jack supporting the transmission, we tilted it down a little to give easier access to the mounting bolts. If your car has a small block like ours, be sure your distributor does not hit the firewall. If there is any doubt, remove the distributor.
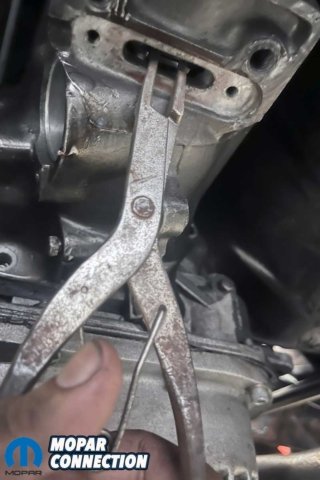
With the transmission in park, we removed the small cover on the bottom of the tail shaft housing secured by two Phillips screws. Here, you will need patience and a good pair of closing-style snap ring pliers to unseat the snap ring, which locks the tail shaft bearing to the housing. With the snap ring released, we removed the housing after a few strategically applied mallet blows.
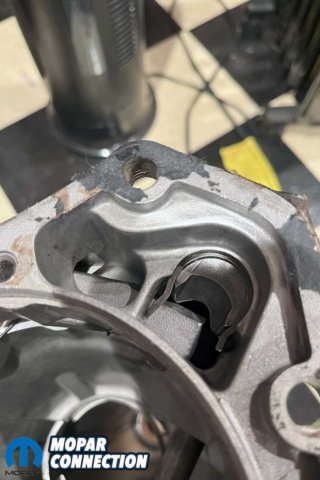
Above Left: The snap ring from the factory Torqueflite was not removed. Above Right: Instead, the Gear Vendors tail shaft extension includes a new snap ring to secure it to the transmission output shaft.
Following the instructions, we swapped parts from the factory tail housing into the Gear Vendors tail housing. We removed the lock pawl assembly and the snap ring for the bearing from the original tail housing and noted how they came apart so we could easily transfer them to the Gear Vendors tail housing.
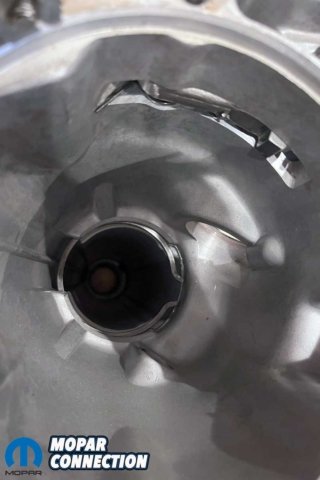
We cleaned the gasket surface on the transmission main case, slid the new gasket over the tail shaft, and applied Edelbrock Gasgacinch to hold the gasket. Continuing, we installed the new tail housing and manipulated the snap ring into place. Upon locking the snap ring into the bearing groove, we reinstalled the small cover over the snap ring opening. We reinstalled our four bolts and torqued them to 28 ft-lbs.
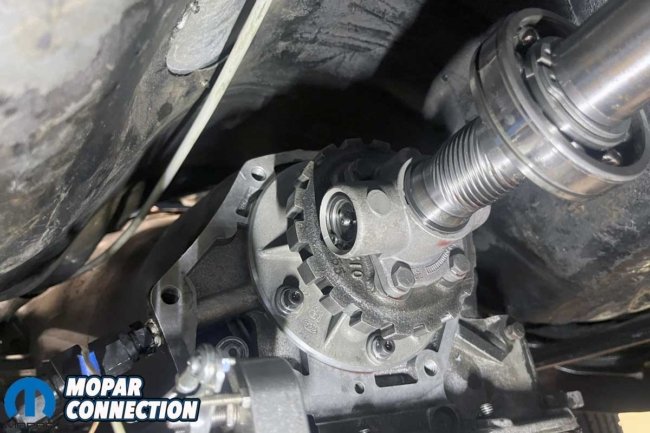
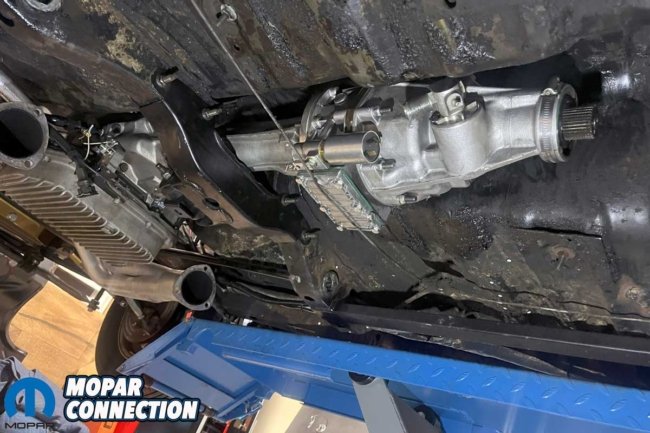
Above: The Gear Vendors tail shaft housing bolted to the transmission housing. We located the snap ring and secured the bearing on the output shaft to the tail shaft housing. The factory transmission crossmember supported the new tail shaft. We added a new transmission mount before installing the crossmember.
Before reinstalling the transmission cross member, we removed the old rubber transmission mount and installed a polyurethane piece. While not a requirement, we felt the additional weight of the overdrive unit and the mount’s age may lead to future problems. With a new, stronger mount, we felt more confident.
We proceeded to reinstall our transmission cross member and secure the transmission. A coupler is required from the transmission’s output shaft to the overdrive unit. A few measurements and shimming were needed to fit it properly and achieve the correct coupler end play.

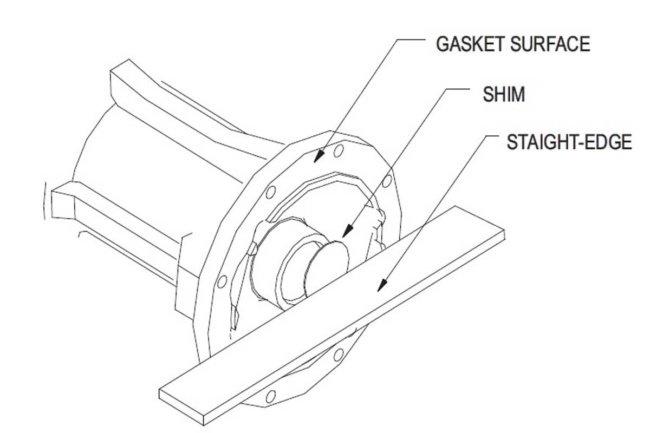
Above Left: The Gear Vendors kit included a coupler that slips over the output shaft splines and the overdrive unit’s input shaft. The shims were used to attain the proper end play. Above Right: A “straight edge” was placed on the gasket surface of the Gear Vendors extension housing, and we added shims to achieve the desired measurement.
The measurement procedure was as follows: We installed the gasket on the surface of the tail housing, greased the splines, and slid the coupler over the splines until it stopped. Next, we laid a straightedge across the gasket surface and used feeler gauges to measure the gap between the straightedge and the coupler’s face. The end play should be less than 0.020″. If it is greater, remove the coupler and add shims (provided with the kit).
To install the overdrive unit, we lined up the eight ½”-28 studs on the overdrive unit and slid it into place. However, during the installation, we quickly discovered that massaging in the tunnel would be required to allow the unit to align with the transmission housing. We grabbed an array of hammers and dollies to remedy the problem. After minor manipulation of the sheet metal, the unit slid in place. The eight studs were torqued to eight ft-lbs in a crisscross pattern.
Above Left: The Gear Vendors overdrive unit hit the driveshaft tunnel when we tried to fit it onto the extension tube. Each floor pan is slightly different from another, so in small number of cases (like ours), there was some interference. Above Right: After a few taps with a dead blow hammer, we had the desired floor-to-overdrive unit clearance.
Next, we needed to figure out the driveshaft situation. The supplied yoke uses a 1350 U-joint. We decided on a new driveshaft rather than shortening the factory driveshaft. We also liked the idea of having the stock driveshaft around if we desired to someday reinstall the stock driveline.
With all four wheels on the ground, we pushed the new yoke all the way into the overdrive unit and measured from the center of the U-joint hole to the face of the yoke where the strap attaches to the rear differential. We subtracted 5/8″ to determine the required driveshaft length. Our driveshaft ended up being 30″ long. A local facility made a driveshaft to our specifications.
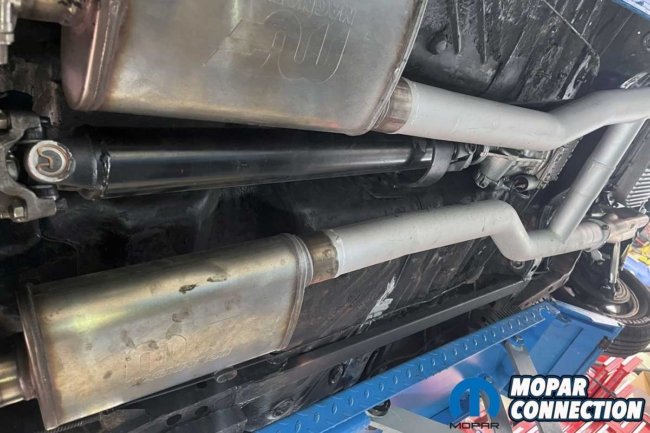
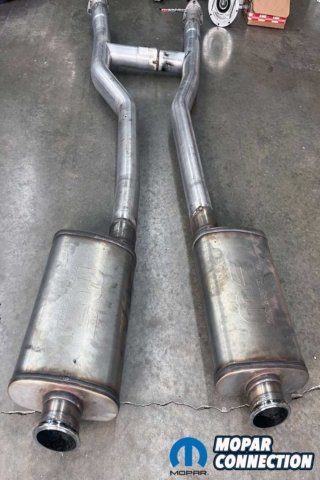
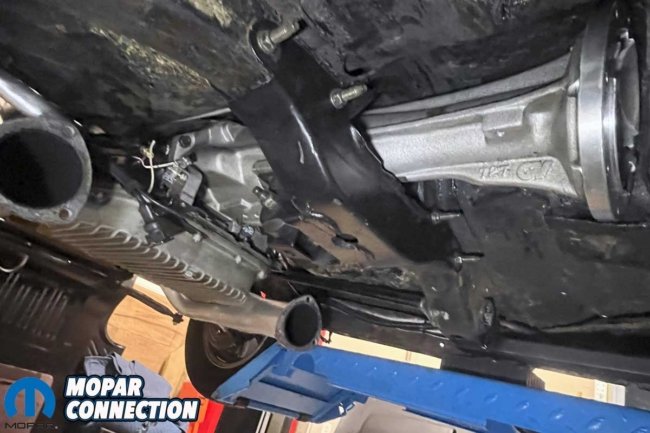
Above Left: After a light massage of the floor, the overdrive unit fit like it was installed at the factory. After the photo, we had to reroute the park brake cable because it rubbed on the overdrive unit. Above Right: We installed the custom-built driveshaft (sourced locally) and fitted the new TTI mid-pipe and muffler section of the exhaust.
While we waited for the driveshaft’s construction (delivered the next day), we installed the speedometer cable. Gear Vendors supplied an extension cable with a speed sensor as part of their package. We routed the extension cable as the factory had and threaded it into the overdrive unit. After installing the extension cable, we attached the speedometer cable to the Gear Vendors speedometer sensor.
However, because we were running an electronic speedometer with a speed sensor, we later learned the Gear Vendors sensor and our speed sensor interfered. We placed a 6″ speedometer extension between the two sensors, which fixed the electrical interference issue. If a speedometer needle bounce had occurred when driving, a small portion of the metal cable that slipped into the sensor may have needed to be trimmed.

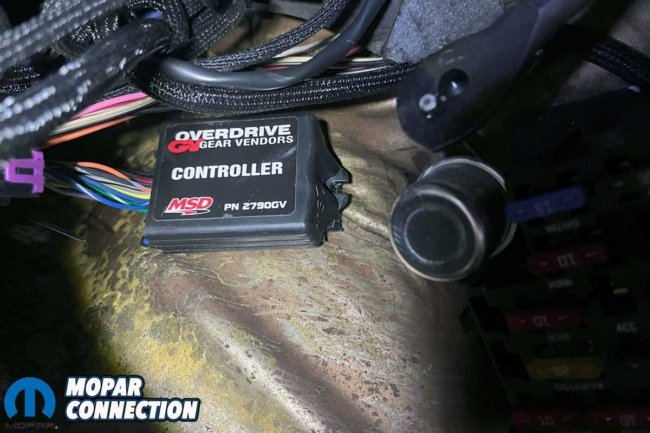
Above Left: Due to electromagnetic interference (EMI), we added a 6″ speedometer cable to spread out the Gear Vendors speedometer sensor and our current Dakota Digital speed sensor. Above Right: We installed the Gear Vendors overdrive controller under the dash.
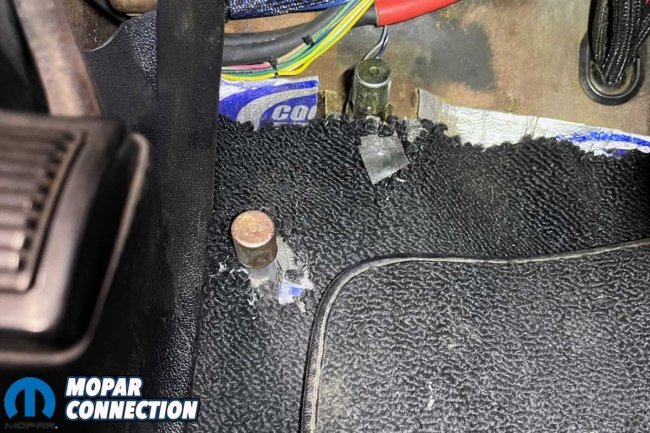
We noticed that our emergency brake cable was running right across the bottom of the sump on the new overdrive unit, so we adjusted it and routed it in front of the sump. We placed a rubber hose around the cable so it would not chafe against the aluminum overdrive housing. To wrap up the mechanical installation, we installed the driveshaft and reinstalled the exhaust.
Luckily, the electrical installation was less complicated than the mechanical portion. Gear Vendors supplied a sleek control box, a nice harness, and concise instructions on how to wire it. Since our transmission has a reverse manual valve body, we omitted the auto/manual function. With a traditional valve body, the “auto” mode automatically kicks the car into and out of overdrive at a certain RPM.

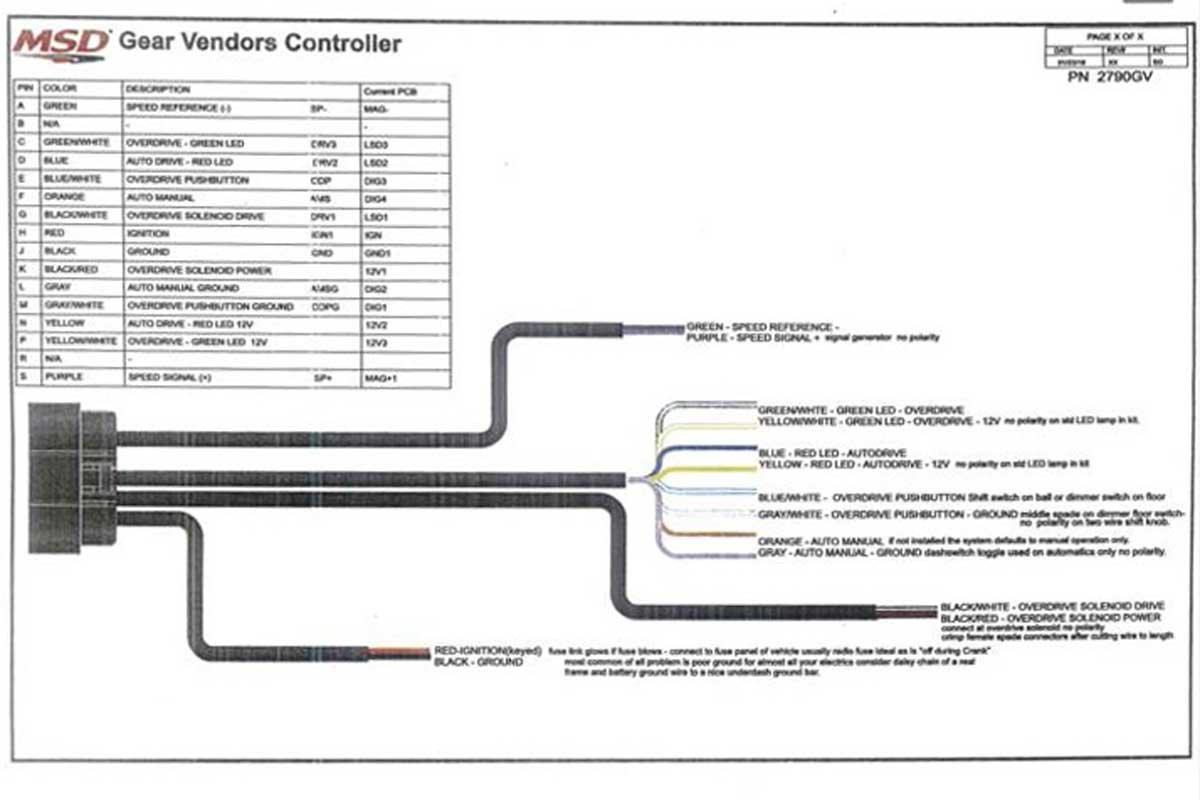
Above Left: The Gear Vendors kit includes an easy-to-follow color-coded MSD wiring diagram. Above Right: Velcro temporarily attached the overdrive switch (upper right) to the floor. We found the most comfortable location before permanently attaching it.
We used Velcro to attach our control box under the dash and ran the harness to the car’s underside through the hole where the stock shifter pivot arm comes through the floor. Our car uses an aftermarket ratchet shifter, and its cable operation rather than linkages provided a damage-free area to run the harness. The wiring is straightforward: find a clean 12-volt source to power the unit and route the harness away from heat sources and sharp edges.
Some users prefer a push button on the shifter to operate the Gear Vendors unit, while others prefer adding a switch on the floor by the headlight dimmer switch. We opted for the floor dimmer switch option. The overdrive switch was placed next to the dimmer switch in the factory position. We drove around with the switch attached via Velcro to the floor for a few days while determining where we preferred it. Once we found the perfect location, we permanently mounted it with bolts.

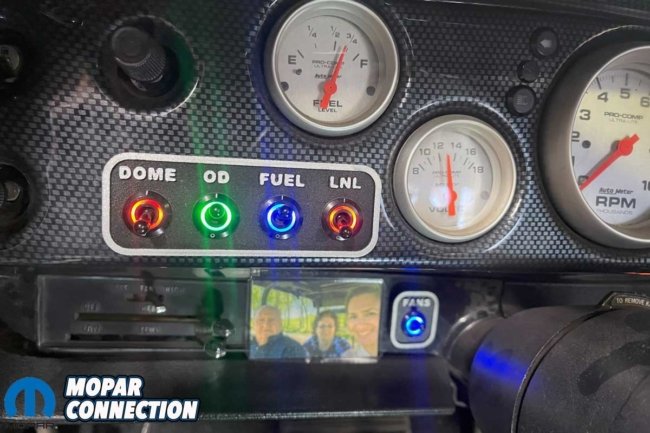
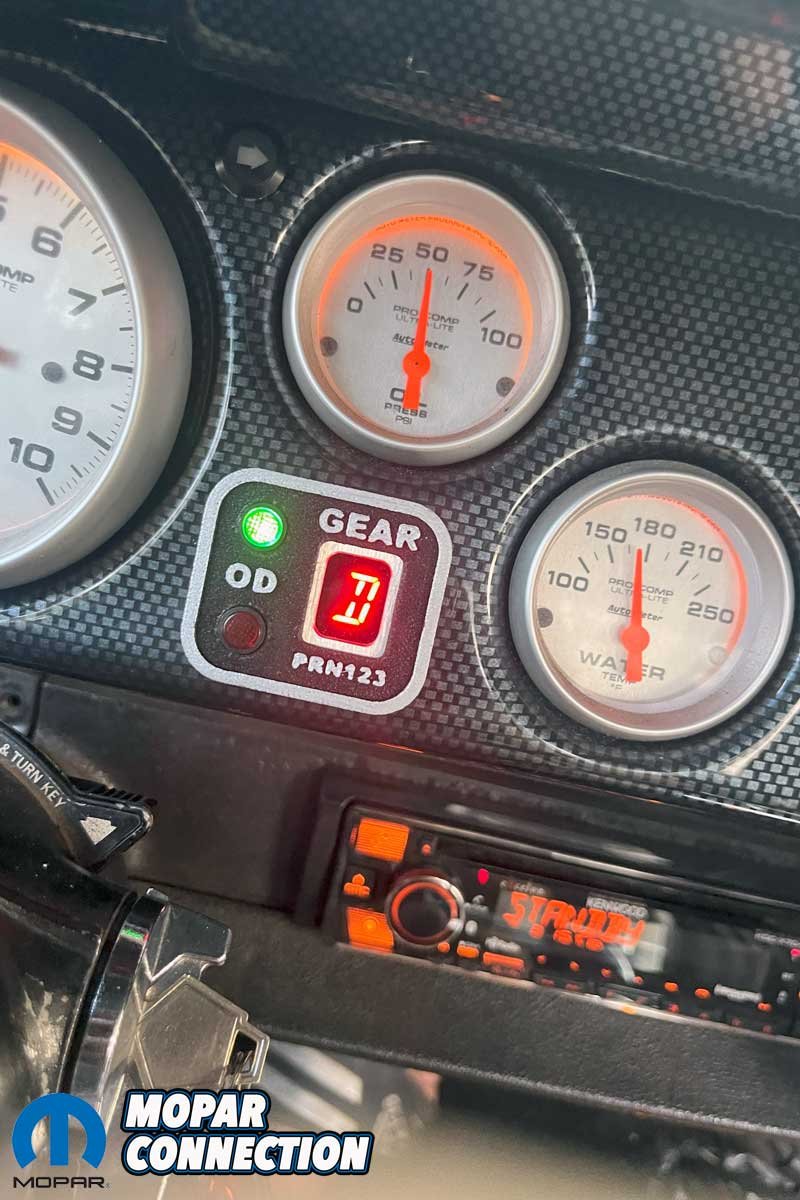
Above: Since we had Dakota Digital instrumentation in our dash, we added the Gear Vendors gear and overdrive selections to the display.
We were already running the slick Dakota Digital gear position indicator setup (Dakota Digital Universal Gear Shift Sending Units GSS-3000 and Alpha-Numeric LED Gear Shift Indicators DGS-1R), so we decided to make a small bezel to house the Gear Vendors on/off indicator lights. We also incorporated a master on/off switch into our instrument panel so we could deactivate it when others drive the ‘Cuda.
How did the Gear Vendors Overdrive perform? It was just as advertised. With the push of a button, we could engage the overdrive for all the Sick 66 events. We cruised 75-85 mph with no issues. Per Gear Vendors instructions, it is advised to disengage the unit below 55 mph, so the unit does not suffer any damage.
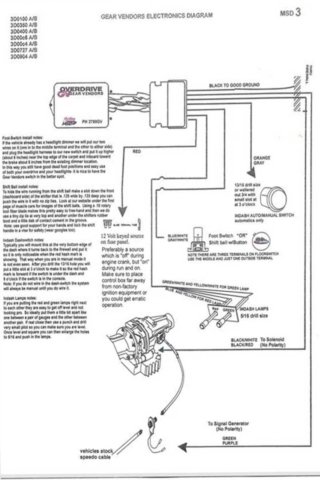
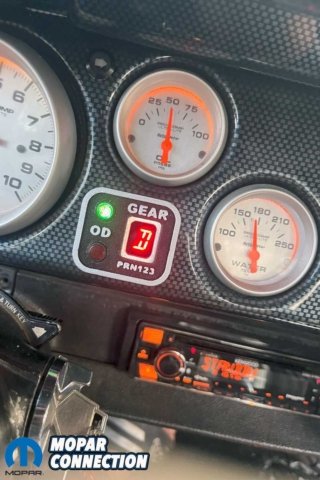
Above Left: Additional wiring schematics provided greater details about installing the switches, lights, and buttons. Above Right: We had an additional location on the Dakota Digital display that displayed the gear and overdrive status.
Learning to shift into overdrive without hearing a “clunk” took some practice. When engaged while on the throttle, it is smooth. However, the thud can be shocking when engaging while off the throttle or under constant deceleration. We found that a quick blip of the throttle while disengaging (like rev-matching in a manual) made the disengagement seamless and sounded fabulous.
We have not touched on the fact that the Gear Vendors unit can also be used to split gears. That means you can have a gear between 1st and 2nd and between 2nd and 3rd. We did not use the Gear Vendors for that, but we did use it going over a winding mountain pass for Sick 66 (towing our trailer). When 1st gear was too much RPM, but 2nd gear was almost lugging, having a half gear was perfect. The same goes with having a gear between 2nd and 3rd gear.
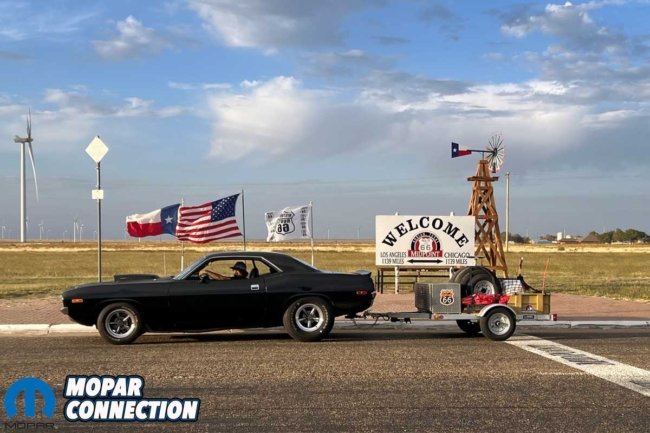
Above: The ‘Cuda in street trim with its trailer during the Sick 66 event looked great and ran even better. With the Gear Vendors overdrive unit installed, the lower engine RPM during the street portion of the event was much more enjoyable.
Like most things regarding hot rodding, installing and setting up a Gear Vendors overdrive may vary slightly based on your combination. However, most enthusiasts would be delighted to add this to their car because of the greatly reduced engine RPM, which will afford you the opportunity to cruise in comfort.


