


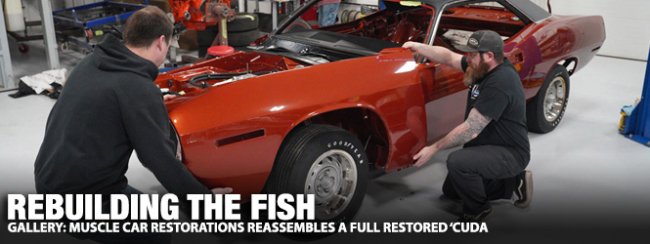
The dream is almost realized. All the previous effort has finally come down to this. It’s time for Muscle Car Restorations (MCR) to bring all of the individual restored parts back together to create what has been fantasized about for a very long time.
The body parts are like new again, better really. The engine has been assembled and tested, actually broken in even. The interior either is new or looks like it again. The transmission, differential, and every suspension component have been returned to factory specs.
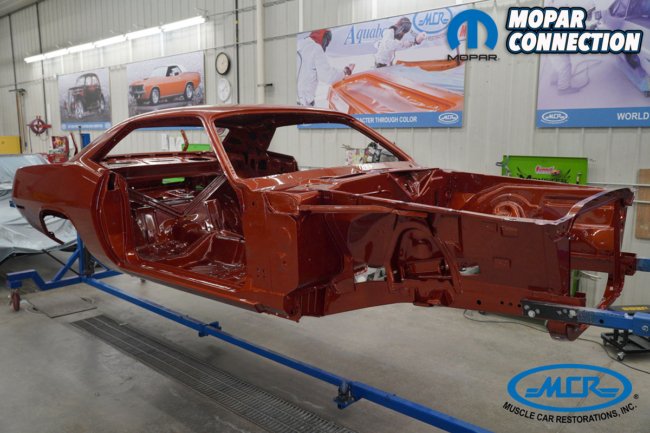
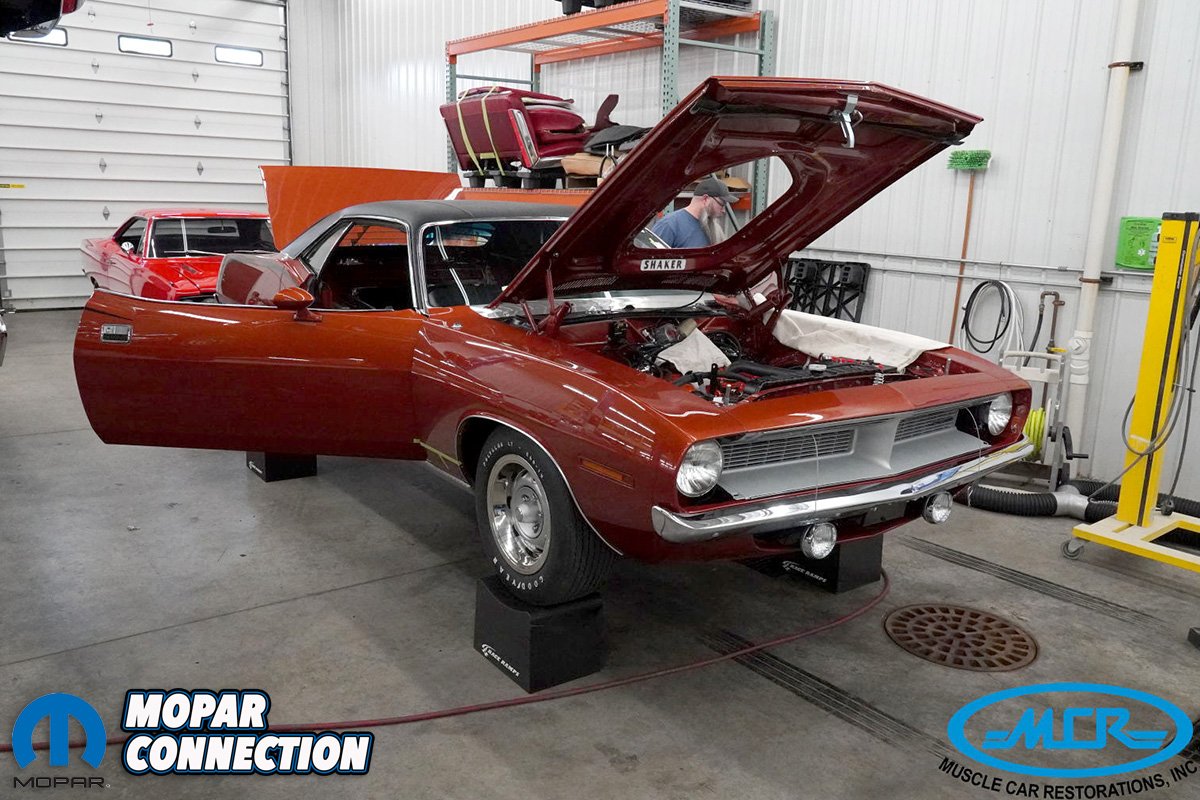
Above: The real excitement starts to build at this point. It’s getting easier to imagine the finished result of all the efforts so far. After the paint has had sufficient time to proper cure, the assembly process can now begin.
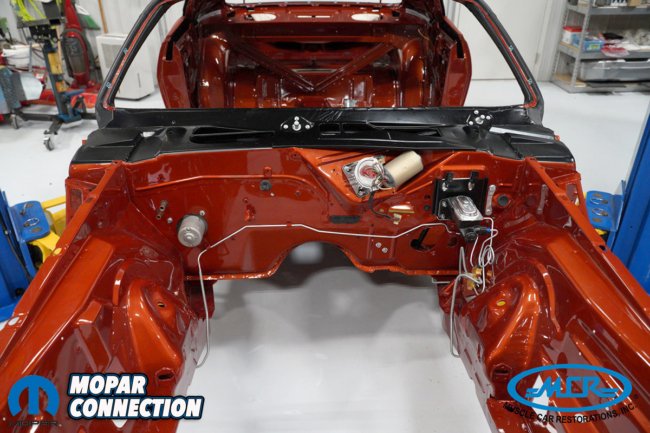

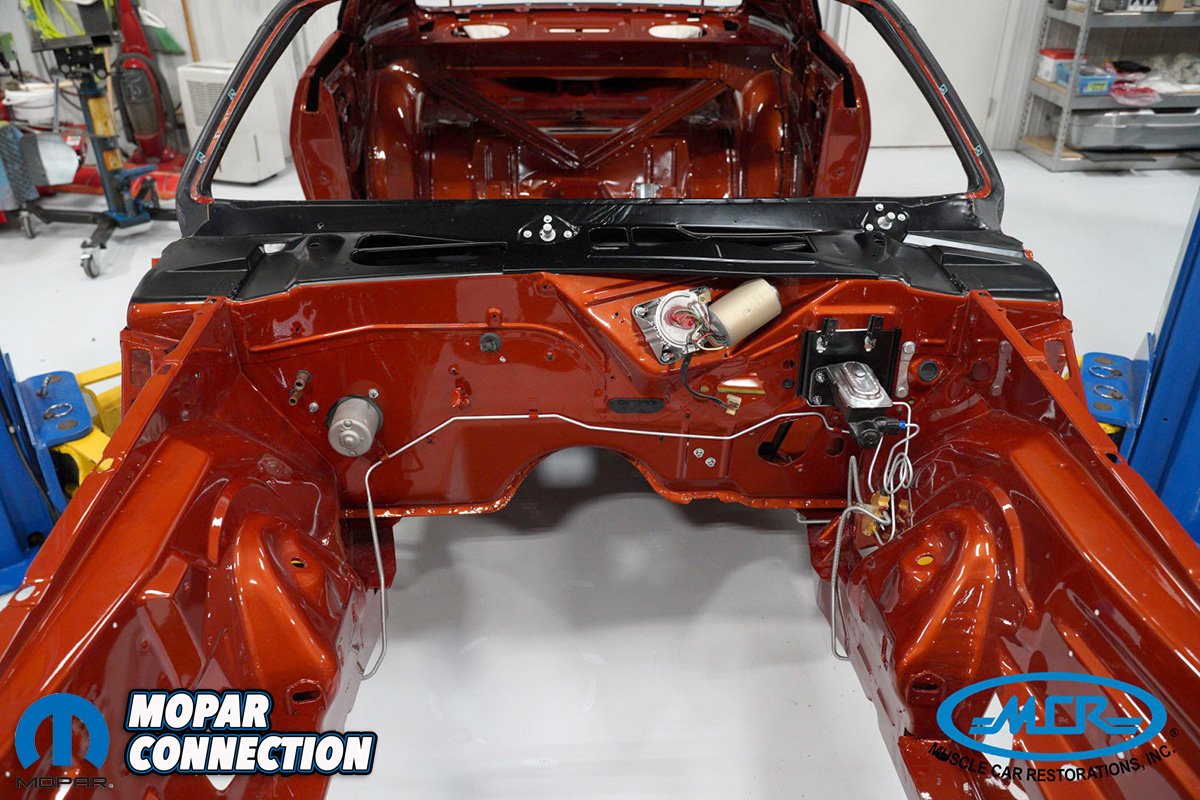
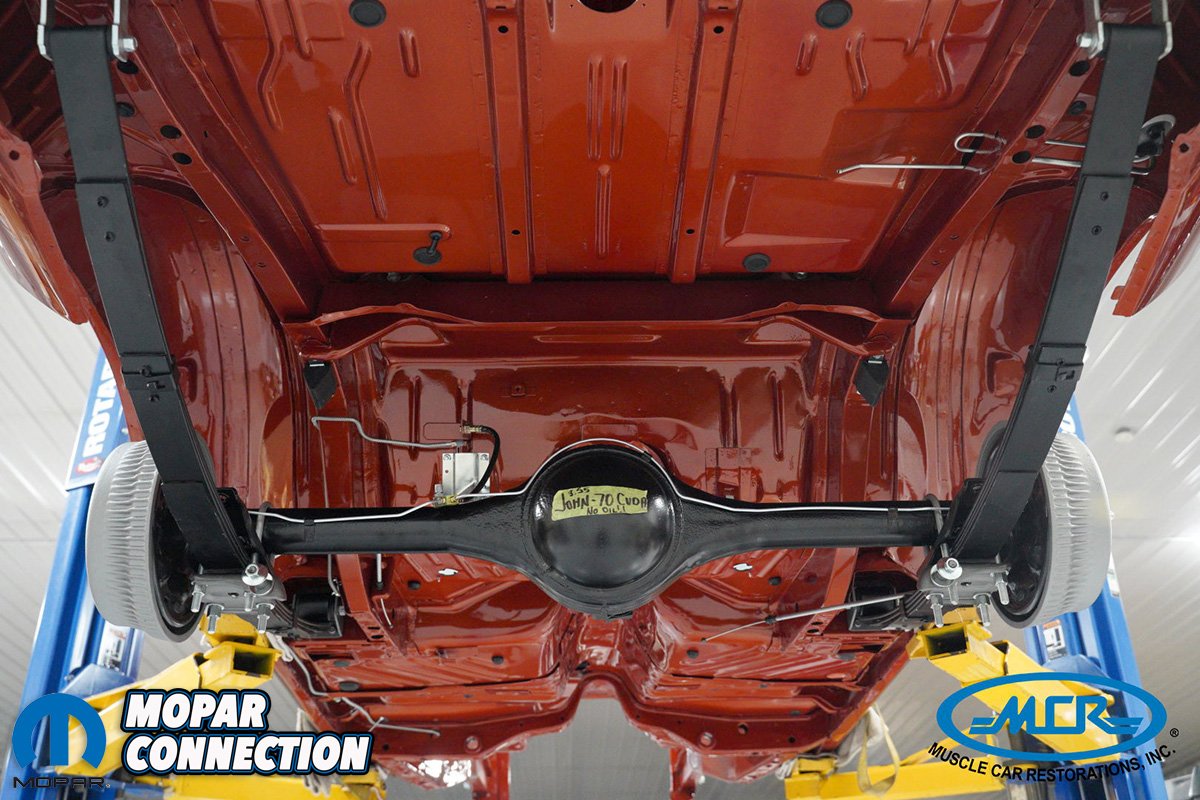
Above left: Notice that the master cylinder, fuel and brake lines, wiper motor and arms and heater box all go in first when the engine is out of the way. Above right: The back of the car is handled the same. While the differential is a pretty simple bolt in, this is also the time to install the brake and fuel lines.
The hundreds if not thousands of small parts, screws, nuts, clips and bolts, carefully documented during disassembly, are ready to hold everything together again.
No more waiting for this or that part to arrive or that process to be completed or research to be concluded. It’s time to assemble this thing. It’s time to realize the vision. It’s also time to reference all of the photo archives to confirm that each stage of the assembly process is 100% correct.


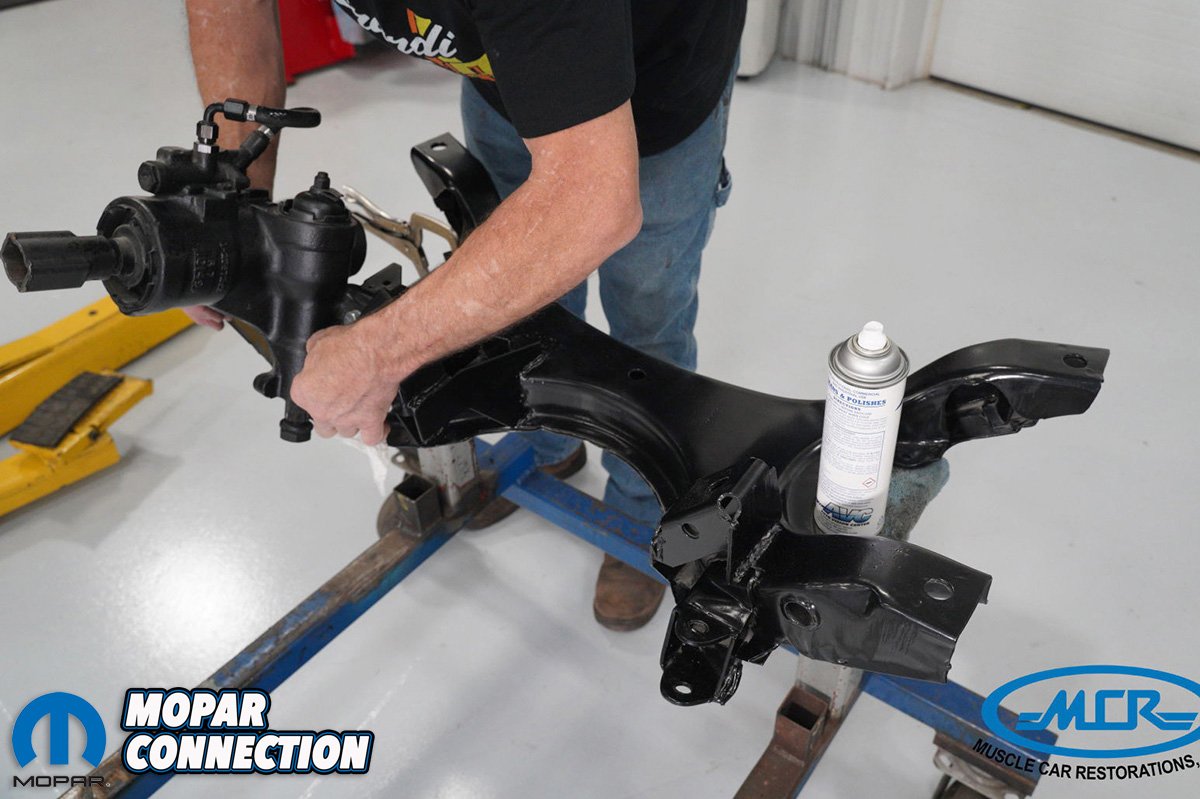
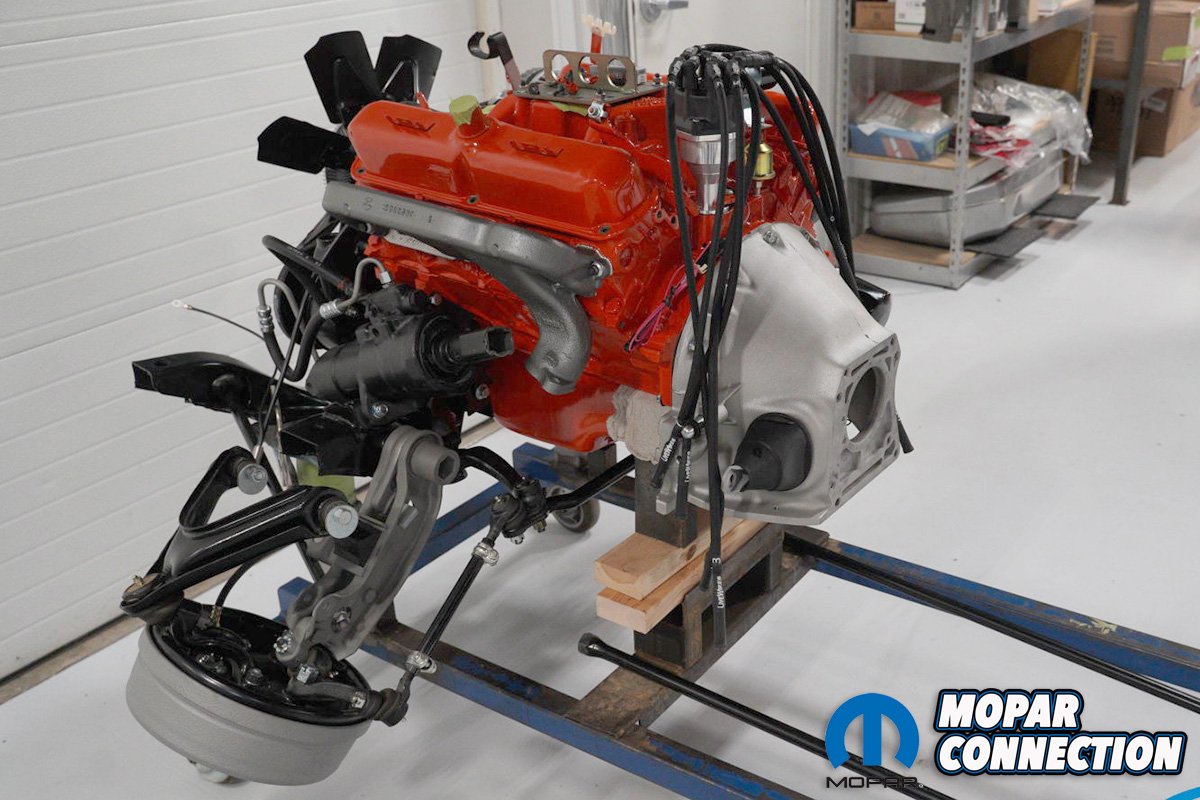
Above left: The K-frame and other suspension components are commonly powder coated for durability when the car is being built as a driver. Above right: The K-frame is assembled with front suspension and engine and trans outside of the car.
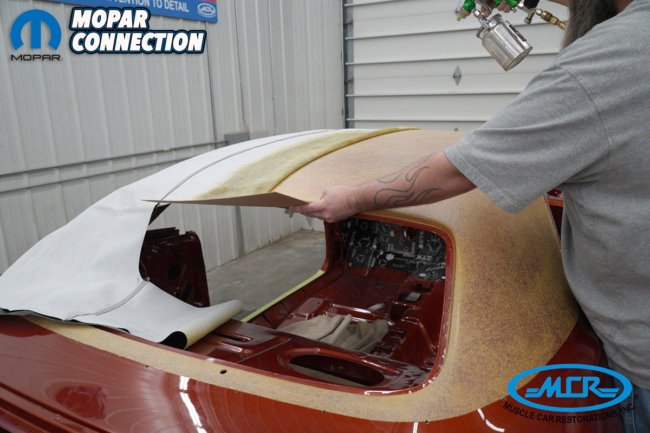
Above: You’ll notice that the roof of John’s ‘Cuda was painted even though it’s getting a black vinyl top installed. This provides a solid smooth surface for the adhesive and guarantees that rust will never form under the vinyl.
Yes, the MCR assembly techs have done this many times before but there is no room for error now. Everything needs to be just right.
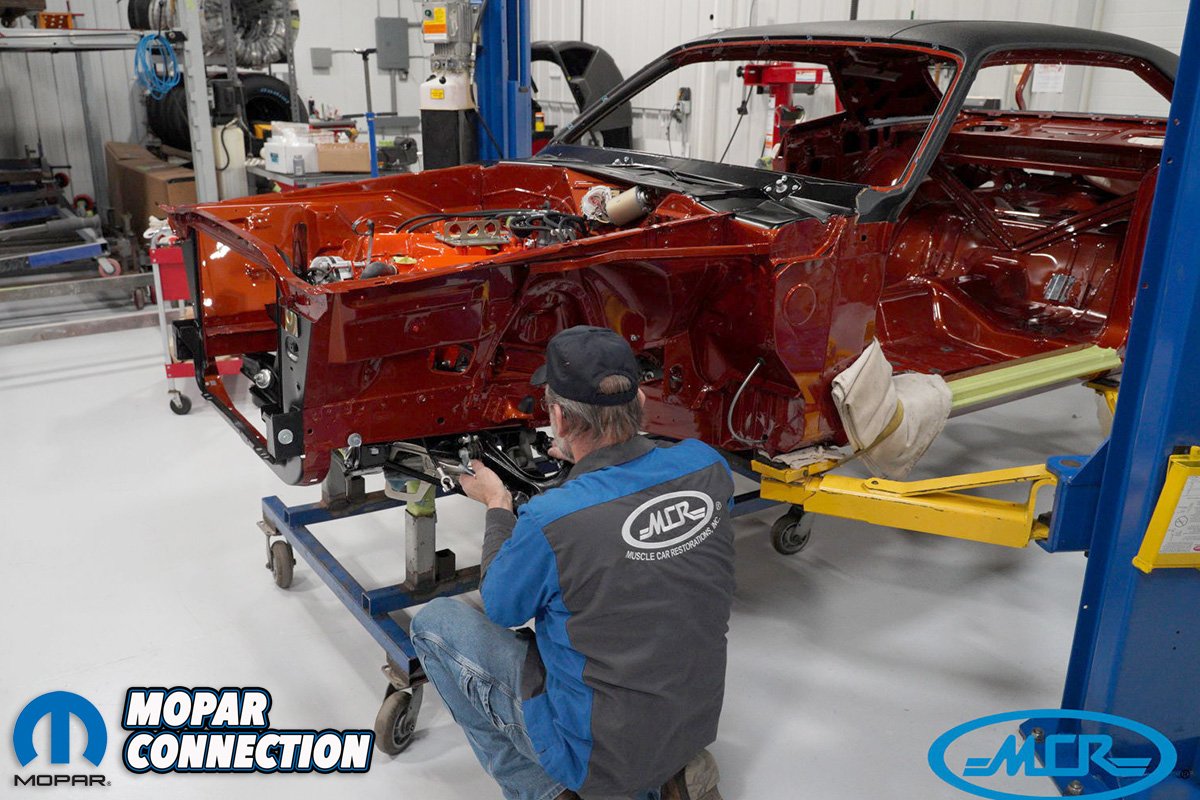
The first steps are generally to build a rolling chassis first. This makes the rest of the assembly process much easier. The rear suspension installation is a pretty straight forward bolt-in but on E-body Mopars the front suspension, K-frame, engine and transmission are best installed from the bottom using a lift.
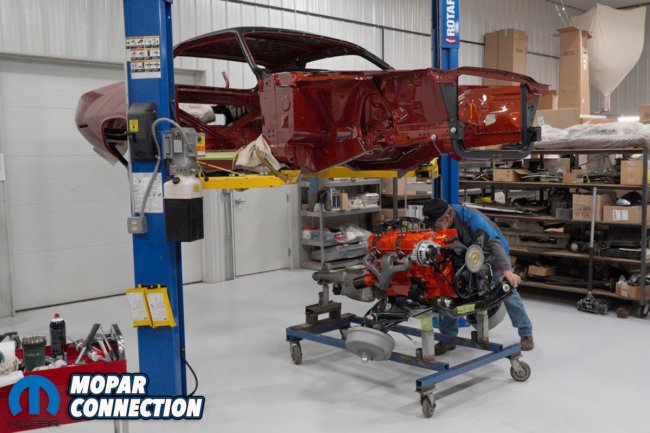
Above: Far and away the best way in fit the engine, trans and front suspension is from the bottom. Of course it can be done the traditional way from the top but this greatly reduces any chance of damaging that beautiful paint as these to assembles come together.


Above left: With the K-frame bolted up, the rest of the suspension is an easy bolt on with little risk to the paint. Above right: A detail of the front suspension parts.
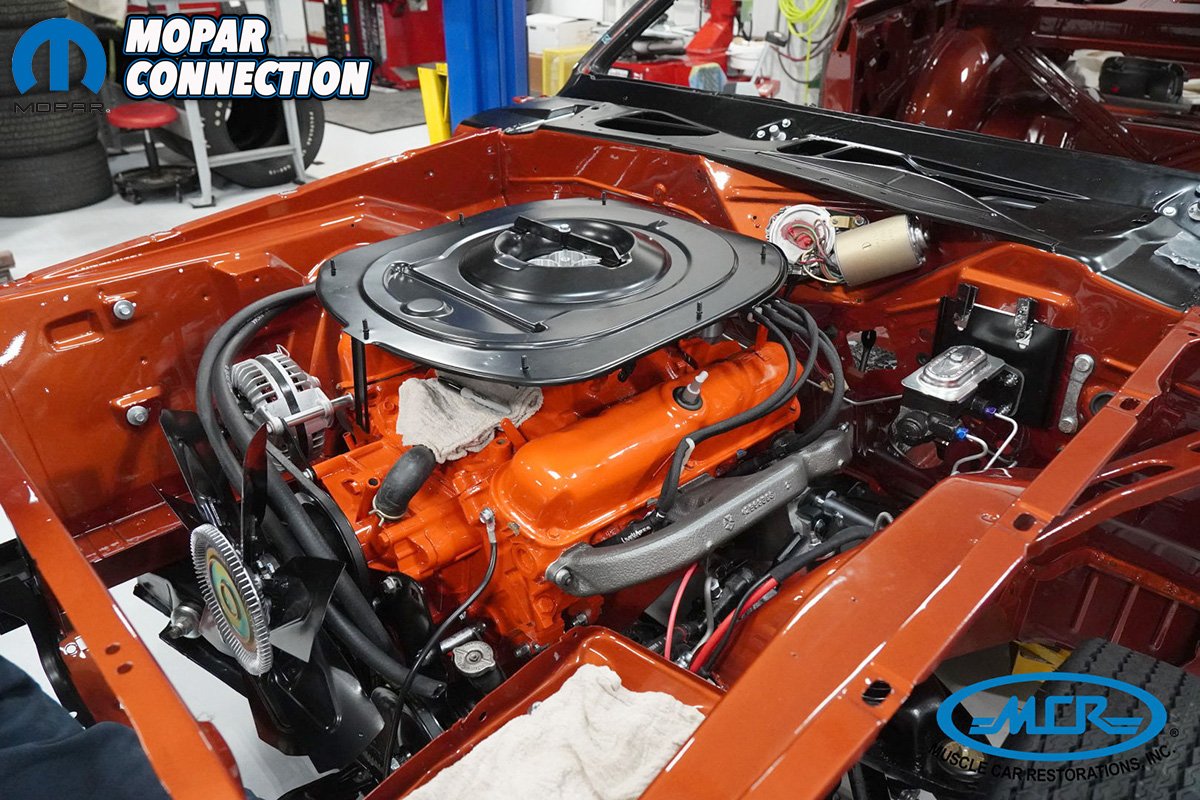
This greatly reduces the risk of damaging any painted parts as everything goes in. The exception is with Hemi cars as the valve covers and exhaust manifolds are just too wide to fit in between the frame rails so they have to very carefully be lowered in from the top.
One might be naturally drawn to a systems approach of assembly but actually a layered approach will generally make things easier. Each component is added to the car when there is the best access for that part. An obvious example would be that the heater box goes in before the dash just like the A/C evaporator box, wiper motor, master cylinder and brake and fuel lines will go when the engine is out of the way.

Above: The bulk of the engine hook ups, wiring and radiator will be accomplished with the fenders, hood and valance off the car. Again, access is easier and then there’s no risk to those parts.

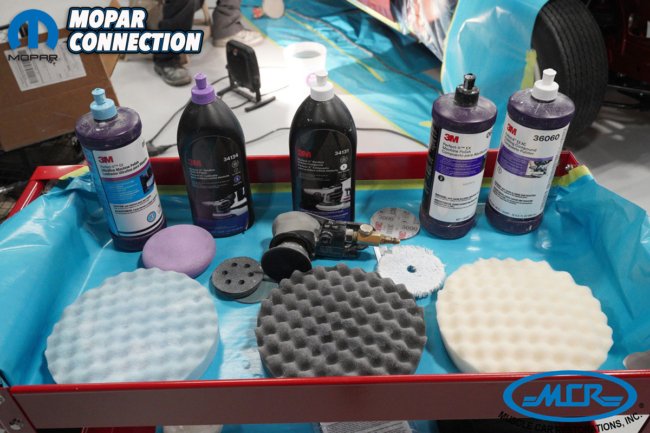

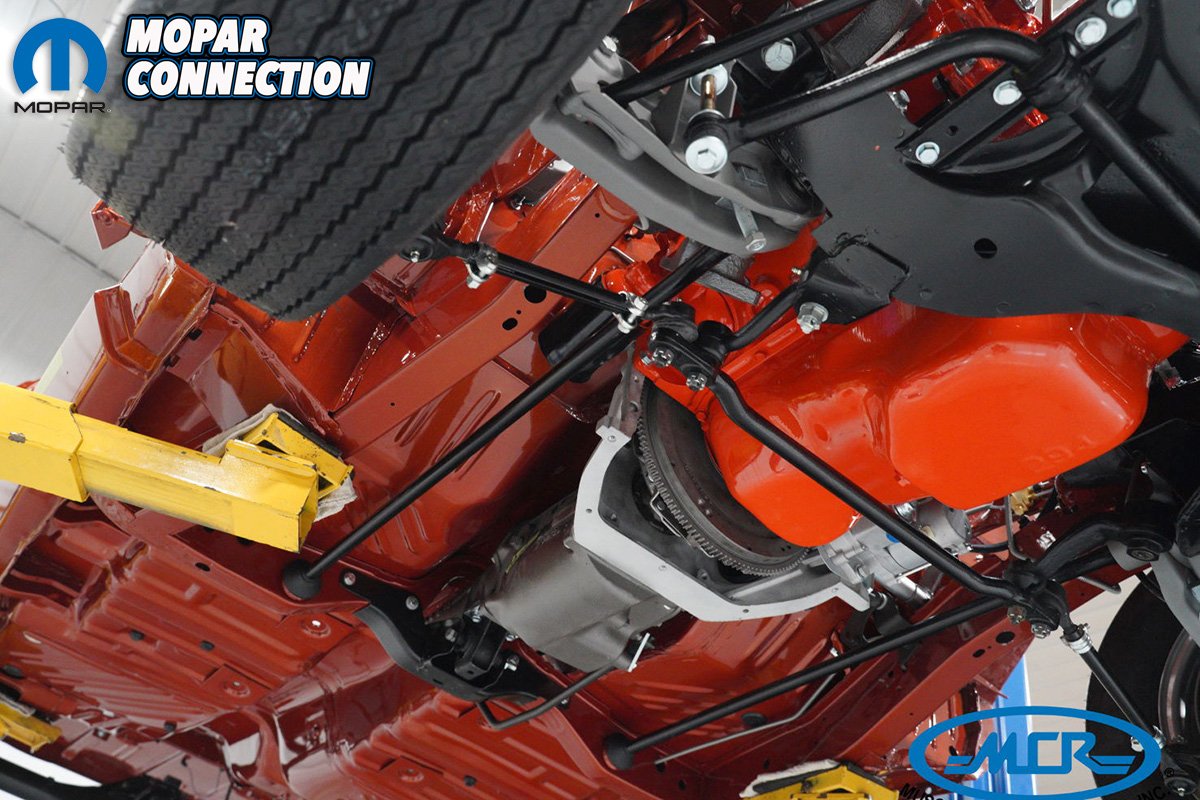
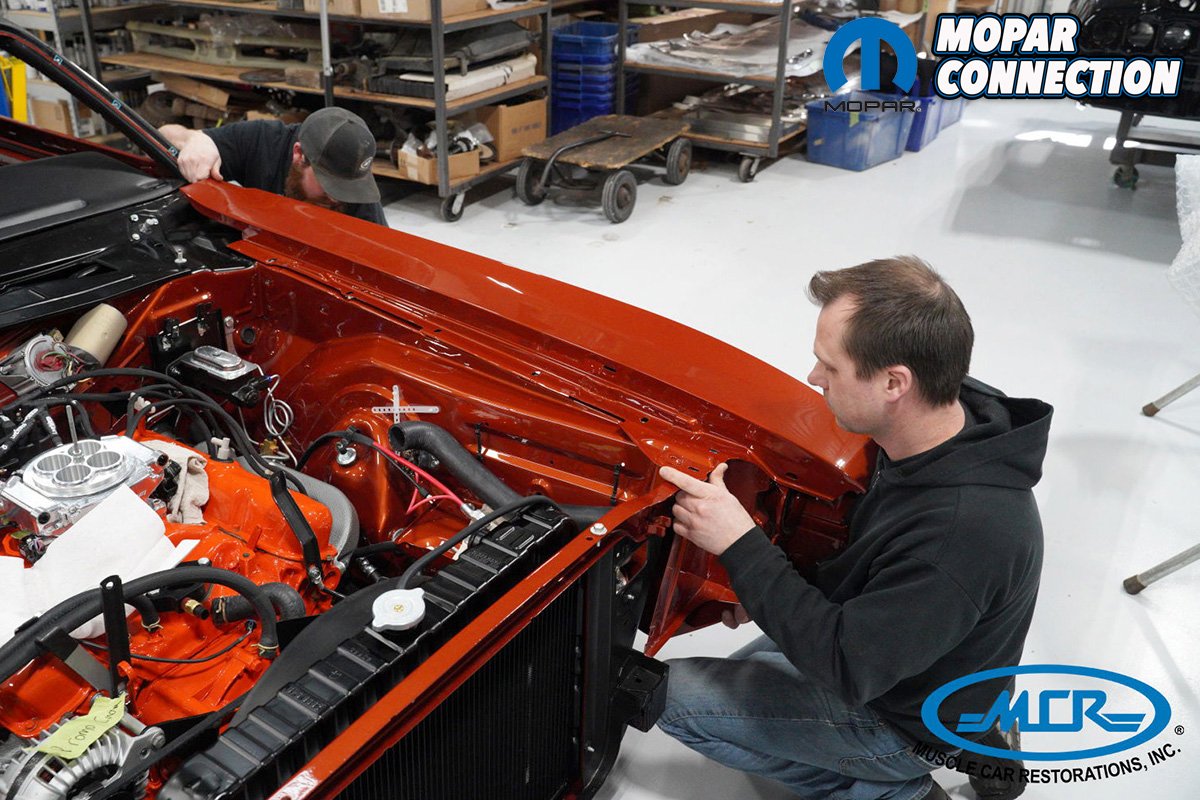
Above left: Here’s a great view under the front of John’s ‘Cuda. It’s doubtful that the bottom of this car looked this good when it was new. Above center: Here’s a sample of the products that are used to do the finish polishing after the paint has fully cured. Above right: The bolt on sheet metal parts are among the last to go on the car. Only the glass and final trim parts remain after that.
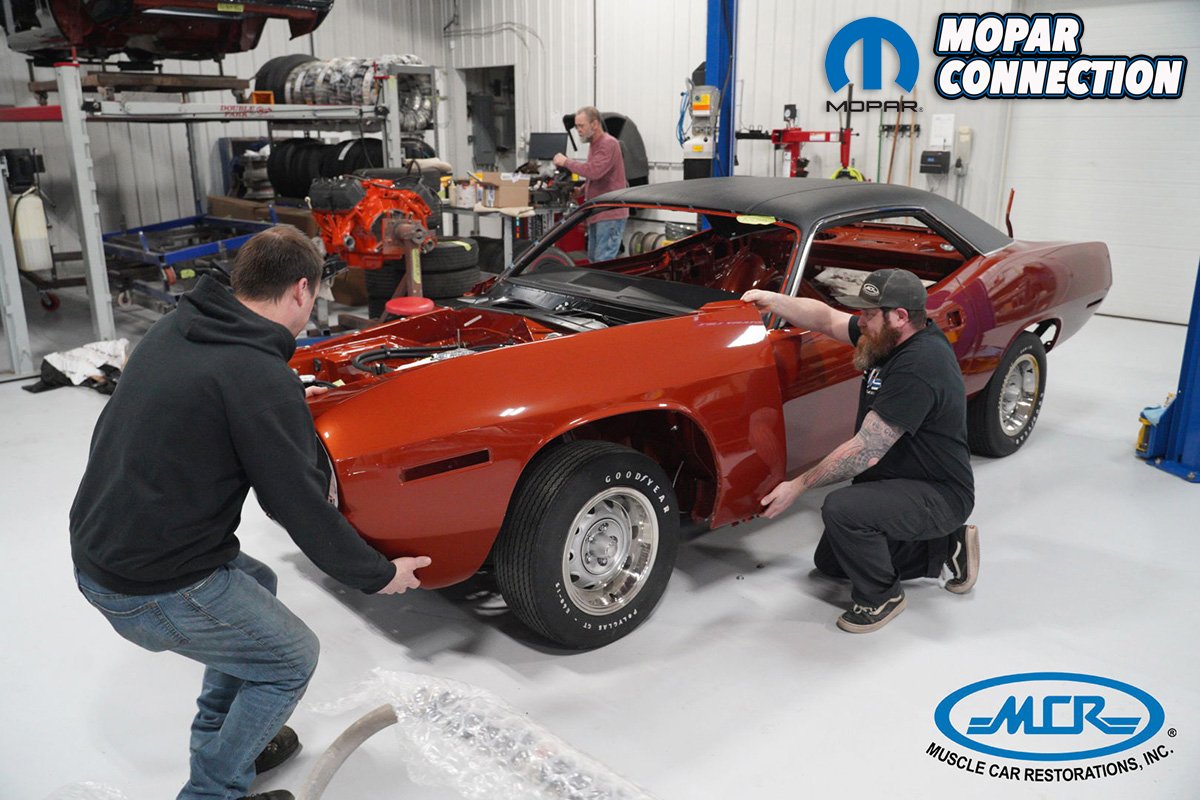
Fenders, doors, hood and trunk lid and the glass are installed near the end but before the last of the interior goes into place. This is done so MCR can test the car for leaks when one wouldn’t endanger sensitive interior parts. Once the car is proven to be leak free then the last of the assembly and final inspection can proceed to the end.
Of course once the car is fully reassembled and checked over it’s not quite yet ready to be delivered. The last step is testing on MCR’s Mustang chassis dyno followed by some actual road miles to positively confirm that the dream is fully ready to be realized by the owner.
Remember, this car has been fully disassembled down to the last nut and bolt and it’s no small thing put that all back together again.

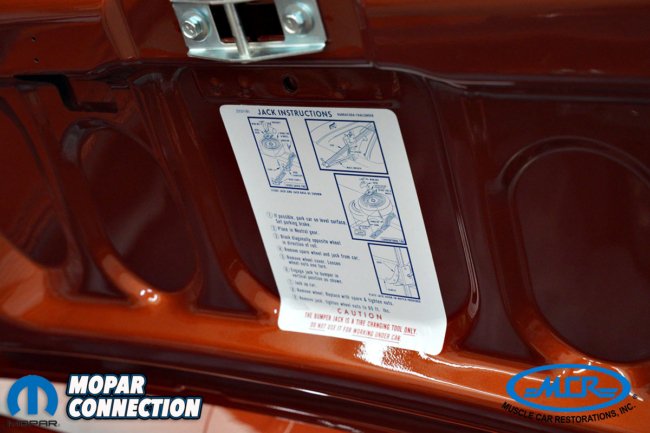
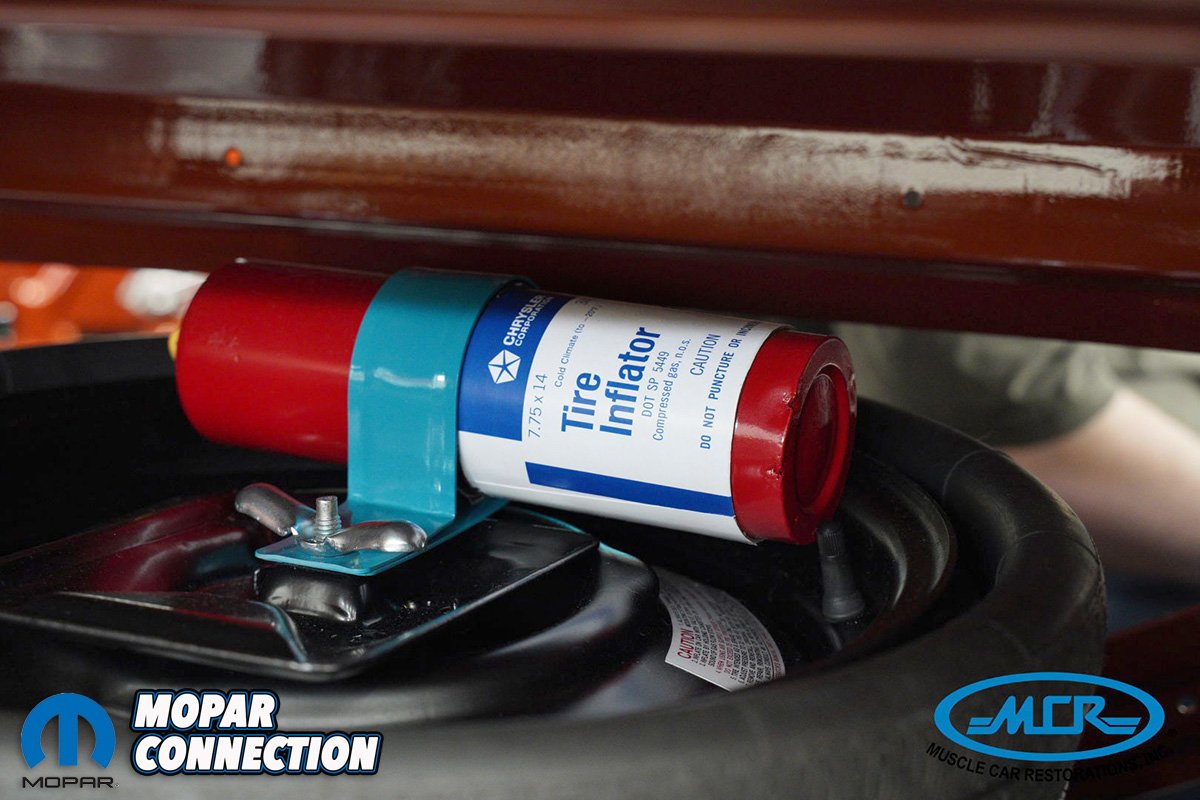
Above left: Little details like this factory Tire Inflator are what take a restoration like this to the next level. Above right: No factory resto is complete without all the stickers, stamps and labels that originally came with the car.

Above: Just about there! Most would have a tough time resisting firing it up and going for a drive but there’s one more step before MCR is ready to turn John loose with his ‘Cuda and that’s a stop at MCR’s Mustang dyno for the initial start up and simulated road tests.


