


How many 5.7L Hemi engines have been factory installed into DaimlerChrysler, Chrysler LLC, or FCA vehicles since its introduction in 2003? Almost immediately after the G3 Hemi release, aftermarket companies began developing parts to improve the performance, durability, and reliability of the Hemi. We have been using a 2006 Dodge Charger, a Police Package vehicle, as our chassis dyno mule to test the vast number of new products for the G3 Hemi.
Recently, while removing the intake manifold to install a component, we noticed a trace of oil dripping from two of the intake runners nearest the hose that extended from the positive crankcase ventilation valve (PCV). To reduce the oil and other debris entering the manifold, we reached out to American Muscle for an oil separator recommendation. The reps suggested a JLT Performance V3.0 oil separator, which fits the 2005-2020 5.7L Hemi in the Charger, Challenger, and 300, and mounts on the Magnum 2005-2010 5.7L engines. We had a choice of a black or satin anodized finish on the oil canister; we selected the satin finish.
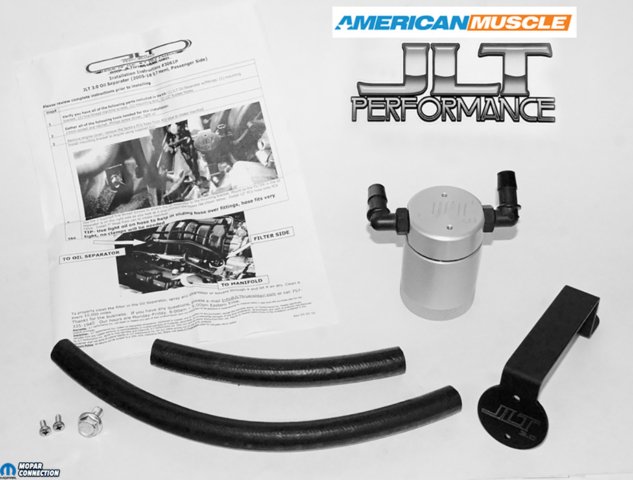
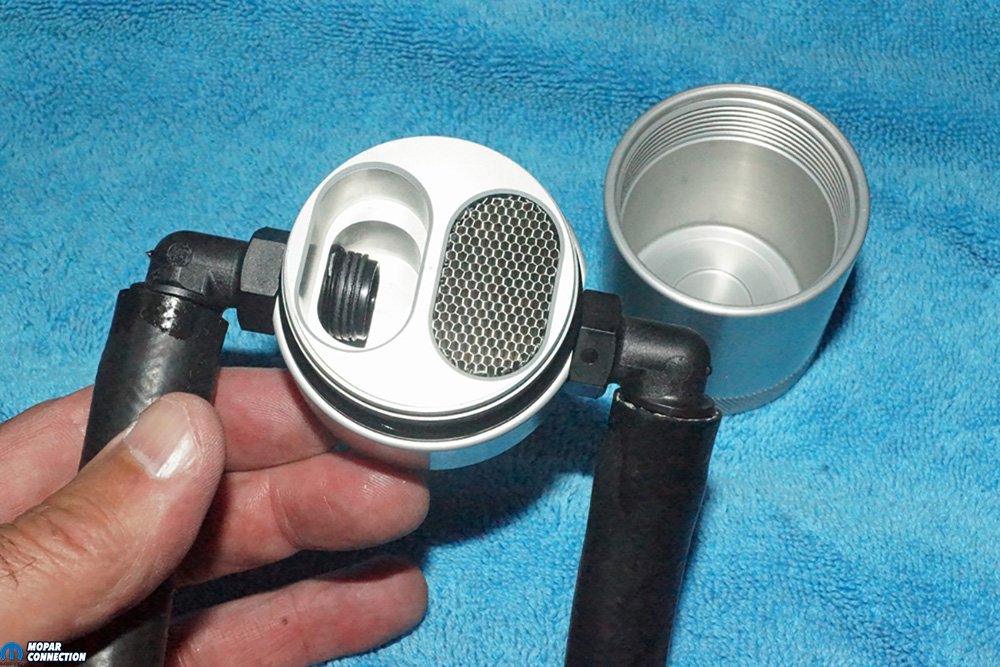
Above: Here is the JLT Performance oil separator from American Muscle Part# CH1721
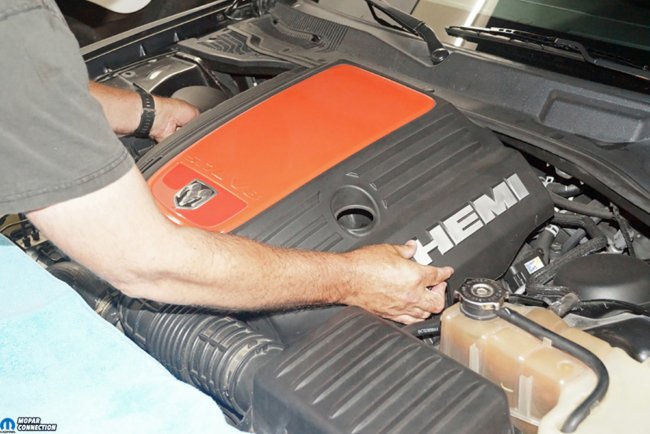
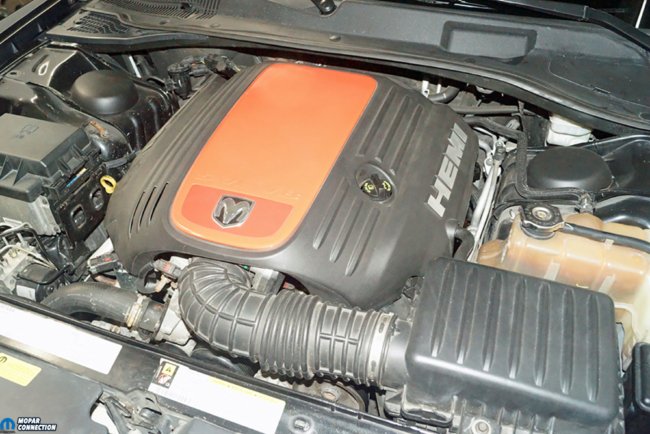
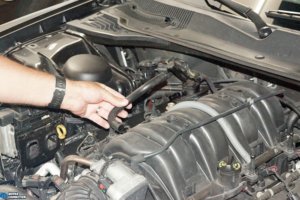
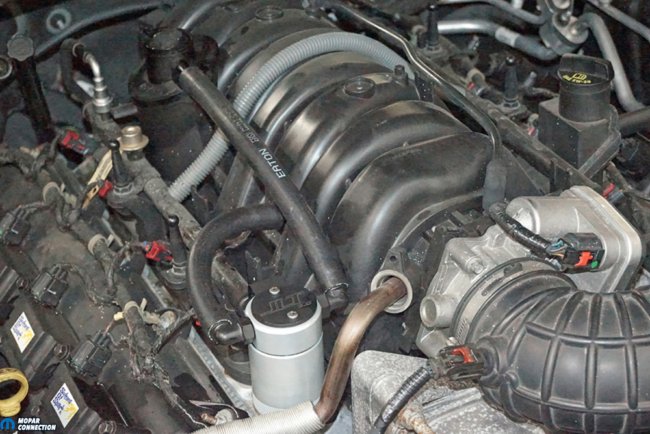
Above Left: Our 5.7L Hemi is a replacement engine with just over 42K-miles on it. The previous Hemi was replaced when the 2006 Police Package Charger was still “Protecting and Serving.” The Charger often sees extended time testing on a Mustang chassis dyno to evaluate new Hemi bolt-on components. Above Right: To install the JLT Performance V3.0 oil separator we picked up from American Muscle, we needed to remove the engine cover to gain access to the Hemi. The cover was quickly removed by pulling upward, which released the four connecting studs.
Why use an oil separator? As a result of the operation of a four-stroke internal combustion engine, some cylinder pressure escapes from the cylinder around the piston rings and into the crankcase during the rapid expansion during the power stroke. Controlling this pressure, called blow-by, requires a PCV system to minimize engine sludging, control oil leakage, and extend oil life. Since the early 1960s, the PCVs have been found on every engine, and they usually operate correctly except in a gross blow-by situation.
Our concern with the Hemi, which endures plenty of rpm when testing products on the chassis dyno, is it experiences a bit of oil entering the intake manifold during the back-to-back-to-back wide-open-throttle (WOT) runs. With an oil separator fitted between the PCV valve outlet and the inlet to the intake manifold, the separator should capture much of the oil and debris before polluting the Hemi’s intake air/fuel charge and reducing the engine’s performance.

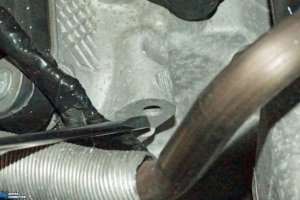
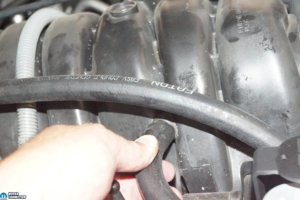
Above Left: The hose located between the PCV and the intake manifold was removed to install the oil separator. We stored the tube, so we could reuse it in the future if, for some reason, we needed to remove the oil separator. Above Right: We removed the PCV hose by slipping it off the nipple and pulling it from the intake manifold. No hose clamps were holding the hose in place, so it was effortless to remove.
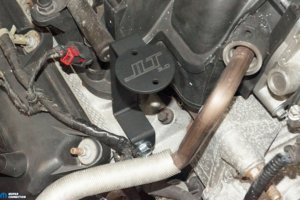
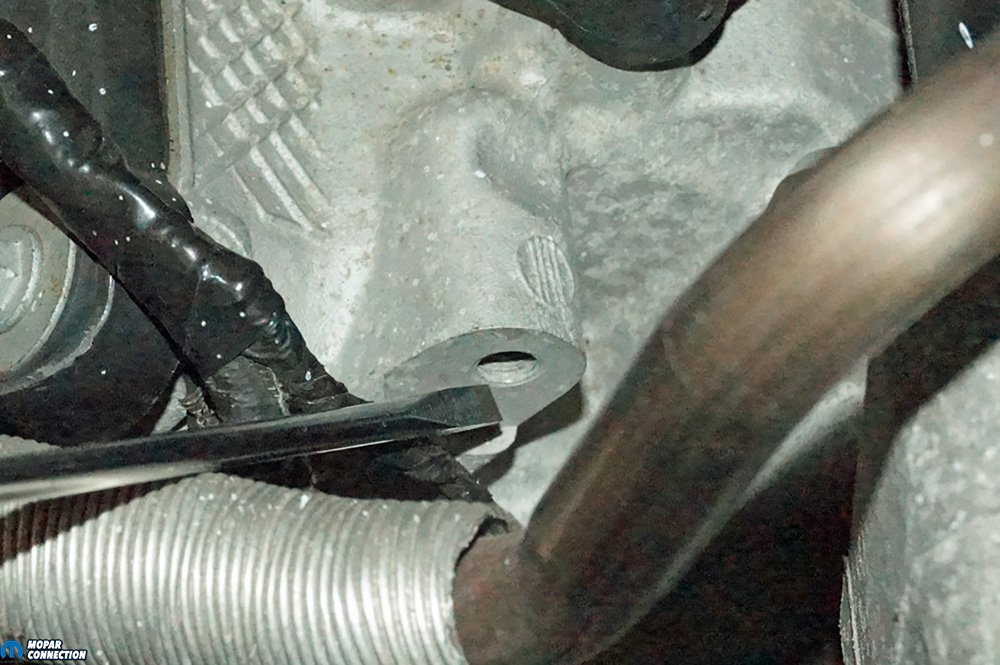
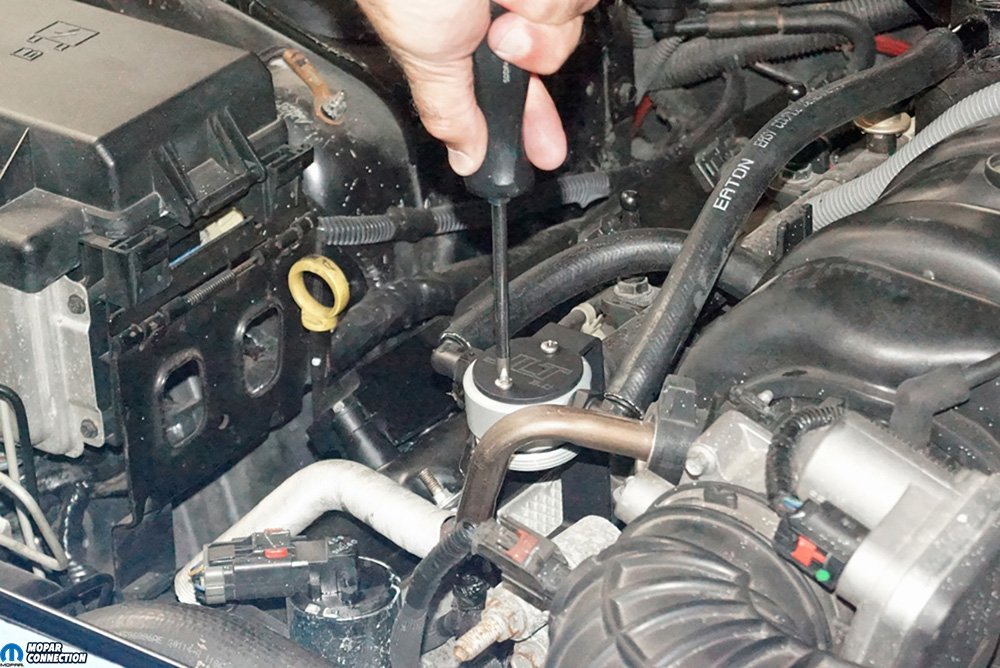
Above Left: The single bolt hole on the passenger cylinder head (found on all the 5.7L Hemis) was the anchor point for the oil separator bracket. Before the bracket installation, we chased the threads with a tap to ensure a proper bolt thread engagement. Above Right: The bracket was lined up with the hole, and the bolt was snugged in place. Once correctly aligned, we worked around the EGR tube to tighten the mounting bolt.
The JLT Performance oil separator has a fine stainless-steel honeycomb screen that traps oil vapors and collects the oil in the satin base cup. The oil is too heavy to exit the container and return to the passing airflow streaming into the intake manifold. The base cup can collect up to 3 ounces of fluid and has a knurled external grip, which allows it to be threaded off for easy servicing of the contents.
Once the container is threaded in place, an O-ring seals the unit and prevents leaks. Servicing of the cup can be performed with every oil change up to a maximum of 10,000 miles between services depending upon the engine’s overall health. Unfortunately, the oil separator has yet to earn its California Air Resources Board (CARB) exemption. It is currently not legal for sale or use in California or any state that has adopted the California emission standards.

Above Left: The hoses included with the oil separator required some lubrication to slip onto the PCV nipple and the intake manifold. Even with the lube, it was a challenge to slip each hose onto the engine. Take your time installing the hoses, so the fittings on the manifold are not damaged. Above Right: The upper housing of the oil separator has a honeycomb screen that captures the oil vapor escaping from the PCV valve. Once enough oil vapor collects, its weight causes it to drop into the cup (top right). A vast majority of the air flowing to the intake manifold will be oil- and debris-free.
To install the JLT Performance oil separator, we opened the Charger’s hood and removed the decorative engine cover. We pulled the hose extending from the PCV valve outlet to the intake manifold inlet and set it aside. Mounting the oil separator bracket required aligning the bracket with an unused threaded bolt hole in the passenger side cylinder head, just below the valve cover gasket surface.
We chased the hole with a bottoming tap to confirm the hole’s threads were free from debris. With the threads cleaned, we lined up the bracket mounting hole with the cylinder head’s bolt hole. We threaded in the supplied bolt, adjusted the bracket, and tightened the assembly.


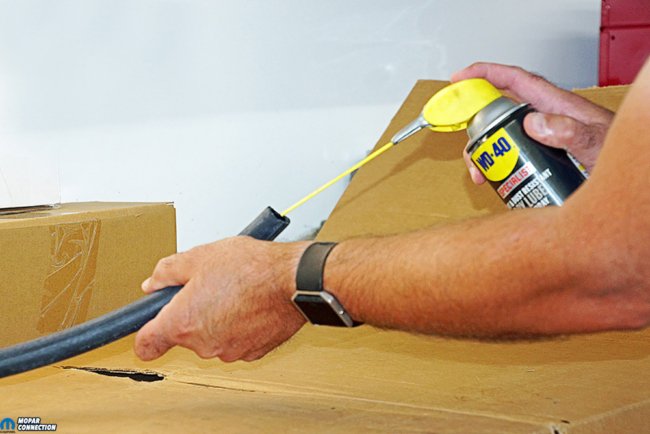
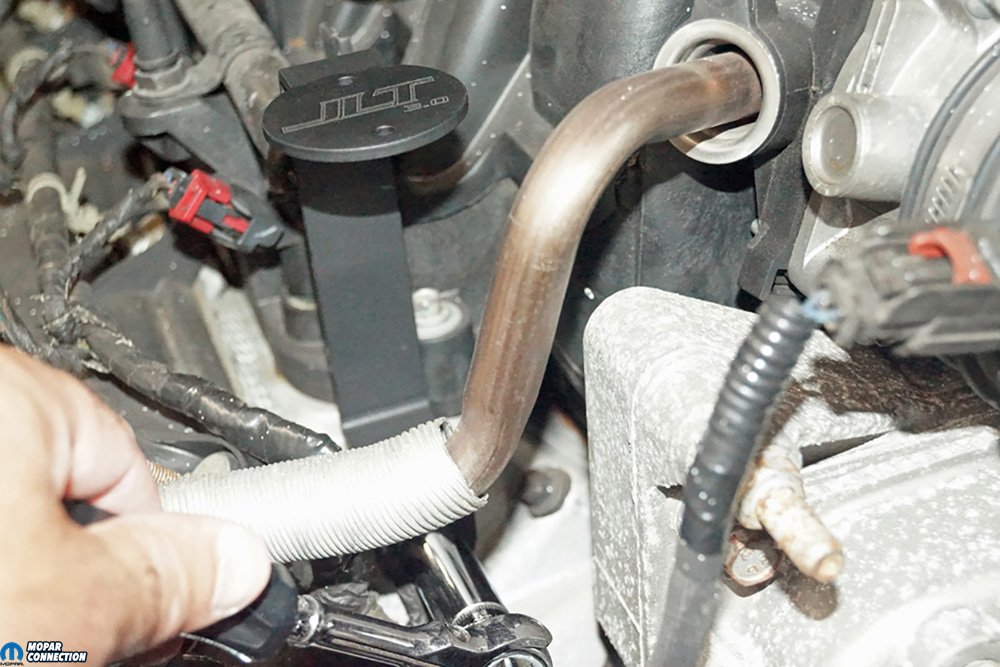
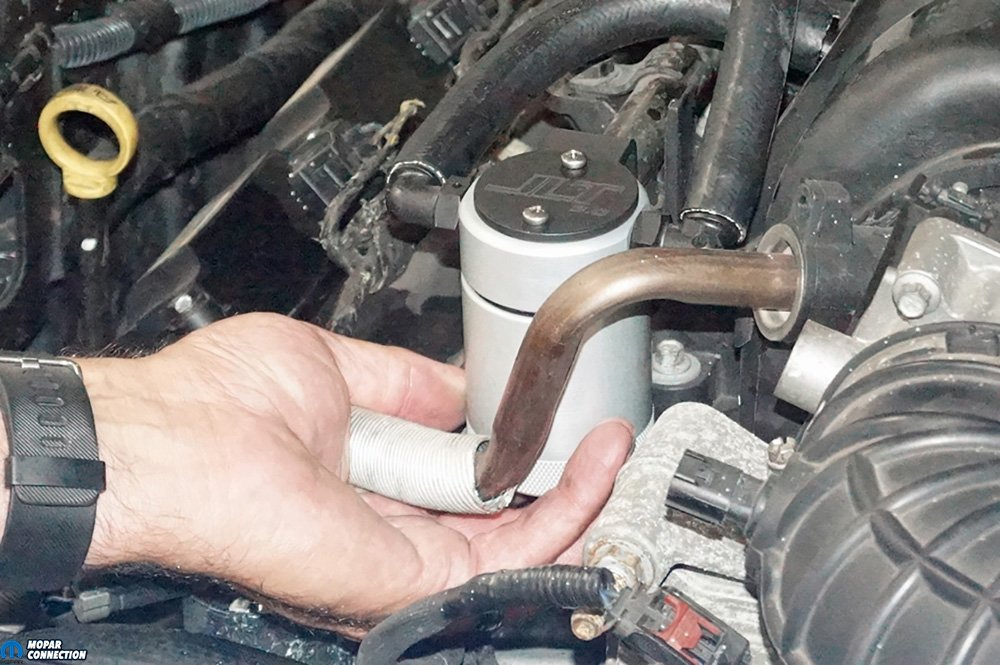
Above Left: Even with the nipple and the hose lubricated (we found WD-40 PTFE worked the best), we labored to slip the hose onto the PCV housing. We took our time when installing the tube. Eventually, the hose slipped into place. Above Center: The same situation occurred with the other hose on the intake manifold. It cannot be mentioned enough. Work diligently, so the intake manifold is not damaged. The two hoses took a largest portion of the total installation time. Above Right: To secure the upper housing to the bracket, we used the two supplied screws. JLT made sure the 90° fittings on the oil separator were angled correctly to guarantee an interference-free installation of the hoses.
We unthreaded the base cup from the upper housing, and the shorter of the two supplied hoses was slipped onto the left-most 90° fitting on the canister. The long tube was pushed onto the 90° fitting on the right side of the housing (the fitting is at a 45° upward angle compared to the housing top). We applied a light oil to the opposite end of each of the hoses. The lubrication facilitates the installation of the tubes onto the Hemi. Even when properly lubricated, the hoses were a challenge to install. The longer hose was routed to the PCV valve, and the shorter tube was directed to the intake manifold.

Above Left: The oil separator installation took less than 30 minutes to complete. A ratchet and a 13mm socket, a Phillips screwdriver, and some lube were necessary for the installation. Above Right: This angle provides the best view of the completed installation. The oil separator looks like a factory designed and installed component.
Two small screws were run through the upper bracket support previously installed to the cylinder head. We tightened the screws into the upper housing of the oil separator. To install the base cup, we had to remove the intake air temp (IAT) sensor connector and maneuver the cup under the exhaust gas recirculation (EGR) valve tube. Once the cup was slipped around the EGR tube, we threaded the base cup onto the housing, reattached the IAT connector, and fitted the engine cover back onto the Hemi.

Above: The oil separator fits under the engine cover without the need for modifications. Sadly, when the hood is open, the beautiful JLT oil separator will never be seen by the average onlookers, but we will know it is there, effectively doing its job.
The oil separator was a simple installation that we completed in less than 30 minutes. It fit perfectly and looks great, but unfortunately, it will be tucked under the engine cover and remain unseen. If we need to go back to the factory parts in the future, we can easily remove the oil separator and reinstall the factory hose. Since the installation, we have driven the Charger on the street and continue to perform WOT tests on the chassis dyno.
At the first oil change since the installation, the oil separator had collected a small amount of oil that would have found its way into the intake, so it appears to be doing its job. If there is a consideration of adding an oil separator to your Hemi (regardless of cubic inch displacement), give the reps at American Muscle a call or check their website, and you will reap the benefits of a cleaner running Hemi.


It might be a good idea to make JLT aware that those hoses were very hard to slip on. I’ve wrestled with this problem before, and it’s irritating.
Mine had pieces of the inner metal screen in the bottom of the canister. I called the company that I purchased it from to get a new screen and they said do not sell a new screen only the entire unit so basically “good luck”.