


Now that the Comeback ‘Cuda is painted, wet sanded, and buffed there are several other areas to spray before assembly can begin. Now is the time to finish anything that involves the paint on the car. If you do the front behind the grille black out, the rear panel black out and the wheel well undercoating, now, if anything goes wrong it will be easier to fix. All three steps involve taping off the painted sections and spraying more paint. If you take great care and careful attention to detail, things will turn out great. If not, now is the best time to fix a problem.
The ‘Cuda tail panel was blacked out with Organisol from the factory. Since the original Organisol formula is no longer available what do you use to re-create the look as close to original as possible? Mopar Connection has already documented our formula for using available products to create Organisol in previous articles, but I will list it again. Since the DDL 9355 lacquer is almost impossible to find we have come up with a formula using the currently available DCC 9355 single-stage urethane.
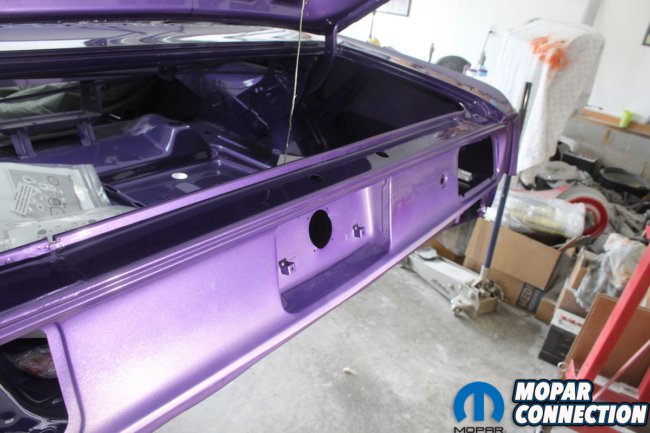

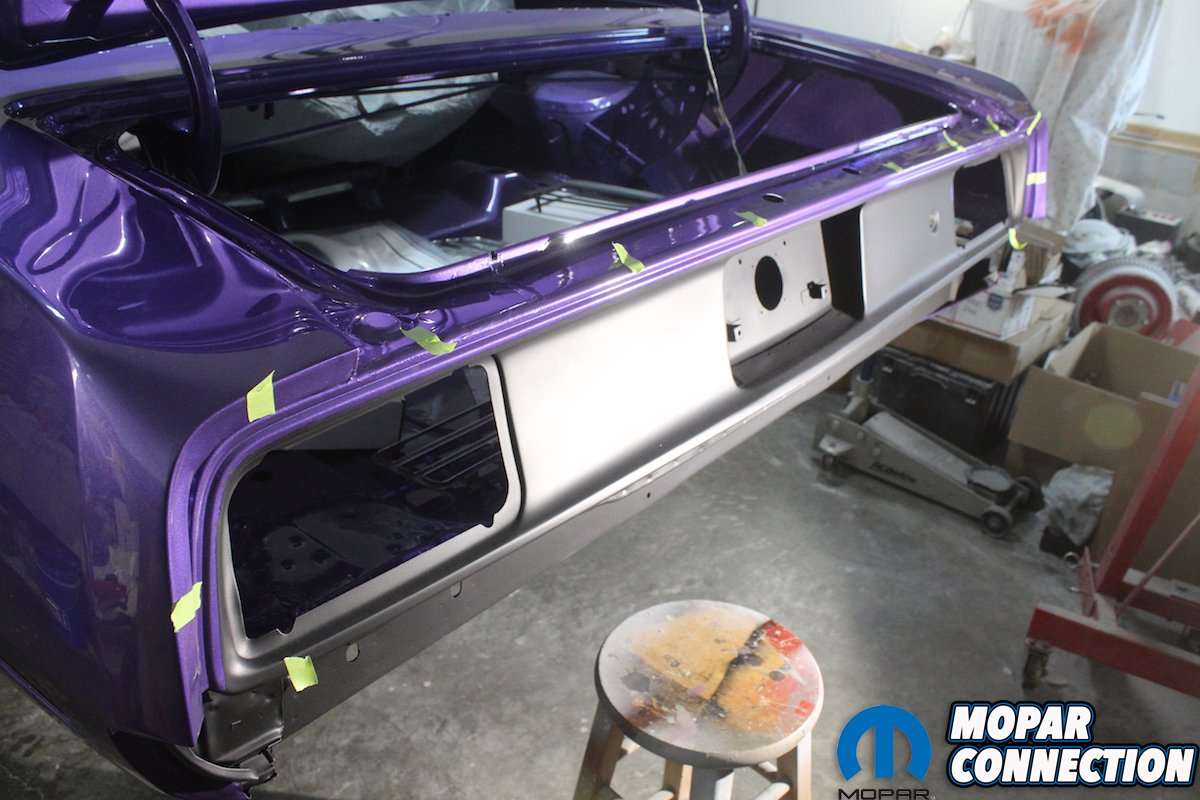
Above left: Since we knew we were going to black out the rear panel, we used very little body color and clear on the panel. This way it doesn’t have a high build up of paint and it is easier to prepare the panel for the blackout. But, you do need to make sure you know where the line is between body color and blackout area. Above right: The line for the black out is half way up on the flat area where the stainless trim goes. We used a good quality 3M automobile tape and not some cheap masking tape that leaves a heavy glue residue.
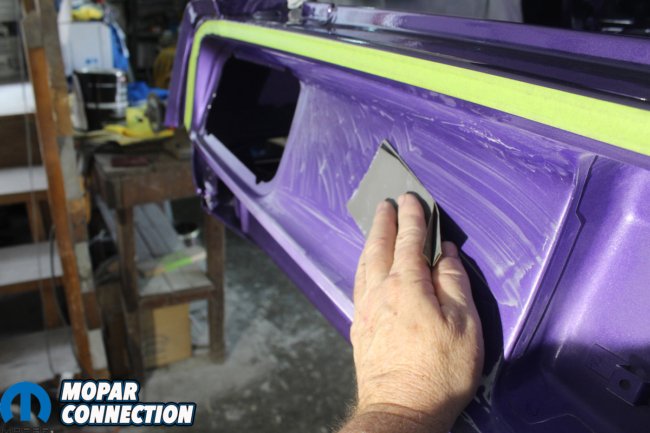

Above left: Using 400 grit, we wet sanded the panel where the blackout would go. It is important to get any grainy areas smooth and every area ready for the new paint. We continued to use the crosshatch sanding motion, so we wouldn’t leave any uniform sanding scratches that would show after paint. We also used a red Scotch-Brite pad the get into all the corners. We wiped it clean with a microfiber cloth and oil and grease remover. Above right: Now that the panel is sanded and clean, we removed the tape and cleaned the area once again. Then we started over and applied our masking tape fresh to cut out any sanding particles. With some professional grade paper, we masked off the trunk and lower quarter panels. Never, and we mean never use newspaper to mask off before painting. It is not heavy enough to keep new paint from bleeding through.
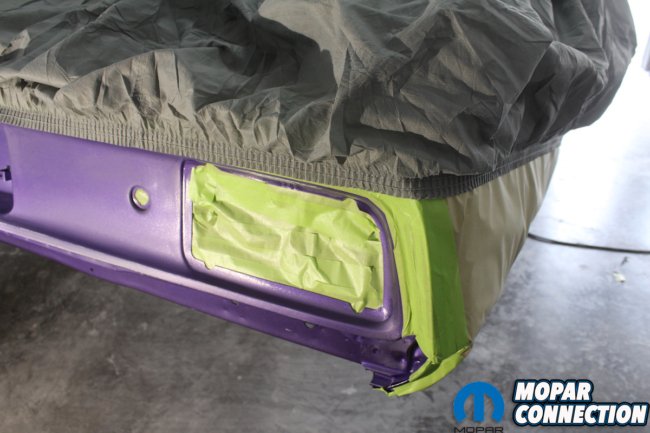
Above: We then back taped the rear tail light openings, filler tube hole and key lock hole to keep overspray from getting into the trunk. We used our cheap car cover we have been using to keep buffing compound off the car to cover the rest of the car and keep any overspray off the areas that are painted body color.
- 4 parts DCC 9355
- 3 parts DT reducer
- 1 part DCX 61 hardener
- 1 part DX 685 flattening additive
- ¼ ounce (per pint of mixed paint) DX 1999 texture additive
We usually shoot two coats of DP 90 epoxy primer then two or more coats of the urethane mixture until desired texture and color are achieved.
Now if you add up all these products it comes a large chunk of dough. If you are doing an A12 or AAR hood it if worth the money because you need the larger quantities of paint. But for just the rear panel, we decided to come up with another way to re-create Organisol. With the help of Chet Biggers, our AAR expert and a few test shots, we loved the final results.
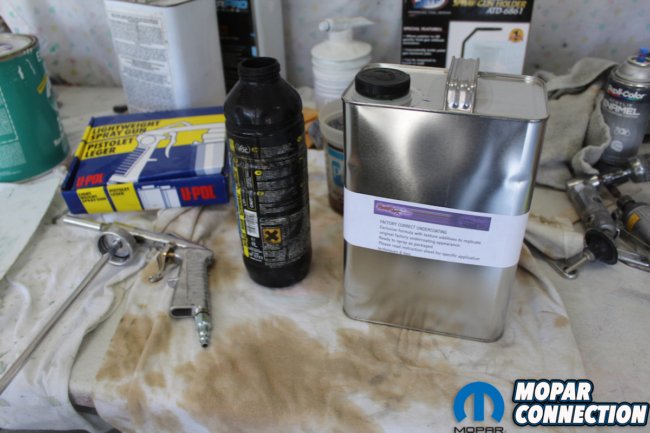
We bought a gallon of SEM Trim Black and we were able to not only use it on the tail panel, but it also worked perfectly on the grille blackout.
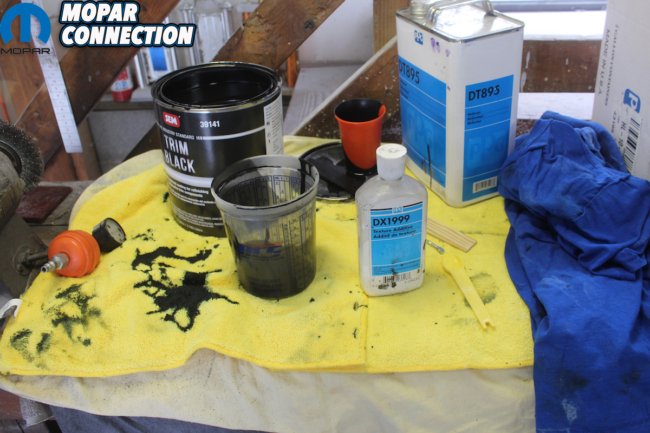
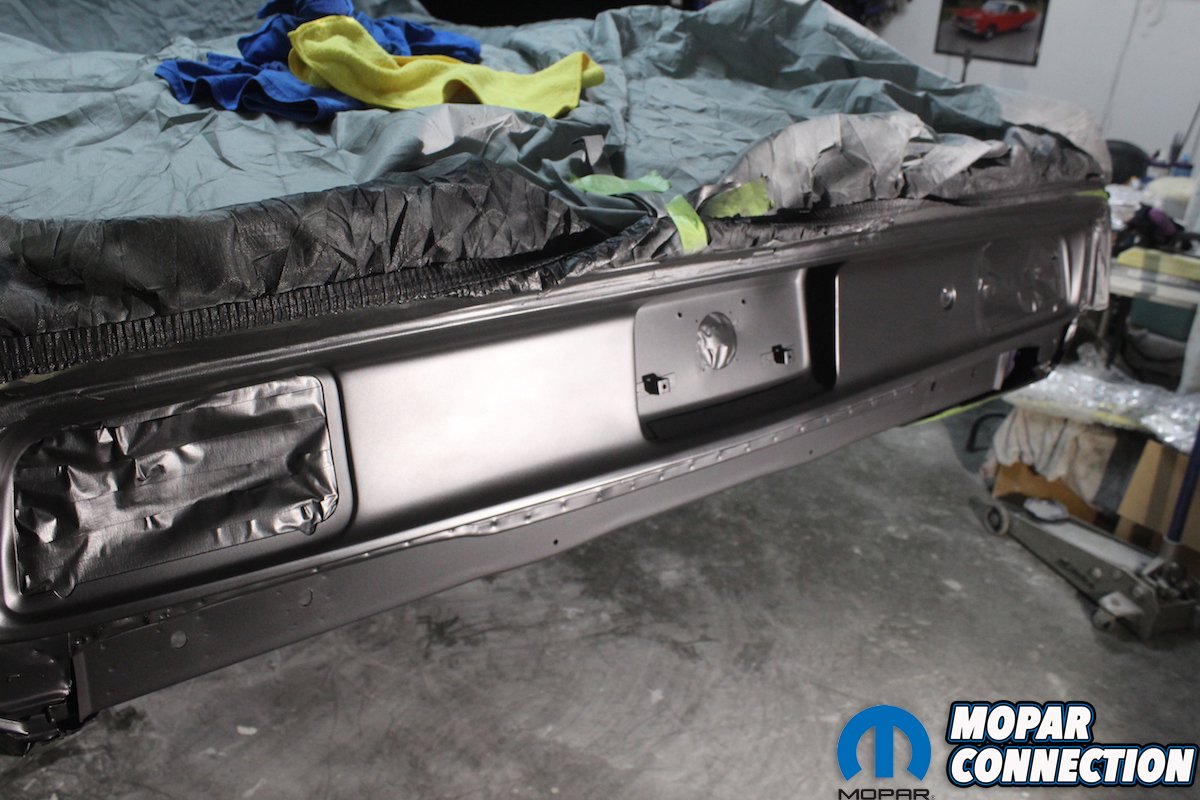
Above: We mixed our Trim Black one part paint to one part reducer. Then we added 1/6 of a teaspoon of DX1999 texture with 10 – 12 ounces of catalyzed paint. This is when you need several spray outs to make sure you get the correct texture to re-create the Organisol finish. We shot it a little dry for the first few coats, then after getting the desired texture, we shot several coats of Trim Black without texture. Most Organisol panels we have seen are too rough. If you catch a rag on the texture it is too rough.


Above left: Shooting this paint really takes some practice. The recess for the tag can get too rough if you don’t pay close attention to the hard to reach areas. Also, the upper curve of the panel can get too thin and rough. Don’t worry. If it turns out too rough, just wet sand it with 600 grit, blow it off and start again. With a bright halogen spotlight on the panel, you can see the final correct sheen matching what we have seen on an original untouched A12 Organisol hood on a 5000 mile 440 Six-Pack Super Bee. Above right: Carefully unmask the tail panel. The paint, even though dry, will mar at even the slightest touch. Keeping these panel in perfect shape is one of the most difficult things to do. You can’t touch it up, polish it, or wipe it down. We use air or a very light touch with a California duster when air is not available.


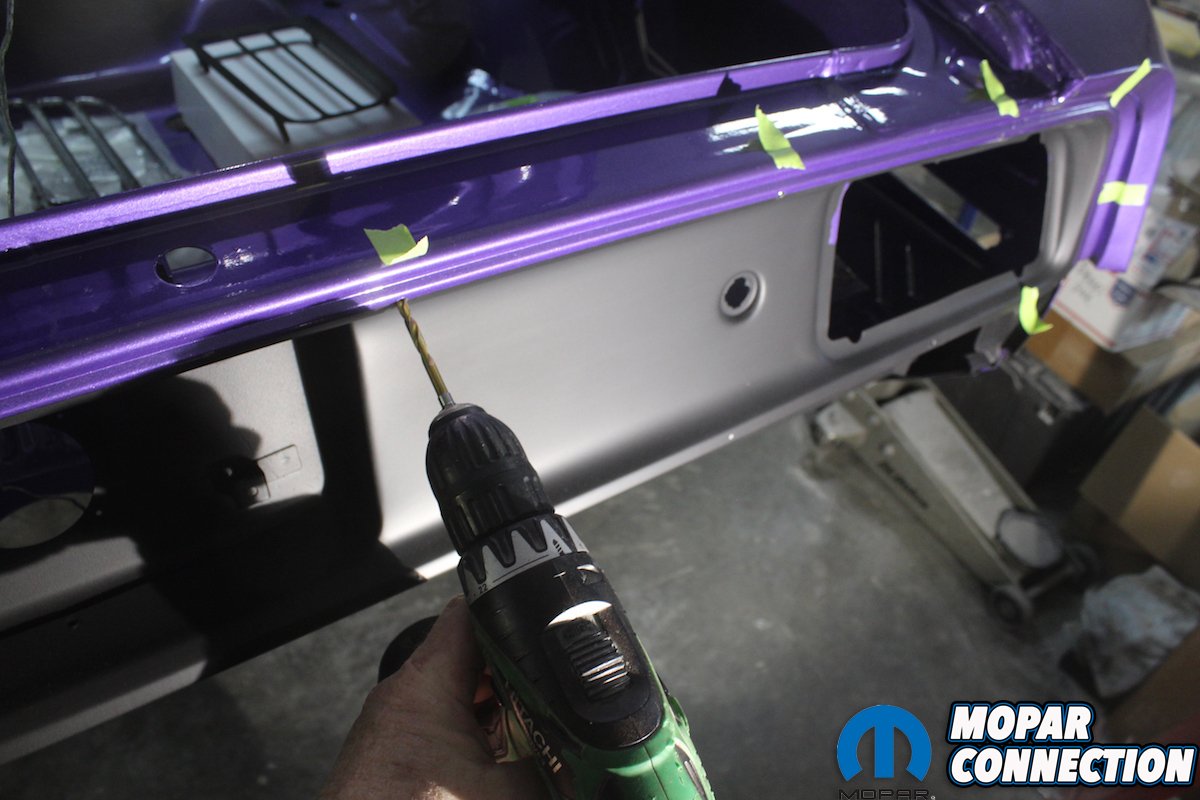
Above: In hindsight, we should have noticed that the new AMD panel was not drilled for the stainless trim. The holes would have been easier to drill before paint. But by drilling now we must be very careful or things could get complicated real fast. There was no way that we wanted to have to repaint the rear of the car. Using Chet’s AAR as a guide, we carefully marked where the trim holes should be drilled. We used a very fine punch to make sure we did not have any walking of the drill bit when drilling these holes. By taking our time and being very careful, all the holes were successfully drilled in the correct places for the trim.
The grille blackout has always been a topic for discussion and disagreement in the hobby. What angle was it shot? Where and when on the assembly line was it shot? What areas got paint and overspray? What sheen is the black? What color cars received the blackout? What color cars didn’t receive the blackout? And on and on. The best way to know what your car had is to look. But if your car has been repainted, how do you know what it had? Since we were starting from scratch on the Comeback ‘Cuda, we used Chet’s original AAR ‘Cuda as an example. Plus, if you adopt the factory line worker’s attitude and the basic reason for doing it in the first place, you can re-produce it as correctly as possible.
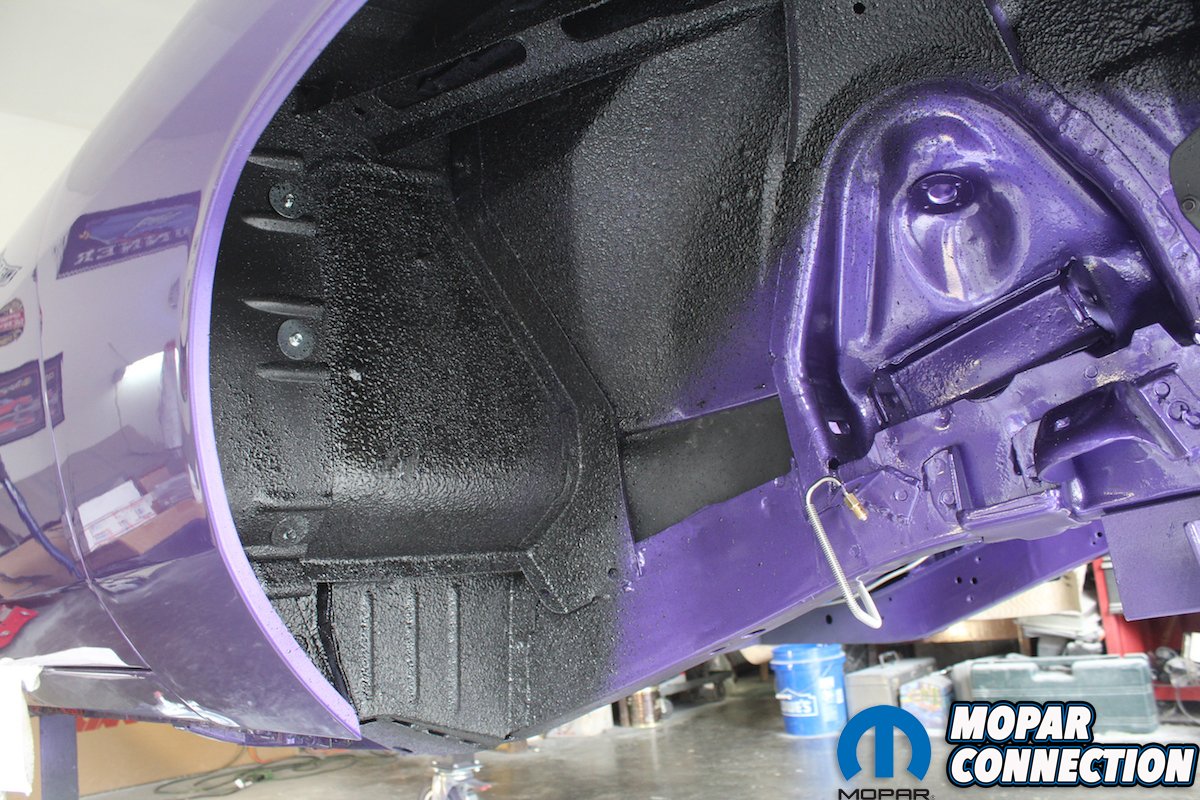
The Comeback ‘Cuda was not a factory or dealer-undercoated car. Many restorers will not apply undercoating to the wheel wells because it looks messy. But we usually never say all, but all Chrysler-produced cars from this era (no matter the color) got undercoating in the front and rear wheel wells. Even though depending on the line worker and how he was feeling that day, variations of how much was applied exists. Again there are enough original examples of cars out there to provide a clear designated area for the undercoating. We always use Resto Rick’s undercoating and it never disappoints.
Now that everything on the Comeback ‘Cuda that needs painting or spraying is done, we can begin to assemble the car. In our next edition we will start under the dash area with insulation, pedals, emergency brake and heater box restoration.

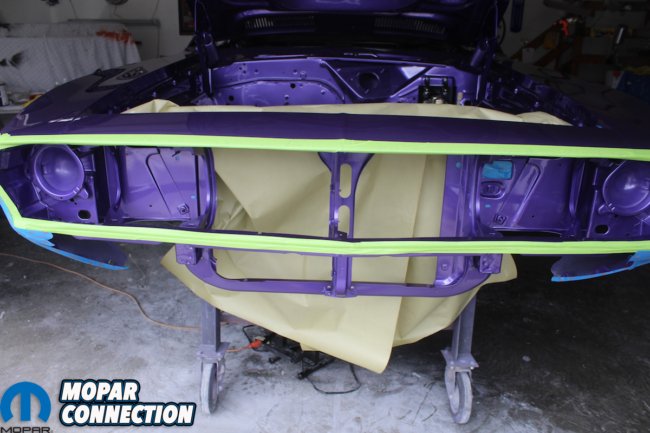
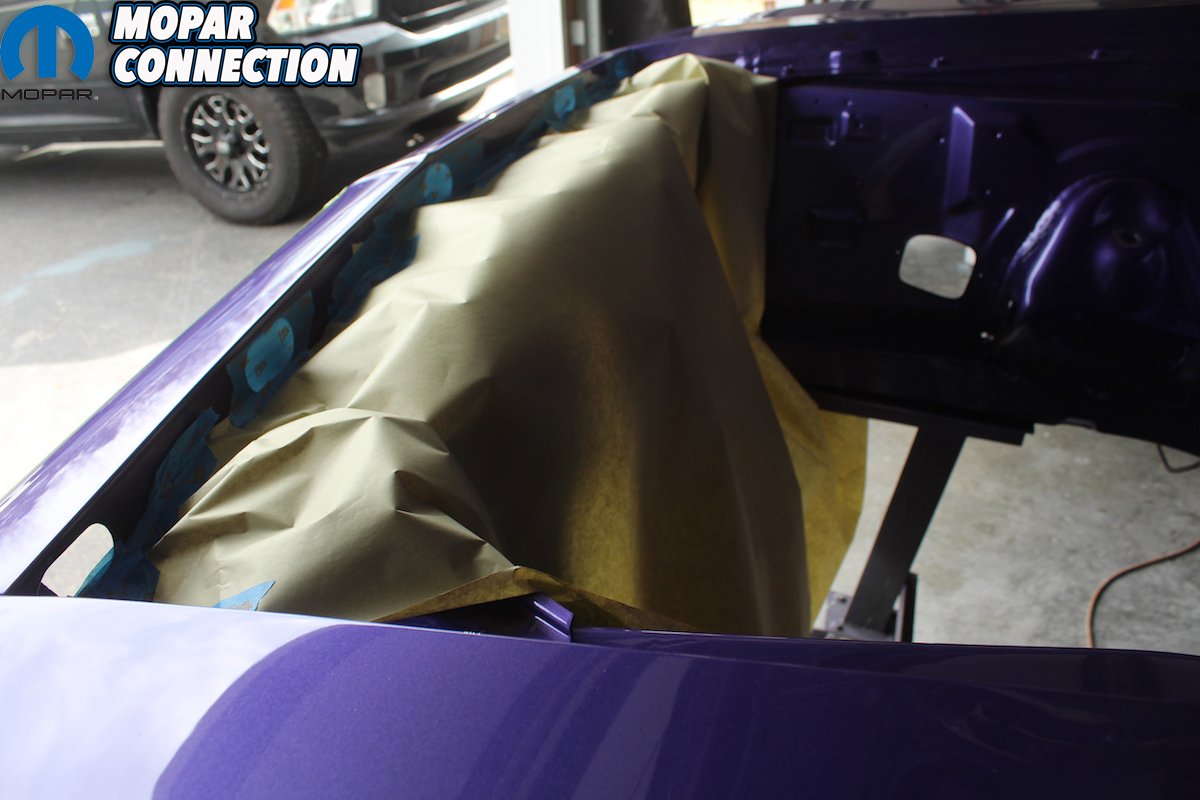
Above left: The factory did not mask off the car when they applied the grille blackout. That is why there aren’t any hard lines on this area. But we chose to mask off around the area to be painted to keep the black from completely covering the entire engine compartment. Above right: We also masked off the nose and front fenders away from where the paint was going to be applied. This way the car keeps its beautiful shine and we can still re-create the pattern of black out behind the grille.
Above left: Using Chet’s unmolested original AAR as a guide, we shot the Trim Black mixed 1-to-1 with a full size paint gun at a lower pressure. We shot it at a slightly upward angle to recreate what we found on the car originally. Above right: Not all of the head light buckets were painted, and neither were all of the grille surround supports, or the up right panel support. We also found that the lower radiator support was covered very well from a bottom up angle.


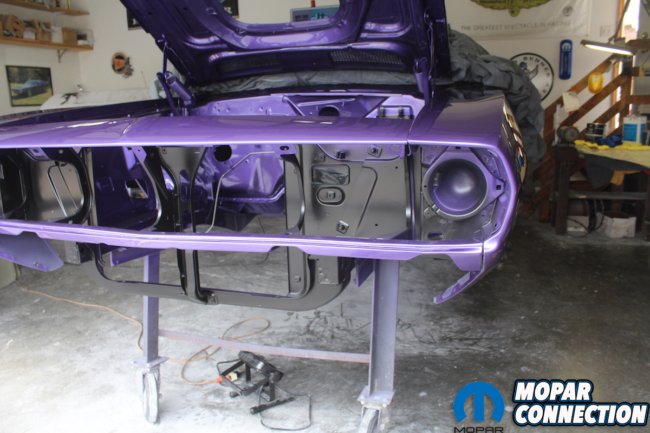
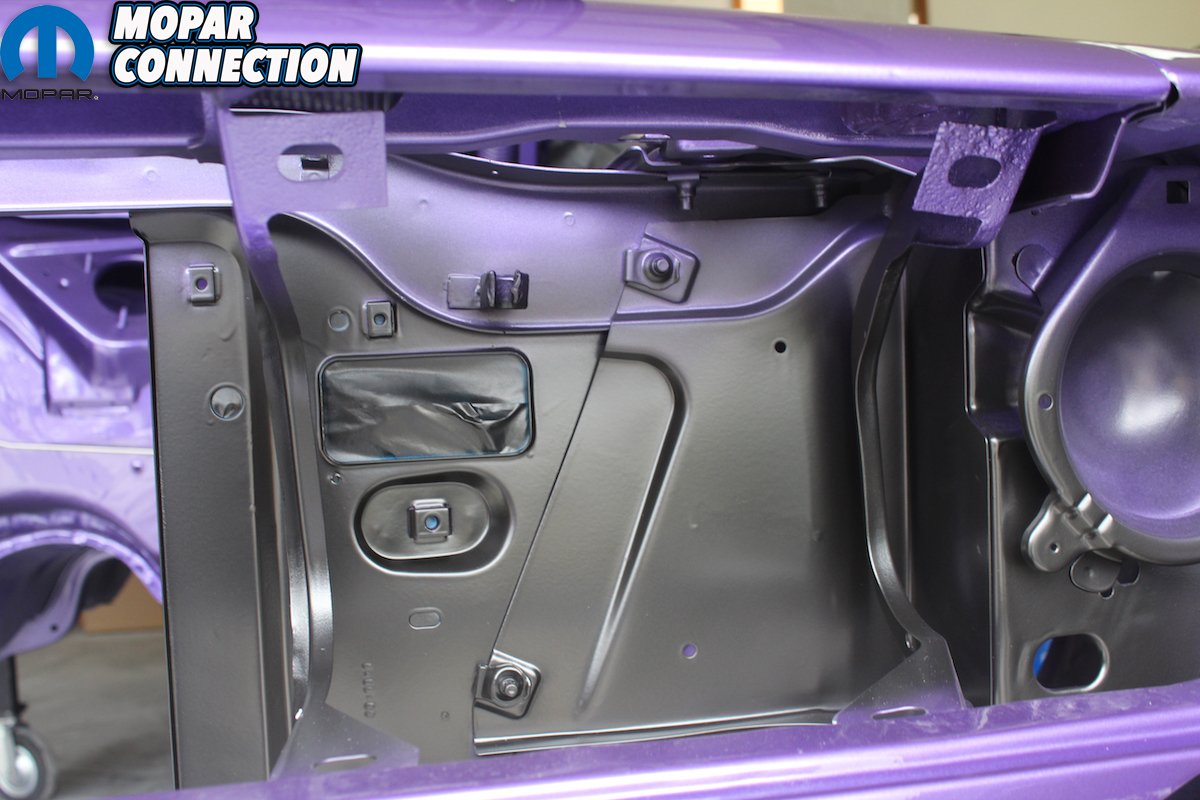
Above left: Here you can clearly see the over spray pattern created without any masking on the passenger side of the car. We stuck to the goal of just blacking out the body color paint, so it wouldn’t show through the grille. Then whatever overspray there was on the upper radiator support was because of the angle of the gun. Above center: On the driver’s side, you can see were the wiring bracket got paint on the underside but not above where the post comes off the panel. You can then see the overspray next to the bracket. Also, the bottom and front of the radiator bolt threaded plate were hit with black but the top did not. Above right: We have seen several high level restored cars, especially B-bodies, that you can see where they tried too hard to extend the blackout onto the upper radiator support. It looks far too contrived and like the spray pattern was from a touch up gun. Here you can see the natural result of a full size spray gun being shot at an upward angle. We did not go back and try to touch up anything. Just like the factory, it was shot quickly and in a one-shot-only time frame.


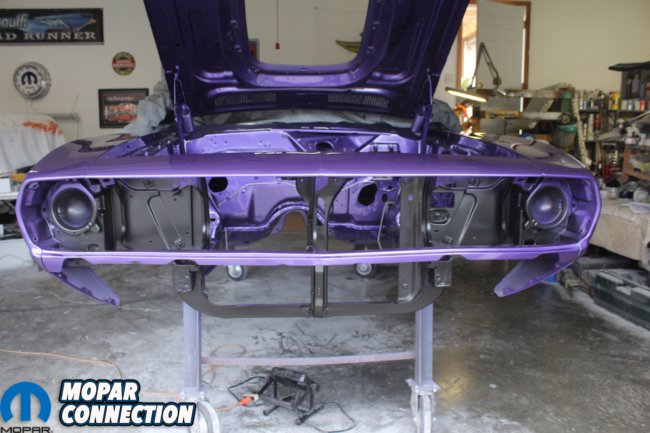
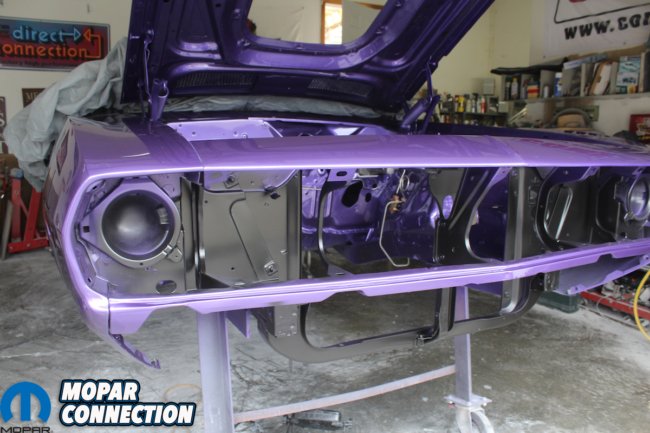
Above left: Here is a shot of the driver’s side, only a little farther away. This shows the contrast between the body color and blacked out areas. The Trim Black has just the right amount of sheen. If you use flat black it really looks way to dull and gloss would defeat the purpose of just seeing the grille. The coverage of this paint is awesome! Above center: Here is another shot of the passenger side again, not so close up. From what we found on the AAR, this re-creates the pattern from the factory. Notice the top of the clip and bolt is still showing body color while the bottom is black. The overspray looks natural and not contrived. Above right: Here is the finished front grille area. In the 45 years we have been restoring and judging cars, this process and these products have produced the best results we have ever seen.

Above left: Resto Rick’s undercoating is as close to the original undercoating as you can get. A gallon will cover the inside of the quarter panels before paint and the wheel wells after paint. If your car is fully undercoated, you will need two gallons. Using a “shutz” gun you can spray the undercoating and it will come out great! Above right: Getting started on shooting the undercoating, several precautions need to be taken. This stuff is messy and cleaning it off the floor, clothes, and your skin is difficult. You must use a solvent since it is petroleum based while cleaning it up. So, we used a big drop cloth, long sleeve shirt, rubber gloves, and a face shield.
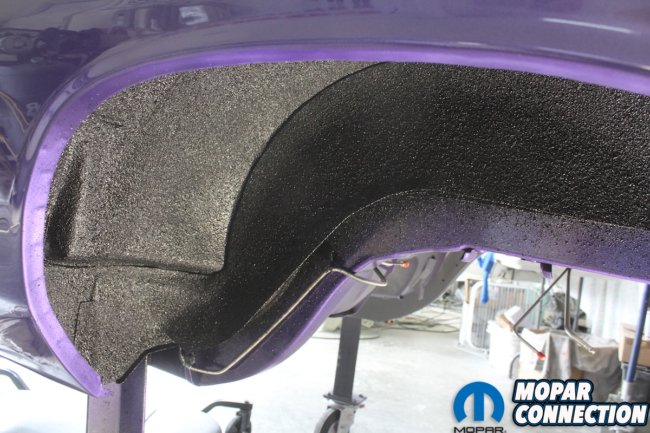

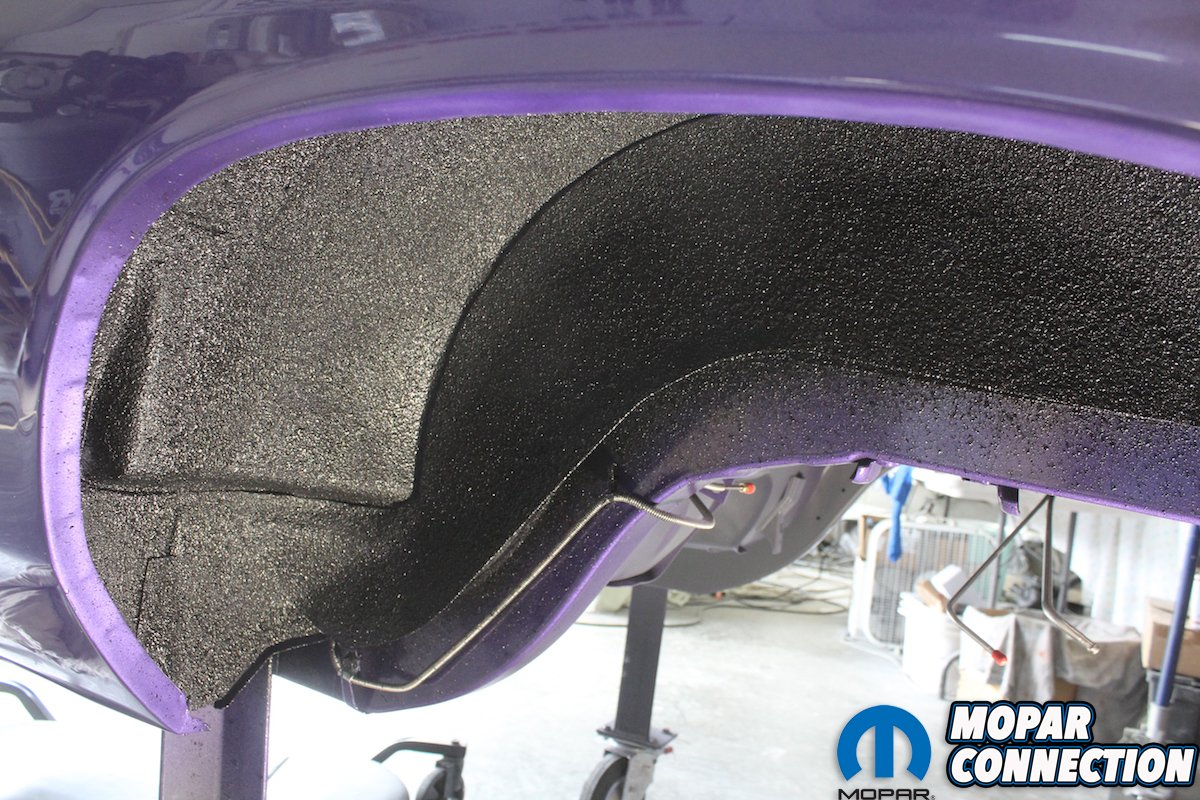
Above left: Here is a great picture of just how good the Resto Rick undercoating goes on. It is important to shoot the outer, upper, and inner parts of the wheel well with undercoating. That way when rocks fly up they will not dent the metal. Plus, that’s the way the factory did it. Above right: You will notice that the brake line is installed on the car before the undercoating is sprayed. The fuel and return vent lines are also on the car before the undercoating is applied. You need to shoot it so that some undercoating hits the frame rails. You can also see in the back ground the trunk pan with the dip grey primer.
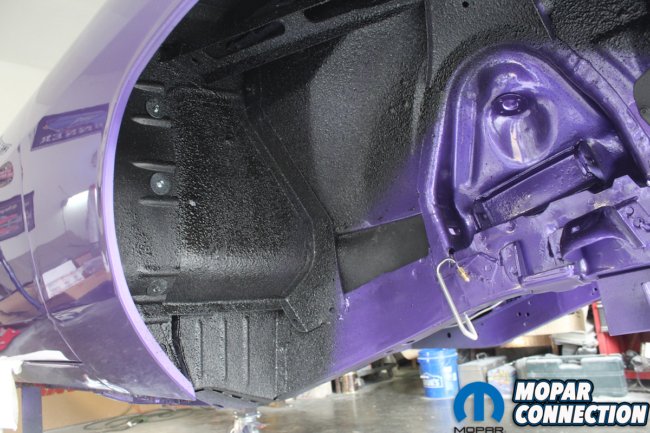

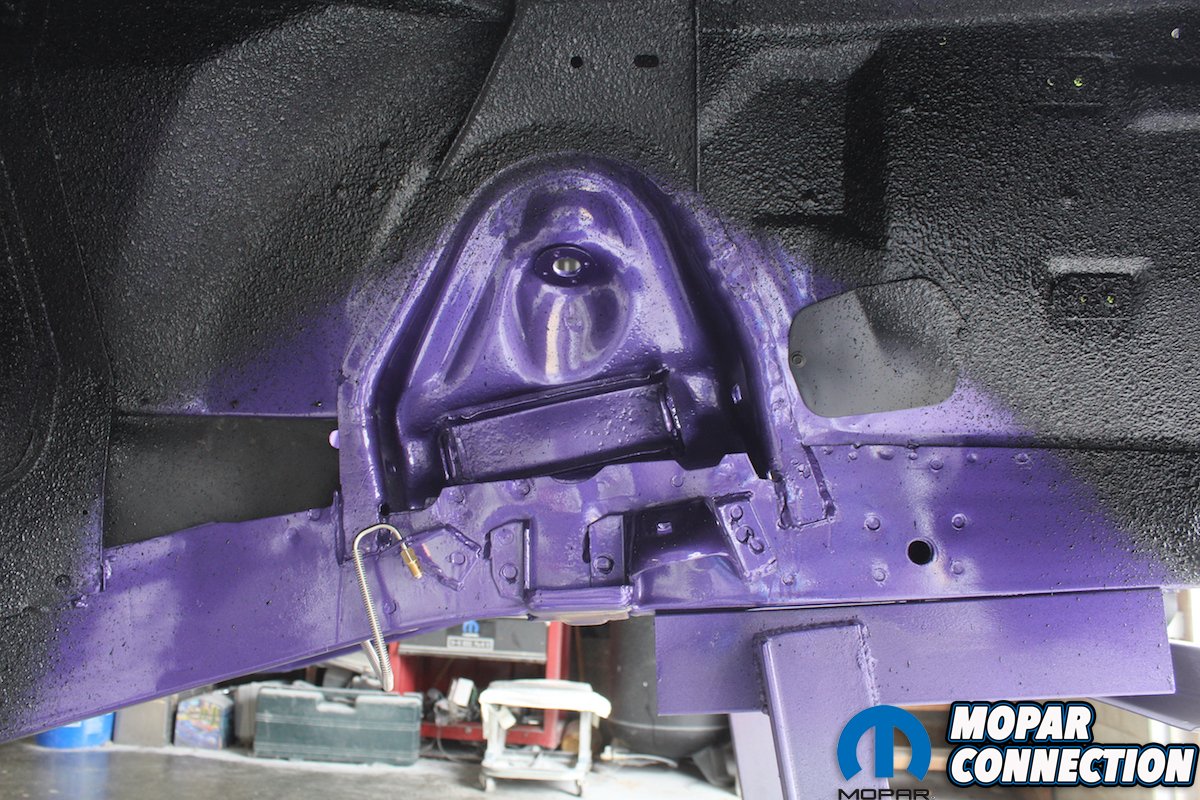
Above left: This is the right front wheel well. The front and rear plastic fender shields are already installed. Variations is how much undercoating was applied to the shields varies from barely to excessive. This is what we found on this car. The large washers and small bolts didn’t have a lot of undercoating on them. Above right: The rubber and metal upper control arm access covers are installed. This spray pattern is seen on every car. It makes sense that they would avoid the shock tower and access plates since they will be used over and over again. The same as in the rear wheel well the outer, upper, and inner areas are covered. Especially the upper part of the fender wheel well needs protection from flying rocks.
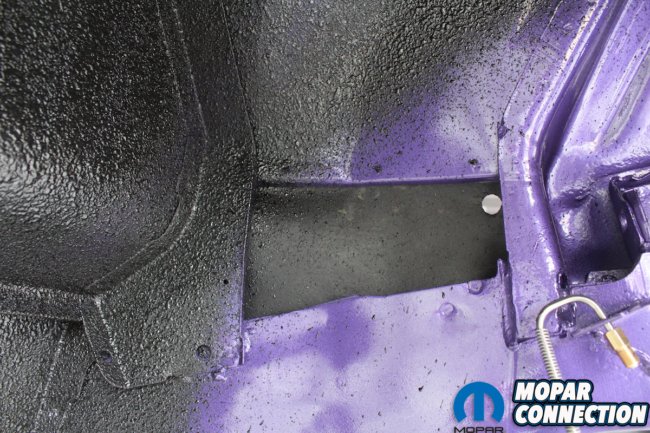

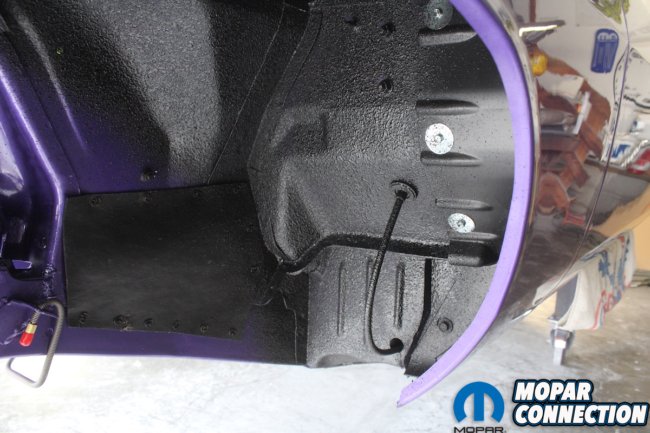
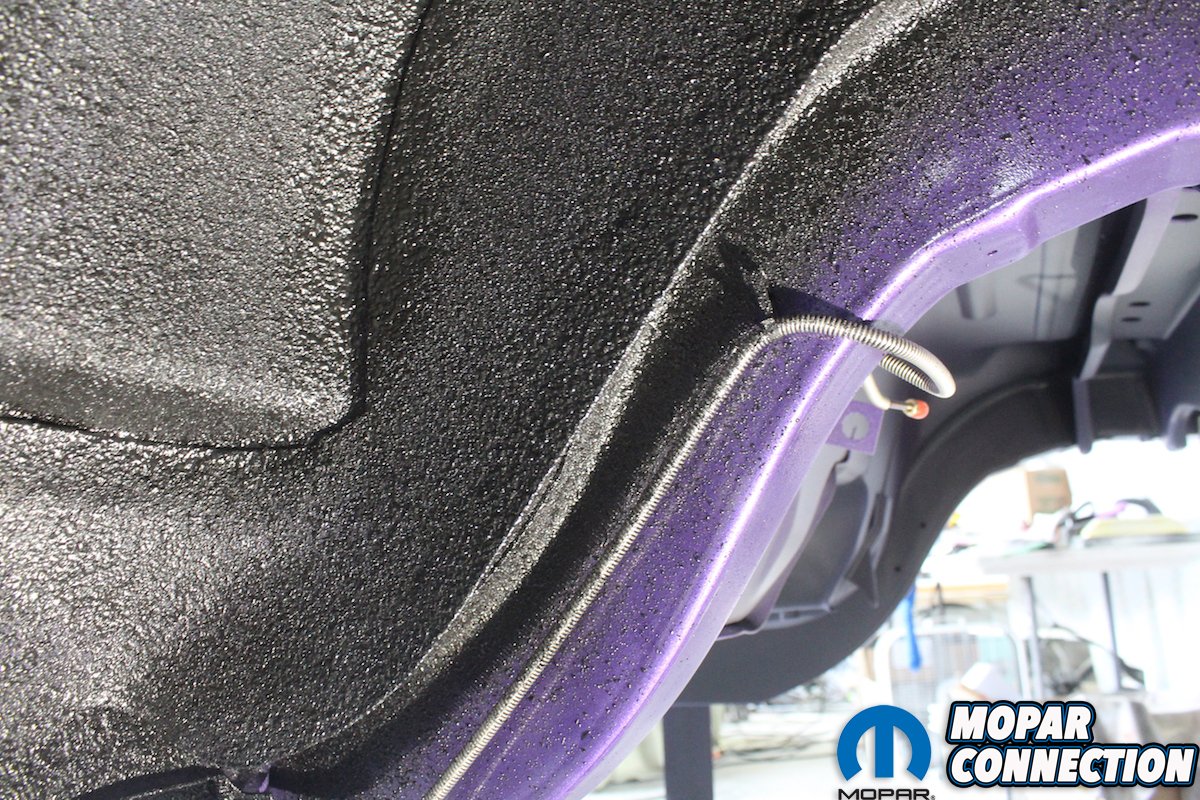
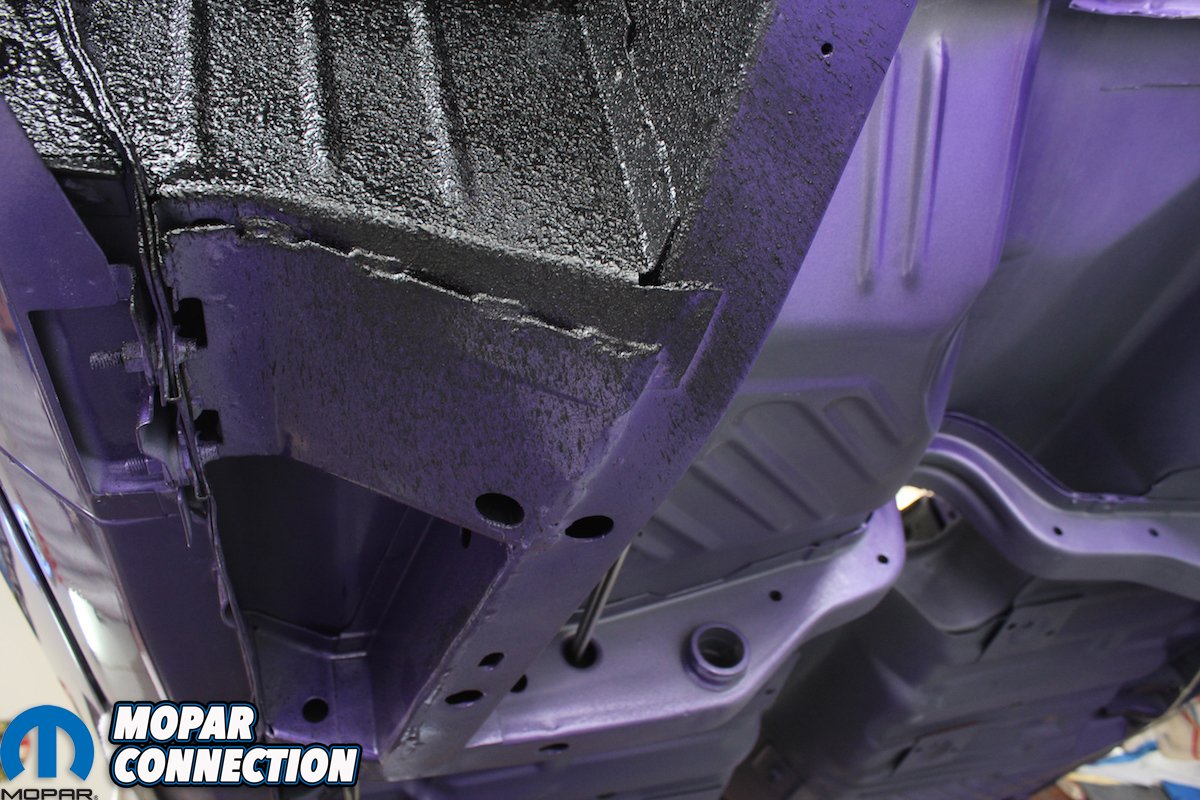
Above left: We cannot tell you how many cars we have judged that have the passenger side rubber access cover installed wrong. The driver’s side goes on the inside of the wheel well. The passenger side rubber cover is installed from the engine compartment. This is true for B-bodies too. You can also get an idea of the amount of spatter occurs from shooting the undercoating. Don’t mask or wipe it off. That is the way it is supposed to look. Above center: Remember when shooting the undercoating that you are an assembly line worker who really doesn’t care where the undercoating goes. He has guidelines, but the application is up to him. Here is the natural spray pattern on the lower frame rail and front torque box that would occur while shooting the wheel well. You can also see the fuel and vent lines installed and the grey dip primer in the background. Above right: Yes, the emergency brake cable was also already installed before the undercoating is applied. The black undercoating not only protected the car, but it also contributes to the look of the car. Just like the blackout behind the grille makes the grille look good without paint color showing through, so does the black wheel wells make the car look better. When we see a restored car without the wheel wells undercoated and body color showing behind the wheels we just shake our head. It looks really bad!


