


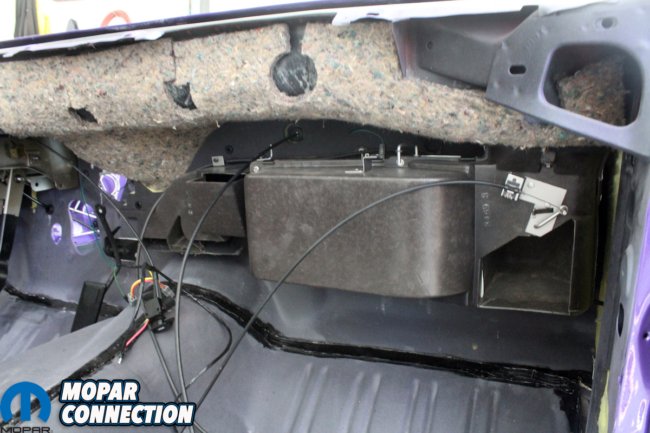
The first step in rebuilding a non-A/C heater box is to evaluate the condition of the box and it’s components. Since the heater box was working when the “Comeback ‘Cuda” met the mail box we knew the components were functional, but what condition would the box’s body be in and could it be restored?
All A, B, E, and even C-body heater boxes were made of the same material. However, they are not interchangeable between body lines. These boxes were made of thermal plastic with sisal fiber added for strength. Their finish is very unique and cannot be replicated with fiberglass or paint. So, care full inspection for cracks or missing pieces is important. If you are not interested in original appearance but just want it functional you can paint them after repair with a flat or semi gloss black paint. But you know we are not going to do that.


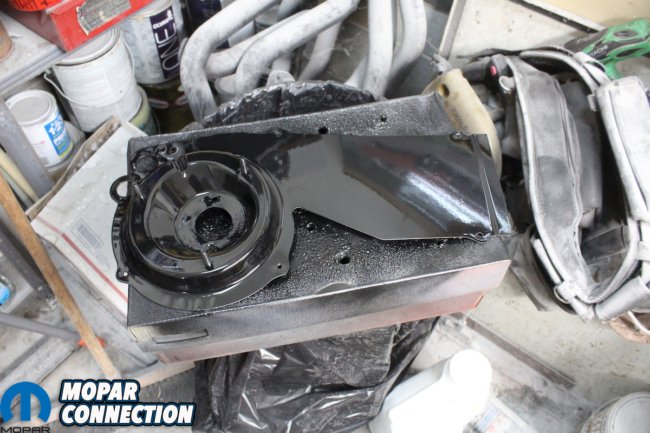
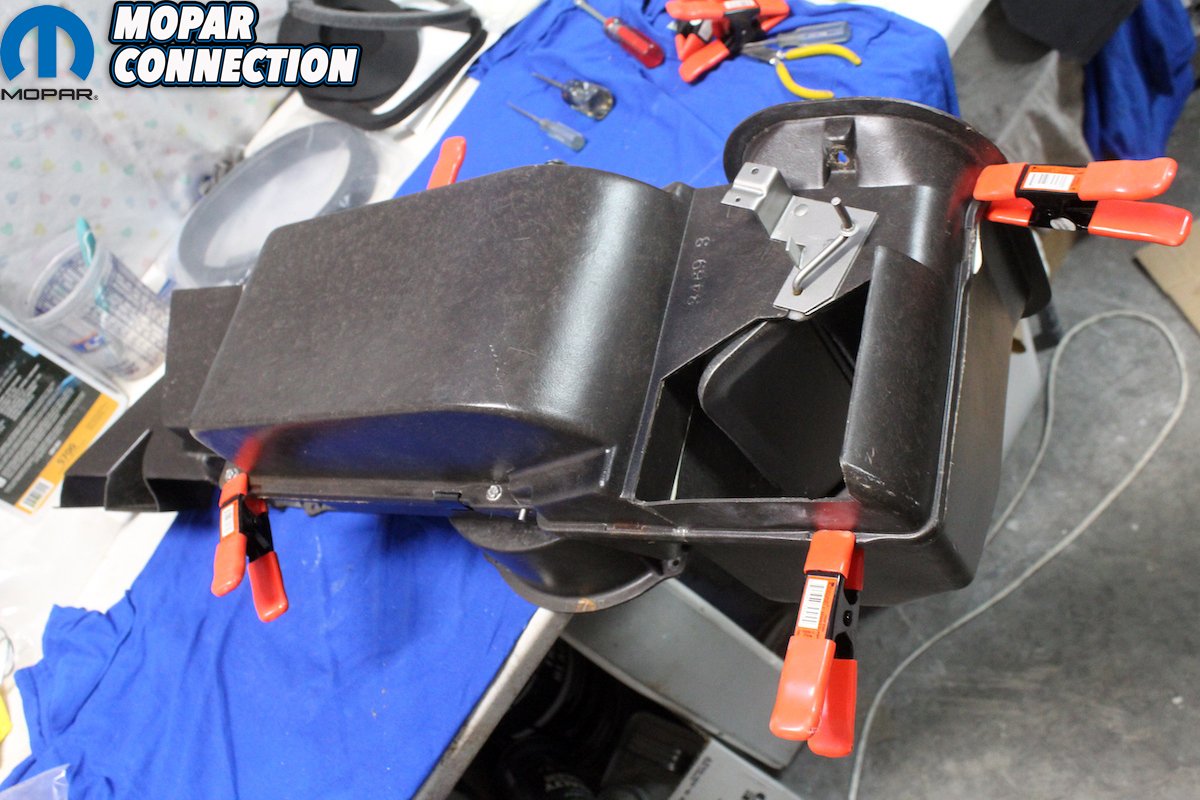
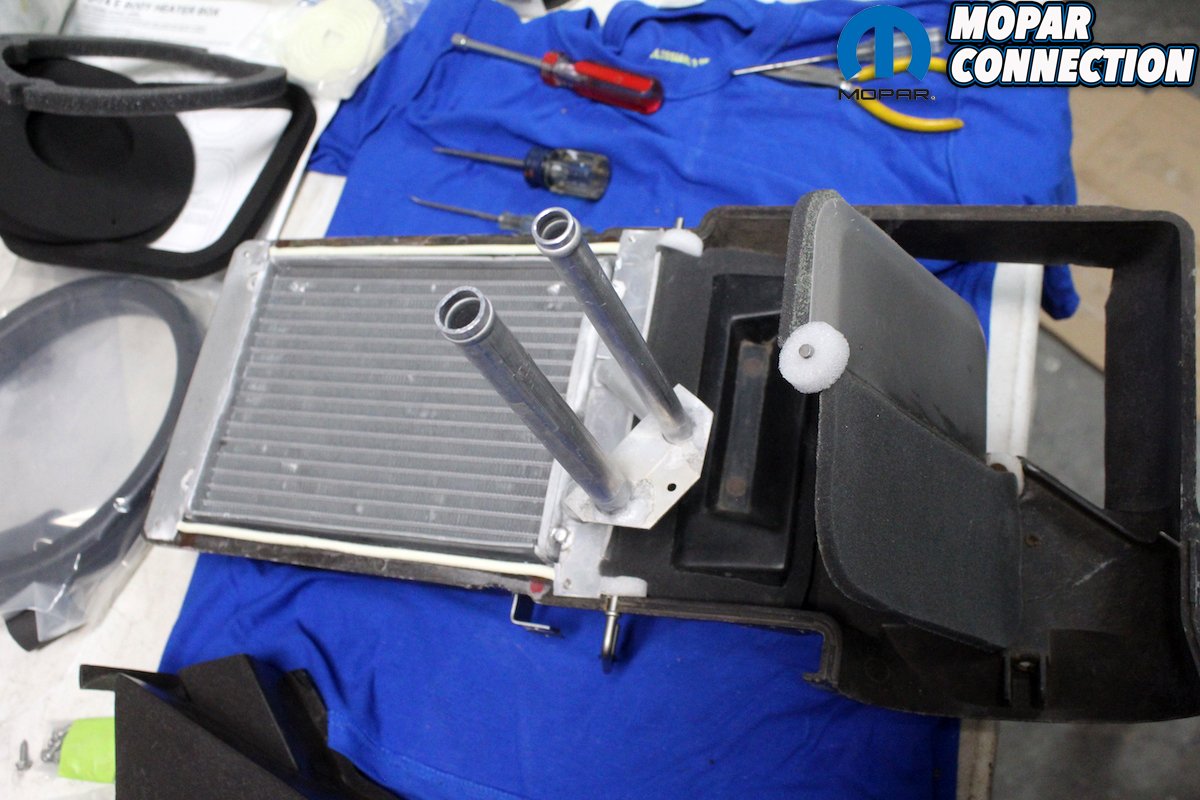
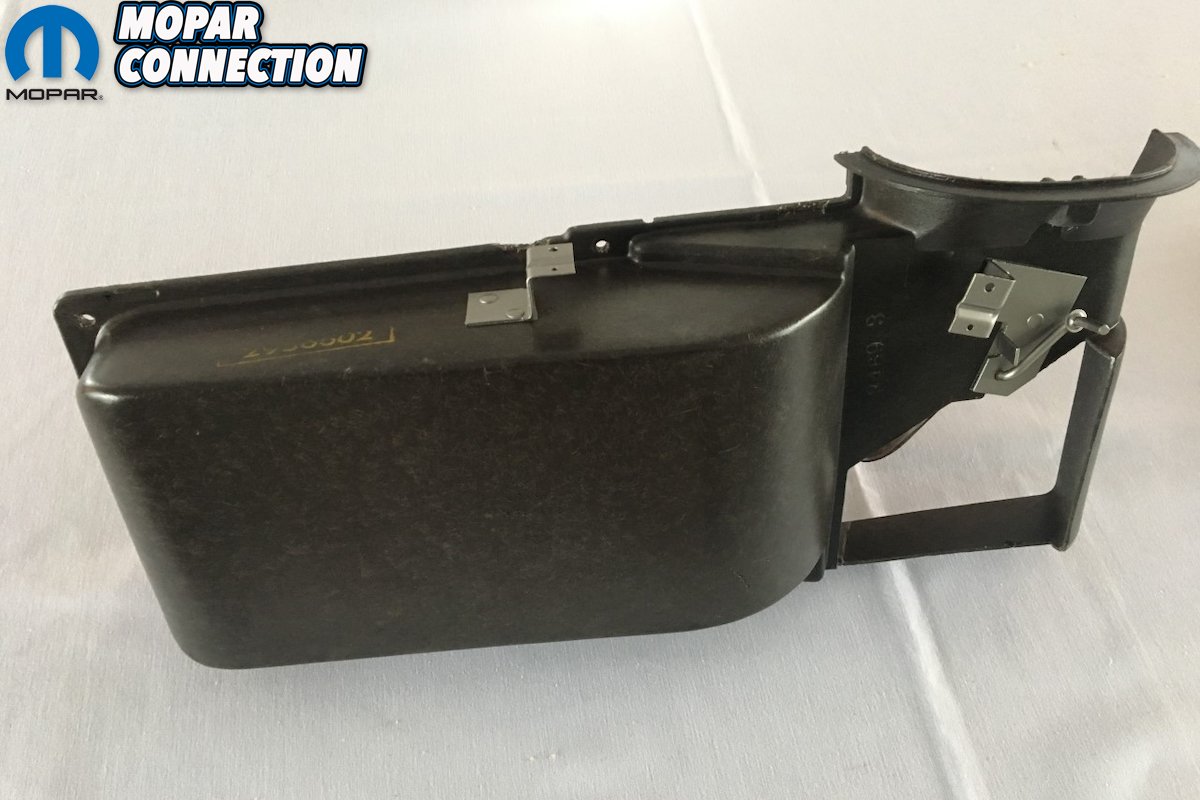
Above left: Most heater boxes are in poor shape after being in a car for 40 plus years. However, they can be restored and made to look brand new. The heater box was working when it was in the “Comeback ‘Cuda.” We just had to see what condition the body of the box was in and if there were any cracks or chipped out pieces. Above right: Everything is there and pretty good shape. The clips were all there and even the fiber board section on the back of the heater box was still there. All the brackets and doors were there and only had surface rust. We drill out the backside of the tubular rivets and blast the brackets and doors then paint them with Seymour’s Stainless Steel paint.
After inspection and testing, everything worked well and there weren’t any cracks or chips. The metal parts were surface rusted and we saw where YearOne had a new reproduction front cover. That would save us a lot of time removing and replacing the hardware. We work closely with these great guys and give them feedback on any parts we get from them. When we opened the package, we didn’t like what we saw. Read on and we will explain fully later.
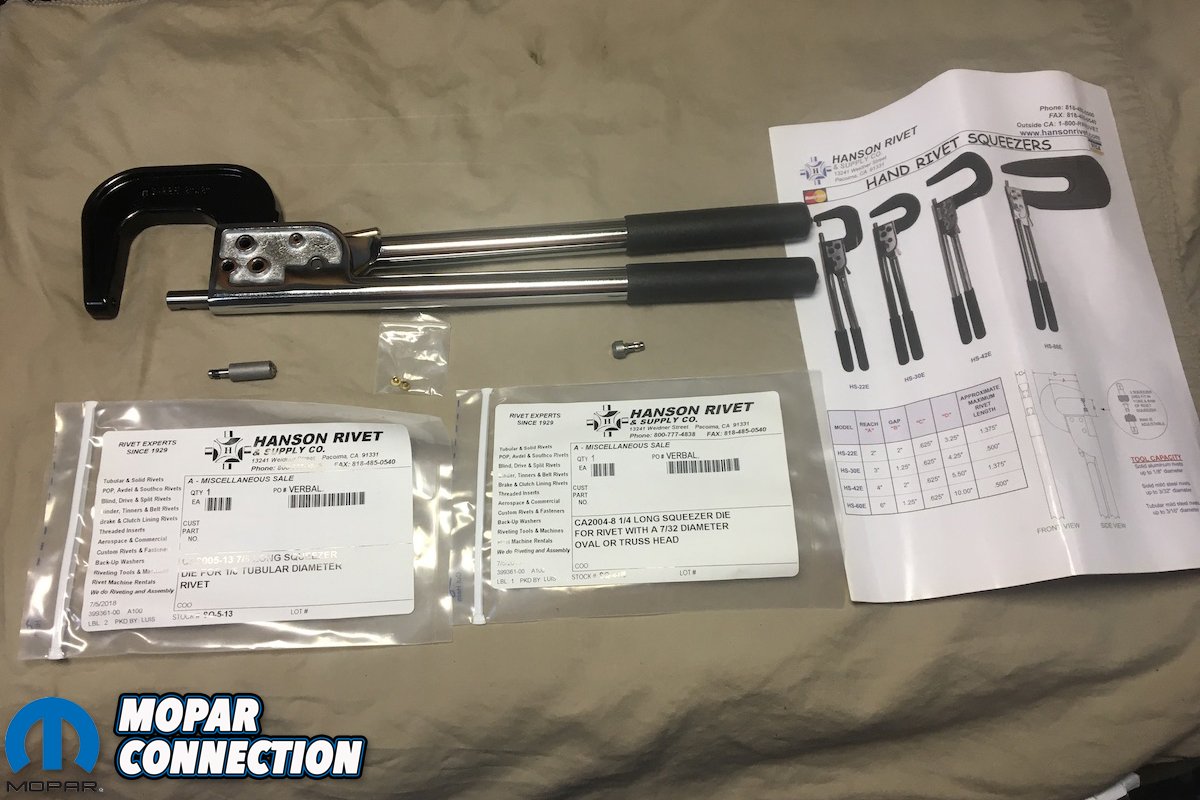
Fortunately, no one had painted the box in the past so a quick disassembly and a once over with lacquer thinner and 0000 steel wool and the box looked new. The brackets are riveted but not with “pop rivets” that have a hole in them. We invested several years ago in a Tubular hand squeezer with a roll die for 1/8 tubular diameter rivet and a 1/4 long squeezer die for rivet with a 7/32 diameter oval or truss head rivet. We got everything we needed to do these rivets not only on the heater boxes but also on the ash tray insert from Hanson Rivet and Supply “www.hansonrivet.com.” Both these units have the tubular rivets.


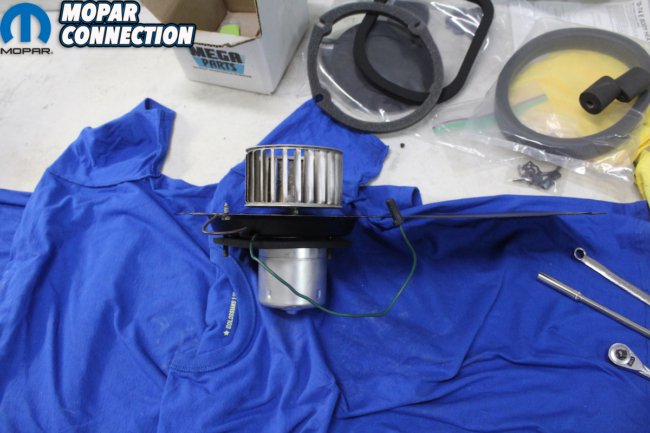
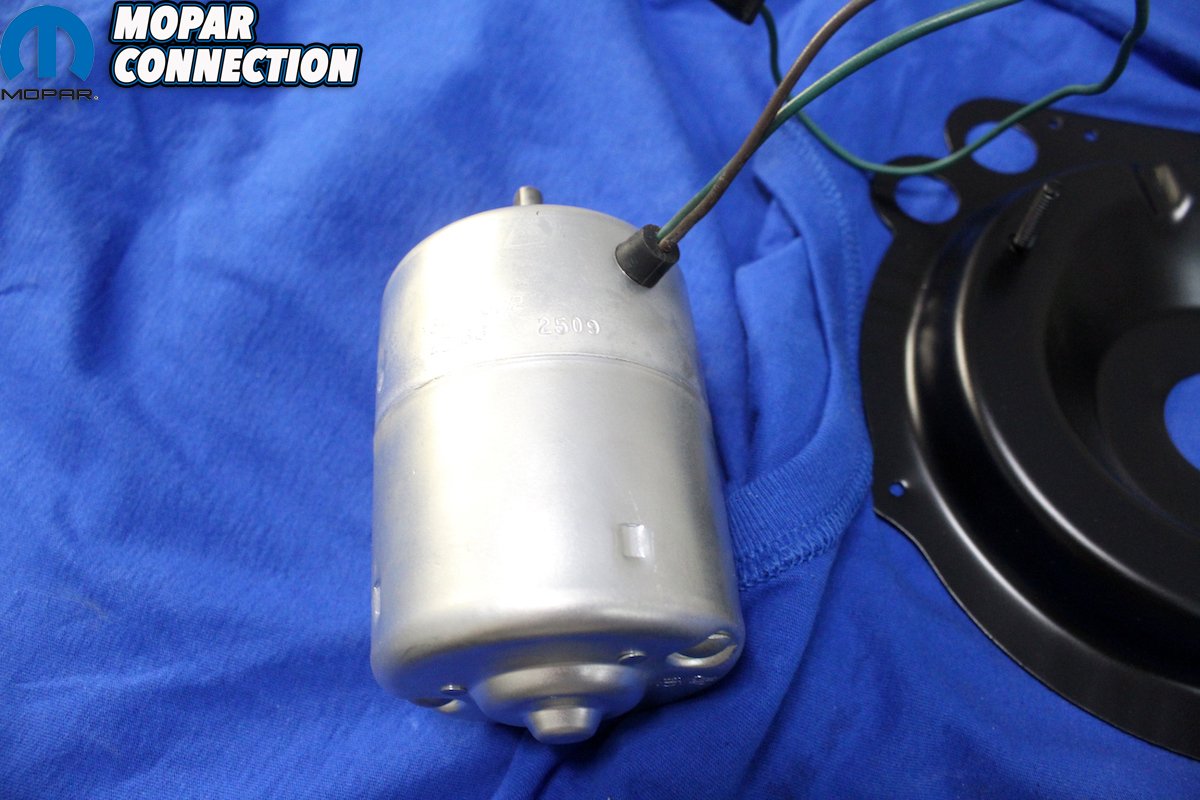
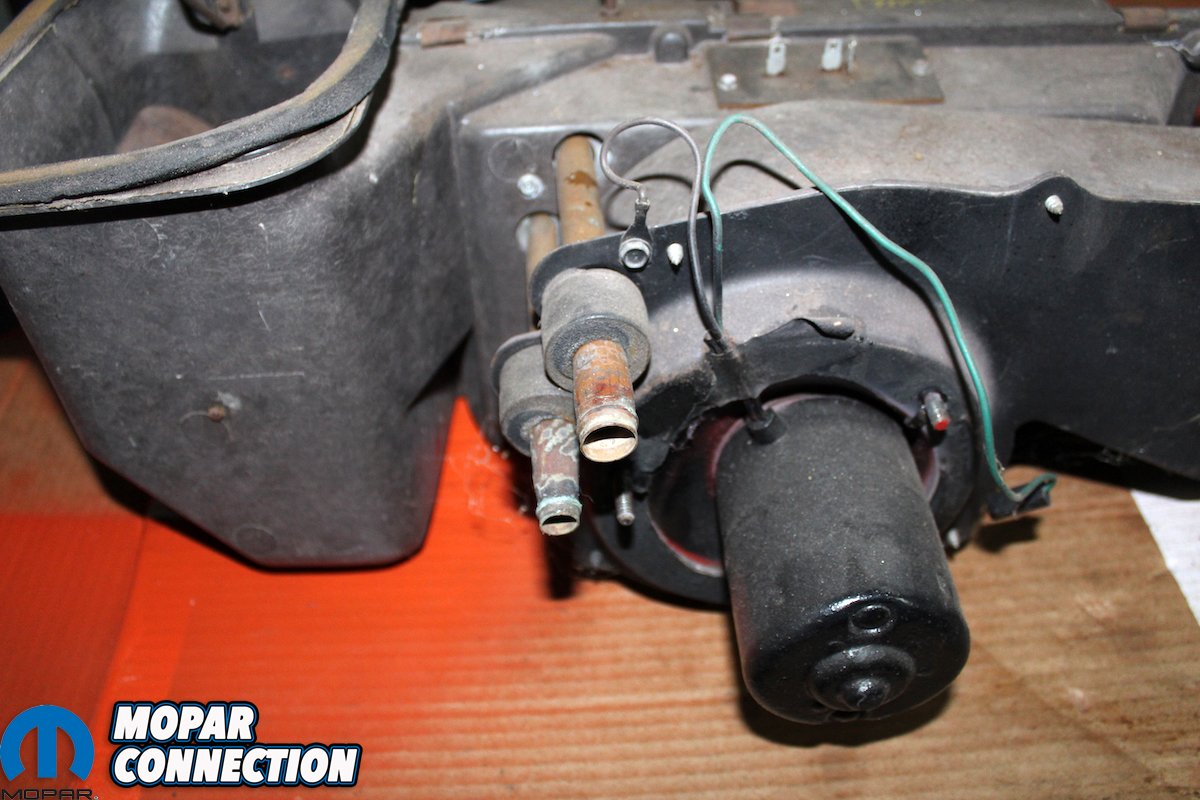
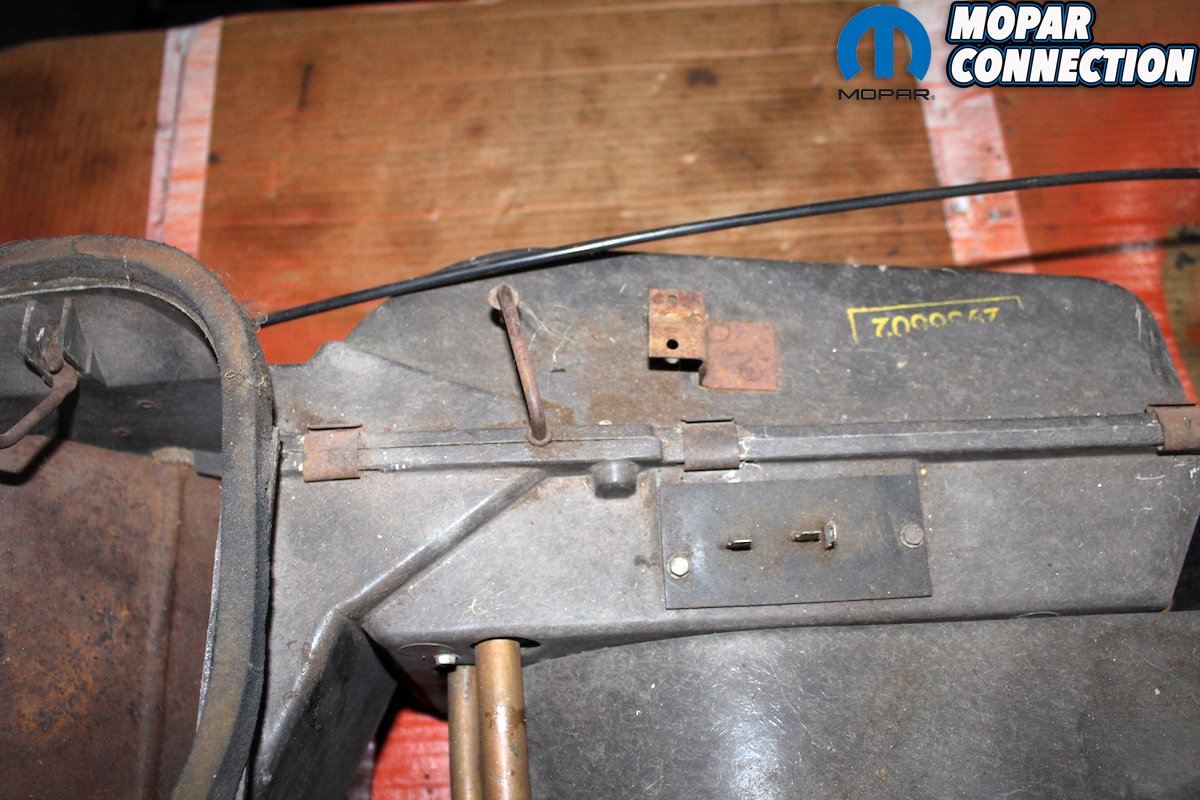
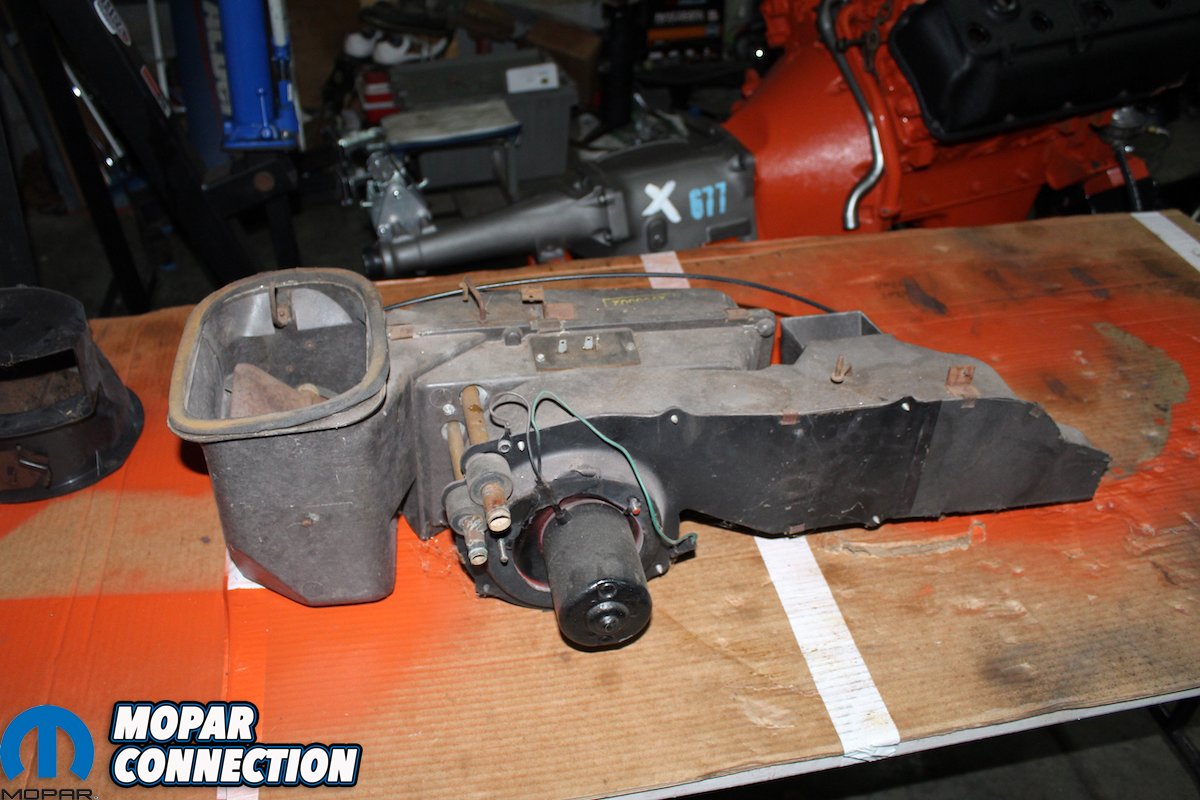
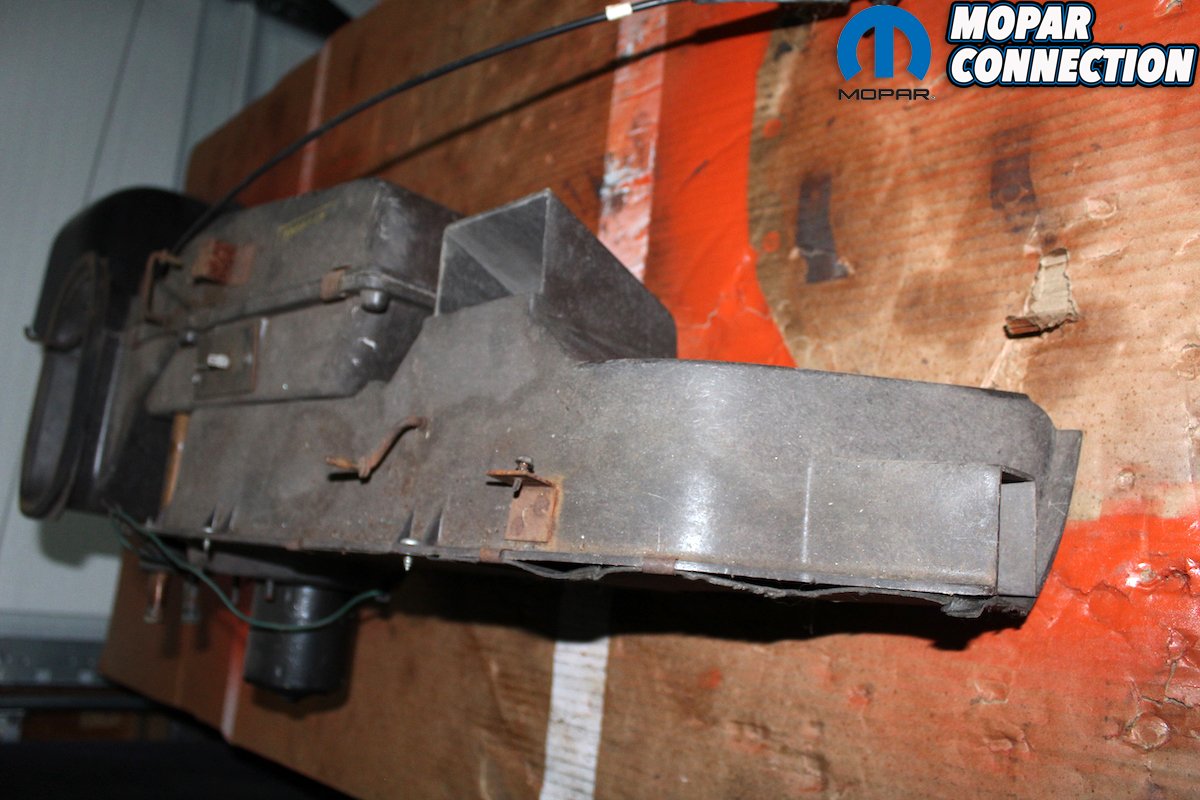
Above left: The blower switch resistor was in good operating condition. In the top of the picture you can see an ever important “hook” that is mounted with a unique screw. This “hook” is important when you go to install the unit in the car. Original part number is intact and as you can see is only partially stamped. Above right: The blower motor was in good working condition but had been painted several times and needed to be re-plated correctly. Notice the paper tape holding the wires. Also notice the different size heater core inlet tubes. These are on all 1970 and up cars. 1969 heater cores are the same size. We found that two of the three mounting studs were broken off. So, we needed to find a replacement.


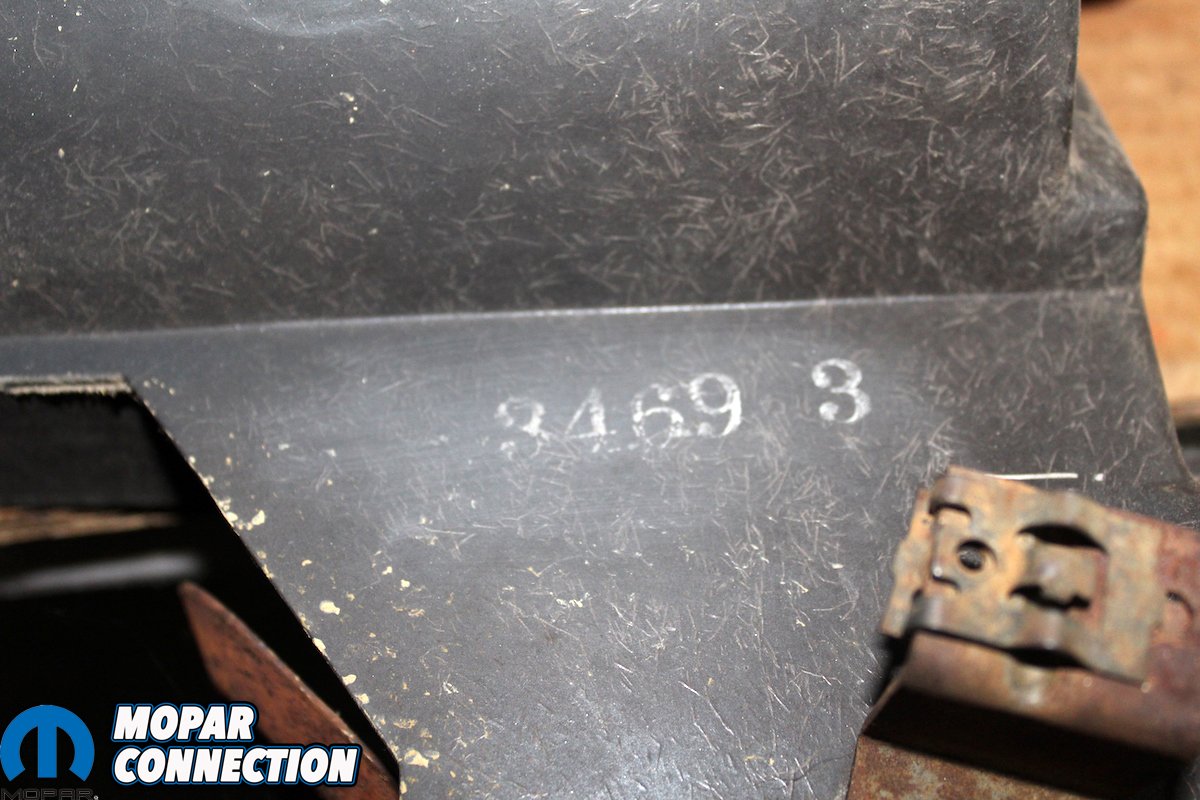
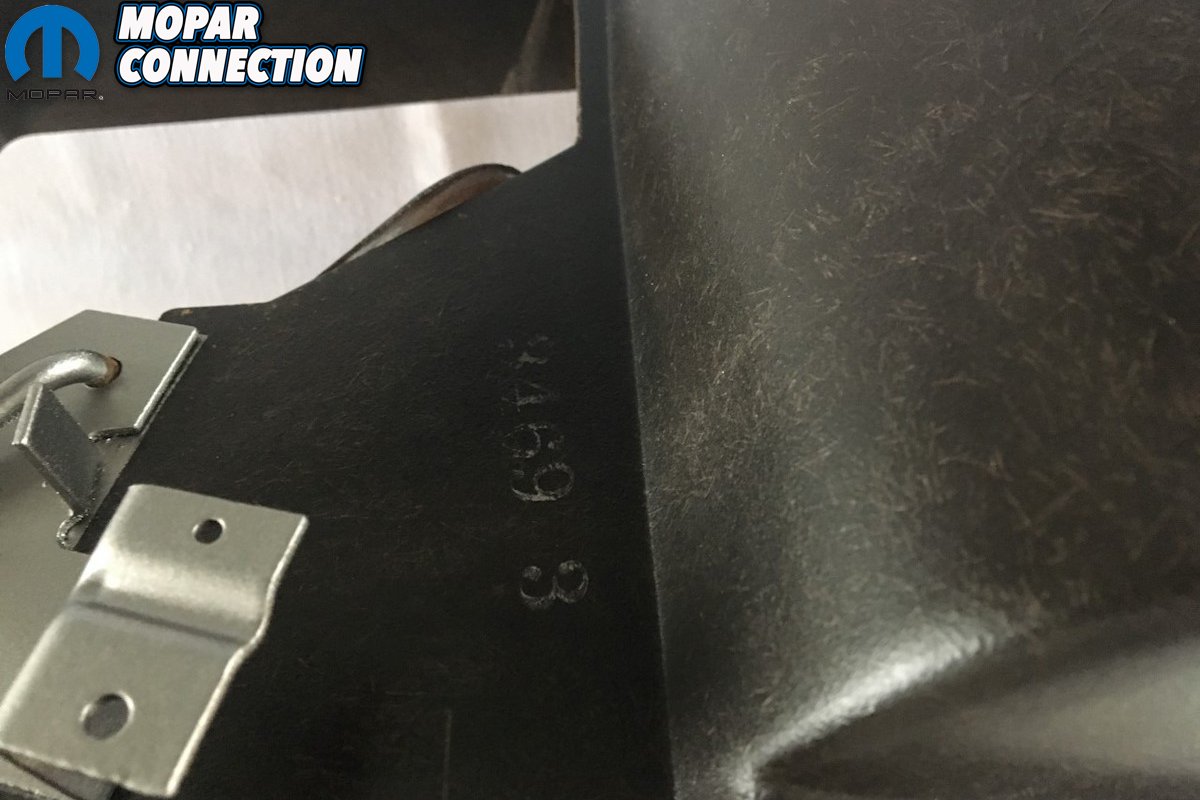
Above left: When was the last time you saw an original date code stamp on a heater box. This one is in great condition, so we are going to try to save it. 346 day of 1969. This close up picture shows the thermal plastic with the sisal fibers embedded. Above right: Now that we know that the box is in complete and good condition we take it completely apart and inspect all the internals. Unlike a B-body unit that uses screws to hold the box together an E-body box uses clips. Carefully remove them because the plastic is old and can easily be damaged. Using lacquer thinner and 0000 steel wool we clean in inside and out side of the box.
We sent the heater motor to Dynamic Renovation, Livonia, MI. There they took the motor completely apart, plated, reassembled, tested it and sent it back ready to install. We have seen these motors painted black, and painted silver. Both are incorrect. An easy way to tell if the motor has been fully restored is to look at the heads of the bolts.
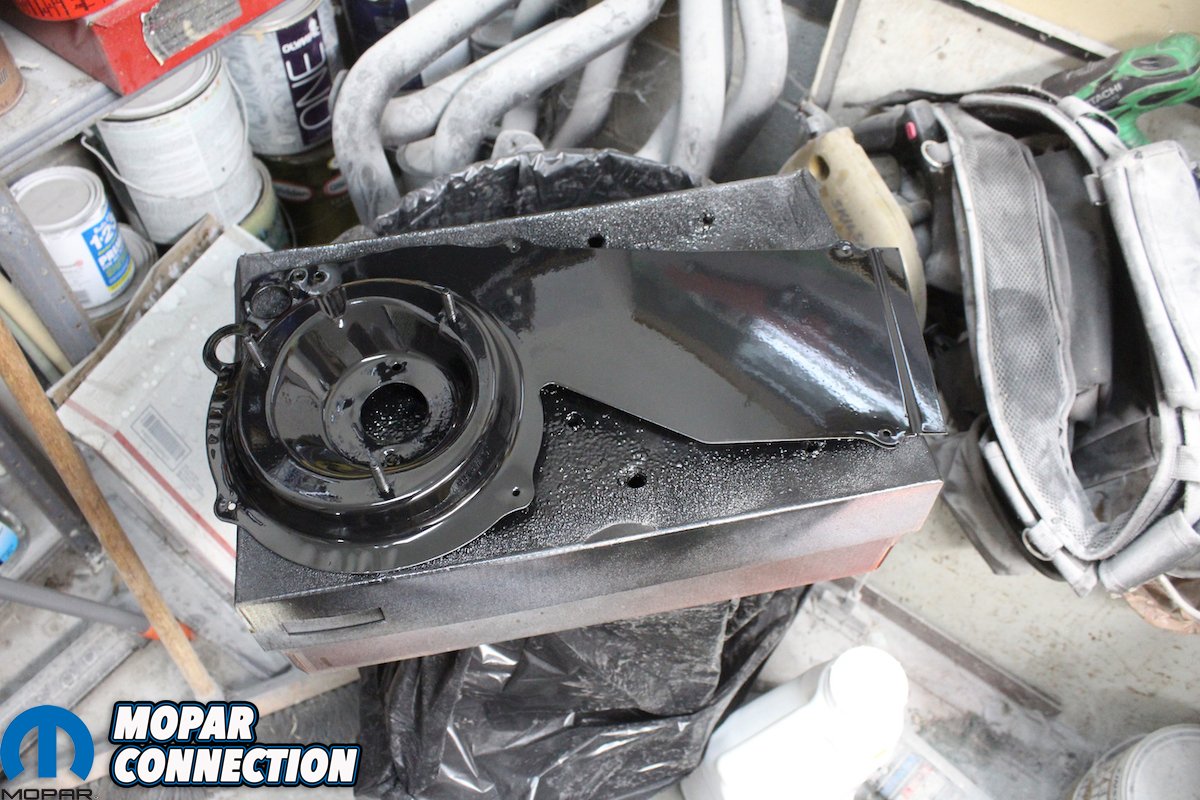
We always use the full gasket heater box rebuild kit from our friends at Detroit Muscle Technologies. The kit has everything you need to rebuild the heater box. We also always replace the heater core with a new unit. In the past we had to blast the body of the box and then reproduce the part numbers. This time the box was so original that we carefully cleaned around the numbers and saved them. After cleaning we shot the box with satin clear, reassembled, and tested it.
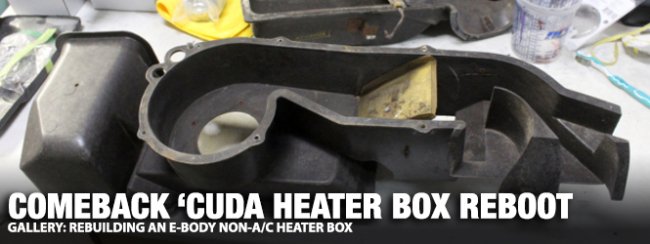
Above: We ordered a new front cover through YearOne a sponsor of the “Comeback ‘Cuda,” thinking this would save us some time. When we received it, it was disappointing. Don’t get me wrong the fact that someone even reproduces this part is amazing, but the box was black and not the original finish. I contacted them with this side by side picture showing the difference. YearOne contacted the manufacturer with the picture. The manufacturers’ response was, “We think they were black.” So, if you don’t care if yours is painted black it is a great new part. As always YearOne took the part back. You really can’t beat their customer service.


Above left: After carefully cleaning the cover and saving the original date code and part number we sprayed the parts with 3 coats of satin clear. This protects and makes the finish look great. Above right: We then attach the brackets with tubular rivets. As you can see the recessed area for the clips are very brittle. One is a little bit ragged while the other is perfect. As long as there is enough of the box edge left, and you can get the clips to hold, it will be good. Gotta love the partially stamped part number.
The finished heater box with cables attached is installed in the “Comeback ‘Cuda” using the silver cad nuts. These were hard to find since most reproductions are black phosphate. Now on to the dash. This can be a really daunting task but we will show you step by step how you can do it in your own garage. Stay tuned!

Above: Detroit Muscle Technologies are our “go to” guys when it comes to seals. This kit is so complete and every foam and rubber seal fits perfect. They include a detailed guide as to what seal goes where. They even provide a new fiber board which is always damaged. That’s one thing where the engineers cut a cost that they shouldn’t have. In addition to the kit you will also need to get some 3M spray adhesive.

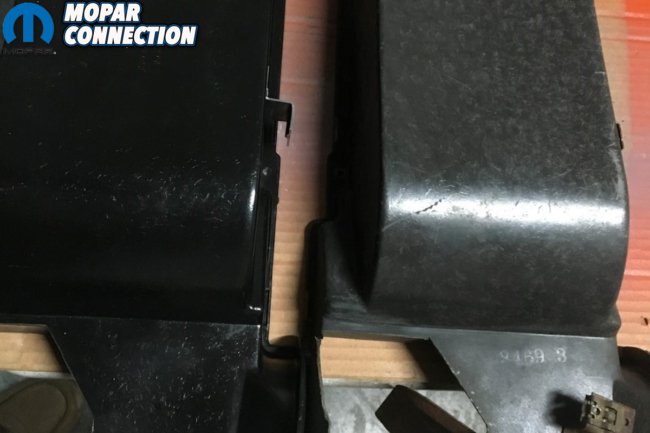
Above left: Included also in the kit is a roll of white strip caulk. There are specific channels where it is used in A and E-body heaters. B-body heaters did not have this caulk. This is a perfect reason for taking a lot of “before” pictures. That way you know where the stuff goes. Above right: Next, we install a new heater core. We did have to do a little grinding on the frame of the core to make it fit perfectly. The heat control door and the heater defroster door are installed. All of them have been blasted, restored and covered with the correct foam.


Above left: During re-assembly it is helpful to use some clamps to press the areas where the strip caulk is used together. Above right: We ordered all new clips since the old ones were rusty and weak. The new clips come with the original finish and have plenty of spring in them. Using a flat head screwdriver they install easily.
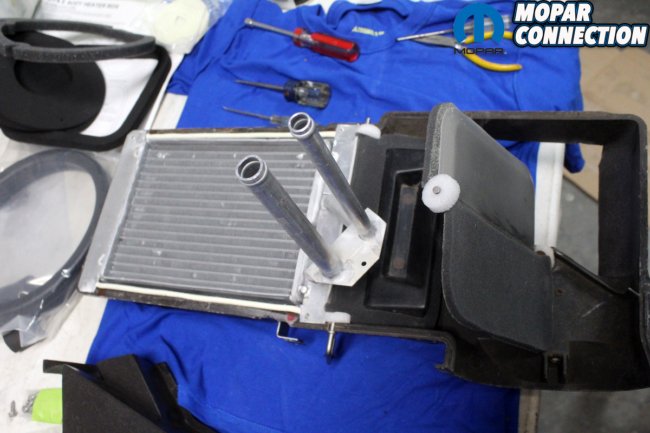
Above left: After locating another heater motor plate, we cleaned it with a wire brush on a die grinder. The blast cabinet was down or we would have blasted it with soda. I wouldn’t suggest using any more aggressive media since it will leave a rough finish. Above right: After cleaning the panel, we shoot it with several coats of semi-gloss black on the inside and the outside. Most of the time we use a gun to shoot the paint. On smaller parts it is OK to use a rattle can as long as you apply several coats since the paint is always thinner in the cans.


Above left: In addition to the heater box we also restored the drivers fresh air vent box. It is made of a completely different material and has a different finish. The restoration process is the same as the heater box. Clean and disassemble then drill out the tubular rivets. After cleaning with box lacquer thinner we remove the inner door flap and clean and paint it. The box itself was in such original condition we decided not to glass bead blast it. After a good coat of satin clear we reinstall all the parts and it is ready to go back in the car. Above right: The blower motor has been completely disassembled and restored. It is not painted black or silver but is plated with silver cad. The amount of detail that Dynamic Renovation does is top notch. Original correct wires, connectors and rubber grommet completes the motor.
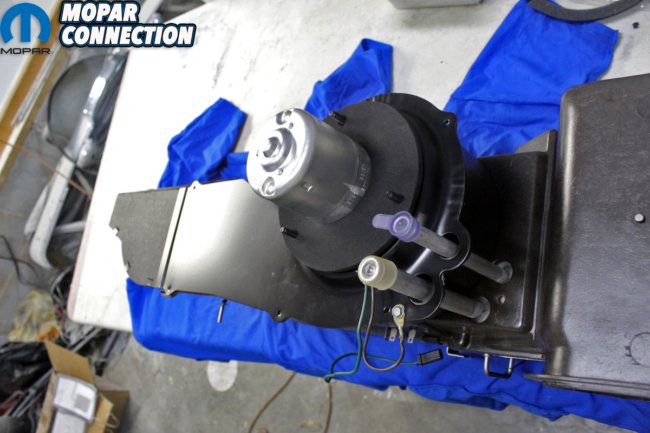
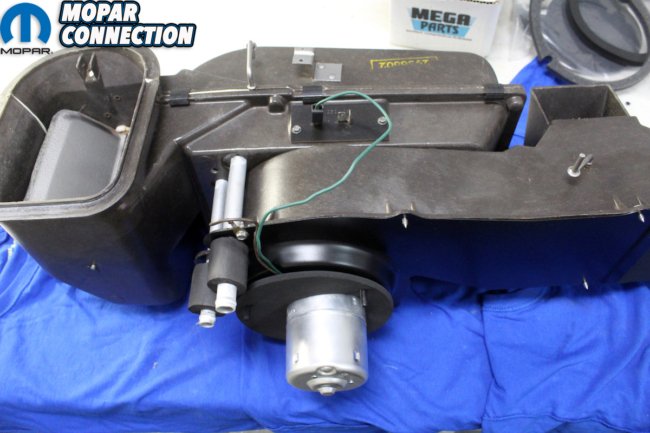
Above left: The squirrel cage has been blasted and painted with Seymour’s Stainless Steel paint. We then assemble the restored wiper motor, the freshly painted blower motor plate, the squirrel cage and test it. There is some adjustment so the cage won’t hit the panel. Now is the time to run the full assembly and make sure it all works without any rubbing. Nothing is more irritation than turning on your heater and hearing any squeaking or fan noise. Above right: We can now assemble the heater box with new core and the blower motor assembly. The fiber board that comes in the kit is also installed with several clips. The foam gasket that goes between the firewall and the heater unit is also installed. The kit comes with two different foam seals. One has the motor opening offset and the other is centered. Just use which ever one that fits your application.

Above left: There are six screws that hold the blower assembly to the main heater box. They are all silver cad and not black phosphate. The heater box assembly really is a very simple design. That’s if you don’t have air conditioning. We plan on restoring an air conditioning/heater assembly in a future article. Above right: Now that the unit is fully assembled, we hook up all the wires and bench test the unit. Make sure all the doors, blower motor, fresh air cables, blower motor resister are all working properly. You do not want to have to get under the dash to fix something after everything is assembled.
Above: Remember the important “hook” with the unique screw we mentioned earlier. Now is when you need it. We glue in the fresh air seal to the box and install the “hook” loosely. We then lift the assembly into place making sure the hook is holding the unit in place. The three studs then go through the firewall and are attached using silver cad plated nuts. Since the nuts are installed from inside the engine compartment it really helps to have another set of hands. When it is in place you tighten the screw and the assembly fits right up to the body. The fresh air vent cables are installed at this time and are left hanging. These and the temperature and heater/defrost cables will be attached when we installed the dash. And BAM! just like that you have a fully functional, beautiful heater box, fresh air vent system in the car and ready to go.


Great article. What size were the rivets that you used? 1/8″ x 1/8″ ?