


Last month, I introduced a retrospective restoration overview of a 2006 Police Pursuit Dodge Charger 5.7L HEMI project. The Charger was complete but riddled with codes in the Powertrain Control Module (PCM), Transmission Control Module (TCM), Anti-lock Braking System (ABS), and several wiring problems.

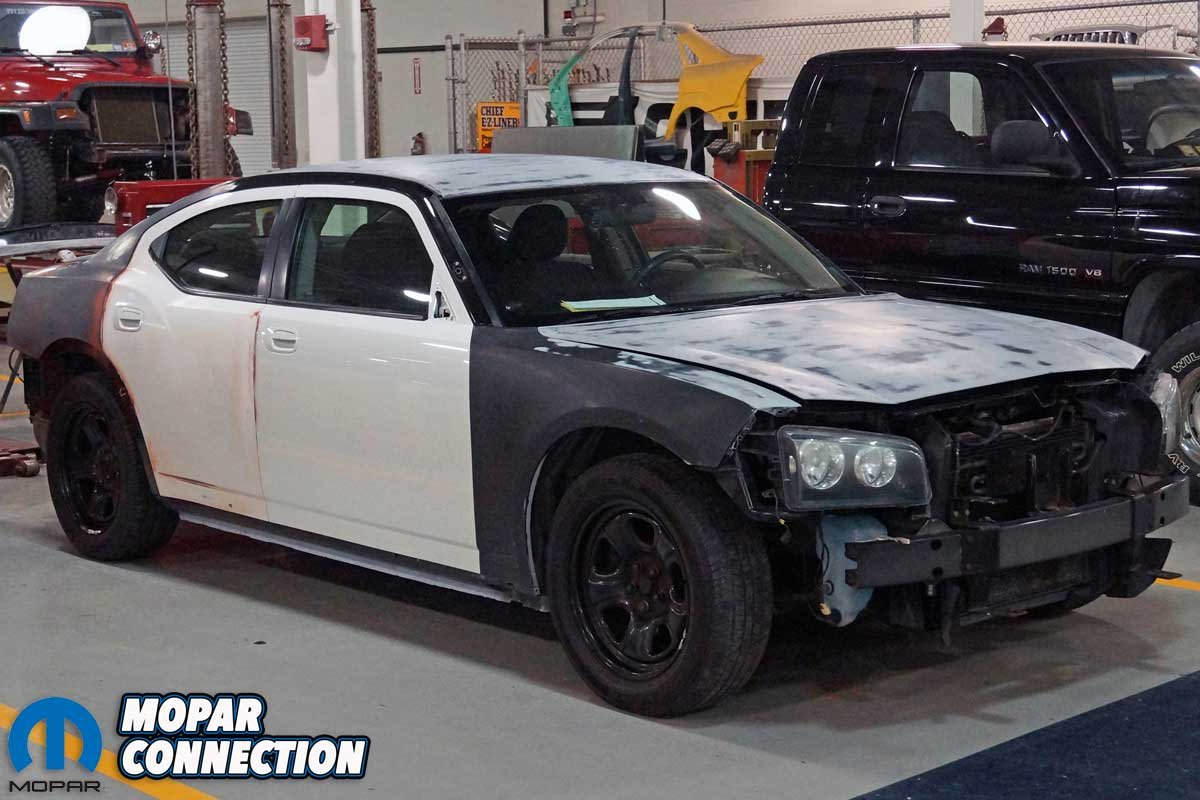
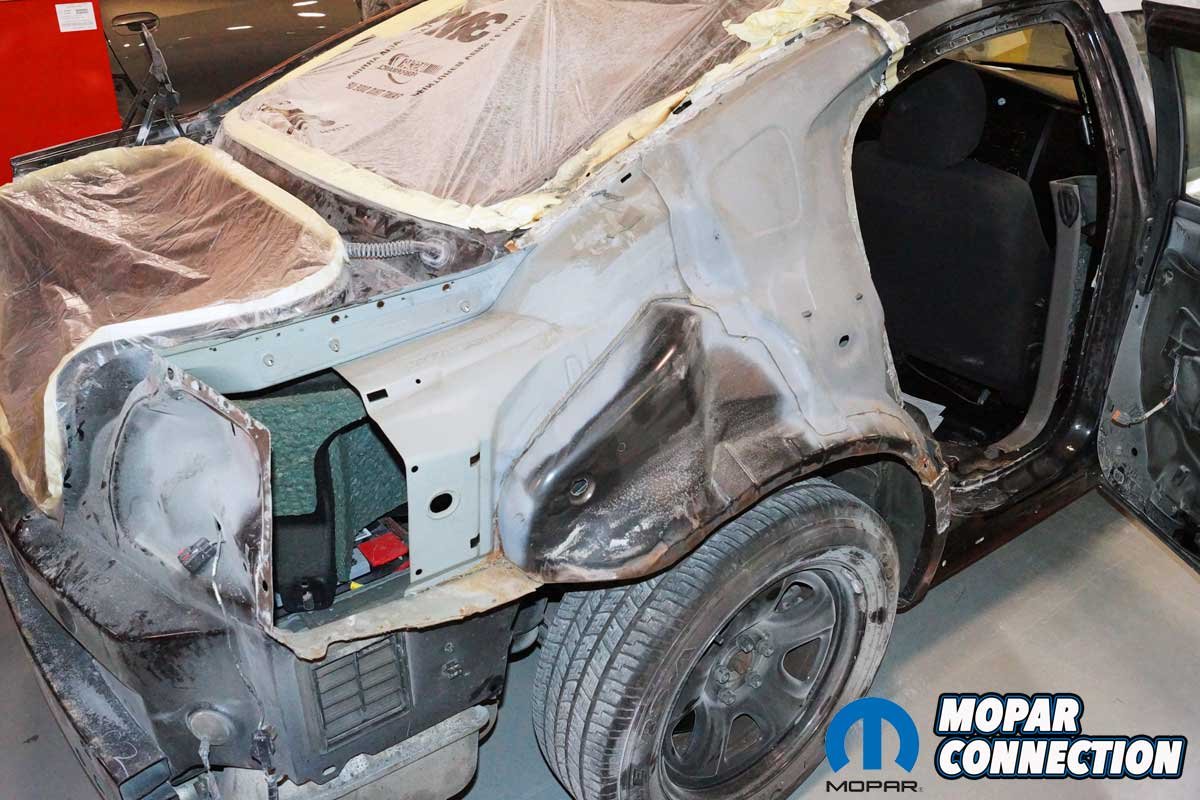
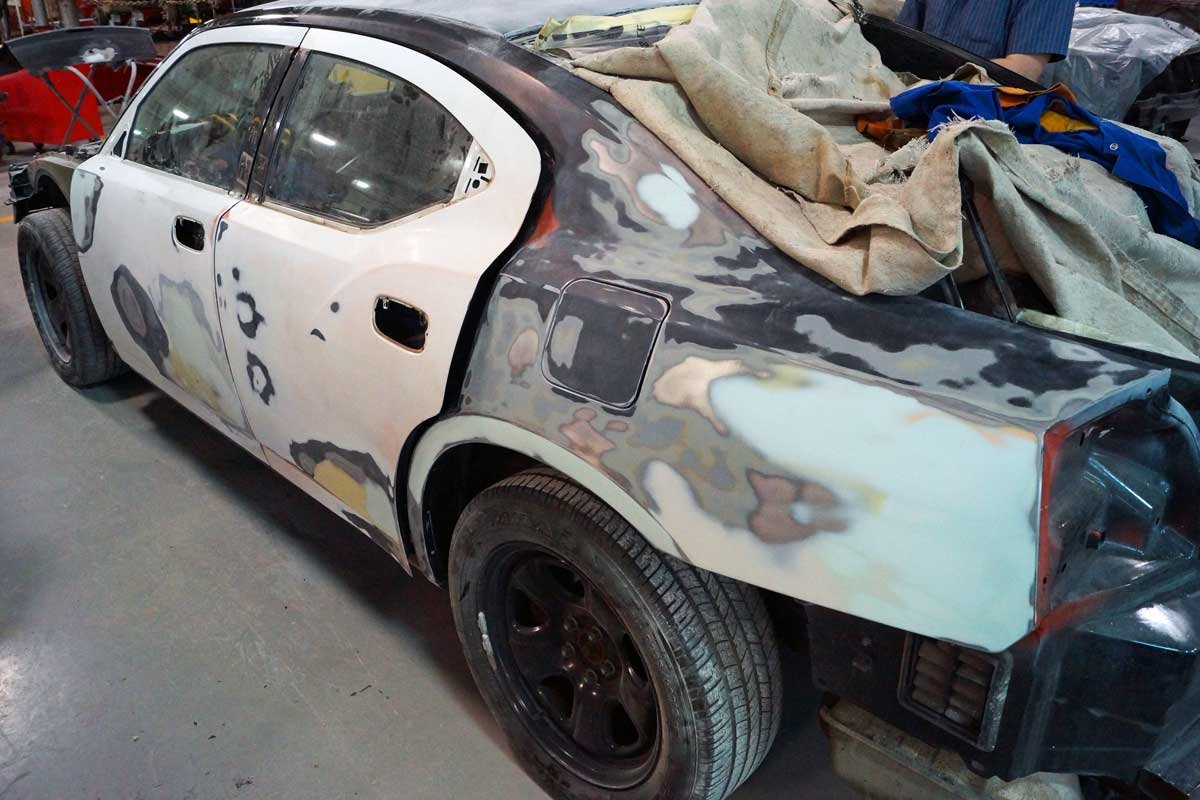
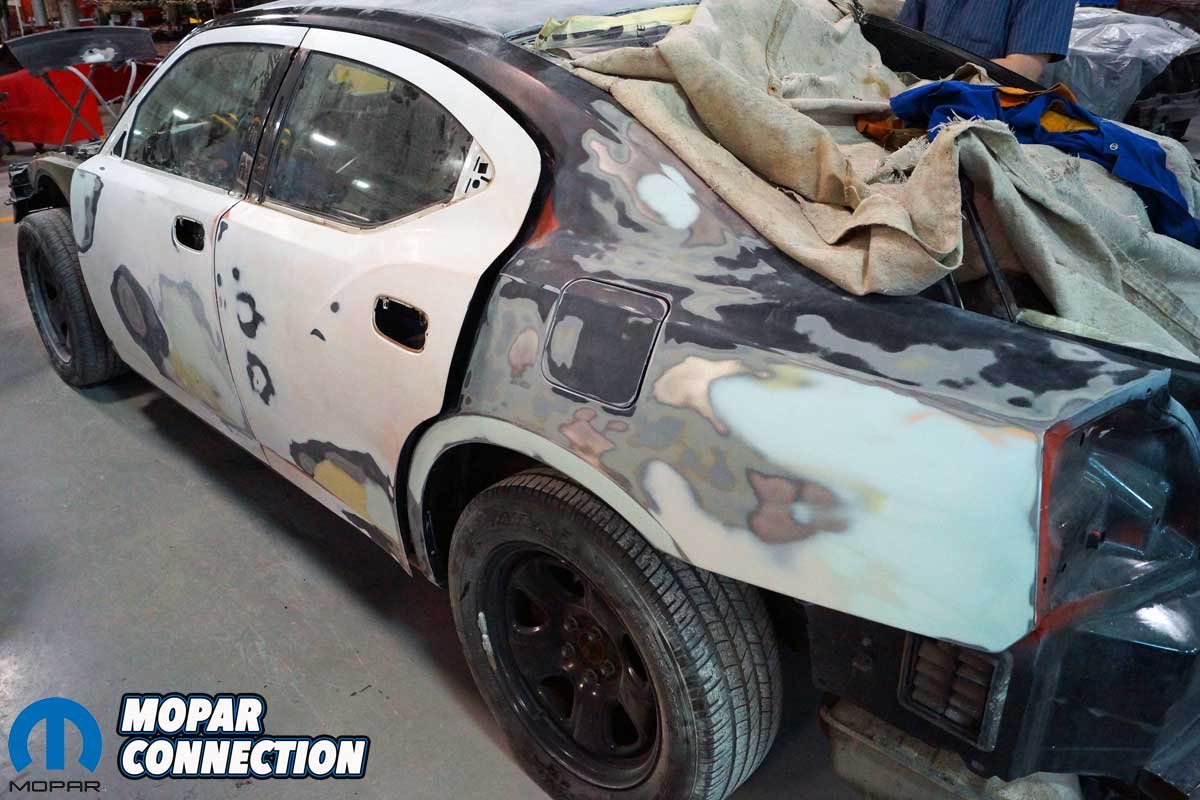
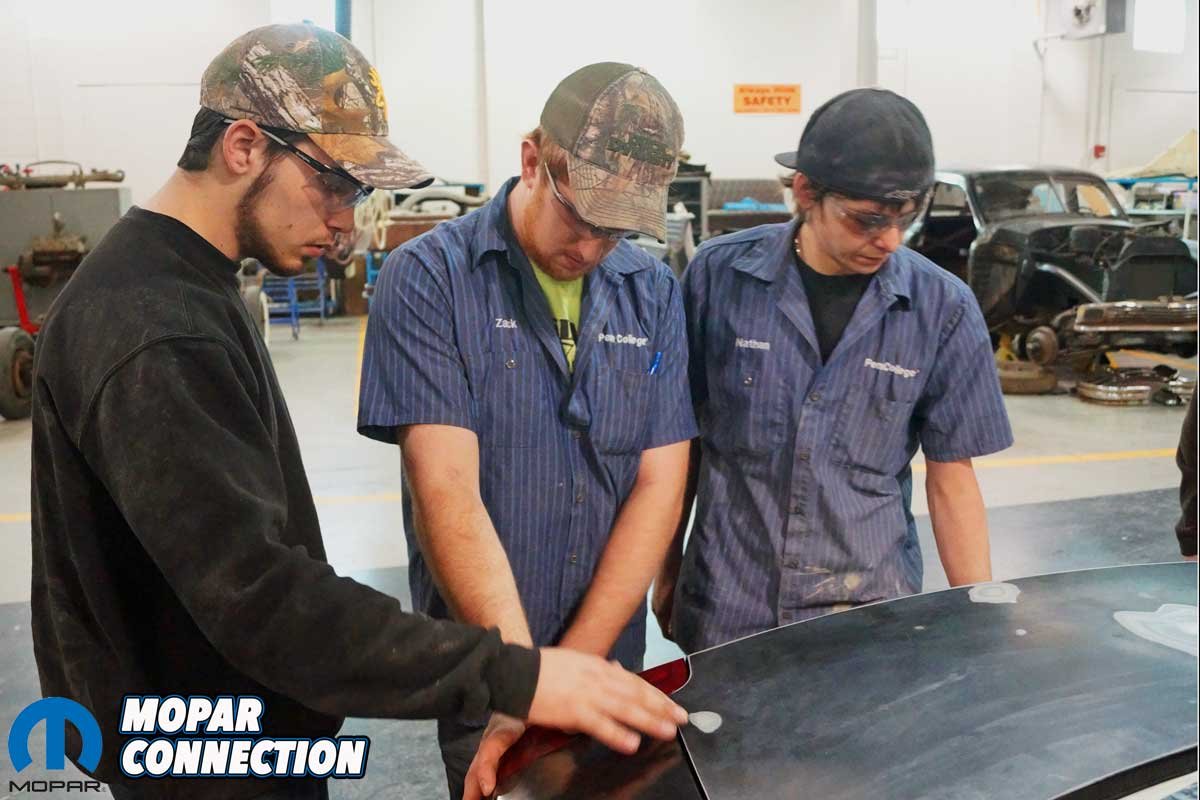
Above: The 2006 Charger 5.7L HEMI former police car was moved to the Penn College collision shop. With all the codes repaired (except the CCN), the students began disassembling the Charger. The Penn College collision students wrote up the repair order and then removed the bumper covers. After this photo, the fenders, hood, and trunk lid were out of the way and prepared for primer.
During the first month of ownership, the Charger was cleaned and detailed, and several codes were cleared after repairs to the wiring harness, component replacements, or module updates. The Charger was now drivable, but it still required attention.

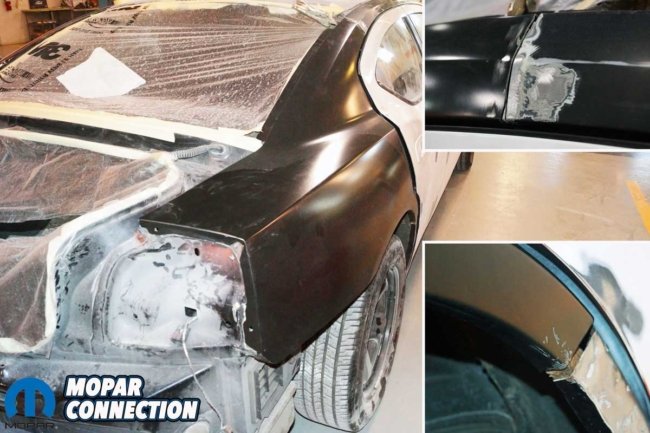
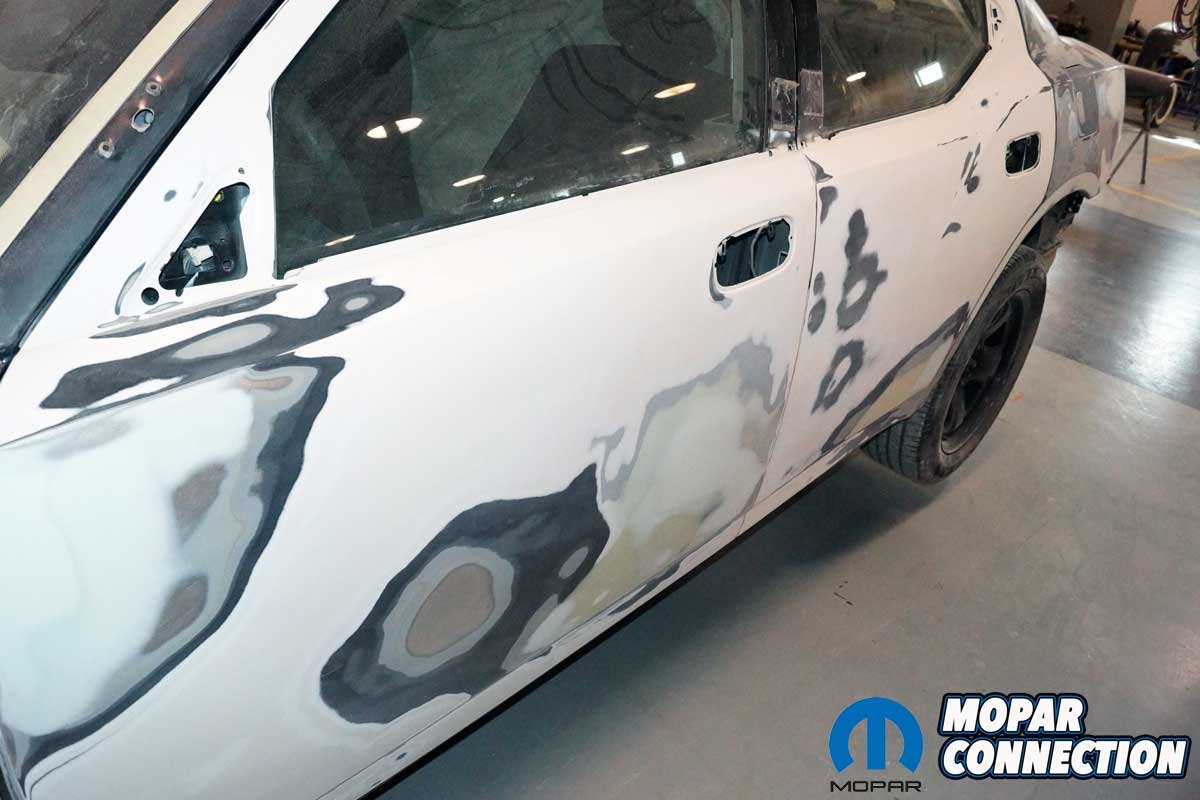
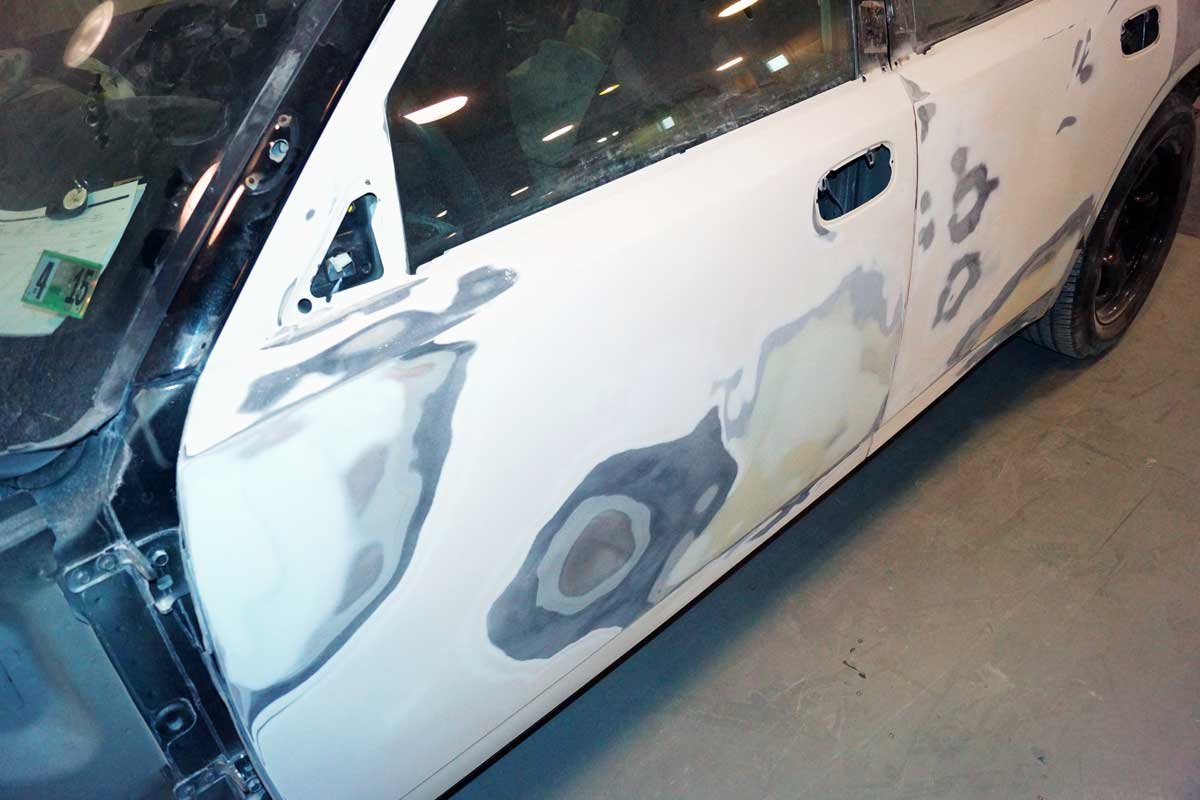
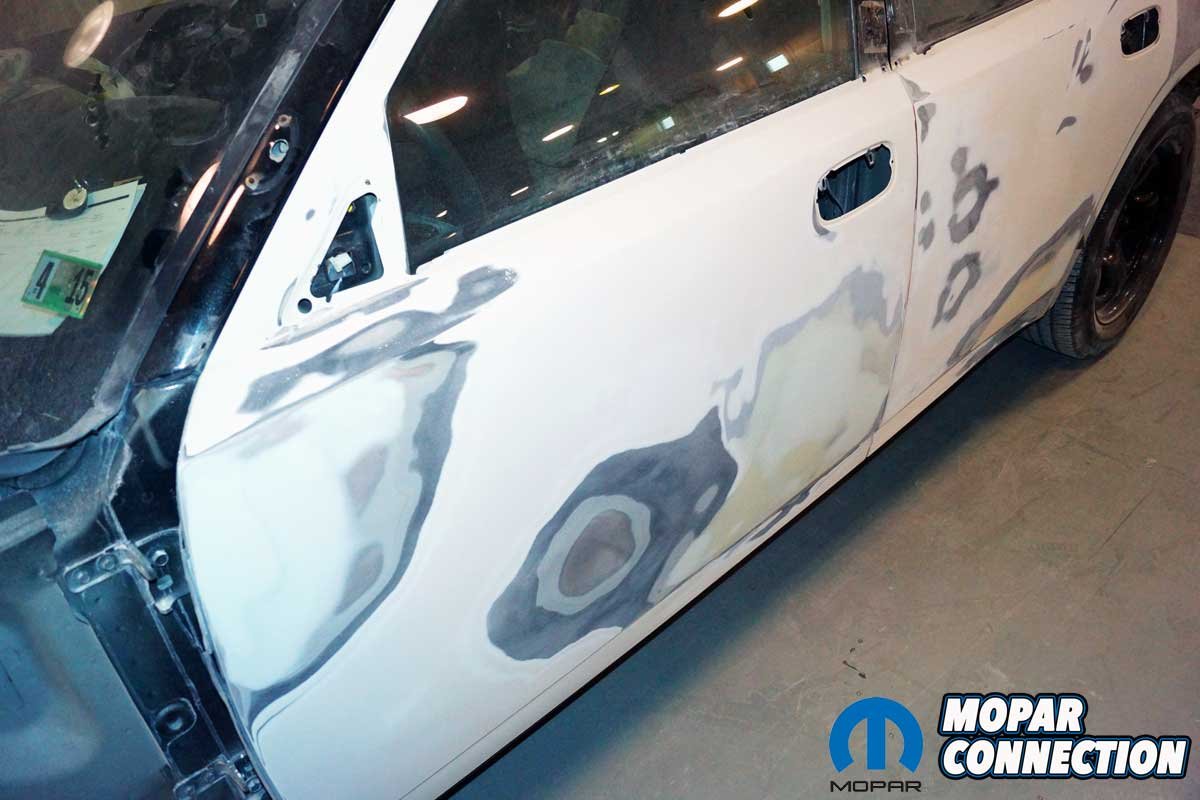
Above: A few minor dents in the driver quarter panel were filled and sanded. A skim coat filler (light brown) was smoothed onto the door. Then, more sanding was required. The driver’s rear door had a small crease in the lower rear area. The students moved some metal around with a block and hammer and laid down a skim coat of filler in that area.
Picking up where the repairs left off, the TCM code guided me to the main wiring harness connector at the transmission. During the removal process of the wiring connector, water dripped from the harness onto the shop floor. A quick visual inspection revealed a weather-pack seal failure that allowed water to enter the connector, resulting in system resistance in the circuits affected by the water intrusion.
As part one of this series explained, the transmission was replaced at 65k miles, and the connector damage likely occurred during the service work. To remove the water, I used compressed shop air to blow out the connector. I then replaced the weather-pack seal and packed the connector cavities with dielectric grease to prevent moisture from reentering the wiring in the future. Upon completion of the repair, the TCM code was permanently erased and has not recurred.

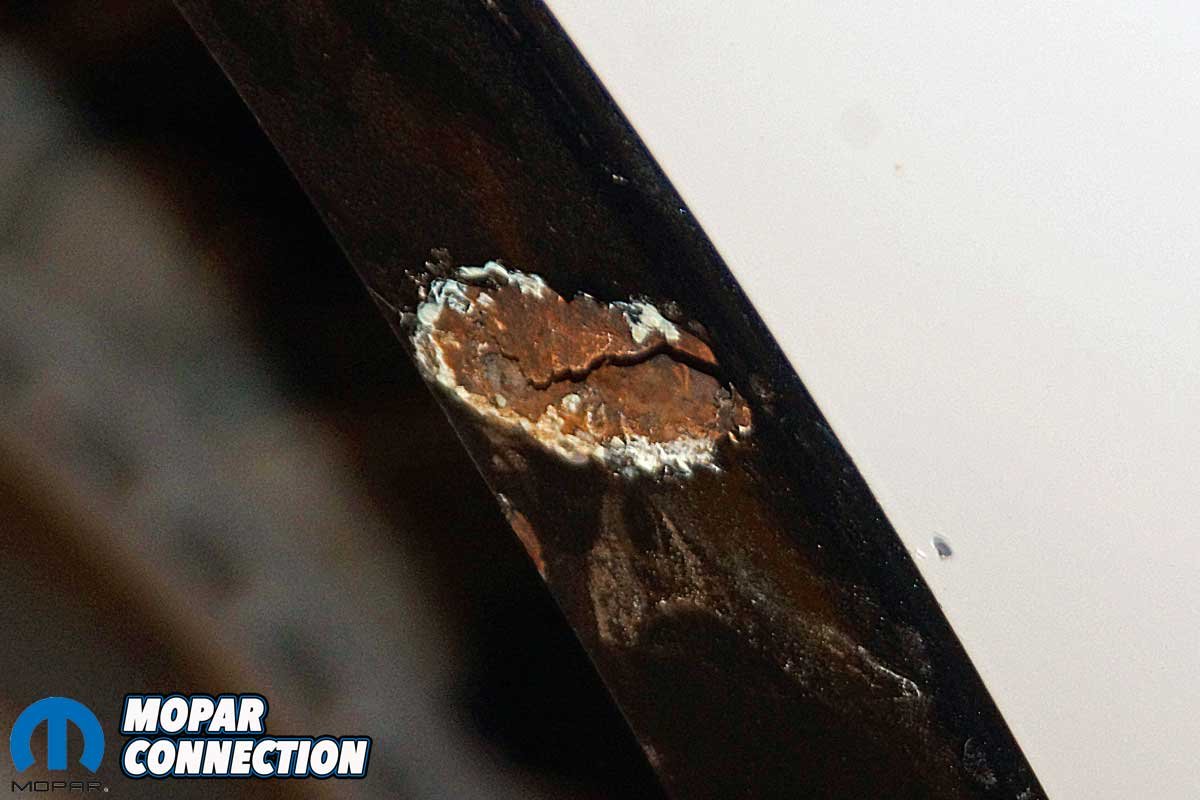
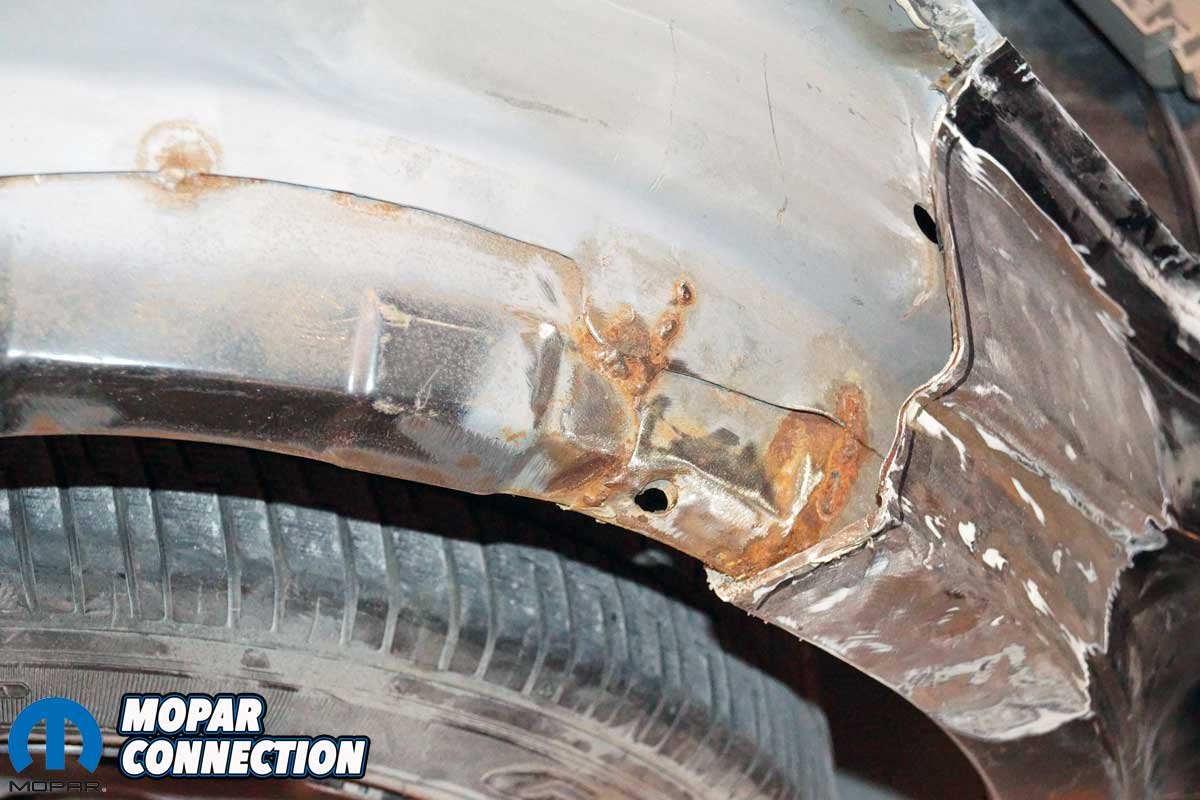
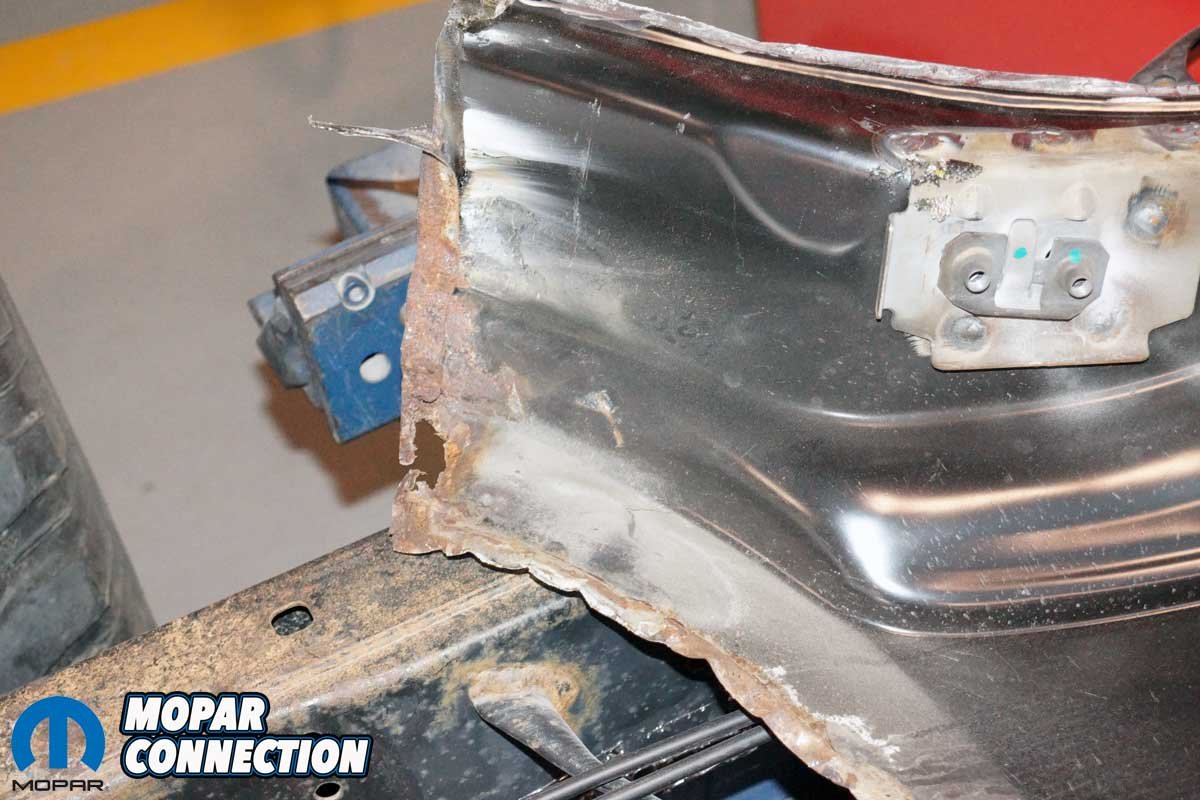
Above: The rust in the dogleg resulted from a poor dealership repair in 2007. The Pennsylvania winters had not been friendly to the repair. Even though it looked like a patch repair could be made, it was decided that removing the entire quarter panel could expose additional problems that existed but could not be readily seen. The cost may have been more significant initially but less over time if other matters were to arise.
Moving to the following code, I reviewed the repair procedures for an ABS code related to the left front wheel speed sensor. The sensor had an irrational value that caused the ABS module to generate a code and illuminate the ABS light. While performing a visual inspection, I noticed the ABS wheel speed sensor connector attached to the inner front apron was missing its lock clip (metal spring clip) and the connector had worked loose.


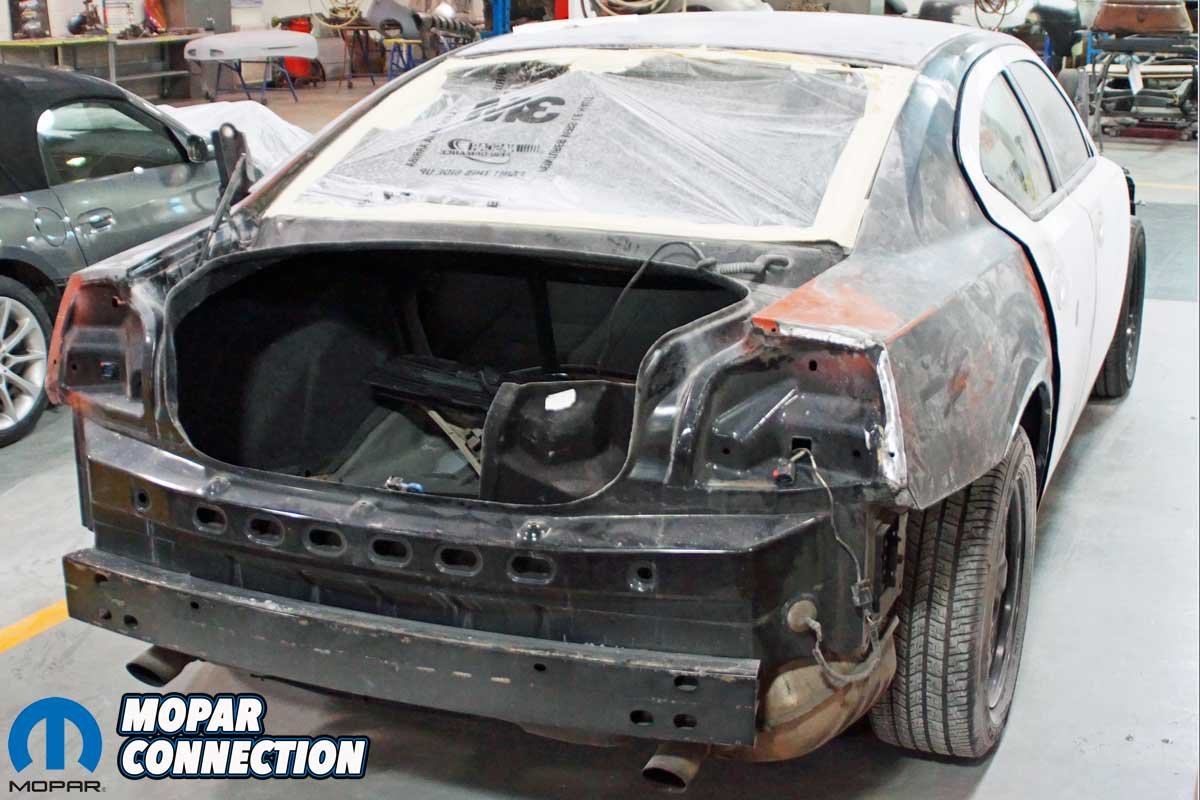
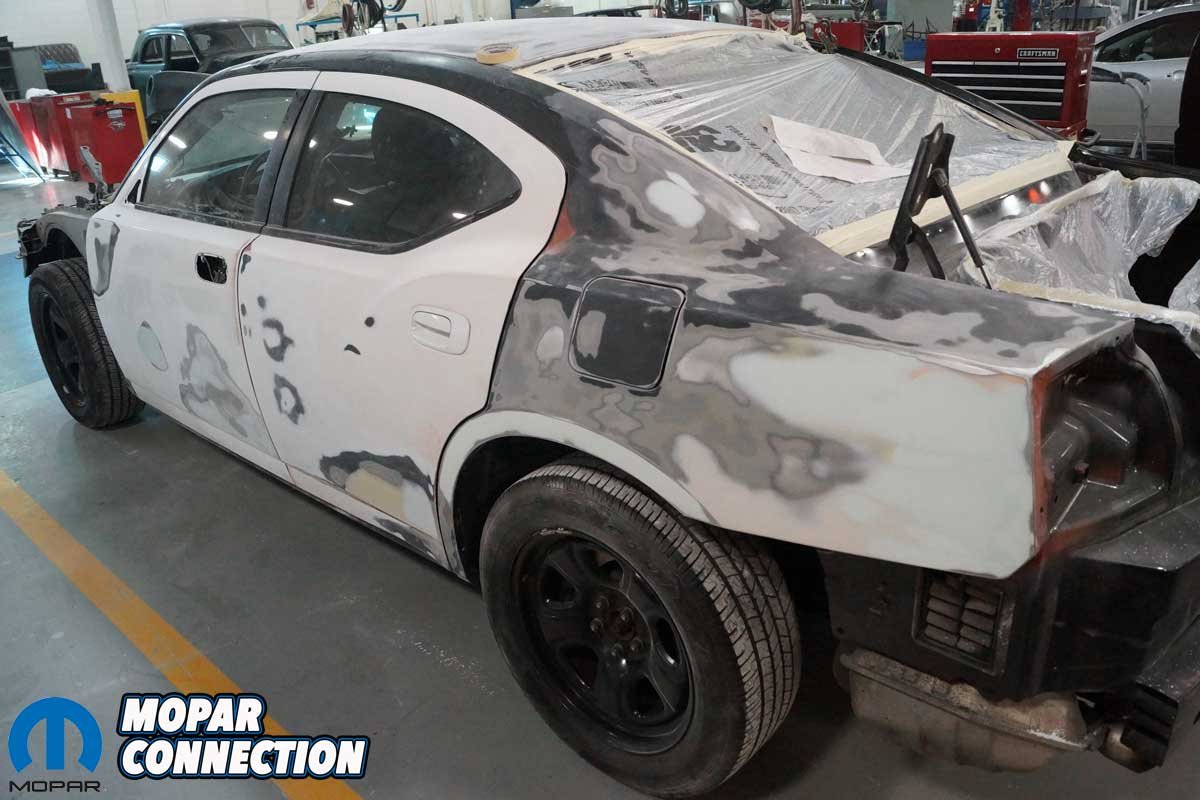
Left: The rear glass was removed so the students could evaluate the entire quarter panel. The trunk lid and bumper cover were also removed to allow greater access to the panel. The students made several measurements and ground off the body filler on the C-pillar and the dogleg to find the previous repairs. Right: Work on the driver’s side of the car continued. The quarter panel was shaping up nicely, and the lower driver door repair was close to completion. The doors were originally black, but they were painted white during the upfitting for the installation of the police parts. Several doors were damaged and then painted white for a second time. Sanding the paint proved interesting, as layer after layer of paint was discovered.
I cleaned the connector terminals, reassembled them, and secured the connector with a new Mopar clip to repair it. With the connector adequately fastened, the Charger’s ABS code was erased, and the Charger was test-driven without setting a code or illuminating the ABS light.
The last code to tackle was related to the Cabin Compartment Node (CCN). The code was stored in the CCN, and no warning lights on the instrument cluster were illuminated. I found a concern with the instrument cluster’s backlighting, which occurred when the park lights or headlamps were turned on. A correctly operating cluster would have a crisp backlight so the speedometer, tachometer, and other gauges could be clearly displayed.


Left: The quarter panel had been removed. The students cut the welded area at the C-pillar and the dogleg. The rest of the panel had been panel bonded in place. The panel bond did not adhere well due to the poor prep of the quarter panel and the outer fender lip. The students pulled the entire quarter panel wheel well lip free from the Charger without needing an air chisel or drill. The panel was even panel bonded at the rear taillight area; that area should have been welded to ensure the strength of the panels if another accident had occurred. Right: The outer fender had some rust concerns but was less extensive than the quarter panel. The rust was addressed after this photo was taken, and it should not be a problem in the future. A small metal filler strip would be fabricated to attach the quarter panel to the uni-side. The rust problem was in the area between both side panels.
The Charger’s backlighting did not operate correctly, and because there were no bulbs to replace, the cluster was considered a complete failure and needed to be replaced. The only option seemed to be to purchase a new cluster assembly from a Dodge dealership. I did not want to work through the required paperwork to verify the odometer mileage before buying a new cluster, so I decided to hold off until I had a better option.

Above: The driver door repair was nearing completion. The rear door and the driver quarter panel were ready for primer. The C-pillar had been addressed as well to fix a small dent.
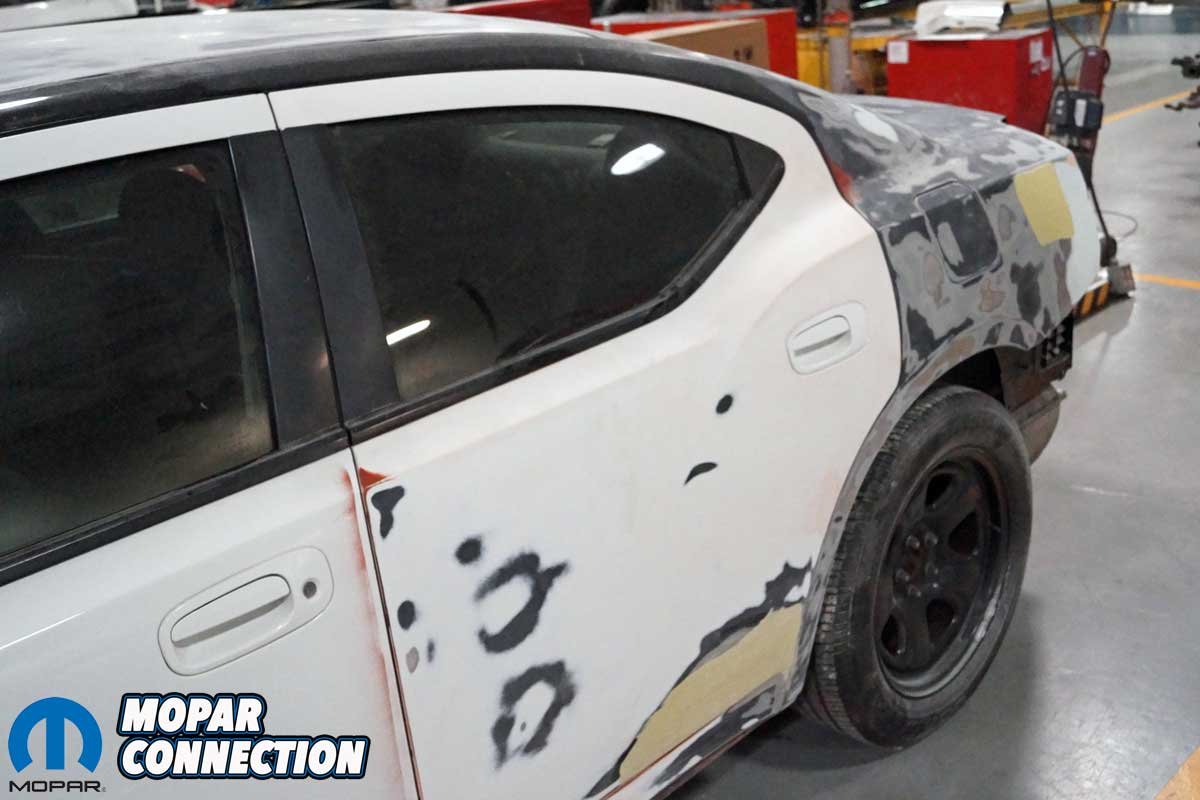
The bodywork was moved to the forefront after resolving all the dash light concerns. During its years of service, the Charger was involved in two separate accidents. One dealership accident repair had to be readdressed to correct several mistakes. The first accident was a light impact in the driver door; however, the second repair was due to a brutal hit in the right rear quarter, requiring extensive repair of the right rear door, replacement of the outer fender well, and replacement of the entire right rear quarter panel.
Additionally, the trunk lid had a hole from the antennae mast and the roof another from the light bar. Both required filling. Lastly, a few small ripples and dents also had to be addressed.
The two holes in the body were the first repairs. The interior plastic pillar trim panels and the overhead console had to be removed to drop the headliner. The metal around the hole in the roof was sanded and cleaned to remove any impurities that would damage the repair. A piece of 16-gauge steel, about 3/4-inch larger in diameter than the hole, was formed to the inside contours of the roof.
Above: The quarter panel was test-fitted, and the fit was pretty good. The upper right photo shows the gap on the C-pillar; it was a good fit. The connection would be solid and tight, with a metal backer behind both parts of the C-pillar. The lower right photo shows the gap between the quarter panel and the uni-side. This area required a fabricated metal filler to fix the gap. As with the C-pillar, a small metal backer would be the foundation for welding the three panels.
With the steel shaped adequately to the roof’s inner sheet metal, panel bond adhesive was applied to the inside of the roof, and the 16-gauge steel plug was pushed solidly into place. After the panel bond dried, the top of the roof was sanded and prepped with a skim coat of body filler. The hardened filler was smoothly sanded with a longboard and progressively less aggressive sandpaper, ending at 320 grit.
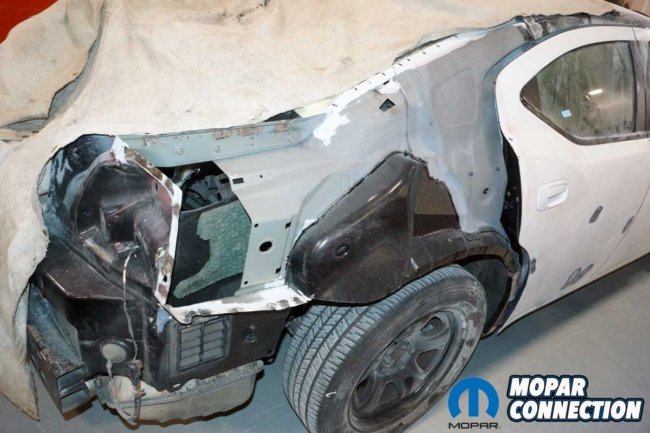
Above: The students treated the outer fender well and the dogleg area. The entire parameter where the quarter panel would make contact was sanded to bare steel, and a weld-thru primer was applied.
Installing the 16-gauge plug in the trunk was more challenging than the roof repair because the hole lined up with the inner framework of the trunk lid. I needed to feed the plug down the framework and then hold it with a screwdriver to allow the panel bond to dry. The hole was filled with a skim coat of body filler and sanded. Both repairs were permanent and would not be visible once the bodywork and paint were completed.
The right rear quarter panel of the Charger was repaired in 2007, and since then, a giant bubble had appeared in the paint on the dogleg area just behind the rear door opening. I pushed a screwdriver through the bubble (Bondo) to expose the rust, which had penetrated through the panel in less than seven years.

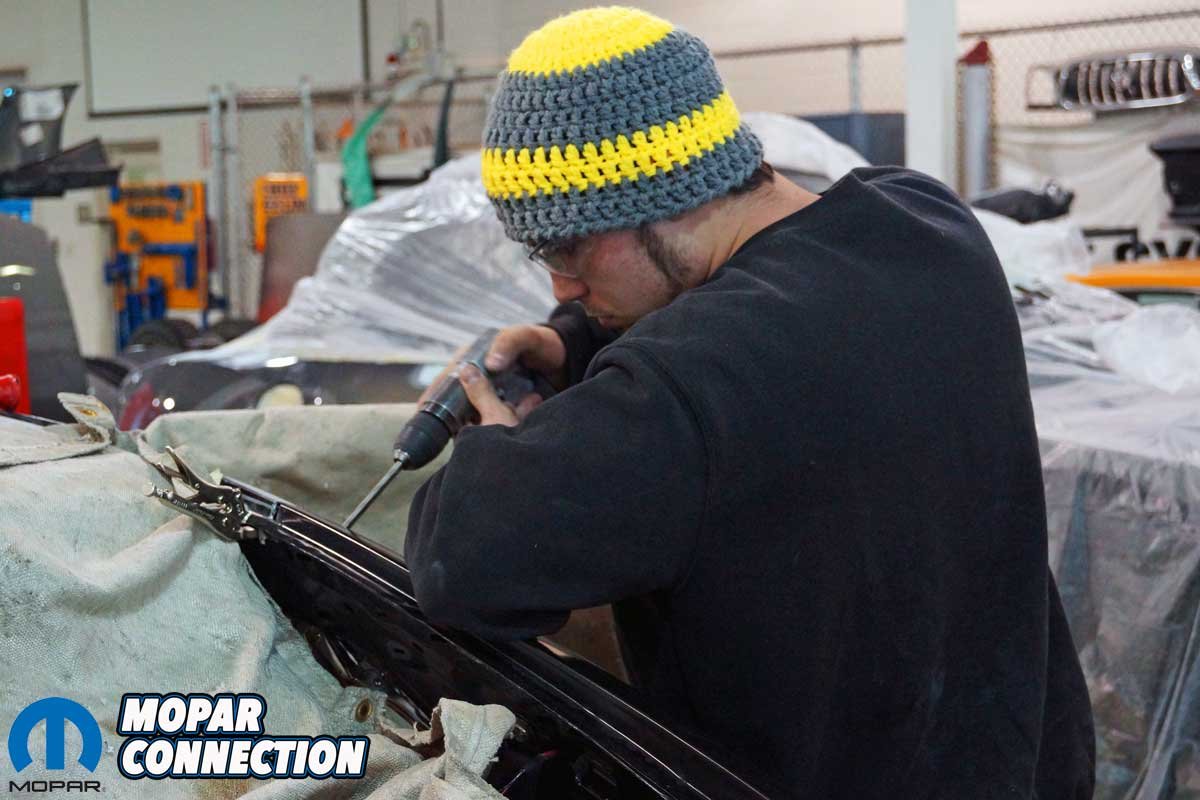
Above: Penn College collision student Hunter Jenkins prepares the quarter panel for welding. He drilled several holes in the quarter panel at the C-pillar so that rosette welds could be performed. The quarter panel would be welded to the previously installed metal backer.
After discussing the quarter panel damage with several professionals, it was decided that a complete replacement would be best. I arranged for the Pennsylvania College of Technology (Penn College) collision students to work on the Charger’s quarter panel and other body concerns, including additional light body damage on the driver-side door. A new quarter panel was purchased from Van Campen Motors of Williamsport, PA. A deal was struck with the parts manager, and the panel was acquired at the dealer’s cost.
With a plan developed, the Penn College advanced refinishing students and the structural repair students (two groups) got to work on the Charger. They wrote the repair orders and estimates and then began removing external handles, lights, bumper covers, and various trim pieces. The new quarter panel was checked for damage and measured to ensure it would fit properly. The rust formation on the dogleg was at the seam between the Charger’s uni-side and the quarter panel replacement panel.


Left: The students removed all the weatherstripping and trim from the driver’s side, and the Charger is now ready for its first coat of primer. Right: The door had body filler from a previous dealership repair, but the students straightened out the last repair and ensured the panel was straight. After the panels were massaged into shape, the external rearview mirror area and the lower door required a thin layer of filler.
Penn College students rarely perform rust repair as part of the curriculum, but the body shop professors decided they could work with what was there. They felt the students could remove the rusted area and fabricate some 16-gauge steel to fill the area between the quarter and the uni-side.
As the investigation of the quarter panel’s previous repair progressed, the rear glass was removed so the students could access the upper quarter panel. After making measurements of the quarter panel’s location, it was ready for removal. The body filler from the previous repair was sanded down at the dogleg and the C-pillar so the students could find the area where they would cut the quarter from the car.

Above: Penn College collision students Hunter (left), Zach Graybill (center), and Nathan Deitrich (right) are inspecting the gaps between the trunk lid and the quarter panel. With the quarter panel held in place with Clecos at the dogleg and the C-pillar, the taillight was also checked for proper clearance with the quarter panel and the trunk lid. The students achieved an even panel gap between the components. Additional Clecos were installed to maintain the gaps before welding.
With the sectioning completed, an air chisel and drill handled the minimal spot welds (less than acceptable for a credible overhaul) applied during the previous repair. Most of the panel had been bonded (glued) into place. Once the panel started to loosen with the aid of the air chisel, one of the students pulled the entire quarter panel wheel lip area from the outer fender well without any tools; it was that loose.


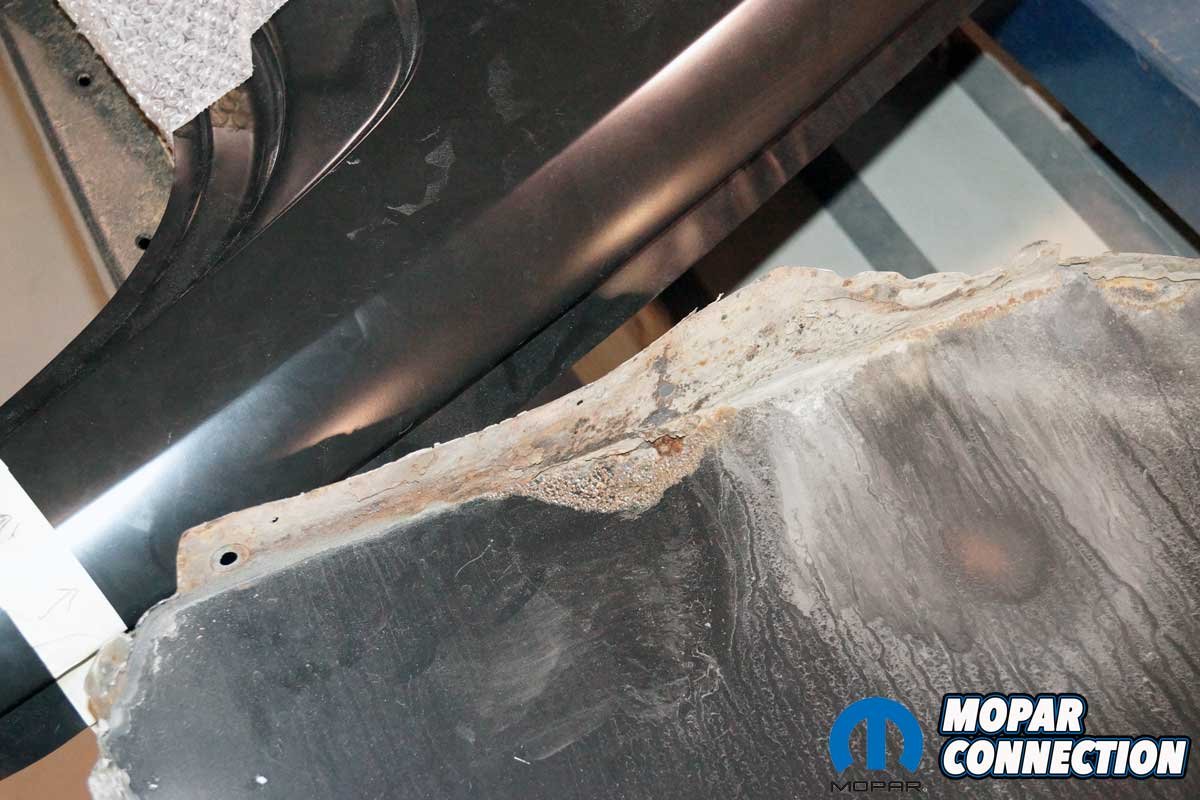
Above: Looking over the quarter panel, almost the entire lower parameter from the wheel well lip to the dogleg had rust concerns. Poor repair, salt and snow, and lack of attentive cleaning led to a significant problem. With rust protection and a new quarter panel, our difficulties with rust should be over.
The panel bond had never appropriately adhered to the entire wheel well area. The rear taillight area was also panel bonded, even though it should have been welded to add to the mechanical strength of the Charger’s rear in case of a future accident.
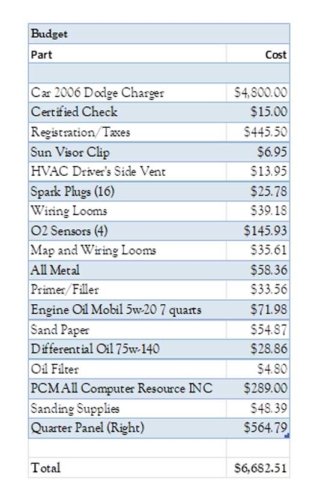
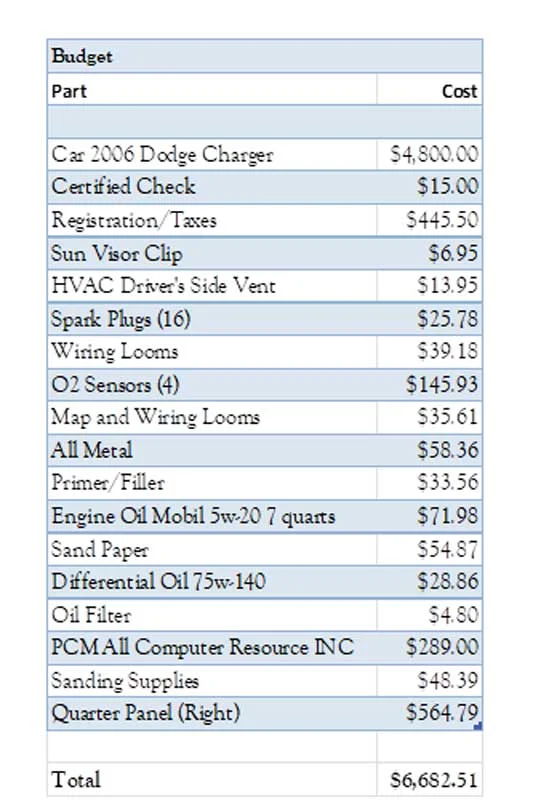
Above: Thus far, I have not broken the bank, but I am fortunate to have access to a college that can handle the paint and bodywork. Just under $6700 was spent to buy the Charger, repair the various codes, and get the quarter panel.
With the quarter panel removed, the body shop professors positively assessed the Charger’s condition. Next month, the body shop students will install the new quarter panel, fix the bumper damage, smooth the body panels, and get the Charger into primer.
Also, I will cover miscellaneous repairs and purchases needed to restore the Charger for civilian duty. At this point in the series, I have spent just under $6700 of my self-imposed $12,000 budget. Be sure to check back for more tales of Charger Five-O.


