


Project vehicles never really reach a completion point, so when an owner states, “I am adding the final touches,” know there will be many more to come. Often, a final touch means replacing factory mechanisms that have failed. Other times it could mean updating or adding new components to the vehicle. In all cases, final touches tend to be (relatively) inexpensive projects to “complete” the car.


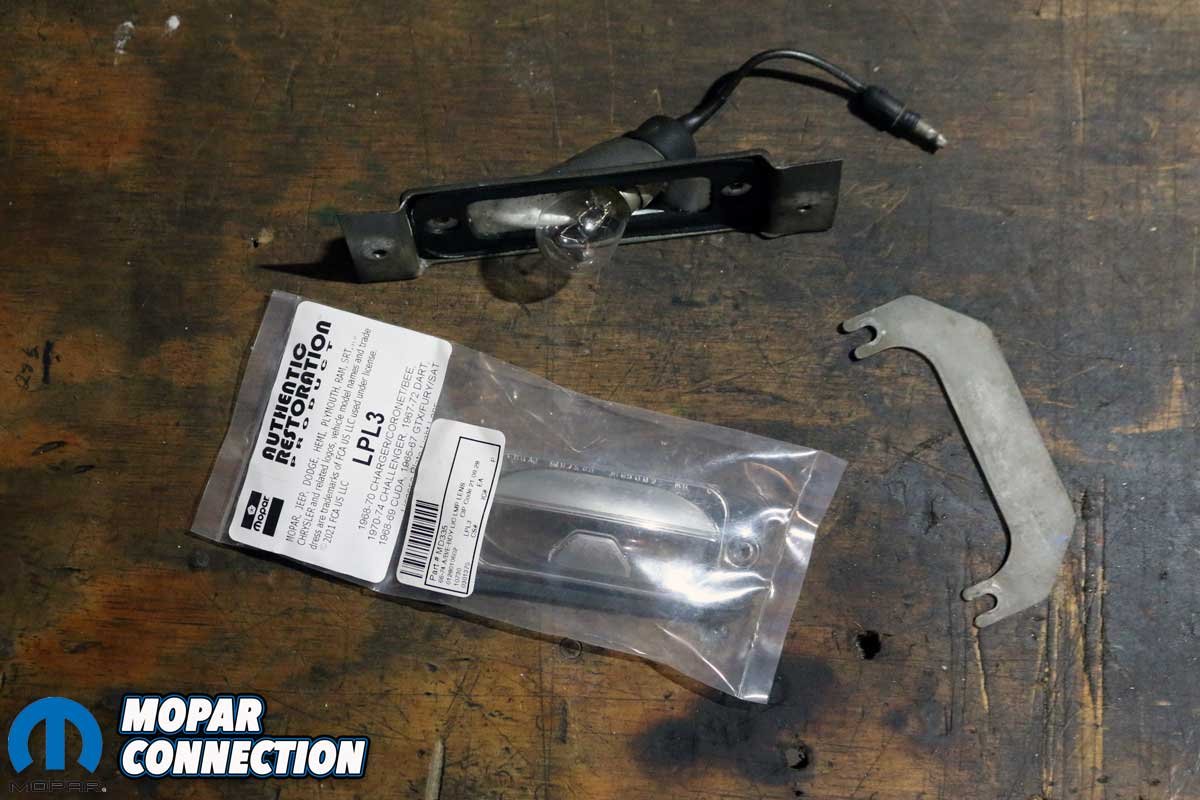
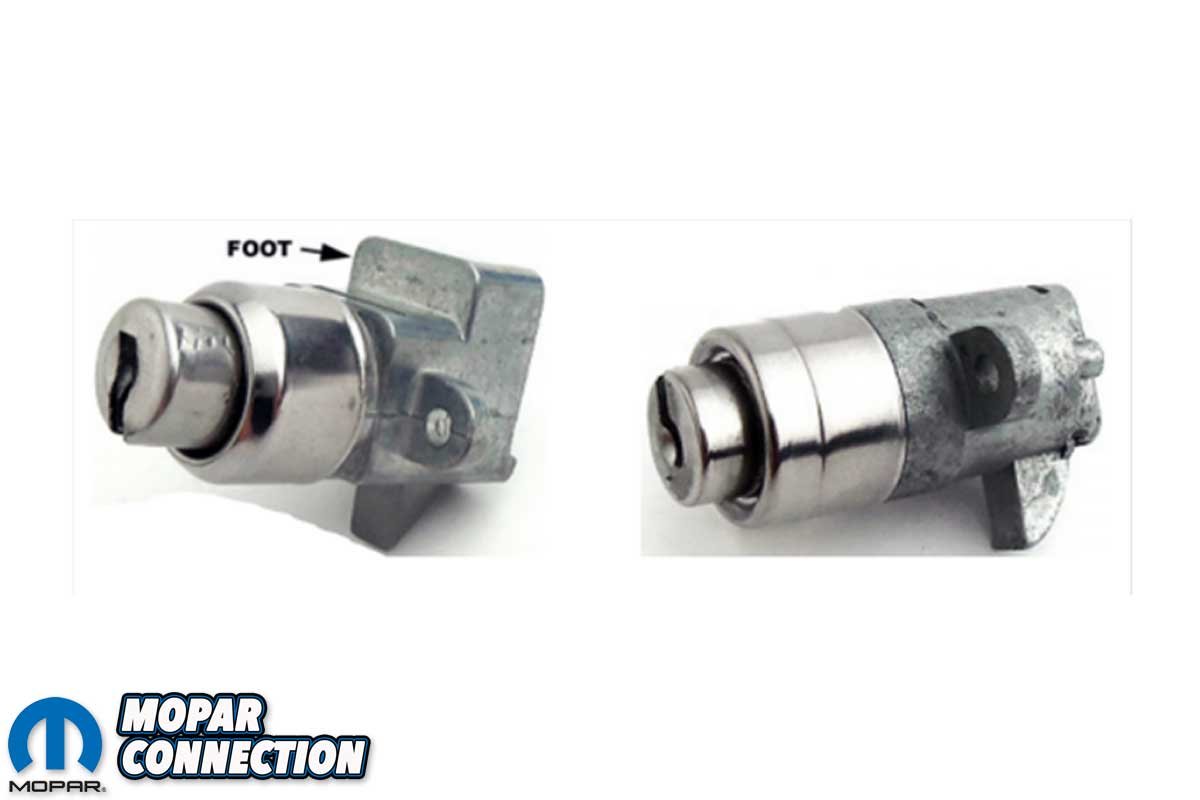
Above Left: The final touches often are updates to the vehicle. For example, Brazen needed a new license plate lens, so we picked up one from Year One. The installation took less than ten minutes. Above Right: The factory glove box lock broke after 50+ years. Luckily, Year One had an updated design glove box lock.
Not long ago, Brazen, our ’69 Dodge Charger project car, received a few final touches from Year One. We picked up a new license plate light lens (part no. LPL3), a glove box lock (part no. CL6870), and a new passenger side mirror (part no. FW869RH), which included a stud and nut, a Phillips screw, and a gasket. The first two parts were replacement parts for damaged factory components, and the mirror was an upgrade to Brazen.


Above Left: The Year One glove box lock assembly had a raised foot area, which provided additional support. Above Right: The new lock assembly fit properly and operated correctly. As a result, the glove box is ready for fifty more years of use.
The new license plate light lens installation was a ten-minute task. First, we removed two Phillips screws to release the light housing from the bumper. Then the light’s wire socket was freed from the factory harness with a twisting action. The two Phillips screws that secured a U-shaped bracket to the lens were removed after placing the light assembly on a workbench.
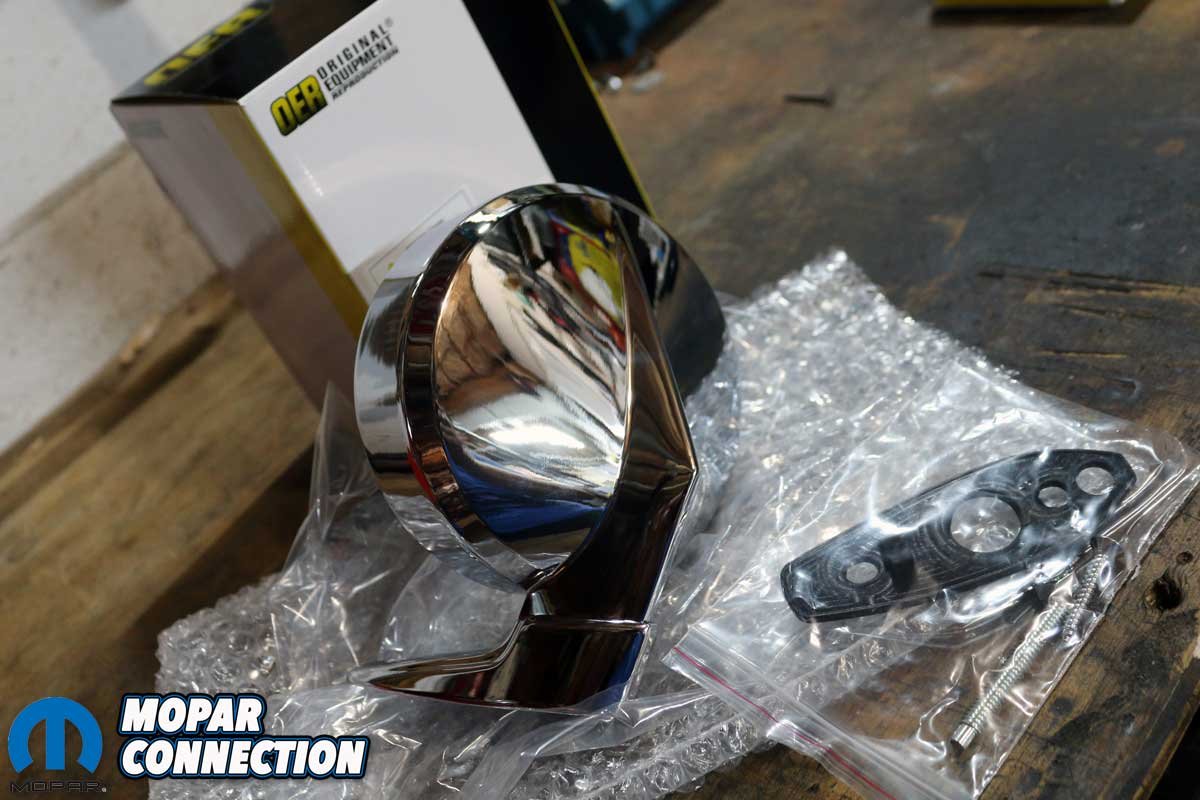
Above: It was rare to see a mirror hanging on the passenger side door of muscle car era Mopars. Brazen did not have a mirror, but with the help of Year One, we picked up one that matched the driver-side mirror.
Once the bracket was detached, the lens and gasket were removed from the light assembly. We took this opportunity to clean the housing’s reflective material and install a new bulb. The assembly process included installing the new gasket, the lens cover, and the two Phillips screws. The wiring was reconnected, and the remaining two Phillips screws reattached the housing to the bumper. To test the repair, we turned on the park lights, and the license plate light illuminated brightly on the plate below.
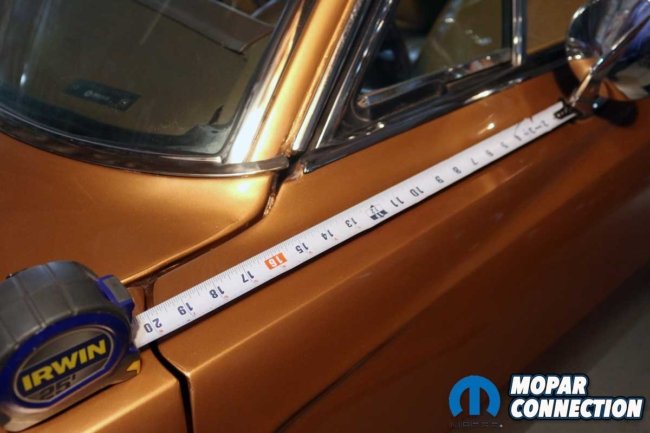


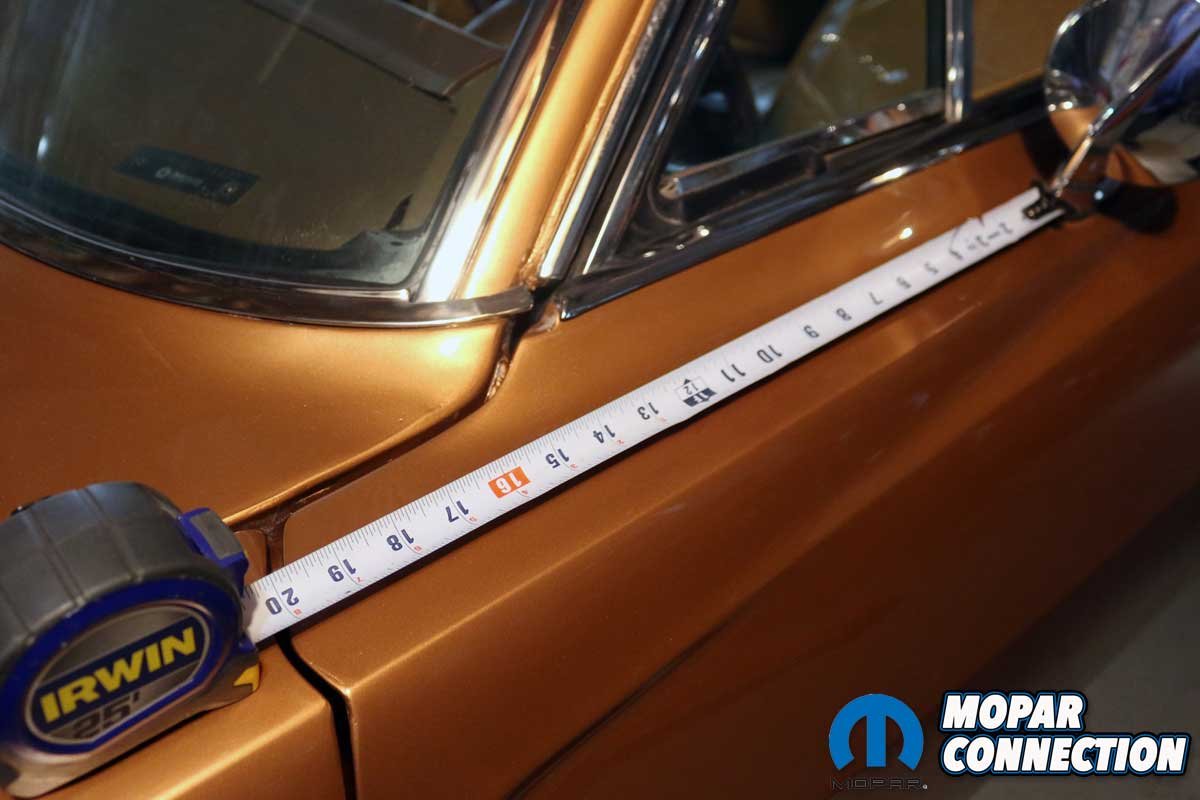
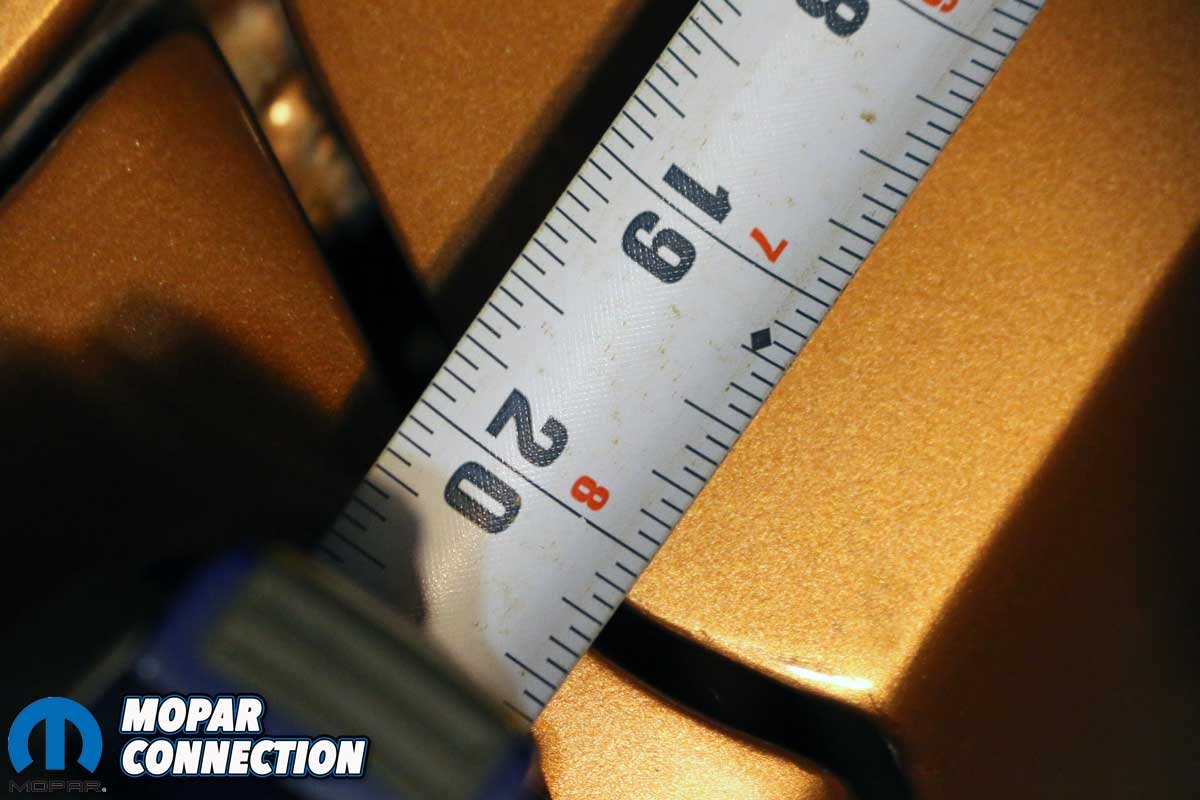
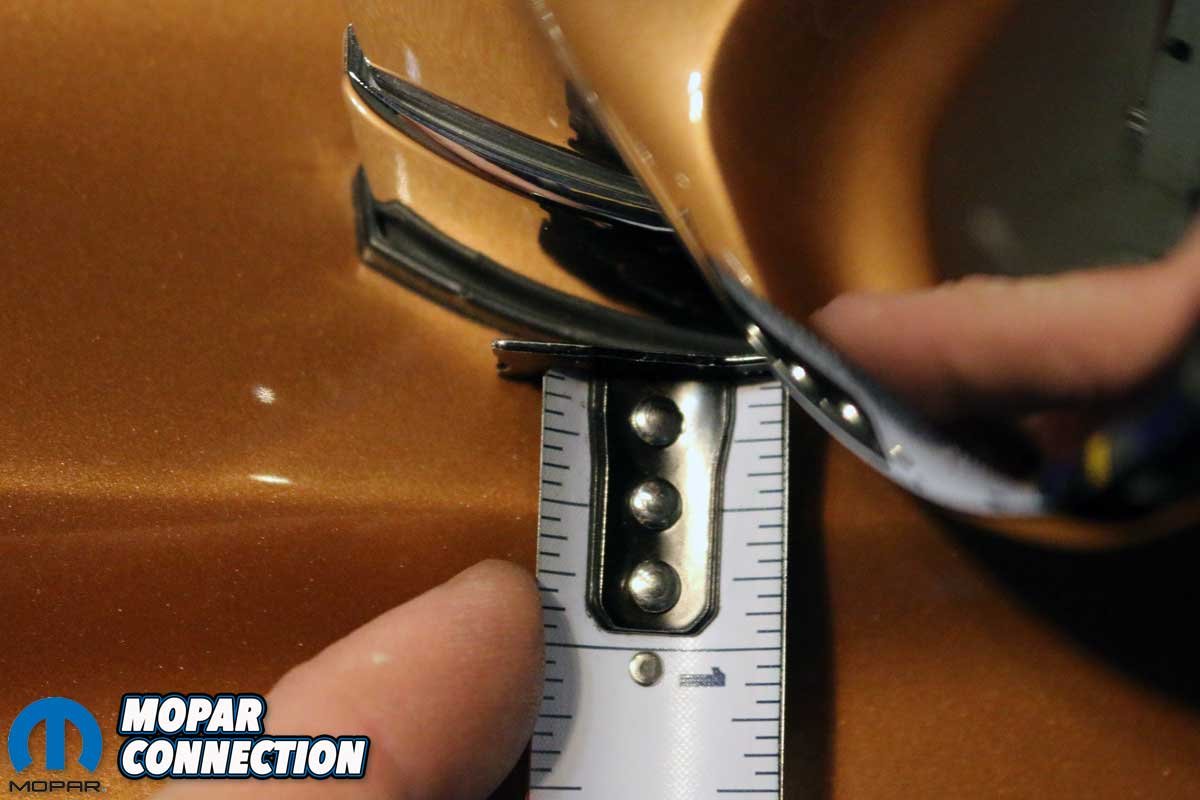
Above Left: To determine the correct location of the passenger side mirror, we measured the driver side mirror. Above Center: We gauged the distance from the mirror’s base to the gap between the door and the fender. Above Right: A second measurement was made from the mirror base to the peak line on the door.
The glove box lock installation was another ten-minute activity. We swung the glove box door open to access the door lock screws. Then, after removing two screws, we pulled the lock assembly from the glove box door. Subsequently, we reused the screws to secure the new lock assembly. Lastly, we ensured that the new lock met the striker cleanly, held the door closed, and locked.
With the easy updates completed, we began the mirror installation by taking detailed measurements of the location of the driver’s side mirror. We used reference points of the door’s body line peak and the top of the door at the gap between the door and the fender.
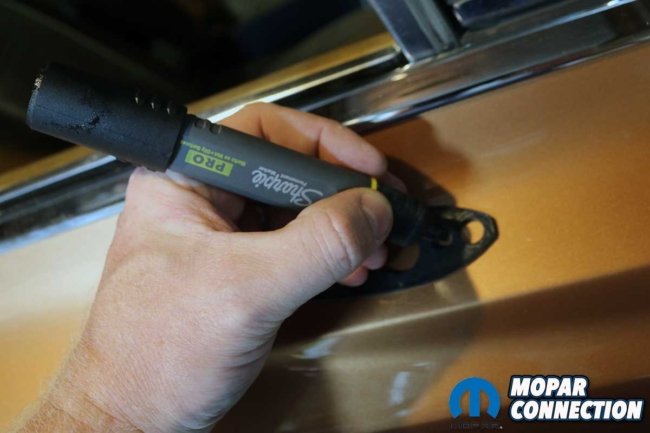

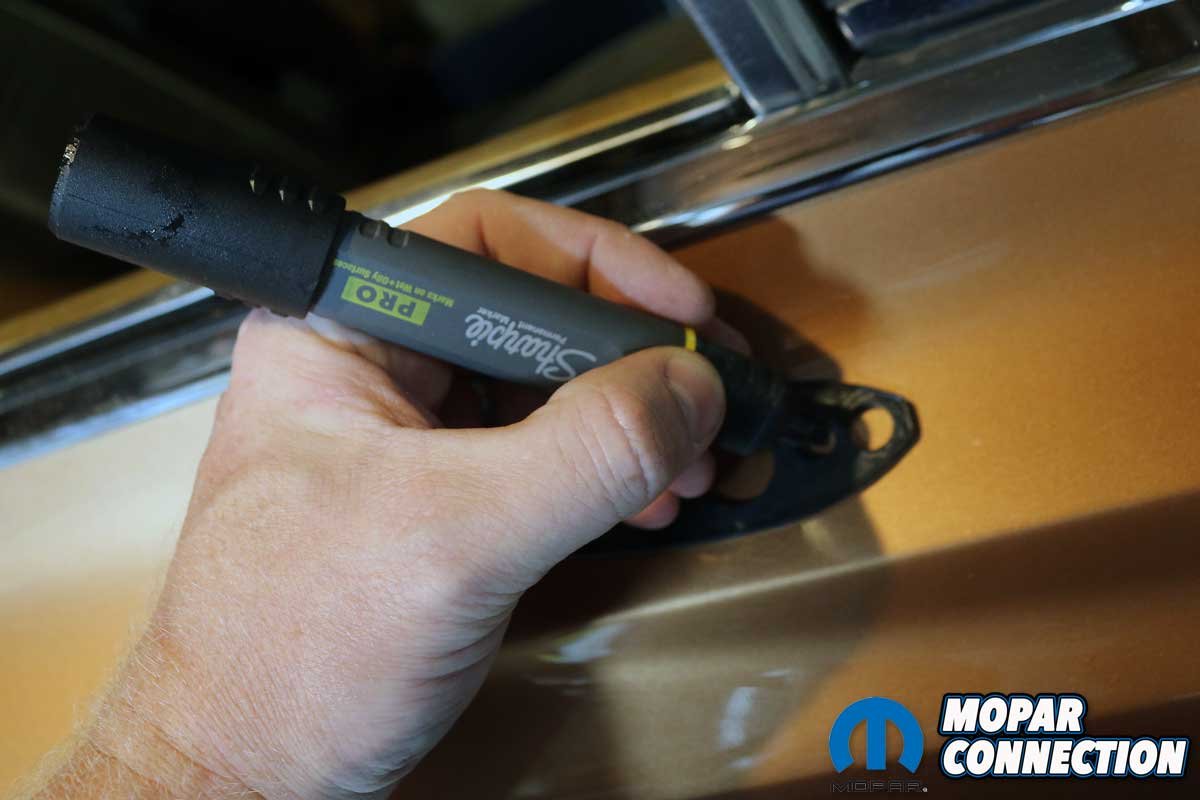
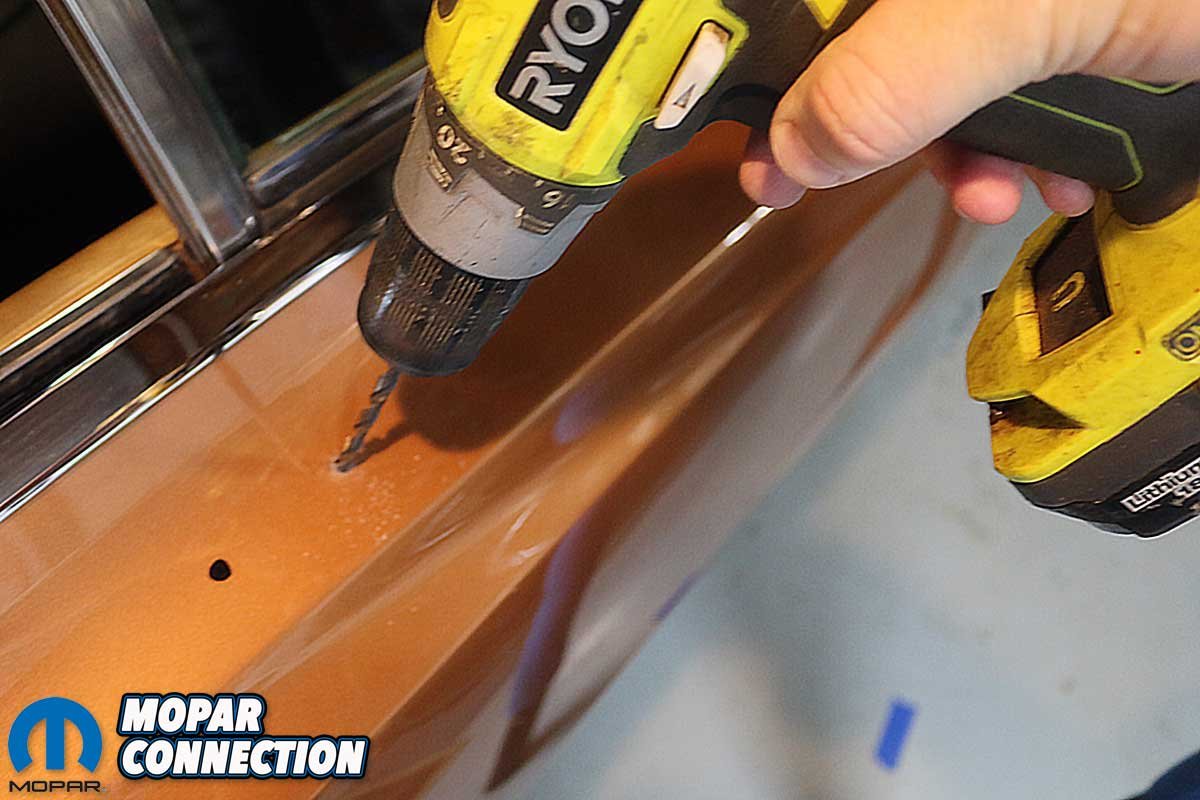
Above Left: After determining the location for the mirror, we used the mirror gasket as a template to mark the points to drill. Above Right: We carefully drilled each hole. One hole was for the mirror mounting stud, and the other was for a Phillips screw.
We carefully plotted measurements from the passenger door’s body line and door gap. Next, the mirror gasket was laid on the door at our measured points. The gasket had two provisions which we marked and center punched to accept the mounting screw and stud.
We drilled a 9/64-inch hole for the Phillips screw (rearmost hole from the front end of Brazen) and a 13/64-inch hole for the stud. Because the mirror was manually operated rather than remotely, there was no need to drill any additional holes for an interior adjuster knob or cables in the door’s exterior.


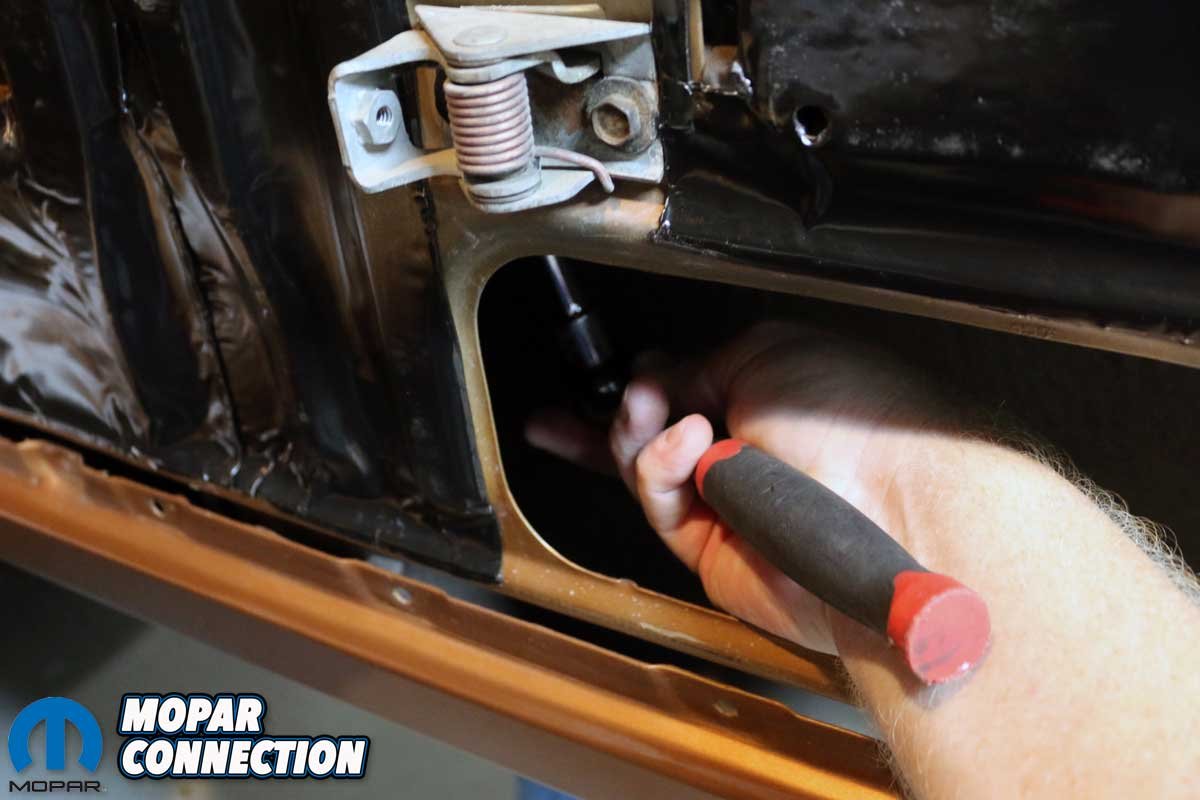
Above Left: We installed the mirror by passing the stud through the door, aligning the gasket, and installing the Phillips screw. Above Right: After disassembling the passenger side door, we threaded a nut onto the mirror stud. We tightened the nut with a ratchet, extension, and socket.
The stud was threaded into the underside of the mirror. Then, we slipped the stud through the door skin with the gasket installed. Finally, we loosely threaded the Phillips screw into the door to secure the mirror.
We removed the armrest, window crank, and door panel and pulled back the vapor barrier to access the stud. Reaching into the inner door, we started the nut on the stud and secured it with a ratchet, extension, and socket. After fastening the nut, we tightened the Phillips screw. To conclude, we reinstalled the vapor barrier, panel, window crank, and armrest to complete the installation.
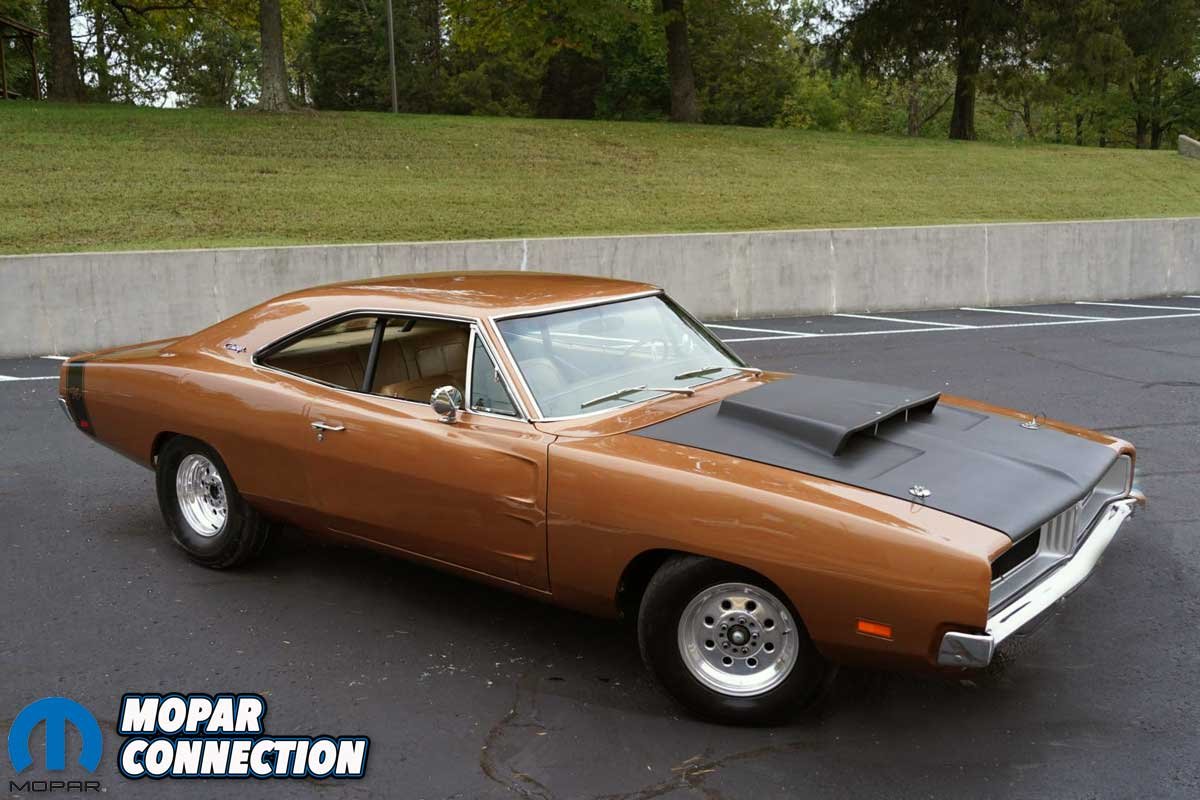
Above: Brazen has entered the 21st century with the addition of the passenger side mirror. The mirror balances the vehicle’s appearance, and it is nice to have an additional viewpoint of the traffic behind us.
We adjusted the mirror and took Brazen for a test drive. After becoming used to having a mirror on the right side of our late-model vehicles, the passenger side mirror on Brazen was a significant modernization.
With our improvements completed on Brazen, we are sure that additional “final touches” will be necessary someday in the future, and we are reassured that the new Year One parts we need will be just a click away.


