


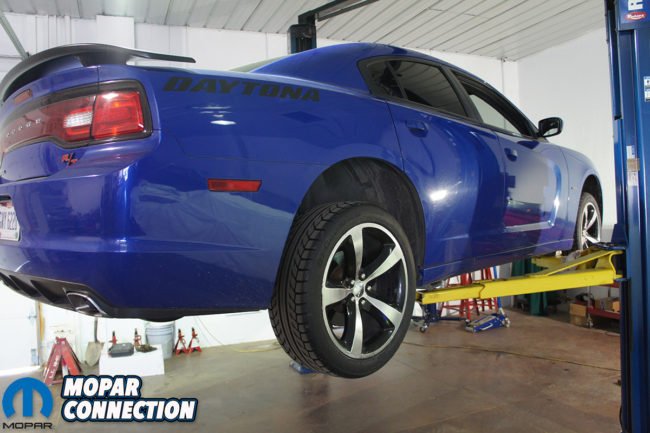
When it comes to vehicles one of the major areas that seem to make or break the way a car looks is stance. For example our stock 2013 Charger Daytona looked more like an SUV with its giant fender to wheel gaps. We wanted to close up the gaps and do it properly. We turned to none other than Hurst Performance Products for their HP Lowering Spring. Our Charger is daily driven and going too low could be detrimental to our front bumper or other body parts. Hurst has done a great job of researching the proper height to give our modern Mopars the perfect muscle car stance without scraping on every little bump.
The Hurst HP Lowering Springs are stated to drop our Charger 1.25-inches front and rear. Back to the stance or look of the car, 1.25-inches just didn’t seem like much of a change. We thought that might not be enough to close up our giant fender gap. Like most people, we jumped on the web and starting looking up pictures of lowered Chargers so we could get an idea of how it would look in the end. With different spring manufactures, wheel/tire combos, body modifications, etc., its almost impossible to figure out what your individual car will look like. We found a few pictures on Hurst website, although they had different body mods it gave us an idea and if it came close we would be satisfied.
While searching through photos online we realized that our wheel/tire combo would also play a big factor of how our car looked after the springs were installed. We found pictures of Chargers with everything from a 17-inch to a 24-inch wheels. The size of the wheel will give the car a different look but the amount of sidewall of the tires make just as much difference. We needed new tires any way and did a lot of searching about different sidewall heights. We ended up with staying with the stock size and ordered 245/45/20 BF Goodrich Comp2 A/S tires. Although we contemplated switching to a 245/35/20 because it would also drop the height of the car 1-inch. We found some examples and yes the car sat really low, the fender gap was still bigger than we liked.
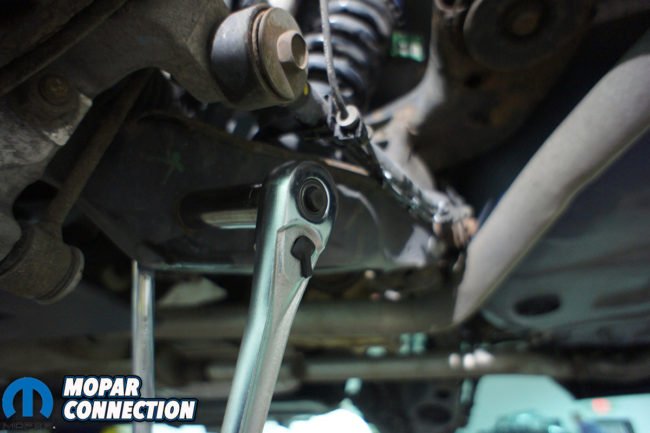
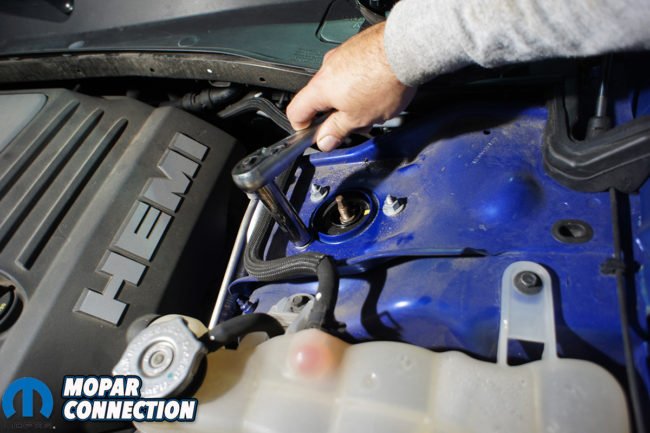
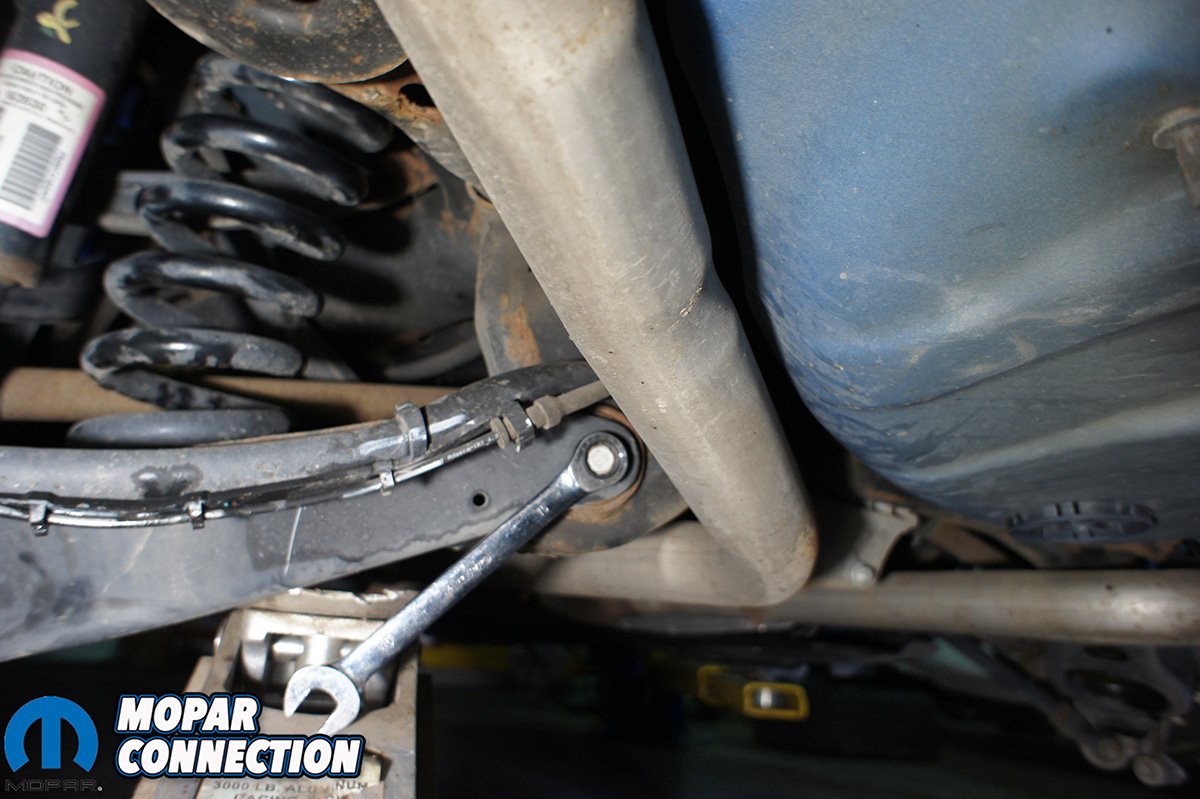
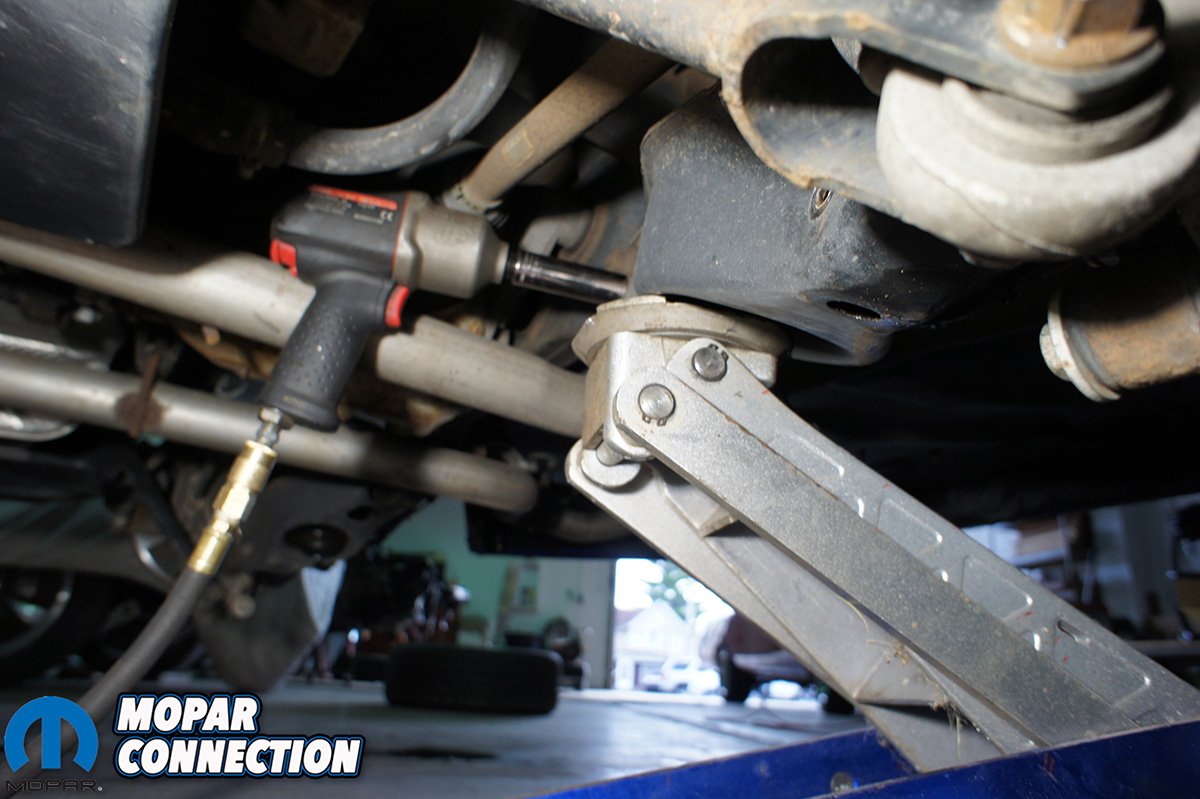
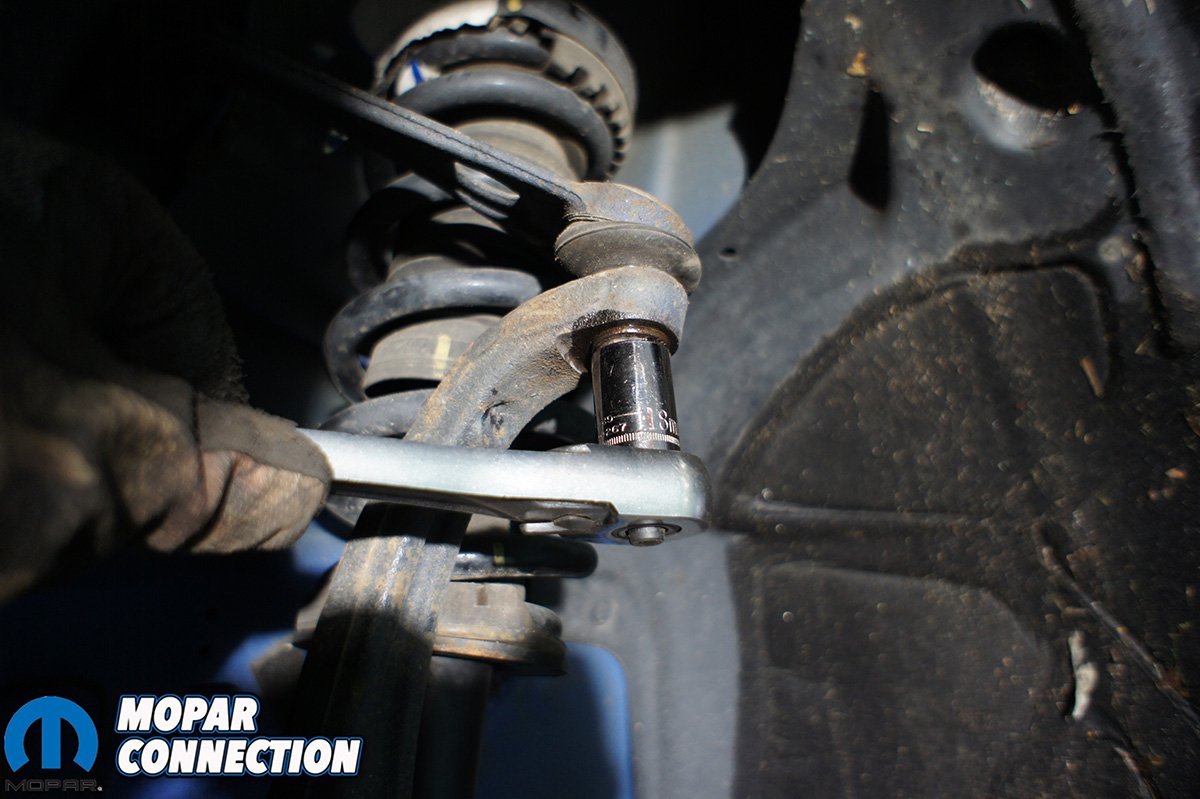
Above right: We used a 18mm socket and 15mm wrench to remove the bottom shock bolt on the rear.
Lowering the car not only helps the aesthetics but also the overall handling. Lowering it the proper amount will give the suspension better geometry, lowers the cars center of gravity and with proper spring rates help keep the tires on the ground through corners. The Hurst HP springs are dual rate and a stiffer rate to properly hold the car up in its lowered stance. We could go down a giant rabbit hole about spring rates, material, frequencies, etc., but Hurst has already done all of that work to create the perfect spring for increased handling on the street.
The average mechanic with basic tools, floor jack and spring compressor can accomplish the spring swap in a full day. It took us a full day in the shop with a lift, but we did a few other maintenance items while we had the car in the air. The only tool that we did not own was a coil spring compressor and rented one from our local auto parts store. The spring compressor is available in a couple different styles, be sure you tell them it’s for strut coil springs.
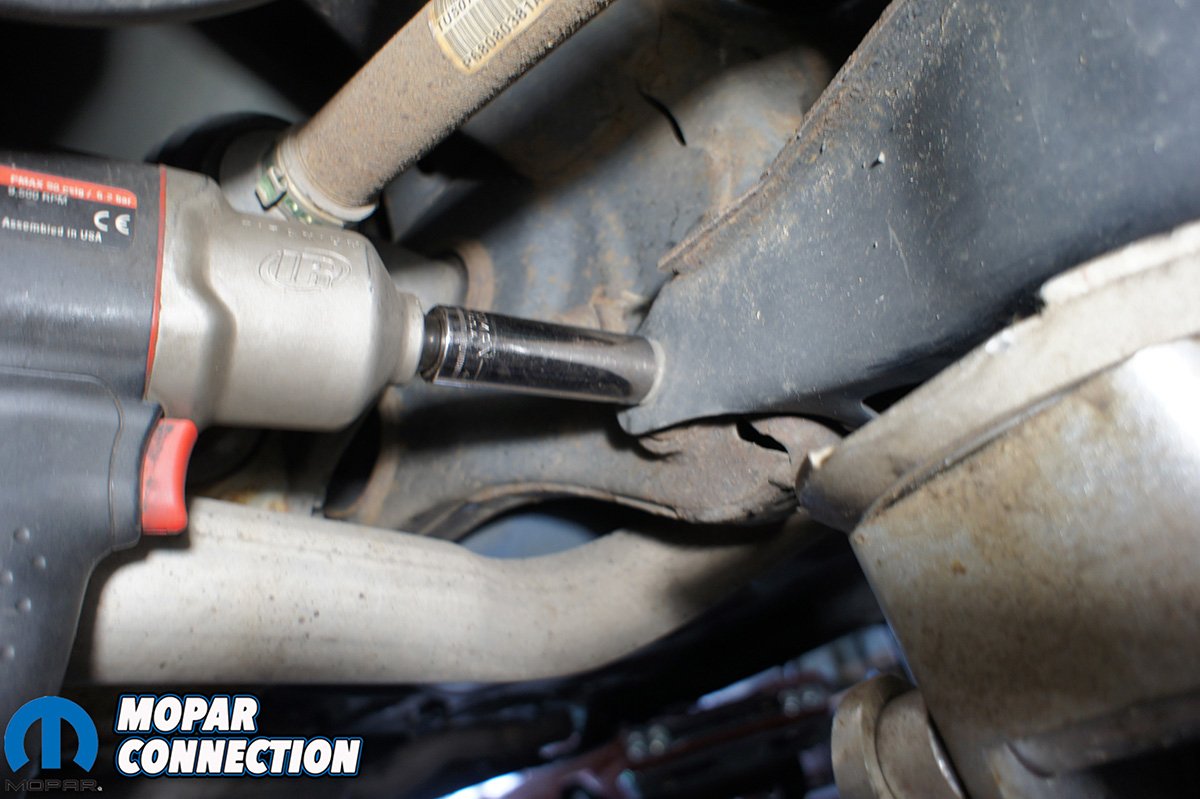
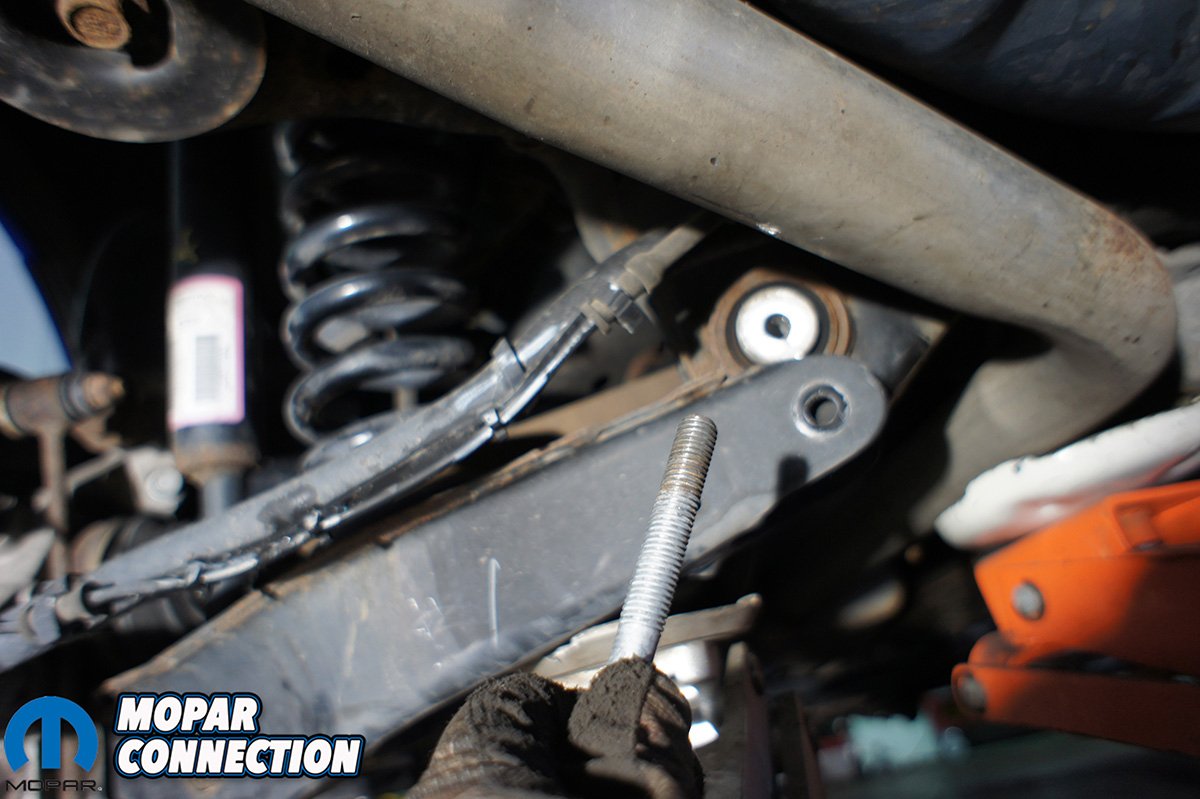
We started with the rear springs first. First with disconnected the bottom shock mount. We found out there is no reason to remove the whole shock. Once the shock bolt was removed we used a floor jack to put pressure on the inner part of the lower arm where the rear suspension pivots. There is only one bolt that holds the lower arm on. With pressure on the lower arm, we removed this bolt. When that bolt is removed the pressure of that spring will force the arm down. This is where you need to keep the jack in place and slowly let the jack down, taking the force of the spring until it’s completely unsprung.
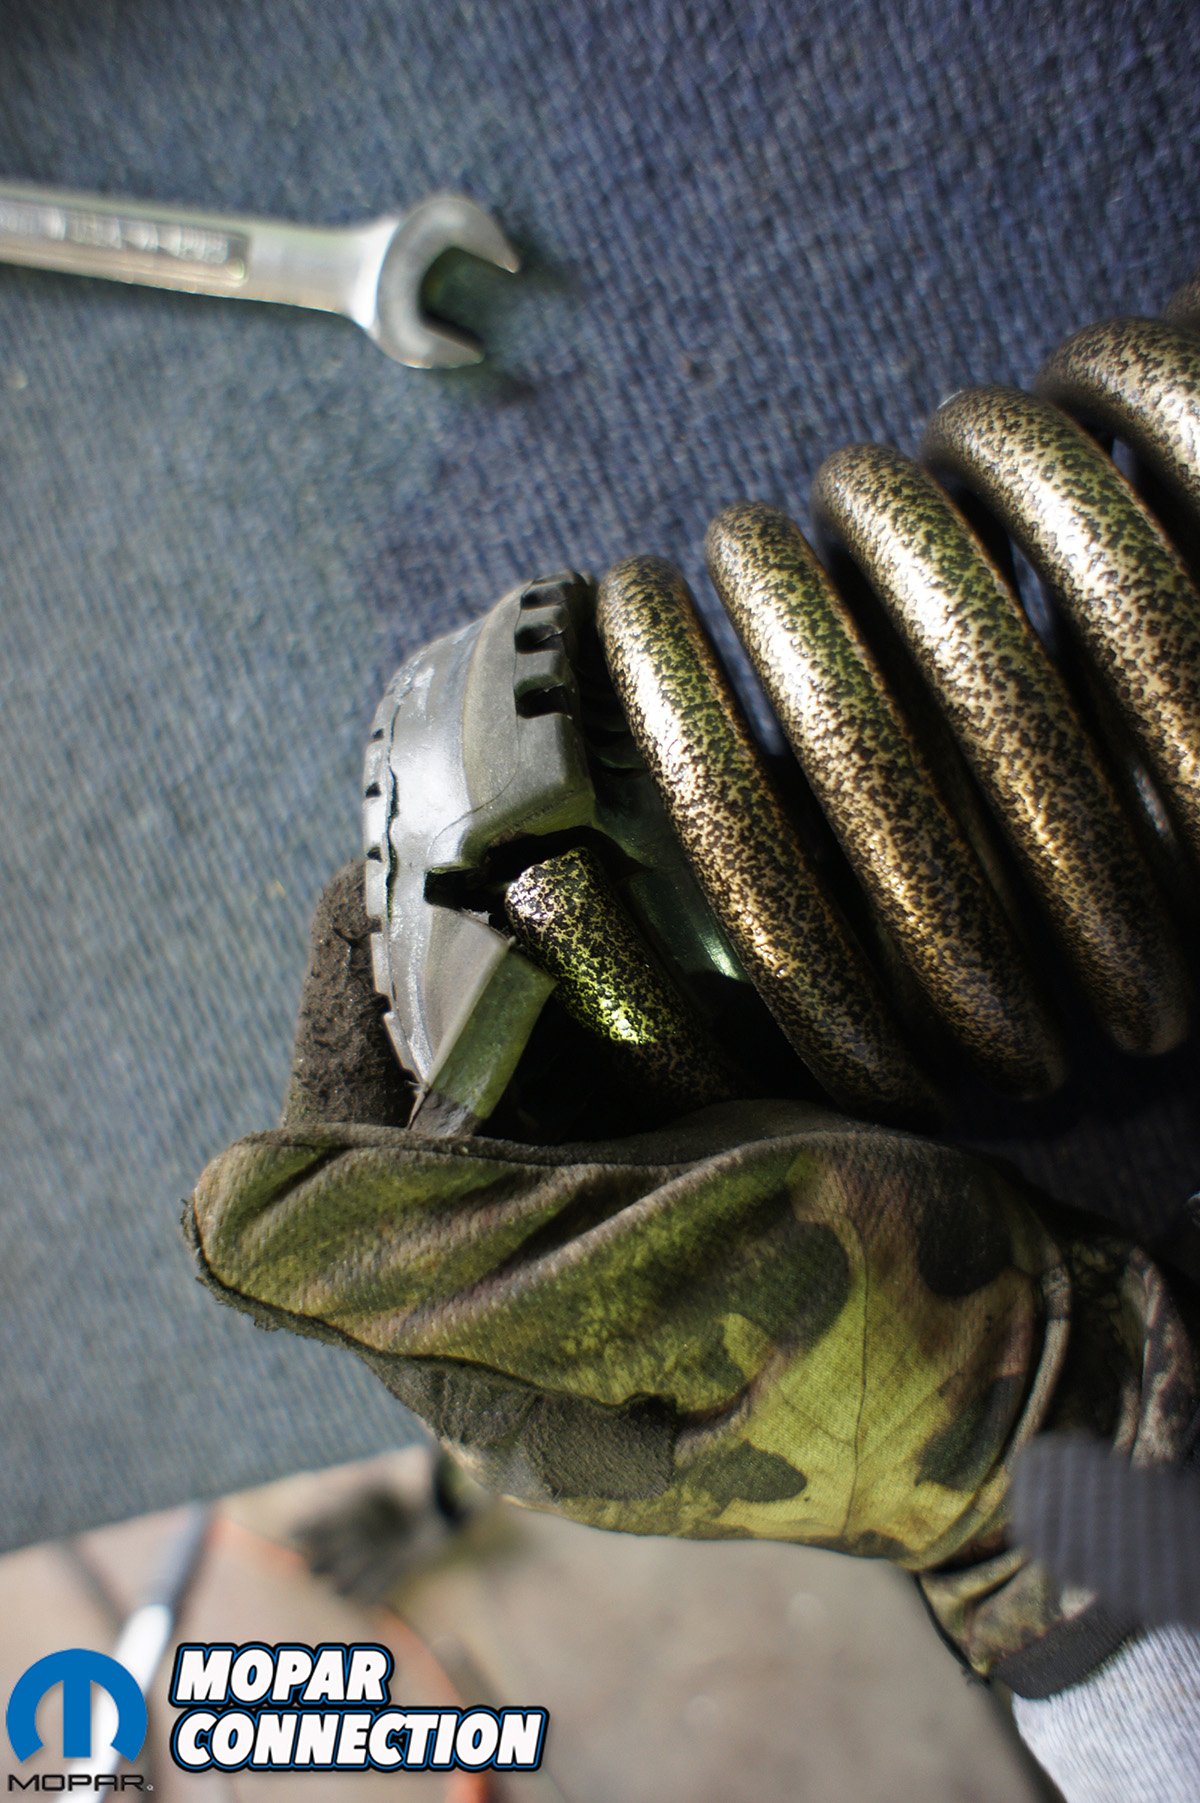
Once the spring is unsprung and loose, simply remove it from the car. As you remove the spring you’ll notice rubber isolators at the top and bottom of the spring. Be sure to notate which one is top and bottom. They will need to be reused with the Hurst springs and placed in the correct location.

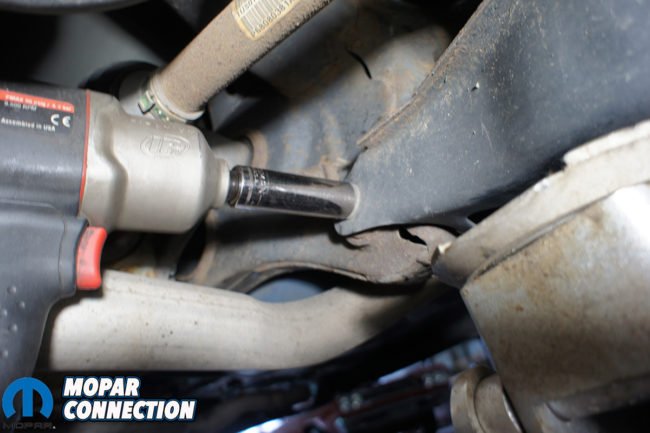
Above Left: We positioned our jack under the rear arm and put some pressure on the arm as we got ready to remove the bolt. Above Right: Using a 18mm socket on our impact and 15mm wrench we started to remove the arm pivot bolt.
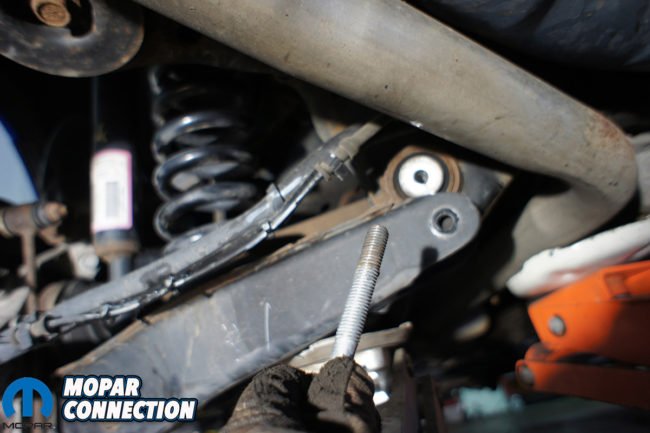

Above Left: We successfully removed the arm pivot bolt. Above Right: With the bolt removed we carefully lowered the arm down slowly.
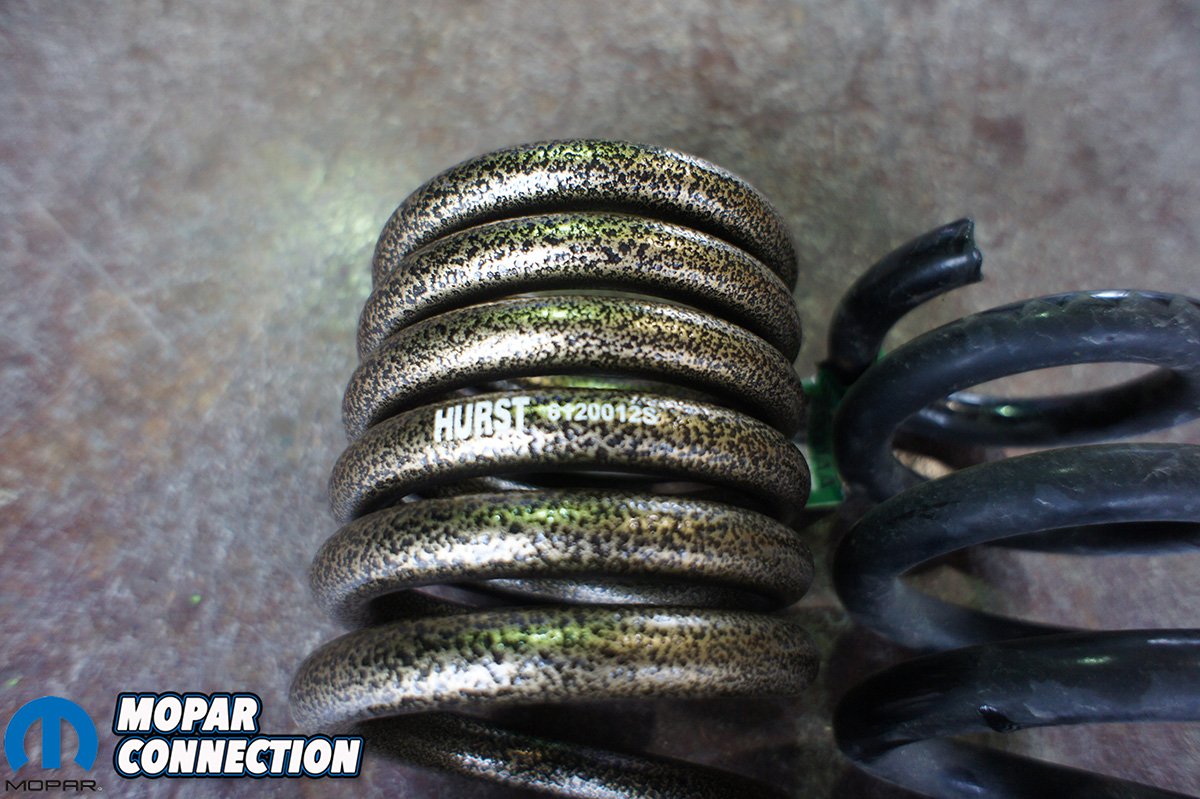
The Hurst HP Springs for the rear are fairly easy to tell from the front. So no one becomes confused Hurst made every part number that starts with 612 specific to rear springs. This will ensure you are placing the correct spring in the rear. The Hurst logo should be right side up when you install them. It is possible to install them upside down, which could affect performance, so be careful.
As you place the new Hurst springs in the rubber isolators be sure they are positioned correctly. The end of the coil spring should sit in the notch. You can see in the pictures how we positioned ours. The difficult part was keeping them in position while we reinstalled them into the arm. Just be sure to check the spring doesn’t fall out of the groove or twist when its back in. Once everything looks good, jack up the arm and reinstall the lower arm bolt and the shock bolt and your done. It sounds easy but getting the bolt back in the arm was tricky and took us a few minutes.
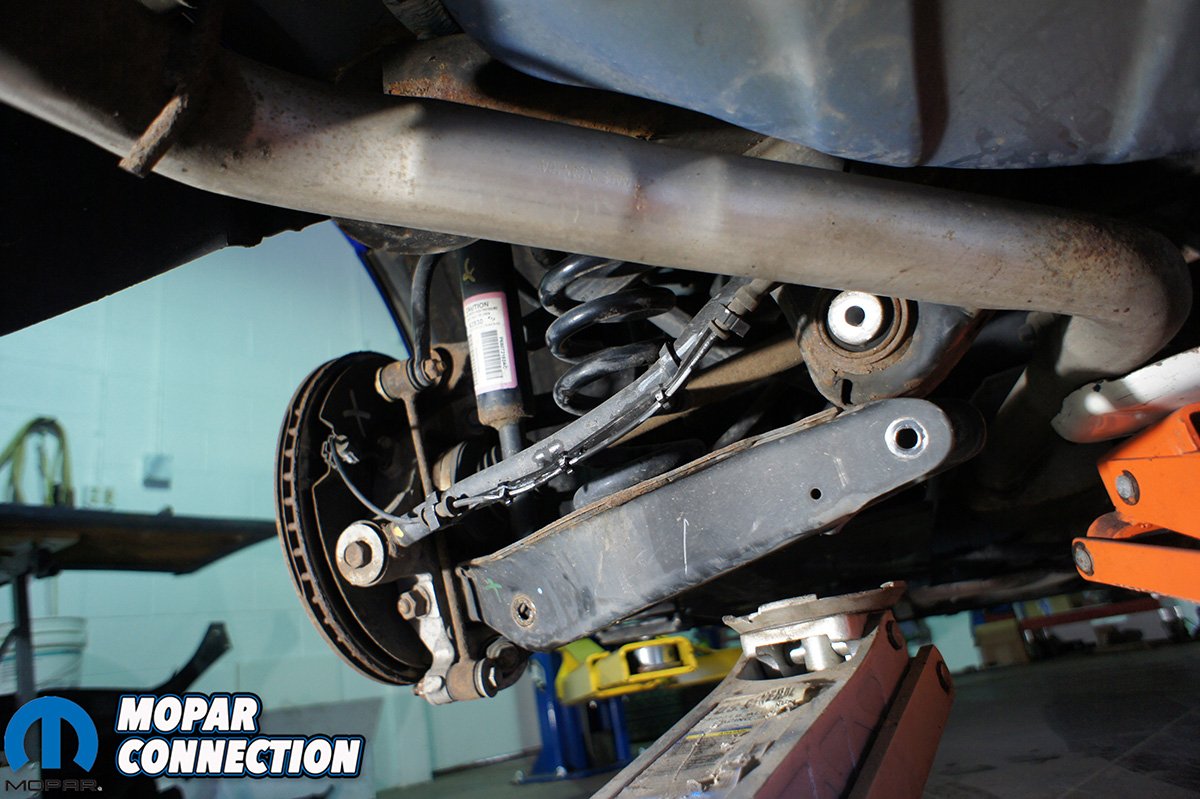
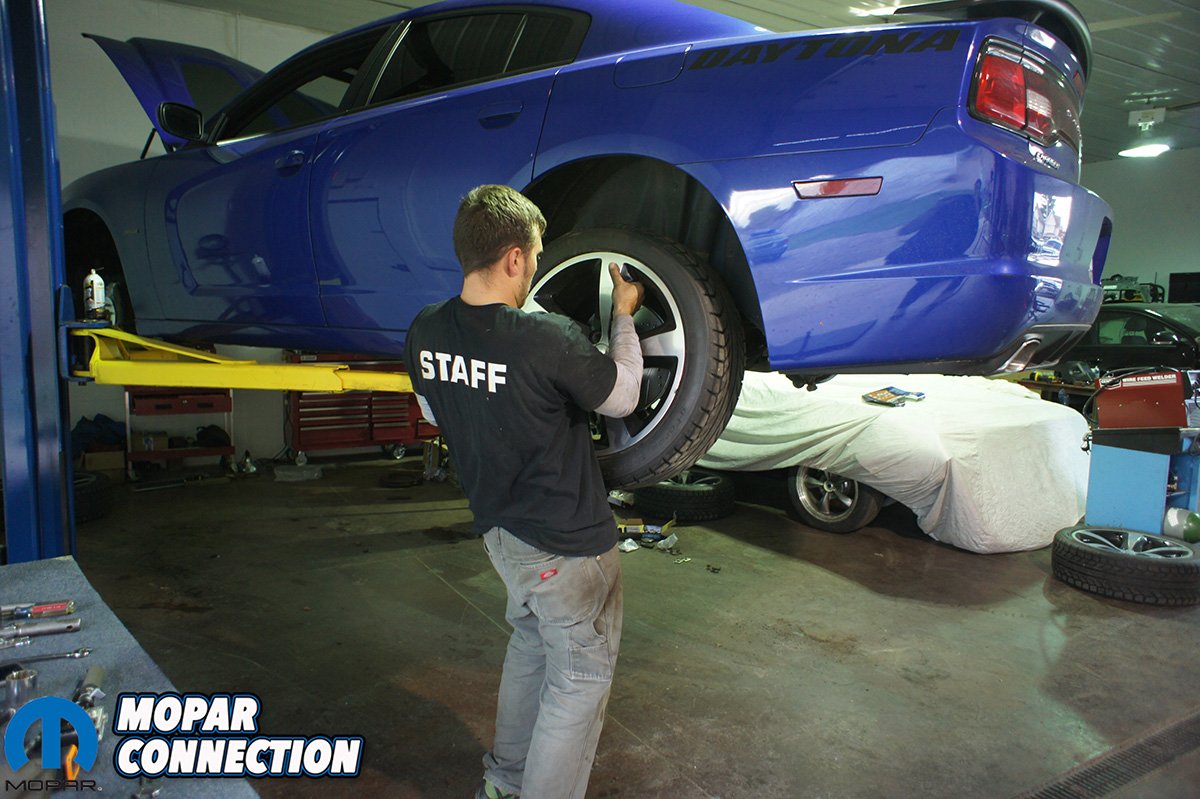
We repeated all the steps on the opposite side and then reinstalled the wheels. The great thing about installing the springs that way is you don’t change any caster, toe or camber in the process. Although the whole care will need realigned after all the springs are installed, in the mean time they will stay about the same.
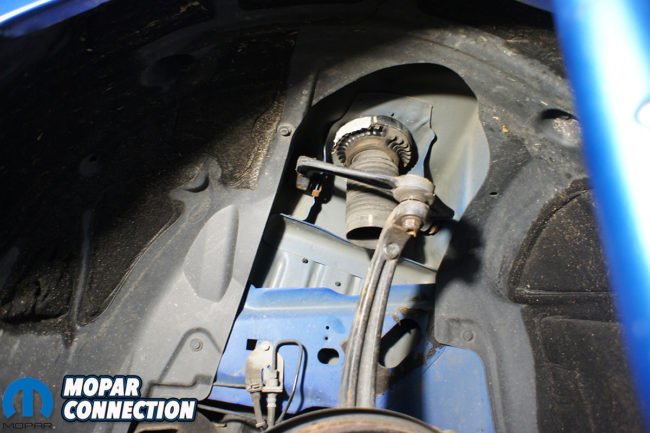
Moving to the front of the car, this took a little longer to complete. At first it looked simple as all we needed to do was remove the strut and change the spring. Well, the issue is the strut doesn’t just come right out like other vehicles. Trust us, we spent way too long trying every angle to remove the complete strut assemble without disconnecting the spindle.

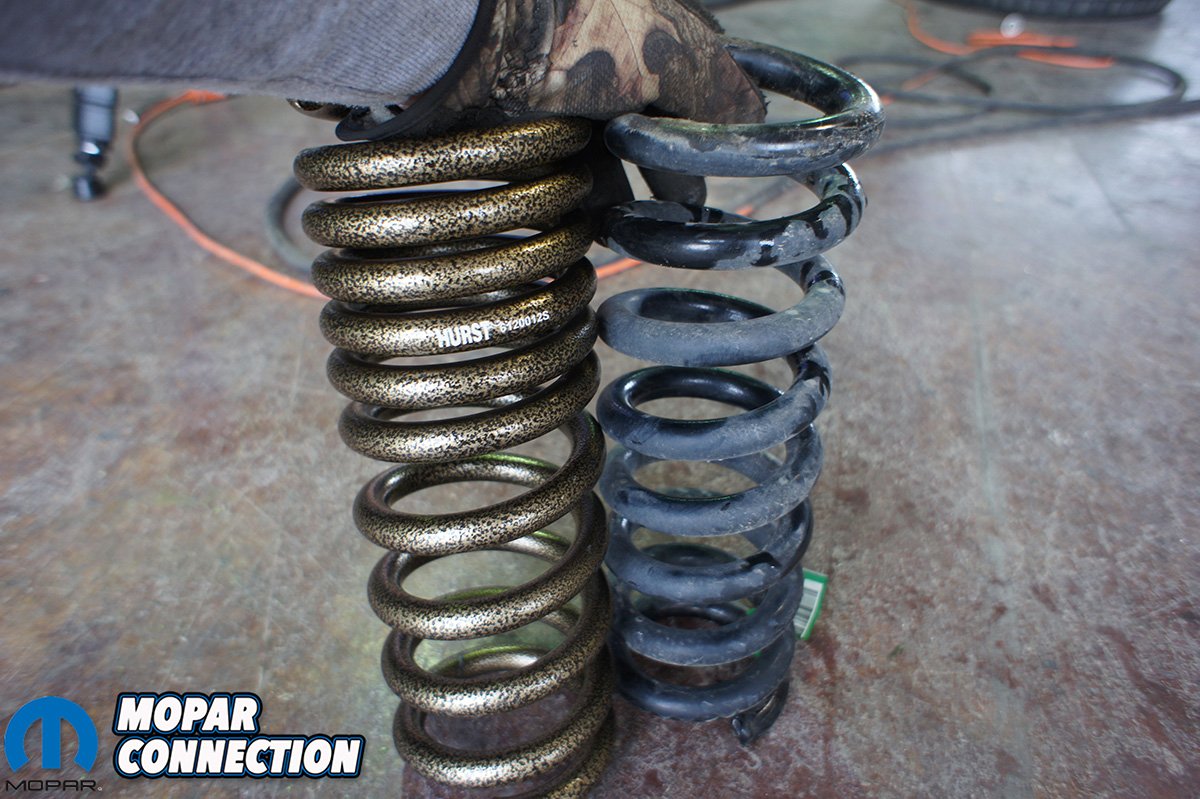
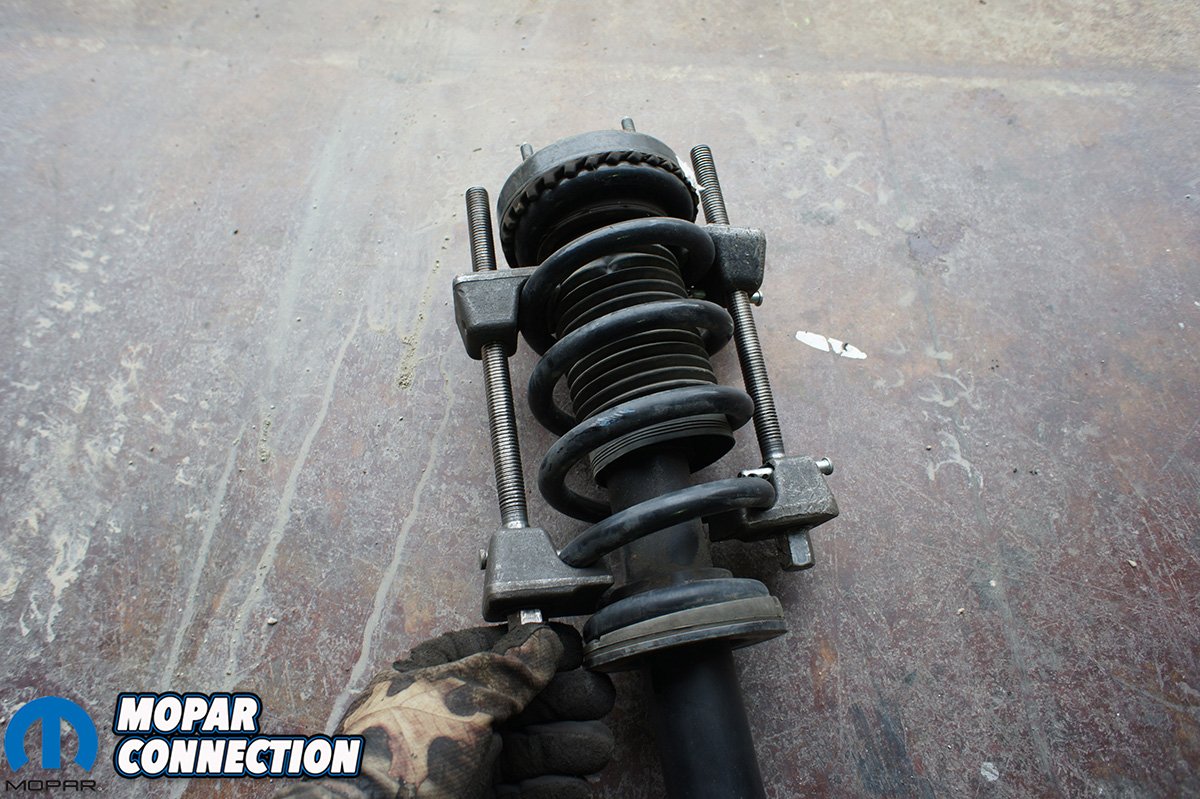
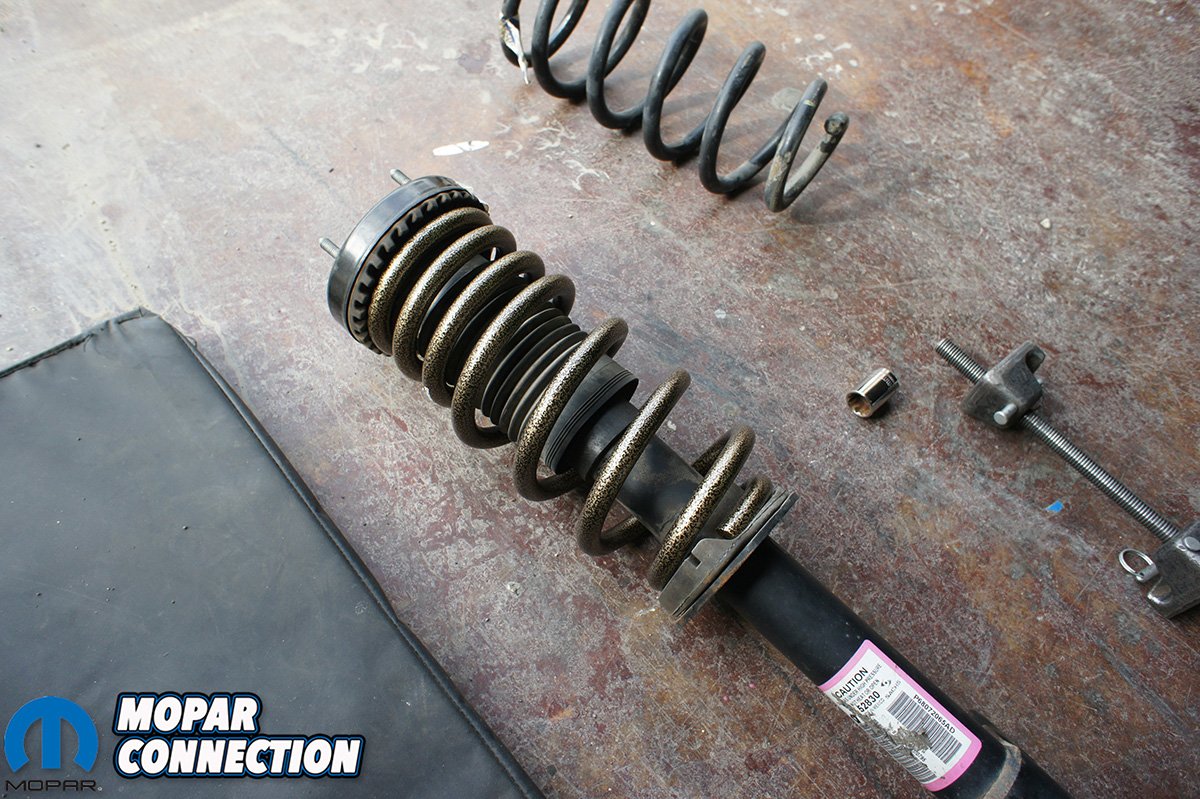
Above: Comparing the stock spring vs the Hurst HP spring you can see its a little shorter, the coils are different (due to dual rate), and the new springs come in a hammered bronze powedercoat finish.


Above: The rubber spring isolaters are designed for the spring to sit a certain way. If the spring is not seated properly you my having binding, noise or ride height differences.
Before you start to remove anything you will want to record what side the sway bar mount is located. When you get ready to reinstall the strut you want to make sure the mount is facing the correct way. If not you will have to remove the whole strut to rotate it to the correct position. The easiest way to do this is snap a few photos of the front strut to refer back to at a later time.
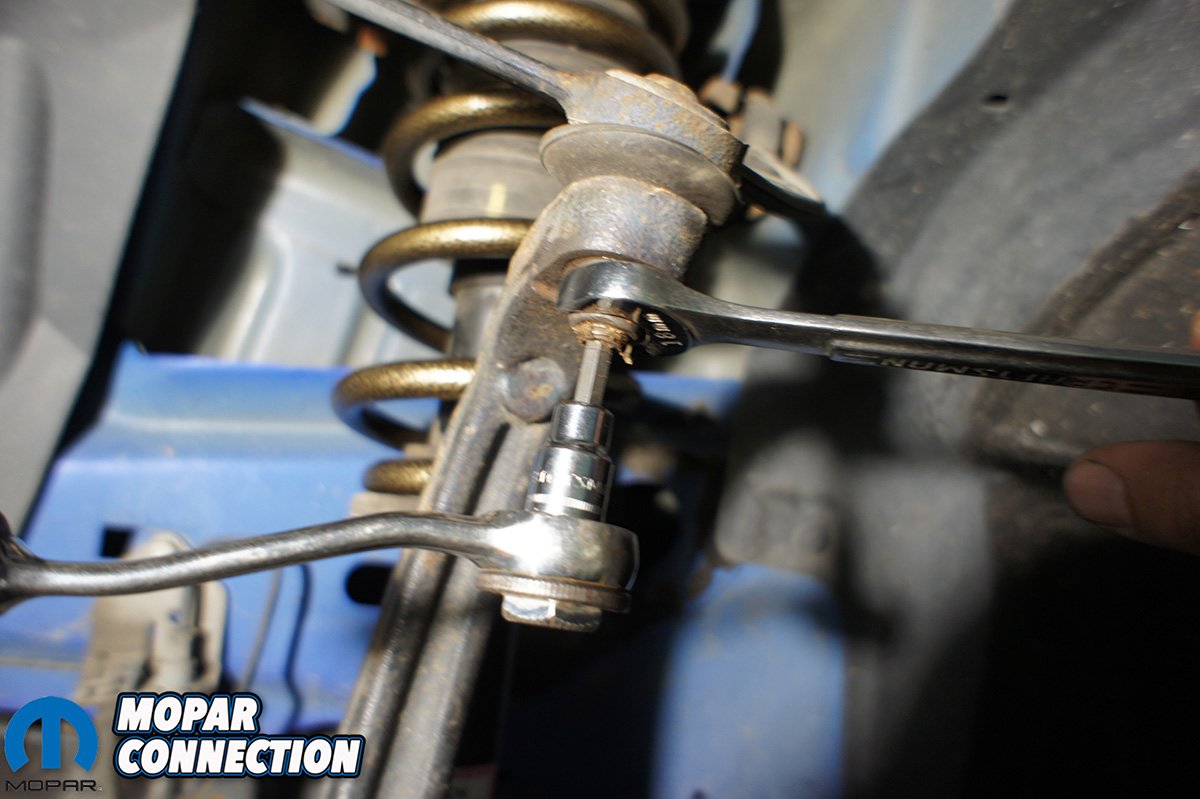
We started by disconnecting the sway bar link first. This will allow the spindle to drop down when we disconnect the balljoint. If you do it after you will be fighting against sway bar. Then we disconnected the bottom strut mount and the 3 bolts holding the top of the strut on. The strut assembly will now be free but as you’ll find out, no room to remove it.
The easiest way to remove the strut assembly is by disconnecting the upper balljoint. You could also remove the upper a-arms if you didn’t want to mess with the balljoint but they take more work. We still have factory a-arms but if you are thinking about upgrading a-arms, which we would suggest for better adjustability, now would be the perfect time.
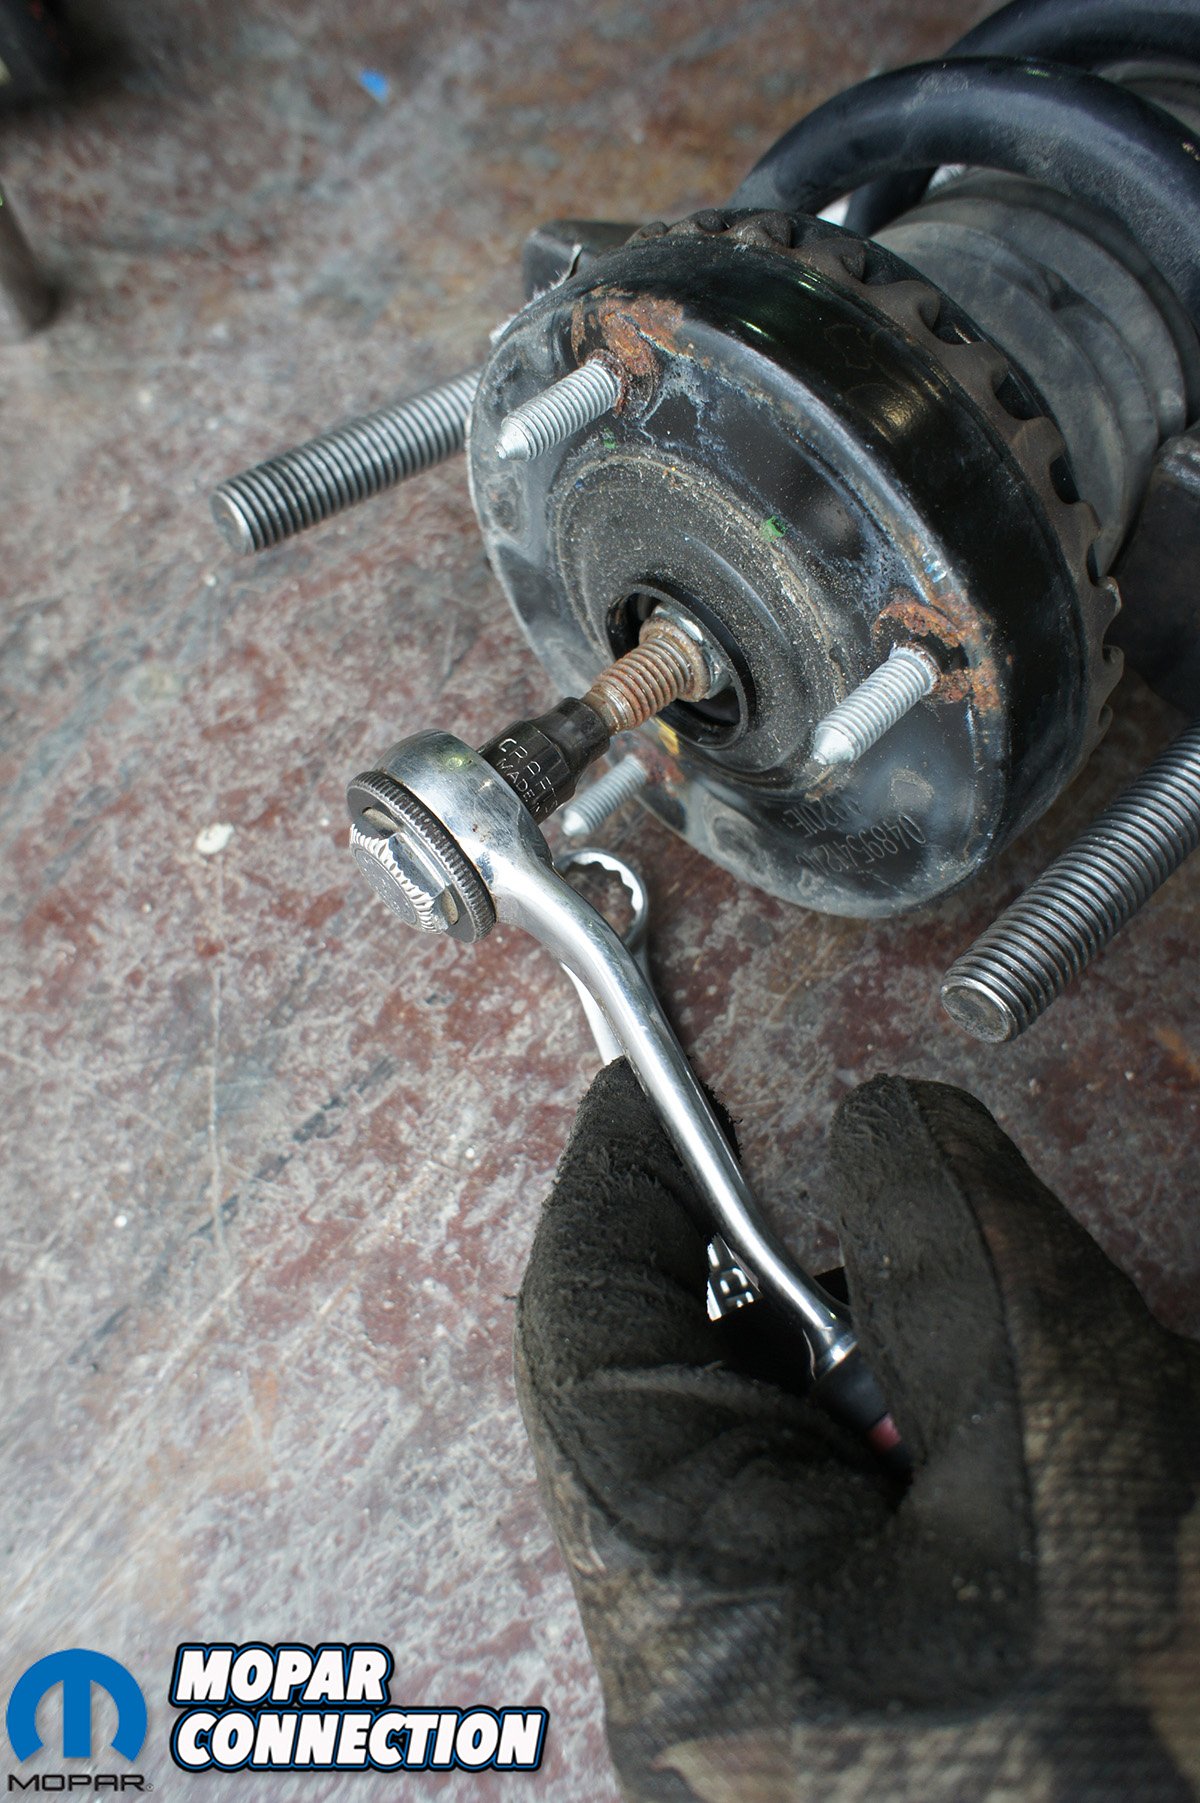
We used a Allen bit to hold the stud of the balljoint while we removed the nut with a 18mm size wrench. Normally to separate the balljoint you want to use a balljoint fork but that would tear the boot and we wanted to reuse our balljoint since you have to replace the whole a-arm and not just a ball joint. We unscrewed the not until it was flush with the bottom of the bolt and smacked it with a hammer until it came free.

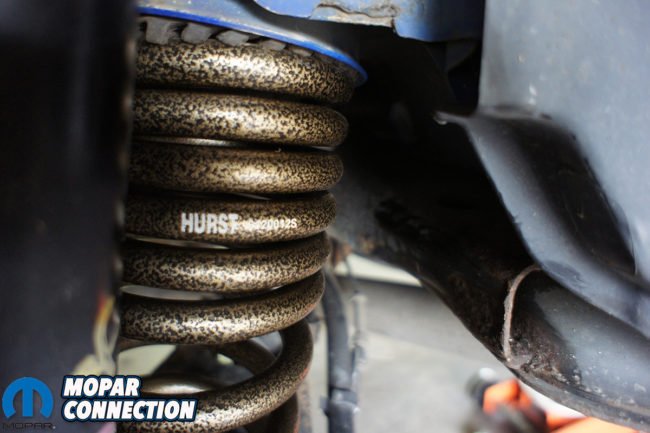
Above Left: The Hurst logo and part number are clearly visible to insure we have the rear spring and that we install it in the correct orientation. Above Right: The spring is installed and the Hurst logo is right side up.

Above Left: Using a flat head screw driver we removed the strut cover. Above Right: With the cap removed we used a 13mm socket to remove the 3 nuts holding the strut in.
We know that it sounds barbaric to just beat on something with a hammer but it worked. Once the balljoint popped loose, we finished removing the nut and the whole spindle dropped down. With the spindle dropped down we were able to fish out strut assembly out. If you need more room to remove the strut you can also remove the tied rod end to allow the spindle to drop even further.
With the strut assembly out we can now use out strut spring compressor. Each spring compressor can be different, so be sure to follow the instructions for your compressor. What ever you do, do not stand in front or behind the strut if you are working on the floor. If something goes wrong the spring can shoot off forward or push the strut backwards and can inflict major damage to you or someone else. Stand to the side of the strut when your removing the spring.
Once we installed our spring compressor, we remove the nut holding on our top plate. If your lucky you can hit the nut with an impact gun and will remove it quickly. One of ours worked this way but the other did not and it just spun the whole strut. If that happens you will need an 18mm open end wrench and 8mm socket to remove the nut. Make sure to take your time and get a good hold on the nut before you start wrenching. You do not want to round the nut off on the strut.


Top Left: Using an 18mm socket we removed the upper balljoint nut. Top Right: Once the strut was removed we temporarily reinstalled the upper a-arm to alleviate strain on the spindle and any wires. Bottom Left: Using our coil spring compressor we removed the stock spring. Bottom Right: The final product after the Hurst springs are installed.


Above Left: When reinstalling the upper a-arm we had to use an Allen bit and 18mm wrench to tighten it down. Above Right: With the springs in and all the bolts reinstalled we were ready to put the wheels back on.
After the old spring is removed, place the new Hurst HP Spring in the perch and reinstall the top mount. Just like the rear, make sure the spring sits in the rubber bushings properly and that the Hurst logo is right side up. You will notice the reinstallation will go easier since the spring is shorter you will not need to use the spring compressor.
Now that you have the new Hurst HP Spring installed, you can reinstall the complete strut. We bolted the top of the strut in first then the bottom and then bolted the ball joint back in. A little different sequence than removing it but it worked better and made it easier to get the balljoint tightened down. We threw our wheels back on the car and were ready to hit the streets.
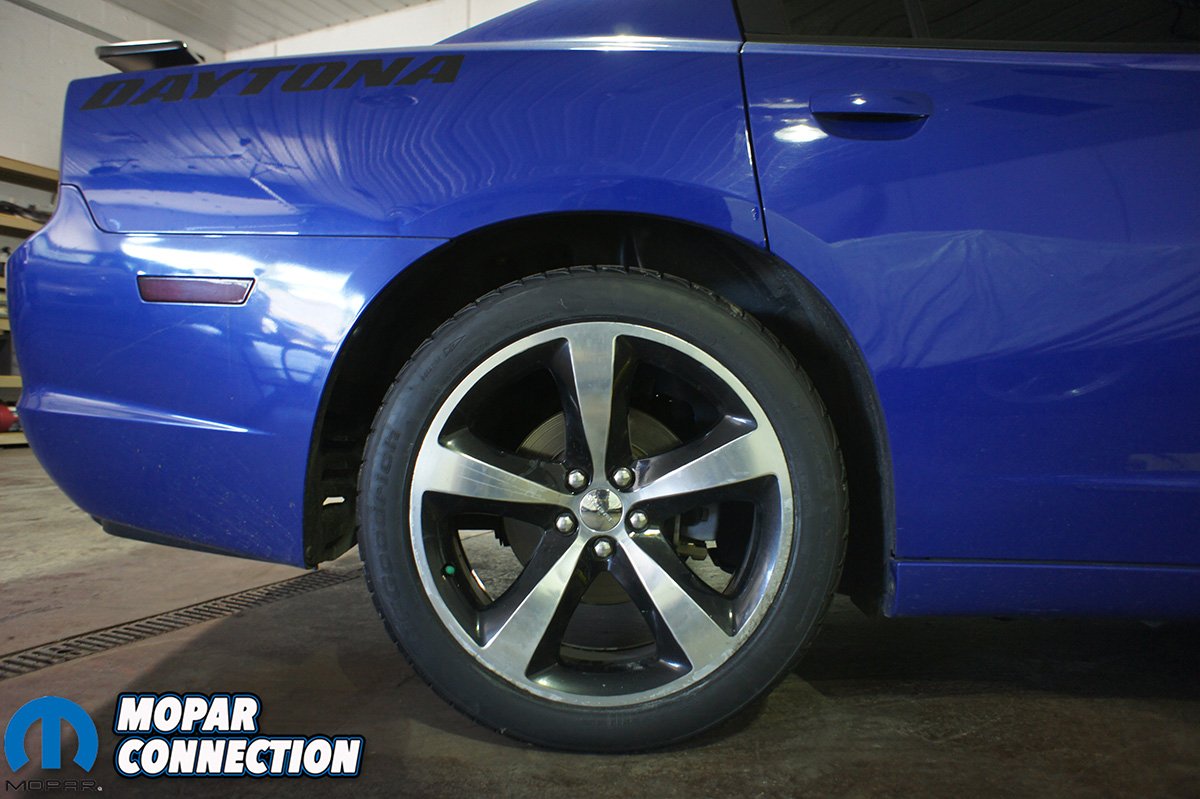
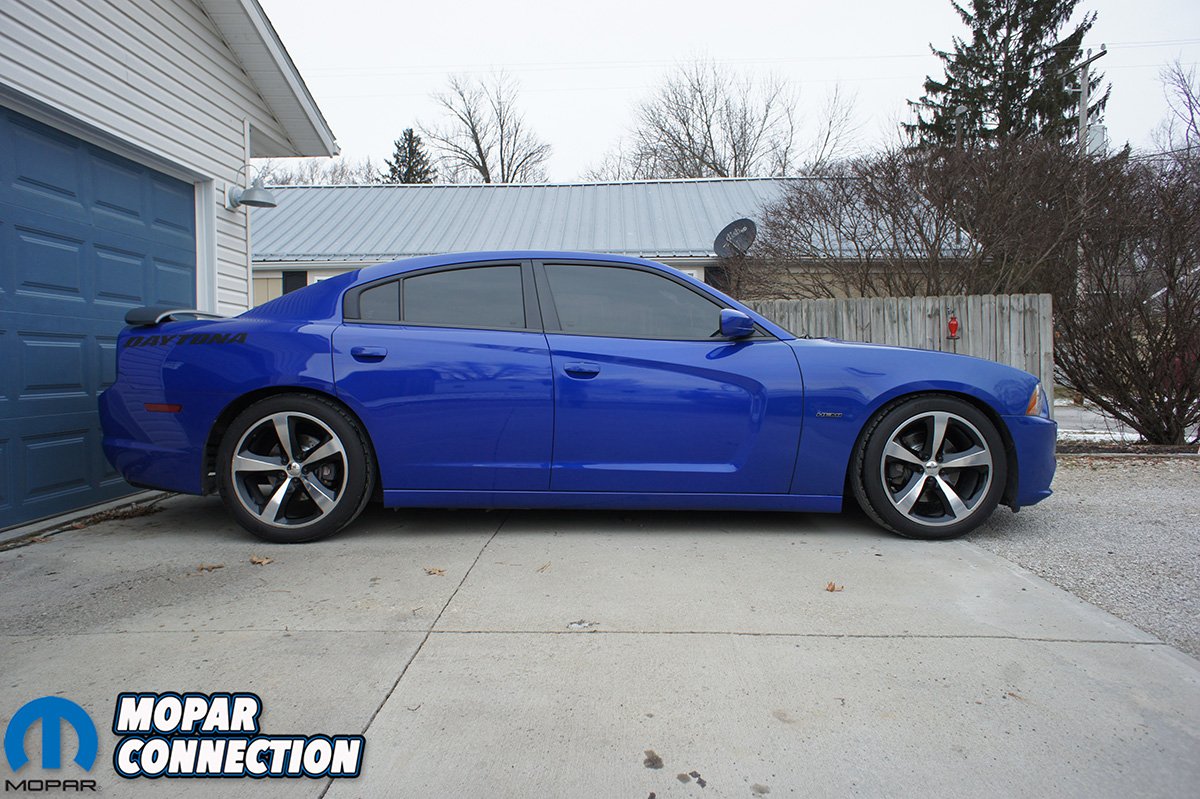
Once the suspension settled from being on the lift, the height of the car was perfect. We honestly don’t know why Dodge didn’t lower the stance of the R/T package from the factory. We still have decent good ground clearance but the ugly fender gaps are gone. Its funny because we have had Mopar enthusiasts come up and ask about our SRT8 Charger. Amazing how much difference the Hurst HP Springs make the appearance change.


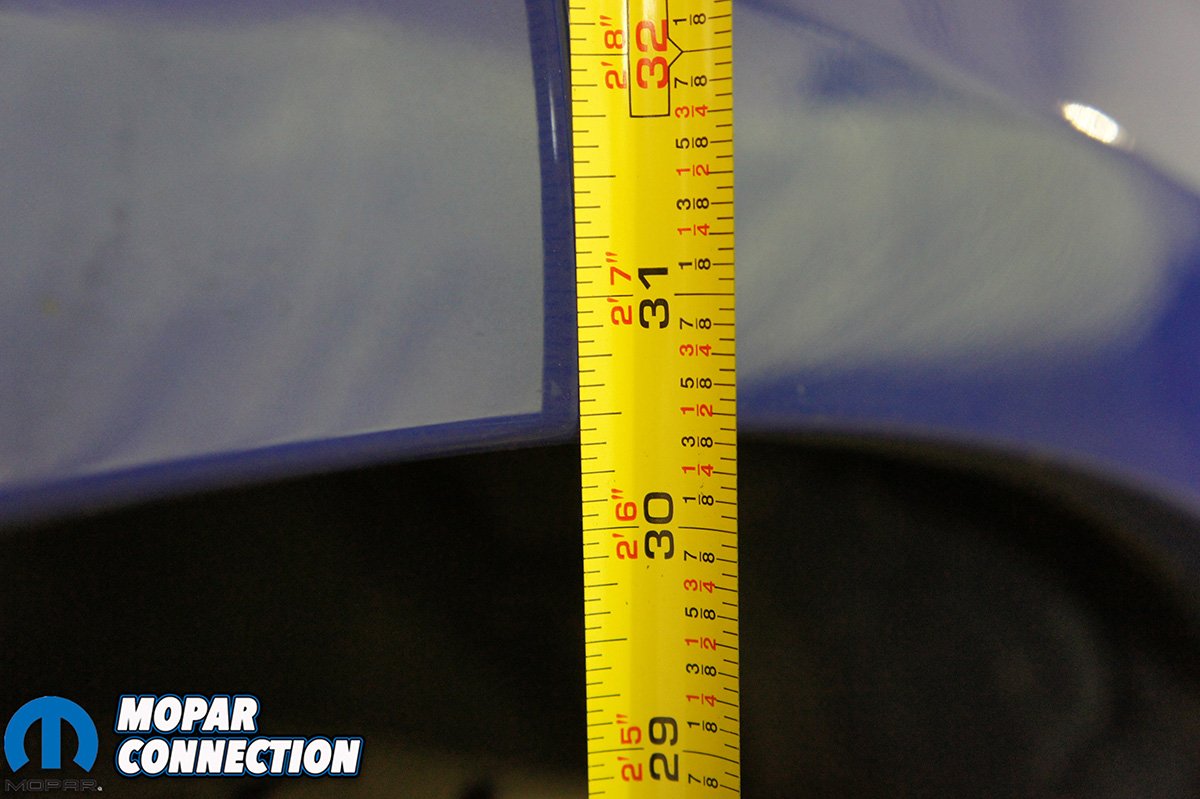
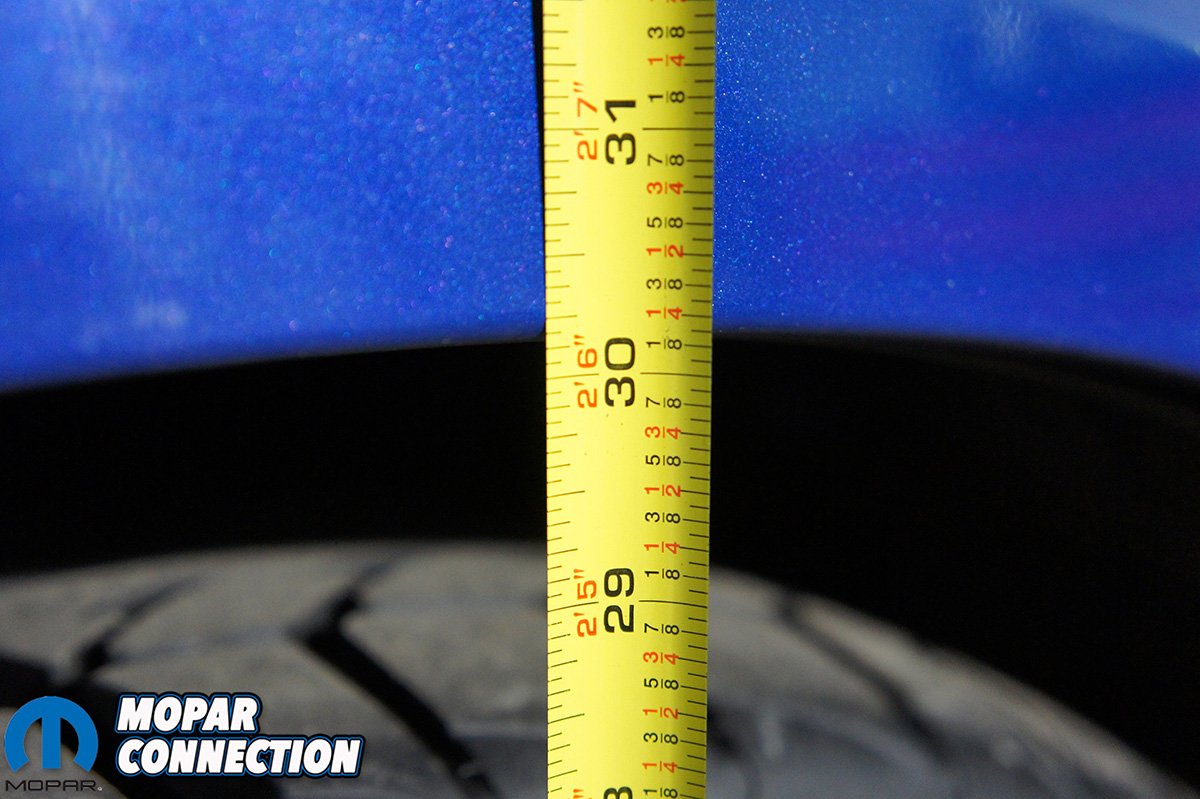
Top Left: Before installation we measured 30 3/16-inches from the ground to the wheel well on the front. Top Right: The rear measured 30 3/8-inches before installation. Bottom Left: After the springs installed we measured 28 7/16-inches on the front fender. Bottom Right: In the rear we measured 29 1/4-inches to the fender.


Above: You can see the difference in the stance and how well the wheel wells compliment the 20-inch wheels after it’s lowered.
Although we love the look of our car now, behind the wheel its also better. It feels like a true performance vehicle now. You can feel less body roll and steering is more responsive. That does come with a little stiffer ride but not by much. Again this is a daily driven car and still enjoy driving it every day.
Looking back, we will be honest and say that we had our doubts. Before the installation we were worried that the new springs would create a very stiff and unenjoyable ride. Even though Hurst promised that we would enjoy the increased handling and look of the lowered car, we still had out doubts. This might be from riding in other cars with poor quality lowering springs or cut springs. We also have stiff springs in Project Orange Crush for track use and although we tolerate the stiff ride in it, we did not want that same feel in our daily driver.
Once again Hurst came through with a great product. The Hurst HP Springs out did our expectations. For under $300 we don’t know of a better upgrade. The HP Springs increase the handling, drop the car to the perfect height and can be completed in one day. There is no reason why Hurst HP Springs shouldn’t be the first upgrade you do to your modern Mopar.


