


A strut tower brace, strut bar, or strut brace enhances a unibody chassis by providing additional stiffness between the engine bay strut towers. While the strut brace helps keep the towers properly located, an export brace takes the concept further. An export brace attaches to each strut tower and connects to the bulkhead (firewall) or a bulkhead support bar to triangulate the support system.
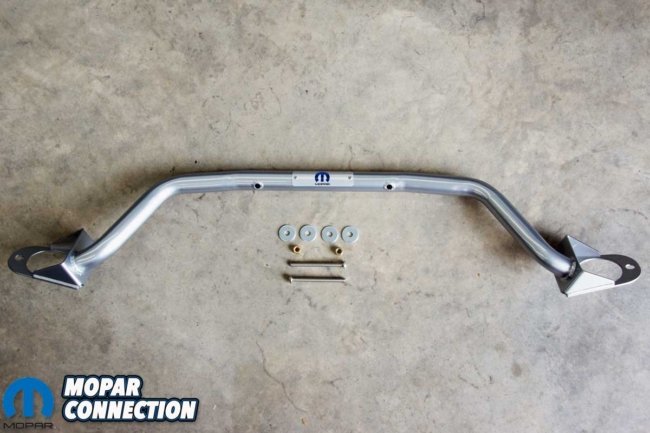
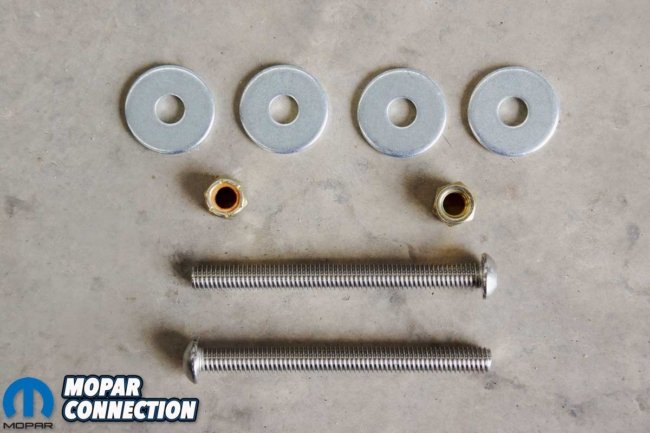
Above Left: The Mopar Performance strut bar is designed to add additional support to the unibody chassis. Above Right: Included with the strut bar is all the mounting hardware to attach it to the Charger’s bulkhead.
The export brace allows better access to the engine compartment components. For example, it will enable easier removal of the engine cover, spark plugs, and valve covers while providing superior support to the strut towers.
Recently, Mopar Connection Magazine picked up a Mopar Performance Strut Bar kit (part no. 5155950) from Mancini Racing for our 2006 Charger. Although it is called a strut bar, it has mounting points to attach it to the bulkhead, similar to the export brace.
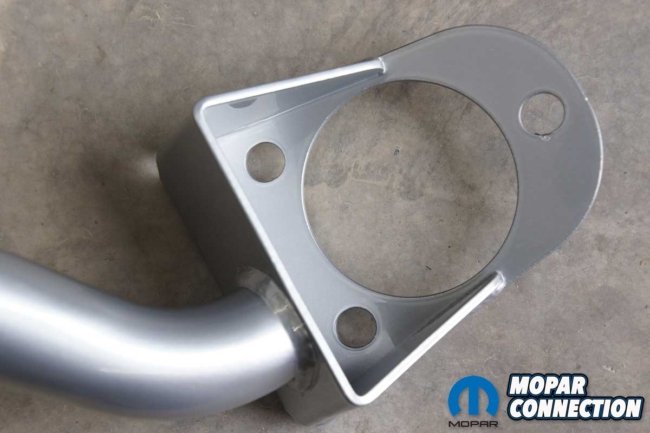
Above Left: The strut brace has high-strength welds and mounting brackets on each end that fit over the strut towers in the engine bay. Above Right: There are two bushings welded into the brace. Each will attach to the bulkhead.
The Mopar Performance strut brace kit includes a gray powder-coated steel brace with a Mopar emblem plate affixed to it. Additionally, the kit has all the installation mounting hardware to install it in ’08-’11 Challengers, ‘06-’11 Chargers, ’05-’11 300Cs, and ’05-’08 Magnums. Though the strut brace fits many models, it is not compatible with Mopars equipped with a Shaker Hood Scoop or an SRT Hellcat Engine.
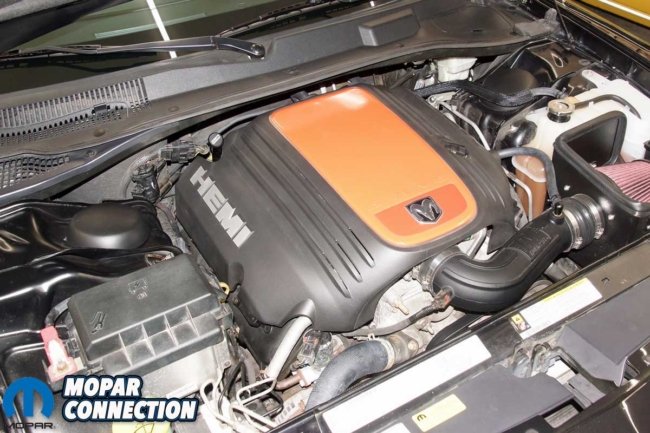
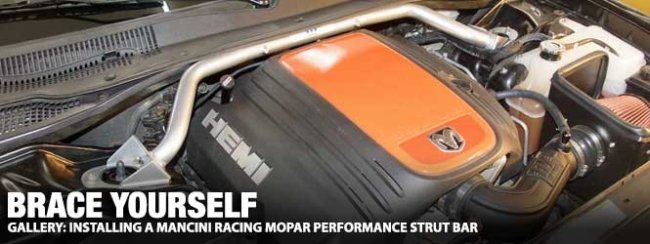
Above: The 2006 Charger was a perfect candidate for the Mopar Performance strut bar. The former police pursuit 5.7L Hemi is occasionally run through the cones at local SCCA events.
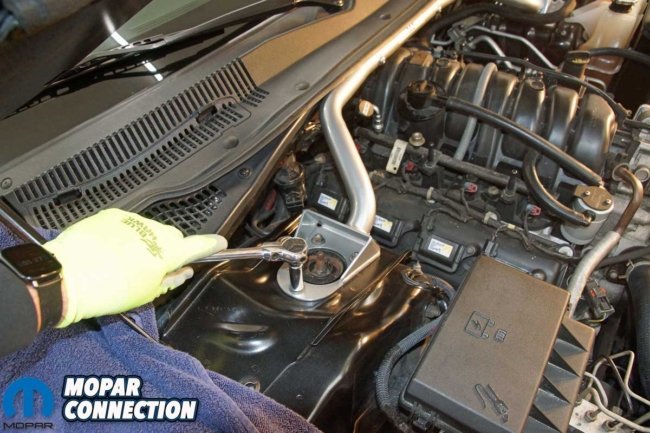
We started the installation of the strut brace by placing the Charger on a level flat surface as required by the instructions. The first step was to pull the engine cover from the Hemi. The factory strut tower covers were removed to access the strut fasteners. We unthreaded three 8mm nuts from each strut tower. There was zero chance of the struts popping loose with the Charger’s weight on the strut plates.
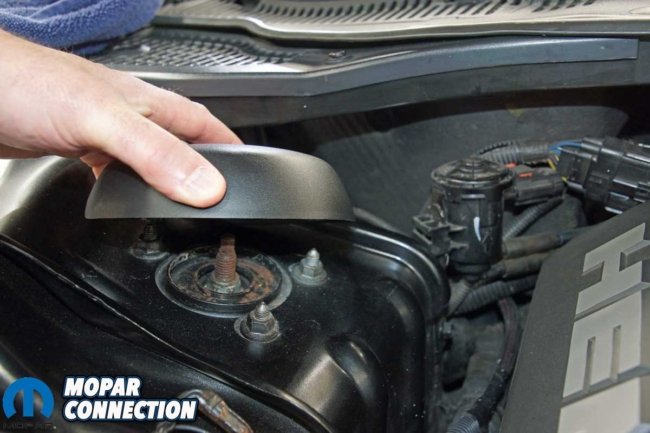

Above Left: The factory strut tower covers needed to be removed. We set the covers aside because, with the brace, they would not be necessary. Above Right: Three fasteners were removed from each strut.
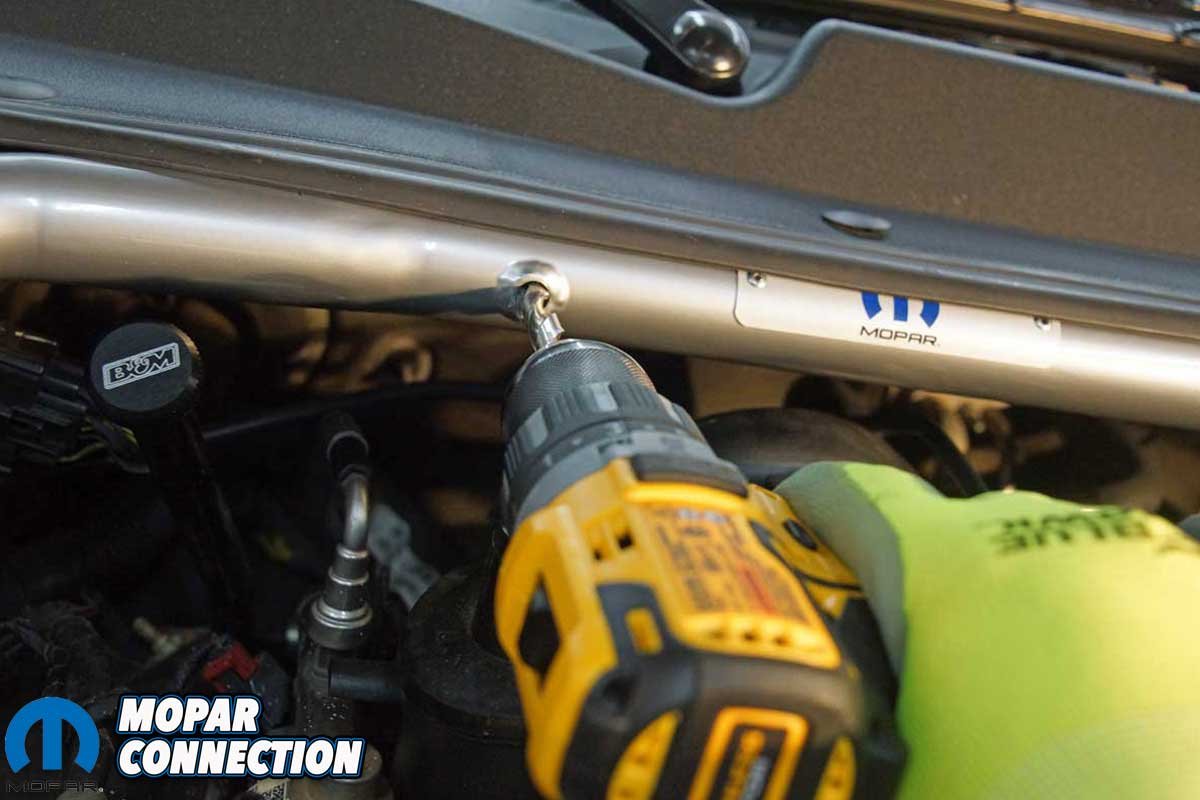
After removing the strut fasteners, we slipped the strut brace over each strut tower and rested it against the bulkhead support bar. If the strut brace had not dropped into place, it would have required lifting the chassis with a floor jack, thus lowering the three strut plate studs down through the tower sufficiently for the brace to drop into place.
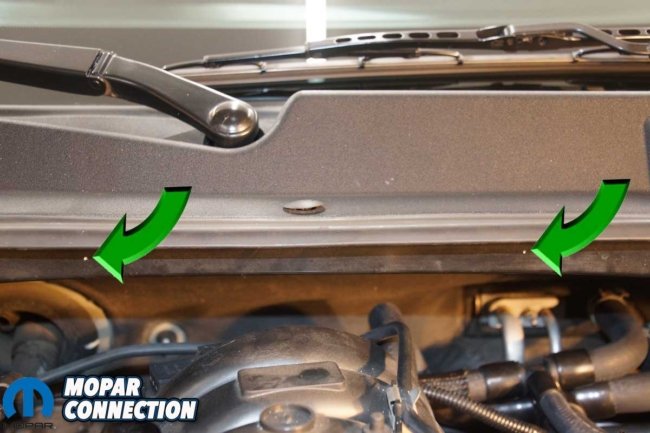
Once the strut brace was located correctly and the chassis was at ride height, we snugged the three nuts on each strut tower. With the brace secured, we used the metal bushings in the strut bar as a guide to locate where to drill through the bulkhead support.

Above Left: We located and installed the strut brace. Each strut fastener was snugged to keep the mounts adequately located. Above Right: We used a 13/32-inch drill bit to make center point marks to complete the drilling of the holes.
Even though it is not necessary to mount the strut brace to the bulkhead support, to gain the maximum performance from the strut bar, the instructions recommended that it be attached to the bulkhead support in the two locations provided in the strut brace.
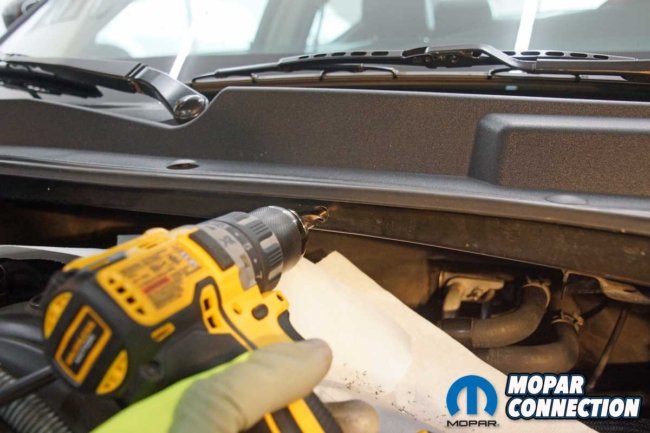
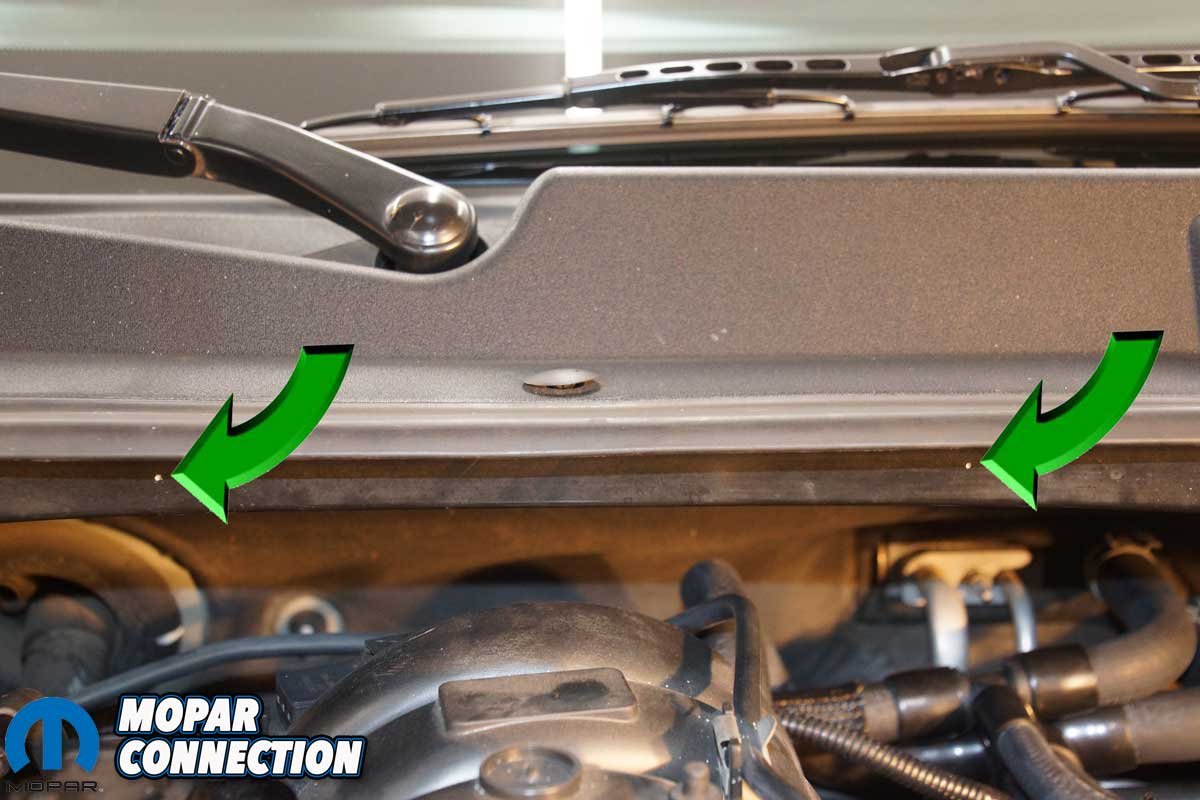
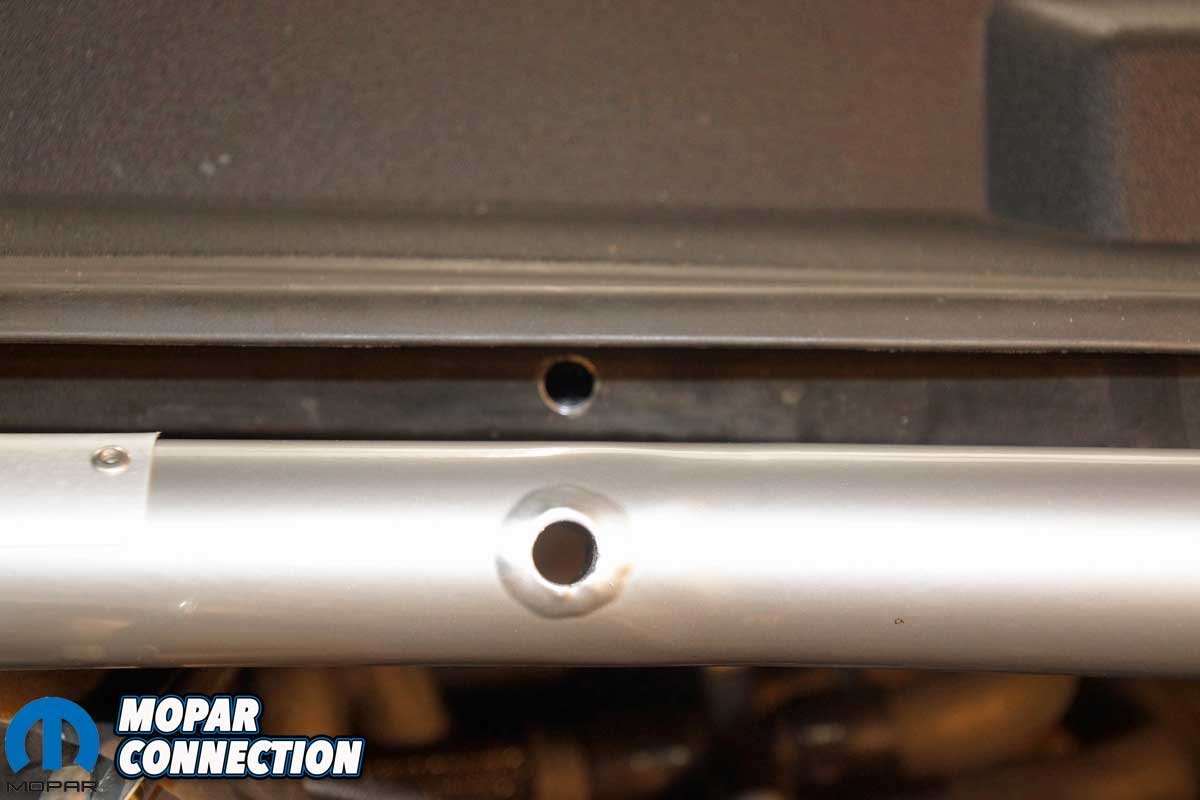
Above Left: With the strut bar removed, we found the center punch drill marks (green arrows). We drilled through the bulkhead bracket with a 1/8-inch drill bit. Above Right: The holes were enlarged to 13/32-inch. We had to drill through both sides of the bulkhead structure.
We used a 13/32-inch drill bit through each bushing to place a locating mark on the support bar. Once the locating marks were established, we removed the strut brace from the Charger. The 13/32-inch drill bit provided a “center punch” indentation for us to drill a pilot hole through the bulkhead.
After drilling the pilot hole with a 1/8-inch drill bit, we finished each hole with the 13/32-inch drill bit. The bulkhead support is square tubing, which requires the inlet hole on one side to parallel the exit hole on the other side. Therefore, it is imperative to have the drill bit extend through the support squarely.
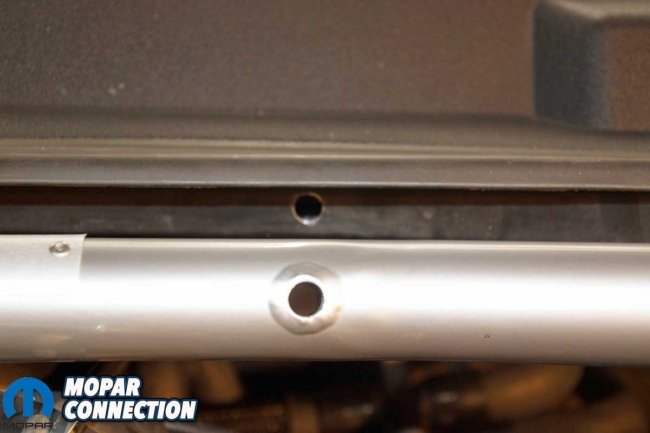

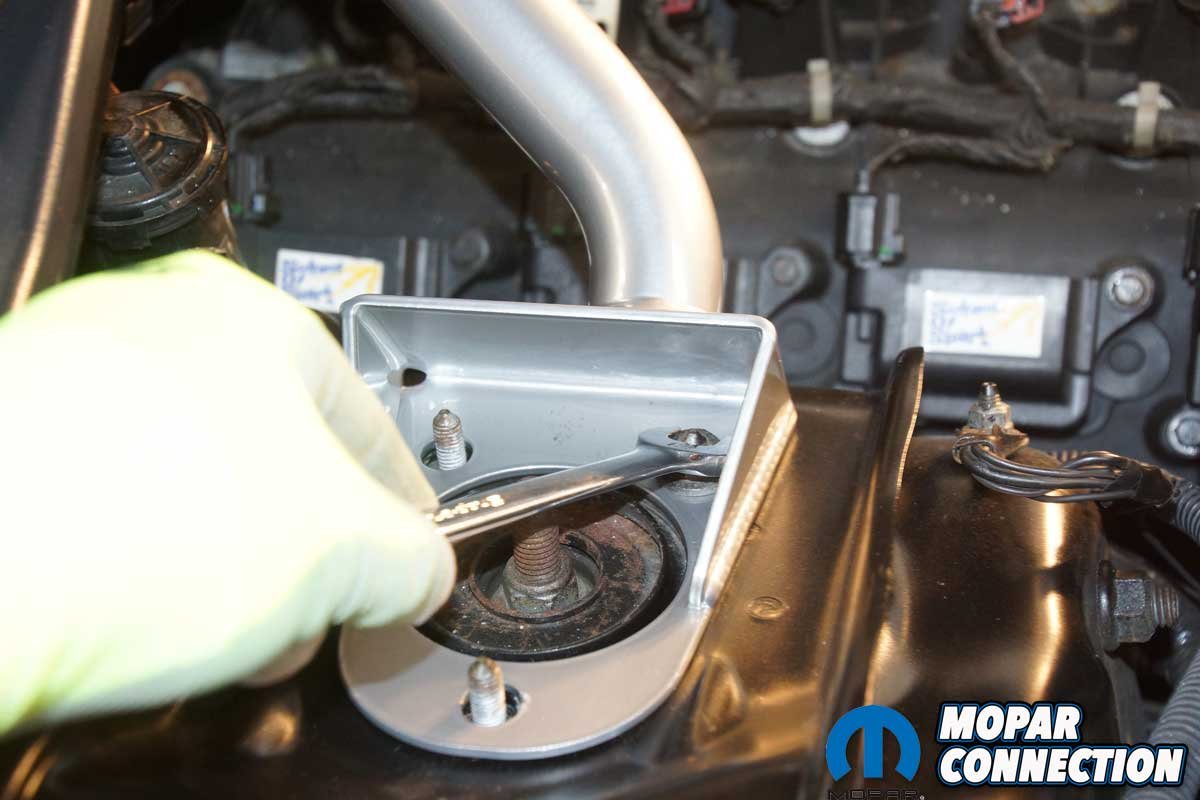
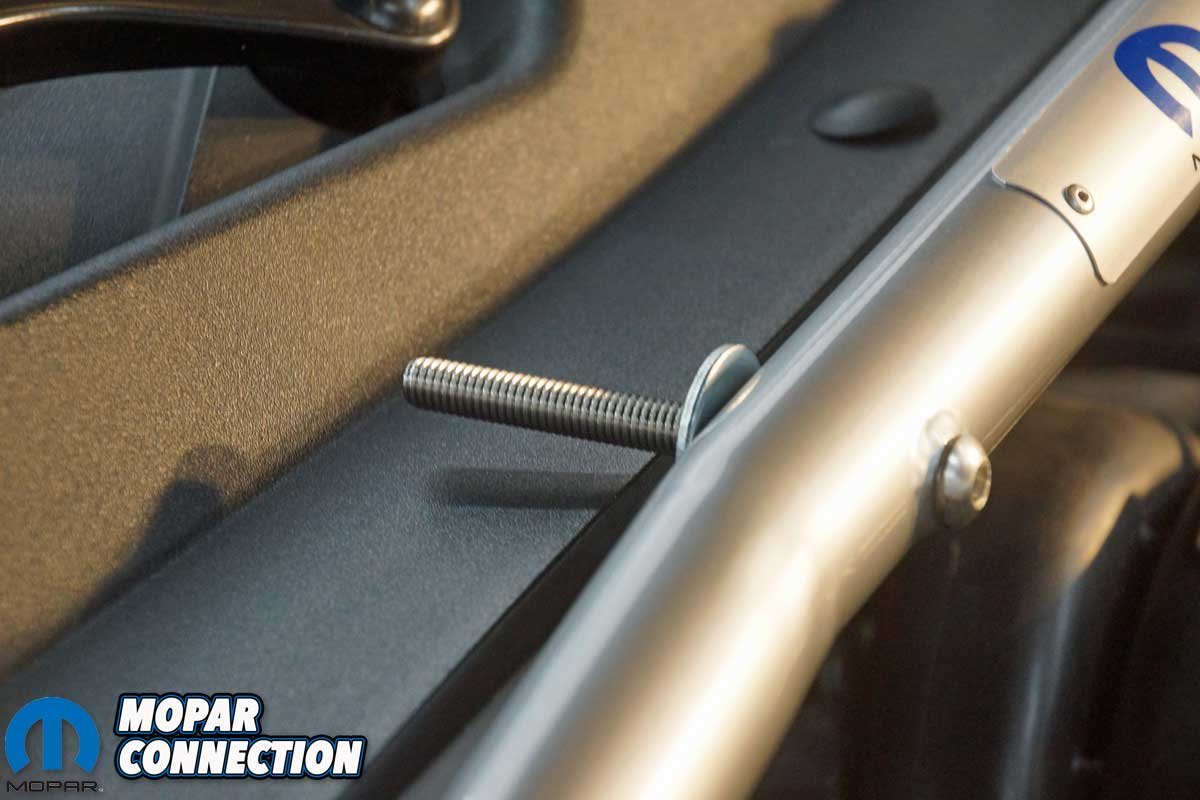
Above Left: We verified the drilled holes lined up with the strut brace bushing. Above Right: Each brace bushing required a bolt with a washer separating the brace from the bulkhead bracket. Next, the strut brace was adjusted, and the bolt was extended through the bulkhead.
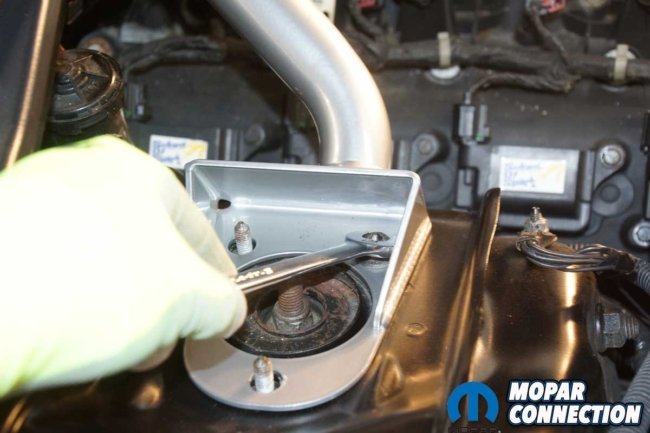
After both strut brace bushing holes were drilled, we reinstalled the strut brace and again snugged the six strut nuts. We slid 3/8-16×4-inch bolts through both strut brace bushings. We placed a washer on each bolt between the brace and the support. The bolts were pushed through the support, and a second washer was installed on each bolt. Lastly, a Ny-Lock nut was threaded onto each bolt.

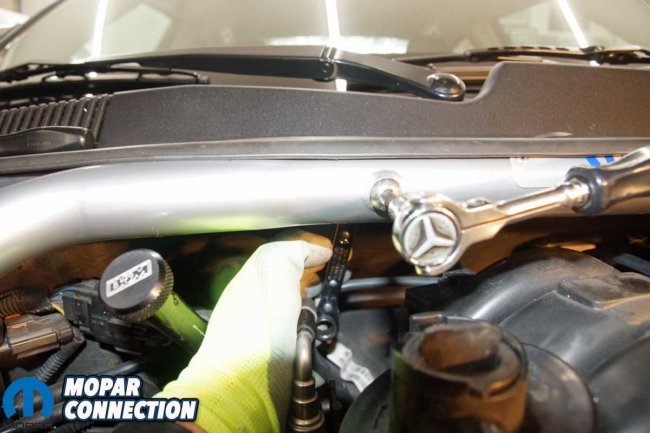
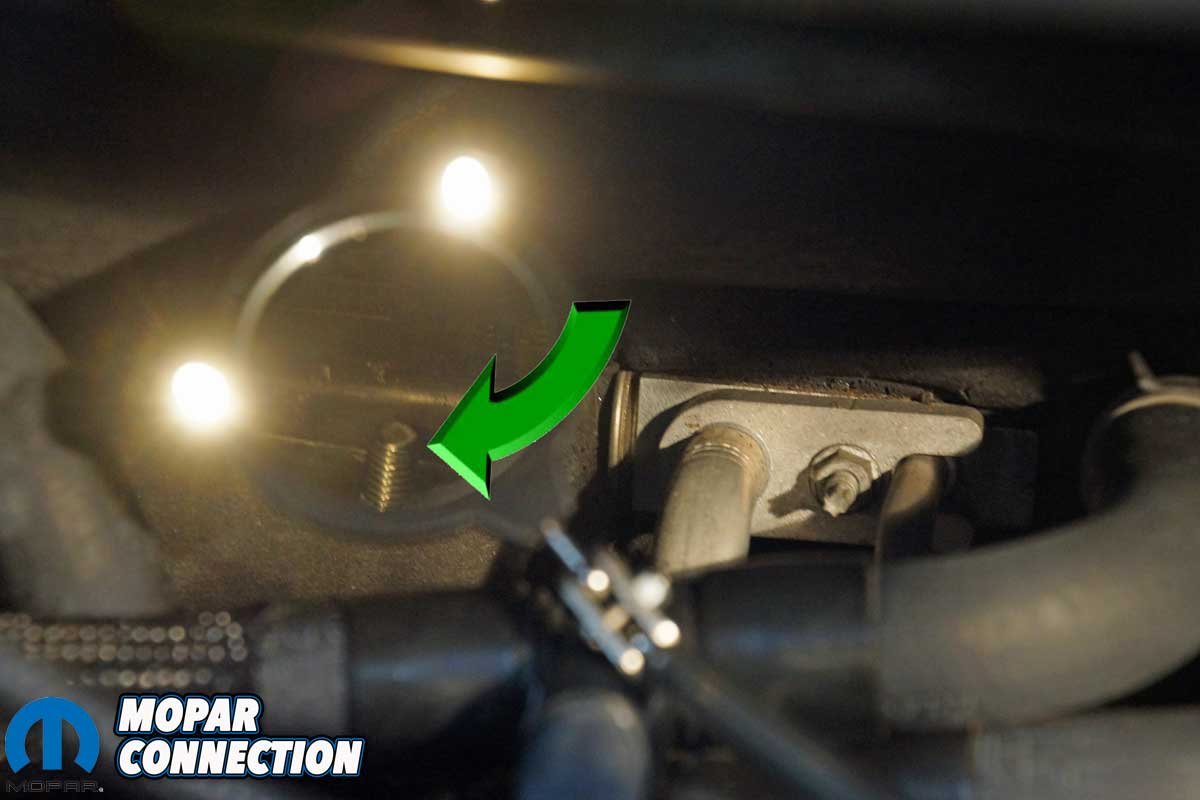
Above Left: Once the bolts were extended through the bulkhead bracket (green arrow), we added a second washer and a nut. Above Center: The bolts were tightened and then torqued to 10 ft-lbs. Above Right: We tightened each strut nut before torquing.
Though it was a tight fit, we could slip our torque wrench around the intake plenum and up behind the bulkhead support. The 3/8-inch bolts were torqued to 10 ft-lbs. If we had not been able to reach the nuts, we would have had to remove the plastic cowl trim to gain access to the nuts.

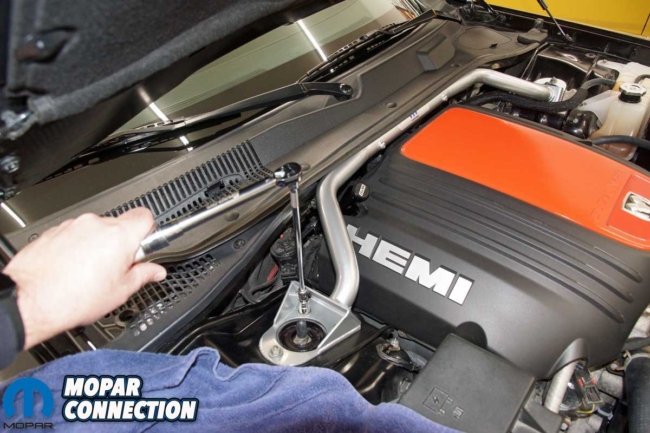
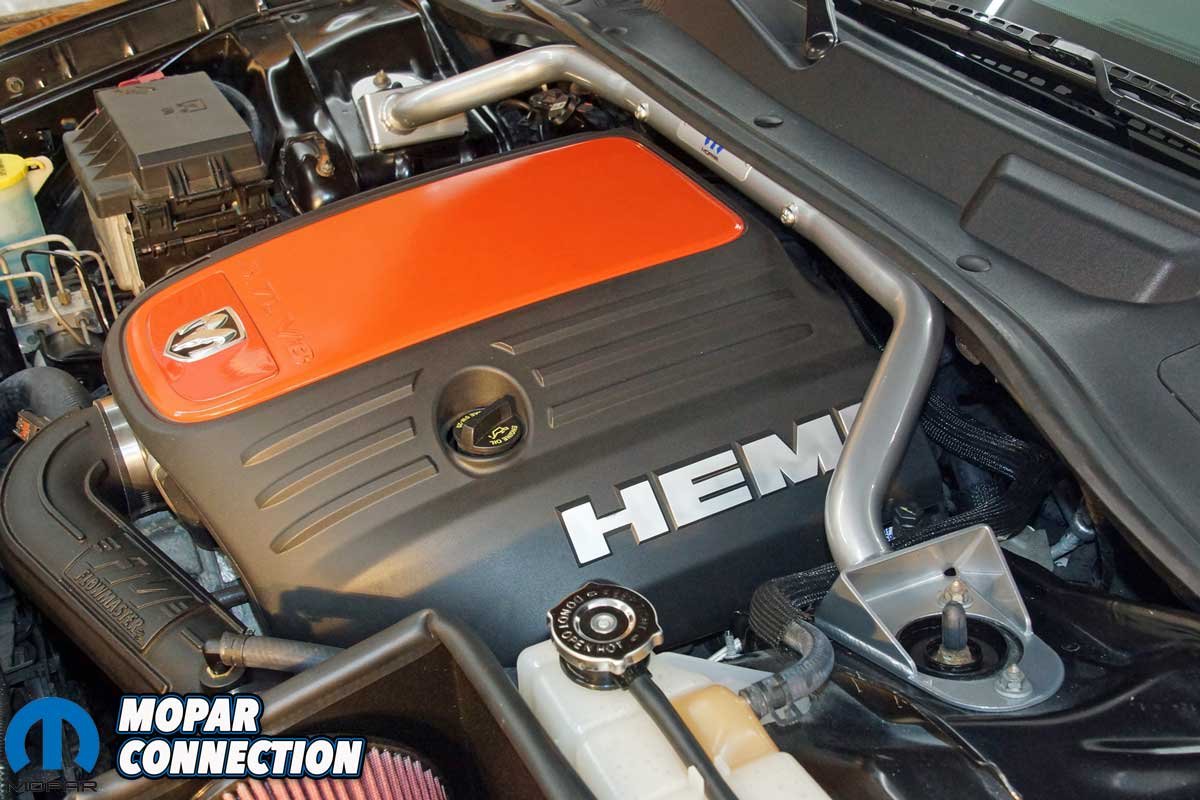
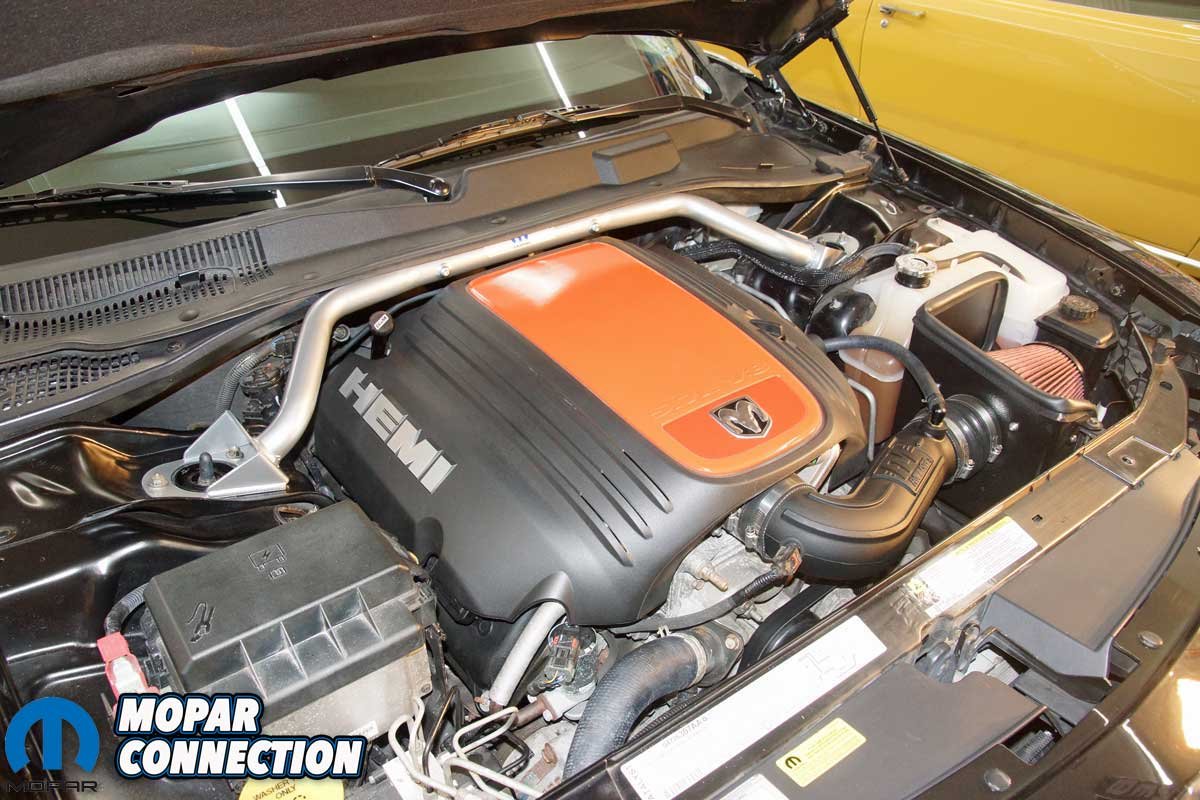
Above Left: The strut brace is a tight fit around the intake manifold. Above Right: The engine cover fits without any problems. Once we knew it would work, we torqued the strut nuts to 30 ft-lbs.
Once the brace was attached to the bulkhead, we torqued all six strut nuts to 30 ft-lbs. To finish the installation, we installed the engine cover. Although we thought it might be extremely tight, it fit nicely without interference with the strut tower brace.
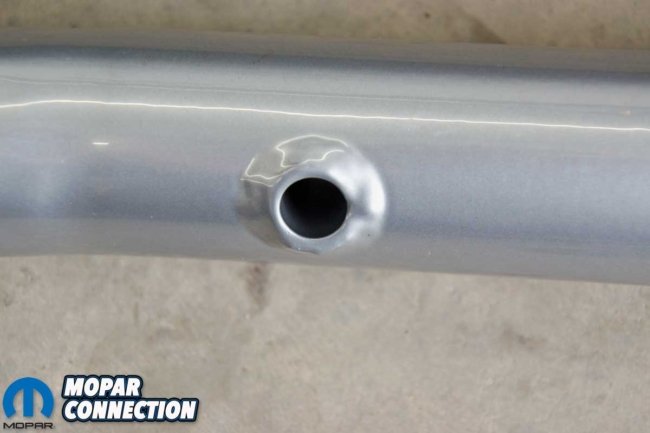
Even though the installation was complete, we finished cleaning around the towers, added a little touch-up paint to each strut, and capped the top of each strut with a large vacuum plug. The new paint and plugs provided a clean appearance.

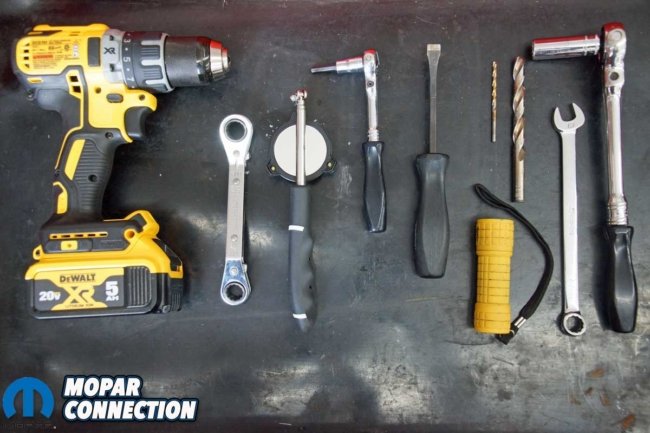
Above Left: The strut bar wraps nicely around the Hemi’s intake manifold and engine cover. Above Right: We needed all the tools photographed and two torque wrenches (not photographed) to complete the installation.
While we have not been able to get out and push the Charger to its limits at an SCCA autocross event, the street driving of the Charger has been positive. Our Police Pursuit Dodge feels stiffer than without the strut brace, but the stiffness was only felt during some cornering events and driving over harsh road bumps, such as railroad crossings.

Above: The installation took about an hour. We are pleased with how well it fit and how it makes the engine bay sportier. We will test the strut brace at SCCA events later this year.
With better tires at the autocross, we expect the strut brace to improve our elapsed times. In addition, the strut tower brace provides a performance look whenever the hood is lifted. If you believe a Mopar Performance strut tower brace would be a great addition to your Challenger, Charger, 300C, or Magnum, contact Mancini Racing for the brace and its complete catalog of Mopar parts.


