


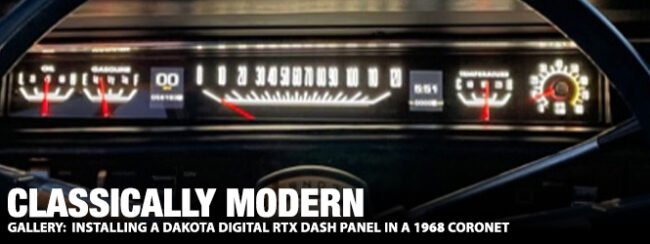
Dakota Digital probably needs to change their name to Dakota Instruments because I usually have to spend at least 10 minutes on the phone explaining to our customers that the gauges aren’t actually digital! That being said, Dakota Digital has hit a major home run with their RTX platform instrument panels.
The R stands for retro, so the panels are designed to mimic the look of the originals yet have some really nice modern features. You can tell by the picture of the RTX panel beside the B-body non Rallye dash that they achieved that goal perfectly.


Above: Dakota Digital offers the RTX panel in the Rallye style (left) or the non-Rallye style (right).
Looking closely, you can see that the RTX panel gains you an oil psi gauge, numerical values on the oil psi, water temp and 2 LCD displays that provide a whole bunch of information options. For a few extra bucks Dakota Digital can build you a panel with the GTX only inspired 150 mph face as well.
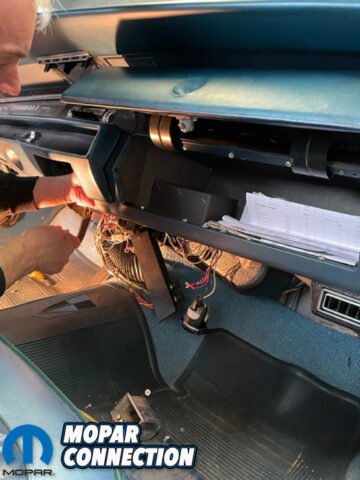
My son Talon has had this super clean more door 1968 Dodge Coronet for over 2 years now. We are continuing to improve on its performance and appearance when time and money allows. Check out the disc brake tech article we did with Master Power brakes here.
 Above: The more door ’68 Coronet dash looked to be in great shape. It needed a few things and we decided to update the dash to something that would be compatible with a Gen III HEMI swap in the future.
Here at Redline Gauge Works we specialize in restoring and customizing stock panels and might be wondering why we decided to go with the new RTX panel instead of restoring and modifying the stock one. There are three main reasons why we choose the RTX panel. First, this car is not a high dollar, number matching, show car and we were not worried about keeping the original parts.
Second, we are planning on doing a Gen 3 Hemi swap in the near future. The features of the RTX panel better suits the modern drive train. And thirdly, this panel is just flat out RAD. The quality, fit, and finish of the Dakota Digital RTX panels are second to none. There is nothing on the market that can even compare to the RTX panels.


Above Left: First things first and that is to disconnect the battery. Above Center: Ken starts to disassemble our dash. Above Right: Impressed with Kens flexibility, this is a common position whenever working on the dash of these old Mopars.
First off let me introduce you to Ken Myers. Ken is a longtime friend that is a wiring and electrical guru from up in Kent, WA. This dude has had his hands on some killer hotrod and muscle car builds all over the USA. This includes builds for actor Chris Jacobs from Overhaulin and Sung Kang aka Han from Fast and Furious.
We tapped Ken to tackle this install because there was a mess of wiring under the dash of the Coronet from the previous owner adding aftermarket a/c. Ken was just the guy to help clean it up and as a bonus he has been installing the Dakota Digital panels regularly for a few years now. One of Kens famous lines is, “When the wiring you can’t see needs to look as good as the welds you can’t see”.
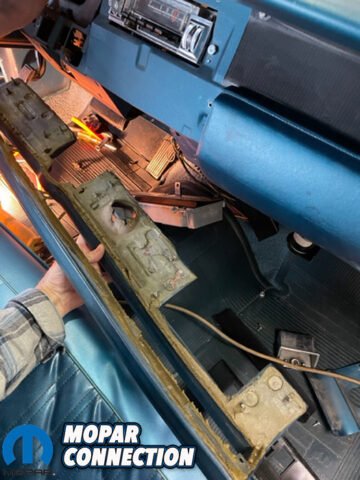
Above Left: The most difficult part of this process was removing the dash and trying not to break anything. Above Right: The lower dash trim panel needed removed to finish disassembling the dash.
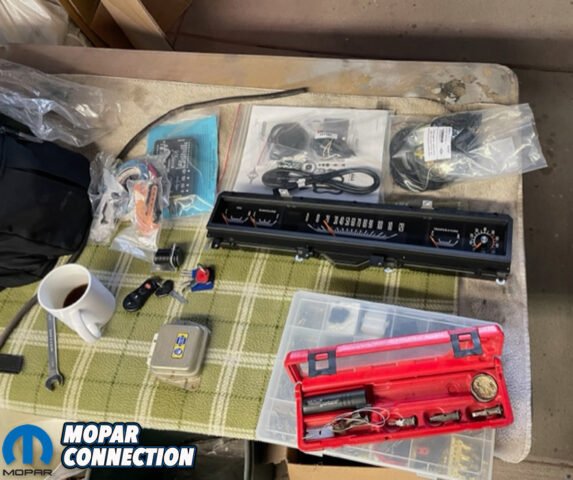
There are a few things we did to prepare for the installation. It’s a good idea to lay out all the parts to be installed on a table next to your tool box and don’t forget a much needed cup of Joe to stay focused (Red Bull works in a pinch also). A quality propane powered soldering iron with various sizes of shrink wrap will also help with doing things cleanly.
Disconnect the battery! You would be surprised at how many people forget to do this and not realize that the ammeter wires on these old Mopars are live all the time and sparks will fly if they short out to ground.


Above Left: A few screws and the lower switch panel removed quite nicely. Above Right: Once the dash was out we needed to do the ammeter bypass. We connected the two ammeter gauge wires and then shrunk wrapped, taped, and stuffed them back under the dash.

Above: With all of the trim pieces off, it was time to remove the dash cluster.
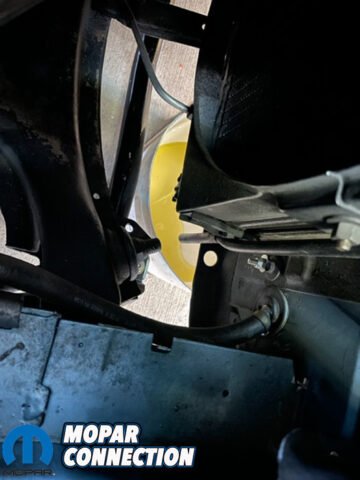
We started by first installing the kit provided water temp, oil psi and VSS sensors. The Dakota Digital sensors are three wire units, you cannot use the original sender wires. The factory harness on my son’s car is in near mint condition, so we hid the original wires and took the time to route the new harness cleanly.
I like to drain the radiator down a bit so you don’t make a mess installing the water temp sensor. We recommend using a thin coating of Permatex thread sealer over Teflon tape because it seals better and provides a better ground to the block.


Above Left: We took a break from the dash to drain the radiator fluid in preparation for installing our temperature sender. Above Center: We successfully removed our main dash harness plug. We had to use a small flat screwdriver to help pry each pin up a little at a time, working our way around the circle to ensure no pins would break. Above Right: The back of our dash looked to be in good shape but after 50+ years, it was in need of a lot of work to bring it up to our standards at Redline Gauge Works.
You can remove your speedometer cable completely because the RTX speedometer is fully programmable to the vehicle, it doesn’t matter what axle ratio or tire size you have. The vehicle speed sensor (VSS) threads right onto your transmission where the cable connected and you can route the wires up into the car using the same brackets that held in the original speedometer cable. You should wrap the wires in electrical tape and use some tech flex to protect the wires.
Next up is removing the switch panel and the ash tray. The car has aftermarket a/c and the ducting and vents need to be removed. We moved them out of the way in order to allow access to the harness connected to the switches from under the dash. Being a bit of a contortionist helps in getting to the plugs on the back of the switch panel.
Above: Let the fun begin. At first glance you might think that is a stock replacement dash and that is where Dakota Digital did a great job. The appearance is uncanny, yet this dash can do so much more and it will be able to communicate with our Gen III HEMI in the future.
Lowering the steering column allows more access to the instrument panel and switch panel. Once they are removed, you should have access to the nuts on the backside of the front dash pad. Removing the pad will grant you access to the hardware holding the instrument cluster in.
Pull the instrument cluster forward to access the heavy ammeter wires. Be careful removing the 2 nuts holding these wires on making sure the studs don’t spin. It may require a thin wrench to hold the nuts under the eyelets. Also be careful when unplugging the round connecter on the circuit board. It might be best to use a small flat blade screwdriver to put under the plug and slowly pry it up until it comes off easily, try not to break a pin like we did.
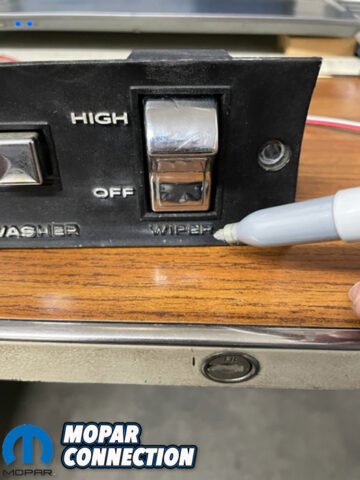
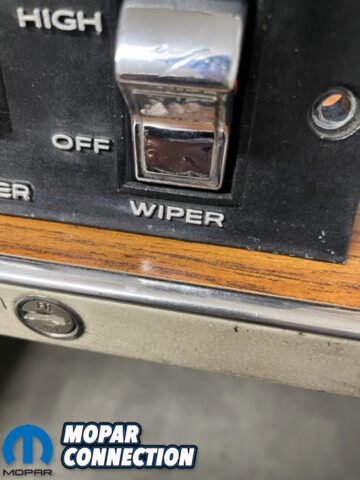
Above Left: You can not even tell what the switch is for due to all the original paint wearing off over the years. Above Right: We went ahead and touched up the lettering on the switch panel with a silver sharpie just to make it look a little better.


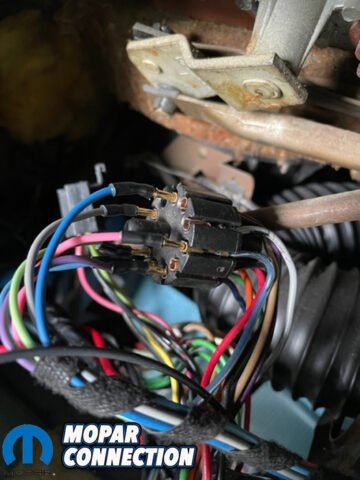
Above Left: We wanted to keep the pins and connector incase we ever want to revert the car for some reason back to the old style. Ken decided to solder and shrink wrap each pin to ensure good connection. Above Right: You can tell Ken has done this a time or two before.
Upon prepping the area for the installation of the new RTX panel, we took the 2 ammeter wires and connected them together with a small nut and bolt then shrink wrapped it and tucked it out of the way. You have to complete the circuit or else the car won’t start. We would advise that you do the MAD ammeter bypass in the engine compartment. Ken did a trick version of the ammeter bypass and put all the wires into a loom.
The dimmer/rheostat on Mopars are notoriously bad. We chose to make a little bypass on the back by soldering a small link from the I to the R terminals on the back of the dimmer, which puts full 12 volts to the dash lights, while still allowing you to use the rheostat to turn on the dome light. This is a great modification to do if you are using an original gauge cluster as well.


Above Left: Dakota Digital makes wiring easy with a module that you plug each wire into. Above Center: You can see here how we kept the dash harness plug and stuck each of our newly solder pins in the corresponding hole. Above Right: With some of our radiator fluid drained down, we installed our water temperature sending unit.
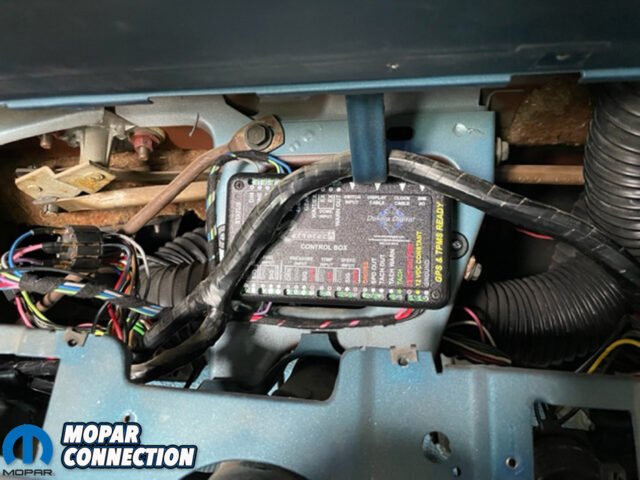


Above Left: The Dakota Digital module tucked behind the dash nicely and will be accessible in the future if we need it. Above Center: The dash came with a new speedometer adapter that we plugged in. Above Right: We double checked fitment and made sure all the wires were out of harms way before reinstalling the Dakota Digital RTX dash panel.
Ken likes to mount the control box right on the steering column support for easy access and visibility to all the new connections that need to be made. However, doing it this way does not give you easy access once the cluster has been reinstalled and it is all put back together.
Another option you might want to consider is to wire it all up on the floor then mount the box under the dash after it has all been tested. Ken has enough confidence in his ability so opts to do it this way and it definitely is a clean way to install it.

Above: A side by side comparison of the old stock dash vs new Dakota Digital RTX dash. Again, with a quick look you would never know there was a difference.
Dakota Digital has the best instructions in the business, so follow them. The wiring is very straight forward and every connection that needs to be made is clearly labeled. We wanted to keep the original harness intact, so Ken soldered and shrink wrapped some brass circuit board pins that fit into the factory connector. This way we didn’t have to cut into anything. We found the pins at Mouser Electronics.
Make sure you use quality solder meant for electronics and it’s a good idea to use some flux as well. Always make sure you make good ground connections, it’s even a good idea to grind off any paint before you install your ground wire.

Above: With all the pieces back together, it was time to reconnect the battery and test out this new Dakota Digital RTX dash panel.
If your car did not come with a factory tachometer you will have to run a new wire from the negative side of the coil to trigger the new tach. All of Dakota Digital tachometers are fully programmable and will work with any type of aftermarket ignition systems, even a Gen 3 Hemi swap. If you are swapping in a Gen 3 Hemi, you may need to buy one of Dakota Digitals BIM modules to get the tach working properly depending on the exact ignition setup.


Above Left: We refilled our radiator fluid. Above Right: We made sure that our battery had good and fully charged battery before we tried starting the car.
Once everything is connected, it’s always a good idea to go back and recheck that all your connections are correct and tight. Refill your radiator, connect the battery and turn the key on. The opening ceremony on the gauges is just another cool factor of the RTX panel.
Once you have started the car, check that all your gauges are reading, check your temp sender and oil psi sender for leaks, check turn signal and high beams are working then turn on your headlights.
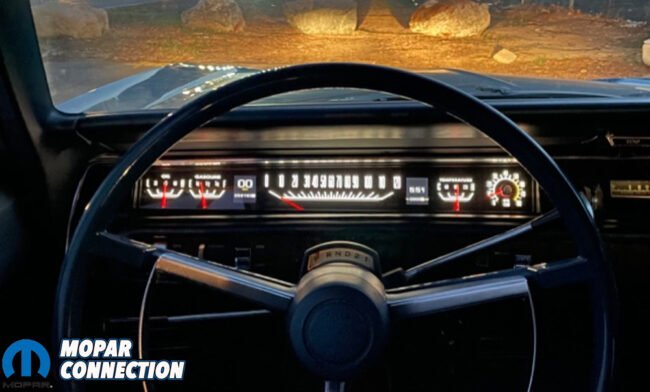
Above: Wow, the new Dakota Digital RTX dash panel is perfect in every way. The bright back lights make it easy to read at night and now we know our gauges are reading correctly. We could not be more happy with the way the Dakota Digital RTX dash panel turned out.
Once you have determined that all things are copasetic, then go ahead and get ready to do the speedometer calibration. The speedometer calibration again is pretty straight forward just follow the directions from Dakota Digital and enjoy a perfectly calibrated speedometer that doesn’t bounce around and make noise. Another bonus to the Dakota Digital instrument panels is the killer Lifetime Warranty.
Redline Gauge Works has been a direct distributor for Dakota Digital for quite a few years and I have to admit that we have not had a single return. Don’t forget that we also offer the most competitive pricing as well. Give Redline Gauge Works a call today and let us help you figure out the best solution for your vehicle.


SUPER NICE! I also upgraded and opted for the 0-15mph setup. Only 2 issues though! 1) – Can’t see Hazzard indicators in dash unless in ACC or RUN mode – not a practical synerio on a true “road side” situation where seeing the flashers in dash might be assuring that they are on.
2) – No dash lights or actions unless in ACC or Run key positions – similar to issue 1!