


[Editor’s note: Shannon Hudson of Redline Gauge Works asked if we’d be interested in following along on his teenage son, Talon’s ’68 Coronet build. “Of course!” we said and then it got lost in the shuffle. Well, Talon isn’t a teenager anymore (he’s 20) and he’s a lot farther along on the car. But here’s the first installment! – Ed.]
I believe it warms every car Dad’s heart when their son or daughter comes up to them and says, “Dad, I want a classic car.” My 19-year-old son, Talon, got his first car at 16 like most teenagers. I found him a super clean, single owner, 2000 Dodge Dakota Sport. It only took a short while before he fell in love with the truck. The truck needed some typical maintenance and while we were at it we did a couple upgrades. From the beginning he has always been eager to jump in and get his hands dirty.
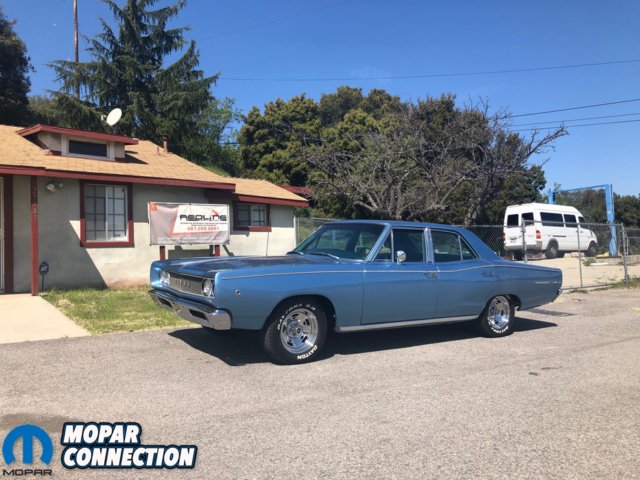
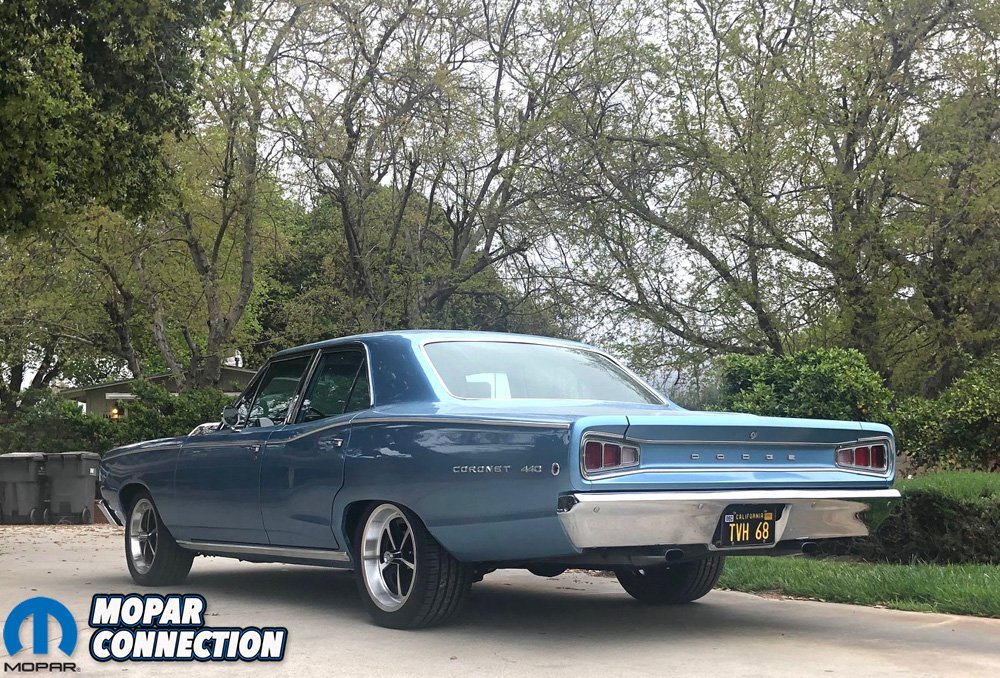
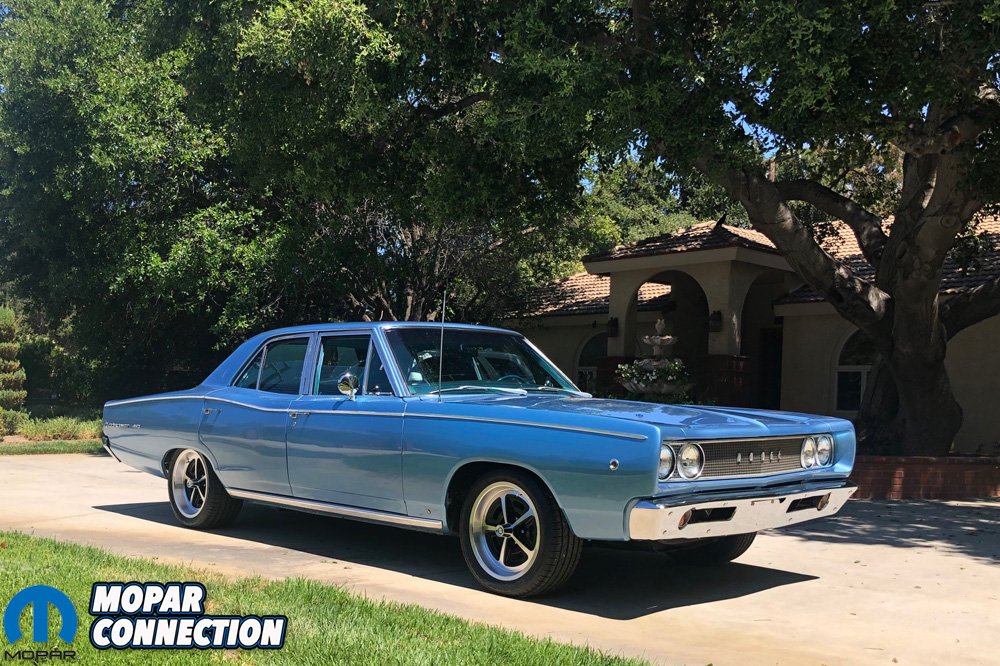
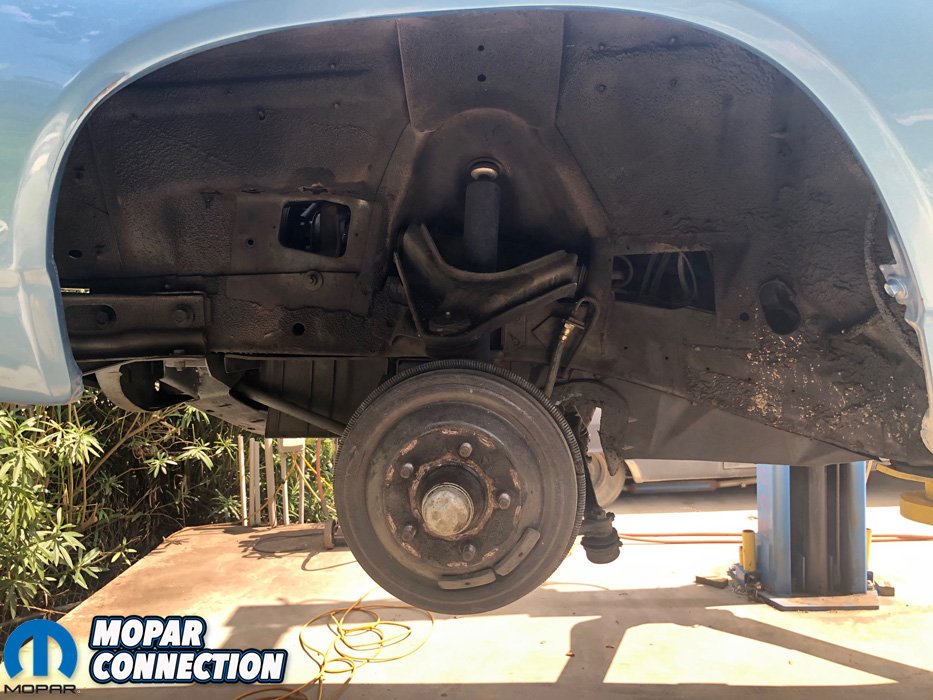
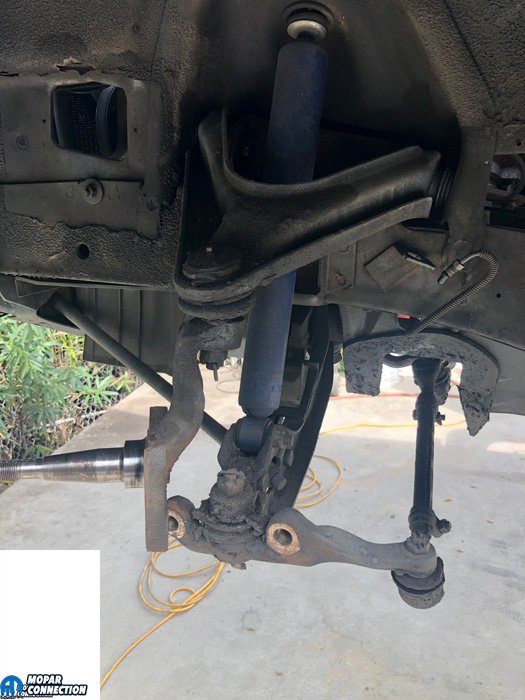
Above: Our Coronet on some chrome mags and drum brakes rolling into Redline Gauge Works.
Around early November 2019, he came to me and asked if we could start looking for a classic car to restore and drive. He had his heart set on finding a 70 Roadrunner, specifically something along the lines of “The Hammer” from Fast Furious Tokyo Drift built by Steve Strope at Pure Vision Design. He had some money saved up but, I had to remind him that finding a 70 Road Runners in his price range would be almost impossible or be complete basket cases. I suggested that we should look for a four door Satellite or Coronet to stay in his price range. He was surprisingly open to the idea of getting a more door.
The search was on. I reached out to friends, made some posts on Facebook about looking for a clean drivable 68-70 4 door Satellite or Coronet and started checking Craigslist and eBay every day. After kissing a bunch of toads, we finally found our Prince but it was in Tennessee. Going to look at it wasn’t going to be an option. We called the owner and talked for a long while. After talking with the owner, I was felt comfortable about buying the car sight unseen and having it shipped to California.

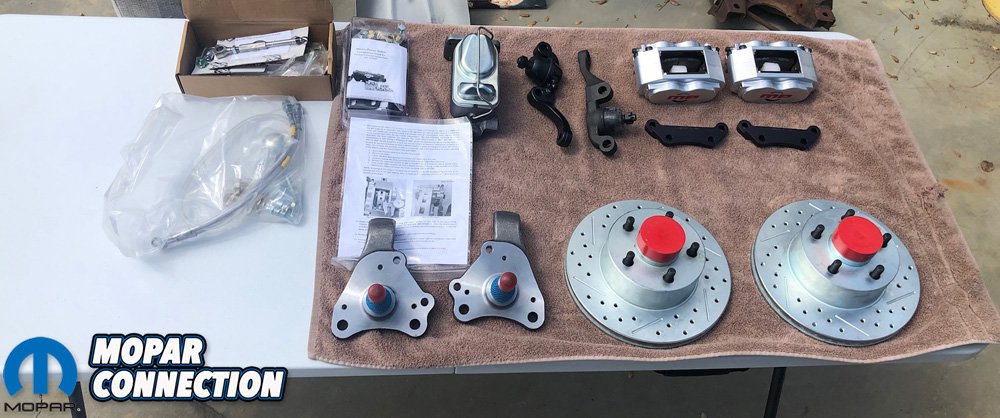
Above: The Master Power Brakes kit came with everything we needed. No extra runs to the parts store.
We took delivery of the car a few days before Christmas and it was everything the previous owner said it was, a total cream puff. Our 1968 Dodge Coronet 440 was equipped with an auto on the column, a smooth running original 318 with dual exhaust and Vintage Air unit that was recently installed. The air conditioning unit was a big plus living in sunny California.
The car was very clean, it boasted mostly original interior, had a single re-paint to the original color and no rust. The car ran and drove very well for a stock big four door B-body car. Not only was the interior and exterior original, the drivetrain was all stock too. The original manual drum brakes were fresh and actually stopped the car decently but could be a lot better. I told my son one of the first projects was upgrading those brakes to disc, so the car is safer to drive. A good disc brake setup would make the big boat stop way better than drum brakes ever did.
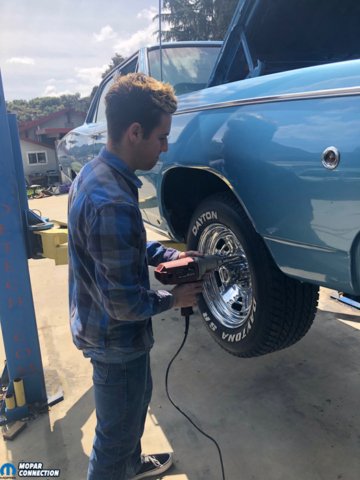

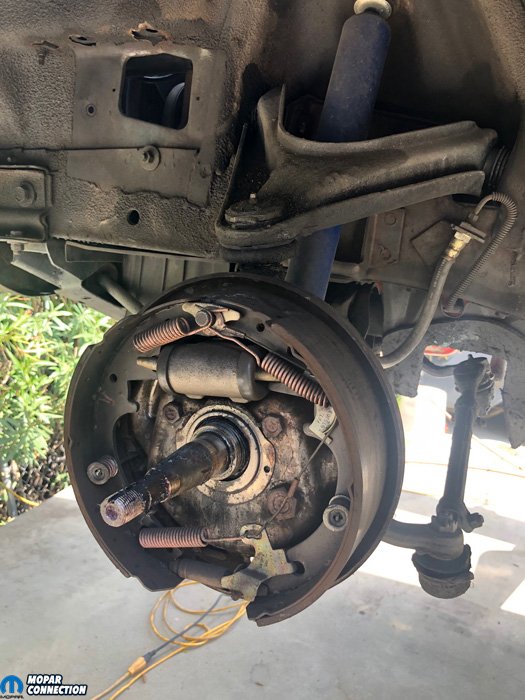
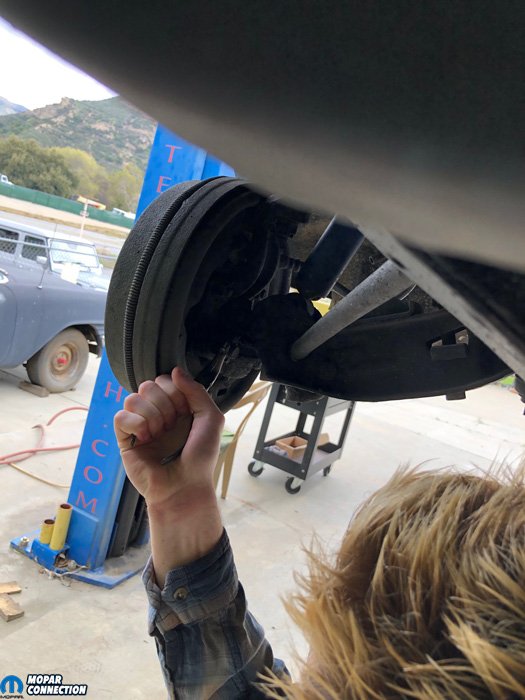
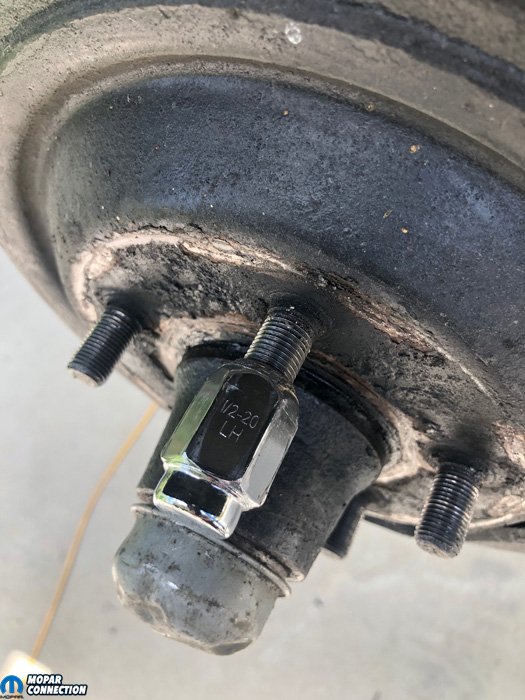
Above: We pulled the front wheels off and got to work. We did one side at a time incase we needed to reference the opposite side during installation. With the wheel off we were able to remove the drum and wheel bearing.
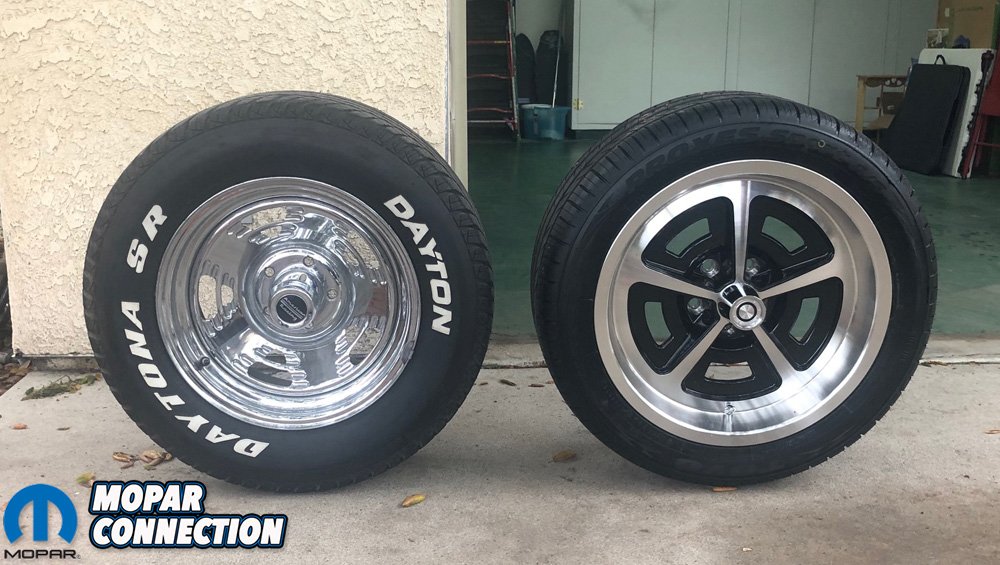
We started searching for the best budget friendly disc swap for our Coronet. The plan was upgrading the brakes and then new wheels and tires. With our eye set on YearOne’s 17” Magnum wheels, we wanted something that looked good behind the wheels too. One of the cheapest options used to be going to Pick Your Part and getting disc brake setups off of Chrysler Cordobas. Those times are pretty much over because those cars just are not there anymore.
There are a lot of good systems to choose from when doing this upgrade however we decided to go with the “Masters” at Master Power Brakes! Their Rallye series kit fit the bill perfectly, looks good and offered serious stopping power in 1 convenient package. The kit is very complete and didn’t require any extra parts to purchase other than a short piece of hard brake line from our local Napa auto parts.


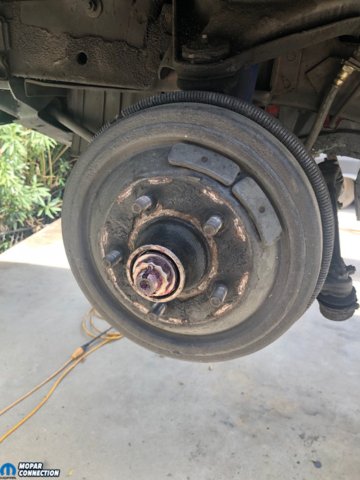
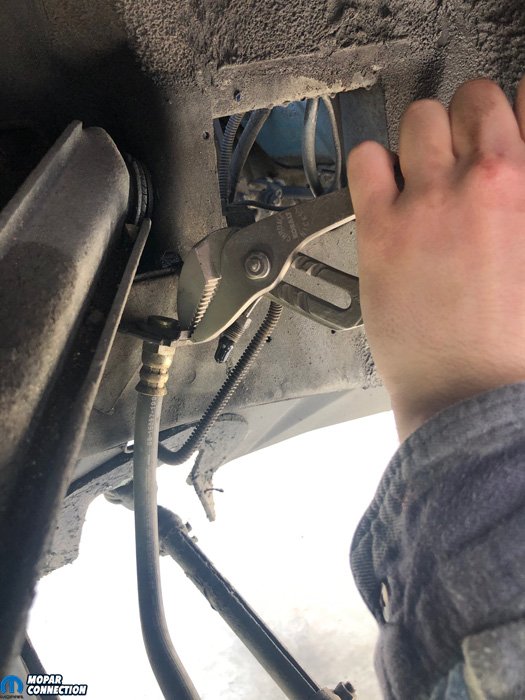
Above: Great thing about drum brakes is that the whole assembly slides off the spindle. After a few bolts, we disconnected the brake hose and remove the spindle.
The first thing we did was setup the work area and laid all the new parts and tools out on a table next to the car. Fortunately my shop Redline Gauge Works has a lift so that made this whole process a lot easier and I had all of the necessary tools needed for the job. We decided to do one side at a time so that we would have the other side to look at for reference.
Removing all of the old drum brake parts is pretty straight forward. The kit comes with new spindles so we were able to strip one side down pretty quickly. It looked like the drum brakes were recently done and got lucky we didn’t have any rusted hardware. Normally we would be spraying all the bolts with a good penetrating oil and let it sit for a while before disassembly.
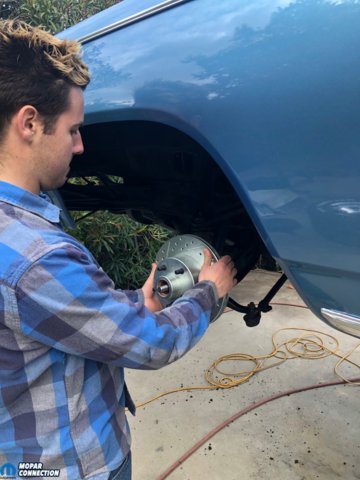


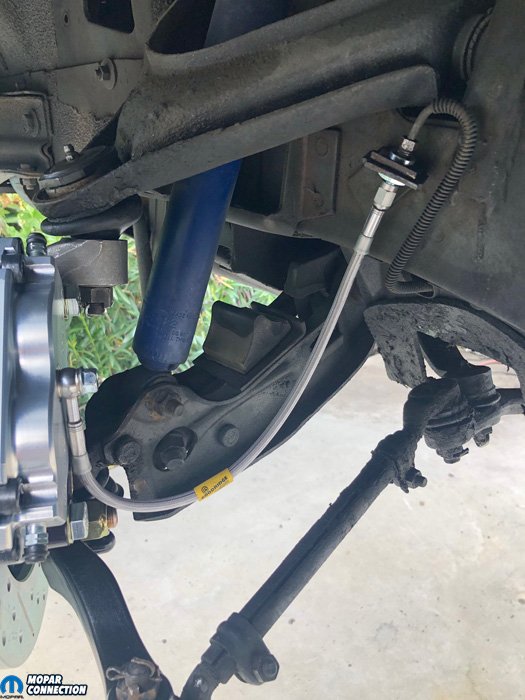
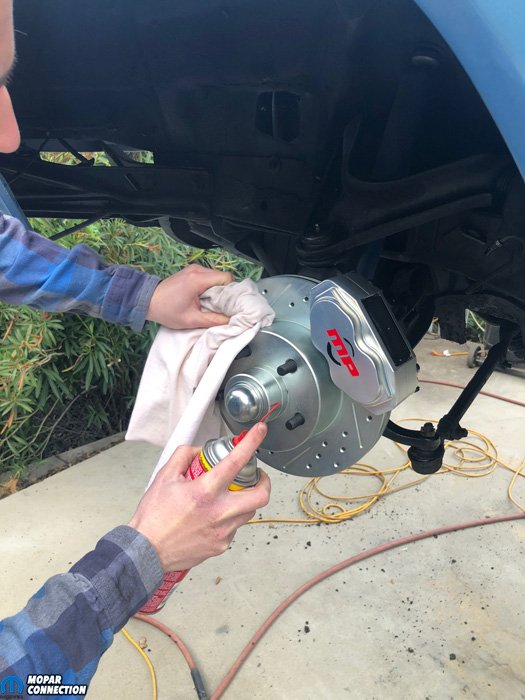
Above: The rotors came with the bearings packed with grease and slid right on the spindle. We noticed that the new lower ball joint was not full of grease and had to make sure to pump it full once everything was installed.
Once all the old drum brake parts were removed we took the time to clean and blow off all the surfaces before installing the new components. During the disassembly we found out the upper control arm bushings were quite worn out and needed replacement. We had plans in the near future to install some new Hotchkis parts so we left them alone at this time.
There are no real step by step install instructions included with the kit so having some knowledge about how these parts need to be installed is very helpful. The Master Power Brakes website has a bunch of helpful tips under in their Tech Talk section. Also you can find some YouTube videos to help you along the way if you are a total beginner.

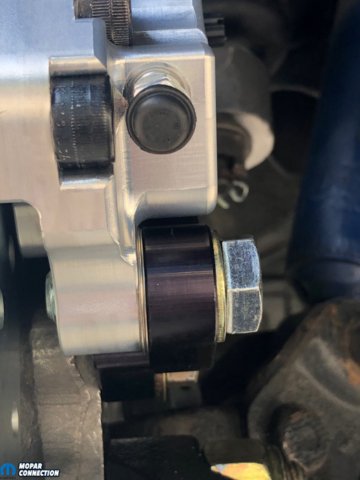

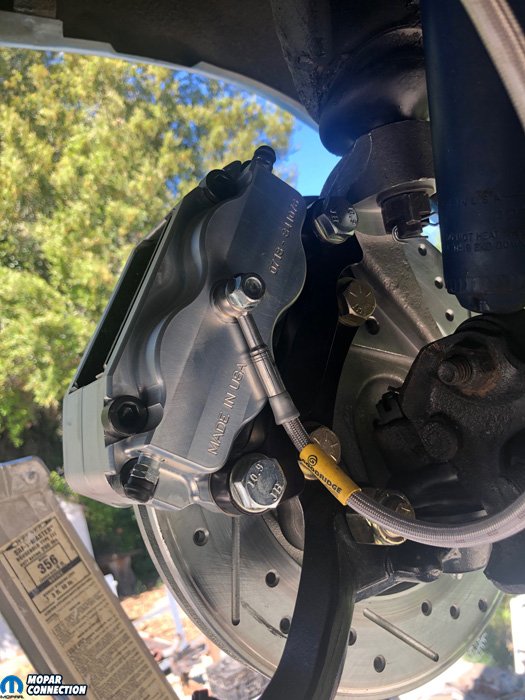
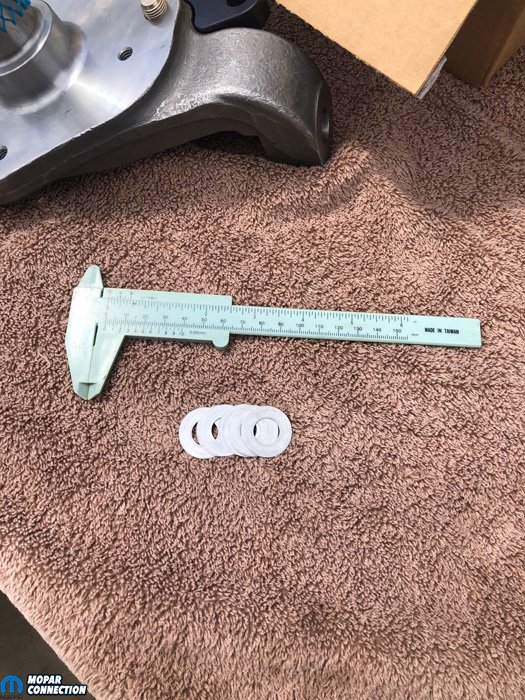
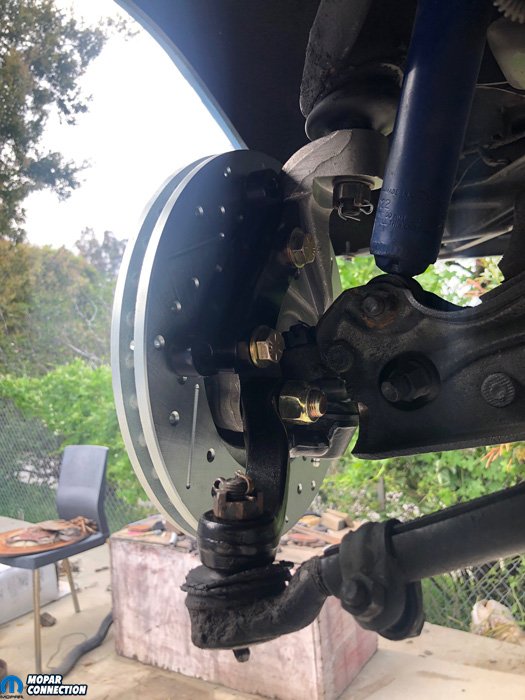
Above: You do not need expensive tools for everything. We used our plastic caliper to measure how many spacers we needed to center the rotor in the caliper. You can see that we needed to install a couple spacers to get the rotor centered.
When you remove the brake line from the wheel cylinder have your (included) rubber plugs ready to slip over the line so you don’t get brake fluid all over the place. Installing the new spindle was pretty much a reverse process of removing the old spindle. Don’t forget to reinstall those cotter pins and always use new ones especially if the ones you remove look crusty.
The quality of the new Master Power Brakes parts are excellent and everything lined up properly, even the wheel bearings were packed with a high quality grease and didn’t require any extra. The new lower ball joints do not have any grease in them so make sure to fill them with a grease gun after you have everything back together. There is a shim kit included with the kit so that you can center the new caliper over the rotor. We used a simple plastic caliper to measure the distance that we needed to shim.

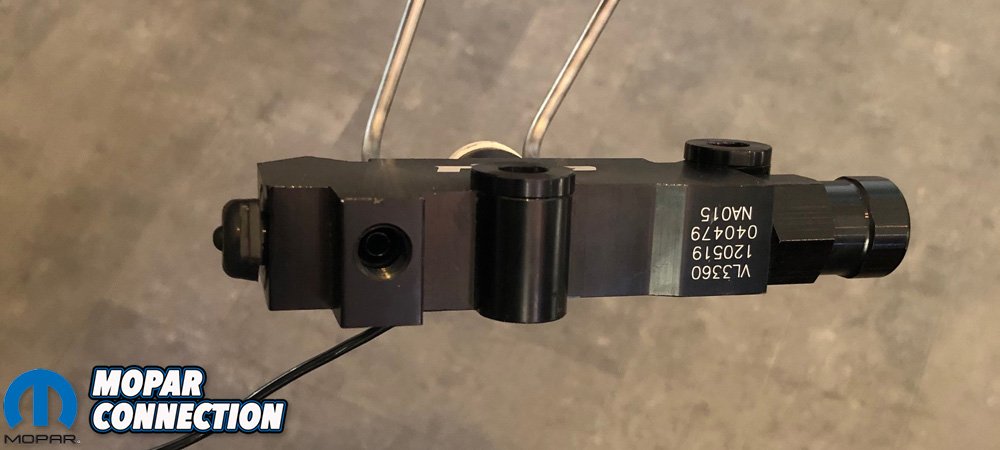
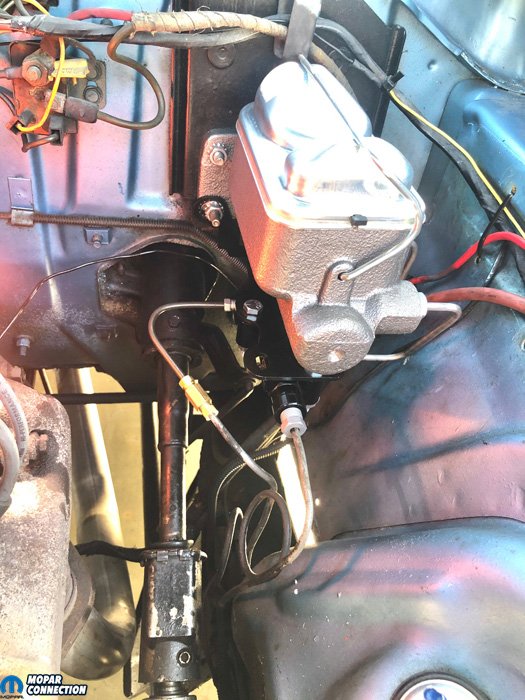
Above: The new master cylinder and proportioning valve are very well built. The pre-bent lines make it a breeze to install.

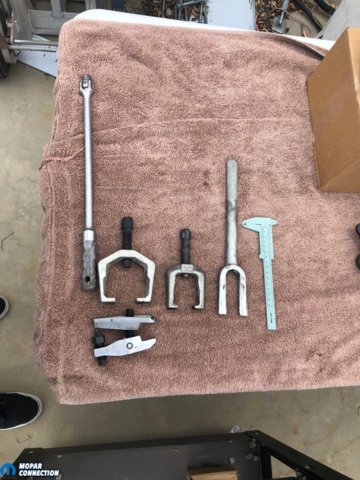
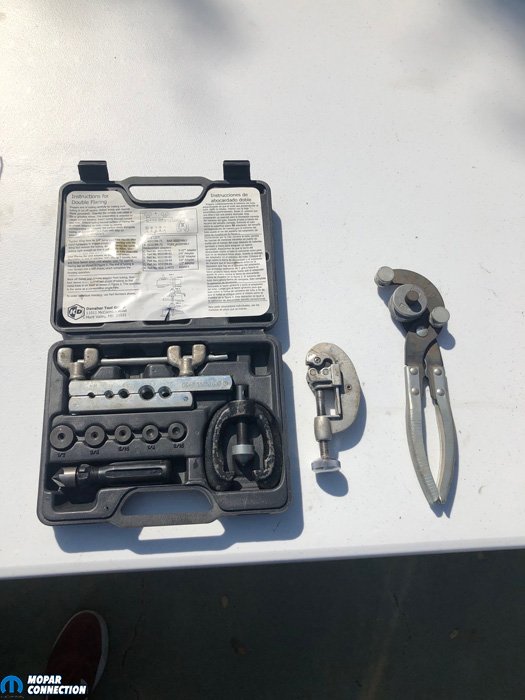
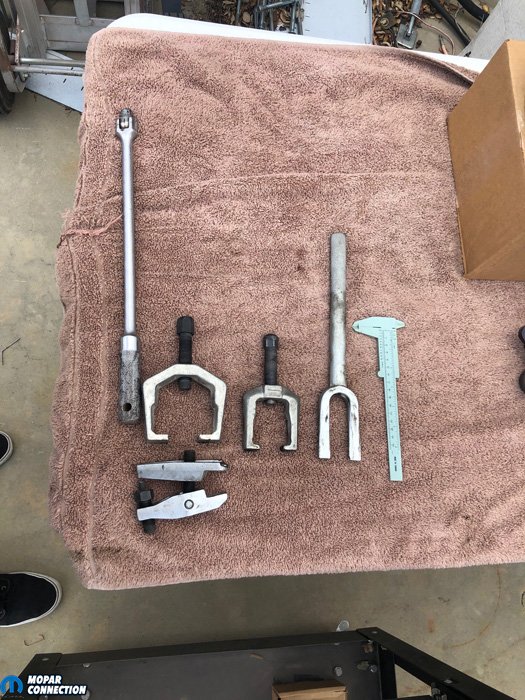
Above: You can see the multiple brake tools and other pullers we used throughout the installation. We do suggest having a quality brake flaring tool to make the flares once and seal.
The new lines included in the kit again are very high quality braided stainless lines with a clear covering and are the correct length. Always check that the new lines don’t get any kinks in them by turning the wheel lock to lock after they are installed. You do not want a line ripping or kinking causing your brakes to fail.
Master Power Brakes provides a syringe that we used to remove all the old brake fluid and we used the provided plugs to plug the lines once we removed the majority of brake fluid. Brake fluid can damage paint, ask us how we know, so be sure lay down plenty of rags incase you spill any.


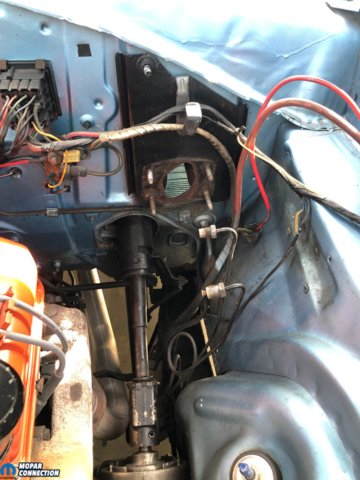
Above: You can see that we had to extend one of our lines and reroute the other to the proportioning valve. Once master cylinder and proportioning valve were installed, it was time to bleed the system.
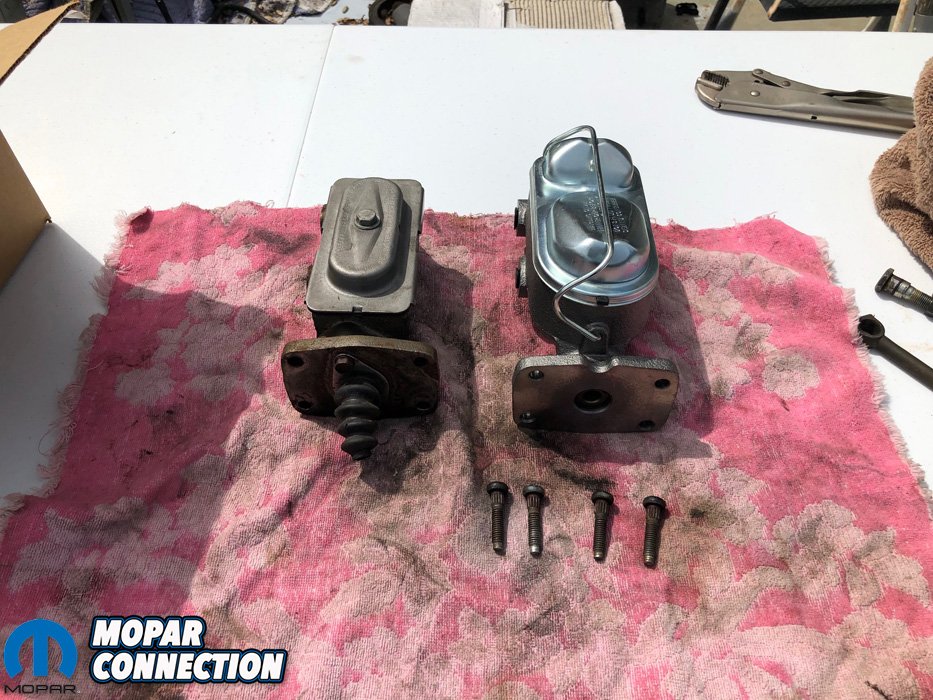
Once all the fluid was out we removed the 4 bolts holding the master cylinder to the firewall. One of the bolts was difficult to get to and required a long extension with a wobble in order to get it out. With the old master cylinder out of the way we cleaned up the mounting area a little bit then installed the new master cylinder with the new included hardware. We decided to put all the mounting nuts on the firewall side for easy access in case the master would ever need to be replaced later on.
The new Master Power Brakes proportioning valve is a very high quality piece and it mounts conveniently under the master cylinder making the installation of the brake lines pretty straight forward. We did have to buy a small brake line to go from one of the original lines to the proportioning valve. Having a quality flaring tool when making new brake lines is highly suggested.


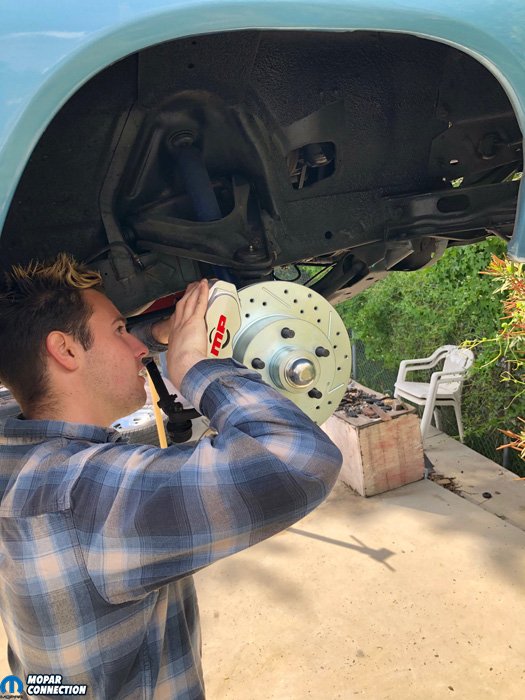
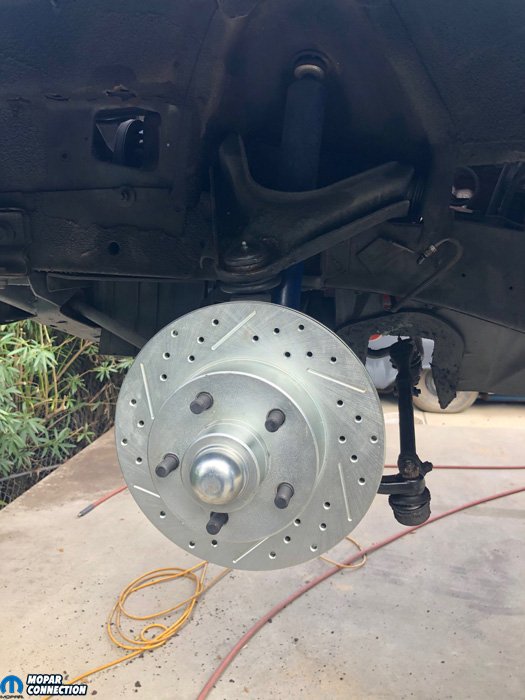
Above: Taking a step back and admiring our work. Before we took it for a test drive we cleaned the rotors with brake clean to get any contaminates off.
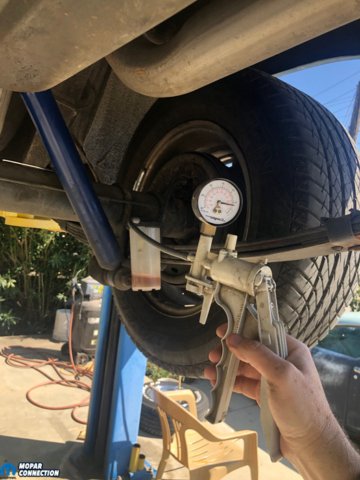
With all the lines buttoned up, it was time to start bleeding the air out of lines. We used Dot 3 synthetic brake fluid and a manual vacuum bleeder to start the bleeding process. To make the process go quicker, we bench bleed and filled the new master cylinder on the bench before the installation. Auto shop 101 with Mr Newman from Hart School in 1985 taught me to always start bleeding the brakes at the wheel cylinder that is the farthest away from the master cylinder then work your way up to the closest.
After we were done with the manual vacuum bleeder, we switched over to the traditional pump and hold method. With my son inside the car doing the pumping and me doing the bleeding, it didn’t take long and we had clean new brake fluid coming out with no air in the lines. Remember to always be topping off the master cylinder while you are bleeding, re-install the cap, then check for leaks.


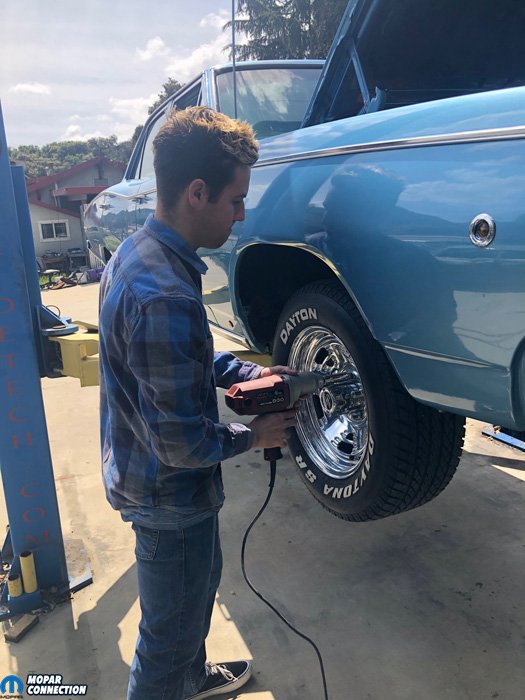
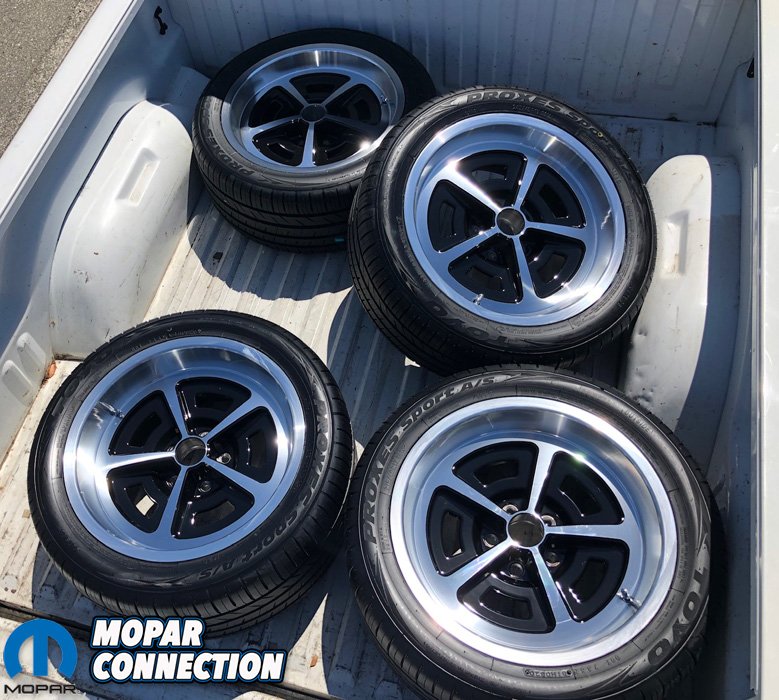
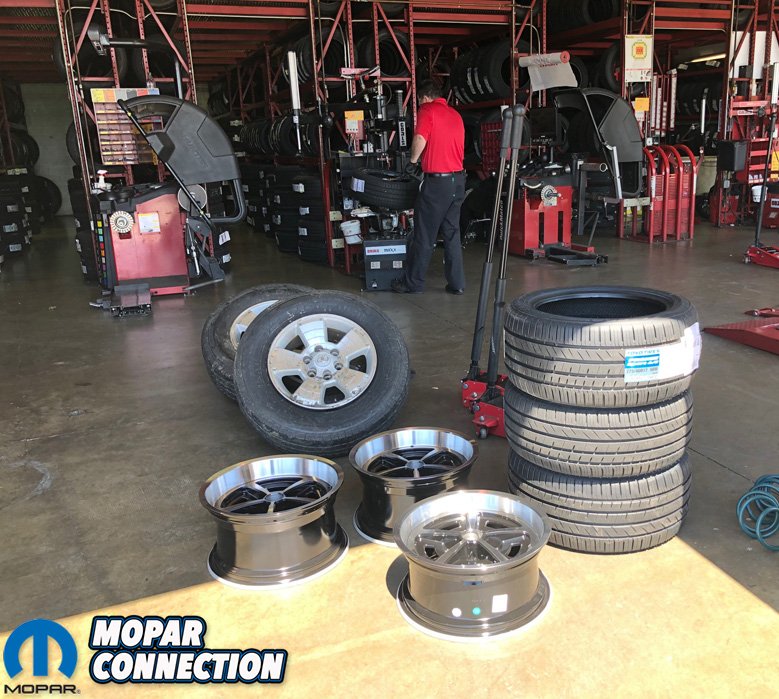
Above: We headed to our local reputable tire shop to have our new Toyo tires put on our YearOne Magnum 17″ wheels. They did an excellent job and we were headed home to put them on the Coronet.
Once we determined there were no leaks it was time for the fun part, a test drive. While we were doing this brake conversion we had set of YearOne’s awesome 17” Magnum wheels and a fresh set of the new Toyo Proxes Sport A/S tires mounted at our local America’s Tire shop here in Santa Clarita. The techs at America’s Tire are great and they are super cautious how they mount and balance. Having the newest equipment, they were able to balance and mount the tires perfectly and used black stick on weights on the inner wheel so we didn’t have ugly weights on the outer rim.

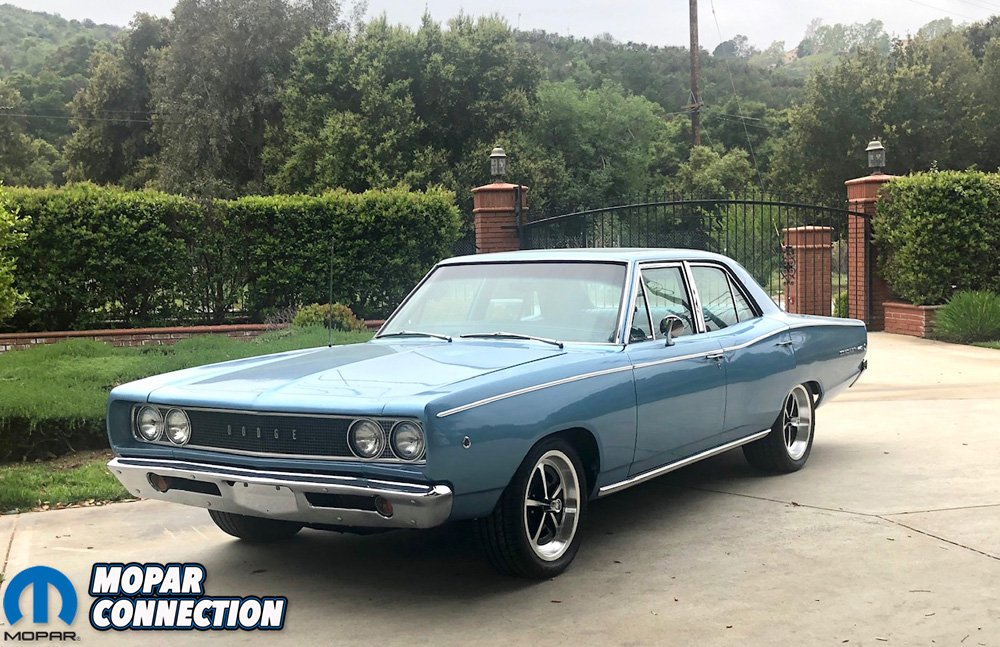
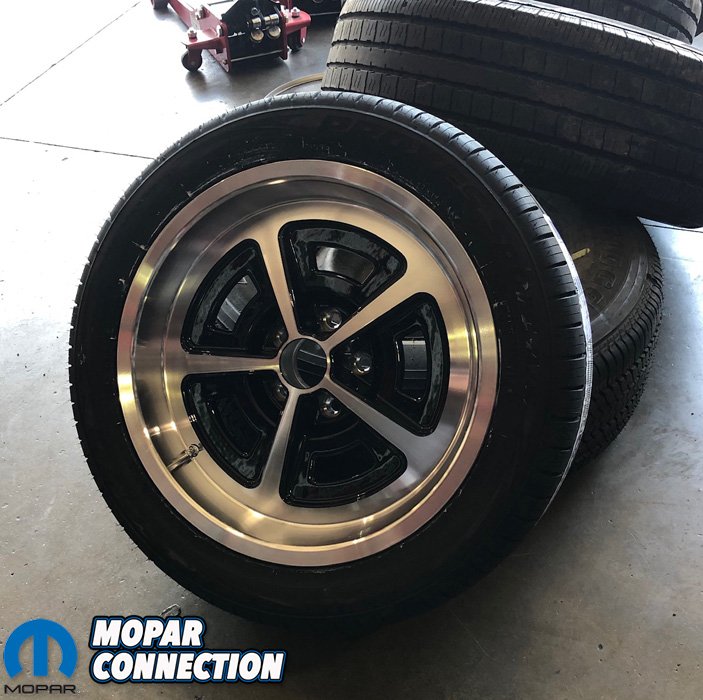
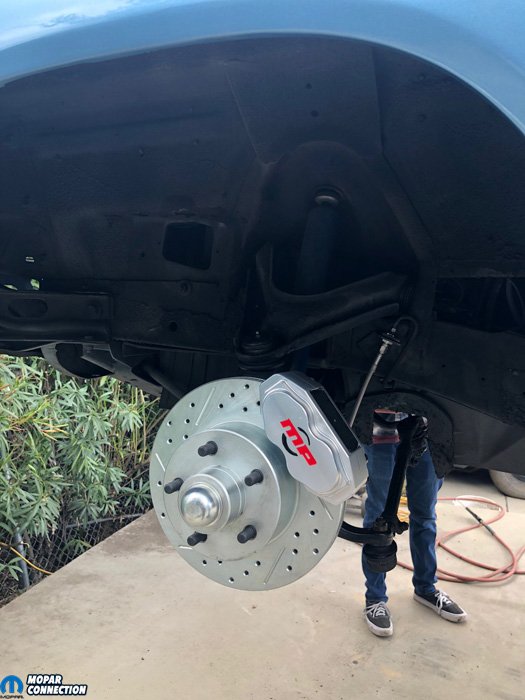
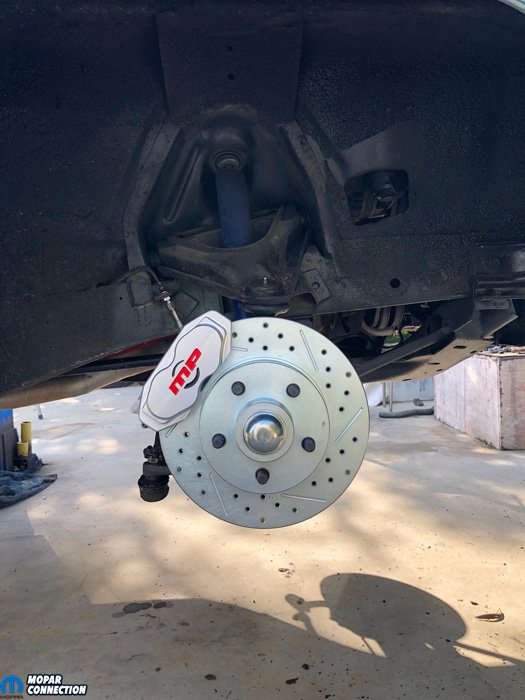
Above: With the new brakes and wheels installed the car is not only safer to drive but also looks awesome.
No surprise the brakes work perfect and for being manual brakes on a big b-body, the car stops great. We still needed to embed the pads to the rotors with multiple heat cycles before we can really get full performance out of our brakes. The car also looks awesome rolling down the road with the new wheels, tires and brakes. You can see the calipers through the YearOne Magnum wheels.
This was a very fun father son project with no major issues or complaints. The quality, fit and finish of all the components were excellent. Not to mention I feel a lot better that my son’s car is safer to drive. You should definitely check out Master Power Brakes if you are planning a brake upgrade. Next up for this more door will be adding some Hotchkis goodies a new Borgeson steering box and then we need to start talking horsepower. Hmm, maybe a Magnum 360 stroker? Stay tuned.


