


Often it is best to let a sleeping dog lie. Regrettably, with our Mopars, we must occasionally poke the dog to fix something, and once that happens, the dog usually gets us. It can be something as simple as replacing an instrument cluster light bulb that leads to damage of decades-old clips, wires, or even circuit boards. It almost makes you regret attempting the repair.
We recently experienced several damaged pins on one of the two instrument cluster circuit boards on Pennsylvania College of Technology’s 1967 Dart (aka the Dyno Dart). While changing a blown cluster bulb, we accidentally bumped the harness connector at the cluster and the result was a broken pin lying on the floor mat upon completion of the bulb swap. Sadly, the pin was from the instrument cluster circuit board, and its function was to pass current to the oil pressure idiot light, which no longer operated.
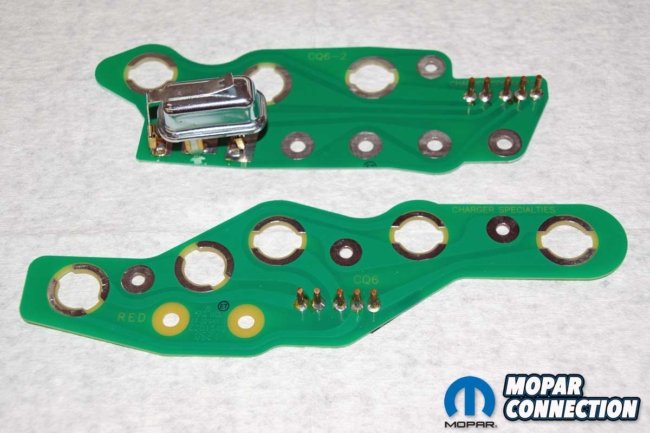
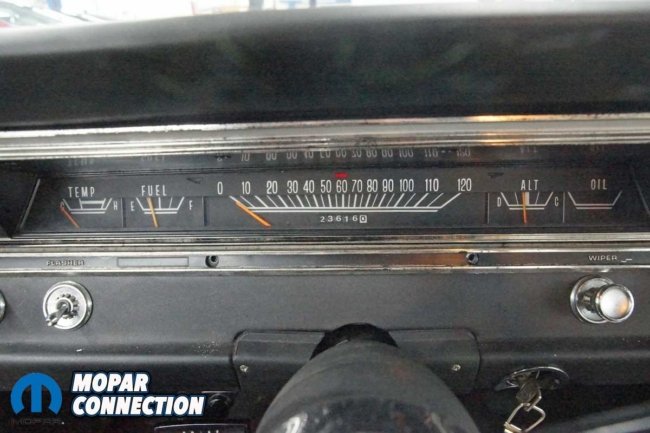
Above Left: Classic Industries has a complete catalog of circuit boards for Mopar products. We picked up a pair for our 1967 Dart. Above Right: After a bulb replacement, our cluster oil light and several bulbs stopped operating. However, the high-beam indicator worked at all times.
A quick solder repair attempt (with the cluster still in the car) failed, and we made it worse by breaking a second pin and then a third pin from the circuit board. However, instead of continuing the frustration, we contacted Classic Industries for a pair of reproduction circuit boards (part no. MA118514), which fit all ’67-’71 Darts with standard gauges.
To replace our circuit boards, we needed to remove the instrument cluster from the Dart. First, we pulled the battery negative cable, so that we would not electrically short any electrical components during our repair. Next, we removed six screws that held the cluster to the dash frame.
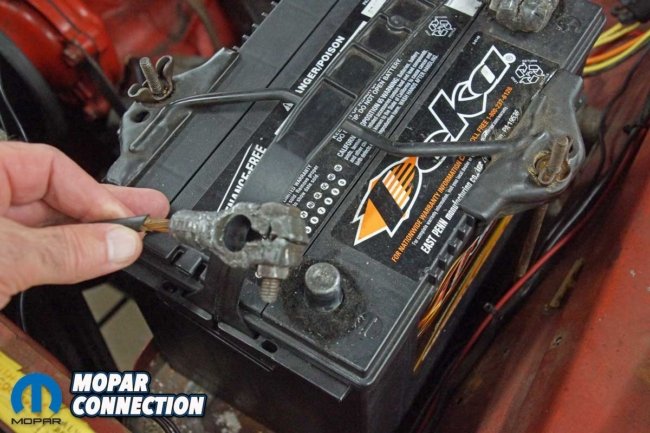


Above Left: The battery negative cable was removed before any work started. Above Center: The lower column trim cover was removed to gain access to the column fasteners. Above Right: The defroster ducting needed to be removed. One duct hose ripped, but the other 55-year-old duct hose looked brand new.
Slipping under the dash, we reached up to the backside of the cluster at the passenger side of the steering column to remove two nuts from the studs extending from the ammeter. The use of a ¼-inch ratchet, extension, and swivel made the nut removal slightly easier.
After releasing the ammeter leads, we reached up and pulled the harness connector from the damaged circuit board. Then, moving to the other side of the steering column, we accessed the second harness connector, pulling it free from the circuit board. Between the circuit boards was where the speedometer cable connected to the cluster.

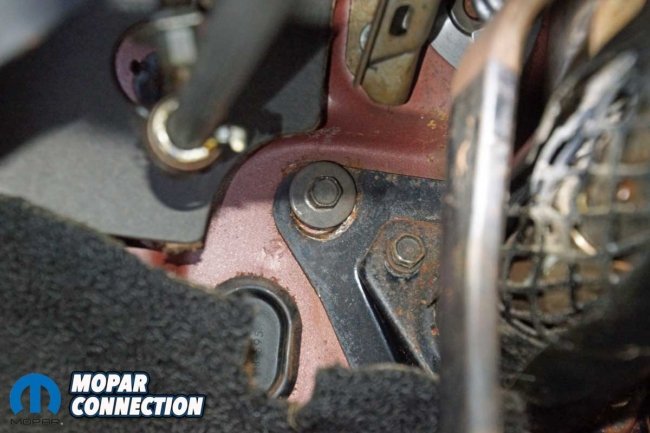
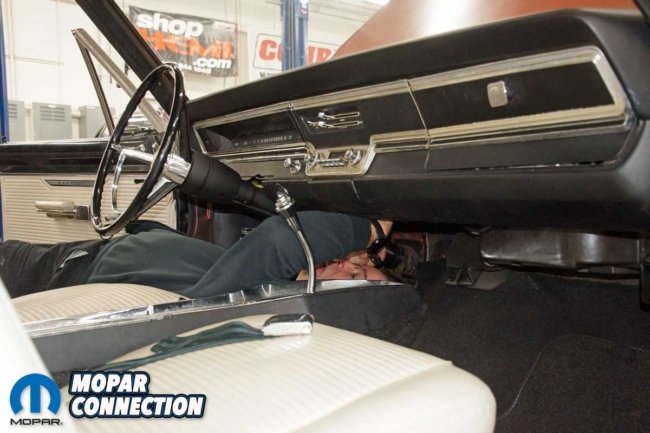
Above Left: The column would need to be lowered slightly for the cluster to clear the column. Next, we removed all three support fasteners. Above Center: Three additional bolts were loosened at the base of the column. Above Right: To gain access to the ammeter harness, the circuit board connectors, the speedometer cable, and the park brake light, we needed to find a “comfortable” area under the dash.
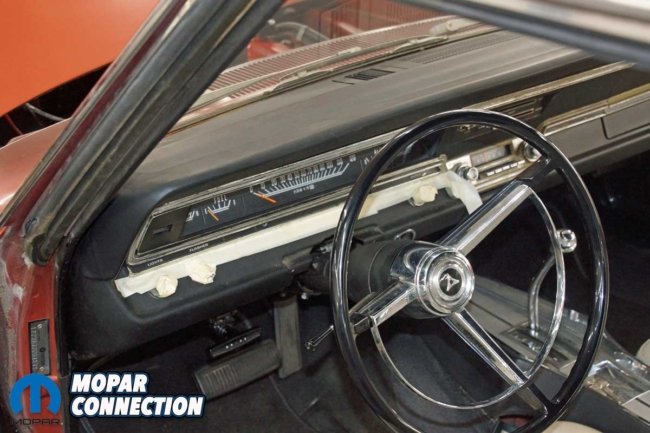
Depending upon the vehicle, the speedo cable is either clipped or threaded to the backside of the cluster. The Penn College Dart had a thread-on design that was finger-tight, so it backed off quickly. The park brake bulb was the last component we removed from the cluster.
With everything disconnected from the cluster, three bolts at the base of the steering column, where the column passes to the engine bay, were loosened but not removed. Additionally, three fasteners that attached the column under the dash were backed off to allow the column to drop.

Above Left: To protect the paint, cluster, and knobs, we installed several layers of tape in critical areas. Above Right: After a few attempts to remove the cluster, we finally freed the harness from the back of the cluster. Fortunately, once the harness was out of the way, the cluster slipped out of the dash.
To protect the painted surfaces of the dash and the plastic cluster housing, we applied generous layers of masking tape. With all the contact areas taped, we attempted to tilt the cluster and remove it from its opening. However, the cluster would not come out. A plastic harness tab turned out to be attached to the back of the cluster. We fought to release the tab, and eventually, the tape securing the tab to the harness gave up.
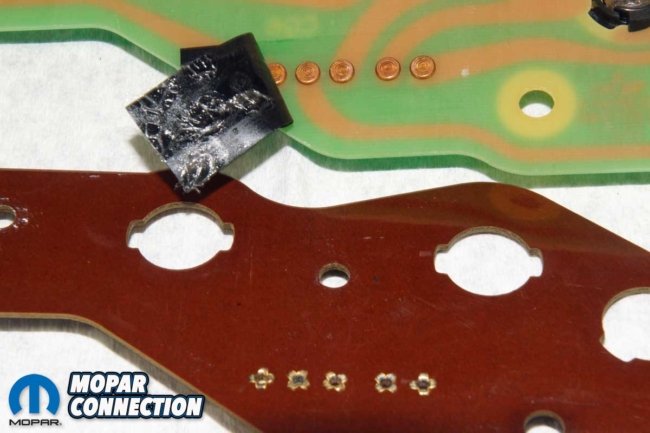
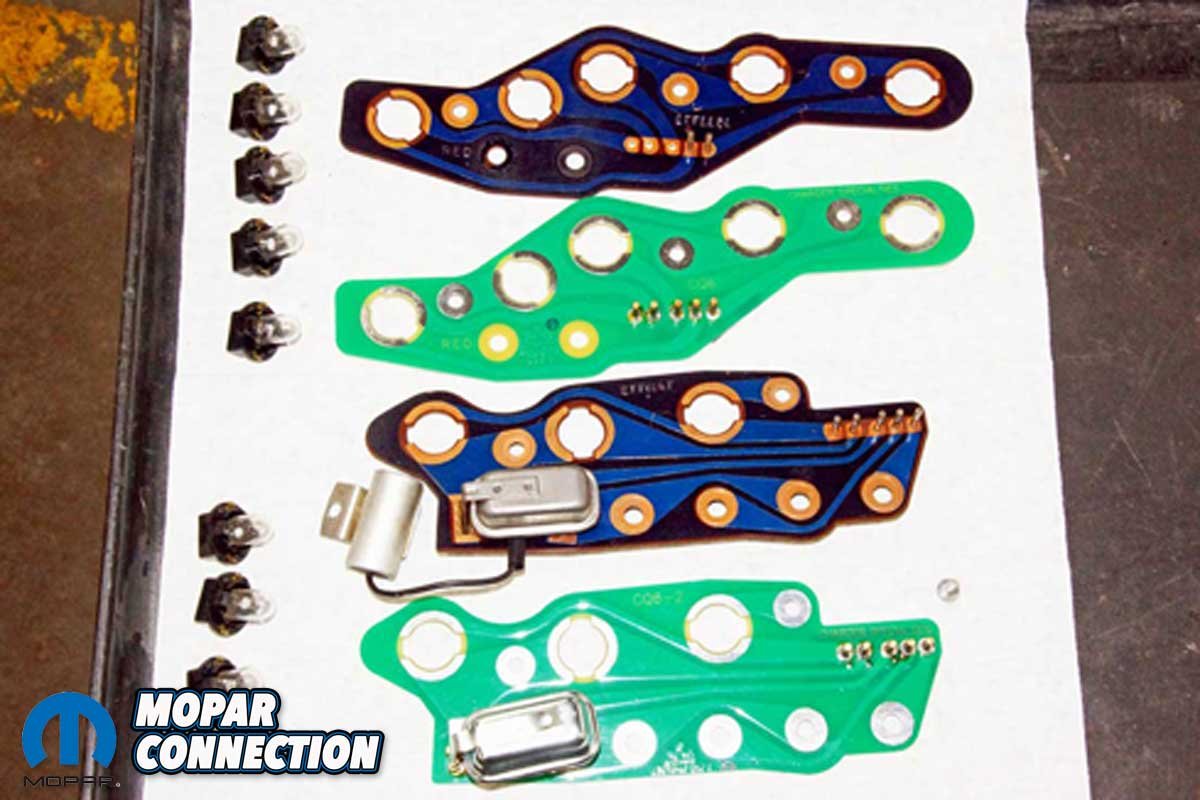
A second attempt to pull up and tilt the cluster resulted in success. The cluster came out of the dash opening without any difficulty. The cluster was in decent shape for a nearly 55-year-old part. The only damage we found was three missing pins on the one circuit board. Both of our circuit boards were blue. Before seeing these circuit boards on the Dart, we had only seen green units.
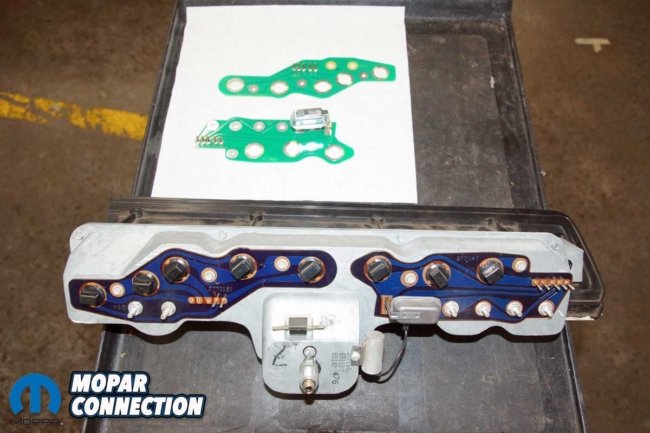
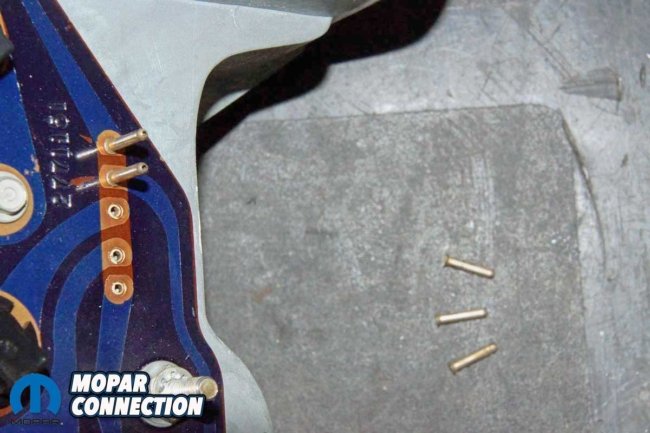

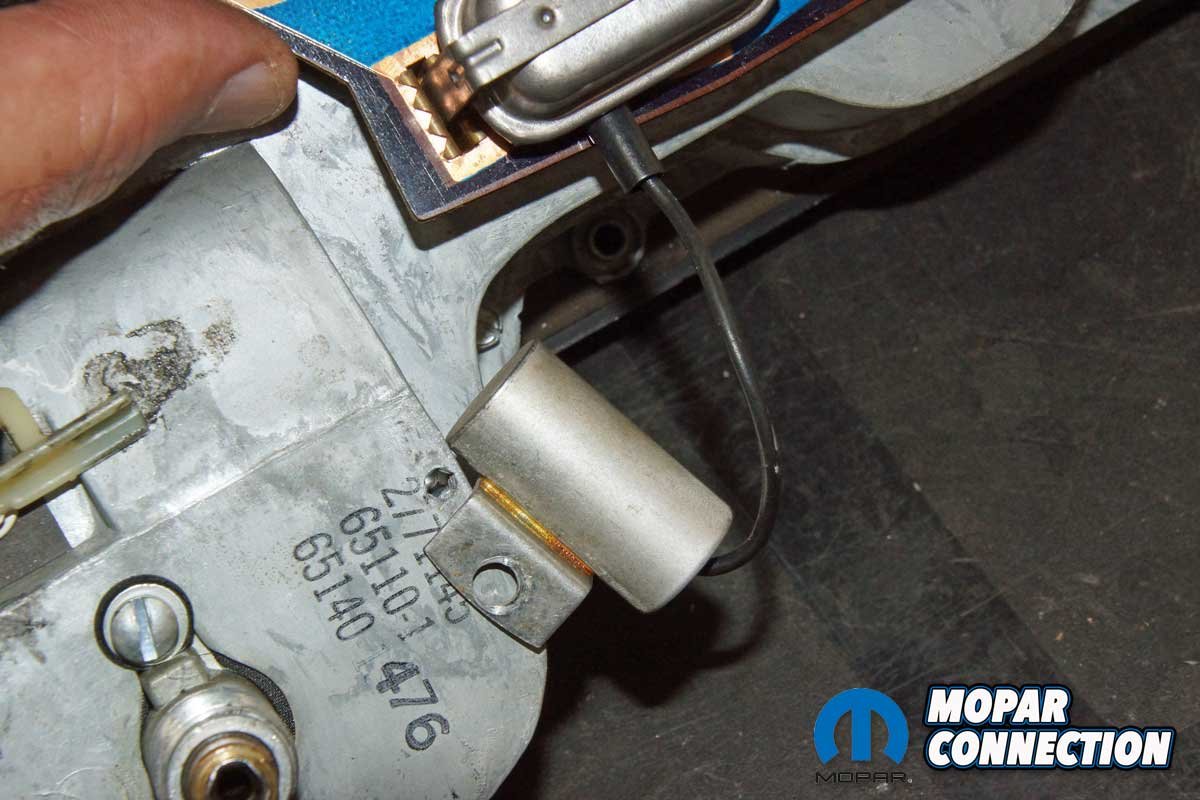
Top Left: The factory circuit boards were blue, which was a color we had not seen before. The new boards were the more common green. Top Right: We recovered all three broken pins. We tried to solder the pins to the board, but it did not work. Bottom Left: Several screws and nuts retained the circuit boards to the cluster housing. Bottom Right: The factory canister capacitor was removed, and it would not be needed with the new circuit boards.
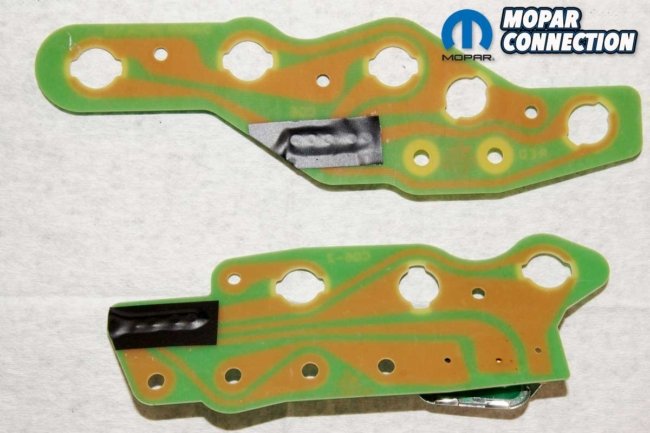
The Classic Industries reproduction circuit boards were the more usual green color. They were made from flame-resistant fiberglass material for increased strength and better bonding adhesion with the copper traces. The boards also featured nickel-plated connector pins, which reduced any chances of corrosion and pin breakage.
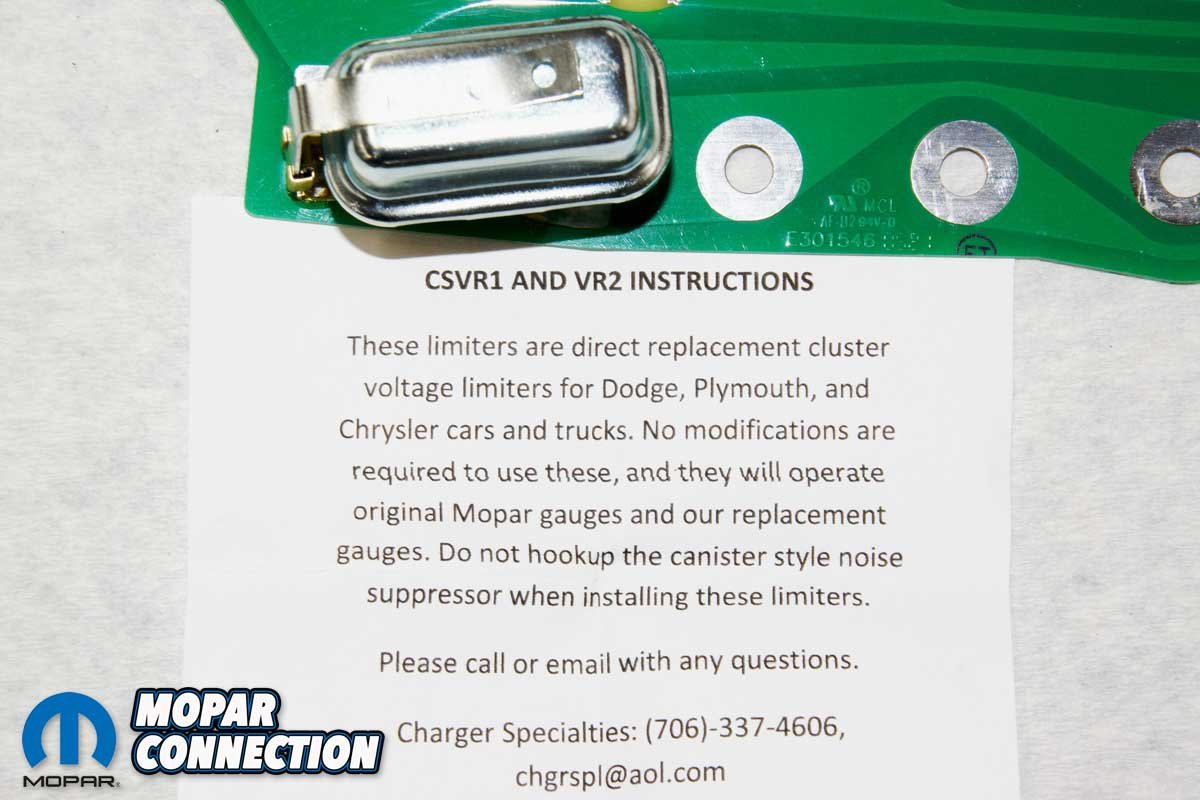
The pins were much more rugged-looking compared to the factory pins. The board with the included voltage limiter had fully soldered socket connections, which replaced the press-on connections found on the original design.

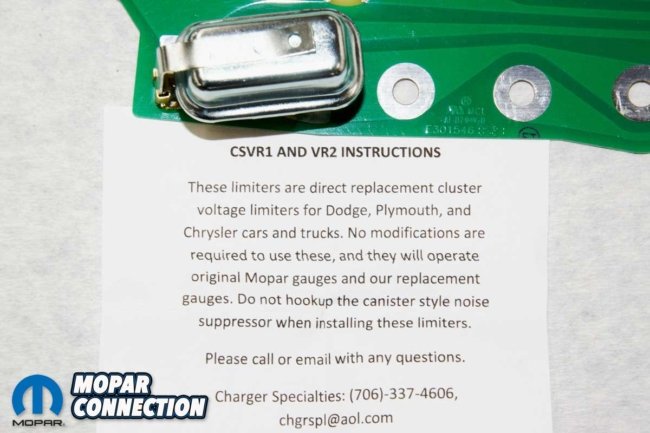
Above Left: Except for the color, the factory and aftermarket circuit boards are identical. Above Right: Included with the circuit boards was a notification that the voltage regulator would operate correctly without the factory capacitor.
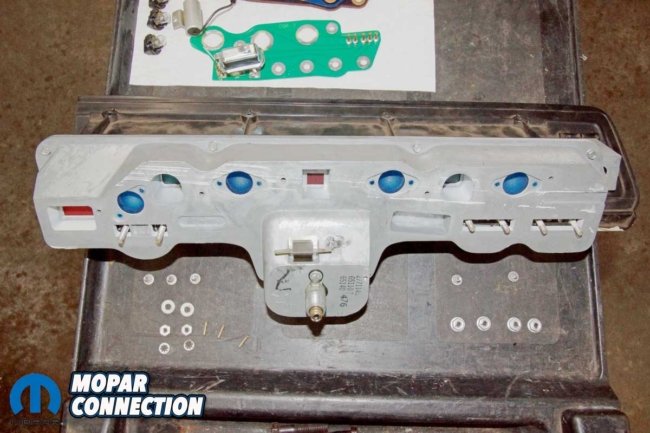
With the instrument cluster on the workbench, we removed several screws and nuts to free the circuit boards from the cluster. Included with the new circuit boards was a notation that the factory voltage regulator capacitor canister would not be necessary with the new circuit boards. We backed out the single screw that retained the capacitor.
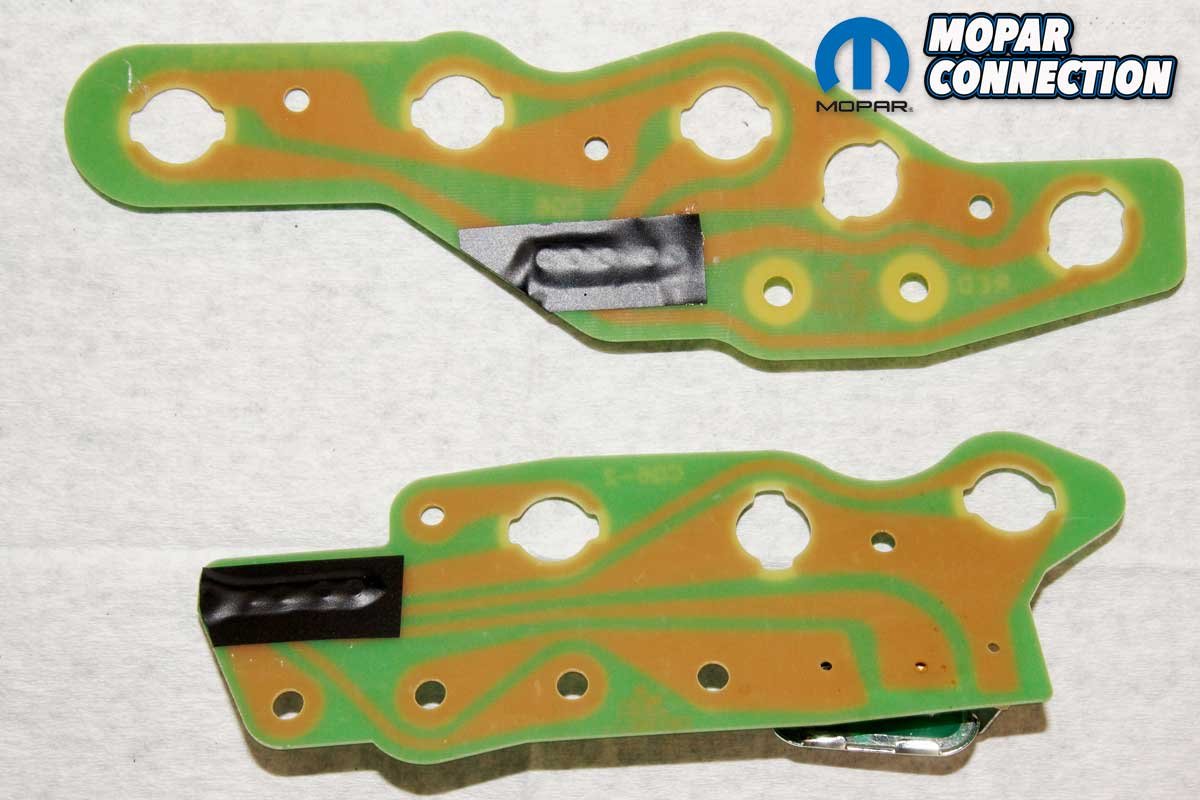
We transferred all the cluster bulbs to the new Classic Industries boards. Before installing each board, we ensured the underside of each had protective electrical tape covering the backside of the pin terminals. The circuit boards fit perfectly. Every screw and stud passed through the holes in the boards without difficulty.

Above Left: The backside of the circuit boards has a protective layer of tape over the circuit board pins. Above Center: The Classic Industries circuit board pins are more robust compared to the factory piece. Above Right: The circuit boards bolted to the cluster housing perfectly.
Once we completed the board swaps, we reversed the removal procedure to reinstall the cluster. With the cluster in the dash opening, installing the connectors onto the new circuit board pins required mild pressure to seat them. We followed the connector installation by installing the speedometer cable, park brake light, and ammeter harness. Finishing up, we installed the column bolts and nuts and reinstalled the cluster screws. Finally, we removed all the protective tape and cleaned the area.
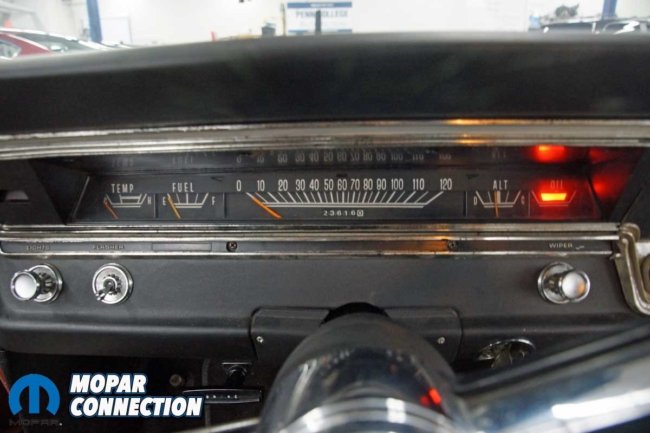
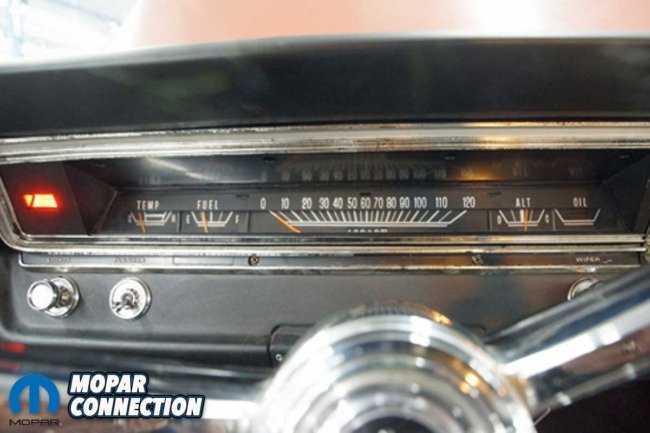
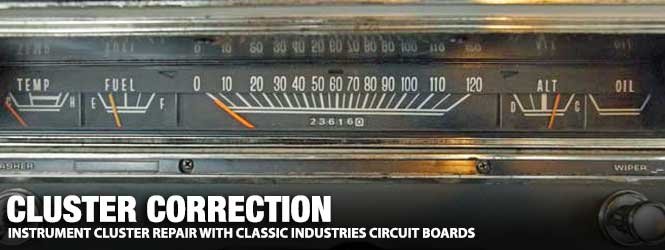
Above Left: With the key on and the engine off, the oil light operated correctly. When the headlight switch was pulled, all the cluster backlights illuminated. Above Right: With the engine running, all the gauges moved to their typical operating locations.
With the battery reconnected, we turned the ignition key to the on position, and the oil light immediately turned on. The cluster backlights that had stopped working once again illuminated when we pulled the headlight switch. We started the slant six and monitored the gauges; all the needles smoothly moved across the gauge faces.
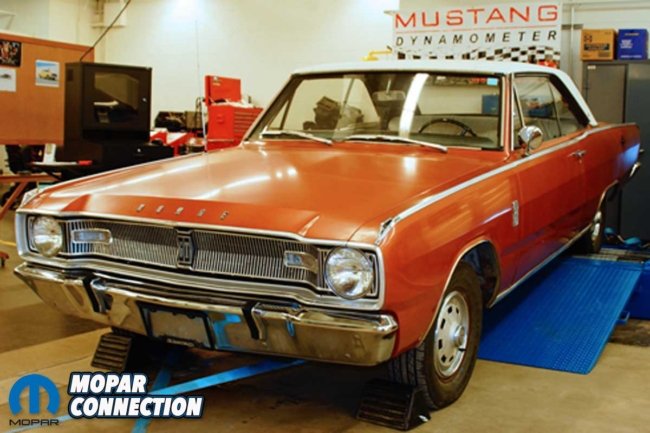
Above: The Pennsylvania College of Technology’s 1967 Dart is a test mule for many performance modifications. The slant six puts down 76 horsepower to the rear wheels in stock trim. After sixteen weeks, the students usually have the rear wheel horsepower exceeding 160 hp.
The Classic Industries circuit boards returned our cluster to its proper operation. If you are in a situation where your ride has some parts of the cluster that are inoperative, contact a representative at Classic Industries about its extensive line of circuit boards for all our favorite Mopars.


Comments are closed.