


The increased horsepower and torque of exhaust headers are benefits all Mopar enthusiasts’ relish. However, headers have drawbacks, such as exhaust leaks, steering linkage interference, and starter access limitations. An often-overlooked downside of headers shows up at the first oil change after the installation of the headers. Oil filter removal can be a considerable challenge. To alleviate the problem, we picked up a Derale Performance Oil Filter Relocation Kit from Mancini Racing.

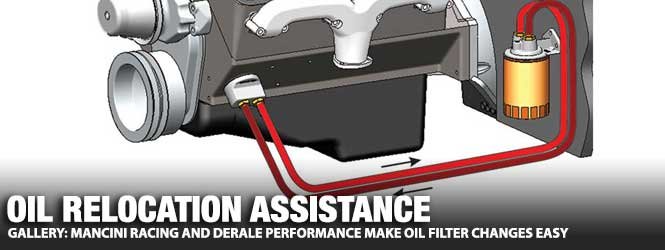
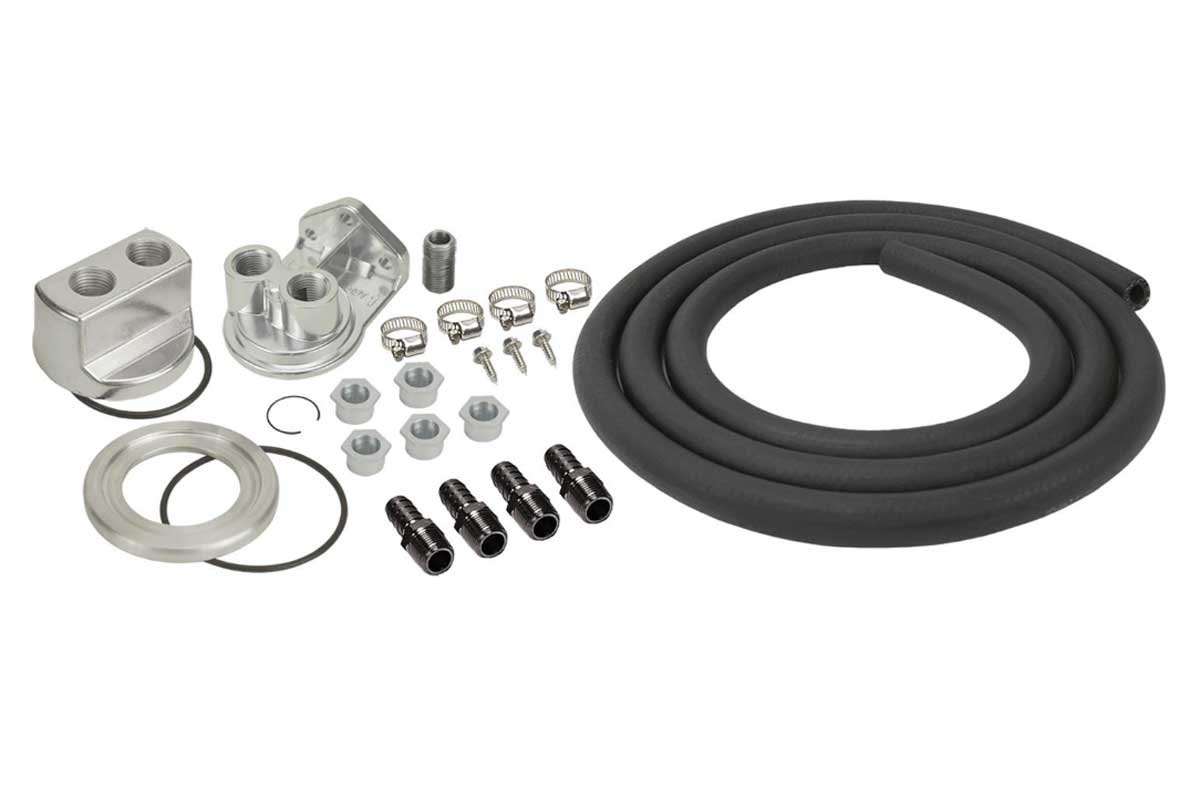
Above: The Derale Performance Oil Filter Relocation Kit comes with everything necessary to move the oil filter to a more convenient location on a vehicle. Follow along as we relocate the oil filter on our ’73 Charger’s small block stroker to allow easy access to the filter and to stop the oil drippage onto the header during the filter change. (Derale Performance Photo)
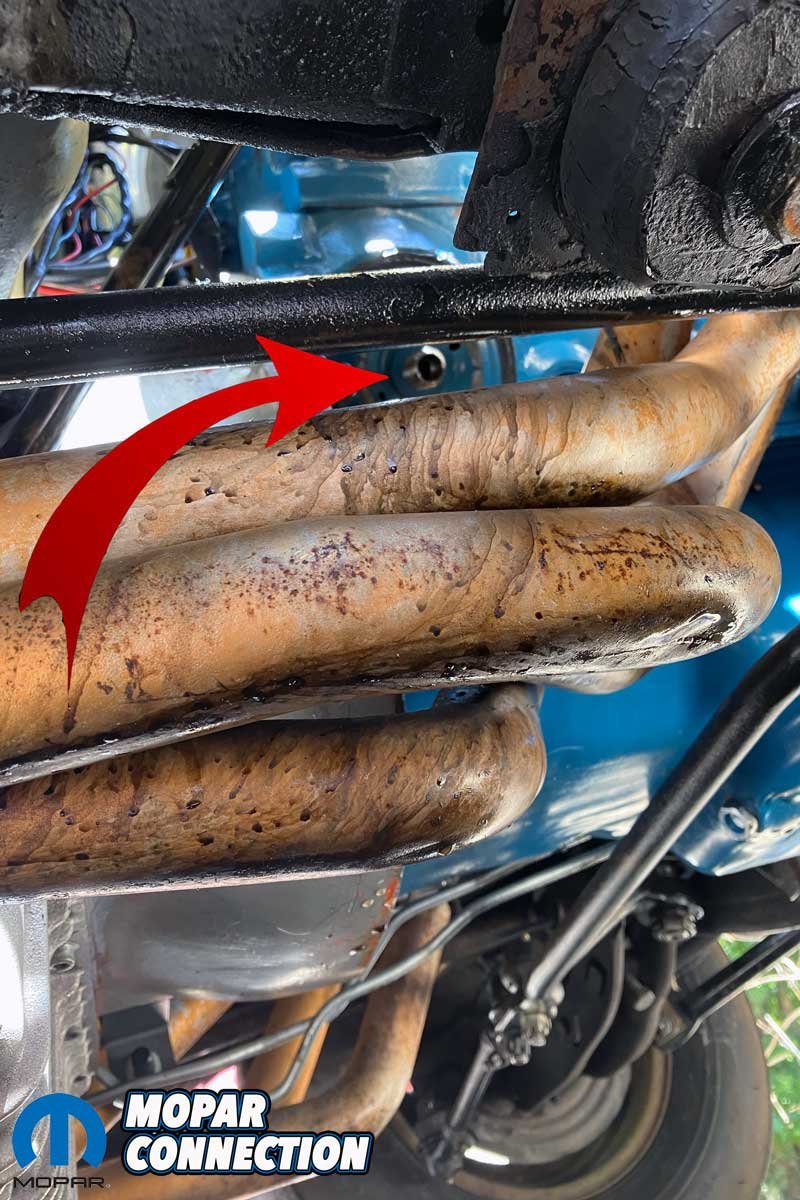
Our ’73 Charger was a perfect candidate for the Derale Performance relocation kit. The 1 ¾-inch primary, long-tube Hooker Headers on our 373 stroker made the oil filter removal more arduous compared to the factory exhaust manifolds originally on the 318 stocker. We were unwilling to sacrifice the power and torque afforded by the headers. Although we made several attempts to remedy the oil filter problem, such as shorter and smaller circumference filters, nothing worked.
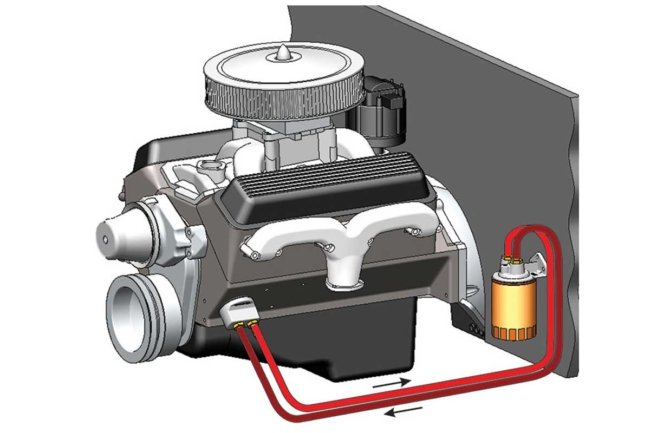
Above: Remote oil filter kits are a great way to make servicing an oil filter or adding a remote oil cooler easier, as well as creating room for other unique and custom engine setups. (Derale Performance Photo)
To install the oil filter relocation kit, we needed to gain access to the engine’s oil filter adapter plate on the passenger side of the engine. The oil filter and header would need to be removed. Taking advantage of a slight incline next to our driveway, we backed the Charger up the slope and blocked the wheels. We lifted the Charger’s front wheels off the ground and slipped supports underneath the front tires.


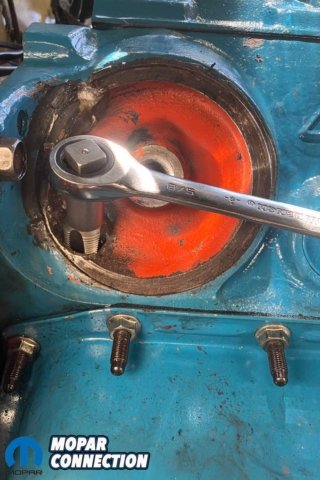
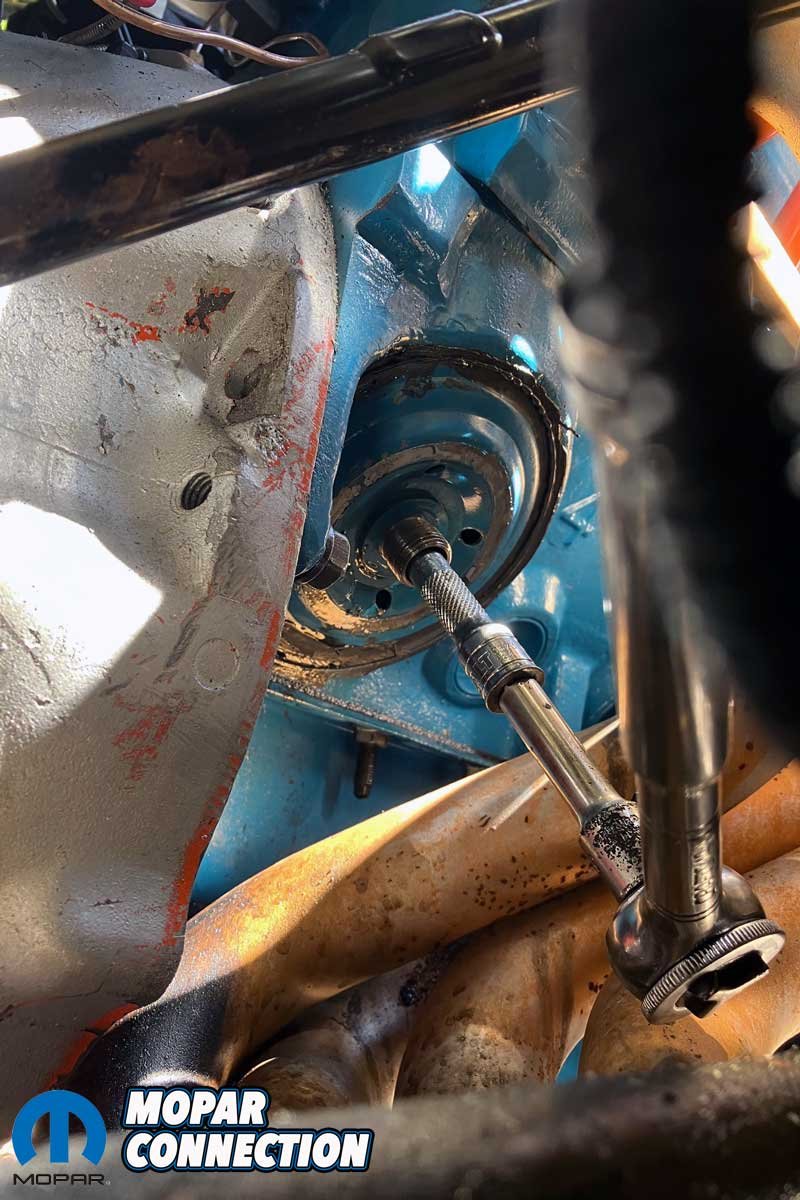
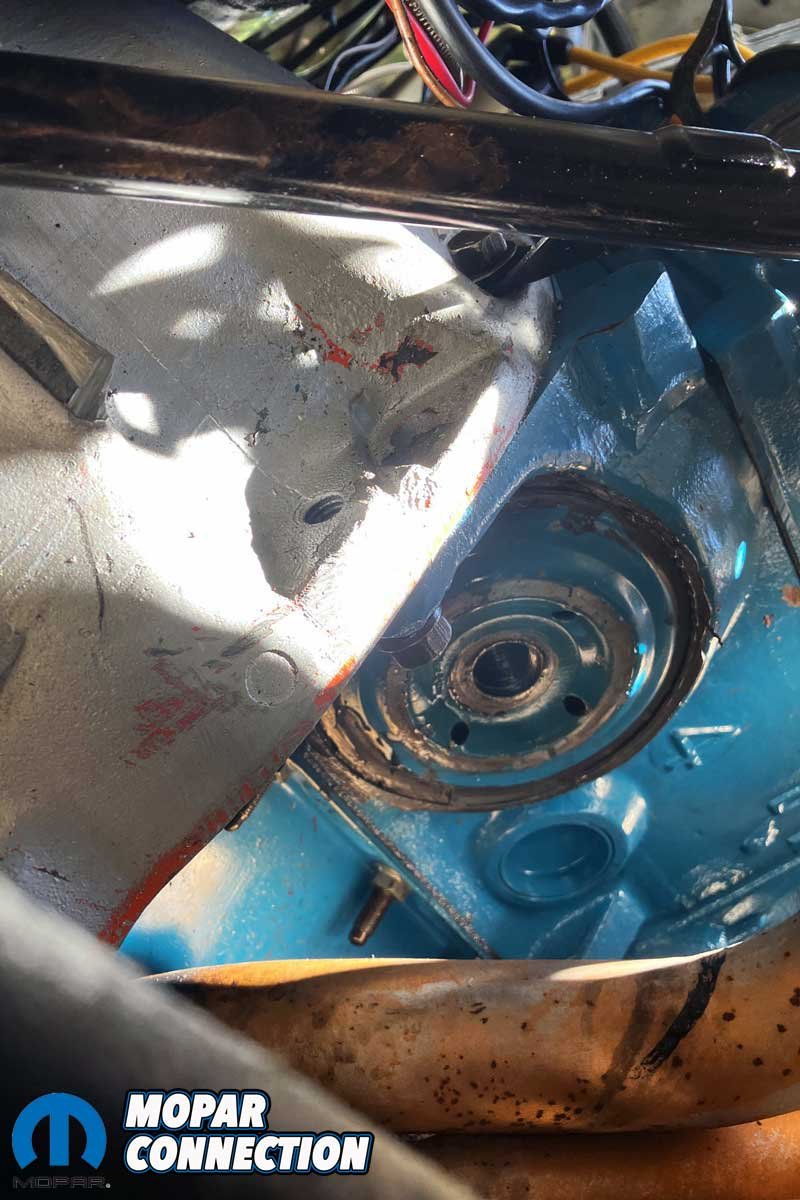
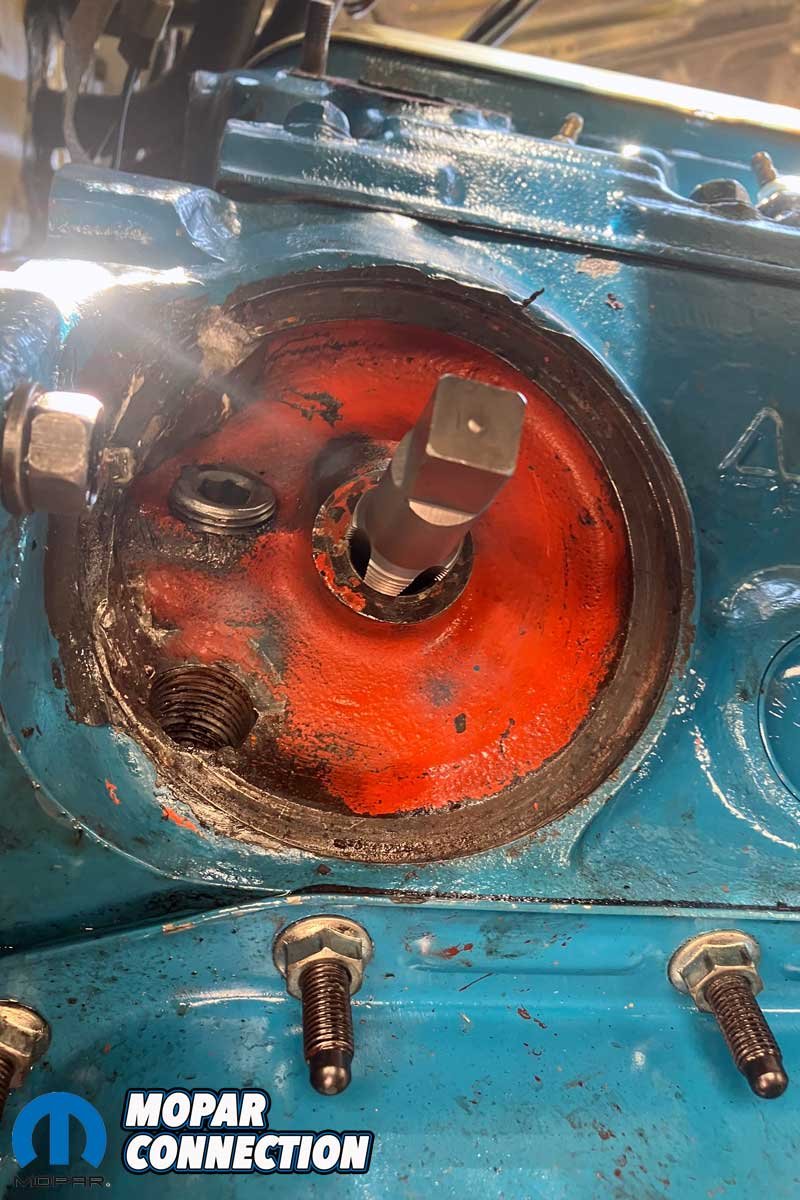
Above Left: With the oil filter removed, it is evident oil has dripped onto the Hooker Headers for some time; it is burnt onto the headers. The relocation kit will end that problem. Above Center: An adapter plate fitting holds the plate to the block. A 3/8-inch extension and ratchet were used to remove the fitting. Above Right: With the fitting removed, we had to gently pry the adapter plate off the block. It had been adhered to the block with RTV.
Once the vehicle was leveled, the engine oil was drained, and the oil filter was unthreaded and snaked out of the engine bay. Of course, oil rained down onto the header during the removal process. We loosened the header bolts, but before finishing the header removal, we pulled the transmission dipstick and tube assembly. Finally, we slipped the header out of the engine bay, which provided unobstructed access to the factory plate.
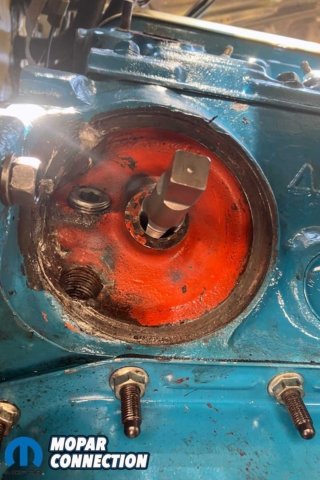
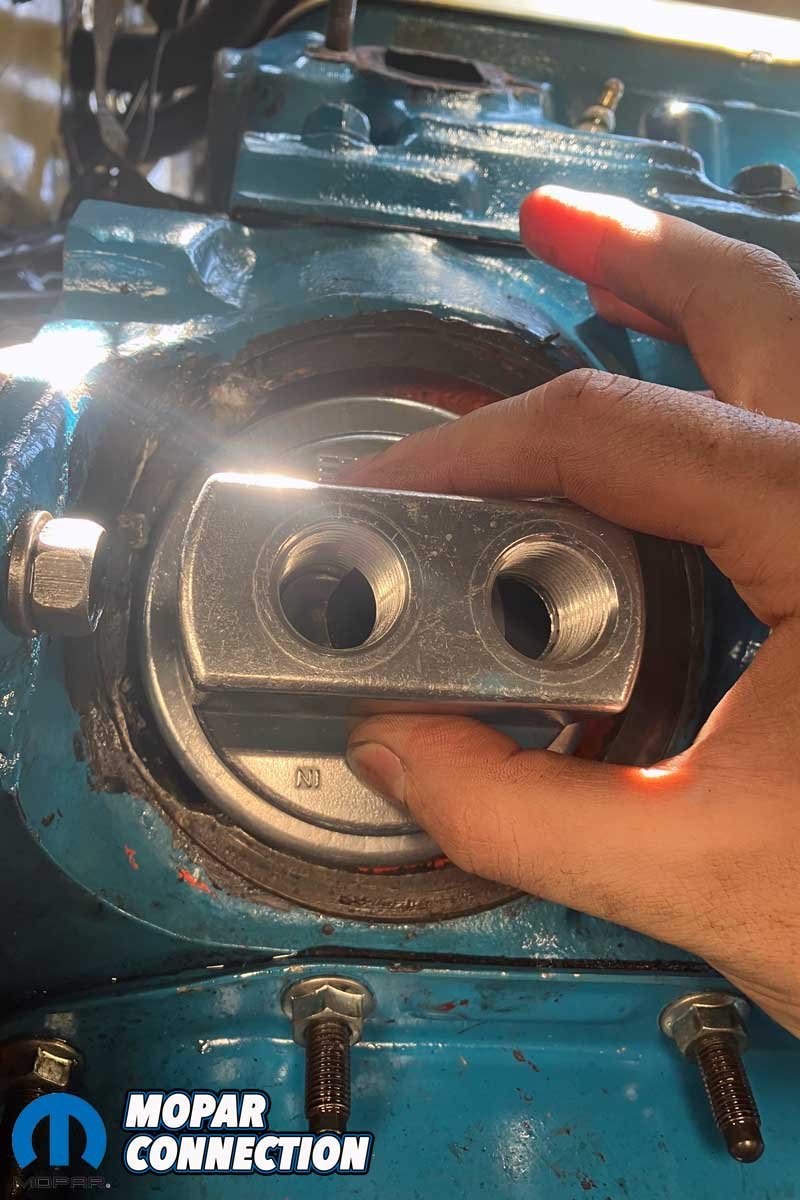
An adapter fitting holds the oil filter adapter plate in place; it threads into the block and retains the oil filter. We unthreaded the adapter bolt and removed the adapter plate to expose three holes cast into the block—two exit holes to the rear of the block and one entrance hole in the center.
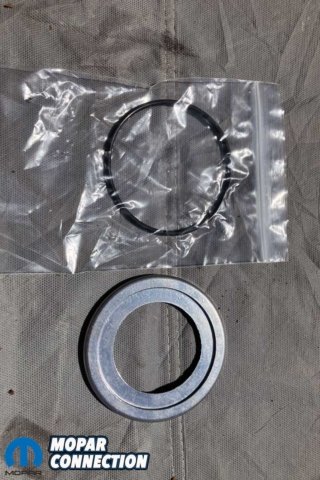

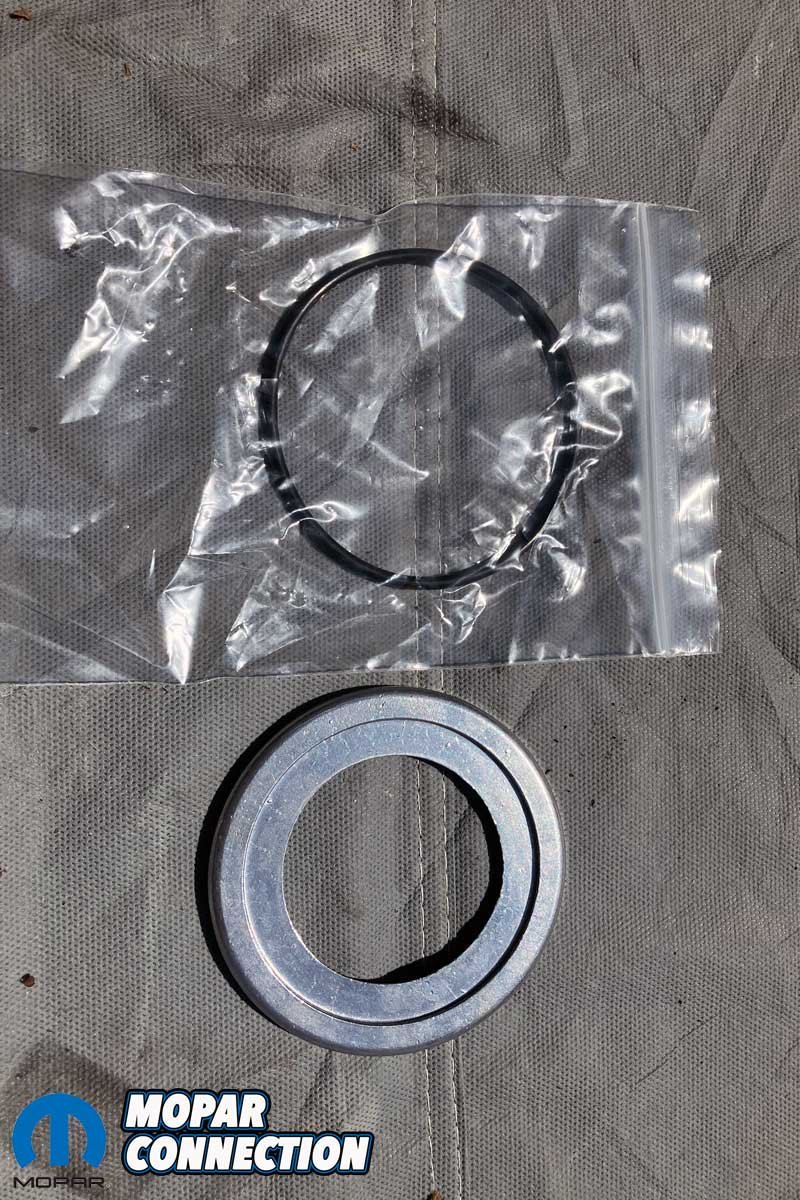
Above Left: An adapter ring and O-ring came in the kit. We elected not to use the plate on the small block Mopar. Above Right: We also chose not to use the Spin-On Adapter, because the surface of the block at the adapter had been ground down by a previous owner of the engine. The grinding resulted in a small but constant leak.
We elected to forgo the Spin-On Adapter and O-ring that came with the Derale Performance kit and install the hose barb fittings into the engine block. After wiping off the residual oil, we chased the holes with a grease-packed ½-inch tapered pipe tap. We thoroughly cleaned the threads in the block with Brake-Klean.
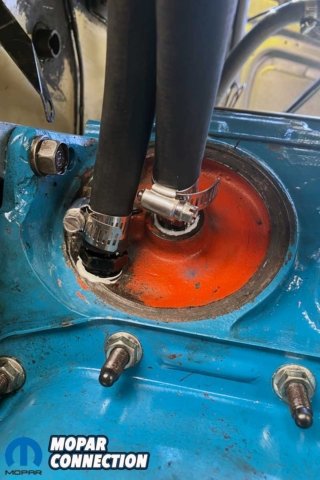
Above Left: We ran a 1/2-NPT tap into the treads of the block to ensure the threads were clean. A dab of grease on the tap captured any small metal shavings that may have resulted from chasing the threads. The center hole feeds the engine with filtered oil. Above Center: We performed the same thread chasing on the passage from the oil pump to the oil filter. Above Right: The threads of the hose barb fittings had sealant applied, and the fittings were threaded into the tapped holes. We secured the hoses with hose clamps.
Satisfied with the cleaning, we applied sealant to a pipe plug and two ½-NPT x ½-inch hose barb fittings. First, we installed a pipe plug in the top hole in the casting. Then, we installed a ½-NPT x ½-inch hose barb in the bottom hole. The hole feeds oil from the pump to the oil filter. Finally, the second hose barb was threaded into the center hole, which provides filtered oil to the engine internals. Both barb fittings were torqued to 30 ft-lbs.
During the sealant setup, we planned the routing of the oil hoses to the external oil filter mount. We located an excellent location for the filter. After some quick measurements, we determined that two four-foot hoses would be sufficient. So, we cut the supplied ten-foot hose to the desired lengths.


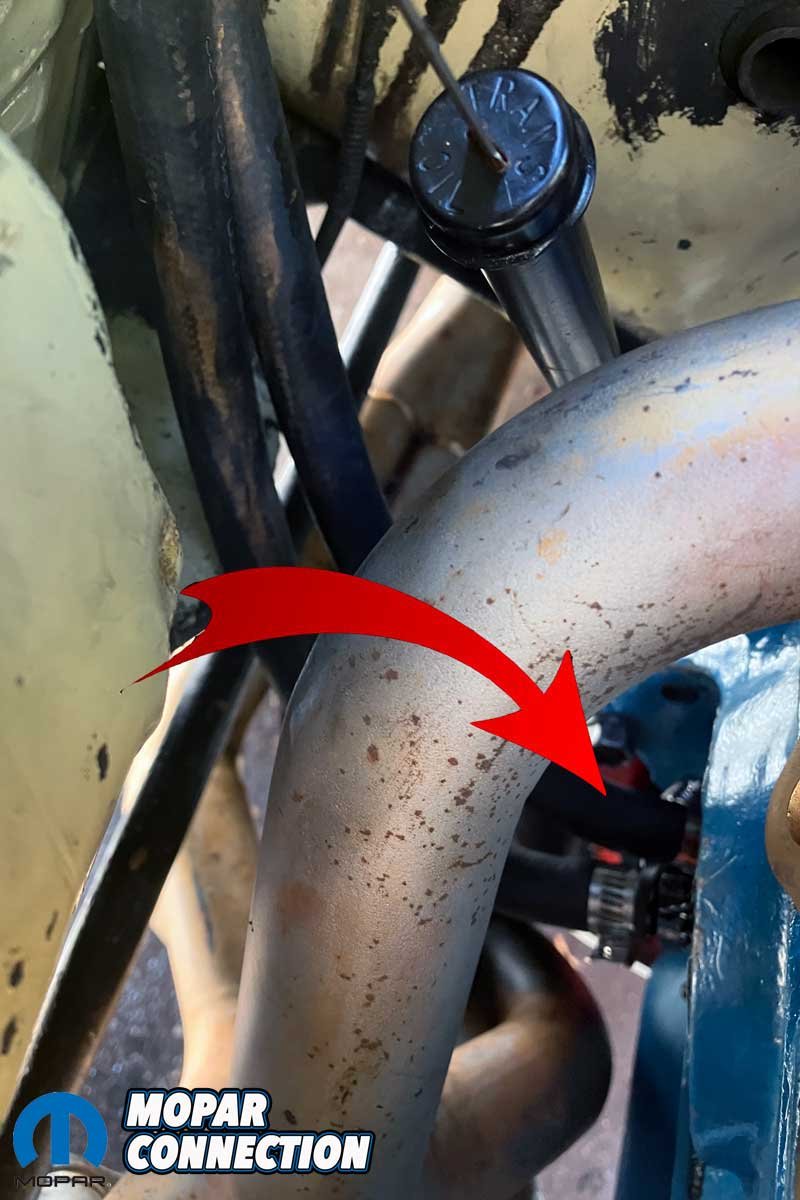
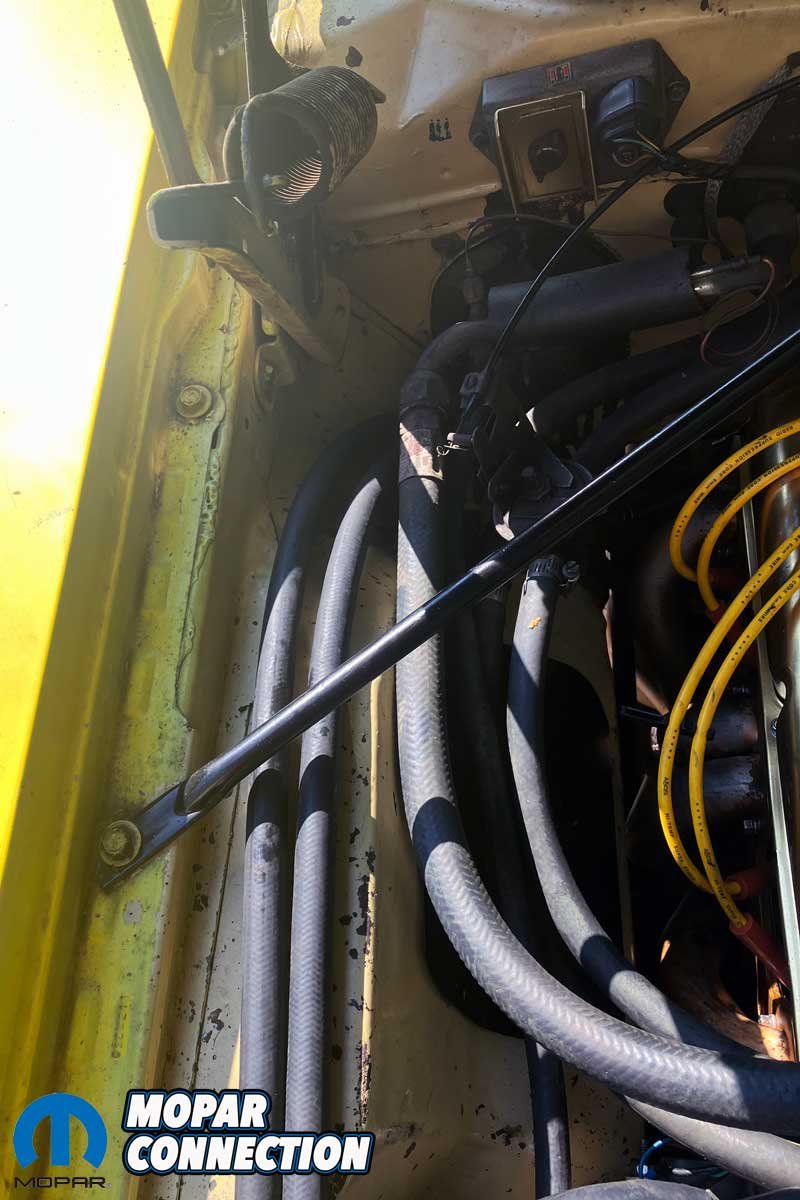
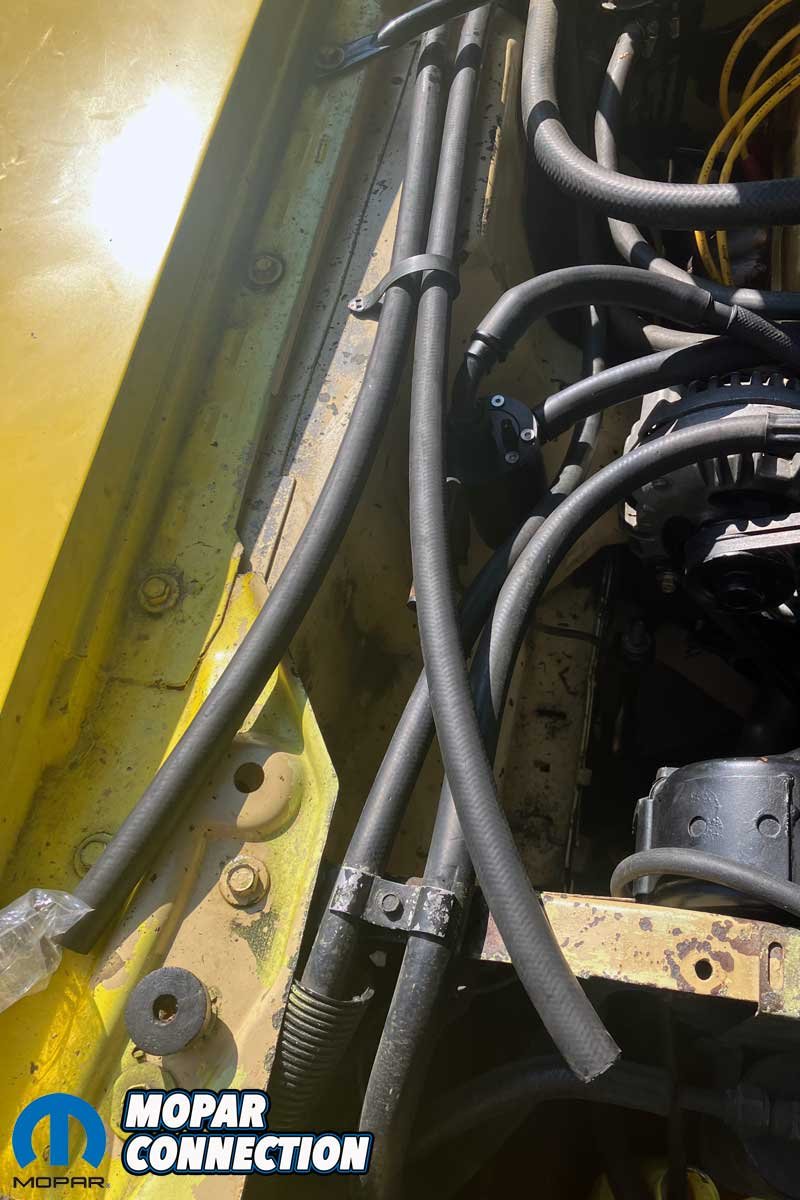
Above Left: The hoses and clamps can barely be seen at this angle. From the barbed fittings, the hoses have to snake around the headers. Above Center: The plan was to route the hoses along the upper side of the passenger apron. Above Right: The hoses were retained to the apron with factory-style clips.
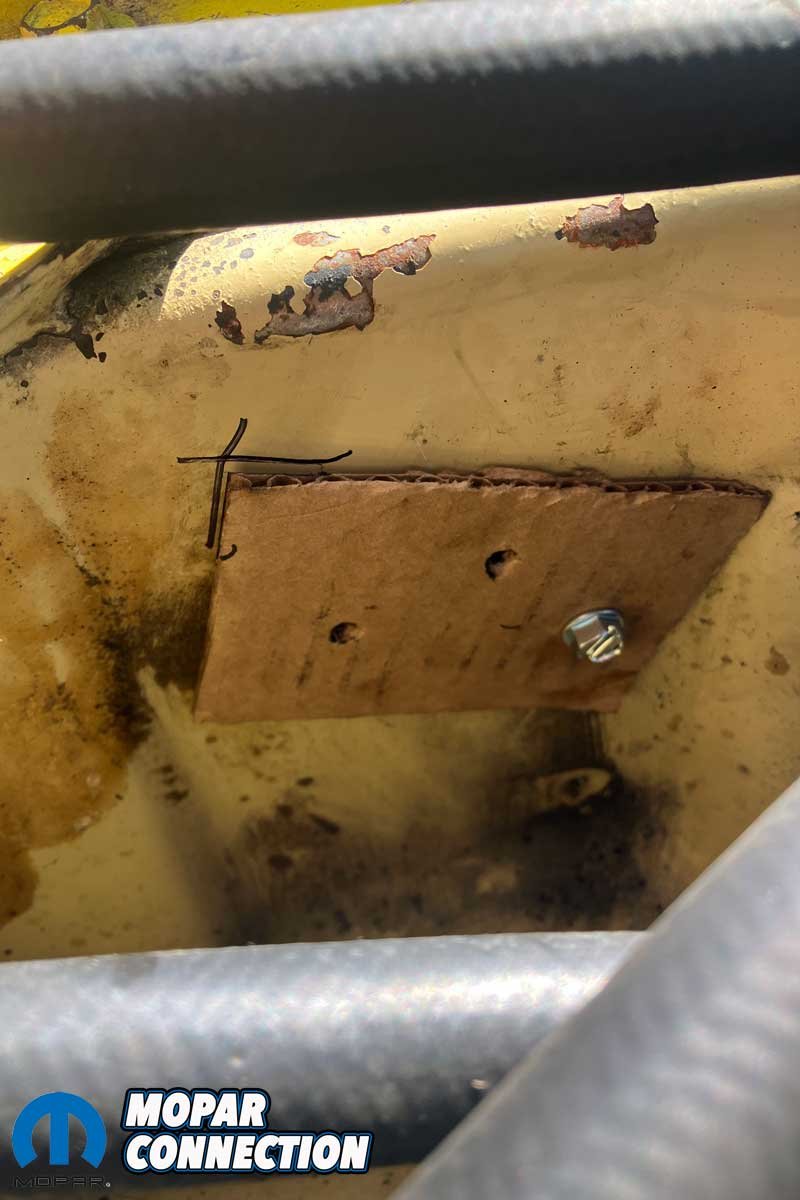
We planned to install the oil filter adapter on the apron in the site that once housed the factory emissions charcoal canister. The installation would take advantage of two existing holes in the apron that we could repurpose for the adapter.


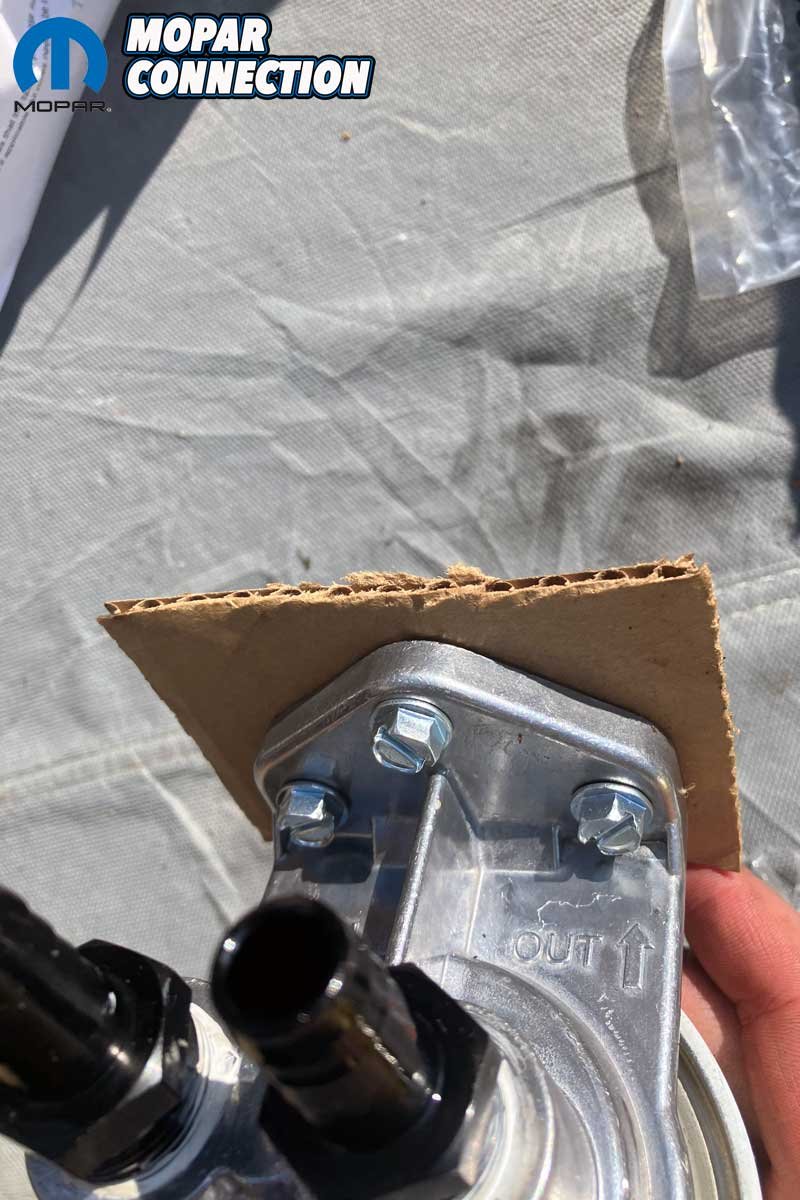
Above Left: The filter mount is designed to accommodate filters from AC (PF2), Fram (PH8A), K&N (HP-3001), Motorcraft (FL1A), and Purolator (PER1A). Above Center: A template was constructed out of cardboard to facilitate the installation of the filter mount. Above Right: Because two holes existed in the apron, we only needed to drill one additional hole.
We constructed a cardboard template for the bolt alignment of the oil filter adapter, lined it up to the apron, and drilled the additional hole. The adapter was mounted at an angle to allow the use of a funnel, which would reduce oil drippage onto the apron during oil filter changes.
With the mounting complete, we ran the oil hoses from the barbs at the block to the fittings we had added to the adapter. We tightened the hose clamps onto the hoses, and to ensure the hoses did not move around, we installed factory heater hose tabs to secure the hoses to the apron.
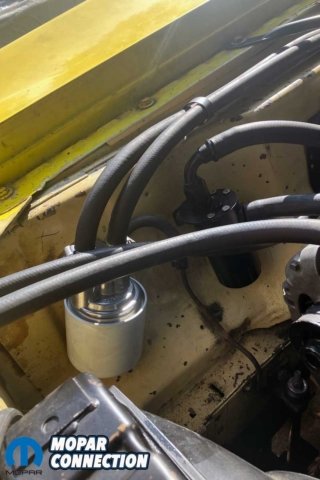

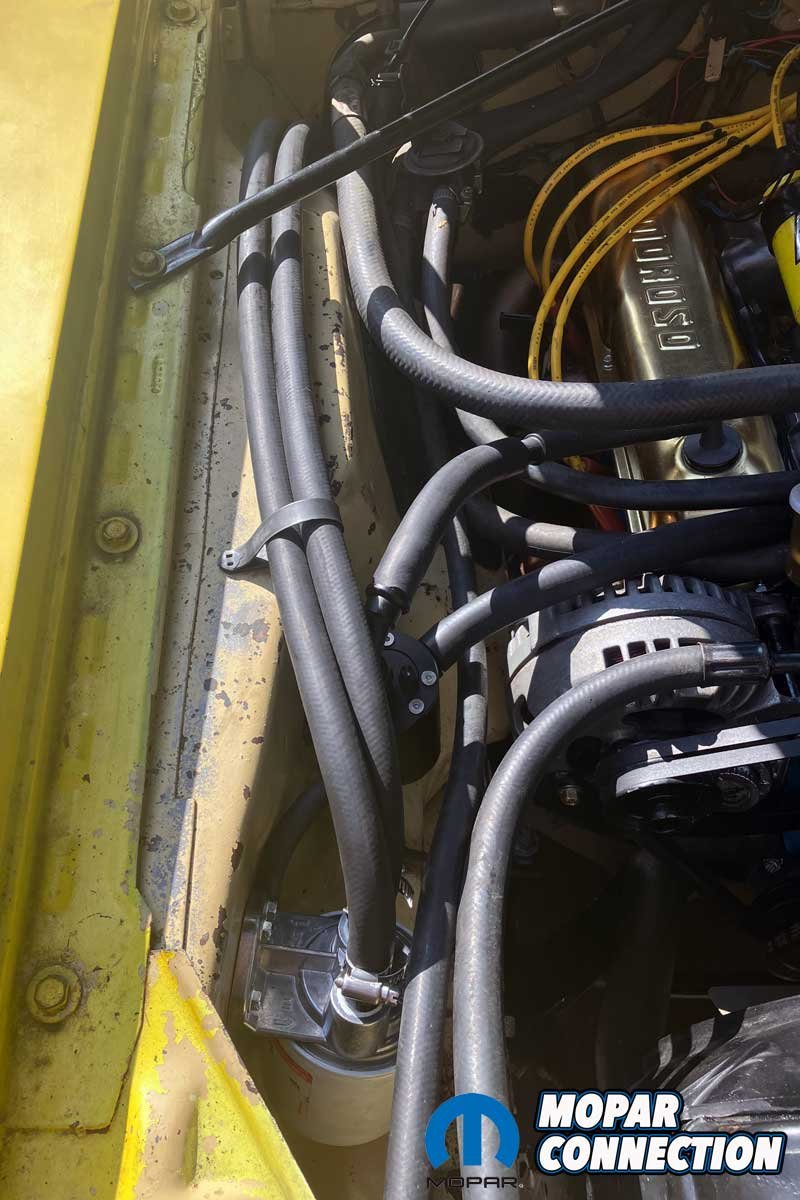
Above: The filter mount location allows us to slip a funnel under the oil filter to catch oil during the filter removal. Also, the filter mount is out of the way, so we can continue to service the other components of the engine bay without difficulty.
After a final overview of the installation, we spun on a new filter and filled the crankcase with six quarts of oil. We started the engine and checked for leaks, and we found none. Upon completion of the installation, we are pleased with the Derale Performance Oil Filter Relocation Kit. Thanks to Mancini Racing and Derale Performance, our oil filter changes have become much less complex.


