


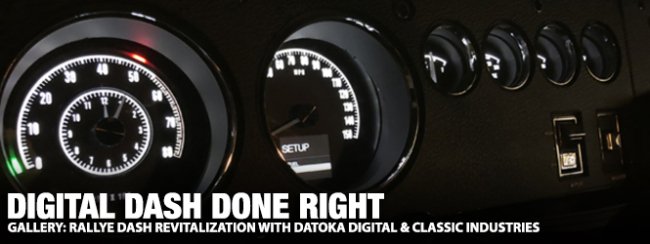
The argument could be made that Chrysler’s most drastic stylistic heel turn from one model year to the next came in 1968. Budget-friendly bruisers like the Road Runner and Super Bee were coming online as the 1967 Charger’s sloping hunchback was hurdled in favor of the now-famous Coke-bottle shape. While sheet metal changes outside were certainly something to behold, interior updates were almost as big and bold. Few things changed more than the Charger’s instrument panel and it was a major step in the right direction.
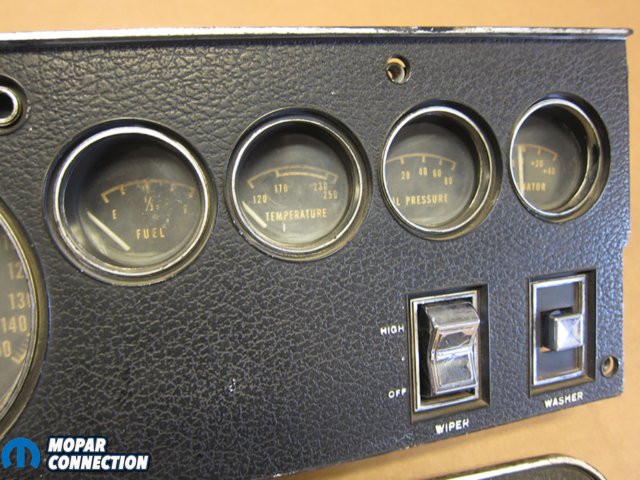
Taking its cues from high-performance European sports car instrument panels of the time, Chrysler’s 1968-1970 B-body Rallye dash still stands as an all manner of informative, elegant, and practical. A look inside something like a 1967 Jaguar XK-E might tell the tale of its origin; two massive gauges, a tachometer and a speedometer, sit front and center while four smaller gauges for water temperature, oil pressure, fuel level, and charge condition sit to the driver’s right. Radio placement and Mopar’s more spacious passenger area led to a bit more squished gauge cluster but, the resemblance is uncanny.
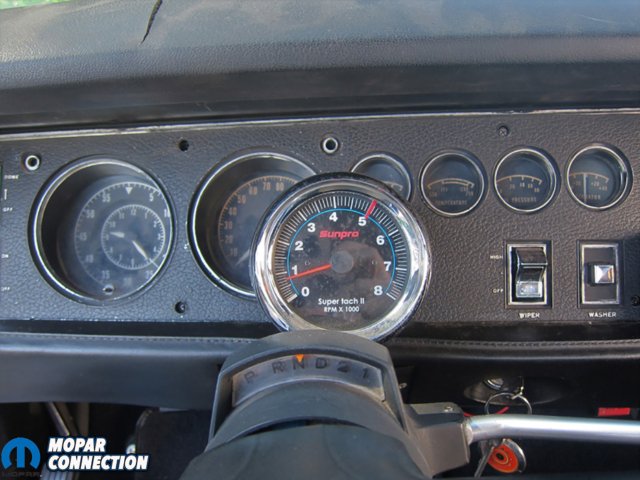
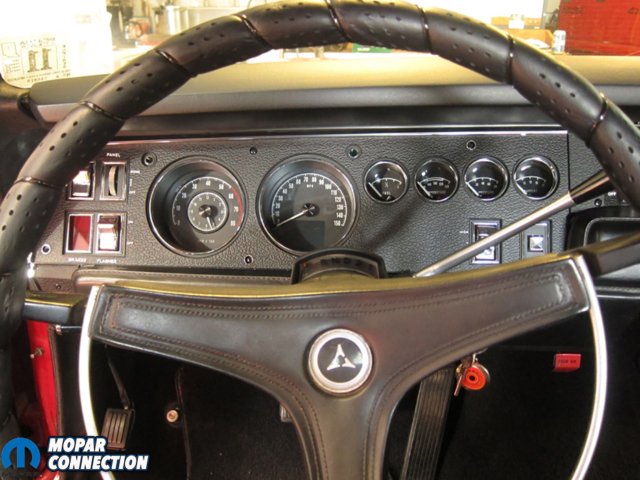
Above: Check out all of those dead gauges.
More importantly, the amount of useful diagnostic information displayed by the Rallye configuration was drastically improved over the previous model year’s layout. While the ‘67 Charger’s cluster did have some means of defining water temperature, oil pressure, fuel level, and charging, it was missing a pretty important piece of the puzzle: numbers.
Basic high/low markers or warning lights were good enough for the masses, but that wasn’t necessarily the primary audience for new-for-’68 cars like the Super Bee and restyled Charger. Gearheads, racers, and generally-informed automotive types would be buying these purpose-built brutes and they knew a number on a Rallye gauge would beat the hell out of a forlorn needle wandering between too much and not enough.
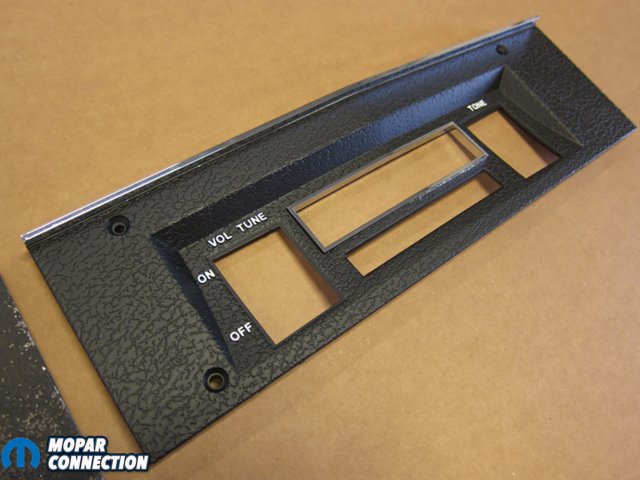
Standard equipment on Super Bees and Chargers and optional on Coronet R/Ts, the Rallye dash was represented by code A62 on the fender tag. The only variability between dashes was in the leftmost hole; a blank-off plate was standard, J21 on the build sheet stepped it up to a clock, and the famous Tic Toc Tach got code N85 on the fender tag. Used Rallye clusters command big bucks and restoring them isn’t cheap. A set of replacement gauges will set a guy back more than $900 while doing nothing to upgrade dated analog instrumentation technology.
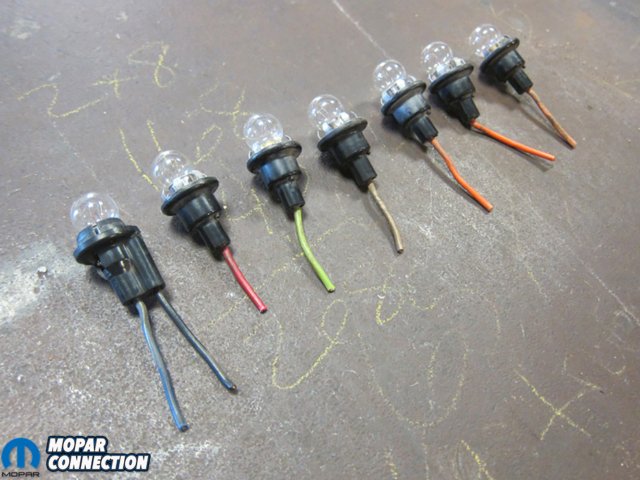

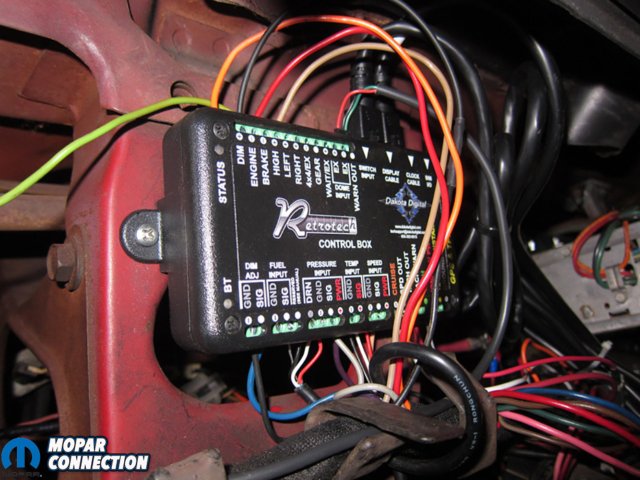
Above Left: Several incandescent bulbs and sockets were no longer necessary with the RTX’s integrated lighting. Above Center: Five screws got the old cluster out of the way for good. Above Right: Wiring the remote control box was a cinch once it was mounted to the steering column support.
Only recently did our 1969 Dodge Super Bee’s last Rallye gauge give up the ghost when the fuel level needle decided to sit well below the quarter-tank marker after a fill at the local station. That left us with a single piece of working instrumentation: an aftermarket, column-mounted tachometer. Rather than rip apart and restore a rickety Rallye cluster, we opted for a top-to-bottom revitalization with the help of Dakota Digital, Redline Gauge Works, and Classic Industries.
Redline Gauge Works, instrumentation specialists and dealer for all things Dakota Digital, recommended the new RTX Rallye dash for 1968-1970 B-bodies. Worth mentioning is the fact that we were able to take full advantage of the free shipping Redline offers just by mentioning we saw it in Mopar Connection Magazine. With stock-appearing gauges packed full of the latest in electronic gauging controls, the RTX series is the epitome of retro styling coupled with modern performance.
It takes the stylistic step that Chrysler made from 1967 to 1968 and jumps it all the way to 2020 while still paying tasteful homage to that beautiful original design. A factory bezel can even be used so that the flow and layout of one of Chrysler’s greatest clusters isn’t disrupted.

Above Left: There sensors were fairly easy to conceal, supporting the factory look. Above Right: The supplied sensors installed just like factory.
Speaking of which, it wouldn’t have made sense to have a dilapidated dash pad and cracked bezels covering those pretty RTX faces, so Classic Industries was the next stop. Their bezel kit (P/N MB854) features exact reproductions of the original bezels, right down to the textured grain finish. A point and click of the mouse sure sounded better than fixing cracks and hand-painting letters on original parts. We can’t imagine how much time the new bezels saved us.
Similarly, the new dash pad (P/N MB529100) was a dead-ringer for the outgoing unit, albeit without the hideous cracks and crevices. Again, we were saved any kind of hassle related to sending an old dash pad out for recovering. With a workbench full of new parts, it was time to start tearing down.
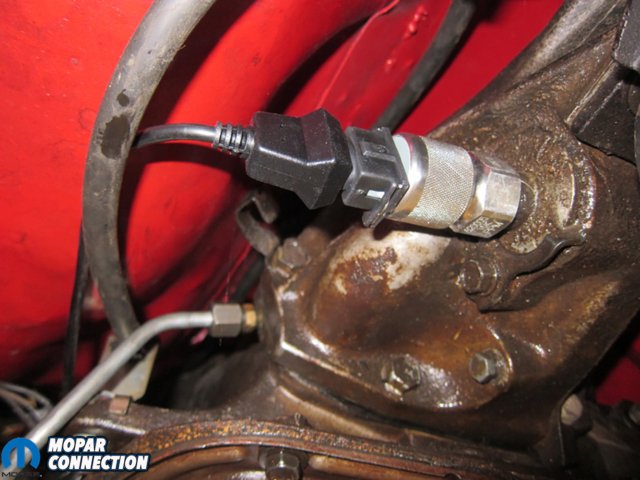
Above Left: The transmission sensor went right into our 727 with ease. Above Center:Cables were run through the bulkhead for a factory appearance. Above Right: The dash was fully stripped and ready for reassembly.
First, the half-century old parts had to go. Five screws peeking through the bezel held the gauge pod to the dash. With them removed, we carefully tilted the cluster around the lower dash pad and steering column to slide it out. Sunny-side-down on the workbench, the backside of the original cluster revealed a host of faulty gauge origins that the RTX would never experience.
For one, two pins on the printed circuit board had broken off and been replaced by bolts. A new instrument voltage regulator (IVR) had been installed to no avail as the combination of crusty circuit board and grimy gauges needed more help than that. Unsurprisingly, the ammeter had fried long ago and was already bypassed.
While everything on the original gauge pack was certainly fixable, comparing it to the new RTX assembly instantly threw that idea right out the window. Let’s be clear: this ain’t no cheap set of universal aftermarket gauges shoved into some flimsy plastic fascia. What Dakota Digital has crafted here is a highly-engineered piece of automotive art that’s much closer to what you’d find inside a brand-new luxury car than it is what you’d find in an auto parts store.

Above Left: Classic Industries’ new pad was a match for the original. Above Right: Even the studs were the same spot for simple installation.

Above Left: Side by side, the RTX was the winner in both function and form compared to the original cluster. Above Right: On the back side you can see quite a difference between the 2 clusters.
The RTX’s solid chunk of machined billet aluminum was set to replace the original pot metal dash frame while still incorporating provisions for the factory switches. Instead of an exposed circuit board with floppy connections, all of the RTX’s inner workings are safely tucked away and connected to the control box via plug-in cables. The biggest plus for us was the removal of all of those incandescent bulbs. Since the RTX lighting is integrated into the cluster, there’s no need for a bunch of stray wires with bulb sockets crowding the harness.
Before we got too much farther, it looked like a good time for dash pad replacement. Comparing the new Classic Industries piece to the original, everything from the color to the grain was a perfect match as far as we could tell. The old pad was hard as a rock, but the new one was plenty pliable for years of crack-free cruising.


Above Left: Switches were transferred to the RTX frame for reuse. Above Right: With switches transferred, we were ready to put the cluster back in the Super Bee.
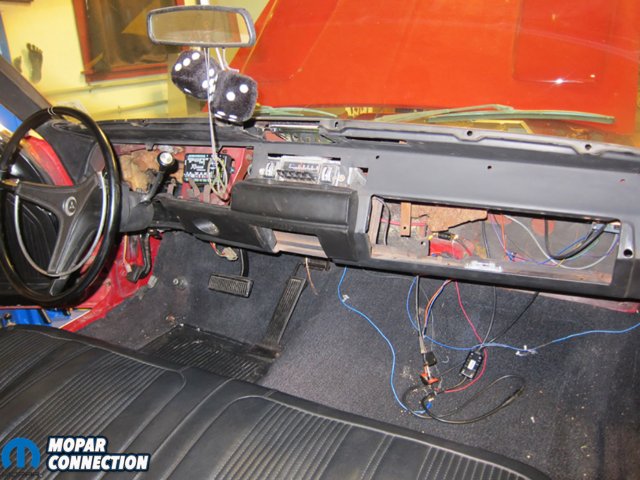
Six studs protruded from the pad, secured to the dash frame with stamped nuts. The tricky part was getting to them. Since we were already in dash tear-down mode, the rest of the bezels, heater controls, ash tray, and glove box all came out for maximum access. A small ratchet, some extensions, and a whole bunch of feel coaxed all six nuts off the old and onto the new.
Mounting the RTX remote control box marked the beginning of cluster reassembly. Between the low profile of the box and the slender aluminum gauge frame, there was plenty of room to mount it on the steering column support with a couple self-tapping screws. Wiring, daunting to some, was a special kind of easy with this control box. Aside from the basic constant power/ignition power/ground, absolutely no custom or fancy wiring was required.

Above Left: The RTX gauges closely resemble factory units. Above Right: All bezels fit as intended and added a much-needed bit of shine.
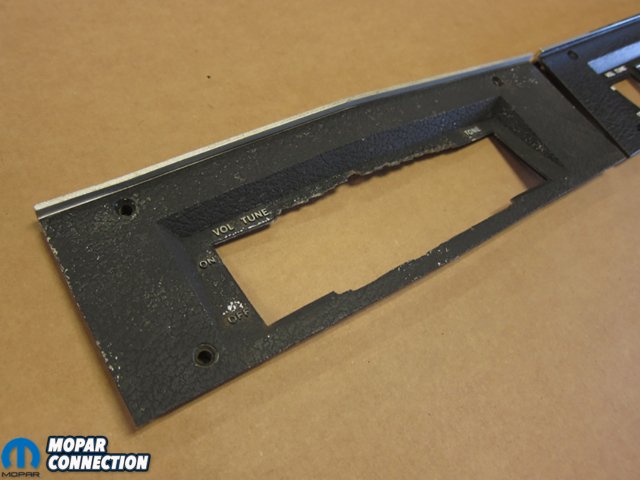
Above Left: The old heater control plate was past repair. Above Right: The new Classic Industries panel was a perfect replacement.
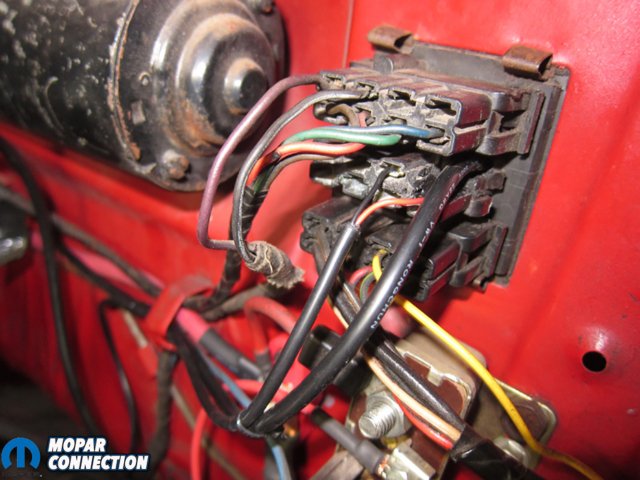
The factory dash harness was retained. All we had to do was reroute existing wiring to the correct terminals on the control box. For signals like high beam, turn signals, and parking brake, this meant chopping off the bulb sockets and running those wires to the box. The result was a massively cleaner look behind the cluster.
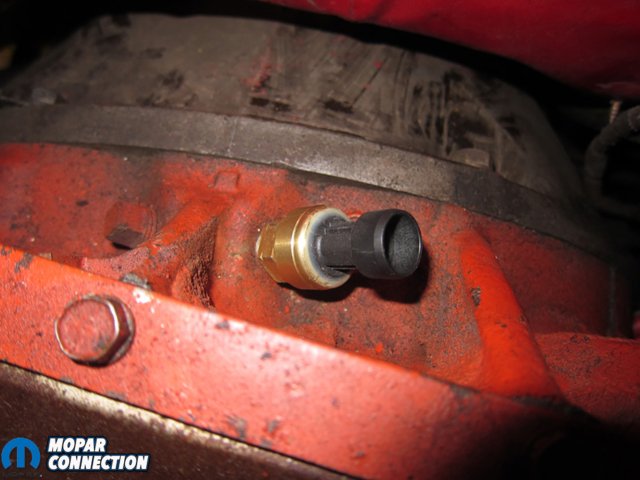
Also part of the wiring process was the installation of three included sensors for oil pressure, water temperature, and the speedometer. Each included a pre-terminated cable so individual wires didn’t have to be run and all of them screwed into the original threaded connections. Even the speed sensor threaded right onto the stock speedometer gear housing on the transmission. One big benefit of the RTX’s electrically-driven speedometer is that its auto-calibration makes rear gear or tire changes a breeze. Swapping expensive plastic speedo gears is no longer necessary as the RTX control box can automatically adjust to whatever gear/tire combination the user might choose.
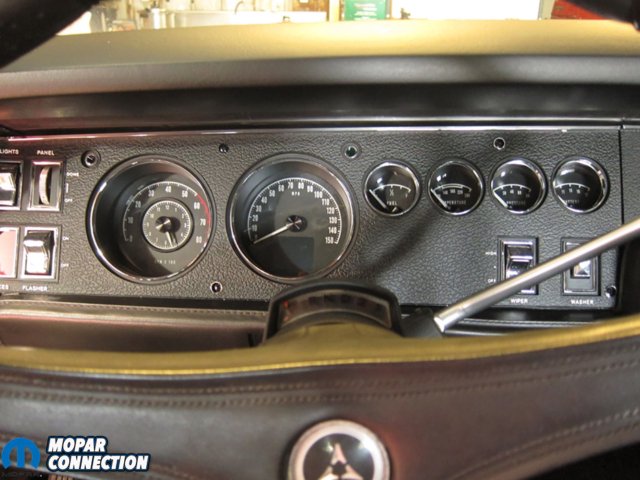


Above Left: Fully installed, the new RTX cluster, dash pad, and bezels were stunning. Above Center: We were amazed how much better the interior looked as a whole with the new cluster and dash pad. Above Right: We could not wait to start driving and showing off our new dash.
We didn’t want the oil pressure and temperature sensor wiring to stand out in the engine bay, so those went through the factory bulkhead. A couple of Packard terminals took care of the two temperature wires. Since the original ammeter wires were long gone after an alternator upgrade, a hole was drilled through one of those unused terminal slots and the oil pressure cable was threaded through it.
Preparing the cluster for installation started with the new gauge bezel. The RTX was able to use a factory style bezel for ultimate stealth. It would have been possible to reuse our original one, but fifty-one years of wear and tear were pretty evident in the form of a faded finish and the occasional crack. Just like the dash pad, Classic Industries’s dash bezels were a perfect replacement for a fresh OEM look.
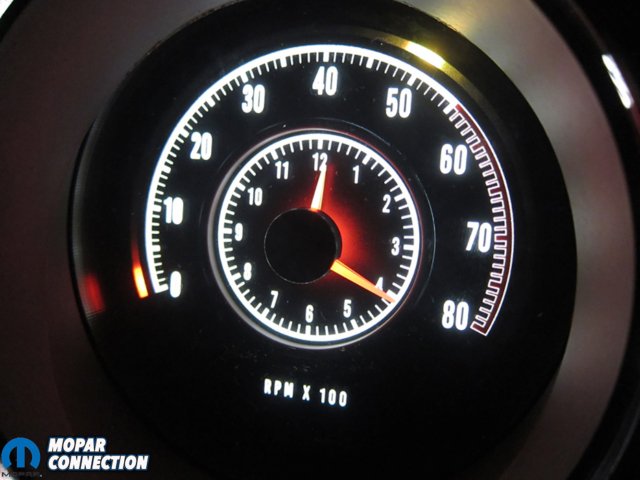

Above Left: The bright led back lights made the gauges easy to read at night. Above Right: The accuracy and well lite gauges were a relief from the old cluster.
The only things we didn’t replace were the switches as they were both looking and functioning fine. Simply transferring them over to the RTX frame using the supplied hardware was all that was necessary. The original mounting screws were painted semi-gloss black and used to affix both the cluster and the rest of the bezels to the dash frame.
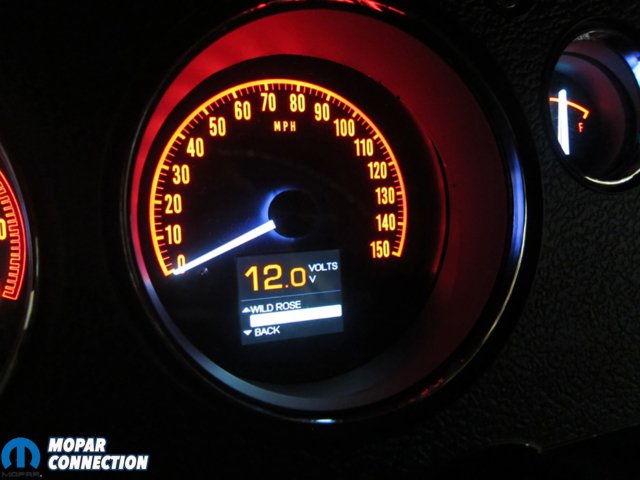
After plugging in the required communication cables, we were ready to set up the RTX. A detailed, 36-page instruction manual was included, but the 2-page quick start manual was more than enough to get us on the road. Fuel sender type, tachometer input, speedometer, and odometer settings were the minimum requirements. Of course, customization beyond that was nearly infinite.


Above Left: We played around with all the color options. Above Center: The bright white back light really made the gauges pop. Above Right: We settled on more of a soft white glow that resembled the original incandescent bulbs.
Lighting configuration was probably the neatest feature. Aside from the basic day/night dimming settings, almost thirty color options for the needles and backlighting made it hard to settle on just one. Bright white really made the numbers pop with an incredible crispness, but the faux incandescent setting drew us in with a warm, vintage appeal. Red was a little too aggressive for our tastes, but did match the exterior of the car well and would have looked right at home in something a bit more pro-touring.
Buttoned up and bursting at the seams for a test drive, we were already smitten at the turn of the key. As the engine came to life, so too did every gauge with a full-range sweep of the needles. Each settled to a live reading almost instantly, just as a new car’s gauge cluster would. Driving down the road, the changes were noticeable immediately with a voltmeter in the ammeter’s original home, a cool needleless tachometer, and dead-steady gauging that was unquestionably accurate.

Above Left: We could not be happier with our restored dash. Above Right: We are ready for a life of trouble free and accurate gauges to relay all the information needed.
The combination of parts from Redline Gauge Works, Dakota Digital and Classic Industries was perfect fit for our 1969 Dodge Super Bee. Rolling up to the local cruise-in, hardly a passerby would notice anything different outside of the beautiful fresh bezels and a dazzling new dash pad. It’s incredible that the RTX Rallye dash can blend perfectly into so many applications. For us, it fit this mildly-modified Bee because it kept the feel of factory while making driving so much more enjoyable (and informative). It could just as easily fit inside an ultimate sleeper or, with the customized lighting, a SEMA-bound pro-touring build. We like a factory-correct car just as much as the next guy but, when modern reliability can look this good, we’ll take retro over resto every time.


Cool!
Now that is what you call a good article…which keeps me coming back to MCM.