


In June 1968, Richard and Winnifred French, walked into Colony Chrysler-Plymouth and ordered a new Hemi Road Runner. From the relatively short list of available options, they selected what would eventually become Project Rara Hemious Birdicus and added the optional dash clock for $16.05.


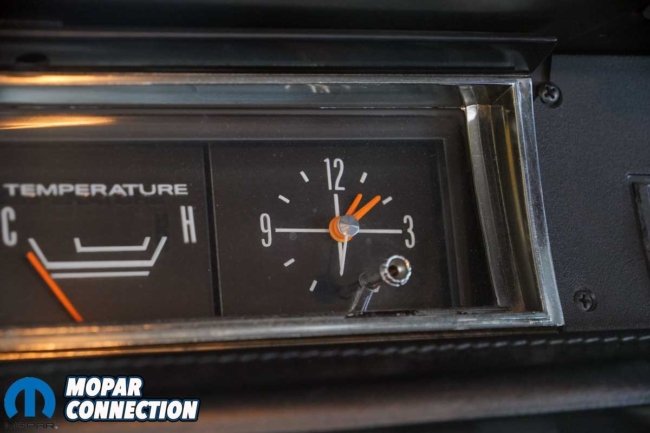
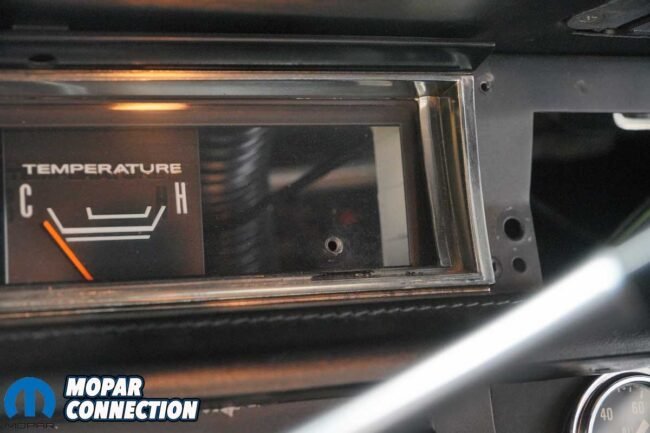
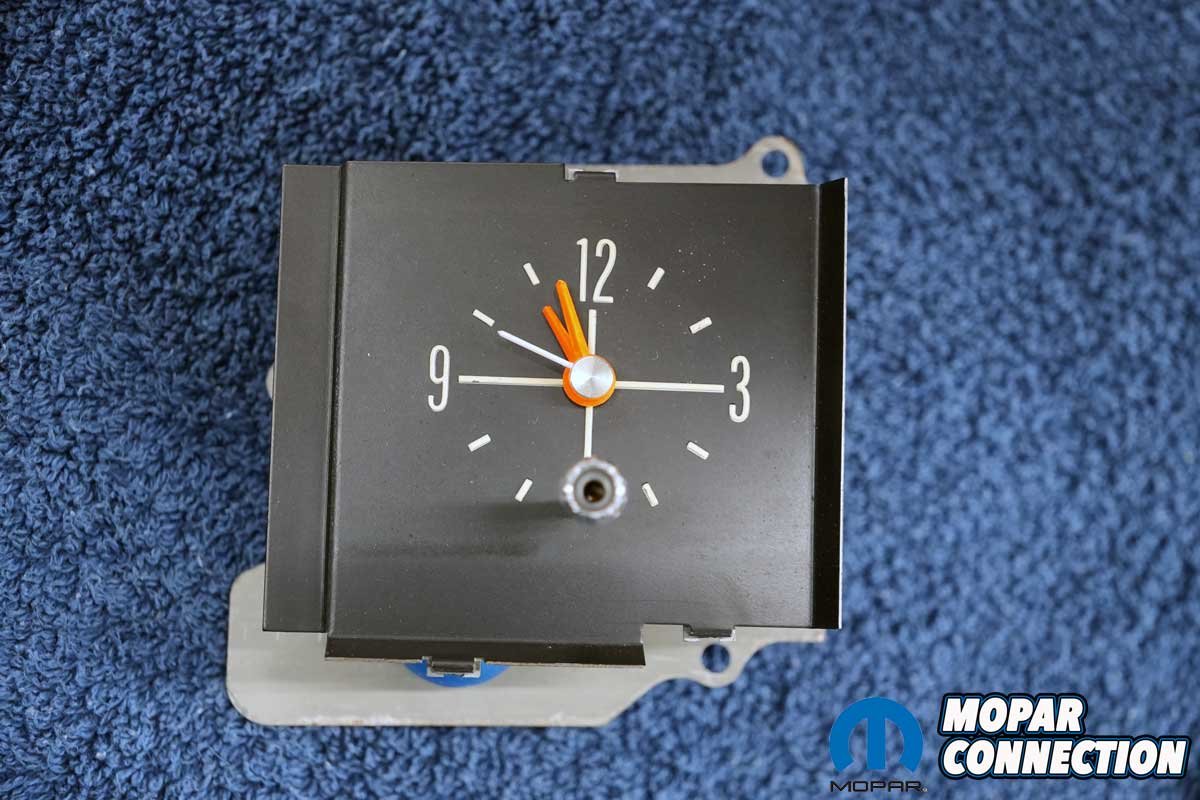
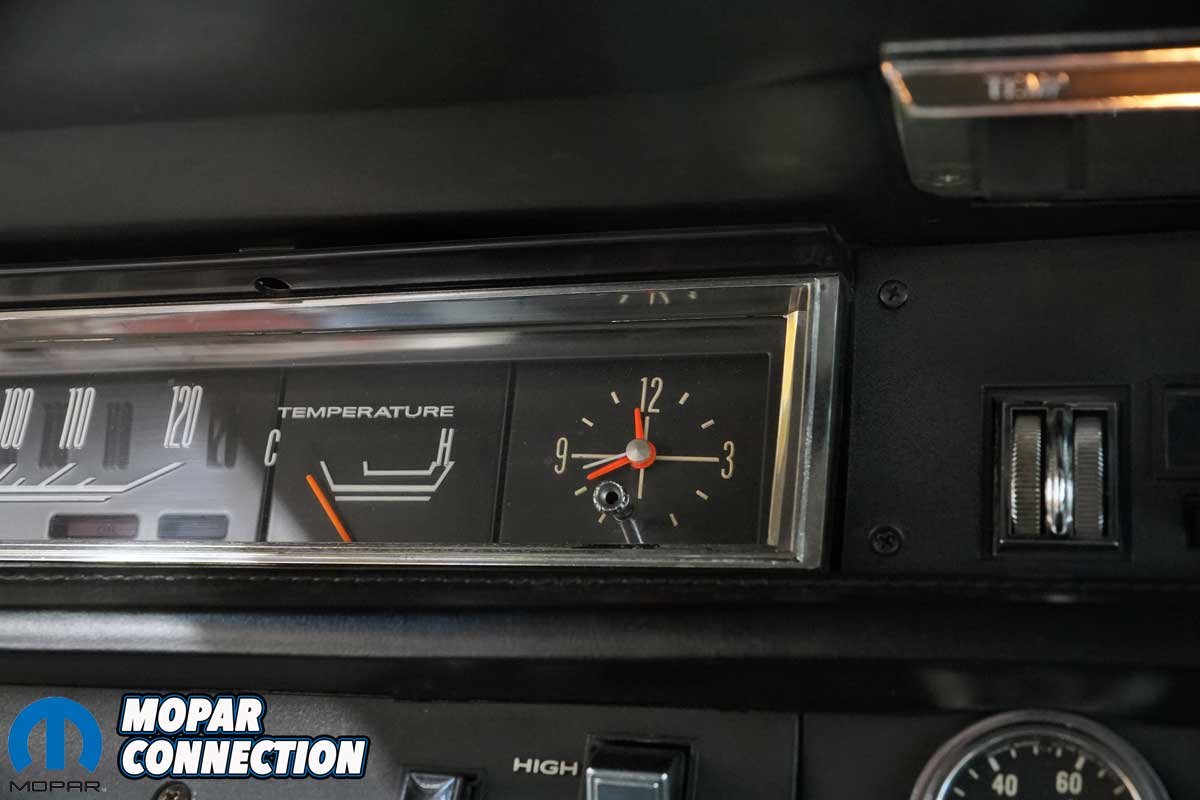
Above Left: After several failed attempts, we finally tracked down a remanufactured OEM clock for Project Rara Hemious Birdicus. Above Center: The original factory clock had stopped working years ago. While having a working clock is hardly essential, we have always felt that every part of the car should function as Chrysler intended. Above Right: When I photographed the Road Runner for MoparMax magazine in 2014, the clock was frozen at 1:09. Exactly when it quit is anyone’s guess, but it is safe to say it had not kept time for a very long time.
The alternatives were either a blank plate in the instrument cluster, which cost nothing, or a tachometer priced at $48.70. Since the Frenches were in their early forties and had ordered the car with a Torqueflite automatic transmission, a clock made far more sense than a tachometer.
At some point during the car’s long life, the clock stopped working. Over the past year, we searched extensively for a replacement, purchasing several NOS clocks that unfortunately turned out to be defective and had to be returned. Eventually, we located a professionally remanufactured unit suitable for the Road Runner.
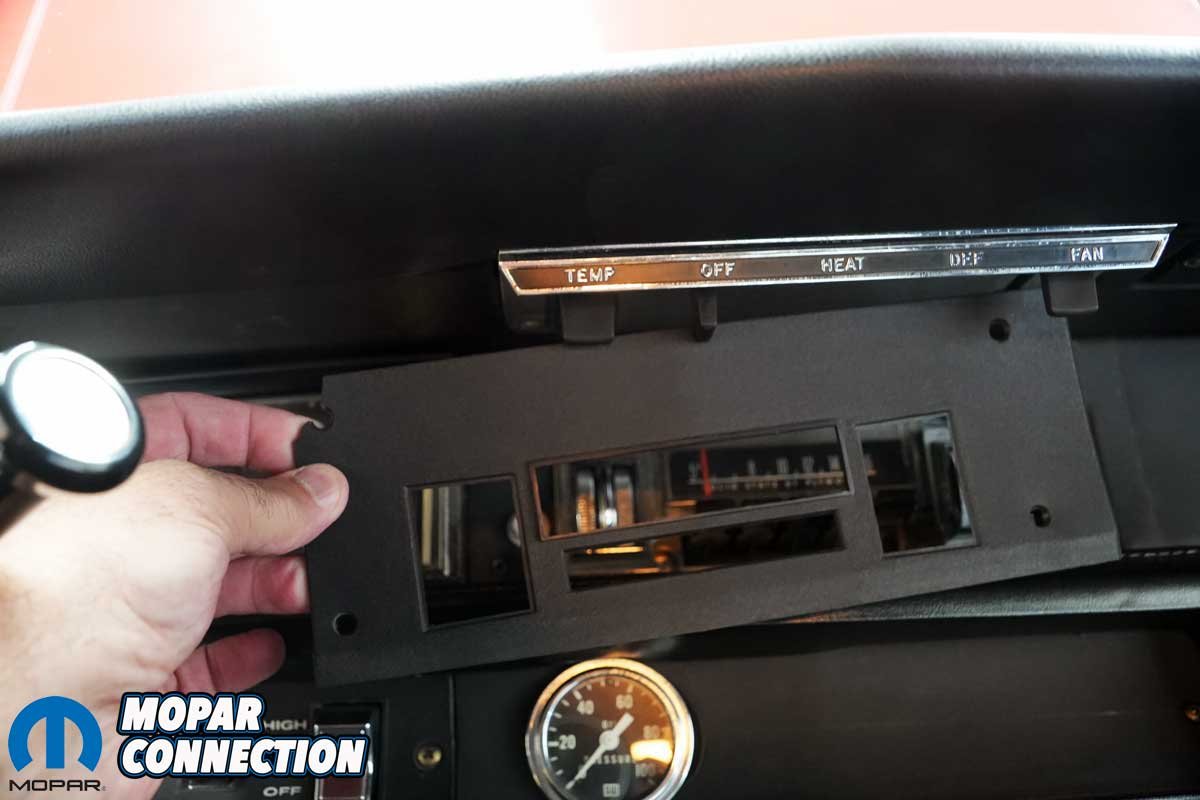
Above Left: The factory service manual recommends removing the driver’s-side defroster duct to access the clock. After evaluating the job, we felt that removing the radio would provide much better access to the rear of the instrument cluster. Above Right: Before removing the radio, we discovered that a corner of the radio bezel had been broken off. What began as a clock repair quickly turned into a search for a replacement bezel.
The clock itself is not a modern electric clock. Instead, it is an ingenious electromechanical design that is primarily mechanical but rewinds itself electrically. Chrysler used movements supplied by several manufacturers, most commonly Borg Instruments, and similar clocks appeared in GM, Ford, AMC, and additional Chrysler products throughout the era.
The operating principle is surprisingly simple. From an engineering standpoint, it is a beautiful example of 1960s technology: part clockmaker’s craftsmanship, part automotive electrical engineering, and completely analog.
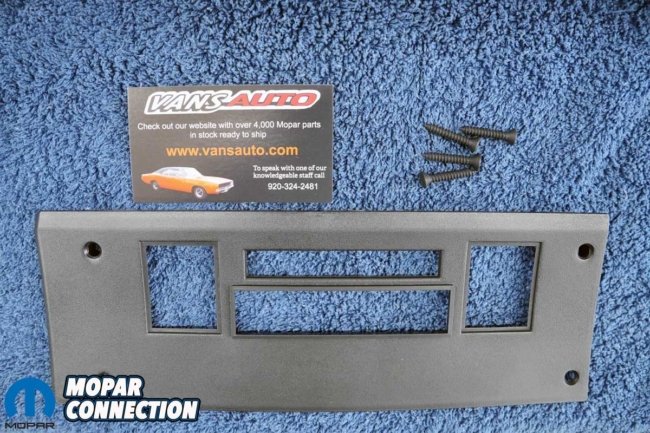
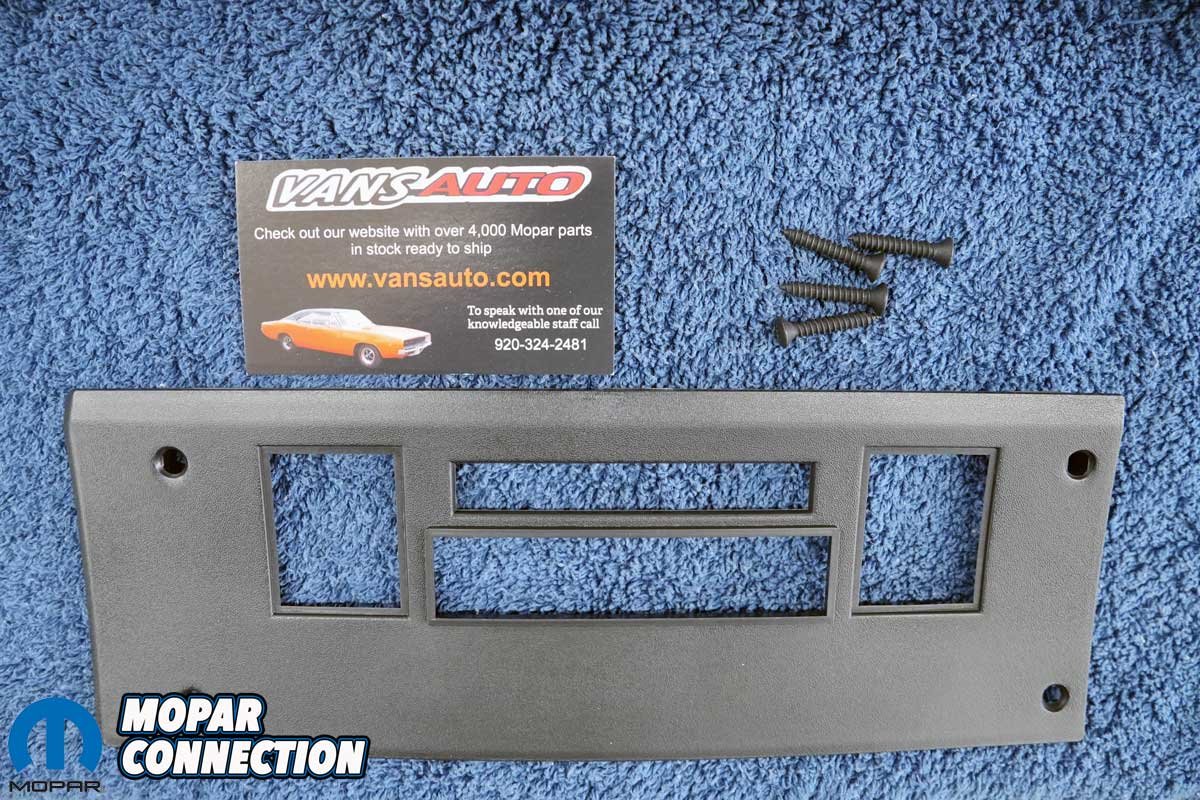
Above Left: Fortunately, we found the bezel we needed through Vans Auto, eliminating the need to attempt to repair the original piece. Above Center: The bezel had apparently been installed incorrectly sometime in the past, with the screws driven in at an odd angle. As we removed them, two of the four screws proved especially stubborn, causing the bezel to try to unthread along with the screws. Above Right: Comparing the two side by side, the broken original bezel and the Vans replacement were identical, making the new piece a perfect replacement for the factory original.
A balance wheel and hairspring regulate the movement, much like a wristwatch. The balance wheel oscillates back and forth several times per second, controlling the clock’s accuracy. A small mainspring powers the gear train and slowly unwinds as it turns the hands.
As the spring nears the end of its travel, a set of electrical contacts closes. The closed contacts energize a 12-volt solenoid, which instantly rewinds the spring. The contacts immediately open, cutting power to the solenoid until the cycle repeats a few minutes later.

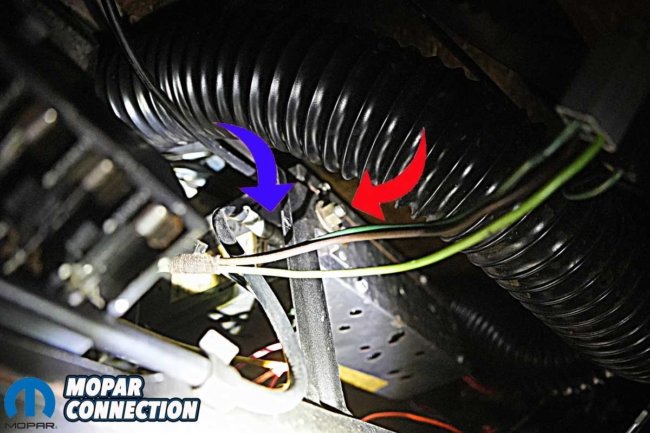
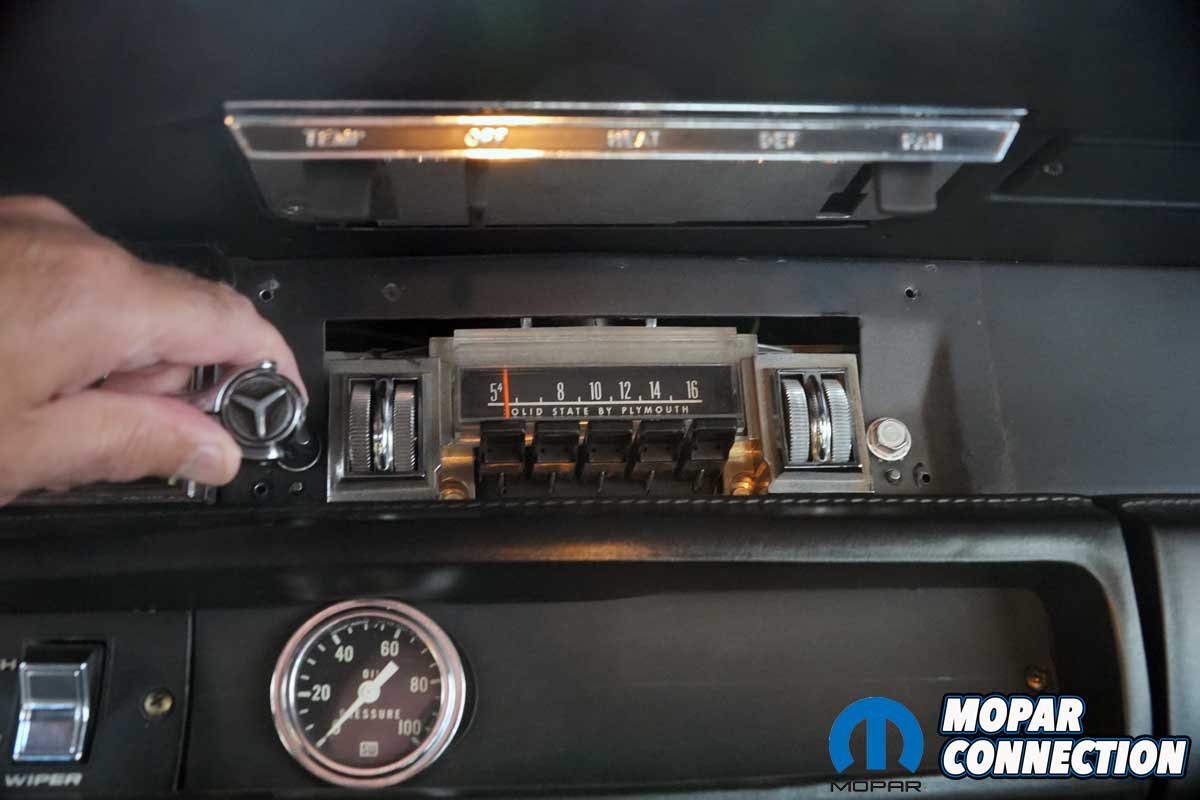
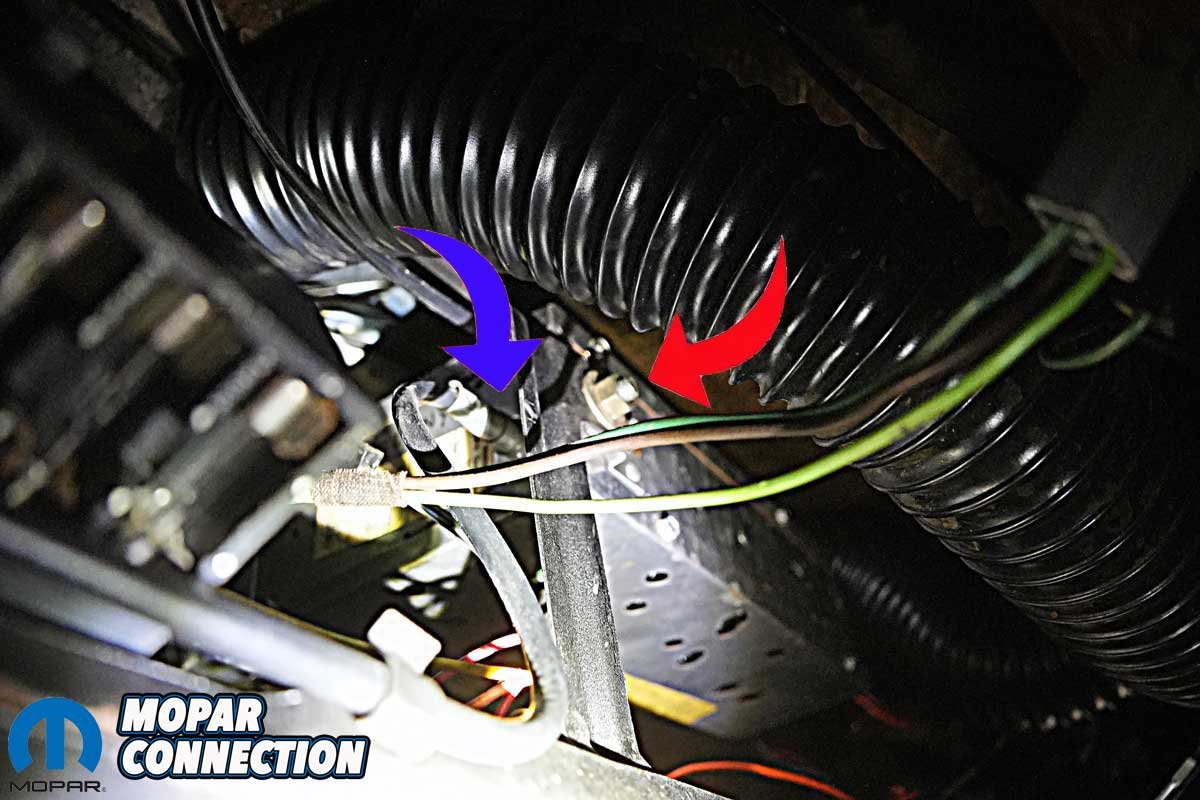
Above Left: The radio has two fasteners that secure it to the dashboard. Above Right: There is a third fastener under the dash (red arrow). Additionally, we removed the antenna wire (blue arrow) to allow the radio to slip out of the dash.
Every time the contacts are closed, the clock emits a distinctive click or clank as the spring is rewound. Between rewinds, it operates entirely as a mechanical timepiece. When new, a 1968 Road Runner clock produced a continuous, gentle tick-tick-tick from the balance wheel, punctuated every few minutes by the slightly louder click of the rewind mechanism.
So why did so many original clocks fail?
The weak points were the electrical contacts and the rewind coil. A common failure occurred when a car was not used for an extended period. If battery voltage dropped while the contacts were closed, there might not be enough current to pull in the solenoid. The contacts would remain closed, allowing current to flow continuously through the coil until it overheated and burned out. After more than fifty years, dried lubricants, worn pivots, and oxidized contact points have also become common causes of failure.
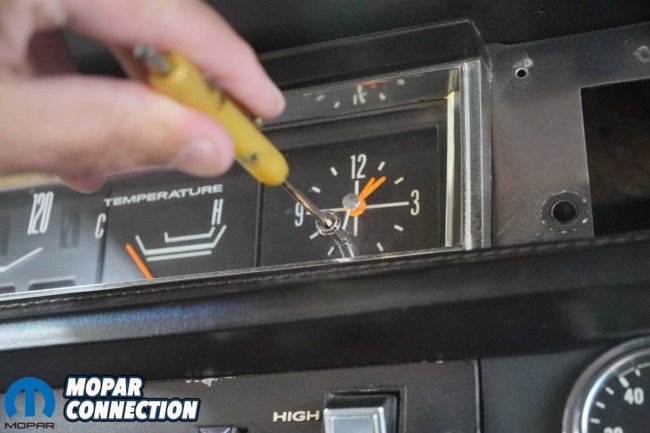
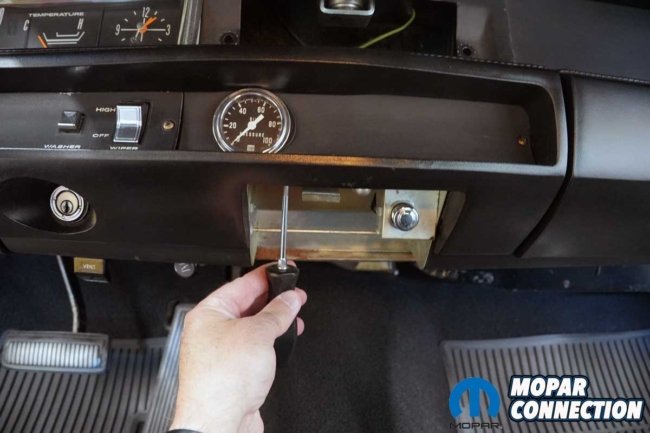
Above Left: Inside the adjustment knob is a tiny retaining screw that threads onto a small stud. We removed it using a pocket screwdriver that we had ground down to fit the slot. We took extra care to avoid damaging the delicate threads. Above Right: To create a little more working room under the dash, we removed the ashtray assembly before proceeding further.
When our remanufactured clock arrived, we bench-tested it by applying 12 volts and ground. It immediately sprang to life. A subtle ticking sound could be heard, and every few minutes the solenoid produced a reassuring clank as it rewound the spring. After setting the correct time, we left the clock powered continuously for five days. It kept perfect time throughout the test.
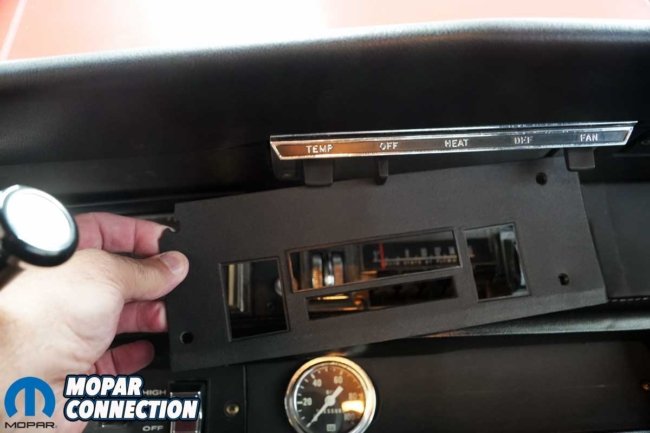
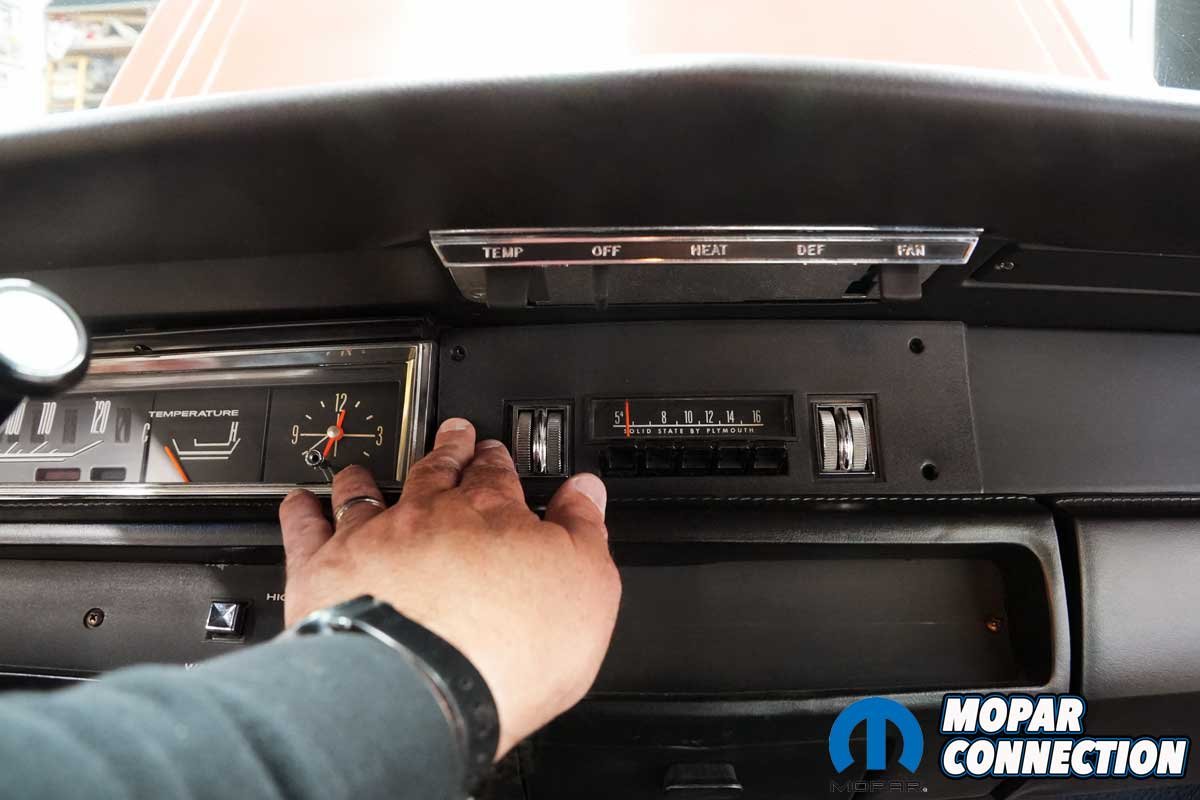
To remove the inoperative clock, we needed access to the rear of the instrument cluster. The service manual suggested removing a defroster hose and working from underneath the dashboard. Instead, we removed the AM radio followed by the ashtray. We slipped the radio downward and to the right, which provided much better access to the instrument cluster.
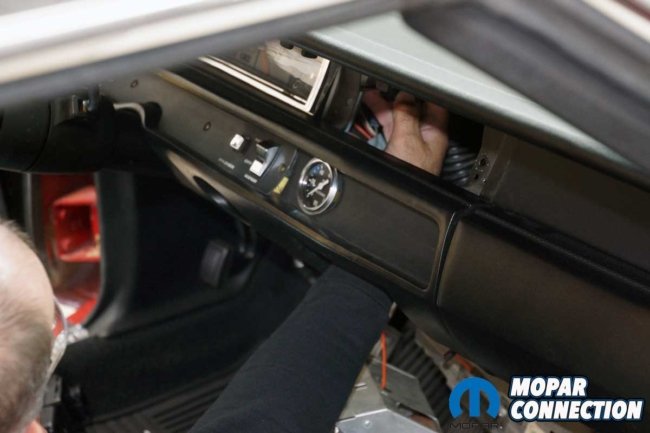

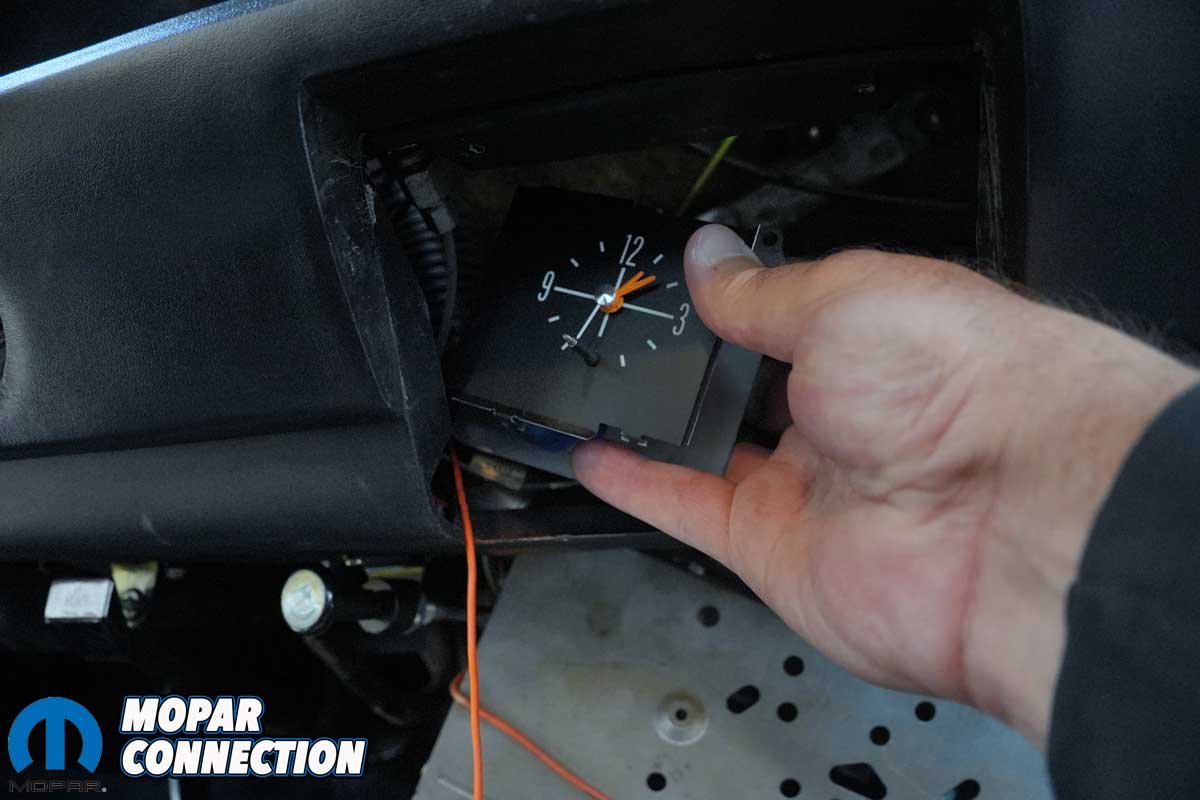
Above Left: Working through the radio and ashtray openings, we were able to disconnect the 12-volt power wire, remove the backlighting bulb, and extract the three Phillips-head screws that secured the clock to the instrument cluster. Above Center: With the wiring disconnected and the fasteners removed, the clock gently slipped free and was carefully withdrawn through the ashtray opening. Above Right: Chrysler engineers made servicing the clock surprisingly straightforward. Rather than requiring removal of the entire instrument cluster, the clock can be removed from behind the dash, saving considerable time and effort.
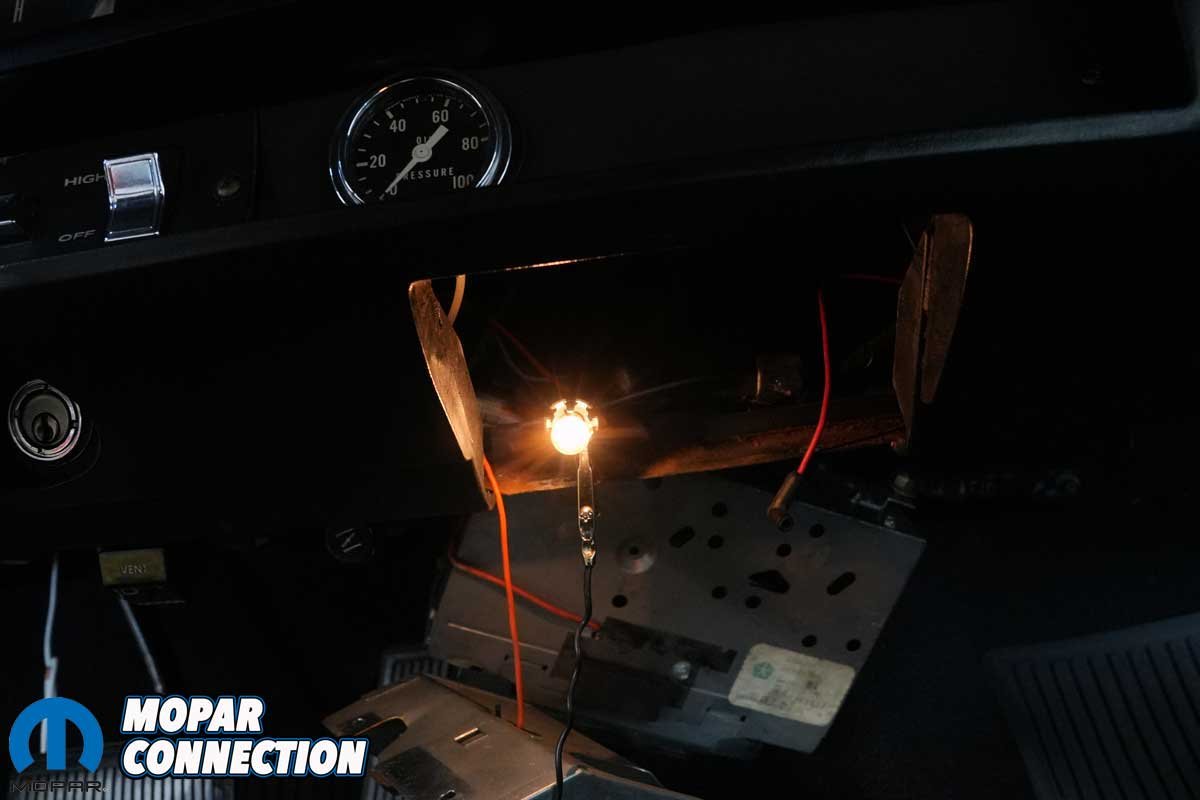
We disconnected the 12-volt feed wire, which we had verified months earlier supplied battery voltage. The backlight was then removed. During inspection, we discovered that the bulb was burned out. Since 12 volts was present at the socket, we installed a new No. 57 bulb. It immediately illuminated when the headlight switch was moved to either the parking light or headlight position.
Removing the clock required extracting three Phillips-head screws. Using a stubby screwdriver, we carefully removed each one. Once all three screws were out, the clock was maneuvered through the radio opening.
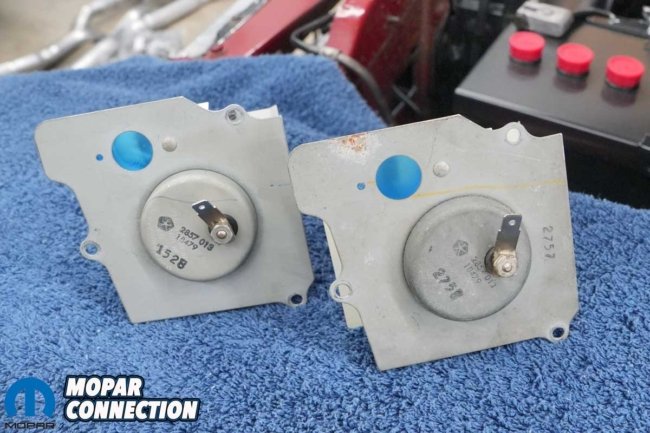
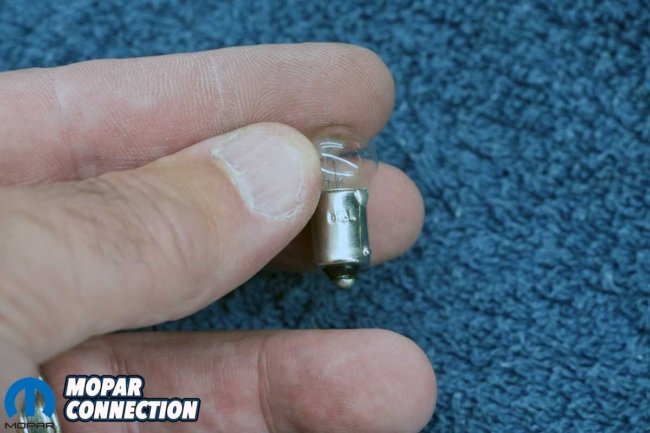
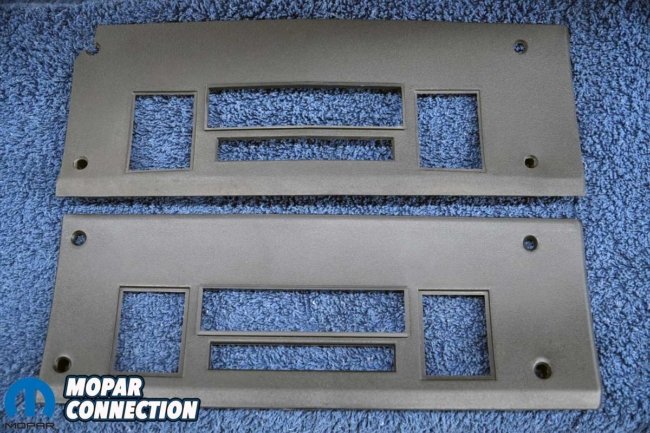
Above Left: A comparison of the original clock (left) and the remanufactured unit (right) revealed that both carry the same factory part number. Some of the smaller stamped numbers differ, likely indicating production dates or manufacturing batches. Above Right: Before installation, we replaced the clock’s backlighting bulb. The correct replacement is a No. 57 bulb, which restores illumination to the clock face when the instrument panel lights are switched on.
The replacement clock slipped back through the same opening. We aligned it with the rear of the instrument cluster and started each screw by hand. After tightening all three fasteners, we reinstalled the backlight and connected the 12-volt power lead. The moment power was restored, the clock snapped back to life.
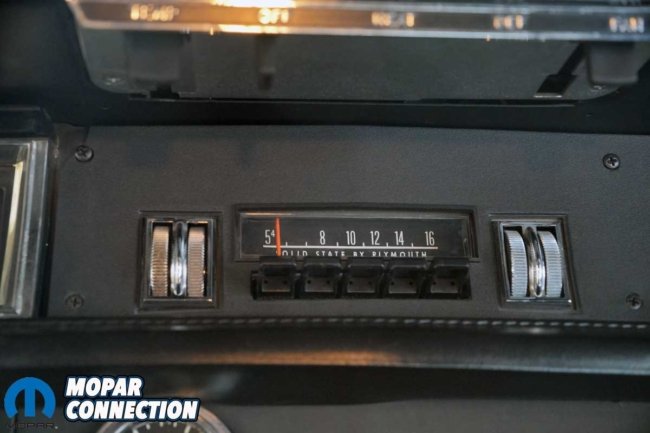
Finishing the installation required reinstalling the AM radio. Interestingly, the radio appears to have been serviced early in the Frenches’ ownership. A piece of tape attached to the radio read “Checked Good,” and the word “Colony” (dealership name) had been written on the side in black marker, likely by someone in the dealership’s service department nearly six decades ago.

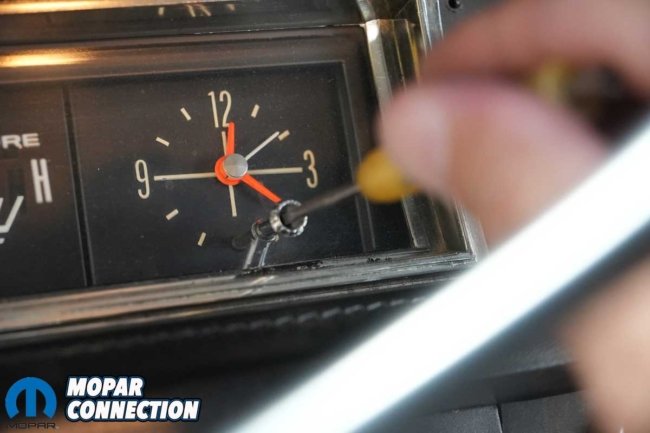
Above Left: The new backlight bulb was installed and the socket properly grounded. When we turned on the headlight switch, the illumination functioned as intended. Above Right: With the clock reinstalled into the instrument cluster and secured by its three mounting fasteners, we reattached the backlight socket and connected the 12-volt power lead. Finally, the adjuster knob was refitted by carefully tightening the small retaining screw onto its stud.

The final steps were installing a new radio bezel to replace the damaged unit, reinstalling the ashtray, and vacuuming the debris that had accumulated on the carpet during the under-dash work.
It is estimated that only 20 to 30 percent of all 1968 Road Runners were equipped with the optional clock, while approximately 50 to 60 percent received the standard blank plate in the instrument cluster. Ironically, many restored Road Runners today wear tachometers, despite relatively few having been factory-equipped with them.
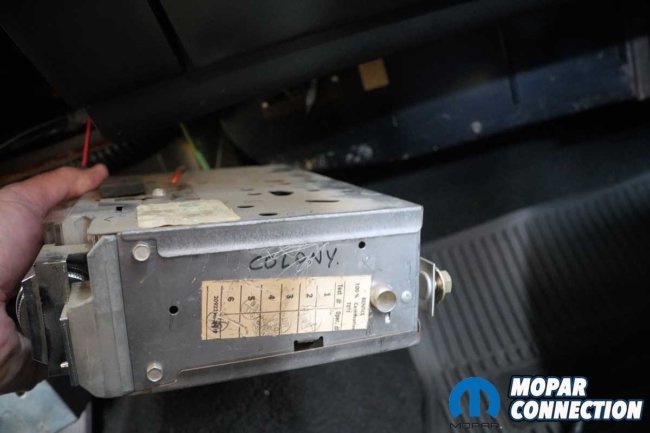

Above Left: At some point early in the Road Runner’s life, the radio was either replaced or sent out for service. The “Colony” marking refers to the original dealership – Dom Marino’s Colony Chrysler-Plymouth. Above Right: The radio tested good and was reinstalled in the dash. It still operates today and, paired with its single speaker, serves as a reminder of just how far automotive audio systems have evolved over the years.
Because Project Rara Hemious Birdicus is one of only 61 Hemi hardtops built with a Torqueflite automatic transmission, and because only a fraction of those cars likely received the optional clock, simple math suggests the car may now be one of roughly nineteen examples with that original configuration.

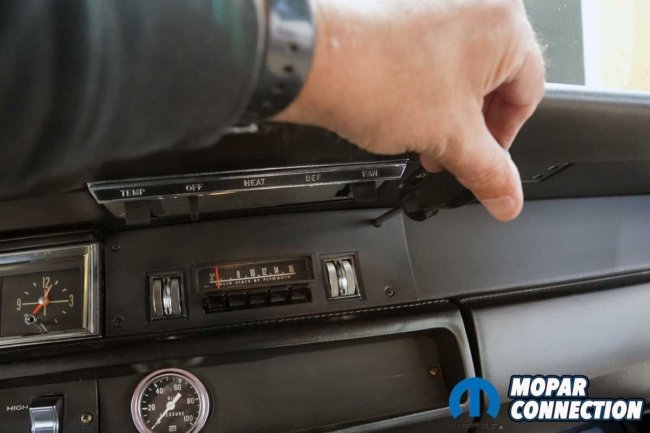
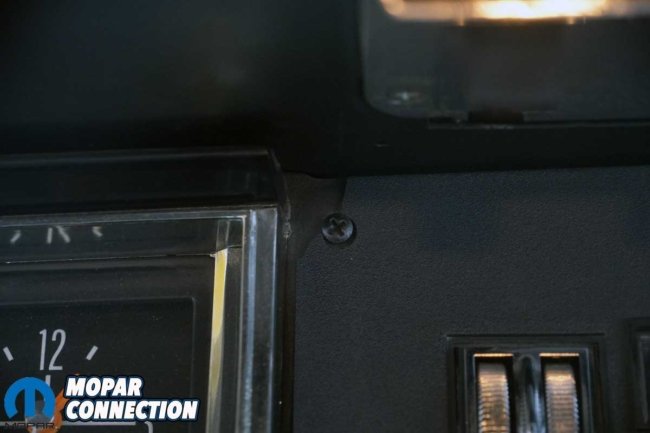
Above Left: After reinstalling the ashtray, radio, and antenna, we installed the bezel. It required the lower edge to be tucked under the rubber padding first. Incorrect installation may explain why the original bezel was damaged and why the screws had been driven in at an awkward angle. Above Right: Once properly positioned, the bezel seated into place and the screws threaded in cleanly. Each fastener aligned and centered within its mounting hole as intended.

Above: The remanufactured clock and new bezel have returned the Road Runner to an era long past. The clock is remarkably accurate and, after two weeks of operation, has not required a single adjustment.
But statistics are not what make this clock special.
For decades, the Road Runner carried a silent clock face. Today, every tick and every rewind click means the dashboard once again sounds exactly as Richard and Winnifred French heard it in 1968.
The irony, of course, is that our favorite drives are often the ones where time disappears completely. Yet now, every few minutes, a small mechanical clank reminds us that time is still passing, one rewind at a time.


