


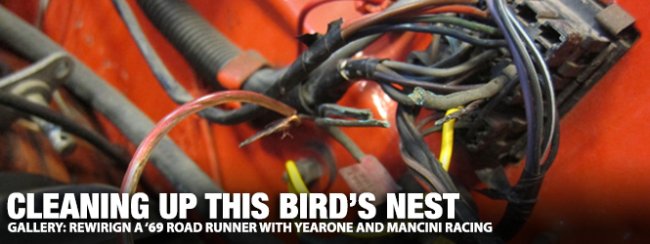
Wiring can be tedious, time-consuming, and a terrifying part of a restoration. Some of you may have been stranded by the dreaded melted bulkhead connection and cooked voltage regulator or probably heard of someone that has. There is nothing worse than being stranded while cruising in your classic Mopar. While these problems aren’t monumentally difficult to fix, they can leave you stranded along the roadside just the same. With a little help from our friends at YearOne and Mancini Racing, rewiring your Mopar could not be easier.
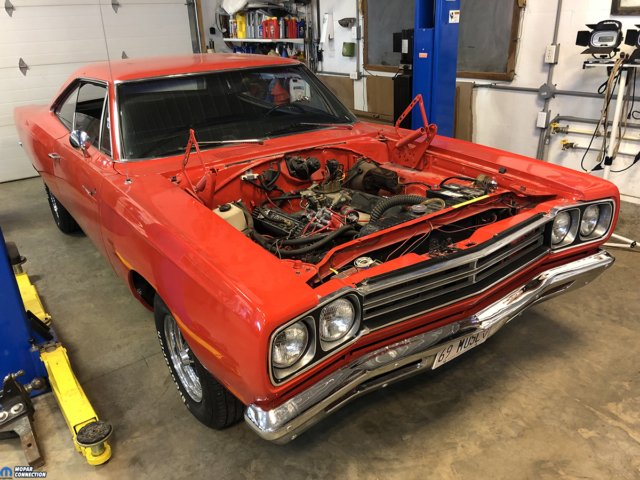
Above: The Road Runner arrived in impeccable shape…except it wasn’t running.
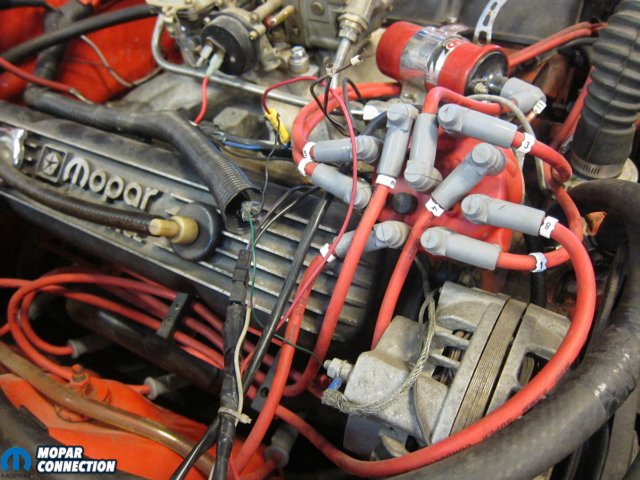
When we got our hands on a 1969 Plymouth Road Runner that had been collecting dust in a local garage, we immediately noticed more than a few haphazard electrical “modifications” under the hood of the 383-powered B-body. Bare wires were laying loose on top of the valve cover, the alternator was wired incorrectly, and a gentle tug of the positive battery cable pulled it right out of the clamp-together lug. Unfortunately, that was just the beginning. Rather than try to fix what had already been butchered, we decided to tear it down and started from the beginning.
Everything starts (literally) with a solid wiring harness. If you can’t get proper power or ground to components, they are going to give you issues. It doesn’t matter what performance modifications you’ve made because the wiring is going to be the weak link. There are four major harnesses on Mopars of this era: an engine harness that runs the ignition and charging, a dash harness, and one harness each for the front and rear light systems. The bulk of those connection points happen within a three-plug bulkhead on the firewall. These plugs are not weather-tight and are subjected to corrosion that can make a harness unusable in a hurry.
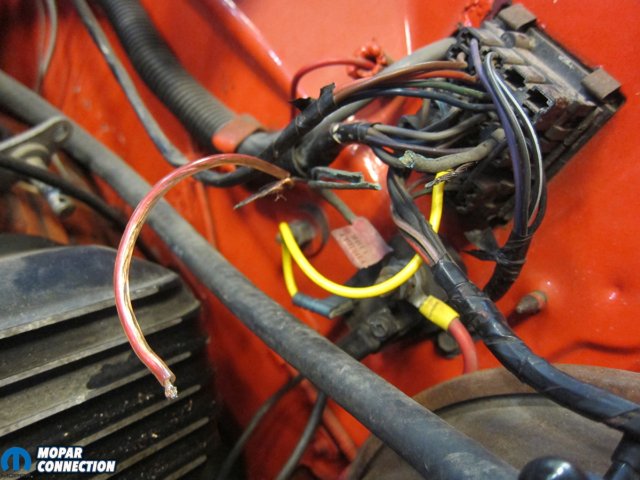
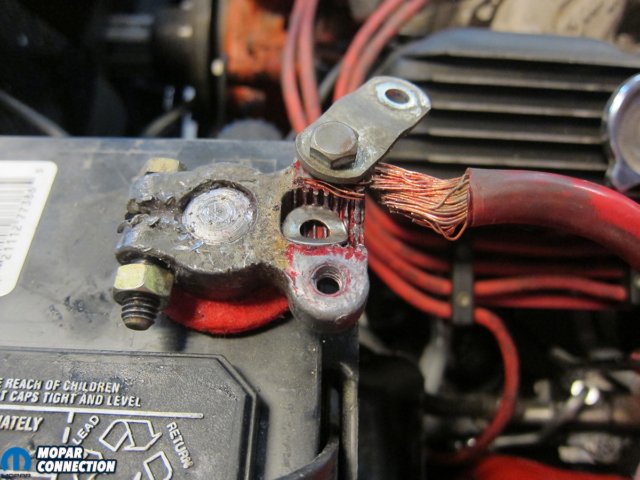

Top Left: Wires are barely holding together. Top Right: Cut wires from who knows what. Bottom Left: You can see someone added a washer to help secure the positive cable. Bottom Right: Even in the trunk there were issues.
As always, we removed the battery before diving in. Most of the Road Runner’s issues were within the center bulkhead plug that connects to the engine harness. Thankfully, YearOne offers new stock and modified style engine harnesses to compliment your alternator and ignition combination. Knowing we were upgrading to electronic ignition and a newer-style alternator, we opted for the modified harness (P/N HU197BM). This ended up being incredibly handy because it made all of our upgrades plug-and-play. It also gave us peace of mind that our wiring harness would be fresh and trouble-free for years to come.
We had to ditch the high-performance MSD ignition due to the owner wanting to go back to the basics with a factory-style system. We were so impressed with the installation on our project Charger a few months ago, we went back to the well for another officially-licensed Mopar electronic ignition kit (P/N 440-427) for the big block. This time we didn’t have to make a single wire splice. The new YearOne harness already had the electronic control unit (ECU) connector built in. We mounted the ECU on the passenger-side inner fender and plugged it in.


Above Left: Looking at the back side of the bulk head everything looks good. Above Right: Terminals “J” and “P” were cleaned with extra care.
While the new ballast resistor was able to be mounted in the same location as the previous unit, it’s worth reviewing the confusion that can come with single and dual-sided ballast resistors. It is fairly simple; a 4-pin ECU needs a single resistor, while a 5-pin ECU must use a dual. The YearOne harness came with dual resistor connectors to accommodate either ECU, but the electronic ignition kit came with a single resistor since it’s a 4-pin box.
We hooked up a blue wire terminal to one side of the resistor and the blue/brown wire combination to the other. The other halves of the connectors, blue on one side and green with a red tracer on the other, were not plugged in to anything. If we had a 5-pin ECU, those wires would have been hooked to the dual ballast resistor in order to feed the fifth pin on the ECU.
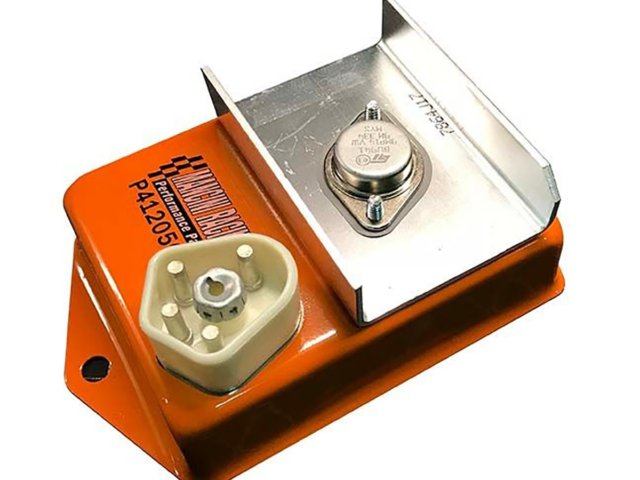
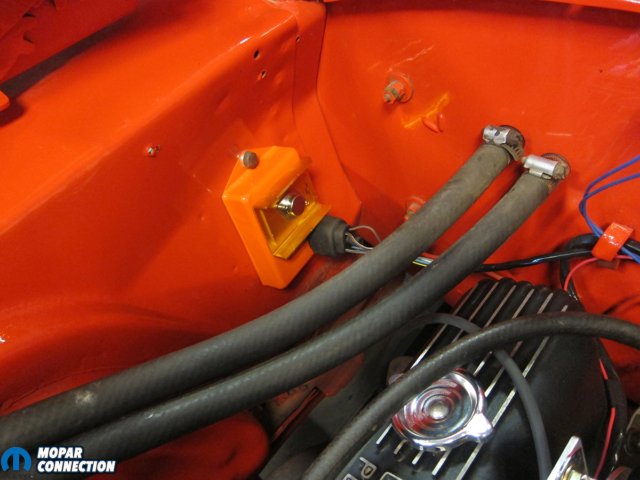
Above Left: We like to keep a spare ECU and ballast resistor in the glove box for emergencies. Above Right: We mounted the ECU on the passenger-side inner fender.
The final piece of the ignition system revamp was a Mancini Racing coil relocation bracket (P/N MRE1064). A Holley carburetor’s front fuel bowl generally makes it difficult to mount a coil in the factory location and some aftermarket aluminum intakes don’t even have provisions for mounting. The Roadrunner’s coil bracket had been bent to fit and was barely hanging on by a single bolt, amounting to quite the eyesore.
The relocation bracket moves the coil mount to the two rear passenger-side intake manifold bolts to provide ample clearance for most aftermarket carburetors, fuel lines, and valve covers. It also moves the coil up off of the engine and away from potentially detrimental heat. Plus, it really cleaned up the look of the engine bay by tucking the coil up under the air cleaner. That’s a bunch of benefit for only a little bit of cost.
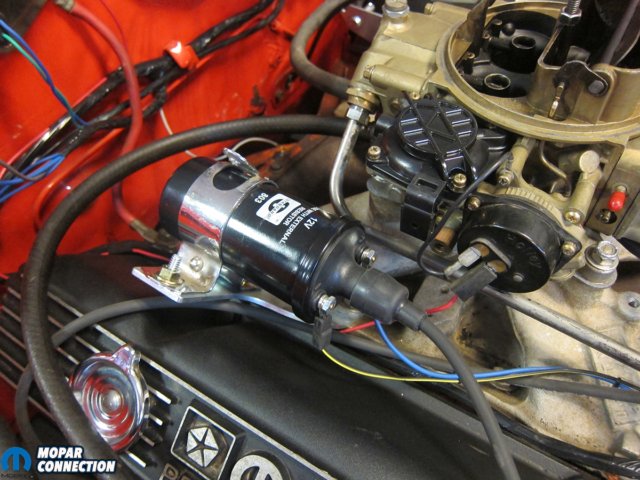
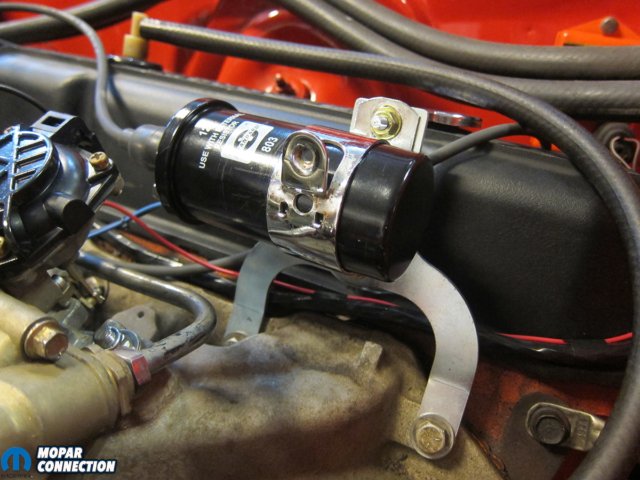
Above Left: Mancini Racing coil relocation bracket (P/N MRE1064). Above Right: Another look at how the bracket mounts.
For all intents and purposes, Chrysler alternators can largely be separated into two groups: round-back and square-back. Through 1969, a single field, round-back alternator was used exclusively and paired with an electromechanical voltage regulator. The 1970 model year brought on the “dual” field alternator that worked in conjunction with an electronic voltage regulator. This duo would go on to charge hundreds of thousands of Chrysler products well through the 1980’s. More or less, these “dual” field alternators are known as the square-back type.
The advantage in upgrading to a square-back is twofold; you get an updated charging design that’s better at putting out amperage at a lower RPM and, more importantly, an electronically controlled regulator rather than electromechanical. Furthermore, square-backs and their corresponding regulators are readily available and relatively cheap at most local auto parts stores.


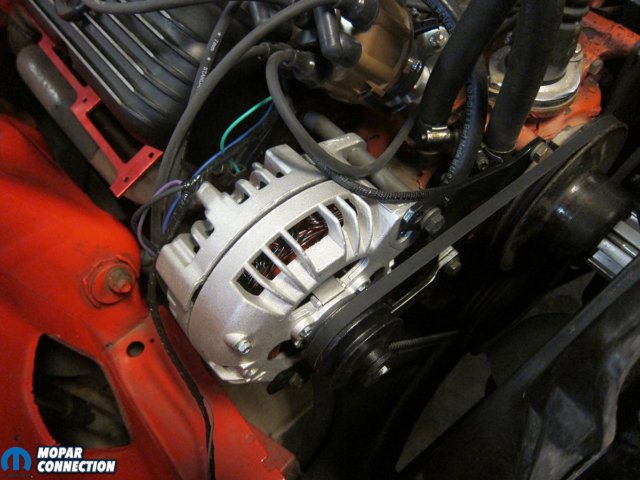
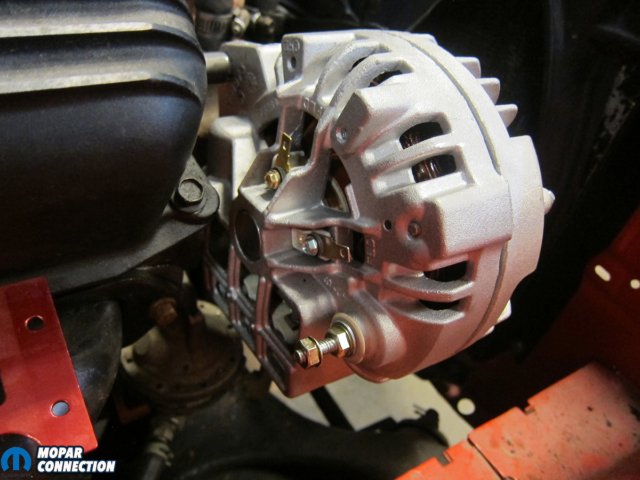
Top Left: The round-back alternator was crusty and improperly mounted. Top Right: Circular shapes on the back differentiate it from the square back. Bottom Left: The new square-back that was mounted with the correct brackets from YearOne fits perfectly. Bottom Right: Another look at the square-back alternator from YearOne.
Since the Road Runner’s original round-back was looking plenty tired, we went ahead and made the switch to square. Again, the YearOne harness was a life-saver as the correct triangular plug for the electronic regulator was already built in, eliminating the need for any splices. The bird’s original alternator brackets had gone missing over the years and were somehow replaced by those off of a ’67-’68 big block with air conditioning. Another look through the YearOne catalog netted a proper bracket kit (P/N RQ89) to replicate the factory 1969-up non-A/C mounting position.
The new wiring harness did require the new voltage regulator to be mounted fairly close to the ballast resistor. The firewall on this car already had a few extra holes in that area, so we picked two and mounted it between the resistor and the wiper motor. A good ground is a crucial part of voltage regulation since the regulator grounds through its metal casing. We cleaned some paint off of the firewall and tied in the existing engine ground cable to the lower mounting bolt to make absolutely sure that it would be grounded at all times. Once everything was buttoned up, a quick check with the voltmeter showed 13.8 volts at the battery at idle which indicated everything was working as intended.
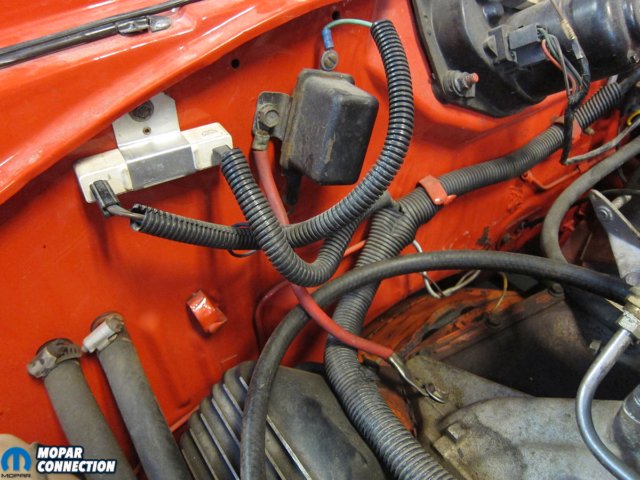
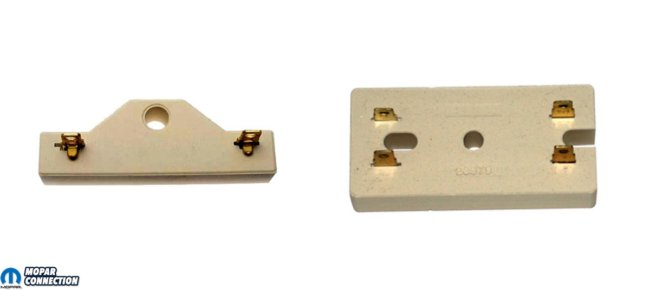

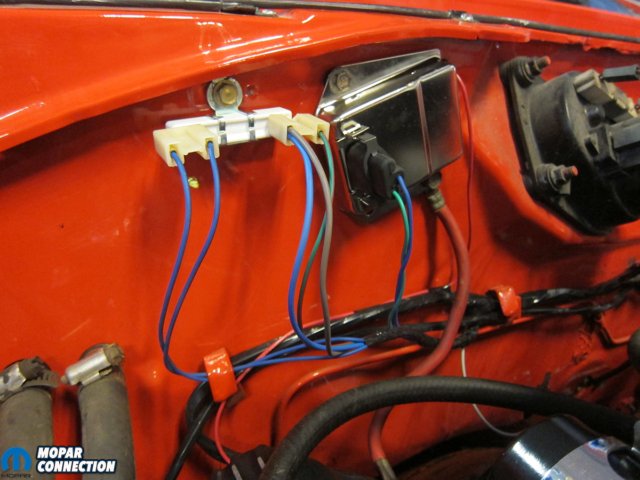
Top Left: Evidence of previous repairs was obvious by twisted wires and several miles of electric tape. Top Right: Both single-row (left) and double-row (right) resistors are available from Mancini Racing. Bottom Left: The ballast resistor, old regulator, and corrugated wire loom were replaced by a new harness, resistor, electronic regulator, and ECU. Also note the coil’s new location. Bottom Right: A closer look at the new resistor from YearOne.
While most of us have had to bow down to a set of under-dash gauges, I think we can all agree that they can be a little unsightly. After all, if there is a factory gauge in the instrument panel, then why not get it working? Even though the area behind the dash can seem like a little bit of a black box, the fix for a gauge is often pretty simple. Sometimes, it’s as easy as replacing a sensor or sending unit. The Road Runner’s out-of-place trio consisted of a mechanical oil pressure gauge, a voltmeter, and a mechanical temperature gauge. All of these are handy to have around for engine vitals, but a non-Rallye dash already has provisions for temperature (gauge), oil pressure (warning light), and alternator function (ammeter).
Since the new engine harness was already installed, we knew it wouldn’t be causing dash problems and started to look elsewhere. The temperature gauge sensor is usually threaded into the water pump housing. A quick glance behind the alternator bracket is all it took to notice that our sensor had been broken off and the wire going to it was unhooked. We replaced the sensor with one from the local auto parts store and just like that, we had a working factory temperature gauge.


Above Left: It gave us a headache just looking at the mess under the dash. Above Right: When we were finished the clutter was non-existing.
Surprisingly enough, the non-functioning factory oil pressure warning light was pretty much the exact same situation. The sending unit had been removed to make way for the under-dash mechanical gauge’s feed tube. We simply screwed the tube fitting out, replaced it with a sending unit, and had a working factory warning light. Since standard, non-Rallye dashes have an oil pressure warning light, their sending unit is different from that of a Rallye panel with an actual gauge. For quick visual verification, the warning light sending unit is a stubby unit while the gauge sending unit is a canister that is about two-inches tall.
Extermination of the voltmeter was the final under-dash undertaking. Sure, one could argue that the ammeter needs to be bypassed and replaced by a voltmeter, but this car isn’t going to see any kind of high amperage from the replacement-level alternator. With that in mind, we stuck with the ammeter after carefully checking the condition of its wiring. One well-known weak link in the ammeter circuit is the bulkhead. There are usually two connection points to triple-check for corrosion or signs of overheating. In the case of a ’69 Mopar, the “J” and “P” terminals tend to be the genesis of most issues. The Road Runner’s bulkhead showed no signs of melting and the terminals were perfectly clean, so we left it alone.
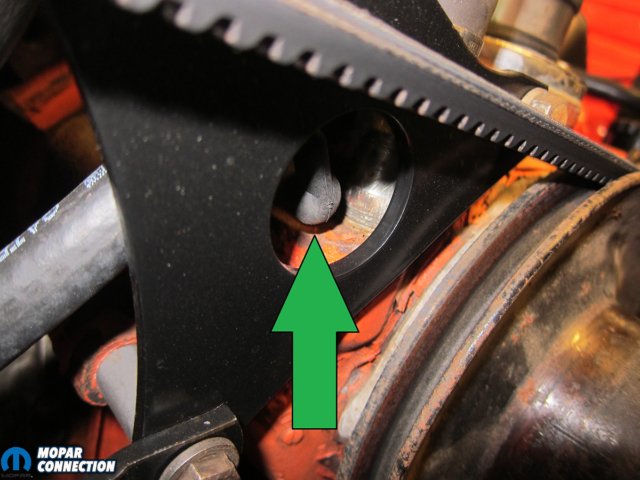
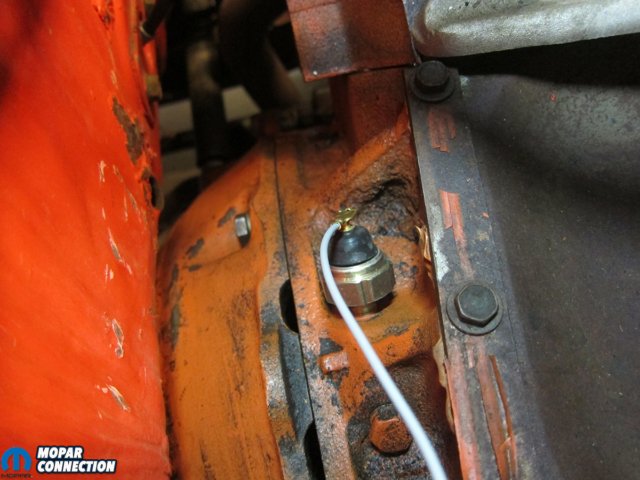
Above Left: The temperature gauge was hidden behind the alternator bracket and accessible through the hole. Above Right: The oil pressure sensor was much easier to access. It is located on the back side of the manifold.
While we had the bulkhead removed from the firewall, we went ahead and verified all of the wire colors on the backside with the help of a factory service manual (P/N RSM69PLY). You never know what kind of hack has been under the dash and this car was a good example of that. The horn had not been working because someone had swapped the horn wire with the emergency brake light wire. A little wire tracing was well-worth it to revitalize that familiar “beep.”
In conclusion, electrical work is a tough task to tackle. With some patience and the right resources like YearOne and Mancini Racing, the average shade-tree mechanic can definitely manage it. Taking the time to do it safely and correctly with the proper tools will, no doubt, pay dividends in the long run. Getting a hold of a good wiring diagram and factory service manual is a step in the right direction. From there, it’s just a web of wires with each strand starting in one place and ending in another. Dive on in!
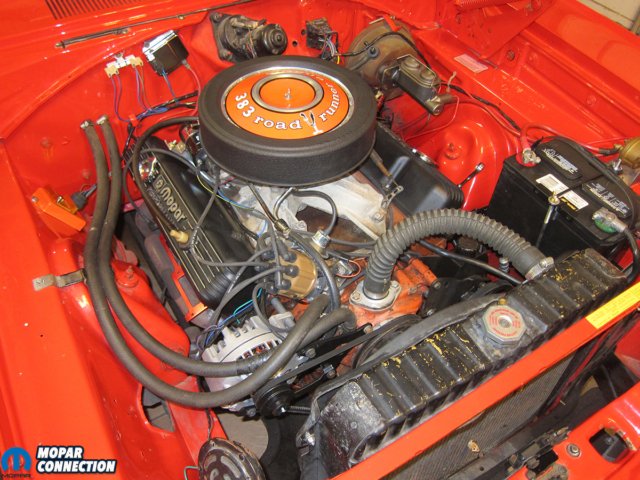
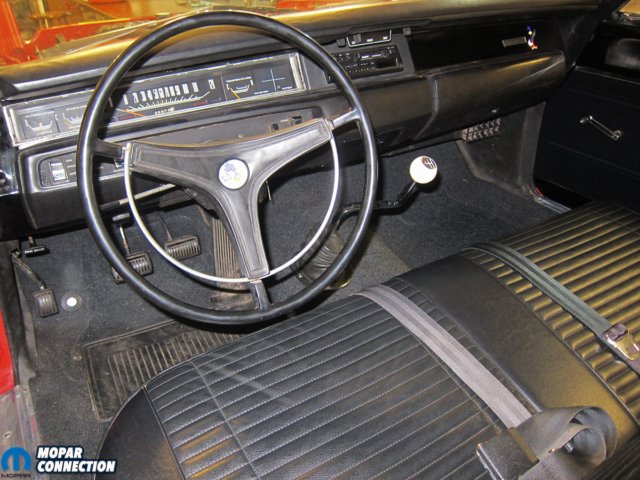
Above Left: The engine bay looked like a different car when we were done. Above Right: The interior finally had a fully functioning dash.


Noticed your electronic voltage regulator is grounded (with a red wire) to the aluminum intake. Seems like trouble.
Also notice its a steel bolt the ground strap is on which passes thru, the intake to a well grounded iron engine block. The aluminum is a good medium for electron flow both positive as well as negative. So ine intake is ; by proxy a ground!