


At one point in time, points-type ignition was the pinnacle of ignition technology. Unfortunately, that was some fifty years ago and points have now become prehistoric. Chrysler debuted the electronic ignition system in 1972 and didn’t looked back. In the twenty years after its inception, electronic ignition made its way on to millions of Mopar products. If you’re one of the few pre-’72 points holdouts left or if your original electronic ignition ready to retire, then your old Pentastar product is ripe for an upgrade with Proform Parts.
The benefits of electronic versus points are many, but let’s start with a basic understanding of points. Timing in a points system is generated by strictly mechanical means. A cam with equally spaced lobes opens and closes the point contacts. Each time the points open, the coil releases spark to the rotor, and the rotor distributes that spark to the lucky firing cylinder via the plug wire. The downfall is that the cam lobes, point contacts, and rubbing blocks wear over time. This degradation can cause a narrowing point gap, retarded timing, increased dwell, and, eventually, a very poor-quality spark.
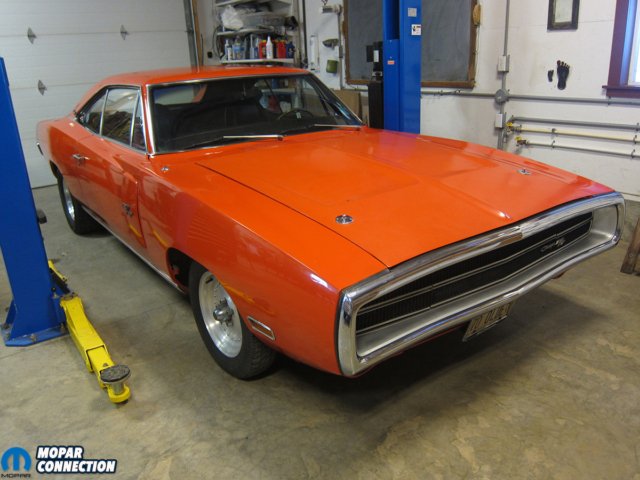
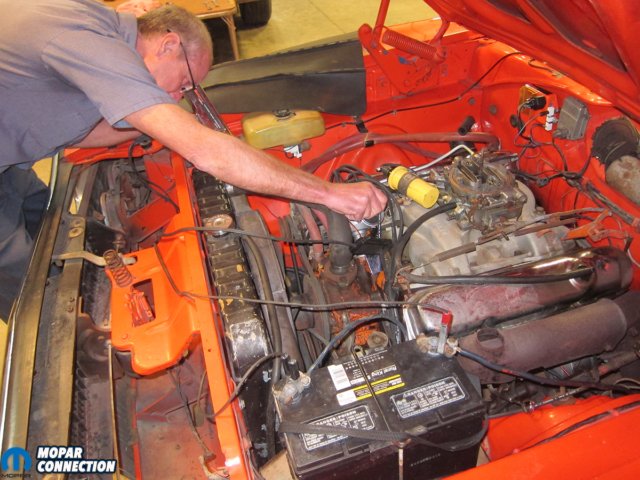
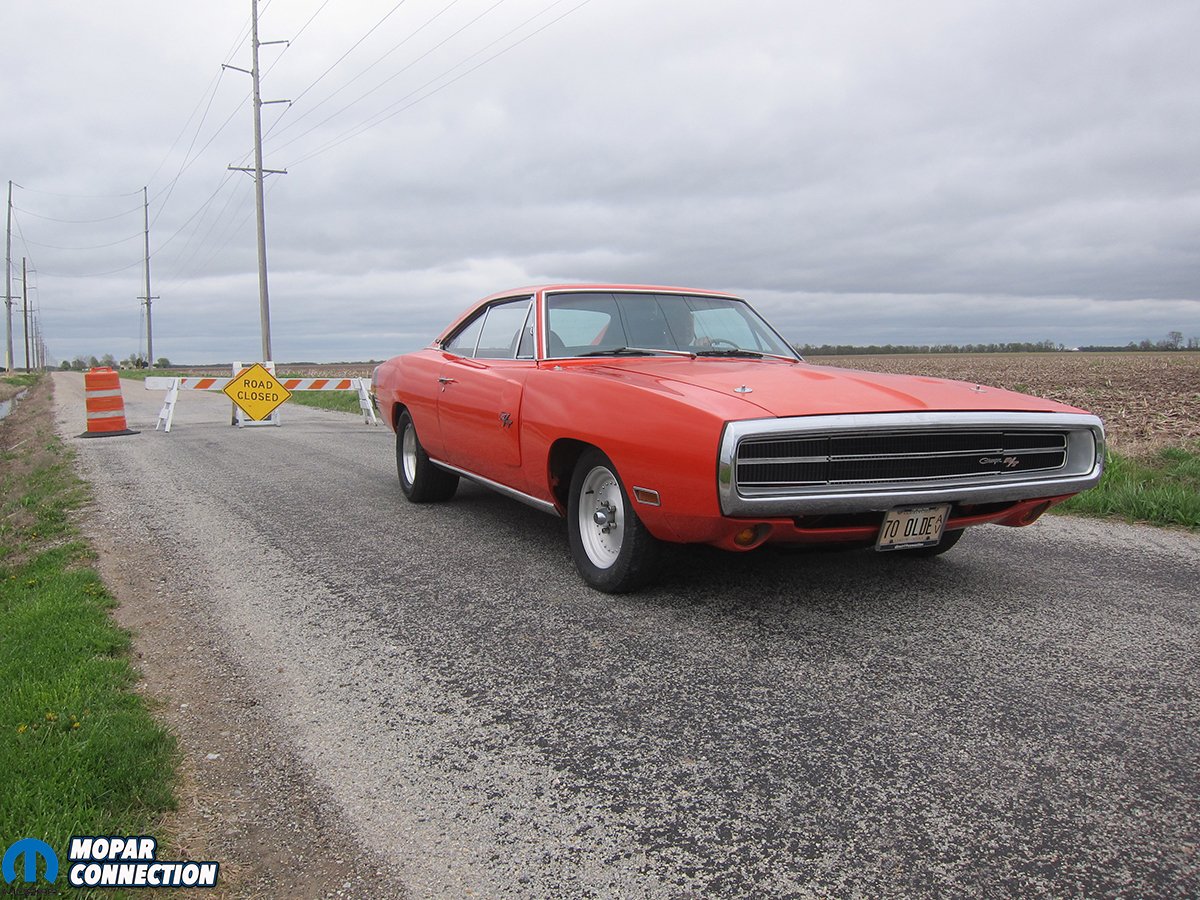
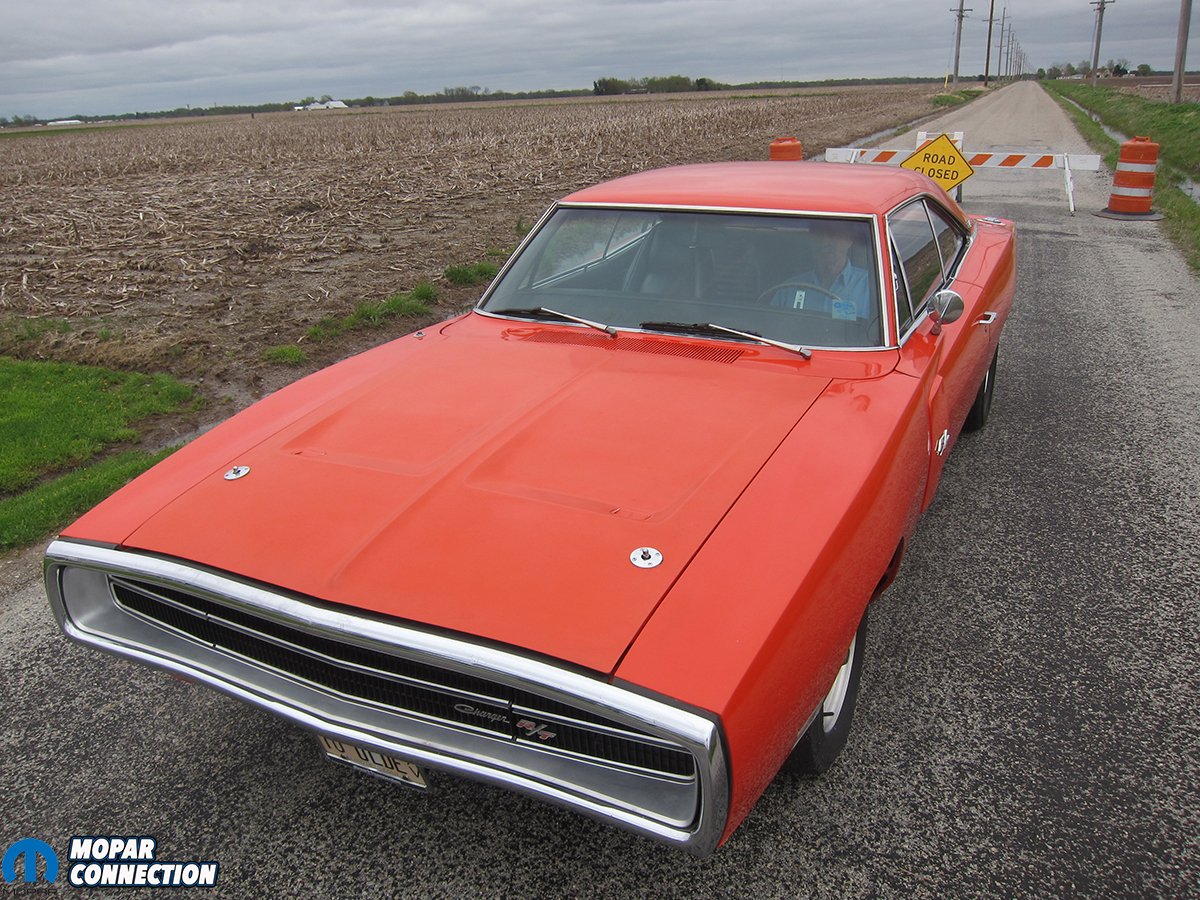
Above: Our 1970 Dodge Charger R/T packing its original 440 still.
One major benefit of electronic ignition is that its non-contact within the distributor. A toothed reluctor wheel and magnetic pickup replace the lobed cam and points. The signal to fire is generated each time a tooth passes the magnetic pickup. That signal then travels to the electronic control unit (ECU) that translates it into a message that tells the ignition coil to fire. All of this adds up to a more reliable, accurate, and consistent spark event.
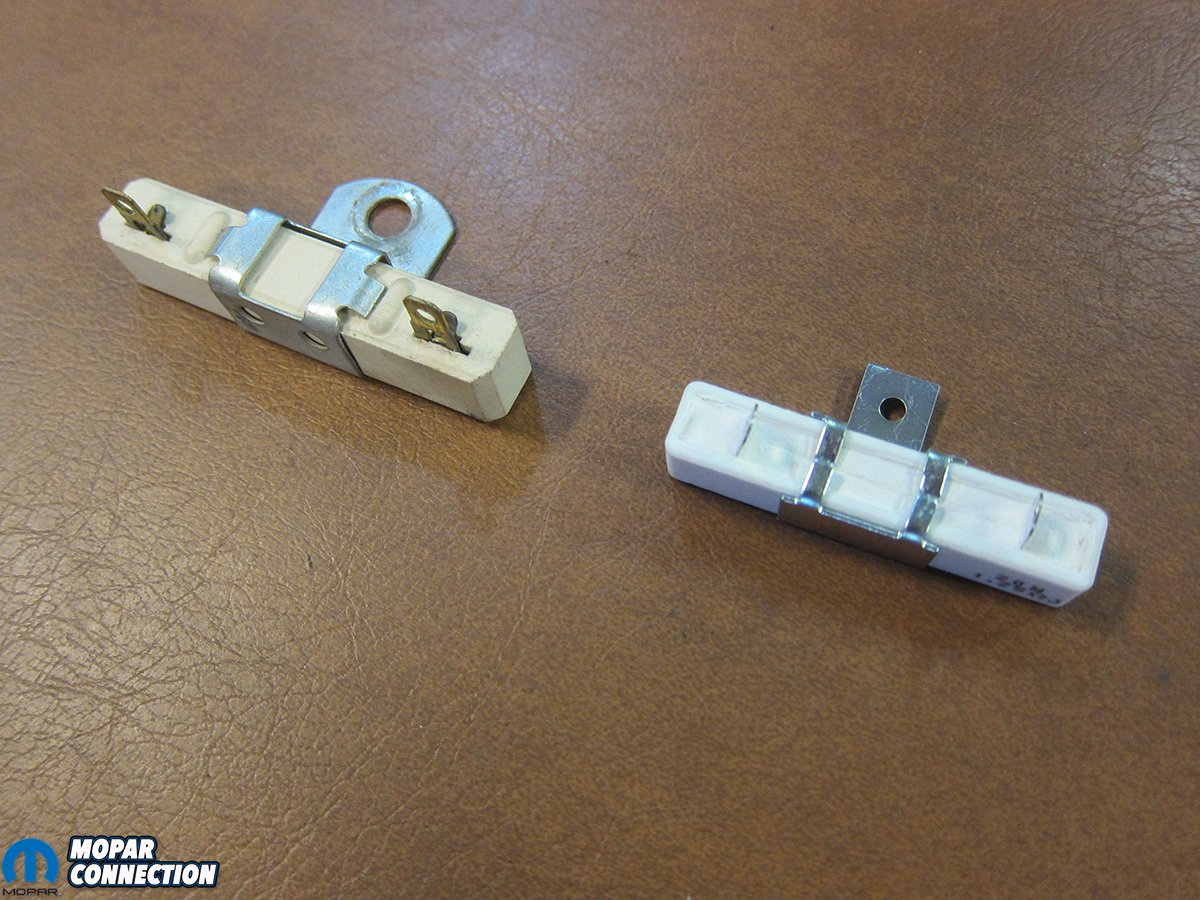
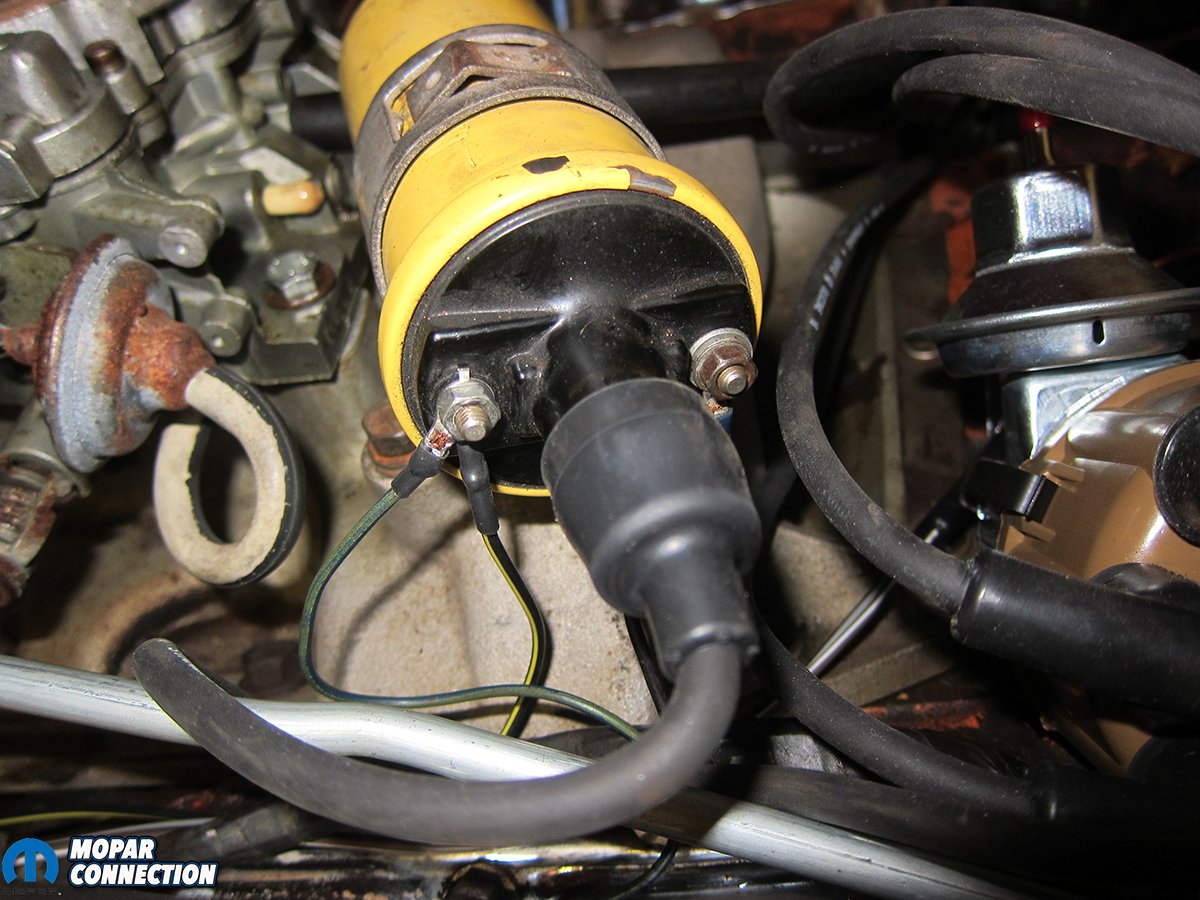
Both ignition methods incorporate a ballast resistor. When the key is in the “start” position, the resistor is essentially bypassed to provide maximum voltage to the coil for starting. Once the engine starts and the key is released into the “run” position, all ignition voltage runs through the resistor to maximize the life of downstream components. Some resistors are fully potted while others leave the resistor wire exposed on the back side. Full potting keeps the internal wire protected and helps dissipate heat.
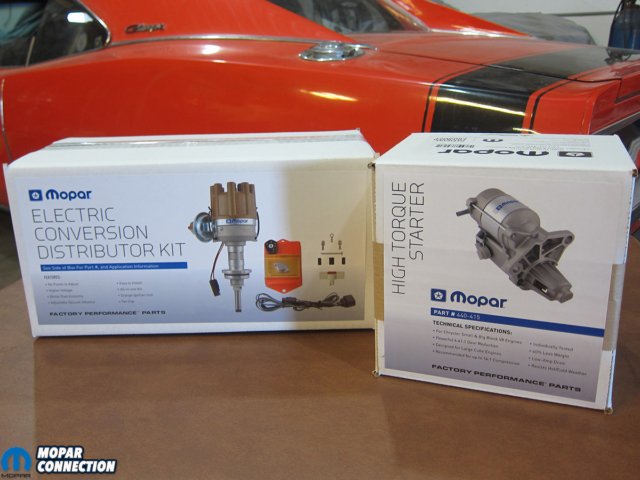
Above: The Mopar officially licensed ignition kit was first up (#440-428). Next in line is a high-torque lightweight starter for the big B-body.
In our case, the ignition on this 1970 Charger R/T was in need of a reboot. Current owner Roy bought the B-body in 1987 and has not changed much over the years. The numbers-matching 440 has remained largely unchanged except for a Weiand aluminum intake and a used dual-point distributor swap some fifteen or so ago. A console-shifted 727 automatic backs the big-block and sends power to a 3.23 Sure-Grip rear. Paint from circa 1980 still shows well as it’s been driven sparingly. Purchased with 98,000 miles on it, the odometer now shows somewhere around 108,000.

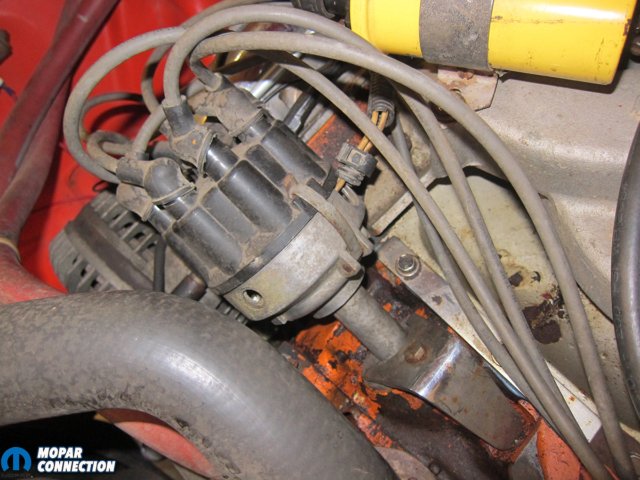


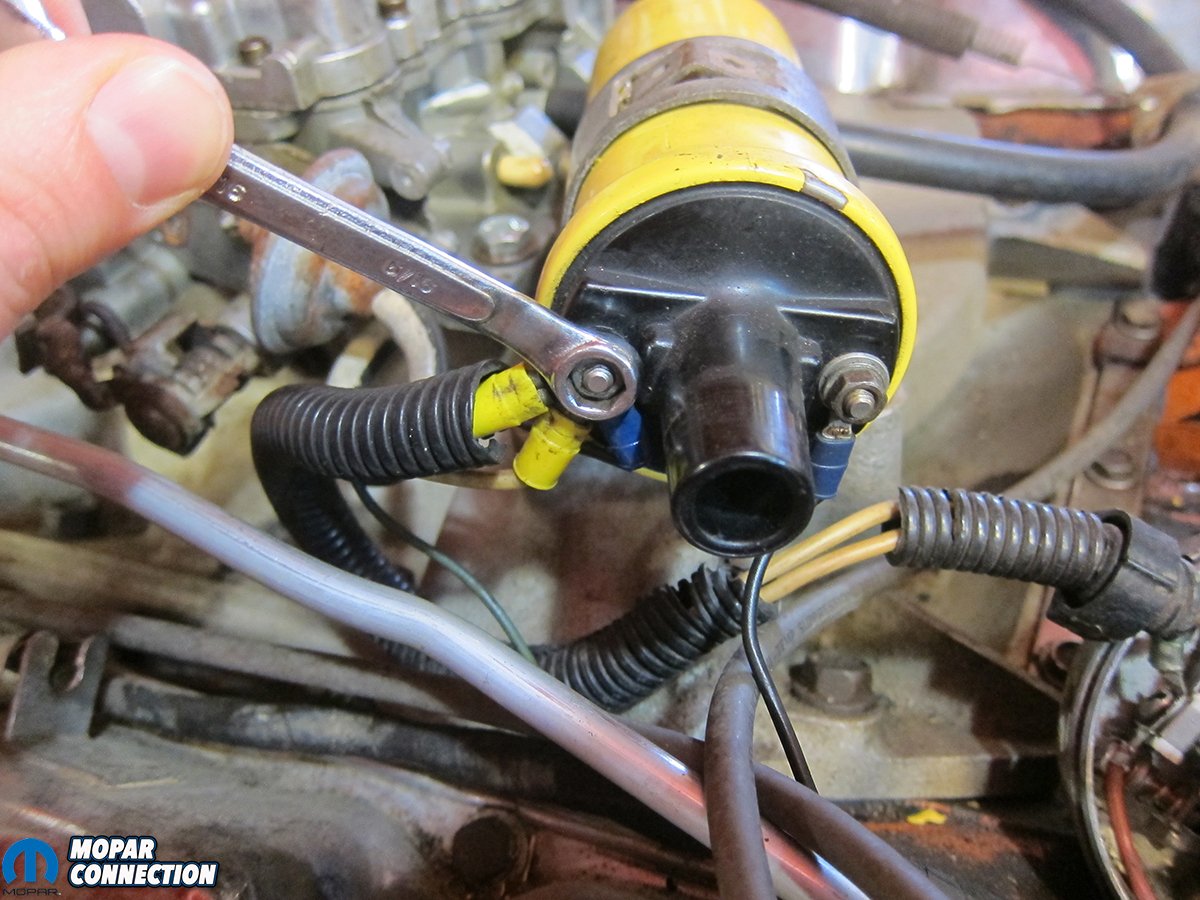
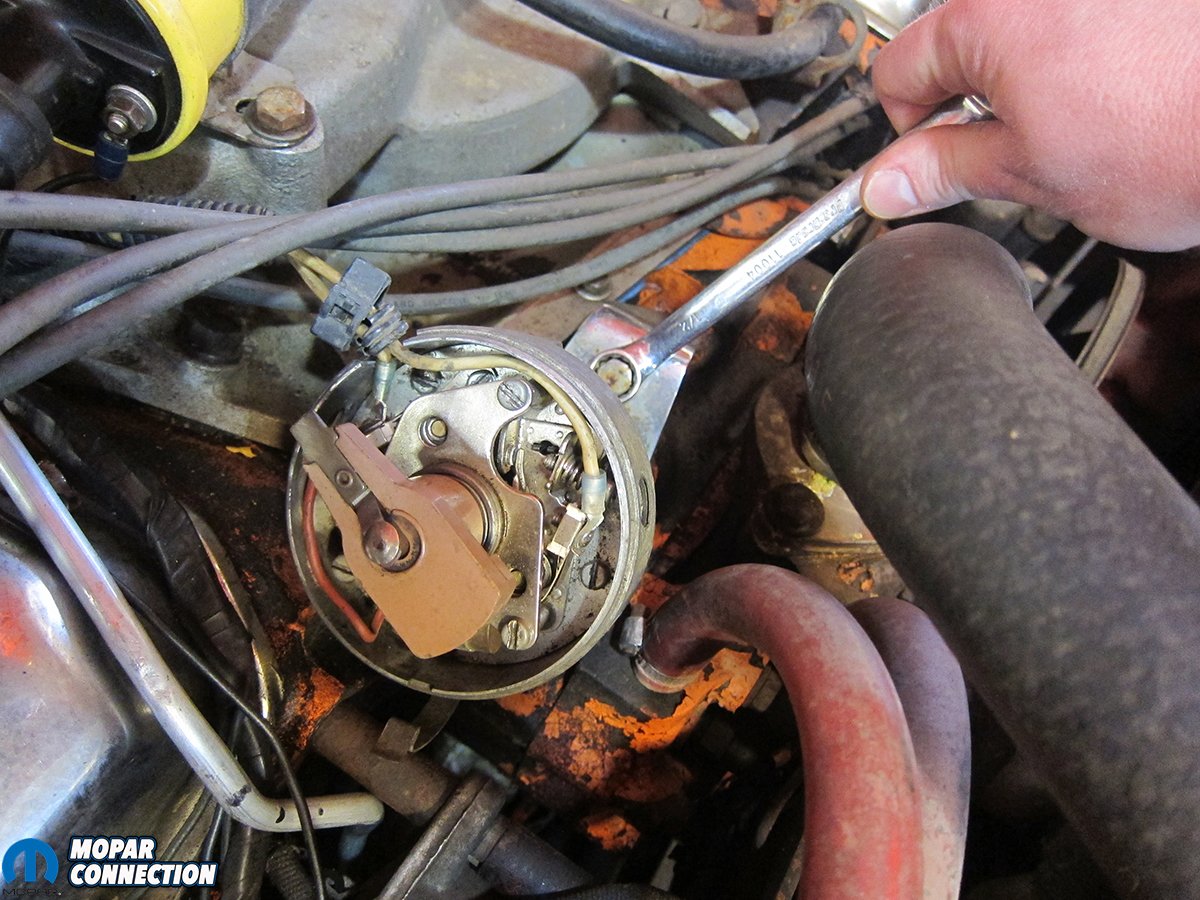
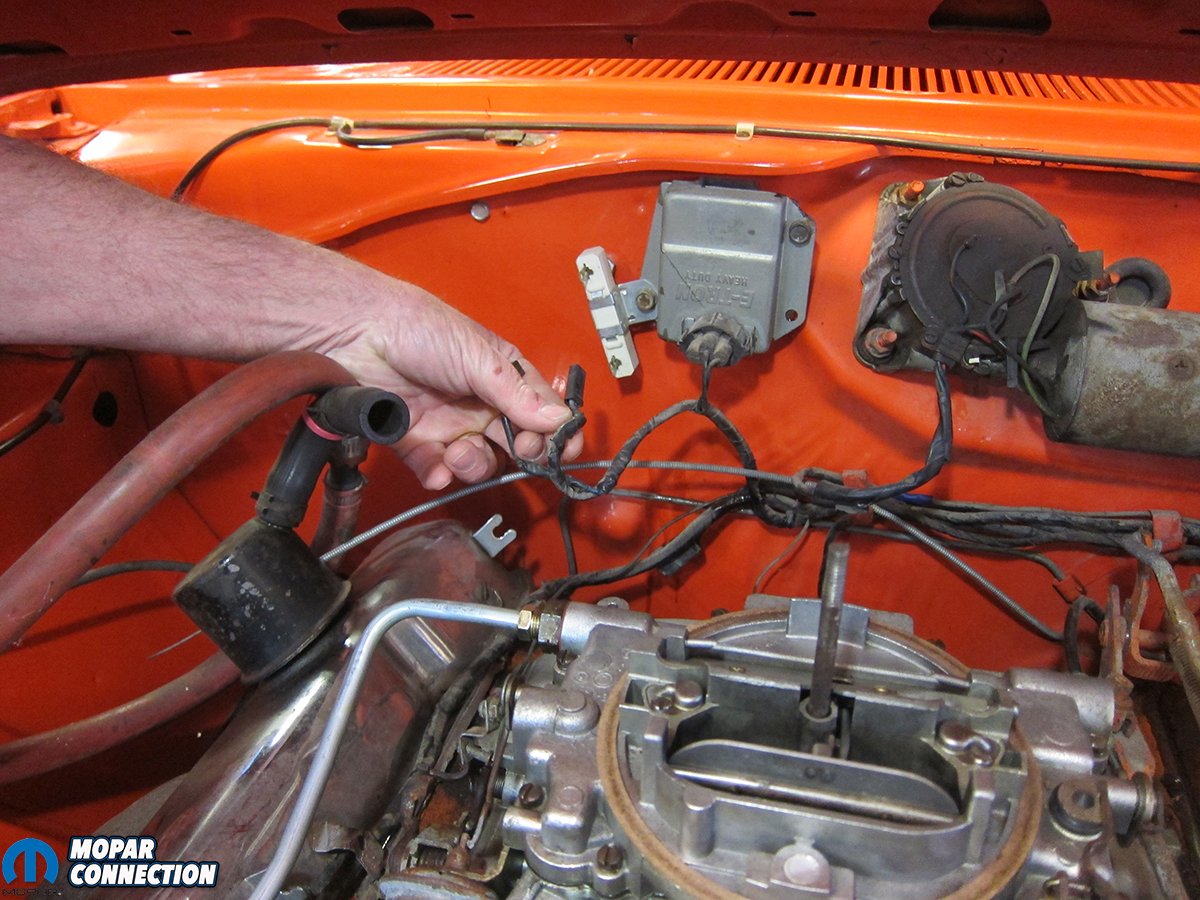
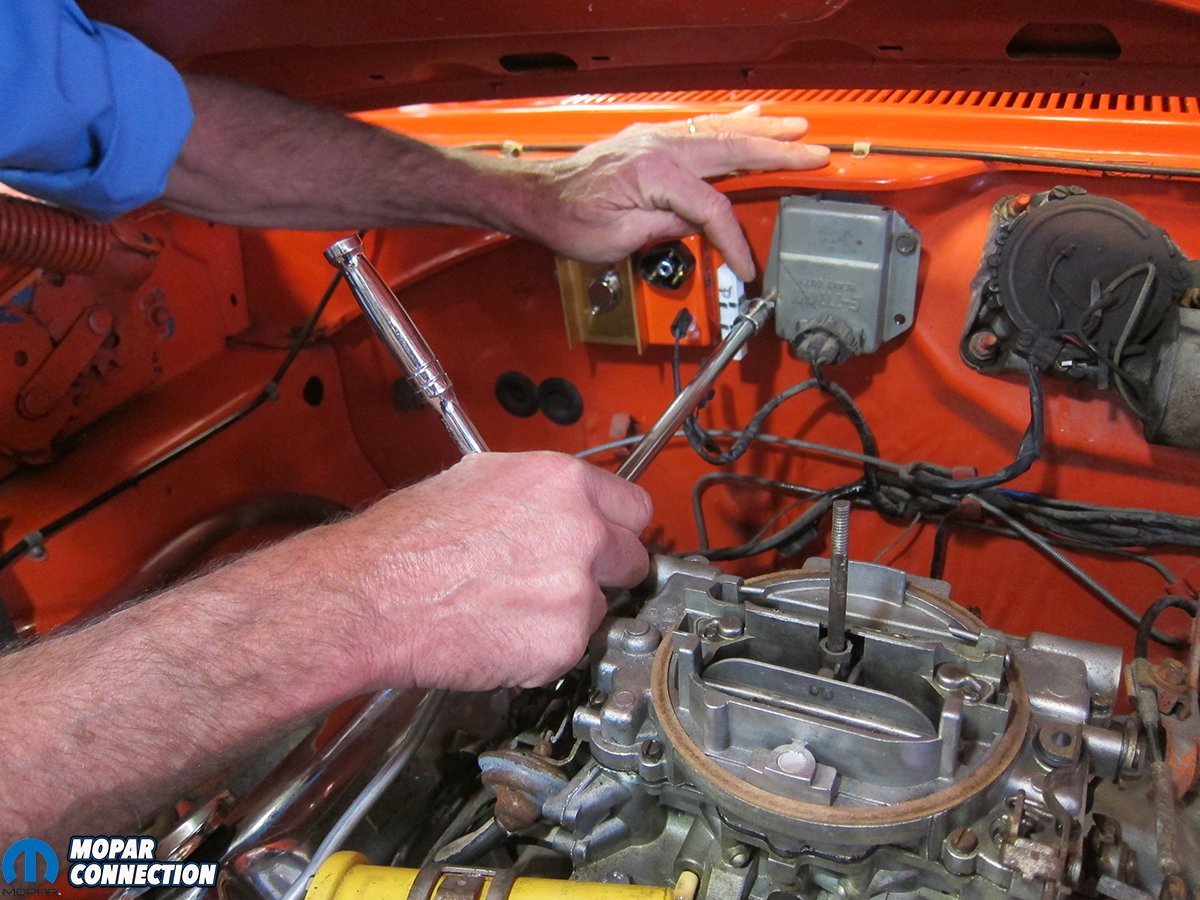
Top Left: First step of any electrical maintenance is disconnecting the battery. Top Right: Our old dual-points distributor that needs removed. Bottom Left: Both wires from the dual-point contacts ran to the negative side of the ignition coil and needed to be removed before pulling the distributor. Bottom Right: Once the cap was off, careful note was taken of the location of the rotor position.
One or Roy’s requirements to ditch the dual-point was that the new distributor had to fit right in with the vintage (i.e. unrestored) look under-hood of the big, orange B-body. That meant no flashy billet bodies, giant red caps, or aftermarket HEI conversions. With that in mind, we sourced a Mopar officially licensed electronic ignition conversion kit from Proform Parts #440-428 to give the tired 440 more kick when the key turns.
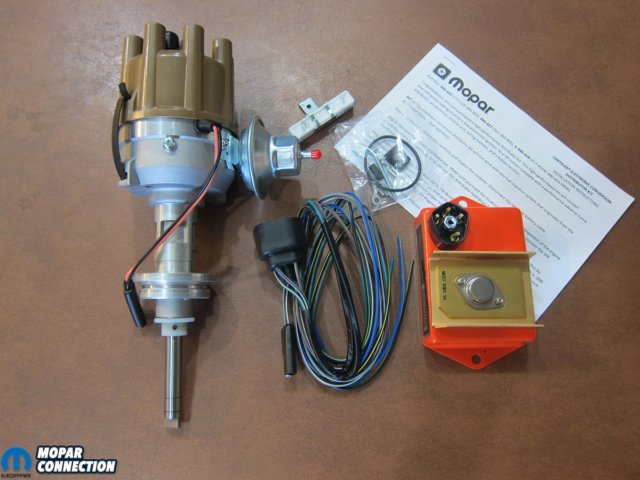
It was the perfect match with its unsuspecting tan cap and high-quality cast aluminum housing. Even a factory-style vacuum canister stuck out the side. Those features coupled with the added performance and reliability of an electronic system made it an absolute no-brainer.


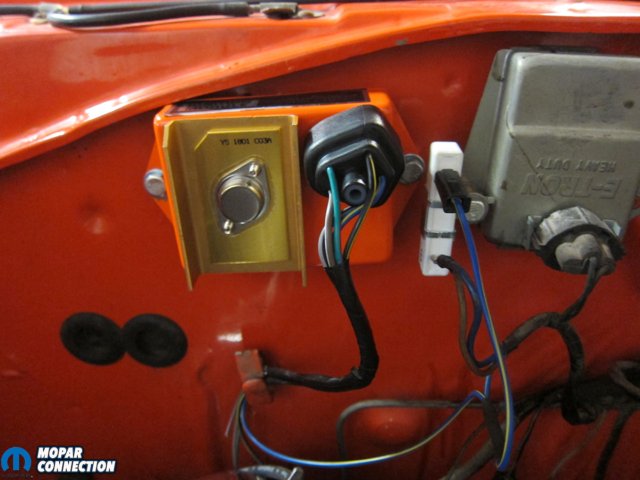
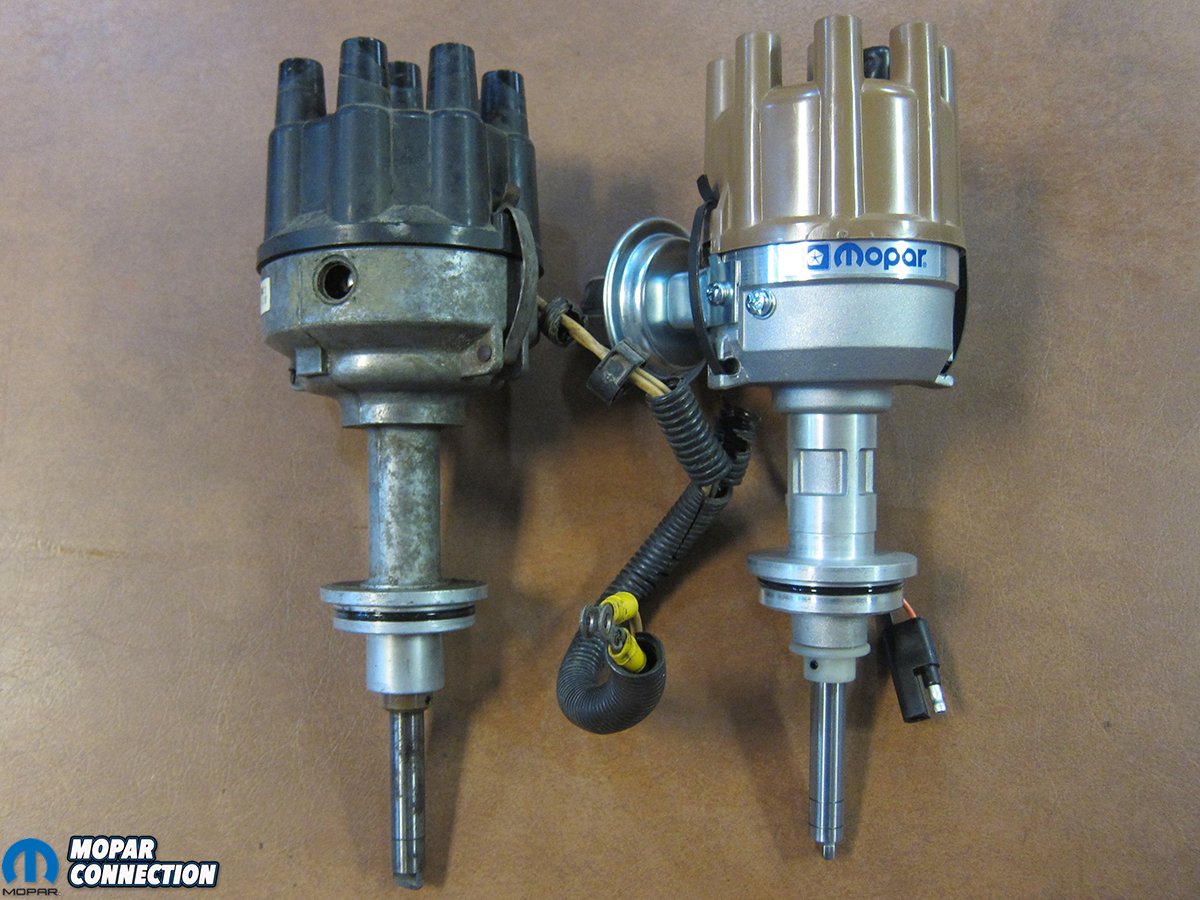
Top: Our old dual-points distributor vs. our new Proform Mopar electronic distributor. Bottom Left: The ECU was also fully potted on the back side to protect internal components. Flanges are unpainted for grounding purposes. Bottom Right: A ballast resistor was included (right) and looked very similar to the old one. The new piece was fully potted for a long service life.
Our first impression was very positive. The fit and finish of all the parts included in Proform’s kit was outstanding. From the packaging to the bright orange finish on the ECU, we were impressed with the overall look and quality. As an added benefit, the new distributor was a bit smaller and lighter than the outgoing dual-point unit.
Included in the kit was a new distributor, wiring harness, ballast resistor, ECU, terminals, and detailed instructions. Necessary tools include 5/16”, 7/16”, and 1/2” wrenches and/or sockets, a brass feeler gauge set, a Phillips screwdriver, a drill, wire cutters/crimpers, and a timing light.


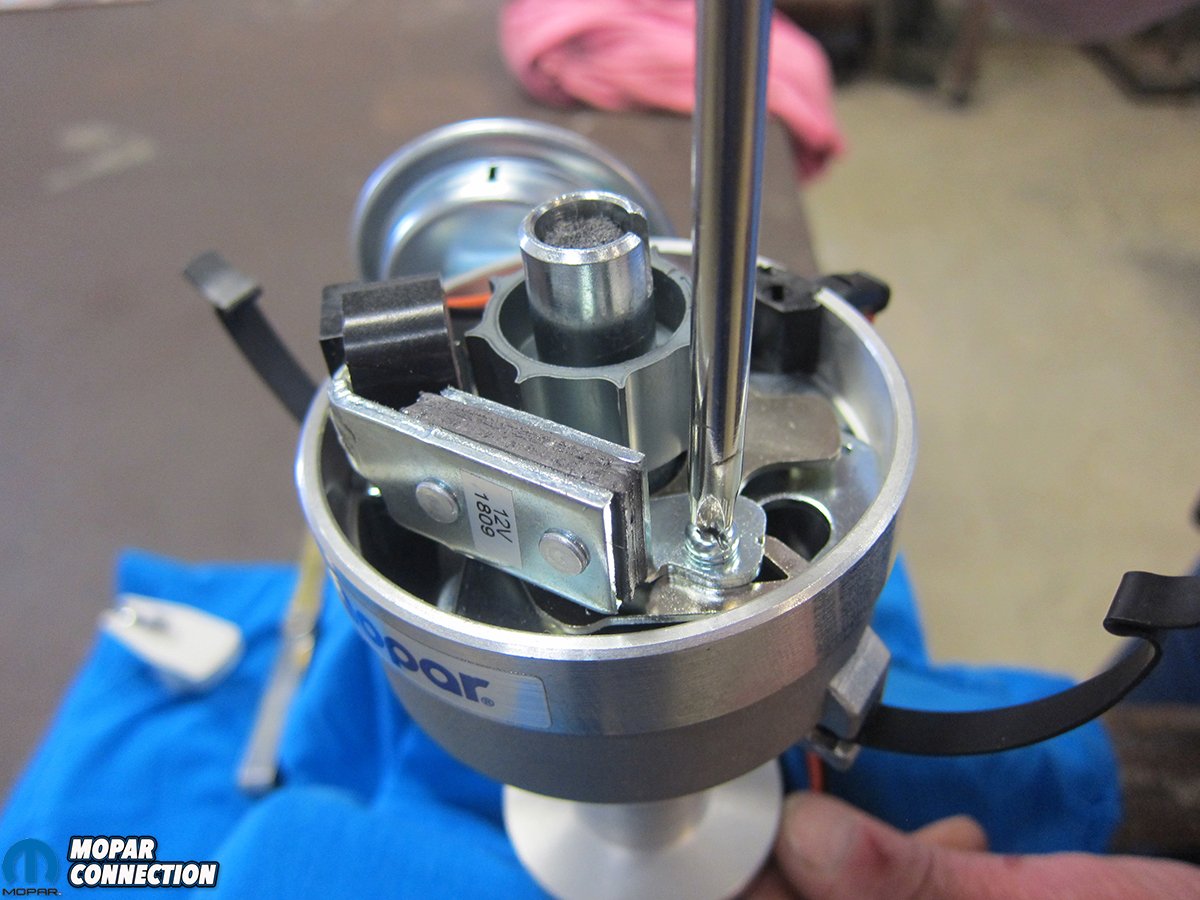
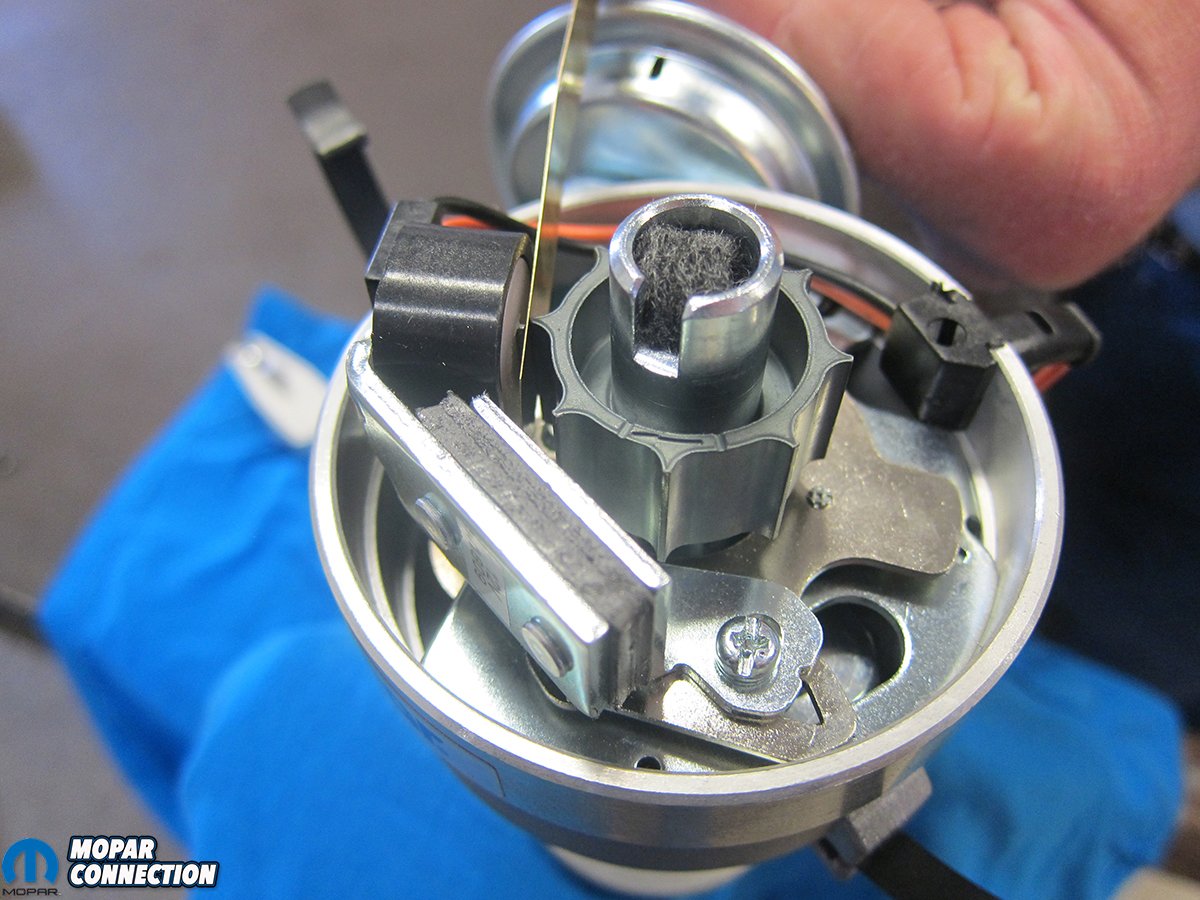
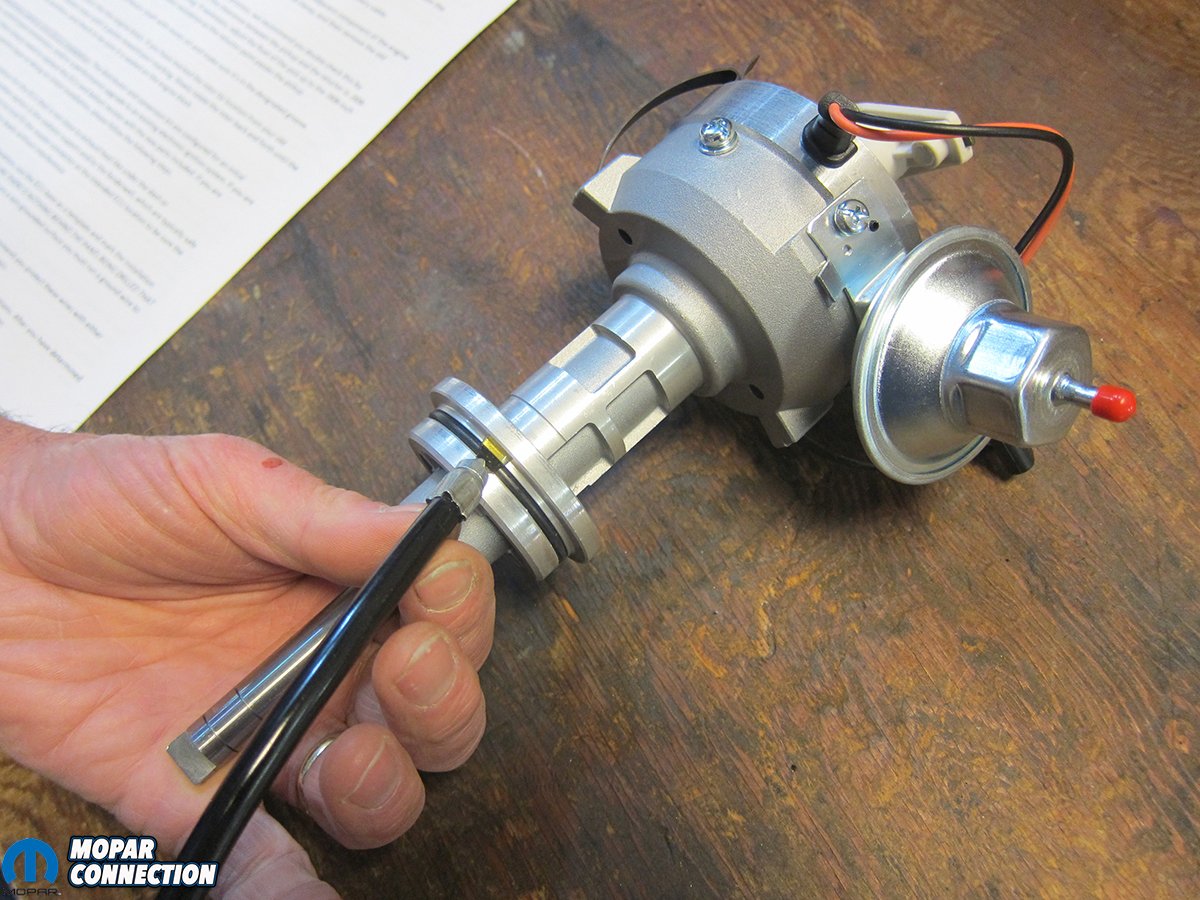
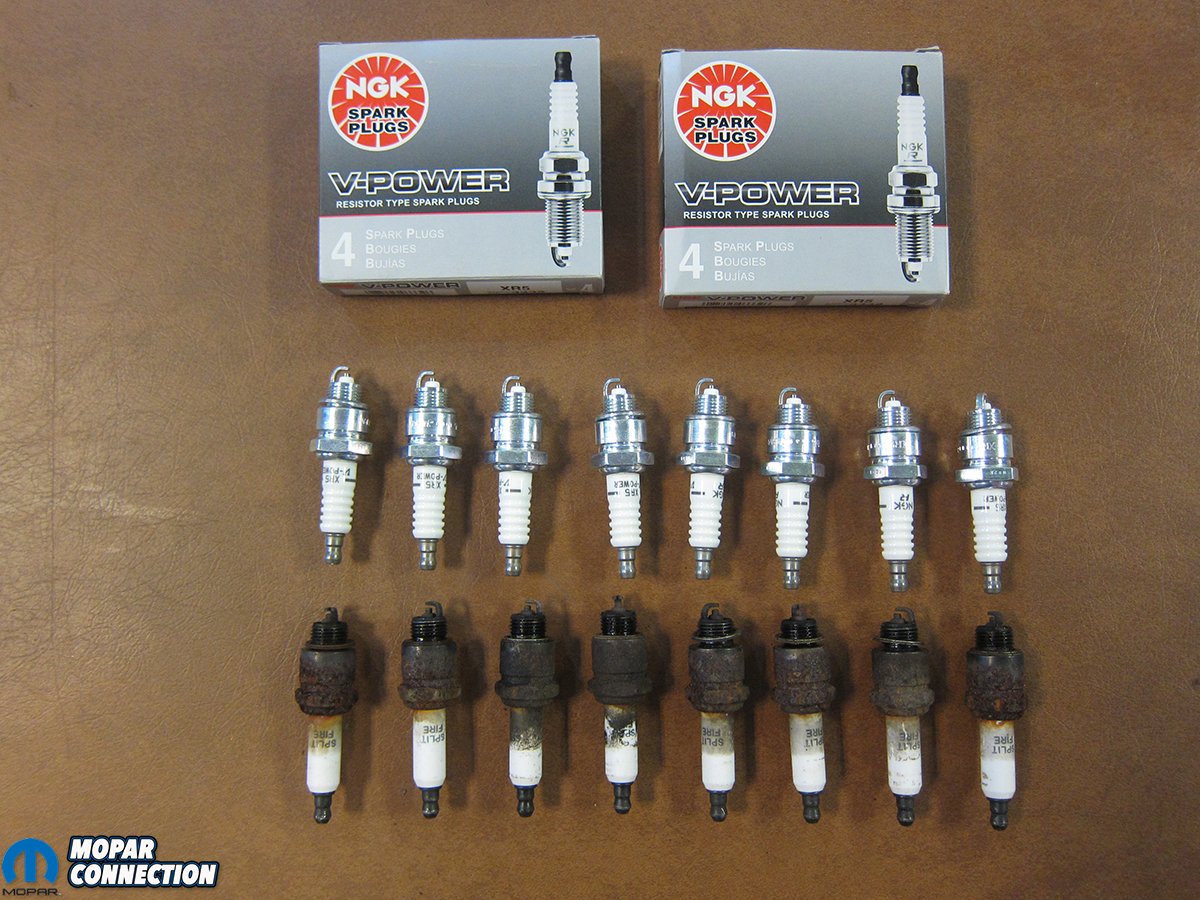
Top Left: Reluctor to pickup gap was verified with a set of brass feeler gauges. Top Right: We gave the O-ring a light oiling so it could slide easily into the block. Bottom Left: Remember which way the old distributor’s rotor was pointing? The new distributor was installed so the rotor location was the same. A gentle push seated it all the way down to the block. Bottom Right: The instructions recommended new spark plugs, so we picked some up at the local parts store. The vintage Split Fire plugs (circa 1990) were shot.
With any electrical work on any car, our first step is always to disconnect the battery. After that, we like to document and photograph the situation as-is before any work begins. That way, any questions that come up later on can reference pictures and notes. Distributor rotor position is one good example. With the cap off, we snapped a few pictures to help remember its orientation. As Proform’s instructions clearly stated, the new distributor needed to go in the exact same way with the rotor pointing in the same direction.
Other prep work included setting the air gap between the magnetic pickup and the reluctor on the new distributor. 0.008” was the goal. Too close and the reluctor will hit the pickup. Too far away and the pickup won’t get a good signal.
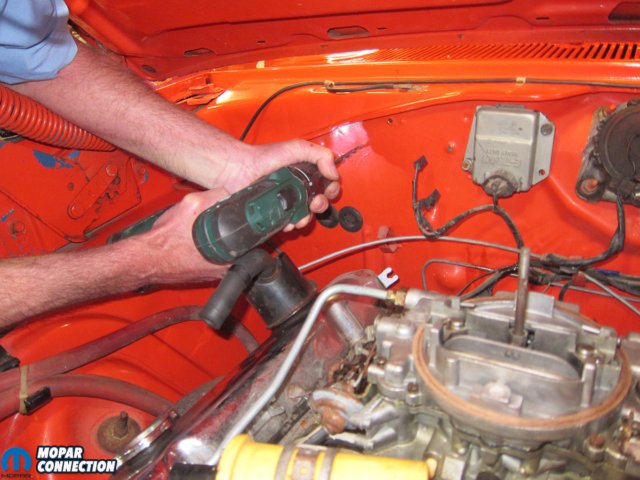

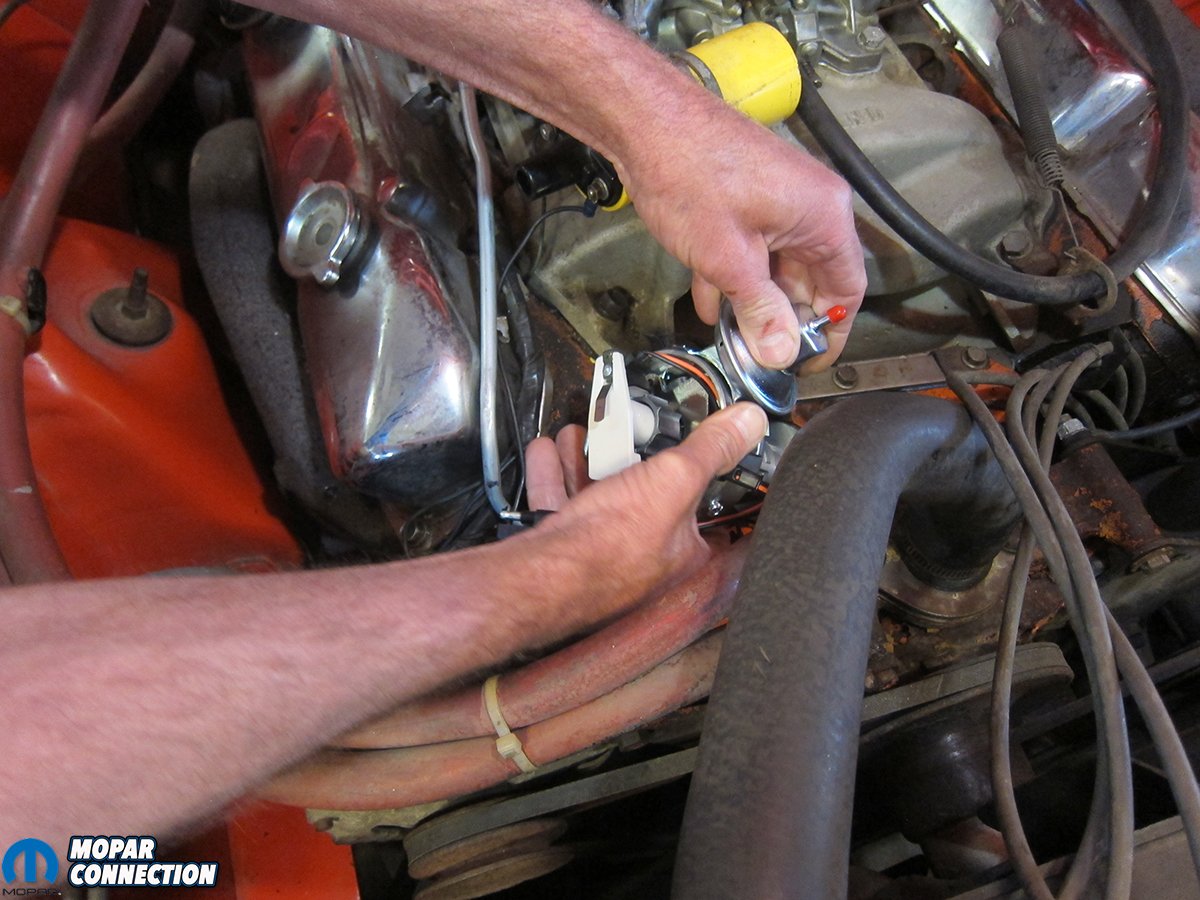
Top: We adjusted timing until we had the best “seat-of-the-pants” feel from takeoff without any detonation. Bottom:We crawled under the dash to make sure nothing was behind the ECU’s mounting location before punching any holes. We scratched some paint around one hole to ensure proper grounding and mounted the new ECU.
Since the Charger didn’t originally have an ECU, we had to find a place to mount it. It needs to be away from heat, but close enough to the other components for the wiring harness to reach. Next to the voltage regulator worked well for our application. Since the ECU requires a good ground, we cleaned off some paint from the firewall to ensure contact.
With the distributor in and all of the electrical connections checked, the engine was ready to start. Vacuum advance was plugged for initial setting. Per the directions, we began with 5 degrees of idle advance and worked our way up from there, gauging improvement with short trips around the block in between each adjustment.
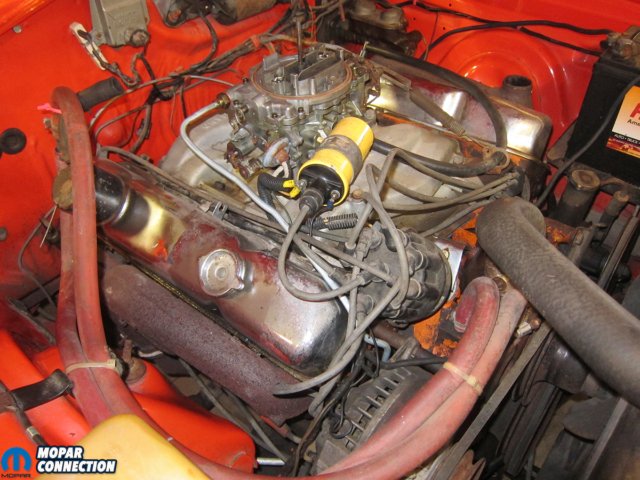

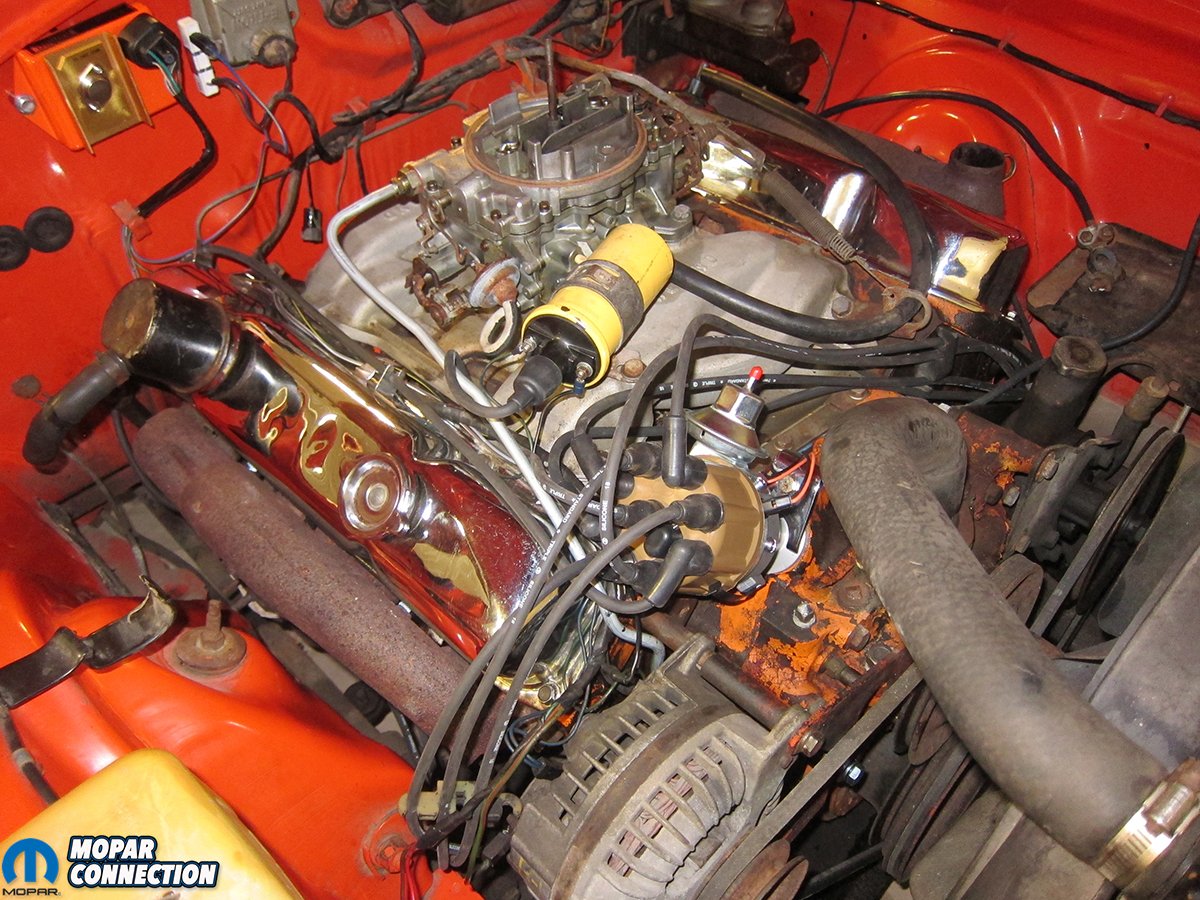
Above: The before and after of Proform’s officially licensed Mopar electronic ignition is hardly noticeable to the untrained eye, but we could definitely tell a difference when the skinny pedal hit the floor.
Right away, we could feel the improvement as the 440 started up quickly. Once it came up to operating temperature, some full-throttle runs were made to make sure there was no detonation or “pinging.” All was good and, with the increased drivability and reliability, the old Charger is sure to see more road time this summer.
Proform Parts electronic ignition kit was exactly what we needed for the Charger. It was plug and play with no modification needed for the distributor. The wiring harness diagram was easy to read and told us exactly how to splice in the electronic ignition wires. Knowing what we know now, we should have done this upgrade years ago. We gained performance and reliability without loosing any of our original Mopar aesthetics. Give your favorite speed shop a call today and order your Proform electronic ignition kit for your small or big block now.


Hello all,
I have a 1988 wrangler Sahara 2.5L, M/T. I’ve tried to have my ECM repaired and was told that it was unrepairable. So, 8 months later, still cannot find one. Even the shop that repairs them could not find one for me.
Now with that in mind, what are my options to get this back on the road?
If you have any questions, feel free to contact me 925-525-7940. I’m in texas.
Thank you,
Ron Hellberg
Bought this proform ignition system for my 71 superbee, and have had nothing but problems with the ecm module. Got a 5 pin harness and a 4 pin ecm unit. After car gets warm it fails to start. 1.3 volts at the coil. I’m not even going to try and hassle get a new ecm from them. Just going to replace the whole system. Thought it was the real mopar deal. Not. I’ll probably put a points type distributor back in. Got 7 70 back 340s, 5 old school hemis and had high hopes these proform systems would be affordable options. Just more chinese crap. Where are the old school mopar guys at. Really dissatisfied. Can’t even drive it to a show cuz it probably won’t start. 1 more thing. Once the engine completely cools down, it starts right up. Got 12.75 at coil like it should be.