


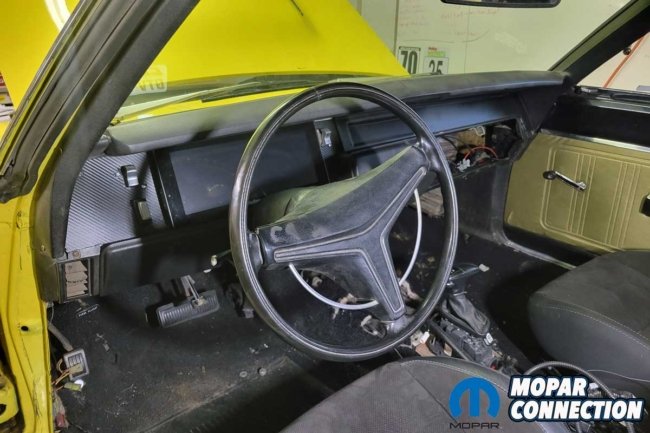
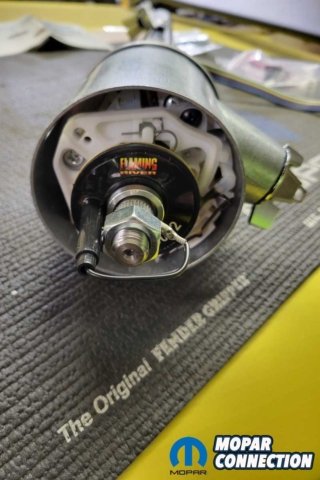
Since upgrading the suspension on our 1970 pro-touring Dodge Super Bee, we noticed a lot of play in the steering column. The time had arrived for either a rebuild or an upgrade. The hazard light (four-way) button was also broken, and the turn signal switch sometimes would not cancel. Even worse, something inside the column was creaking and popping whenever the steering wheel was turned, making us a little nervous when at speed on a road course or an autocross event.
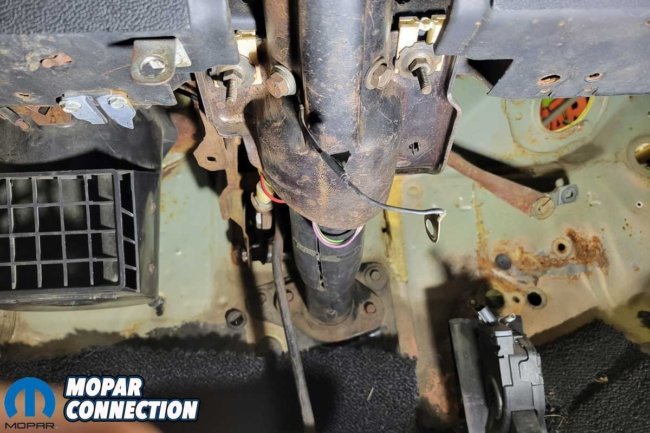
Above Left: The Super Bee’s factory steering column felt loose, clicked, and popped when the steering wheel was turned. Above Right: To remove the steering column, we removed the fasteners at the base of the dash and the interior of the firewall. The steering shaft coupler had to be disconnected to allow the removal of the column.
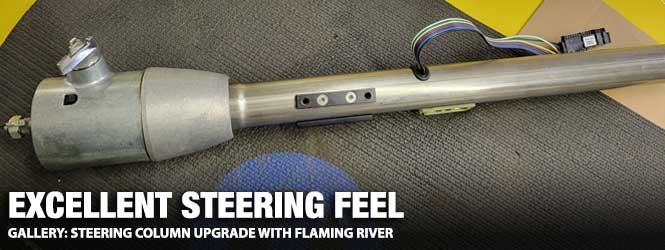
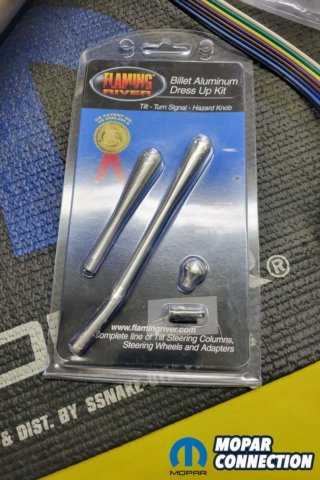
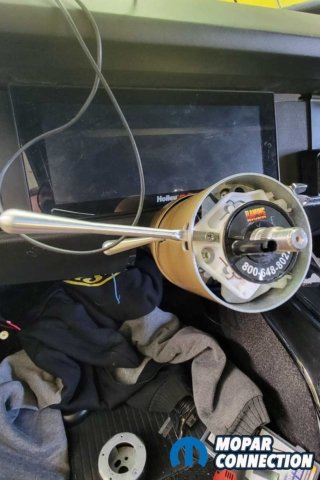
While contemplating future advancements for the Super Bee, we contacted Flaming River for the perfect steering column (part no. FR30012CP) to secure our safety. The recommended steering column has a tilt feature that will make it a lot easier to get in and out of the car after we finish installing the roll cage. Much like the original steering column, the ignition key tumbler is on the column, and the key even has a Pentastar shape.

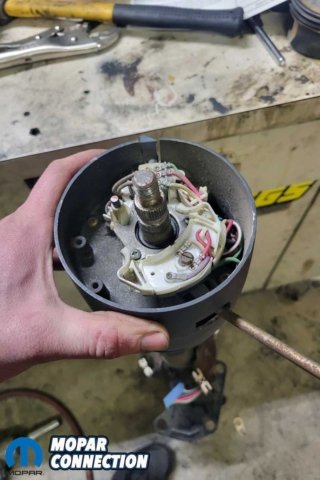

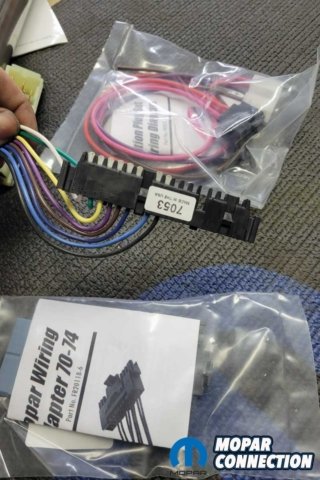
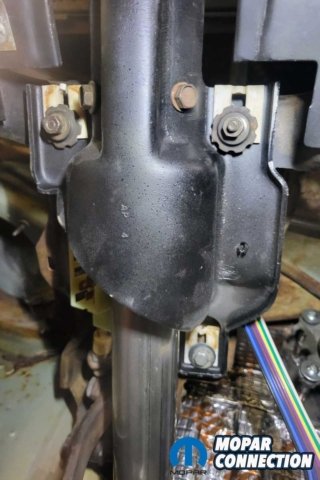
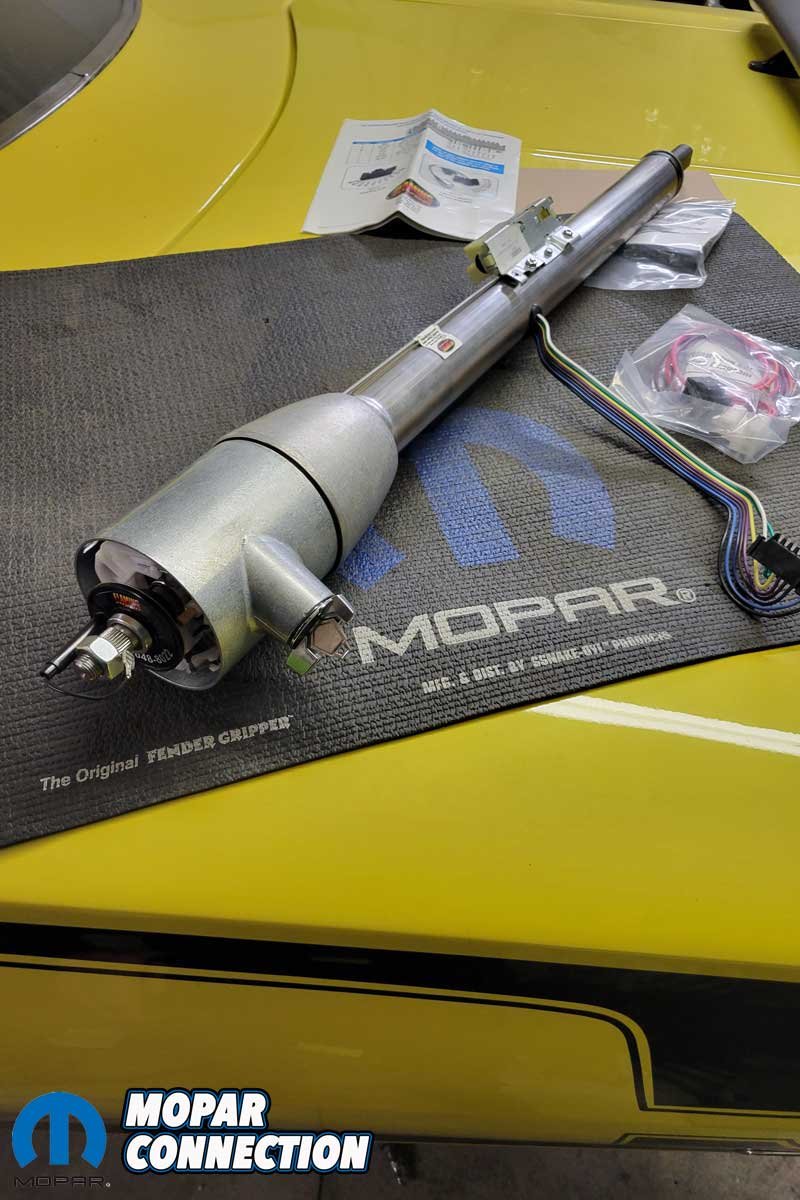
Above Left: The factory column had a modified aftermarket bearing and sleeves to couple the column to the rack and pinion. Above Center: The factory blinker switch would not always cancel after it was activated. Above Right: The Flaming River steering column comes ready to install. Just swap over the factory brackets, and it can be slipped into place. The column’s wiring harness has an adapter to connect to the factory harness.
The column is designed to fit multiple aftermarket steering wheels and adapters, and the Flaming River representatives were kind enough to recommend the correct adapter for the steering wheel we selected. Flaming River has multiple color options for its steering columns. However, we went with the natural finish to save a few bucks and not feel guilty about sanding off the powder coat later if we changed the interior color.
Before the column’s installation, we picked up some off-the-shelf spray paint from a local auto parts store that complemented our current interior color. We removed the mounting brackets from the factory steering column, cleaned them, and painted the brackets and the new column before installing the brackets.
Above Left: The Flaming River column comes equipped with a blinker switch. The ignition switch key is like the original Pentastar design. Above Center: The blinker switch and tilt levers have a billet aluminum appearance. Above Right: The column’s connector is prewired and terminated. It is a plug-and-play assembly.
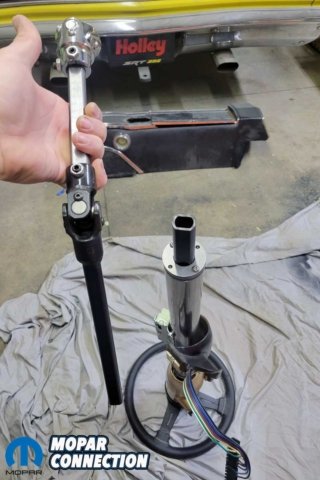
The column came ready to install. There was no requirement to weld or modify it, as all the mounting bracket holes were already correctly located. With brackets installed, the steering column bolted in the factory location. The steering column came with one new U-joint for the steering shaft. We also had a leftover U-joint and three-quarter double-D rod from our QA1 coil-over suspension install.

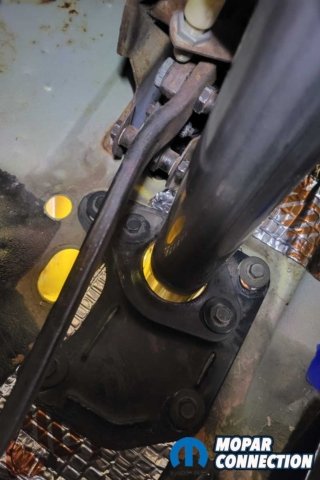
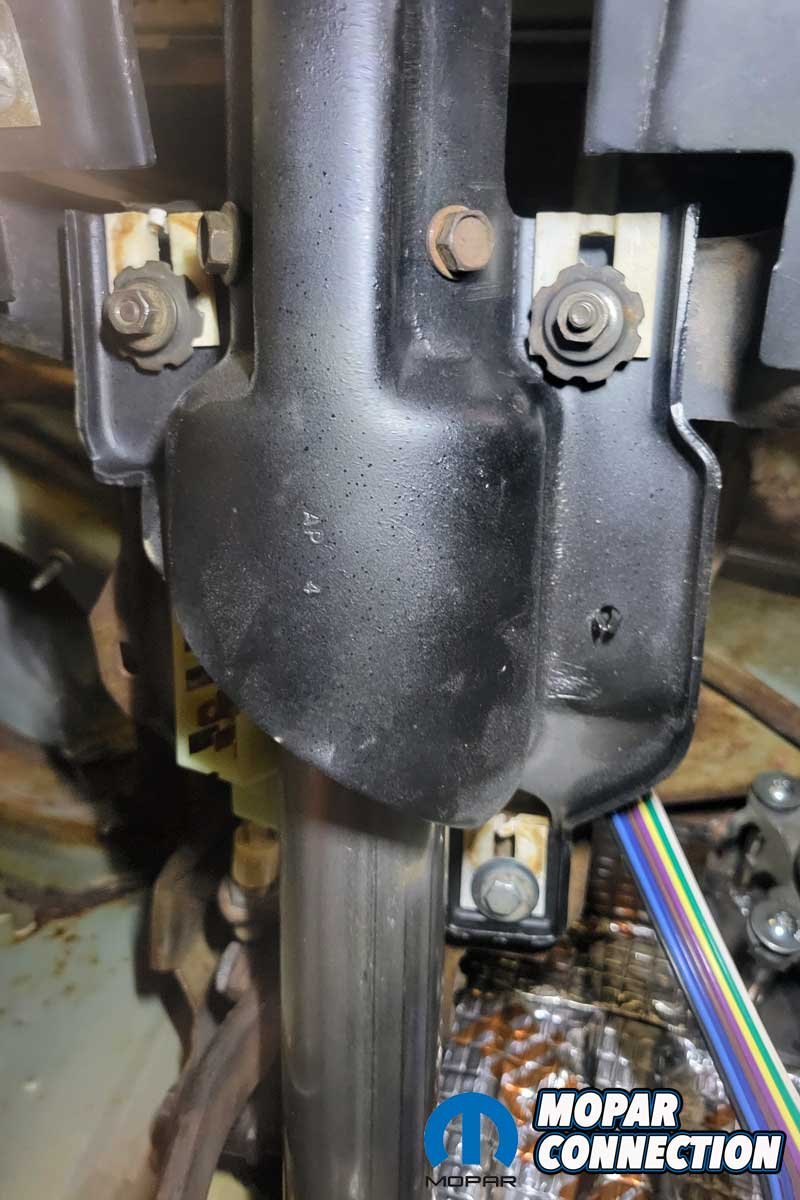
Above Left: After painting the OEM brackets black and the column collar tan, we admired how nice the column looked. Above Left-Center: The shaft assembly has a collapsible section. We properly aligned and test-fitted the U-joints on the various shafts. Above Right-Center: We slipped the column into the Super Bee. The breakaway plate bolts were snugged into place. Above Right: The retainer plate was attached to the lower firewall. Once the bolts were tightened, we secured the breakaway plate fasteners.
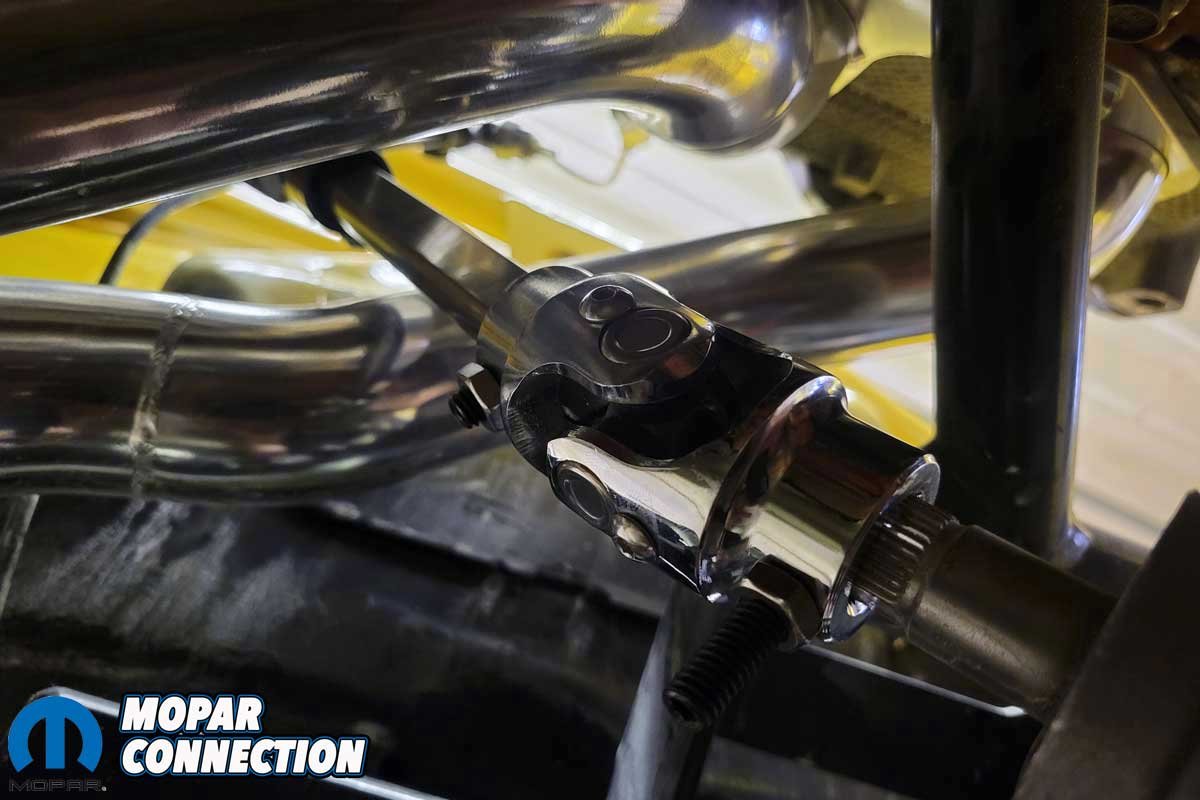
With the U-joints in place and phased correctly, we measured the distance between the column and the steering box to cut the D-rod steering shaft to the proper length. The TTI header primary tubes have a large gap where the steering shaft can cleanly pass. The U-joints attached to the D-rod with Allen set screws and a lock nut. After verifying the position of where these Allen set screws contact the D-rod, we removed the rod and drilled a dimple into the shaft to be sure it does not slide out of the U-joints once the set screws are secured.

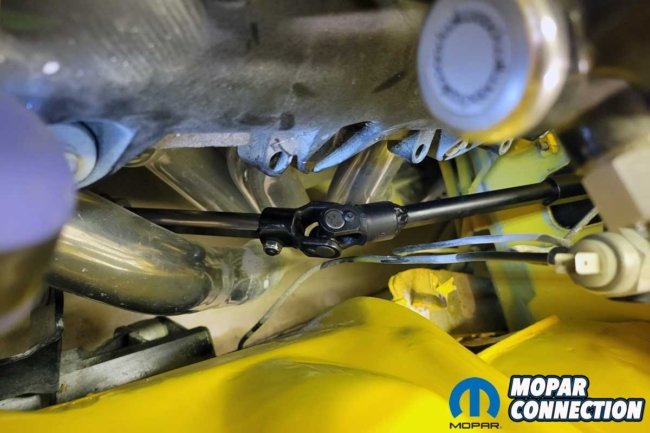
Above Left: The steering shaft slips through the TTI primary pipes. A U-joint attached the intermediate steering shaft to the pinion of the rack and pinion. Above Right: A second U-joint tied the steering shaft from the column to the intermediate shaft.
After mounting the steering column, we focused on installing the hazard light button, turn signal, and tilt lever. We used a Grant steering wheel for its excellent grip and feel. Using the correct steering wheel adapter made the installation a breeze.
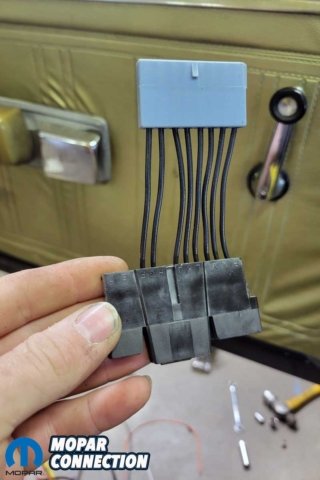

Above Left: We plugged the adapter connector into the GM connector on the Flaming River column. The three connectors at the bottom attach to the OEM harness. Above Center: We test-fitted the Grant steering wheel. Flaming River has plenty of adapters to fit a multitude of steering wheels. Above Right: The billet aluminum levers were added to the column. Once everything was in place, we performed our final torque on every fastener on the column and the shafts.
Wiring the steering column was plug and play. A GM connector was used with the correct adapter for the turn signal to fit a factory Mopar connector. The ignition switch works with factory connections. Installing the Flaming River steering column took an evening. Another bonus of using the Flaming River steering column is that Sound German Automotive sells a paddle shifter option to control the 8HP70 transmission.

Above: When aligning the U-joints, it is imperative to ensure they are correctly phased (top photo). If the phasing is incorrect, the result will be speed changes as the steering wheel is turned, making the steering unstable. Even worse, the shafts could bind, which will stop the rotation.
The result of our work was firm, tight steering with predictable feedback. The Flaming River steering column was so impressive it left us wondering why it took us so long to upgrade. If a column swap is in your future, Flaming River has a column to fit your Mopar; contact its representatives for more information.


