


Our street/strip 1973 Plymouth ‘Cuda was built with a tasteful mix of modifications, all in the pursuit of maximizing performance without sacrificing any street manners. Many of these modifications are focused on weight reduction in the front end of the car to help get it through the 1,320 just a little faster. To date, roughly 200-pounds have been removed from the nose of the ’Cuda! This article will walk you through one of our little weight loss exercises.
Our ‘Cuda was a factory power brake car; power brake systems just have more stuff than a manual brake system. It just seemed like having less stuff would equal less weight…thus, our search for parts began. On top of losing a few pounds, it would also open up more room in the engine bay for wrenching, which is always a plus.
After much research, we found that the master cylinder sold through the DoctorDiff had great reviews, especially if you chose the master cylinder with the smaller bore diameter to maximize line pressure. We decided to go this route and snagged the following parts from their website:
- Aluminum Master Cylinder Kit with 15/16″ bore for maximum line pressure and the 4-stud adapter for B/E Bodies ($125)
- ’70-’74 Mopar B/E Body Firewall Stiffening Plate ($40)
- Adjustable Master Cylinder Push Rod ($50)

Above: The parts cache from DoctorDiff and Detroit Muscle Technologies


Above left: Beginning the teardown of the power brake master cylinder and booster. Above right: Power brake booster with master cylinder removed.
Other items we thought we may need that were not available through the DoctorDiff site were gaskets. We checked with Detroit Muscle Technologies and ordered the following items:
- Mopar 70-74 E-Body 71-74 B-Body Brake Booster to Firewall Gasket ($3.95)
- Mopar A B E Body 66-76 3pc Master Cylinder Gasket Set ($5.95)
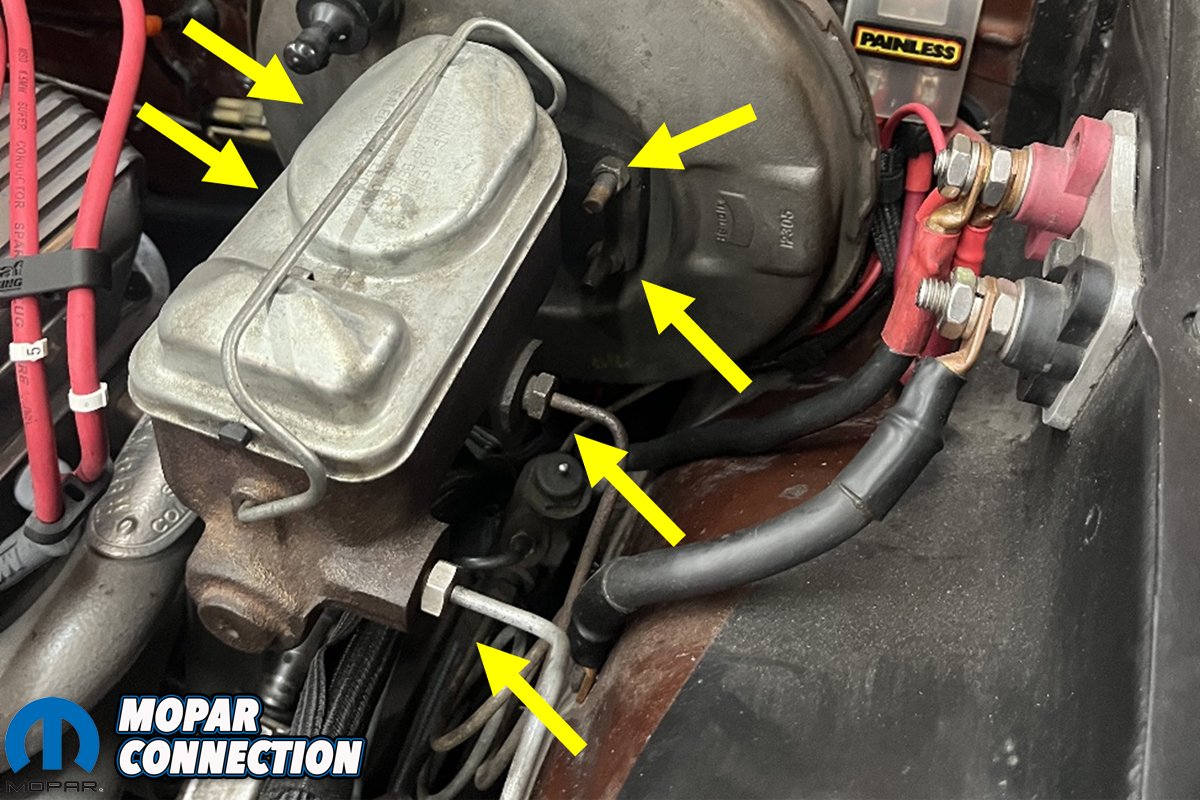
No instructions came with any of the parts, so we came up with a plan and began working our way through the conversion. The teardown was pretty straight forward, starting with removing the brake lines from the master cylinder and the four bolts holding the master cylinder to the booster.
For this task you’ll need a 9/16” wrench for the brake line fittings and ½” for the four master cylinder mounting nuts. Have some rags ready as you’ll make a little bit of a mess when you break those lines free!


Above left: Under the dash view of studs/nuts holding the brake booster in place. Above right: Brake booster removed.


Above left: Under the dash view of power brake pedal linkage assembly. Above right: Power brake pedal linkage assembly removed.
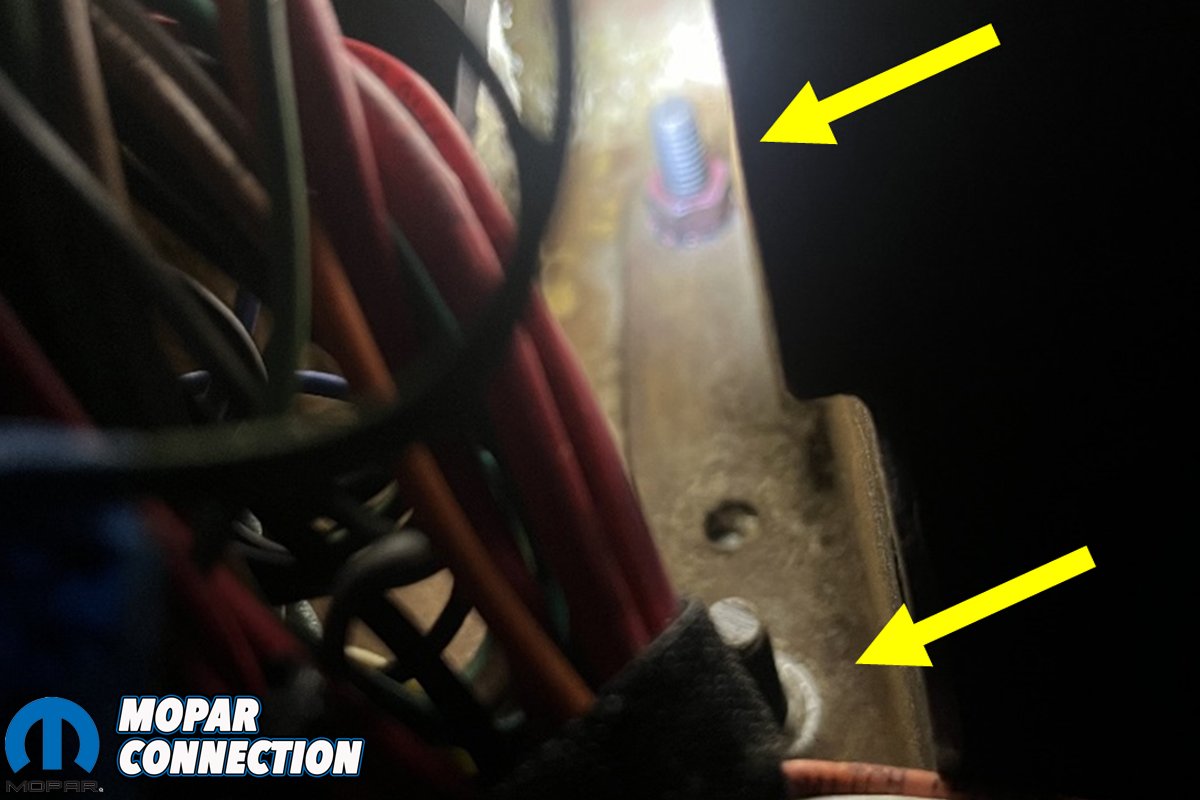
With the master cylinder removed you are left with the brake booster attached to the firewall. At this point find your most comfortable laying under the dash position as you’re about to go hunting for the backside of the four studs where they protrude though the firewall.
Using a ½” wrench or socket loosen the nuts and pull the booster off. If you have an electric ratchet it is very handy for this task. Our 3/8” Milwaukee battery powered ratchet with the right extensions made easy work of this task.
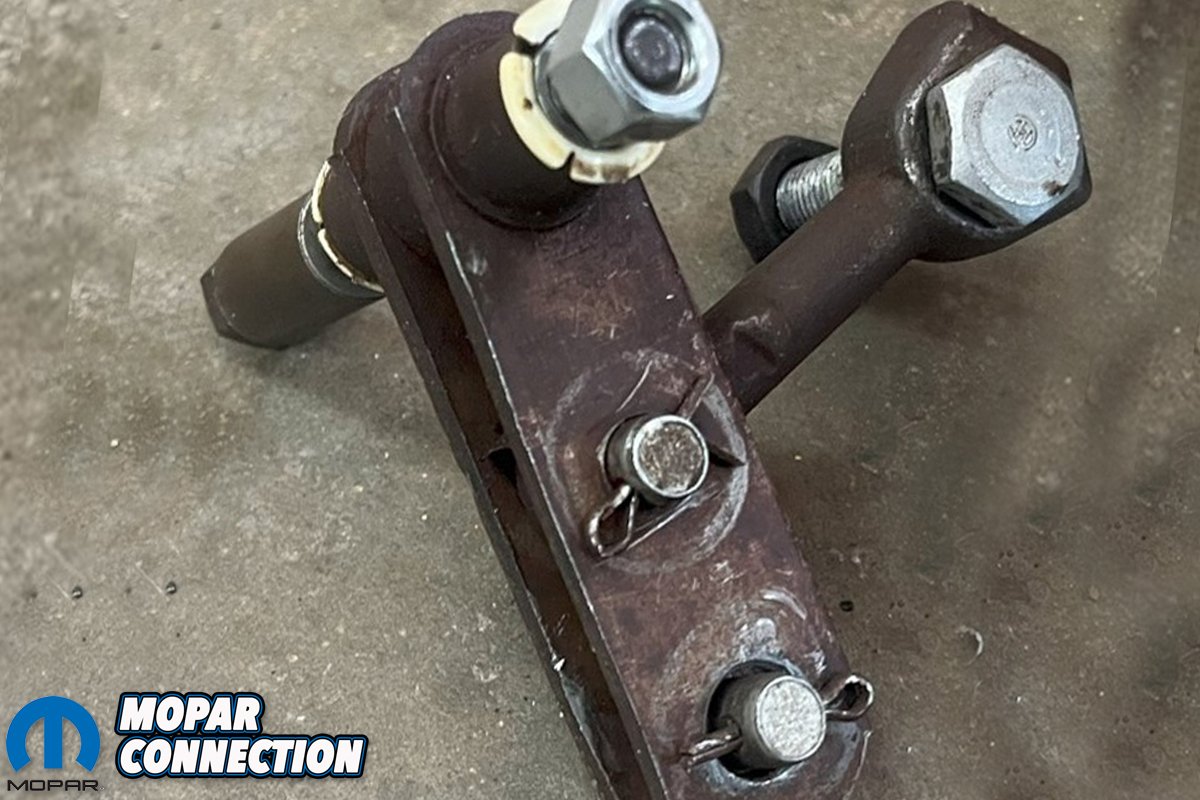
While you’re under the dash in a super comfortable position it is also a good time to disassemble the linkage from the brake pedal as it will not be used with the manual brake setup. This entails removing series of linkage pins / bolts. They attach the linkage to the pedal, and the linkage to bracketry under the dash.
An 11/16” and ¾” wrench will free that large bolt/nut, and a pair of 9/16” and wrenches will get the smaller diameter longer bolt free. A cotter pin secures the linkage pin which needs to be removed. Pardon the messy Painless wiring harness installed by the previous owner (future project to clean that up)!

Above: Bare firewall ready for new parts.


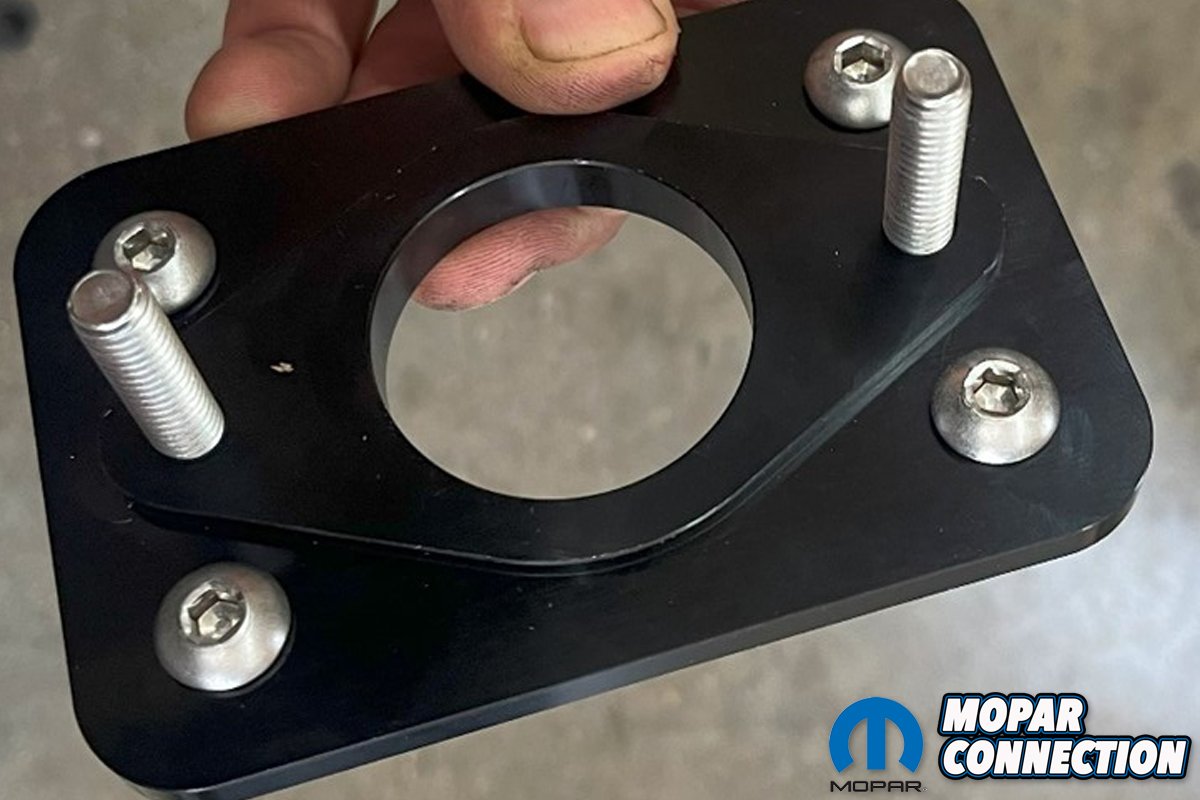
Above left: Aluminum adapter plate backside. Above right: Aluminum adapter plate front (master cylinder) side
With everything out of the car you’re left with a bare firewall ready for the installation of the new parts. Again, with no instructions there was a little trial and error to get everything mated together correctly.
It starts with sliding four bolts through the black aluminum adapter plate. These will secure the adapter plate to the larger steel stiffener plate and pass through the firewall to secure it all.
Using a 3/16 Allen wrench you’ll thread the two longer chamfer head bolts through the adapter plate in the opposite direction. These will be used to secure the new master cylinder to the adapter plate. The holes in the adapter plate are threaded so the bolts stay secure while tightening the nuts holding on the master cylinder later.
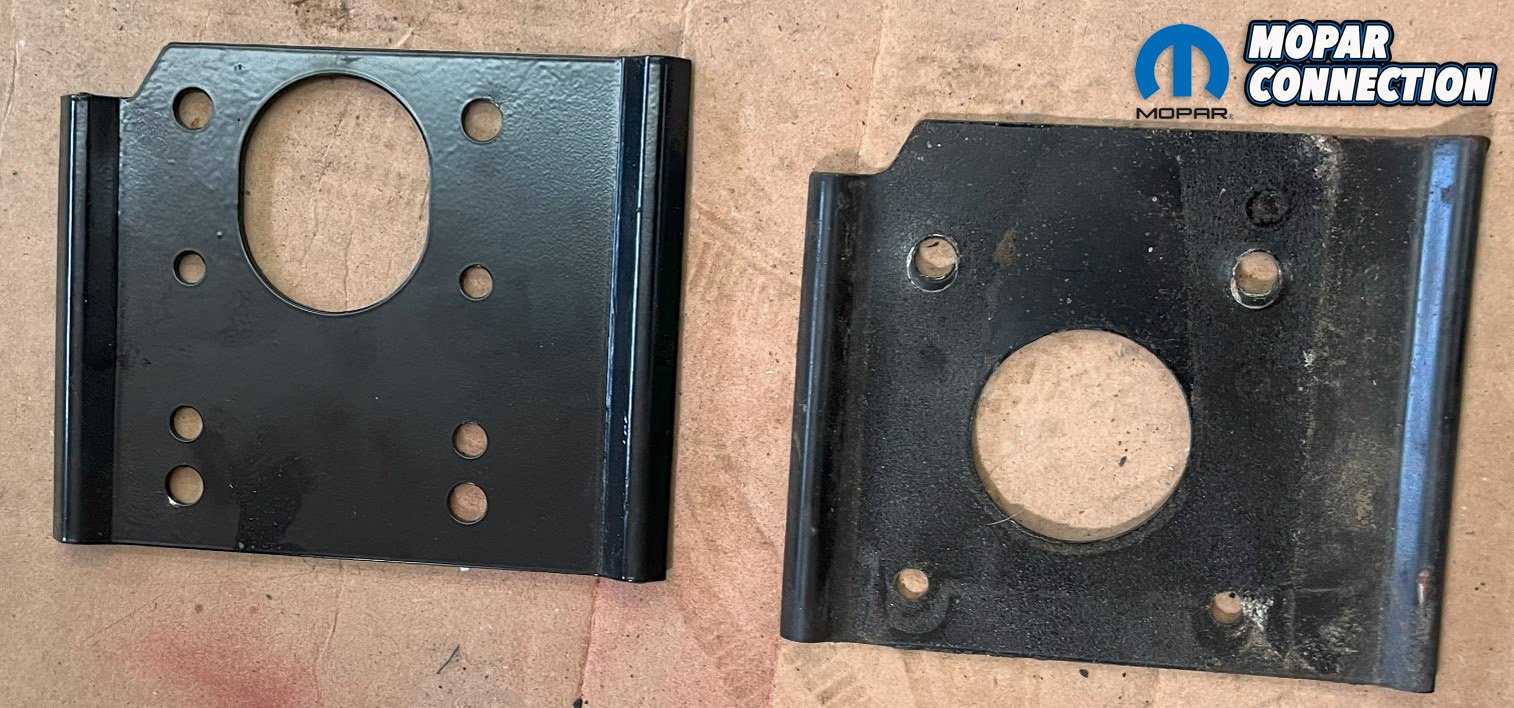
Next you’ll make an adapter plate, stiffener plate and gaskets sandwich as shown in the associated image. You will also insert two additional bolts at the top of the stiffener plate resulting in a total of 6 bolts holding the assembly to the firewall as opposed to the four holding the old power brake assembly. As you can see there are some differences between the old and new stiffener plates.

Above: Adapter plate, gaskets and stiffener plates sandwich. Adding two additional top bolts to the plate and gasket sandwich.


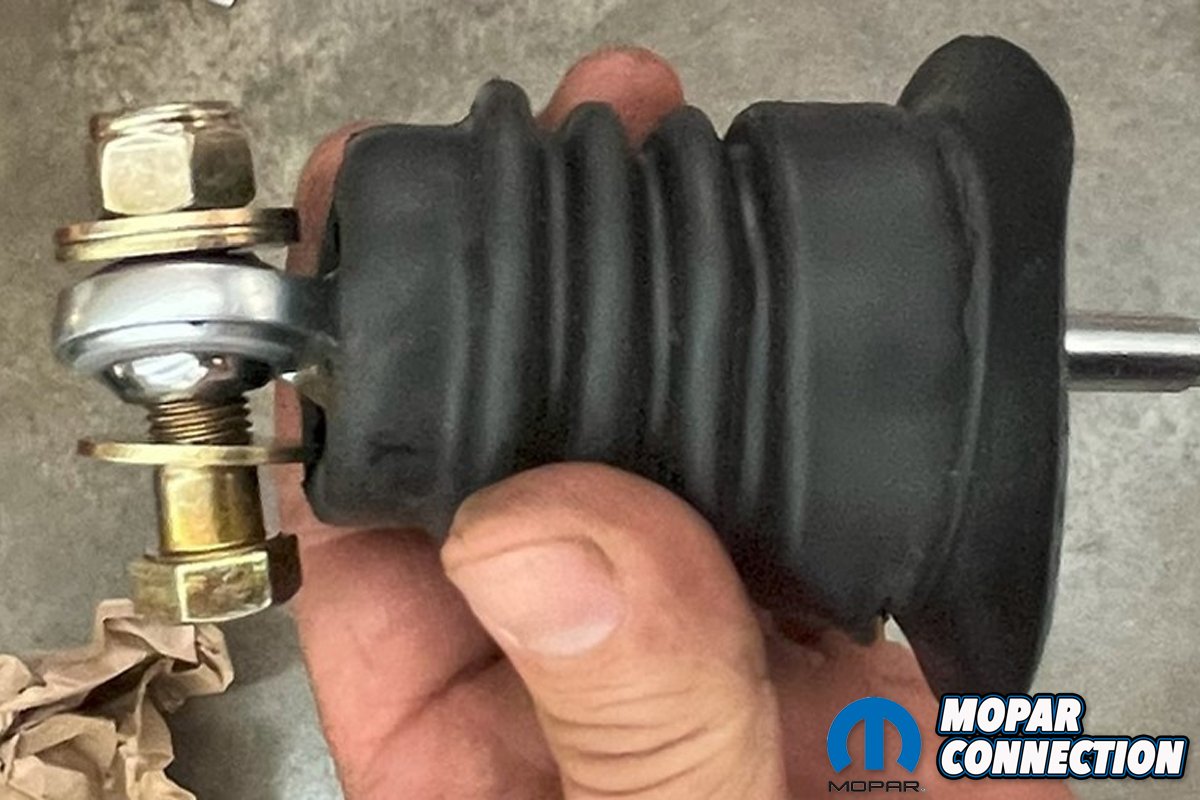
Above left: Adapter plate sandwich with rubber boot boot and brake pushrod. Above right: View of adjustable pushrod and rubber boot.
At this point you can remove the rubber boot from the old power brake assembly and fit it to our sandwich with the new adjustable pushrod. Reference the associated image for how it fits together.
Now is a good pause point to wash the years of grime off your firewall if you haven’t already … or if your car is nice and clean just proceed! With this gaggle of parts sandwiched together you are finally ready to attach it to the firewall.
Once the 6 bolts are slid through the firewall, you’ll head back under the dash to tighten nuts up and secure it in place. Like before you’ll need a ½” wrench or socket and your extensions of choice for reaching them all.
Under the dash the attachment of the pushrod to the brake pedal was a breeze. Very easy to get to and to adjust! You will need a pair of 5/8” wrenches to secure the bolt. Be sure to use the 3 washers as shown by the arrows in the associated image or the heim joint will bind up. [Ask us how we know!]

Above: Adapter plate sandwich test fit to firewall (without rubber boot and pushrod).


Above left: Adjustable pushrod attached to brake pedal. Above right: Location of washers on new adjustable pushrod linkage bolt.
Back in the engine bay the master cylinder install is easy. Slide the new master cylinder over the two bolts protruding from the adapter plate. Use a ½” wrench or socket two snug the two nuts up to lock it in place.
Back under the dash you’ll need to adjust the pushrod until there was a very small amount of play in the pedal. An 11/16” and 5/8” wrench was needed for the adjustment.
Now it’s time for plumbing. Back on the topside we were able to gently persuade the rear brake line to reach the new master cylinder inlet position, but the other one (the front line going to our linelock) had to be replaced with a new line. A trip to NAPA for some brake line and a few minutes with our bender made quick work of it.
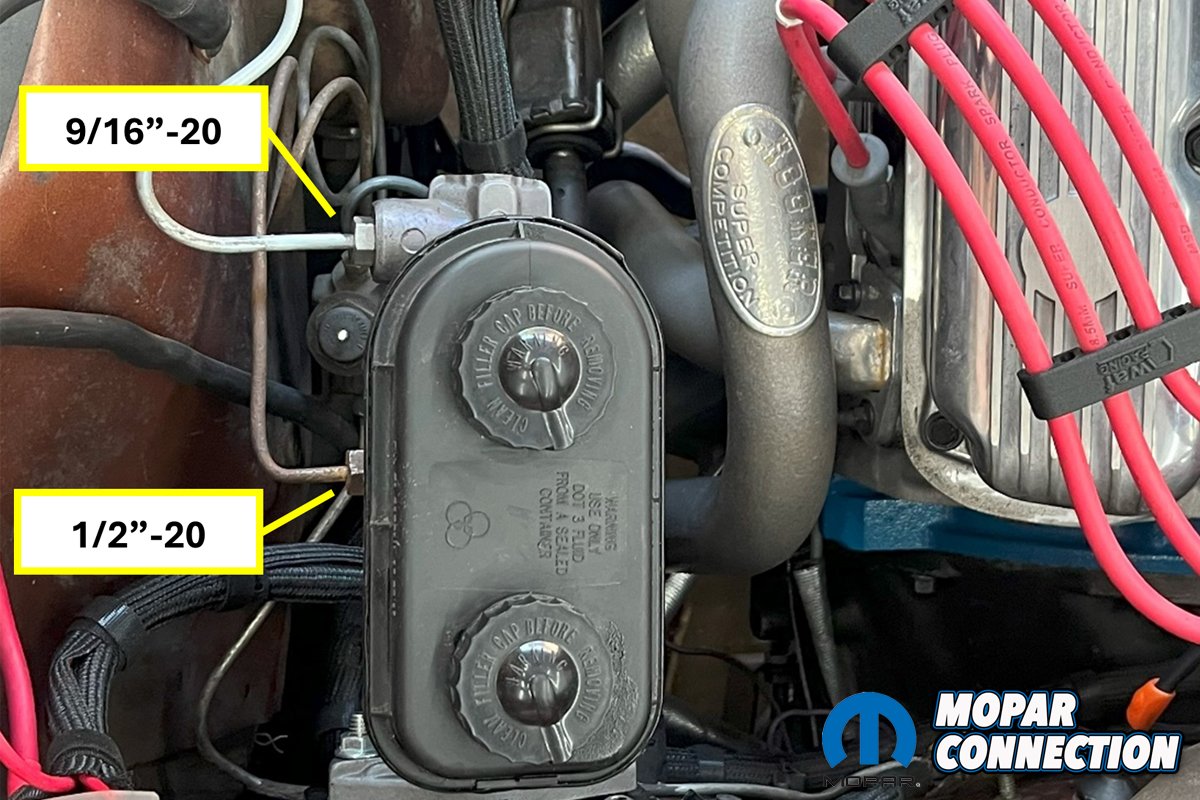
We do have some other general information to be mindful of regarding the brake lines and master cylinder as well. The front fitting size on a Mopar master cylinder is 9/16”-20 not the much more common 9/16”-18 used on other platforms.

Above: Adjustable pushrod adjustment


Above left: Brake line fitting sizes. Above right: Master cylinder area before and after.
So if you want to make new lines with new fittings plan ahead and order the fittings, the 9/16”-18 will start in a couple of threads; just enough to confuse you and the parts store guy! The rear line is the typical ½”-20 size. We could not locate a 9/16”-20 fitting in town so we cleaned up and reused our old one.
We also bench bled the master cylinder before hooking up the lines although not on a bench. We prefer to bolt the master cylinder to the car and make little lines from the outlets right back into the reservoir and use the brake pedal to bleed the master cylinder. This isn’t the only way to do it of course, but just our preference.
But what are the results of our swap?
- Brake Feel The brakes feel no different to us than the power brake setup that it left the factory with. And the added bonus of good “brake feel” if rolling the car around in the garage while it is not running is another plus we hadn’t thought of. We completed roughly 1,200 miles in the car for the Hot Rod Power Tour a couple of weeks after the swap and had zero complaints on the new setup.
- Space under the Hood A picture is with a thousand words in this case… there is just more room.
- Weight Savings The factory brake booster, master cylinder, stiffener plate and linkage under the dash ended up weight 18 lbs. The new components going back in weighed in at 3.6 lbs for a nice weight savings of 14.4 lbs.!


