


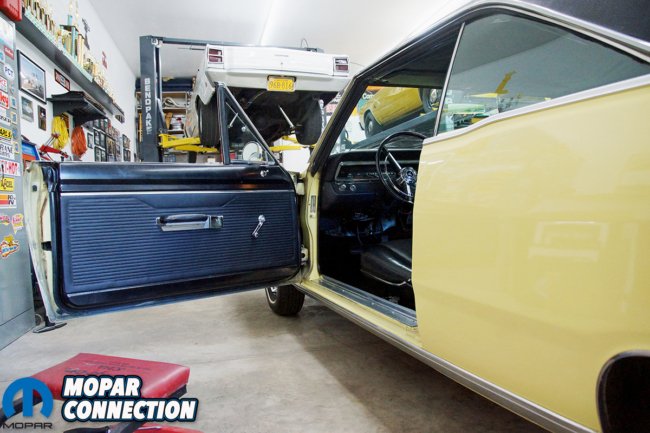
Recently, we picked up a 1967 Dodge Dart GT equipped with a 273 engine with a two-barrel carburetor, a console shifted 904 Torqueflite automatic, and a 2.94:1 geared 7.25 rear end. The Dart survived five previous owners and over 50 years of driving. Although the Dart was in pretty good shape it did have an intermittent starting issue that the last owner could not figure out. This did not deter us and luckily with help from Classic Industries it was an easy fix.
The Dart was built at the Los Angeles assembly plant on May 11, 1967, and it remained in the Los Angeles area through the first two owners until 2005, when it was sold to a new owner in Maine. The Dart bounced around through a few owners in the Northeast, and when the Dart popped up on a Craigslist ad in Albany, New York, we were immediately interested.
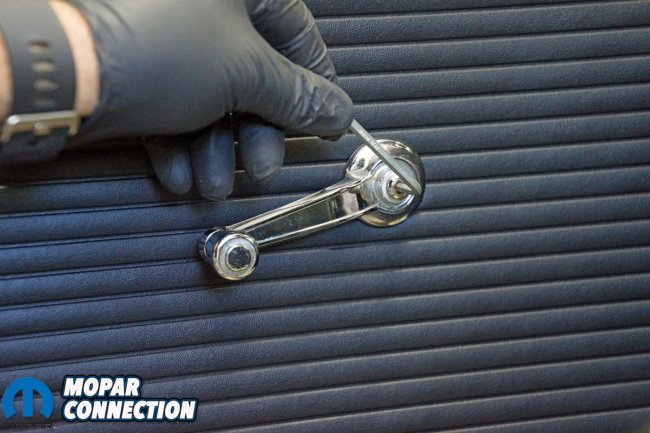
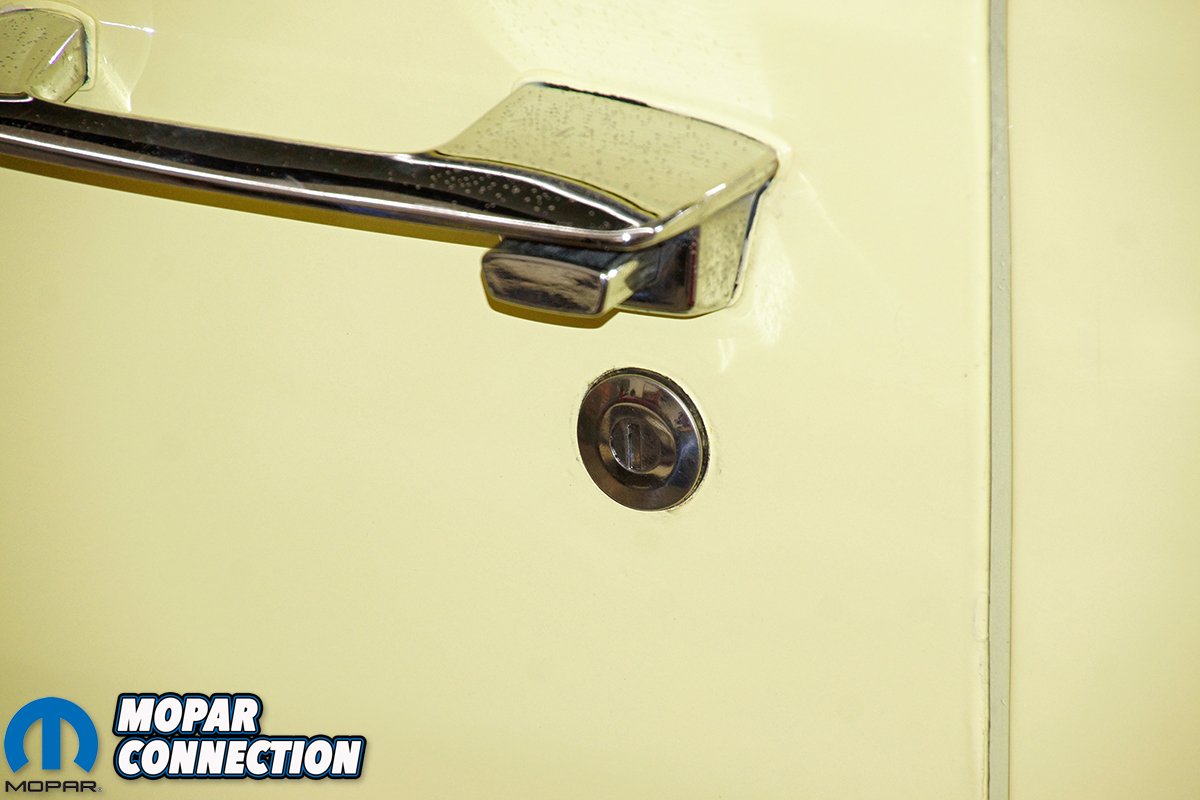
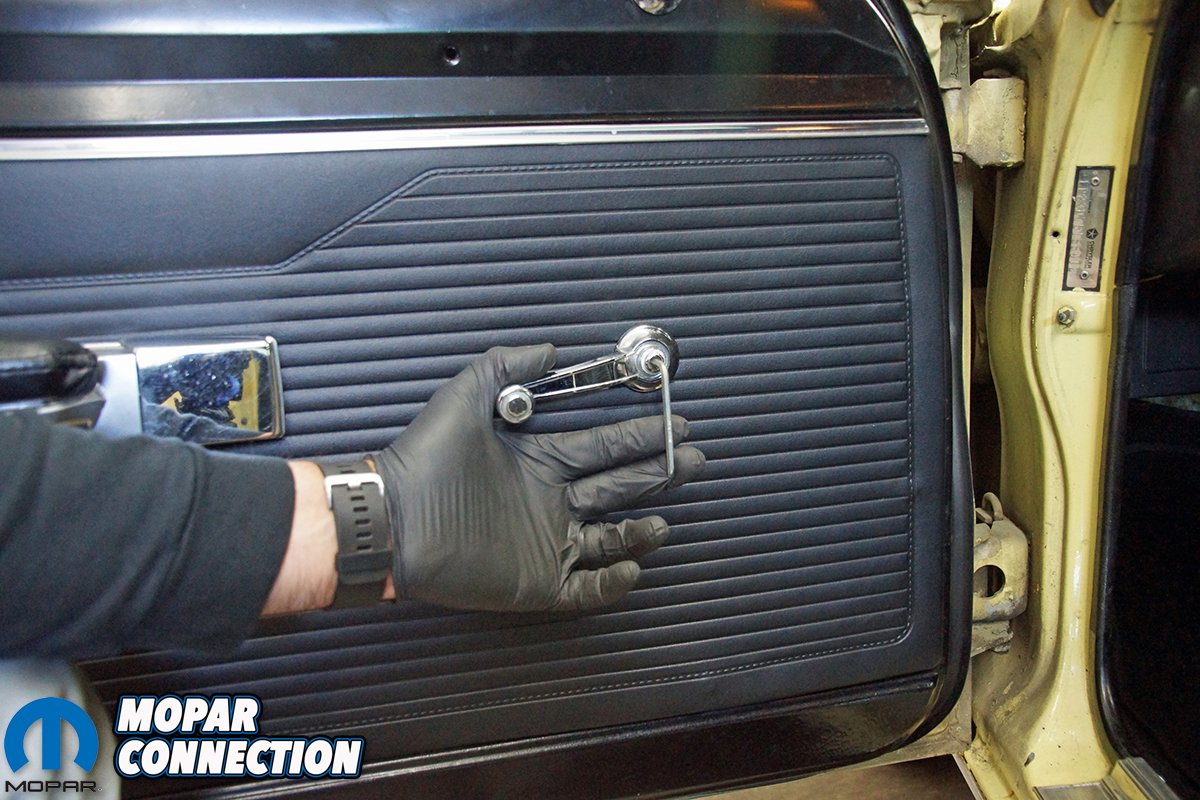
Above: The door lock cylinders were the first to be replaced. The window crank handle, the door release handle, and the arm rest and base would have to be removed before access to the door lock cylinder could be attained.
The Dart was originally silver, but fairly early in its life the silver burned through due to the blistering California sun, so it was repainted to a factory color called Sunfire Yellow (Y2). While the paint work was not the best, the rest of the Dart was kept in very good shape.
The second owner (1971-2005) maintained the Dart and made updates along the way, which included removing the points distributor and stabbing a 1976 electronic ignition distributor in its place along with wiring the into the factory harness. The third owner continued to keep the Dart in good operating shape by repairing or replacing components as necessary to maintain the Dart’s function and appearance.
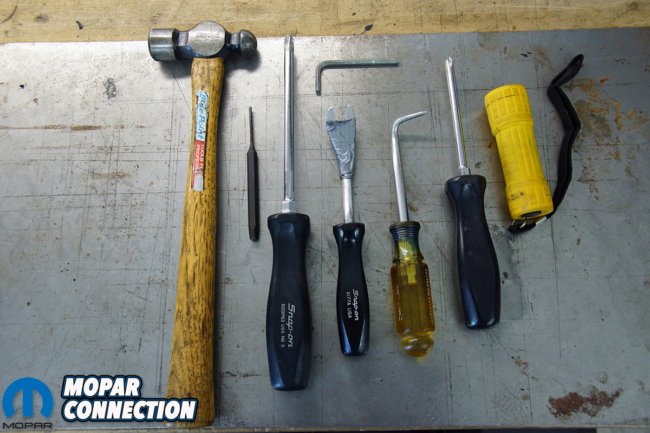
Above Left: Just a few hand tools and a couple of hours is needed to repair both doors and the ignition tumbler. Above Right: With the window in the up (closed) position, the angle of the window crank handle was noted for reinstallation.
By the time the Dart was with the fifth owner, the Dart had developed a finicky starting problem that left him befuddled without a suitable repair to the problem. Often the Dart had no problems starting, but on occasion (and with increasing frequency), the Dart would not start. Actually, the starter would not even click when an attempt was made to turn the key. This intermittent no-start condition did not deter us from pursuing this well preserved rust-free ’67 Dart.
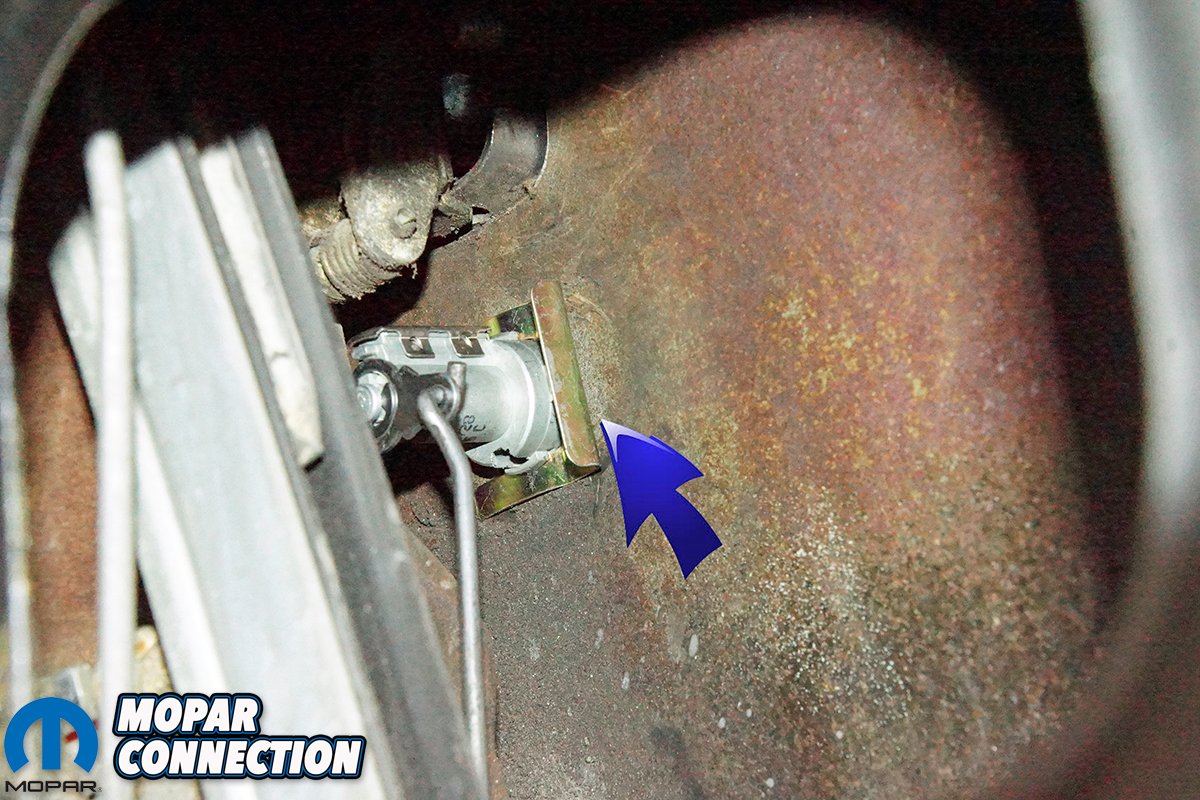
After several calls and photo exchanges of shots from various angles of the Dart, we settled on a price, and the Dart was ours. We had to make a four-hour trek north from central Pennsylvania to just south of Albany to pick up the Dart. When we arrived in Albany, we saw the Dart for the first time, and it was pretty much what we expected. The owner told us again about the intermittent starting problem, and he informed us it was probably a neutral safety switch that was out of adjustment.

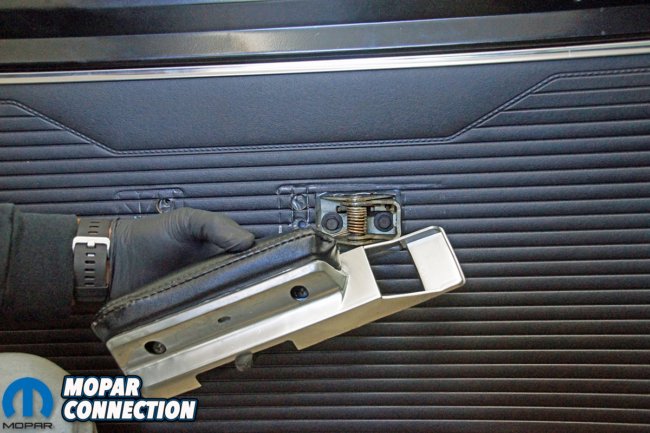


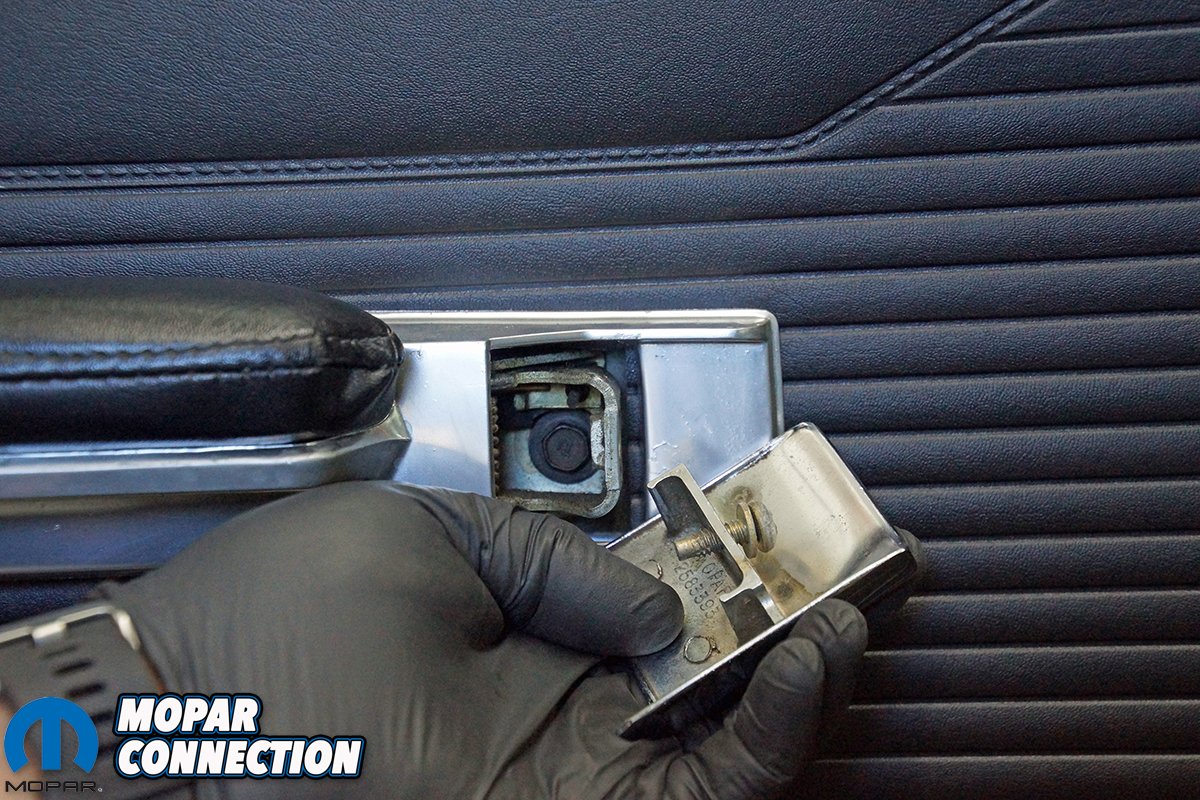
Top Right: A Phillips screwdriver unthreaded the single screw that held the chrome door release handle. Top Right: Two screws were backed out of the door, and the arm rest and the base were pulled from the door. Bottom Left: A door panel removal tool with some protective gray tape on it loosened each door panel clip. The key was to gently pry next to the clip that was pressed into the door frame. With a slight prying movement, each clip popped free from the door frame. Bottom Right: With all the clips removed, the door panel was pulled down from the chrome trim that held it in place.
We heeded his suggestion as the Dart was loaded into the trailer for the trip home.
Once at home and out of the trailer, we evaluated the Dart more thoroughly, and much to our surprise, no rust could be found in any of the usual problem areas on the Mopar a-bodies or anywhere else on the chassis. Being rust free was more important than anything else to us because finding a rust-free or low-rust car from the 1960s in the northeastern states can be very difficult in 2018. Rust can be extremely difficult to eliminate, and that translates into increased costs for body parts and any labor that may have to be farmed out.
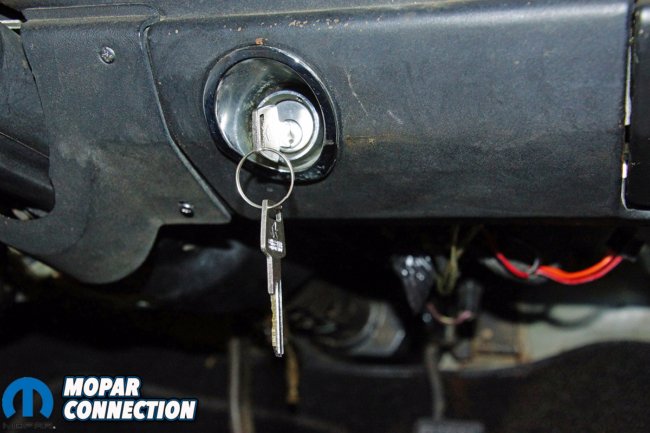
After starting the Dart several times without any problems, we finally experienced the no-start condition about which we had been warned. The first thing that was noticed was that the key would not rotate in the ignition tumbler. No matter how the key was jiggled, the key could not be turned.
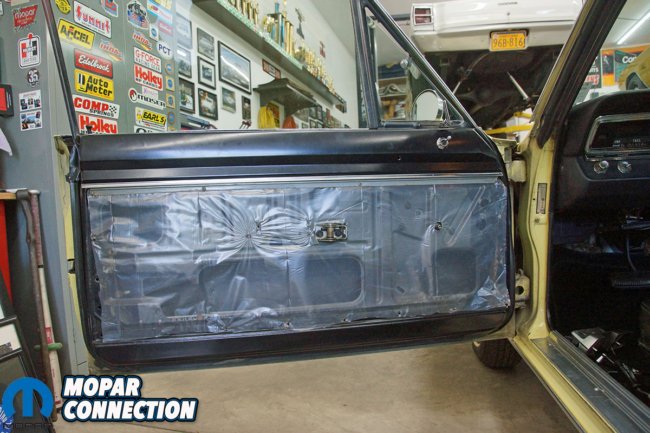

Above Left: The door panel was out of the way, and a quick look at the vapor barrier let us know someone had been in the door before us. Above Right: The removal of four screws freed the chrome trim from the door, and the vapor barrier was then able to be removed.
On every occasion the Dart would not start, the ignition key would hang up in the tumbler, and in most cases, removing the key and reinserting it allowed the key to rotate and the engine would start. After observing how the key was getting stuck, it turned out, the original 51-year-old ignition key was so worn and thin that if it was not properly inserted into the tumbler, it would enter crooked and jamb.
Additionally, the driver side door lock cylinder would not operate with the key. At first, it seemed a new key could be ordered and then cut by a locksmith, but once the door lock cylinder was removed and disassembled, it was apparent the cylinder had been damaged by the key (or another object), and it would not operate even with a new key.


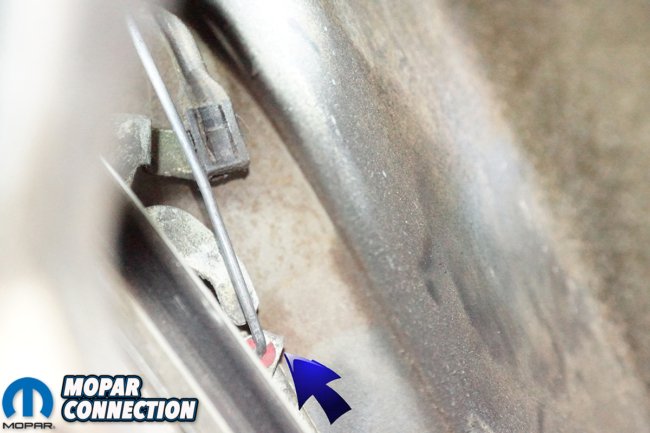
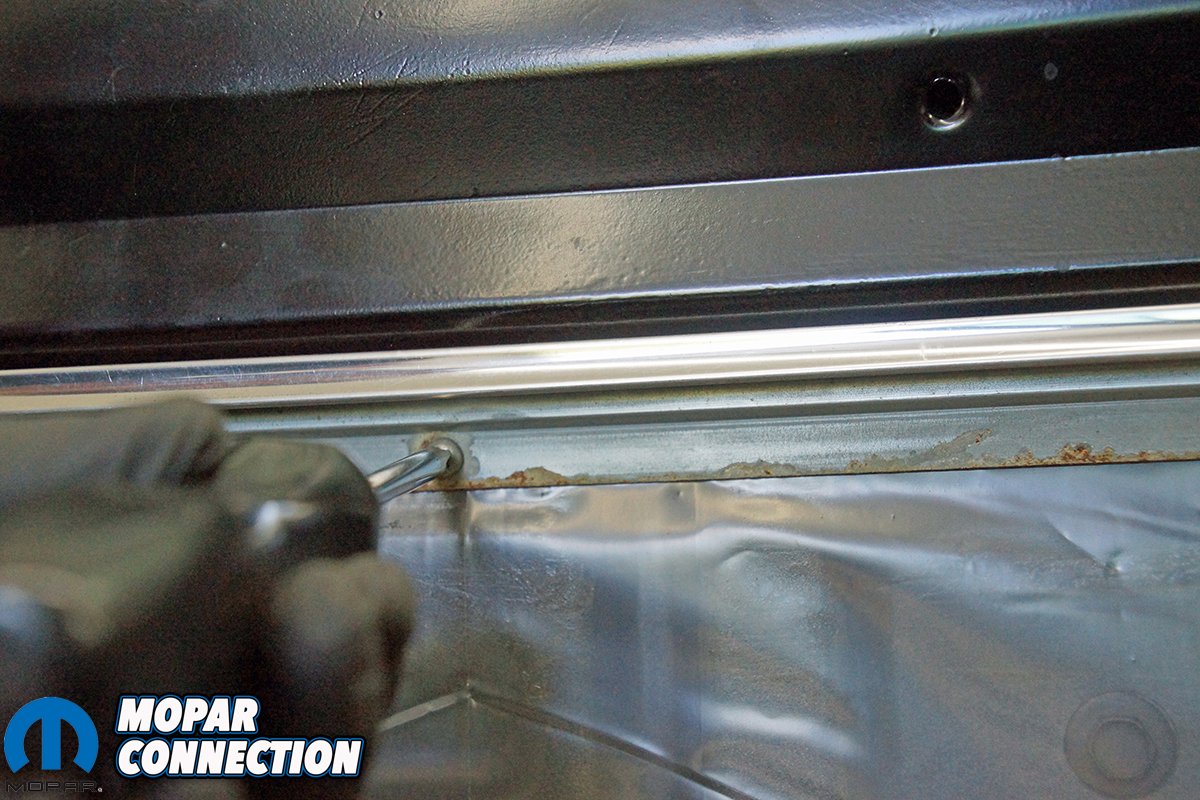
Top: The clip (blue arrow) has to be pulled to allow the factory door lock cylinder to be removed. Before the clip was removed, the rod just below the door lock cylinder was pulled (at the bottom end) forward toward the door hinges to free it from the latch mechanism. Bottom Left: A little wiggling with a flat tip screwdriver against the clip permitted the clip to be guided out of the door lock cylinder’s housing. Bottom Right: With one hand inside the door applying light pressure on the cylinder, our other hand guided the door lock cylinder out of the door.
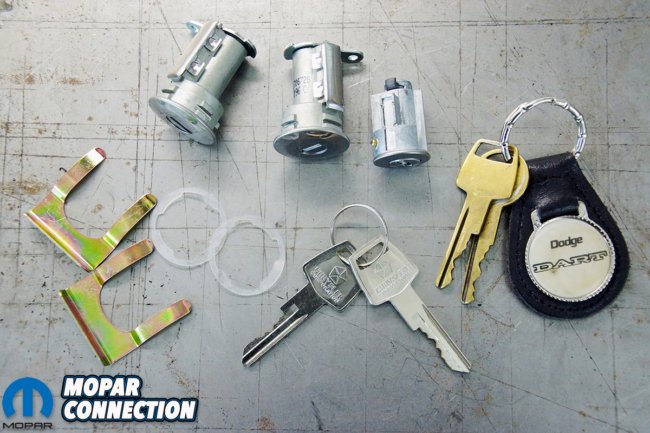
Knowing we needed a new tumbler, keys and door lock we jumped online and looked up our parts at Classic Industries. They had a complete set of both door locks, gaskets, clips, keys and ignition tumbler for $63. The parts were reproductions of the originals, but they were designed to be an exact fit replacement for the factory components.
We elected to install the driver side door lock first. The window crank handle orientation was noted with the window in the up position, and the crank handle was removed. The chrome interior door release handle was unfastened, and the arm rest was unscrewed from the door. The door panel was removed with the assistance of a door panel removal tool.


Above Left: The door lock cylinder was pulled upward out of the hole in the door, so the rod could be removed from the door. Above Right: The new door lock cylinder with the rod attached was guided into the hole in the door, and the cylinder was lightly pressed into the hole.
When the door panel was pulled off we noticed that the plastic vapor barrier was not the original nor was it the proper length or correctly adhered to the inner door frame. The vapor barrier was removed when the door panel chrome support strip’s four screws were unthreaded. With the barrier out of the way, another surprise was discovered as some work had been done to the inner door frame. At some time in the past, two speakers were added to the door, and the inner door frame was modified to make clearance for the speakers.
The cylinder removal was fairly easy and was accomplished with a few hand tools. Inside the door extending down from the cylinder to the door latch mechanism was a rod that had to be released from the door latch. A cotter pin removal tool was used to hook the rod at its base (opposite end from the cylinder lock arm) and pulled toward the door hinges of the door. With a pop, the rod released from the latch.

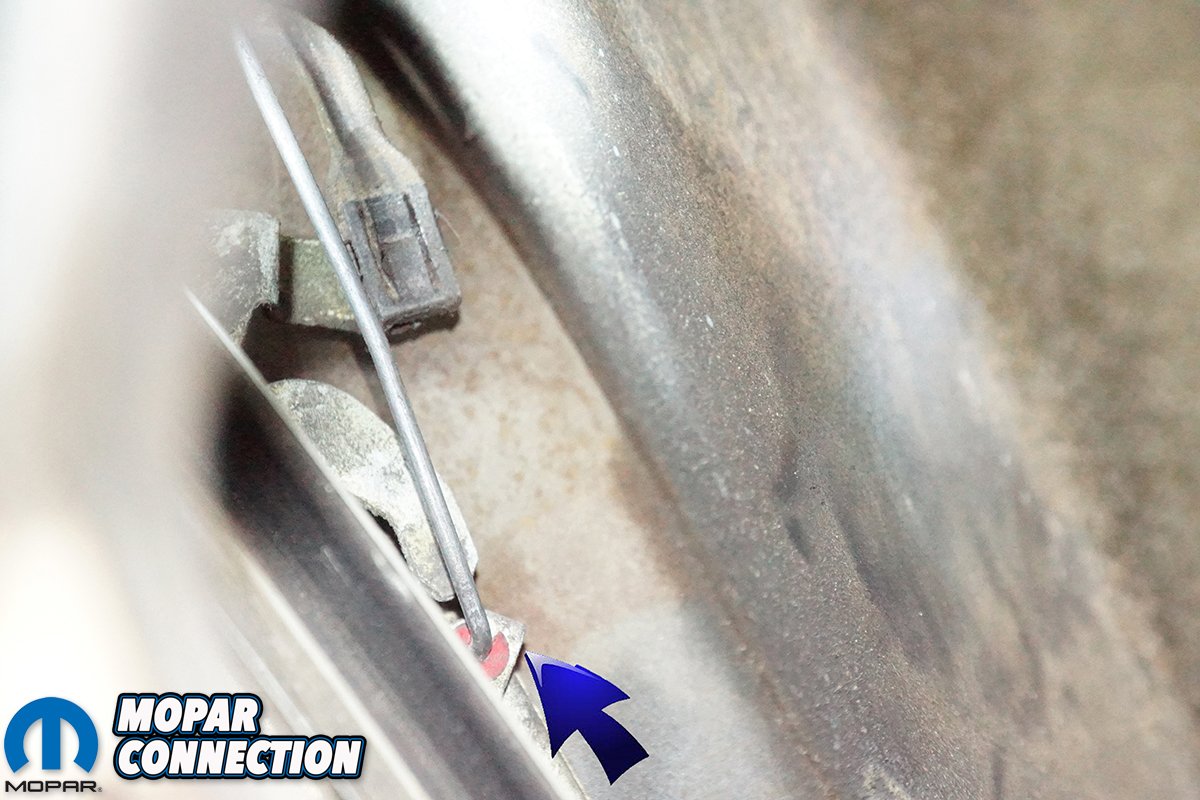
Above Left: The new door lock cylinder’s clip (blue arrow) was slipped into the cylinder’s housing. Above Right: The rod was pressed back into its red grommet (blue arrow) at the door latch mechanism.
Using a flat tip screwdriver, the clip inside the door that held the door lock cylinder in place was pried from the cylinder. After the clip was removed, a slight amount of pressure with one hand was applied to the lock cylinder inside the door while the other hand guided the cylinder lock from the outside of the door.
Once the cylinder was freed from the door, the cylinder along with its gasket was pulled upward allowing the rod to clear the cylinder lock opening in the door. The rod was transferred to the appropriate new cylinder lock (there is a left- and right-side cylinder lock), and the rod was fed through the hole in the door followed by the lock cylinder and gasket. A new clip was pressed into the cylinder lock’s body inside the door, and the rod was pressed back into the door latch.
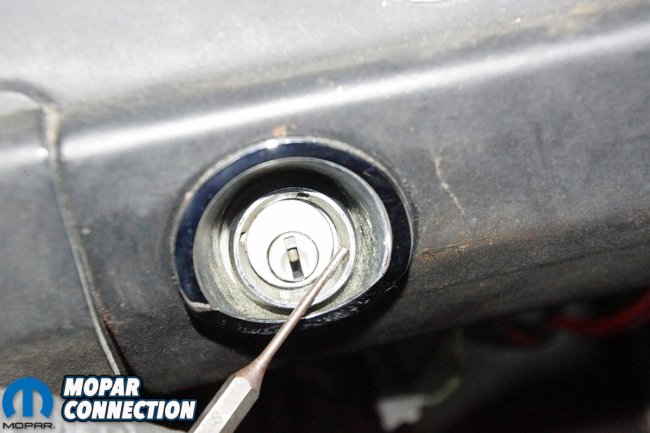

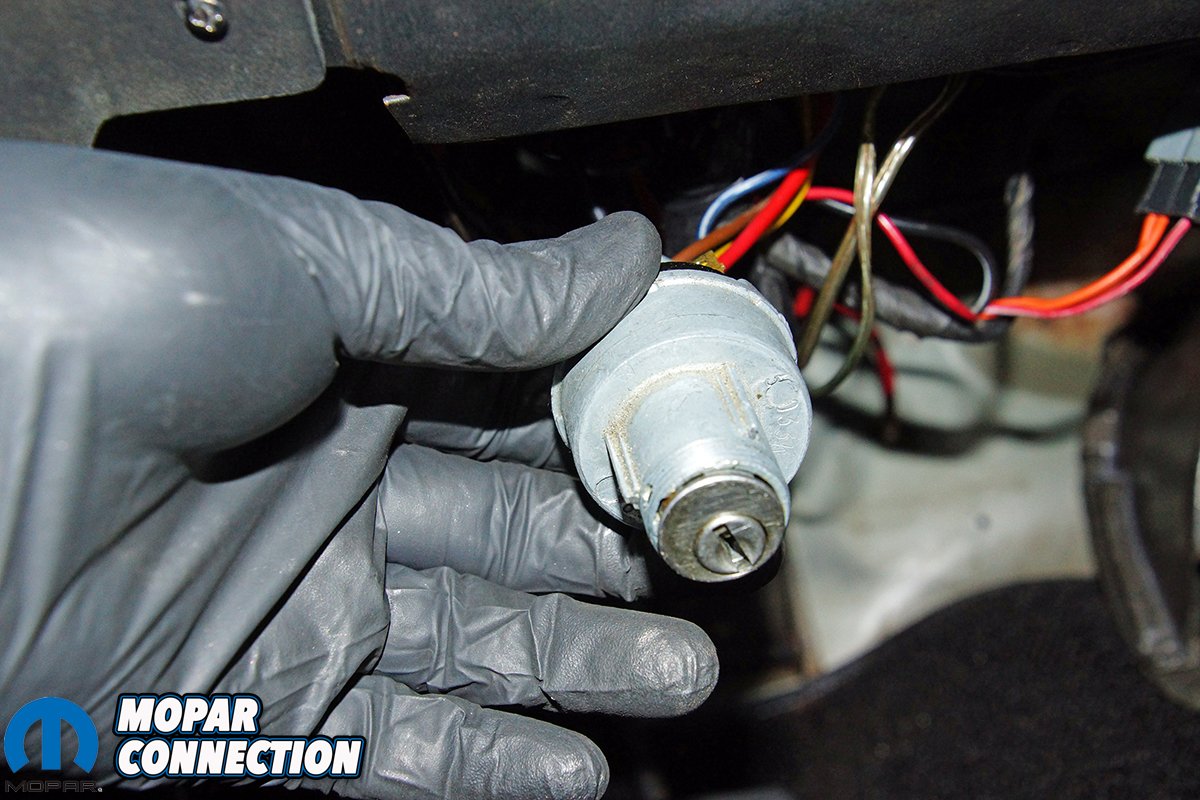
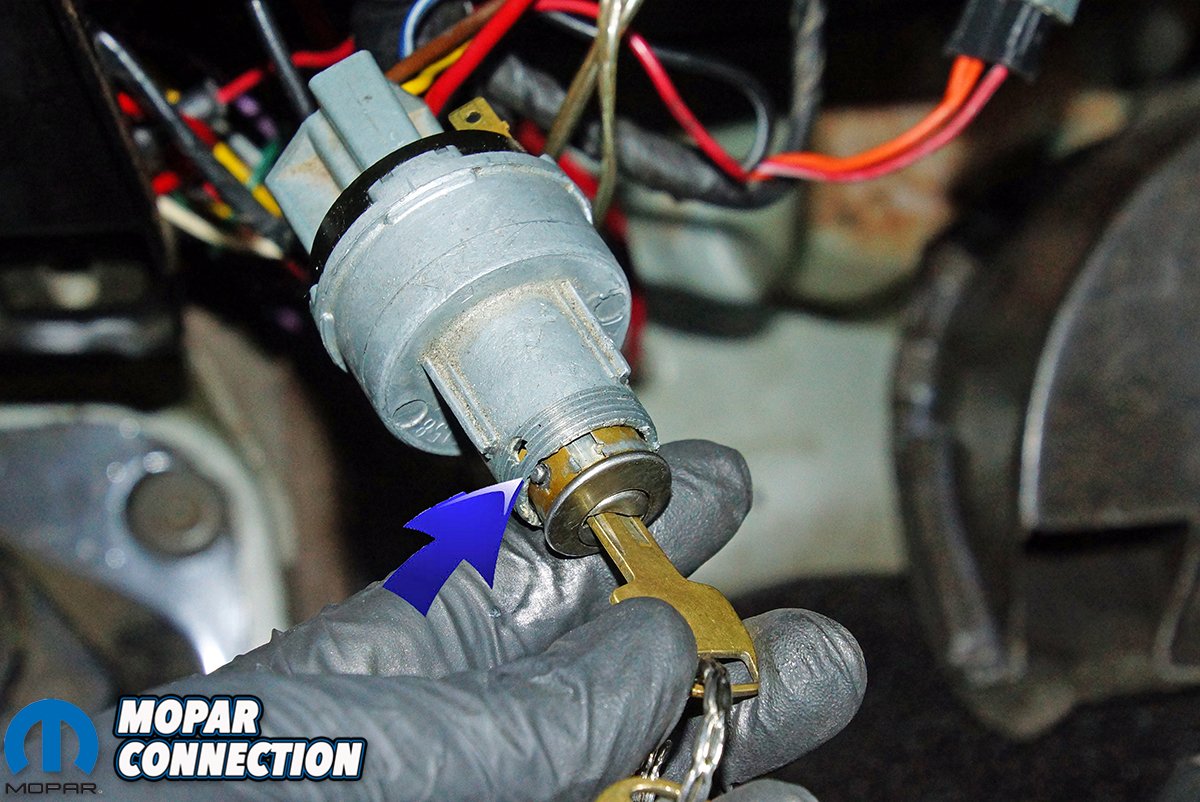
Top: Tapping a small punch that was engaged in one of the four grooves in the tumbler nut with a hammer made short work of loosening the nut. Bottom Left: The tumbler housing was pushed through the dashboard and dropped under the dash. Bottom Right: Inserting the ignition key and then rotating the key about 1/8th of a turn allowed us to depress the pin (blue arrow) and pull the tumbler from the housing.
With the door lock in the unlocked position, the door was closed, and the new key was guided into the cylinder lock. The key was turned in both directions, and the door locked and unlocked without error. Pleased with the operation of the key, we reassembled the door and moved to the passenger side of the Dart. The same process occurred with the passenger side providing us with door locks that operated properly on each side of the Dart.
The ignition tumbler removal was even less challenging than the doors. A factory nut was threaded onto the ignition switch housing, and the use of a hammer tapping on a small punch located in one of the four grooves on the nut loosened the nut to the point where it could be threaded off by hand.

Above Left: The tumblers are nearly identical but separated by a half century difference in age. The new tumbler has the same pin, so rotating the key about 1/8th of a turn permitted the pin to be depressed. With the pin depressed, the tumbler was inserted into the tumbler housing. The key was rotated to the off position, and the pin locked into place. Above Right: The tumbler was reinserted into the dash and the nut was rethreaded onto the housing.
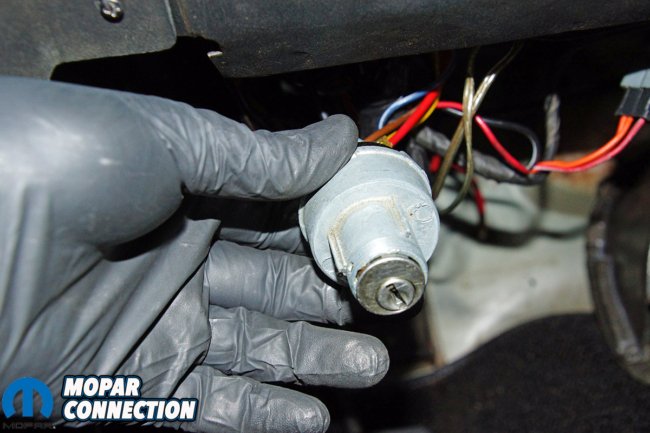
With the nut removed, the ignition switch housing was pushed back through the hole in the dashboard and allowed to hang down below the dash. There was a single pin in the switch housing that needed to be depressed. With the ignition key installed into the tumbler and twisted about one-eighth of a turn, the pin was depressed followed by a pull on the key, which resulted in the ignition tumbler sliding out of the housing.
The new ignition tumbler with the new key inserted and rotated about an eighth of a turn was slipped into the housing, and once seated, the key was turned to the lock position causing the locking pin to snap into its seat in the housing, which completed the swap of the ignition tumbler. The switch housing was pushed back through the dashboard, and the nut was tightened onto the housing.
Above: Just a few hand tools and a couple of hours repaired both doors and the ignition tumbler. A quick call to Classic Industries we were able to get everything we needed.
With everything assembled, the key was turned, and the starter whirled the 273 to life. The key was removed, reinserted, and turned several times, and each time the engine started. Since the key upgrade was performed, there have been zero problems with the intermittent starting concern and both of the doors lock and unlock without any difficulty.
Rekeying the Dart took a little over an hour to perform with basic hand tools, so for $63, a similar classic Mopar can be quickly renewed in a short weekend afternoon session with quality parts from Classic Industries that will provide decades of trouble-free operation.


