


It is often stated when one door closes, another opens. Such was the case when Dave Chamberlain, owner of All Classics Restoration, got a call from Mopar Connection Magazine editor, Kevin Shaw. Chamberlain had been steadily working on Project ZomBEE (a 1970 Super Bee), but the magazine’s priorities had changed, and ZomBEE would be moving to Finale Speed for a complete overhaul.

Above: Project Marsha arrived at All Classics Restoration with most of the rusted sheet metal already removed. Dave Chamberlain, the owner of All Classics Restoration, removed additional rust when repairing the driver’s side quarter panel.
While disappointed not to see the project completed, Chamberlain was not down for too long. Project Marsha, the magazine’s 1970 Plymouth Fury convertible, would take the slot in the shop once held by ZomBEE.
Strangely, finding 1970 Super Bee replacement sheet metal had been challenging for Chamberlain, but locating sheet metal for C-bodies is even more difficult, especially for convertibles. Some panels exist, but they leave much to be desired and require plenty of tweaking to fit appropriately and provide a decent appearance.


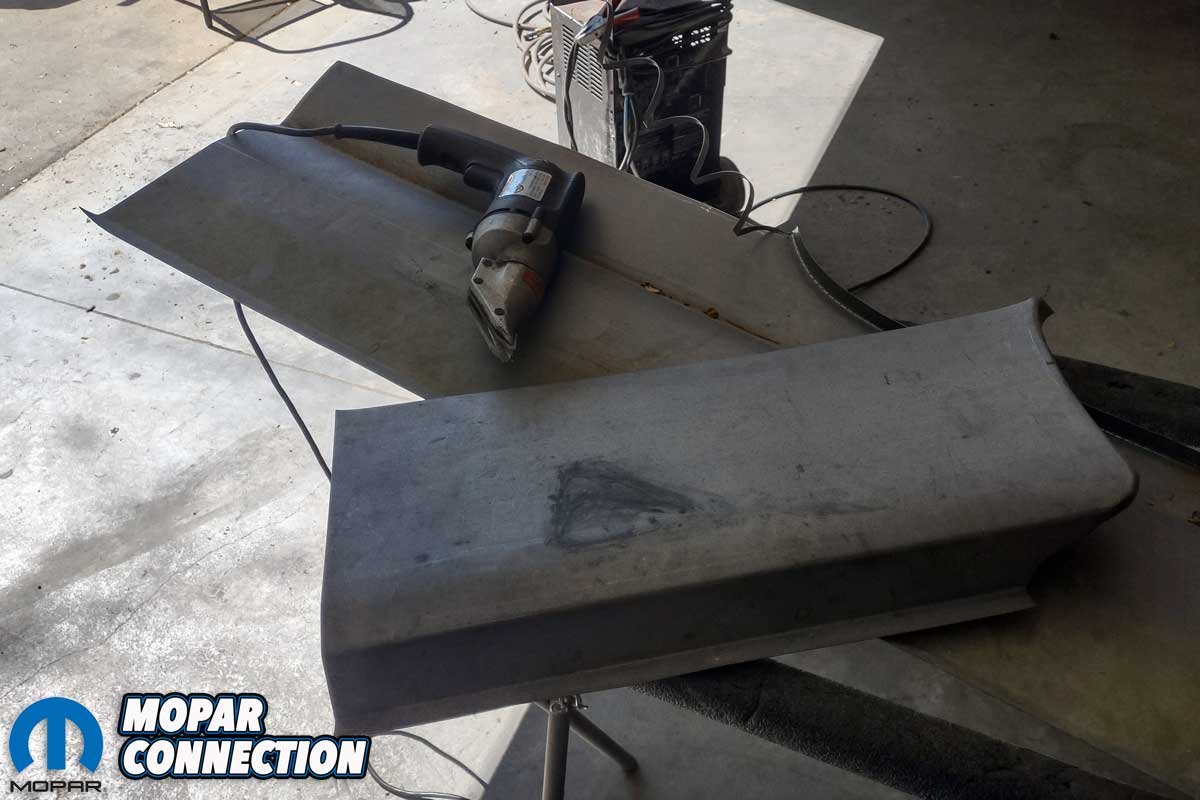
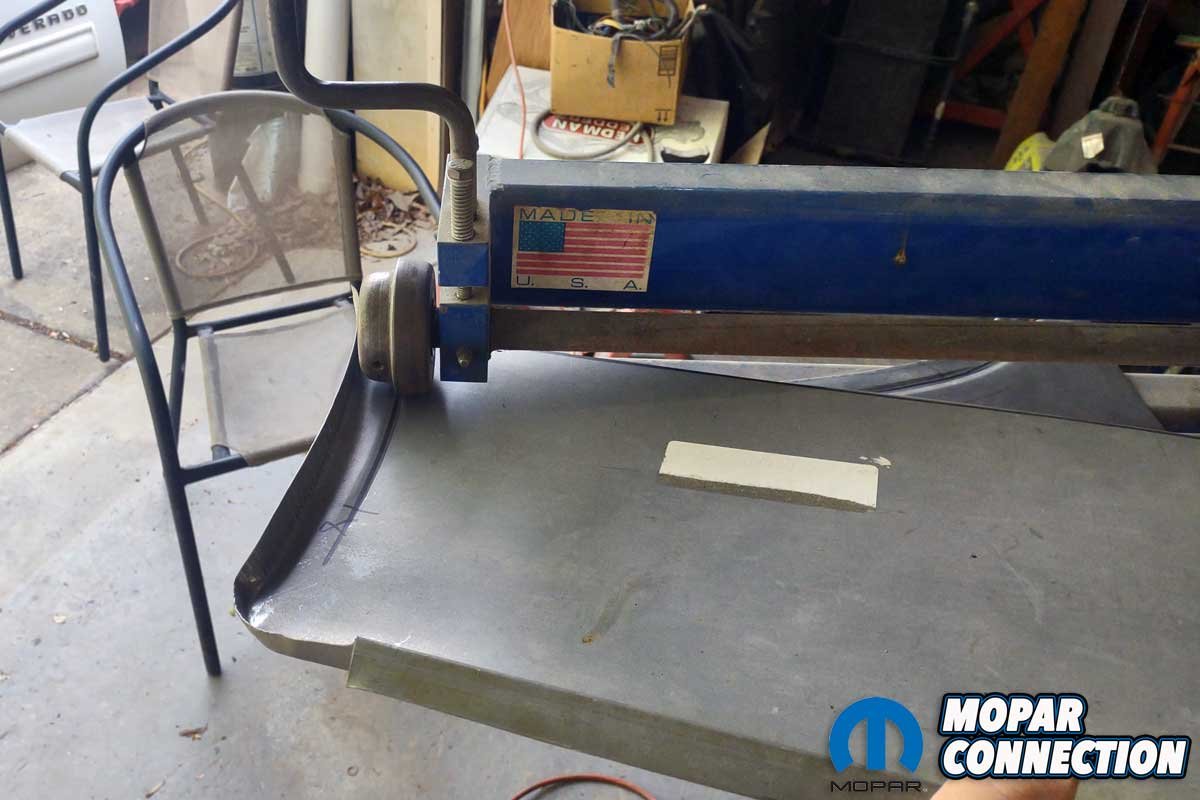
Above Left: When Marsha arrived at All Classics Restoration, a pair of poorly shaped stamped steel quarter panels accompanied the arrival. Chamberlain cut rust repair sections from the new metal. Above Right: Chamberlain used a roller tool with various-sized dies to achieve a body line that matched the wheel well lip.
Upon receiving Marsha, which had most of the rusted sheet metal removed, Chamberlain found the Fury’s driver’s side inner structure panels promising. The structure and rocker panel were in decent condition, and the outer wheel well lip, where the quarter panel attaches, was in good shape with no signs of rust.


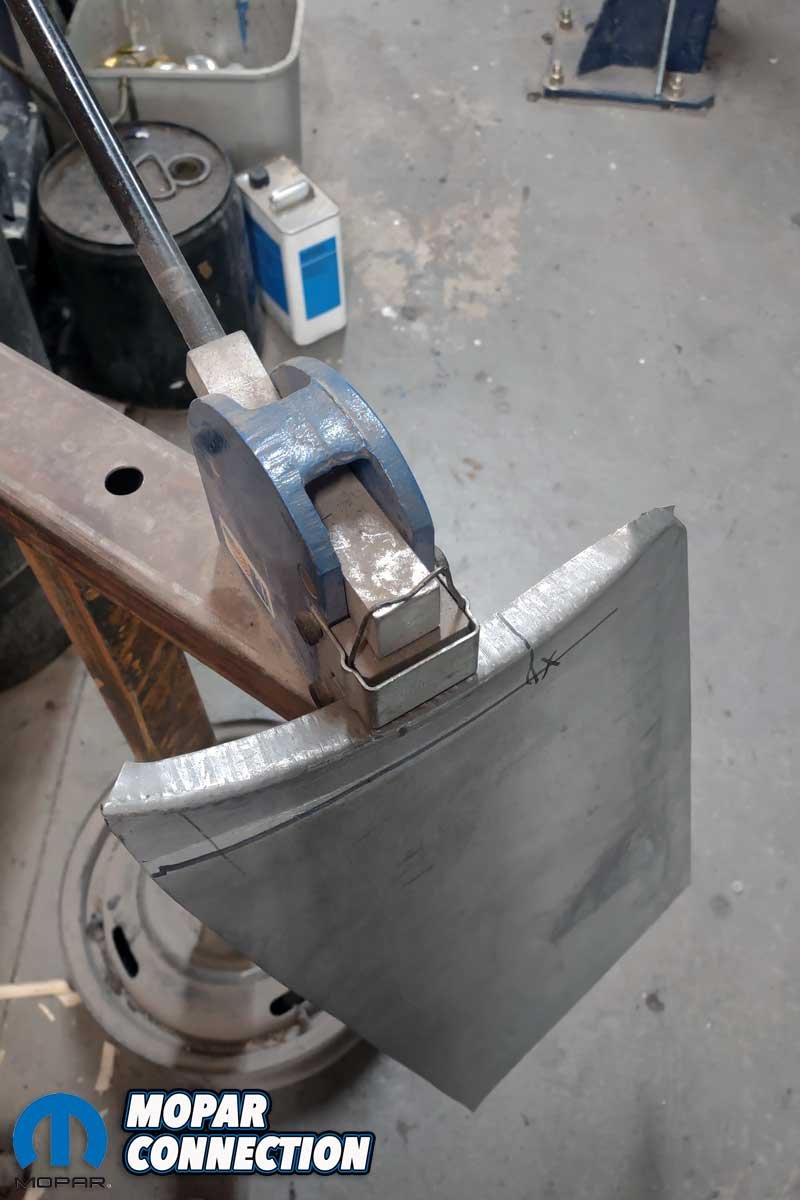
Above Left: A shrinker/stretcher tool manipulated the sheet metal to develop the correct panel contour between the rear wheel and the door opening at the rocker panel. Above Right: The panel was clamped between two angle iron plates. The sheet metal bend was hand formed.
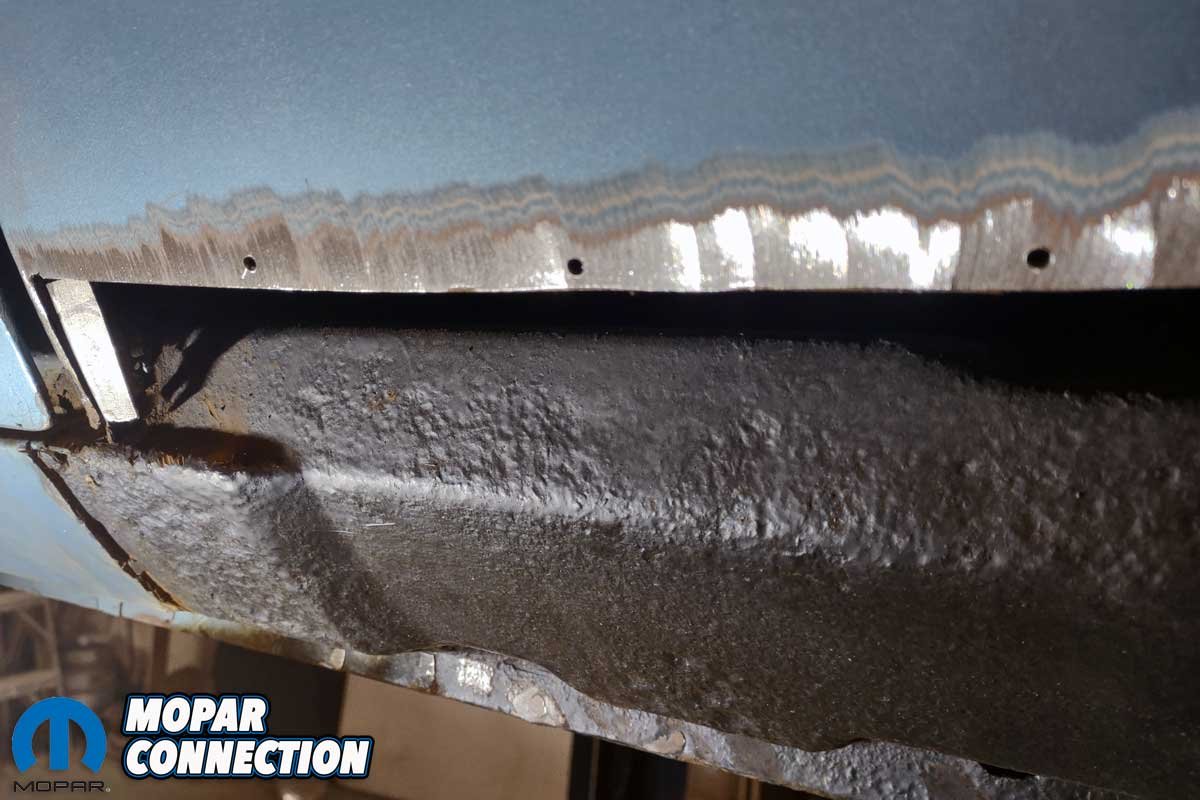
However, the inner and outer wheel well had minor rust through where they met the trunk pan. Additionally, the left side trunk extension had modest rust concerns. Because the damage was slight in each case, a couple of patch panels were all that would be necessary to ensure a proper repair and provide an excellent surface to attach to the lower rear quarter patch panel.
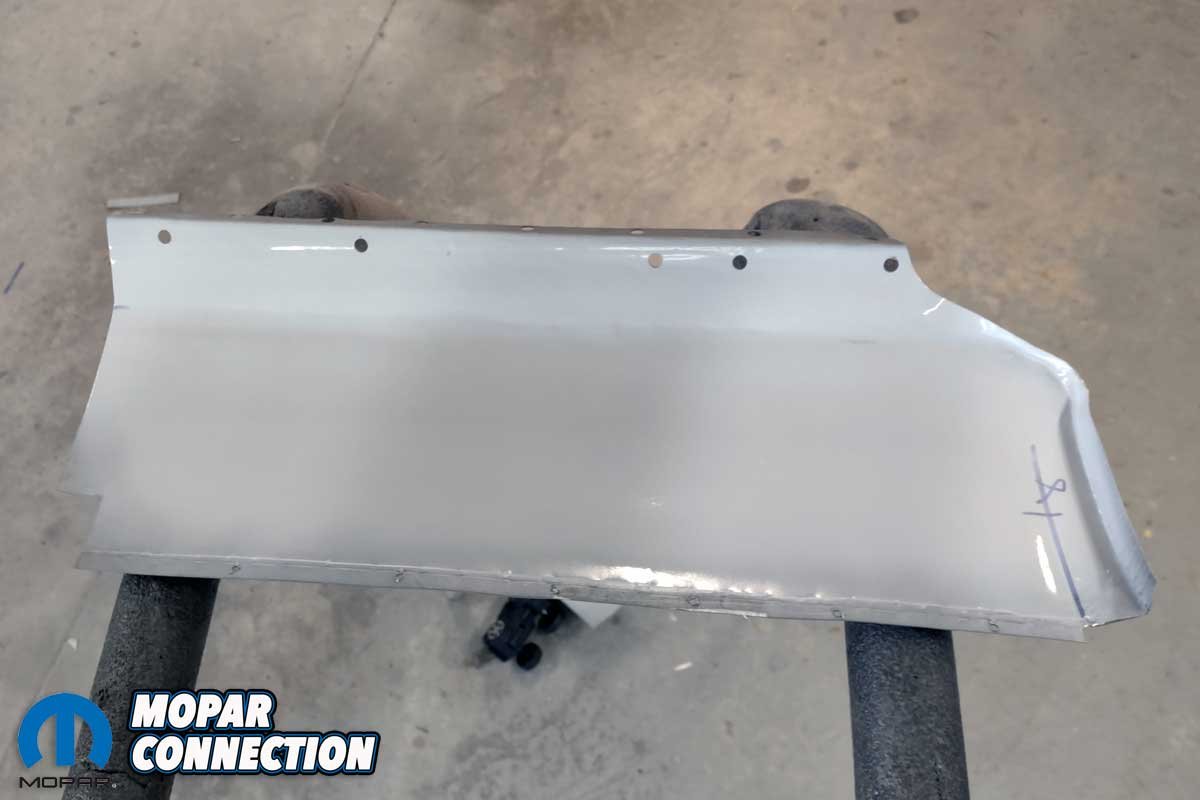
Above Left: The panel fits well. The body line at the wheel well matched the factory lines. Additional clearance was still necessary at the door jamb, but the panel looked good. Above Right: After trimming the sheet metal at the door jamb, the metal was punched with holes at the pinch weld to facilitate the use of plug welds.
The plan for Marsha was to remove all the rust concerns, return the chassis’ integral strength, and make the Fury aesthetically pleasing to view. That meant not everything would be a spot-on replacement panel. Repair work may be visible in inconspicuous areas under the car or where the carpet is pulled back. However, no repair work would be evident when looking at the exterior.


Above Left: The paint above the patch panel was sanded to bare metal to ensure a clean weld seam. Above Right: Holes were drilled through the new metal and the factory quarter panel. The holes were for Cleco fasteners.
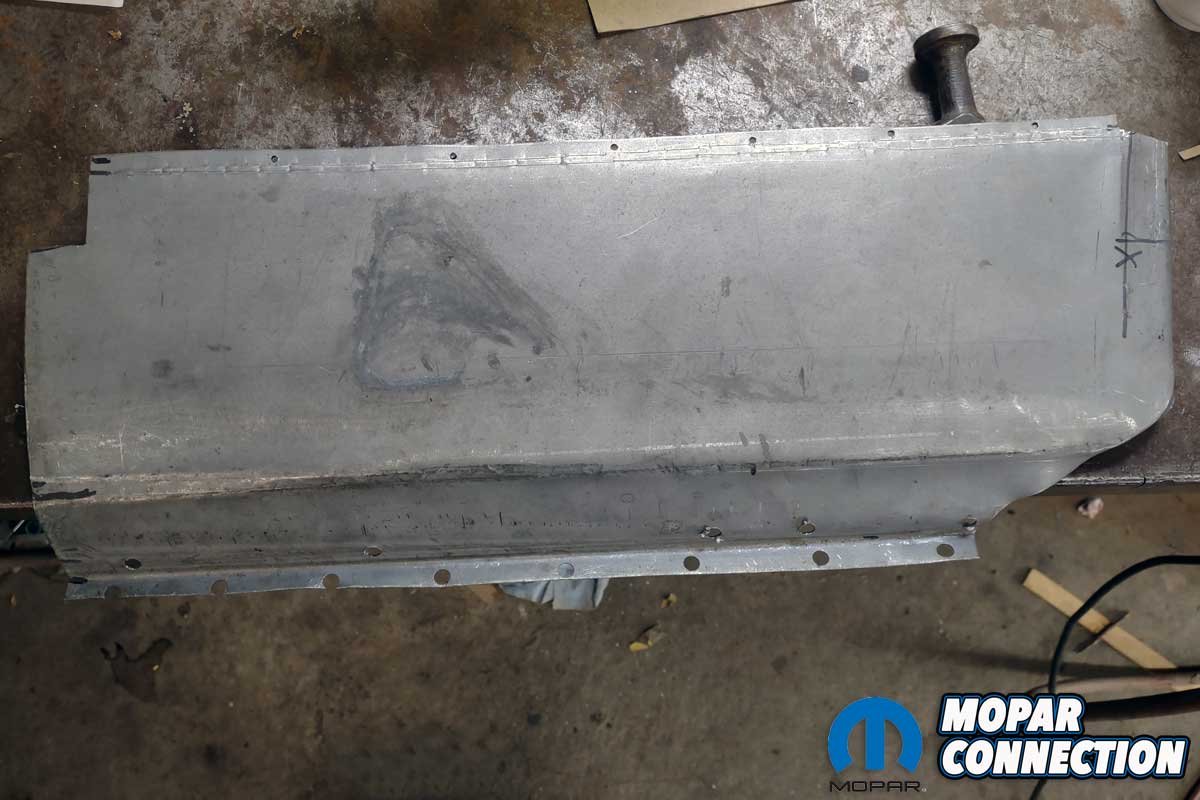
When Marsha arrived at Chamberlain’s shop, it was accompanied by a pair of roughly shaped aftermarket quarter panels. Because the Fury did not need full quarter skins, each panel would be sectioned for what would be required. After several measurements of Marsha’s quarter panels, Chamberlain marked and cut the aftermarket sheet metal.


Above Left: The panel exterior was given one last check before installation. Above Right: The interior side of the patch panel was prepped and sprayed with a thin layer of weld-thru primer.
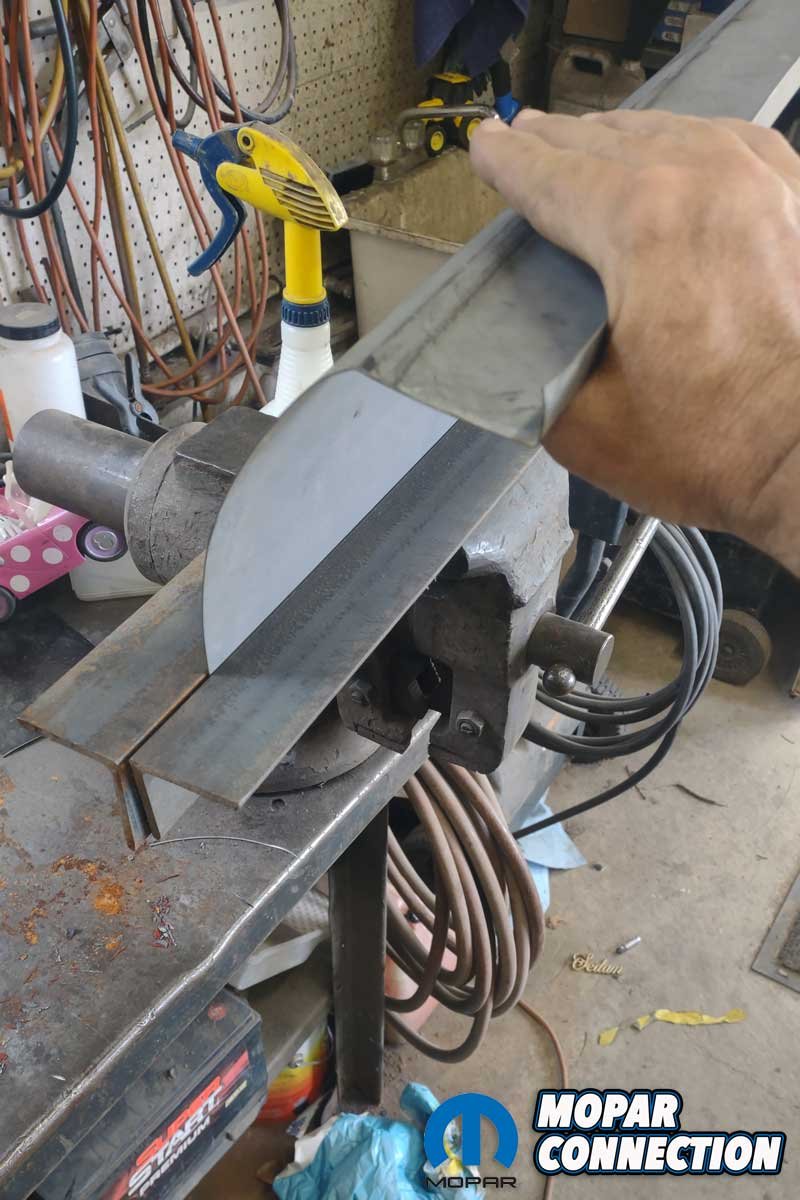
Chamberlain used a motorized bead roller incorporating a series of stepped dies to achieve the body line that followed the wheel opening. While patiently swapping dies and feeding the panel into the bead roller, Chamberlain acquired the correct contour and appearance. After making the body line break, the section below the line was worked with a hammer and dolly to shape the wheel lip opening.
The new panel still did not match the curvature of the factory outer wheel well, so two more techniques were employed to make the correct curve. First, Chamberlain used a shrinker/stretcher tool to, in this case, shrink the metal at the lip to meet the contour of the opening. Next, using two pieces of 3/16-inch angle iron mounted in a bench vice, the panel was clamped and gently pulled until the desired arc of the panel was realized.

Above Left: The Clecos held the patch panel tightly to the original metal. After a few tack welds on the lapped panels, the Clecos would be removed. Above Center: The tack welds were spaced evenly to minimize the heat in the panel. Above Right: Keeping the heat to a minimum reduced the chances of panel warpage.
Fitting the first patch panel to Marsha was straightforward. The horizontal meeting edge was welded with a lap joint using the step flange on the Fury at the point where the body line starts. A 1-inch section from the body line to the lip was butt welded because there was no room to slip a flange between the patch panel at the wheel well lip and the original quarter panel.


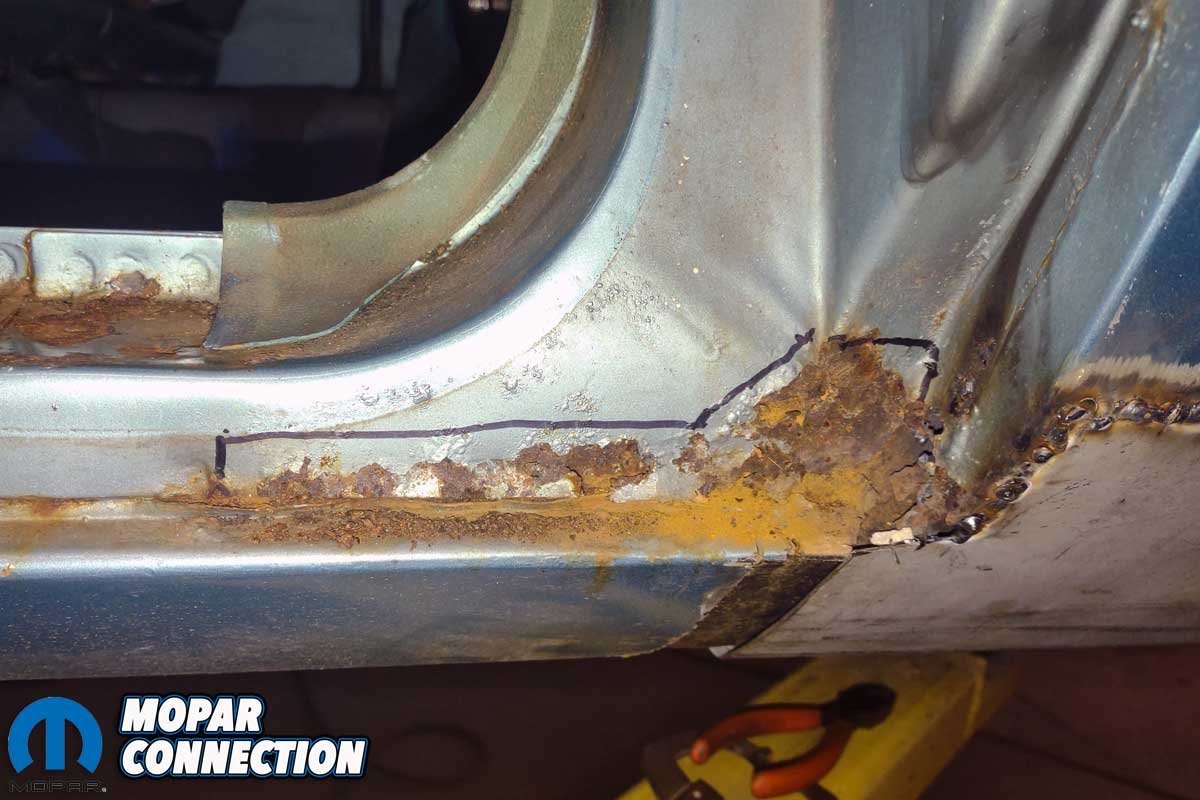
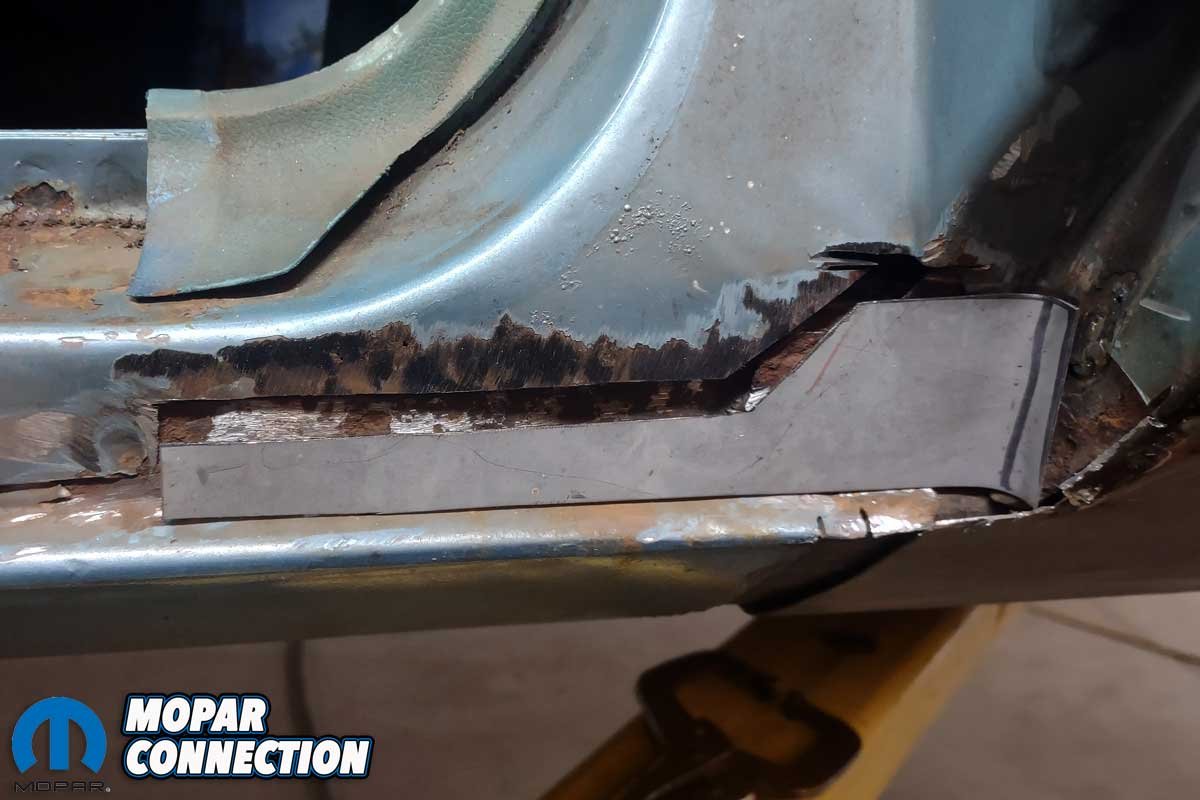
Above Left: The bottom corner of the door opening at the base of the B-pillar had rust concerns. Chamberlain marked the damaged area with a Sharpie. Above Right: The rust was cut from Marsha’s chassis. The remaining steel was treated with a rust inhibitor.
At the front edge of the panel near the door opening, Chamberlain added extra metal. Again, a butt weld secured the metal but allowed the original panel to remain in the door opening. The lower section of the patch panel was laid over the original inner rocker panel, and it matched so well that it only needed holes punched through the lower edge at the pinch weld for plug welds.


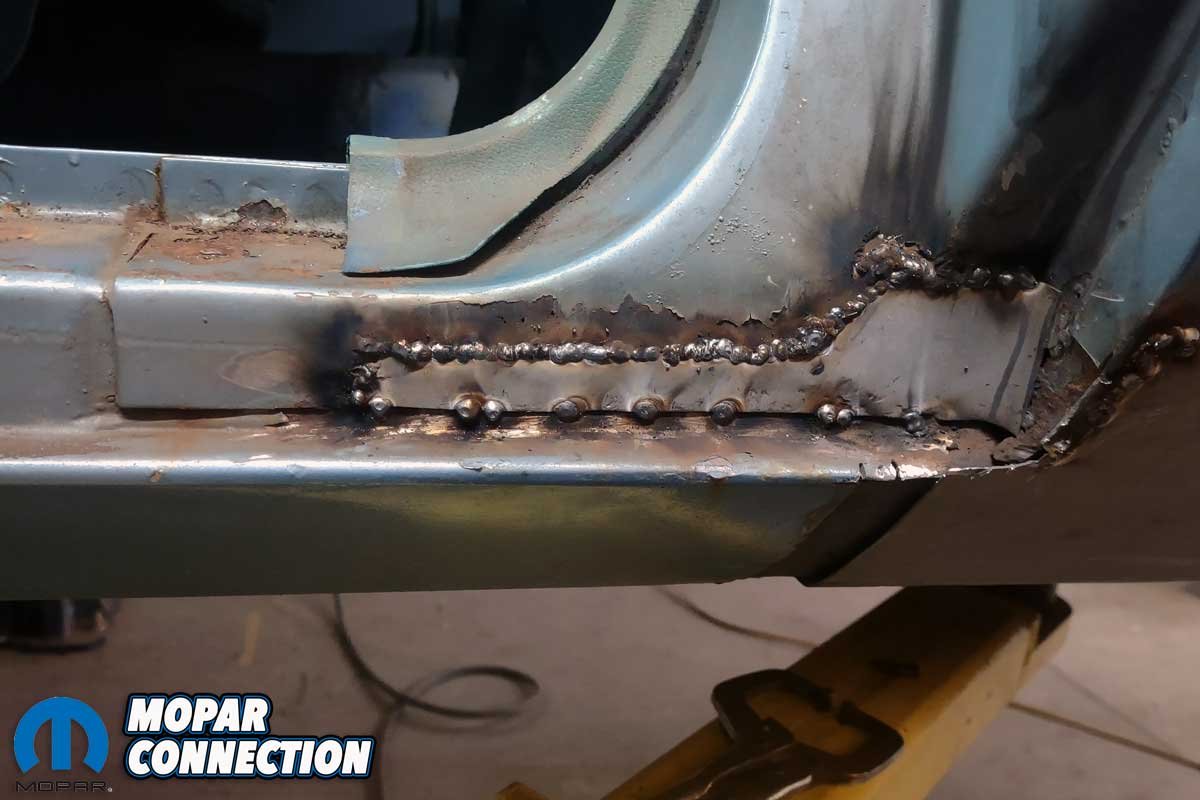
Above Left: After cutting and bending the metal, the patch panel was test fitted. It needed a little more work, but it was close. Above Right: The metal was methodically welded to the door opening area.
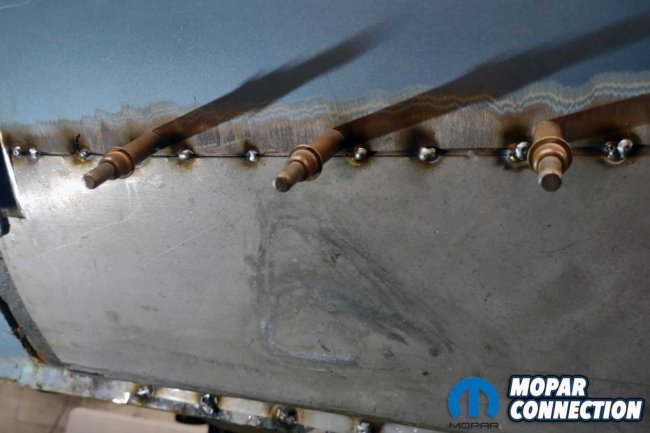
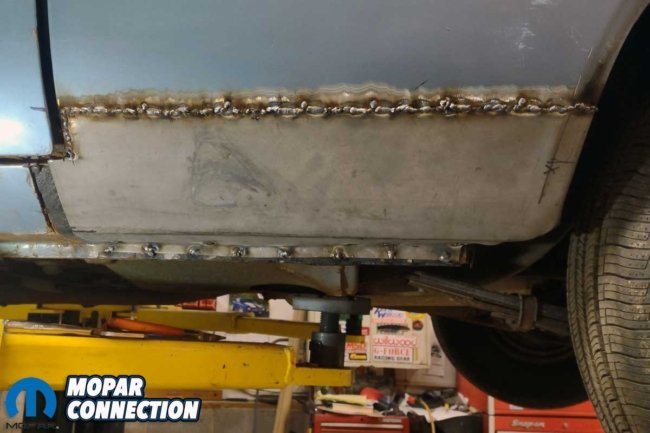
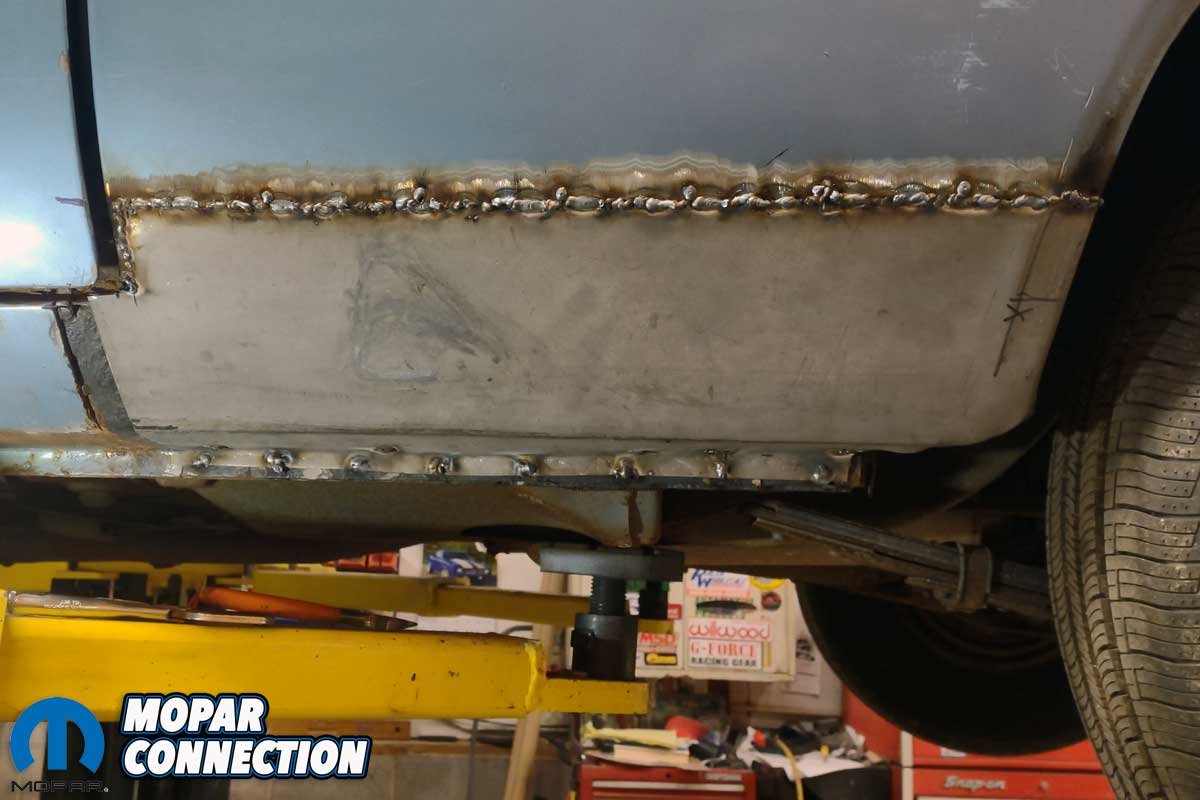
After the final adjustments to fit the panel, several 1/8-inch holes were drilled into the upper portion of the patch panel. The holes allowed Cleco fasteners to draw and secure the original quarter panel to the new patch panel. Large c-clamps secured the lower segment of the patch panel to the rocker panel pinch weld. Chamberlain welded the panel to Marsha. Once welded, he smoothed the welds with a grinding wheel to reveal a nearly seamless repair.
The next area to repair was the lock pillar (B-pillar) at the base of the door opening. The damaged metal was marked with a Sharpie and then cut out. Several cardboard templates were made and taped together. The templates were transferred to steel, cut out, and welded to Marsha. A similar process was employed for small patch panels on the quarter panel over the wheel well opening to eliminate a few rust bubbles.
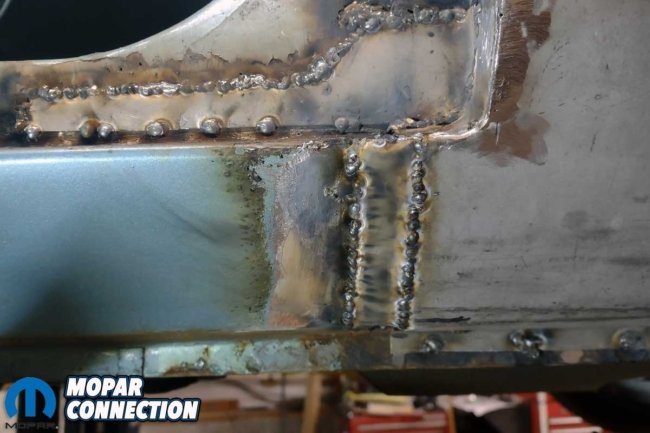
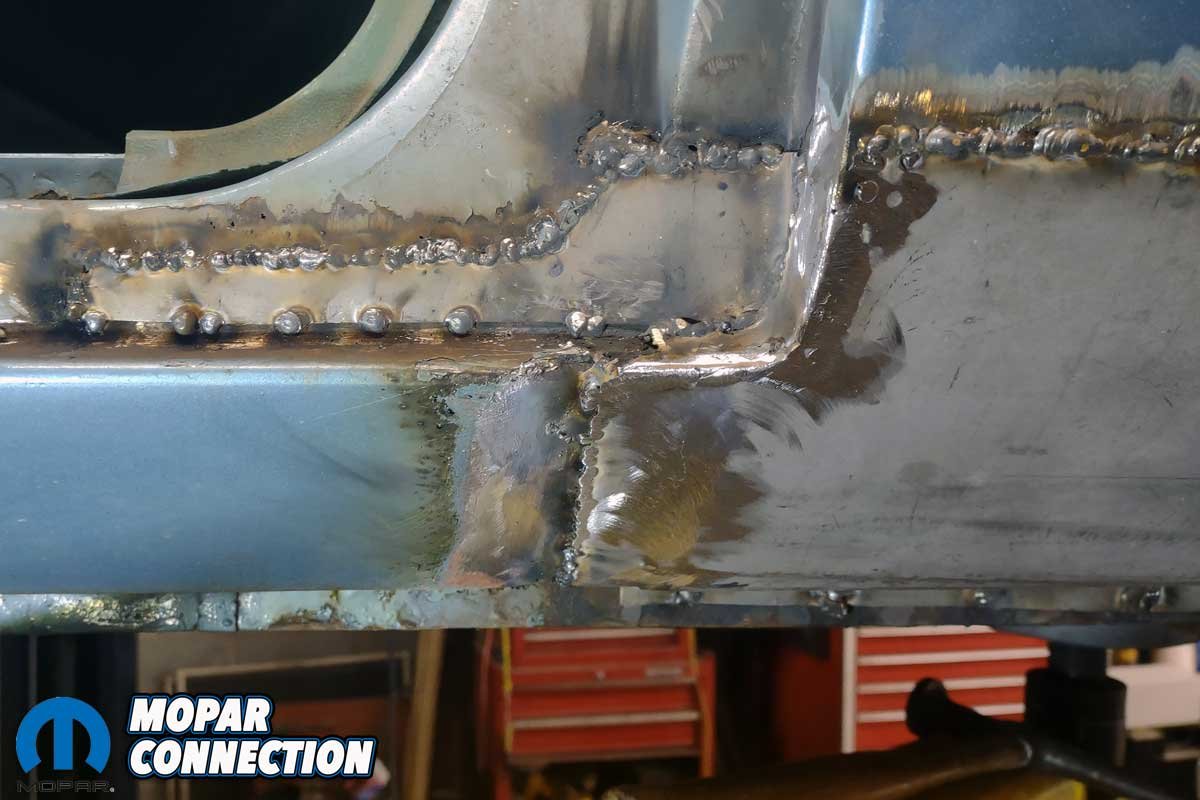
Above Left: A 1-inch steel section joined the repair panel to the factory rocker panel. Above Right: The welds on the strip were sanded smooth to observe the fit into the rocker panel.
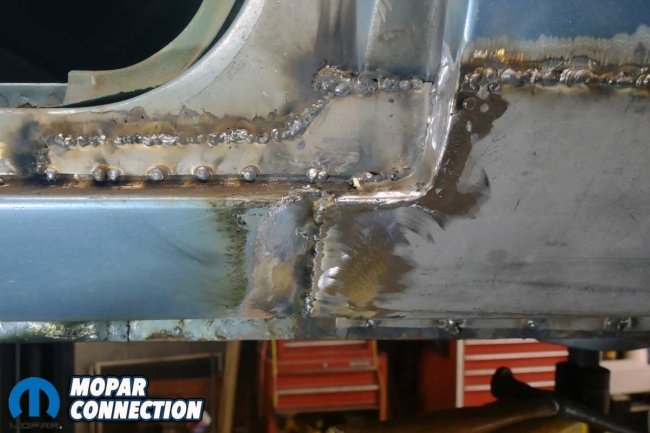
With the areas in front of the rear wheel and over the wheel well repaired, Chamberlain’s next hurdle was addressing the trunk drop-off’s front and lower edge. Patches were fabricated and welded using metal salvaged from the remainder of the quarter skin. The rear lower quarter patch panel installation was the same as the front section. Chamberlain had to rough fit the panel, locate the body line, add more arc, trim the panel for a precise fit, and weld the panel.

Above Left: With the patch panels installed before, after, and over the wheel well, Chamberlain ground the welds and then sanded the complete quarter panel and door jamb area. Above Right: The rear section of the quarter panel was attached to the new metal on the lower inner and outer wheel well and the repaired trunk extensions.
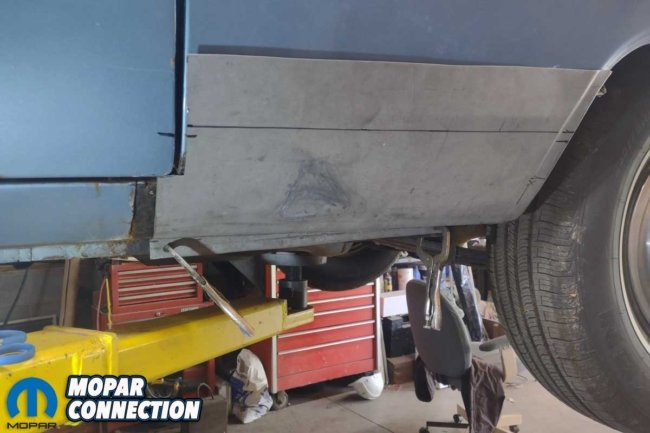
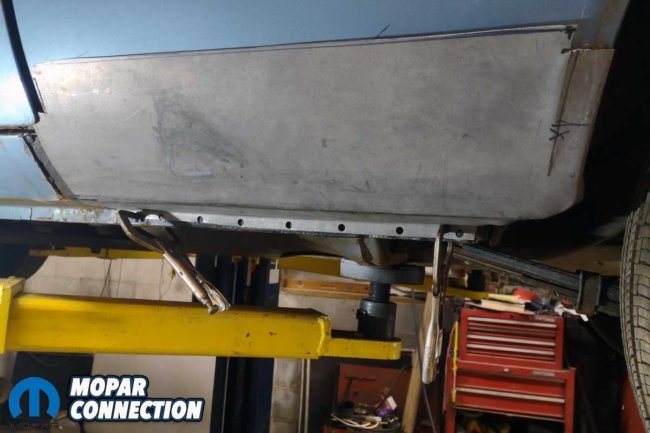
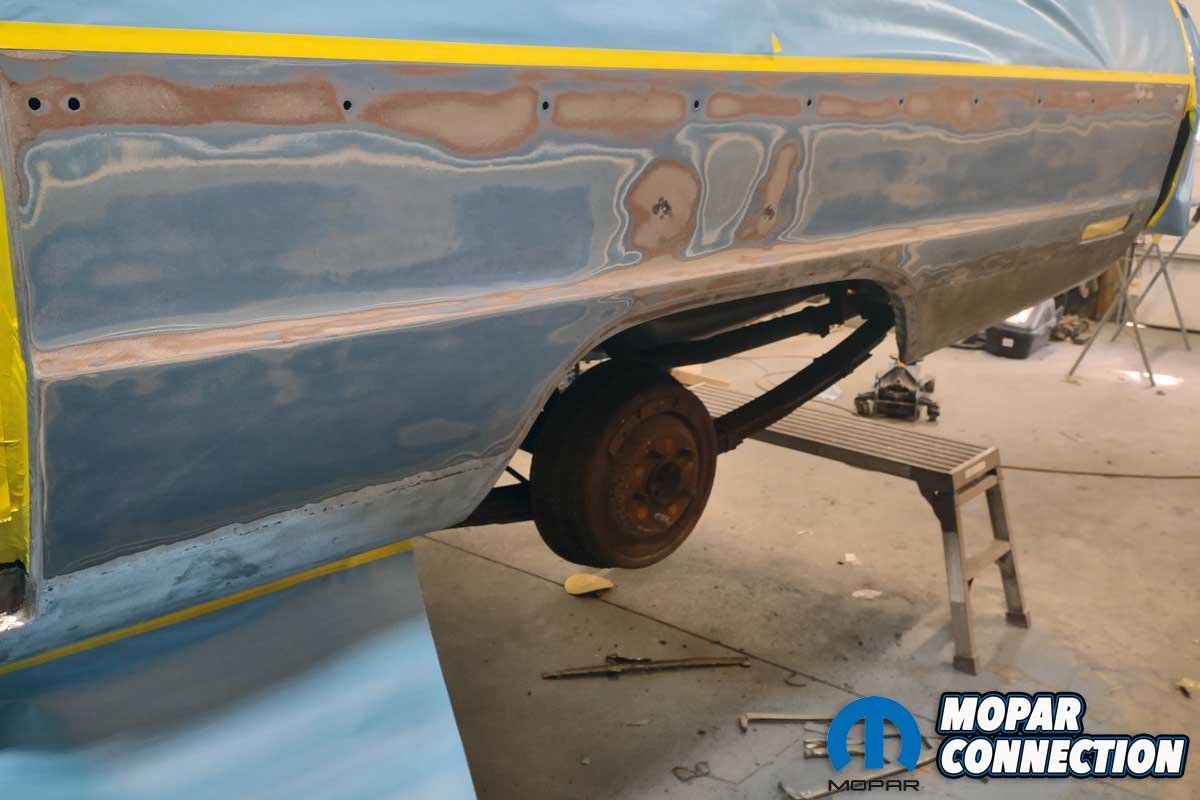
Once all the new metal was welded, it was smoothed down with a grinder. To prepare the area for primer, Chamberlain used a dual-action (DA) sander with 80-grit paper to remove several layers of paint. The entire quarter below the trim metal was sprayed with two coats of epoxy primer. The epoxy primer sealed the bare metal while the next steps were planned.

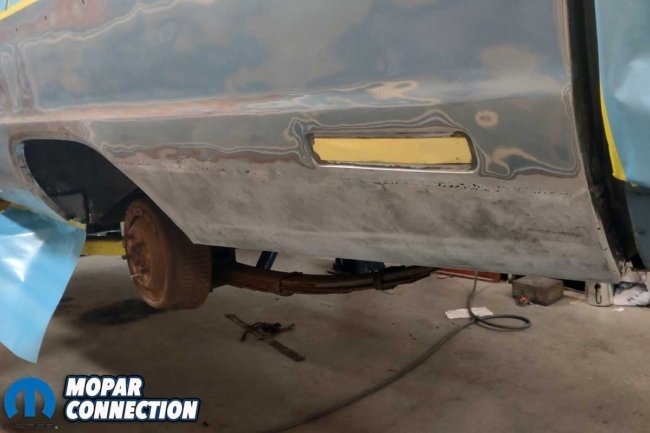
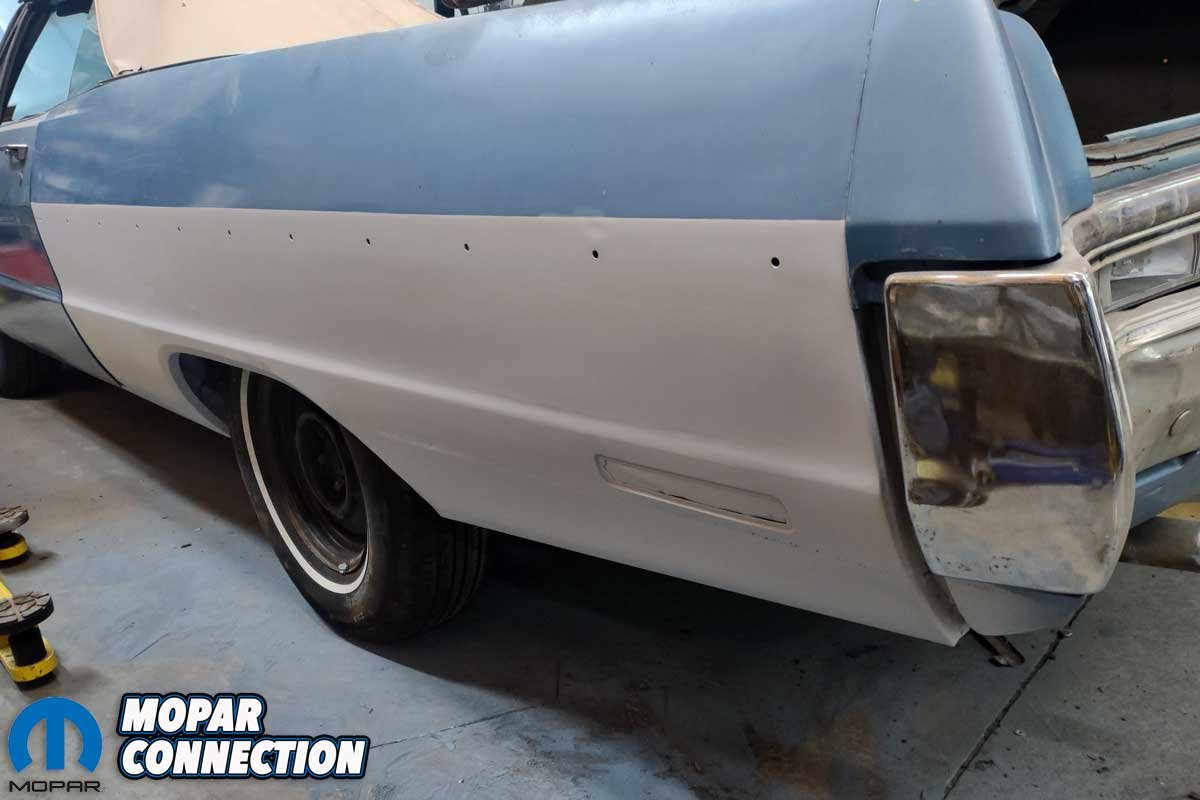
Above: While additional bodywork is required on the quarter panel, it is complete and rust-free. Chamberlain still has the passenger’s side quarter panel and other areas of rust repair to complete.
The passenger side quarter panel still needs to be restored. Additionally, Chamberlain will repair rust spots, as needed, to return Marsha to its former glory. Look out for videos Chamberlain will soon make available covering the quarter panel repair. Stay tuned for further adventures in the restoration of Marsha.


Nice!
Hack quarter panel repair. Repair rust by overlapping metal creates the area where new rust WILL start.
Butt welding sheet metal is the ONLY acceptable method of repairing sheet metal.
Certainly a “classic” repair technique.