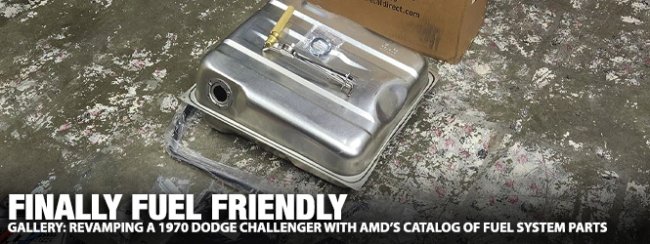
Over the years, Auto Metal Direct (AMD) has worked very hard to produce brand new reproduction sheet metal to replace all of the rusty parts on your Mopar. They proudly offer practically everything you would need to rebuild your Mopar’s body back-to-new condition. With new products being released monthly, we’ve always said that if they don’t offer it yet, there is a good chance they will at some point in the near future.
Thanks to their dedication to provide quality parts, AMD has built up a very extensive catalog of sheet metal products. What many don’t know is AMD also reproduces and sells full glass kits, trim and other goodies for your beloved Mopar!

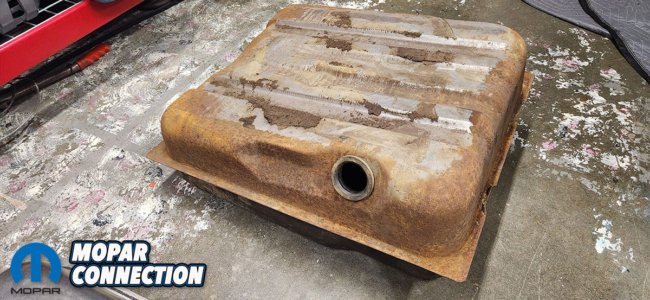
On top of that all, they also offer everything you’d need to redo the fuel system in your classic Mopar! When we purchased our Plum Crazy Purple 1970 Dodge Challenger back in the spring, we were told the car hadn’t been on the road in a number of years which meant the fuel system definitely needed some love. The fuel tank and associated parts had been removed from the car and stored on a shelf over the years so they were solid but they were showing their age and looked visually rough.
While some folks doing a more intense OE restoration would chose to send their factory tank out to be hot tanked and cleaned, we decided to go the aftermarket route due to budget and being on a tight time line to finish the car for a big Mopar show locally. On top of that, our Challenger is a nice honest driver and not a trailer queen by any means.

To redo our entire fuel system out back we ordered the following from AMD:
Part# 890-2570- Fuel Tank (comes with new seal and lock ring)
Part# 881-1570-3R- 3/8” Sending Unit w/ Return
Part #891-1570-1- Fuel Filler Neck Grommet
Part# F-939- Fuel Tank Vent Tube Grommet
Part# F-151R- Fuel Filler Neck to Trunk Floor Seal
Part# F-TIP5- Fuel Tank Insulation Pad
Part# X880-1570-P- Gas Tank Straps
Part# X880-1000-1S- J-Bolts with Lock Nuts
The first thing we restored was the vent line that goes from the fuel filler neck through the trunk floor and into the frame rail. We careful wire wheeled it and painted it silver. During installation, we installed a new rubber hose end where it attaches to the filler neck with new clamps. We ordered a vent plate gasket kit from Detroit Muscle Technologies since our original was pretty rough.
We also note we recommend replacing your fuel tank grounding strap when doing your fuel system. We honestly forgot to order one but our original looked good so we went with it. AMD also sells a full line of reproduction gas caps including the legendary pop-up gas cap as well as your basic screw in cap.
Whatever you need, AMD has it. Our original one gas cap was still in great shape so we just polished it on the buffer wheel and then used a black paint pen to carefully redo the black paint on the top. We couldn’t find the trim ring for under the gas cap so ordered a reproduction one but eventually did find it. When comparing it to our original one, it was also spot on.
Everything we ordered showed up from AMD quickly and well packaged. We got to work right away opening everything up and checking it out.
We decided the next step was to restore the fuel filler neck. Surprisingly, AMD doesn’t sell reproduction replacements but other restoration parts companies do. Our original was in great shape with only some minor surface rust inside the tube. The exterior had been crudely painted purple so our goal was to restore it back to the more proper silver finish like found from the factory.
We didn’t have access to a sandblaster so we decided some other alternatives. Firstly, we wire wheeled the entire outside of the tube and removed all of the purple paint. Next up, we sprayed some Evapo-Rust down the tube to hopefully break up any surface rust that could be found. We sprayed it thoroughly on the tube and down the inside of the tube and let it sit for a few days in a 5 gallon bucket. That was a mistake.
When we removed it, it had a thick layer of sticky yellow residue that would not come off easily at all. After using numerous cans of brake clean, more Evapo-Rust and a scrub brush, we managed to finally get the bulk of it off. We learned after doing some research that Evapo-Rust can have a strange reaction with lead gasoline and as our car had been off the road for numerous years, it made sense that the potential for lead gasoline residue in the filler neck was still possible. We came to the conclusion that Evapo-Rust will still work good if you spray it on and remove it after but not if you let it sit for a longer period. Lesson learned.
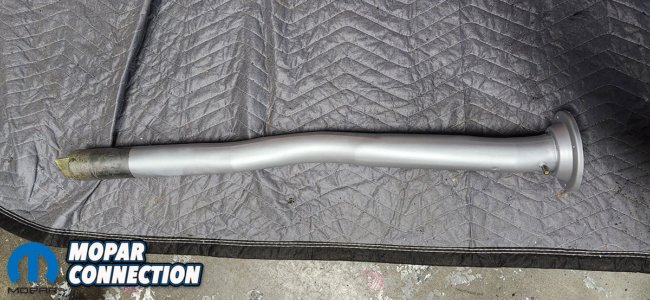
After cleaning all of the sticky yellow residue off, we masked off our filler neck and sprayed the exterior of it in a fresh coat of silver paint. Please note we masked off the portion that approximately goes into the fuel tank so you don’t risk it being eaten away by fuel over the years and gumming up things.
Next, we turned our attention to the fuel tank and assembling it. When comparing the reproduction fuel tank beside the original, while the overall look is very similar, there were a couple of minor differences we noticed for those that want to be picky. Firstly was the part number and Made in Taiwan declaration stamped in the tank where the factory one had nothing. Although that part is covered by the tank insulation pad and faces the trunk floor so nobody would ever see it once installed.

Next we noticed the reproduction tank had a small hole stamped in all four corners. For what reason, we don’t know. Overall, the reproduction tank was very similar in general appearance to the original. AMD states their reproduction tanks are stamped from high quality rust resistant steel which is lead/tin plated inside and out and every tank is pressure tested for leaks.
We were very happy with the build quality and overall it’s a fantastic reproduction fuel tank. We would gladly order another one and will for anything we are building going forwards.

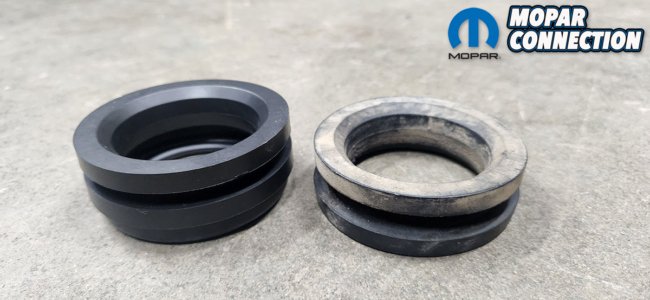
When assembling the tank, first we installed the fuel filler neck grommet. When looking at the original versus the reproduction, you can clearly see the difference in shape and style however it seems all reproductions are like this. We installed the reproduction however when we installed the fuel tank underneath the car, we had a very tough time getting the filler neck to go into the grommet, even after oiling the grommet up.
We switched it out for the original grommet and found the same issue so we opted to reinstall the reproduction to avoid any leaks down the road with the original part. It just happened that both the reproduction and the original were a very tight fit on the filler neck which is obviously a good thing to prevent leaks. In the grand scheme of things though, once you install the reproduction grommet, it looks the exact same as the original from outside the tank.
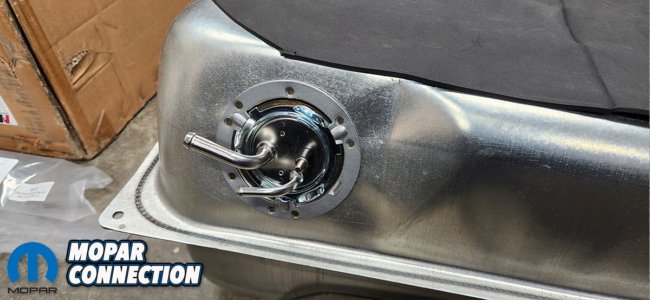
Once we had the grommet in, we installed the new fuel sending unit. Our Challenger was originally equipped with a 383 Magnum from the factory so it was factory equipped with a 5/16 fuel line. For those that don’t know, typically 440 (4-bbl and 6-bbl) and 426 Hemi-powered cars received a 3/8″ fuel line with a ¼” return line and the 383 and everything down received a 5/16″ line.
Since our Challenger now has a 440 Magnum under the hood, we upgraded to a 3/8″ line which meant we went for the 3/8″ fuel sending unit. The sending unit was very good quality versus some of the other reproductions we’ve seen. We have always heard that the factory lock rings for the sending unit are thicker and fit better than the reproduction ones so while we used the new sending unit and gasket, we cleaned up and reused our factory lock ring for a tighter fit. We did try the reproduction one briefly and wasn’t a huge fan of the fit.
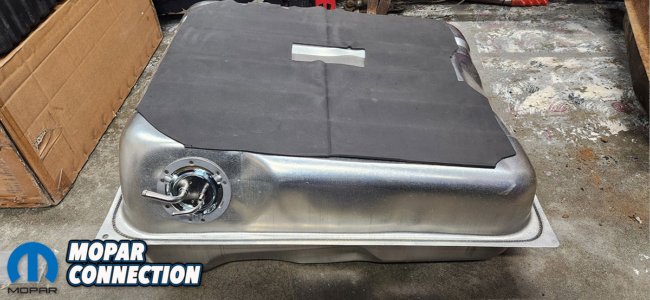
With the gas tank assembled, we just had to install the insulation pad before installing it. These insulation pads are always an interesting topic as there are quite a few options in the market. You can choose between a felt paper one which is very similar to OE material (.070” thick), a masticated heavy rubber one for maximum sound deadening (.090” thick) or a neoprene foam rubber one (.250” thick) that’s lightweight and usually cheaper. The one we received from AMD is the foam based one. We trimmed it a bit for a better fit to our liking and then glued it to the tank with 3M Super 77 spray adhesive to make it sure it wouldn’t move around.
The fuel tank straps, filler neck to trunk floor seal and fuel tank vent tube grommet were all basically identical to the original parts and were great quality. The J-bolts were identical however we noticed the nuts were different than the ones we had. After doing some research though, we learned the nuts from AMD are actually correct and the ones we had were wrong.

With the tank ready to be installed, we got to work installing it. First we hung the tank straps and J-bolts from their proper spots. It took us a fair bit of finessing the tank itself, especially with the fuel filler neck where it went into the tank but eventually we got it installed. The big tip we can share is don’t bolt your fuel filler neck or neck to floor seal in place until the tank is fully installed as you’ll need those to be movable while you install the tank. We originally bolted the filler neck into place and thought it would just slide into the tank easily but that wasn’t the case at all.
Once the tank was installed, we bolted the filler neck up tight to the back side of the gas cap and slid the floor seal into place and secured it. We then cleaned up, painted and reinstalled the metal vapor vent tube that goes from the top of the filler neck out through the trunk in the trunk and installed a new rubber line and clamps for where it attaches to the filler neck. We also ordered a new plate and gasket kit from our friends at YearOne as ours had seen better days and installed that.

Everything looks absolutely fantastic installed and we couldn’t be happier with the quality. Overall, everything fit great and works well with no leaks. AMD made sourcing everything easy with 95% of the parts needed available directly from them. We can’t thank them enough and highly recommend them for any fuel system parts you need. The team at AMD truly are the best. We couldn’t have done it without them!






No mention at all if the sending unit was tested and/or reads correctly or needed adjustments. Given that 99% of them are off, I would suspect the same on this one until told otherwise.