


Step in to any muscle car shop worth its salt and you’ll likely hear the gentle hum of a welder doing its best to stick stitches on the mangled mass of what used to be solid Detroit steel. Imagine, hood down and hunched over, the man or woman wielding the wire creating a cacophony of sparks that collide with concrete in a faux fireworks display fit for a TV show’s slow-motion intro.
But what led up to that point of patching things back together? In most cases, a few decades of destruction, intentional or accidental, requires careful demolition before an even more careful reconstruction process in a subcategory of restoration known as “body work.”
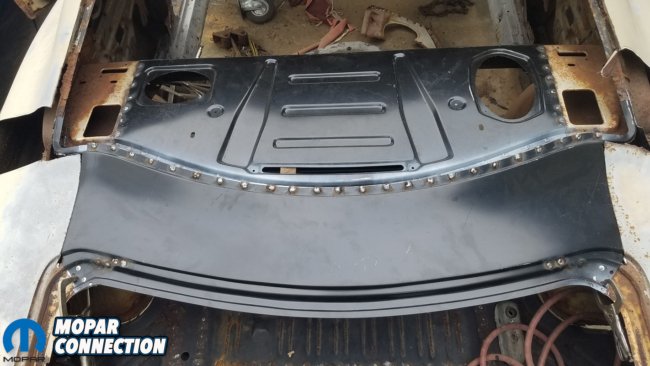
Above: ZomBEE’s original tail panel was toast, so a cut-off section from a parts car was sourced.
For those of us in the Rust Belt, bodies were salt-stricken long ago, when these cars were still daily drivers, and now the damage can’t be undone but with careful surgery of the highest order. Luckily, Auto Metal Direct (AMD) has all but single-handedly saved even the saddest of Dodges and Plymouths with an epic outlying of aftermarket sheet metal.
And when it comes to a beat up, battered, and bashed body, you can look no further than Mopar Connection’s own Project ZomBEE. For it, combing through the AMD catalog was straightforward, although a thorough dissection by Dave Chamberlain at All Classics Restoration was the first and infinitely more difficult task.
After limping down to Dave’s shop in Statesville, North Carolina, like a patient dragging a broken leg into the ER, the operation began in earnest on its rear crossmember, trunk pan, trunk extensions, and rear frame rails.

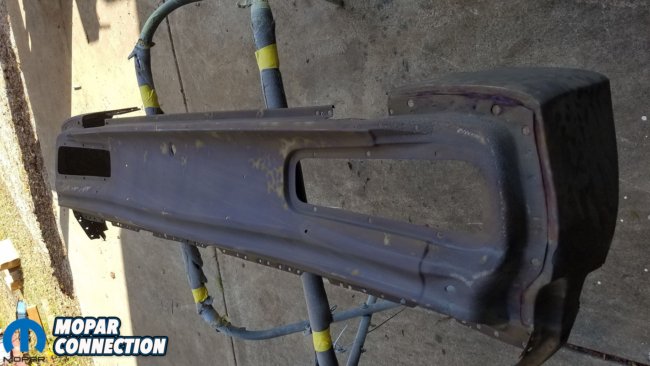
Above left: The replacement panel’s cut-off quarters slide in behind the originals. Above center: The rear flanges of the original quarters were cut off for clearance. Above right: Once happy with fit, Dave zipped some screws in to hold it.
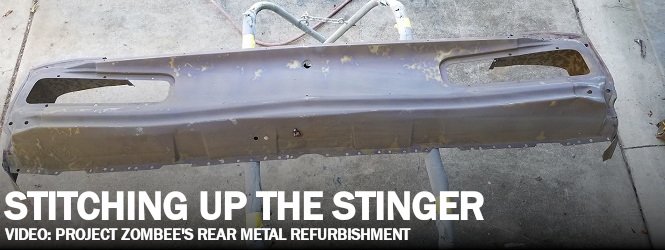
With those out of the way, the final component needed to tie the back half of the car together was a tail panel. Because the 1970 Coronet body style is a one-year-only model, several parts like this tail panel have never been available in aftermarket form. Therefore, restorers’ only options are to fix existing pieces or find cut-off sections from other cars.
ZomBEE’s stinger end was pretty much stingerless when it was dragged out of that Ohio barn. It was one of the first pieces to go to make room for a whole bunch of backside butchering. A replacement section was sourced and, while bruised, it was certainly not broken beyond Dave’s skills.


Above left: Notice the trunk gutter extensions were left off for now. Above center: The extensions were able to be saved and used to help confirm tail panel alignment. Above right: Once happy with that alignment, Dave tacked in some angle iron to hold the gutter after the quarter gets cut off.
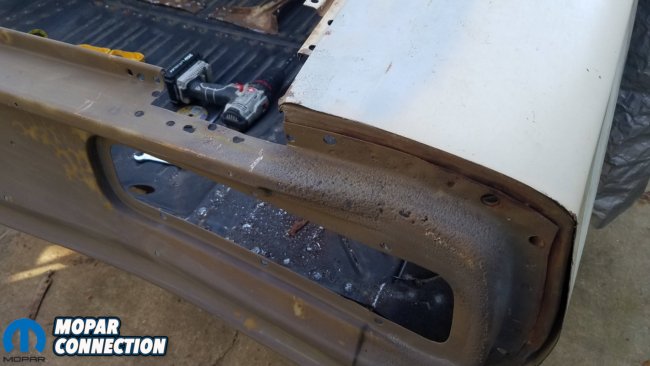
Some pitting around the upper corners of the tail light buckets would need to be addressed at some point. However, the first order of business was to get it back on the car in order to restore the quarter panels’ reference points.
Fortunately, the substitute section still had a few inches of original quarter panel steel attached, an unintended advantage in getting everything back in alignment. First, the rear flange of ZomBEE’s original quarters were cut off to make room so the entire “new” tail panel assembly could slide in from the back.
Dave carefully guided it in, slipping the partial quarter panel sections in between the trunk extensions and original quarters. With it roughly squared, a pair of Vise-Grips and some self-drilling screws held it in position via the trunk floor’s rear edge.


Above: The center of the package tray was inexplicably cut out. What was left was removed with a spot weld cutter and cut-off wheel.
Next was ensuring proper trunk gutter height. Since the new tail panel’s quarter sections fit into the originals, it was easy to confirm correct elevation. Some scrap angle iron was cut to fit, then tack welded between the underside of the gutter and the top of the trunk floor on each side.
For the time being, that was all that could be done with the tail as it awaited new quarters for the final tie-in. Moving forward both physically and metaphorically, Dave’s next subsection to tackle was the package tray and deck filler area. For those who haven’t taken a deep dive into this intricate array of stampings and spot welds, it can get pretty daunting once the layers start to peel.

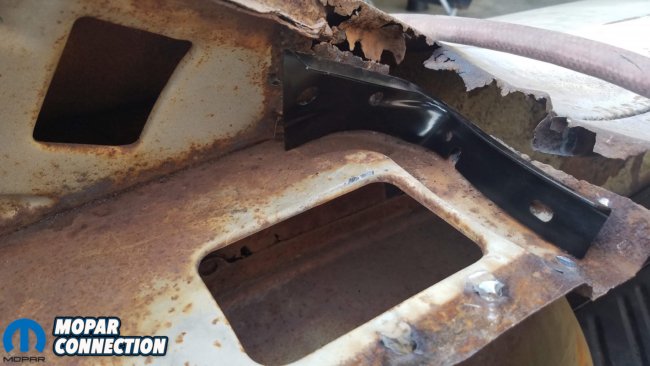
Above left: The passenger’s side inner rear window corner was completely gone. Above center: Of course, AMD was able to supply a replacement. Above right: The C-pillar structure also needed a small, home-made patch.
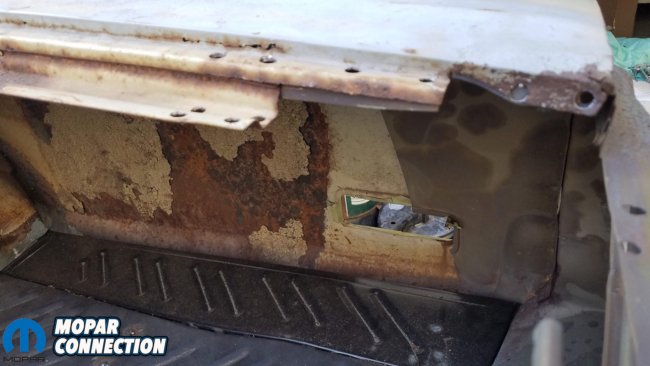
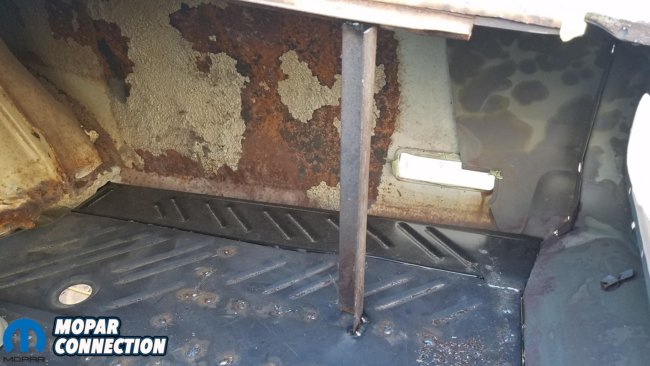
Typically, on vehicles this old, the rust is deeper than what can be seen on the surface. Often, there are multiple subsurfaces and sub-subsurfaces that form a network of support beneath every panel. If you’ve ever crawled into a trunk and looked up, you’ve seen the menagerie of metal that makes up the area underneath the Dutchman panel.
In this space directly under and around the rear window are the package tray, package tray extensions, deck filler, inside and outside deck filler corners, trunk hinge mounts, back glass lower window frame, back glass lower corner fillers, C-pillar inner structure, and rear seat cross braces. That’s a whole lot of metal mushed together in a spot that really isn’t all that sexy or even visible once a car is complete.


Above left: The pre-punched package tray was installed with plug welds. Above right: The driver’s side inner corner required similar repairs as the other side.
Nonetheless, it all has to be precisely fitted together for proper glass and trim fitment. The only bad thing for Dave was that it seemed like every time a part got cut off, another rusty piece was under it.
Before the spot weld cutter started spinning, he began by marking all of the factory indentations so he’d know where to drill. Reference holes were key as well in order to maintain alignment across a bunch of missing, rusty, or otherwise crappy components.
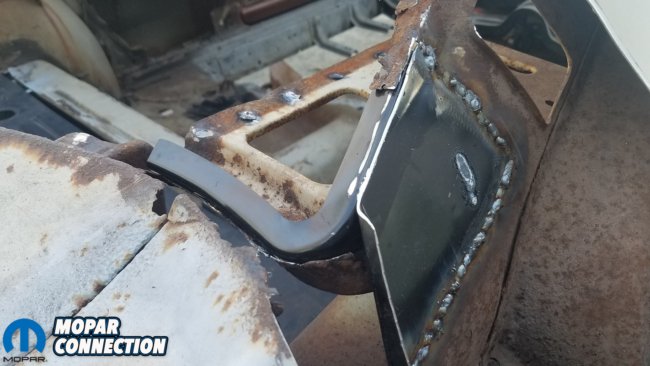
Underneath both back glass inner corners, the original structure was basically gone. Back glass lower corner fillers (P/N 654-1468-3R and 654-1468-3L) were installed based on reference points from the original quarters and Dutchman panel. Then, the flimsy supporting cast was removed and patches were made around it.

Above: Yet another integral component was the lower rear window frame which attached to the package tray with more plug welds.
On the passenger’s side, it was fairly straightforward with only a small fix being made to the C-pillar framework. On the driver’s side, the fix was a bit more involved. Parts of the package tray extension had to be repaired with some home-made pieces before its corner filler could go in. Plug welds cinched it all together.
Prep work on the new package tray (P/N 640-1468) included punching holes for plug welds while still outside the car. Those were located by dropping the panel in place, marking the edges underneath, then punching holes every few inches within the scribed lines.

Above left: Careful extraction of the original deck filler made the new part easy to drop in. Above center: The deck filler would end up fitting over top of the lower rear window frame. Above right: And then the MIG came back out for even more plug welding.
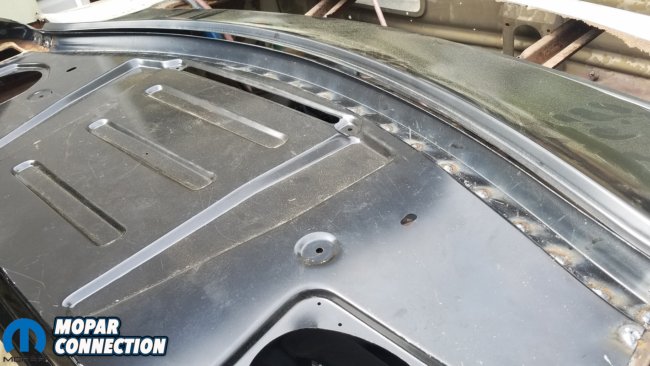
Fully welded in, the new package tray really provided a solid base to start in on the Dutchman panel, also known as the deck filler (P/N 650-1468). It came out next with careful cuts on the quarter panel seams to maintain reference edges.
But, before the new one could go in, a reproduction lower rear window frame (P/N 655-1468) was added to the back of the package tray between those aforementioned fresh lower corner fillers. From there, the replacement deck filler could sit on a combination of the lower window frame edge and the rear support of the underlying inner wheelhouse brace.
Here again, plug weld holes were punched, the panel was fitted, and the welding commenced. Several pounds of MIG wire later, ZomBEE’s unstable unibody was slightly less of a structural liability. These few key components in the deck filler, package tray, and tail panel will all go a long way in helping hang its wings.


