


Are you a do-it-yourselfer (DIYer) automotive enthusiast that has finally gotten to the point where it would be a benefit to have access to Metal Inert Gas (MIG) (also known as Gas Metal Arc Welding (GMAW)) equipment? MIG welding is the most common welding method for the DIYer because of its versatility, initial cost, ease of equipment setup, and a welding technique that is less complex than other forms of welding. It is said if you can use a hot glue gun, you can MIG weld. That assertion is a great understatement, but with some basic overviews of the equipment setup, proper gun usage, and coverage of the required safety precautions, you can be welding, at least sticking metal together, in a short period of time.
To learn the necessary basics of MIG welding, we contacted the representatives at Miller Electric Mfg., which is owned by Illinois Tool Works and headquartered in Appleton, Wisconsin. Miller has been the world’s largest manufacturer of arc welding products since its inception as a one-man outfit in 1929. Miller’s innovation has led to welding products used in manufacturing, fabrication, construction, aviation, motorsports, and many other areas that benefit from welding processes. Miller’s tagline “The Power of Blue,” is inspired by their easily recognized blue color of their equipment.
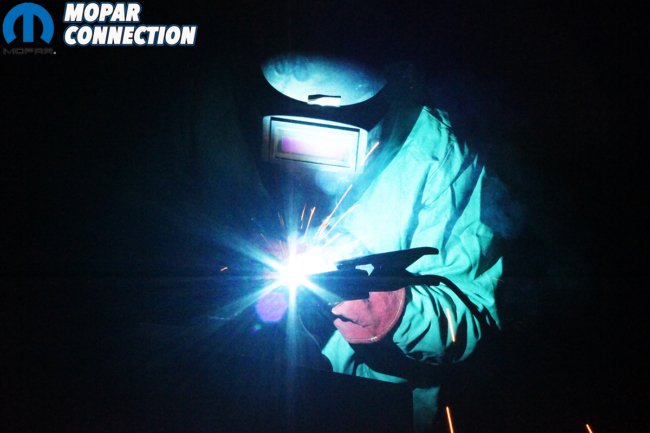
Above: MIG welding is an extremely valuable skill for any automotive enthusiast that wants to expand their fabrication skills. The techniques to properly weld can be learned over a period of time. To become a proficient welder requires plenty of practice.
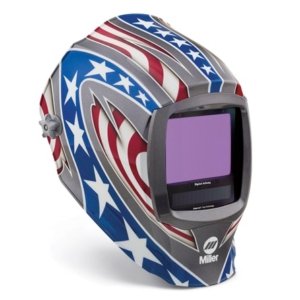
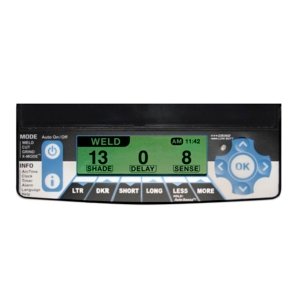
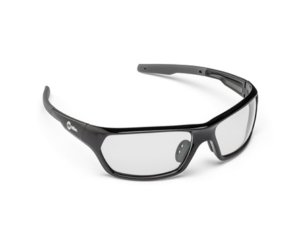

Far left: To protect the welder’s face and eyes, a quality hood (helmet) with an ANSI Z87.1 filter and lens is required. The hood must be constructed of materials that comply with the ANSI Z49.1 standard. A hood with a large auto-darkening lens allows the welder to focus on the subject to be welded. Upon striking an arc, the lens immediately darkens to the shade that has been selected by the operator. Most MIG welding applications require a #10 or #11 shade rating. Center left: The lens control pad inside the hood allows the operator to set the auto-darkening lens. Most auto-darkening lenses can be adjusted from a #8 (lighter shade) to a #13 (darker shade). A quality hood will allow the operator additional options including the shade activation delay (usually measured in milliseconds). Center right: Under each hood, a welder must wear safety glasses with side shields. The glasses must fit comfortably on the operator’s head while not interfering with the hood’s ability to be raised and lowered. Far right: Many welders simply turn their baseball cap around and slip the hood over their head, but a flame-retardant welding cap may provide greater head, hair, and neck protection. The welding caps come in many different styles and sizes to fit the needs of any welder.
Before striking an arc, the proper personal protective equipment (PPE) must be selected. PPE is important because any exposed skin is vulnerable to the painful and possibly damaging effects of ultraviolet and infrared rays. Skin coverage consists of flame-resistant full-length oil-free pants (denim) void of pant leg cuffs and free of holes or damage. A pair of ankle-high leather boots are required with or without the optional metatarsal guard over the shoelaces, and the pants must cover the top of the boots. A quality properly-fitted lightweight flame-resistant jacket made of cotton material and pigskin leather will, when fully buttoned, protect the core of the body to the neck and the welder’s arms. Jacket colors in black, blue, green, and brown diminish the arc flash reflection off the jacket into the hood thus reducing injury to the welder’s eyes.
To protect the hands, ergonomically designed welder’s gloves made of soft, supple top-grain leather are available in heavy-duty or medium-duty designs for MIG welding. These welding specific gloves will provide hand protection while allowing enough dexterity to grip the gun or to adjust the knobs on the equipment. The gloves will protect the skin from burns from the welding spatter, but the gloves will not withstand direct contact to hot, freshly welded material, so the use of pliers to move material will protect the gloves (and hands). Some professional welders in a high-volume shop will opt for a welding apron that is worn with the above-mentioned PPE to further reduce any exposure to wayward sparks and spatter.

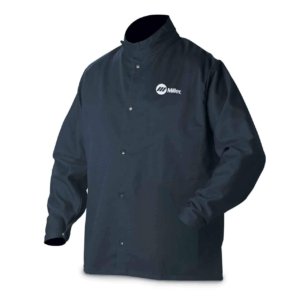


Far left: If a welding cap is not comfortable, a welding bandana can be worn to protect the head, hair, and neck. Regardless of your preference, it is imperative that some type of cap is worn for personal safety. Center left: A properly fitted lightweight flame-resistant jacket made of cotton material, pigskin leather, or a combination of both, which is buttoned from top to bottom will protect the neck and the core of the body as well as the welder’s arms. Jacket colors in black, blue, green, and brown diminish the arc flash reflection off the jacket into the hood thus reducing injury to the welder’s eyes. Center right: A pair of soft leather gloves will protect the hands from spatter and ultraviolet and infrared rays. This pair of medium-duty gloves will allow the operator to easily handle the welding gun and adjust the dials on the welder unit. Far right: Heavy-duty gloves are great for entry-level welders. They provide maximum hand protection, and are acceptable for gripping the welding gun and for adjusting the welding unit’s settings.
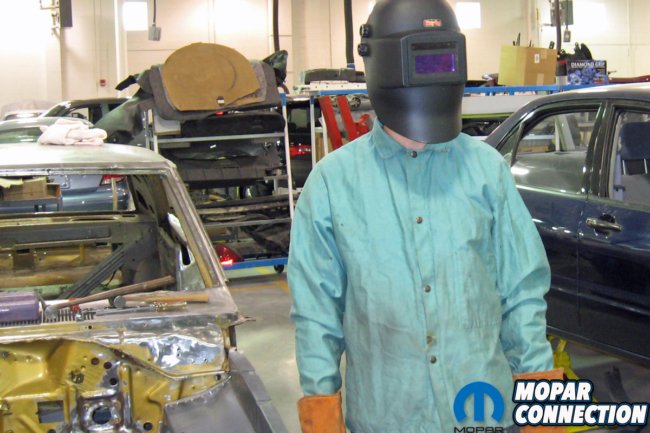
Above: This is your author preparing to weld on a 1975 Dodge Dart. I am decked out in a complete ensemble of personal protective equipment (PPE). I am sporting an older auto-darkening hood with a smaller viewing lens (I have since updated to a larger viewing lens). Additionally, I am wearing a flame-resistant jacket, heavy-duty leather gloves, blue jeans, leather boots, a welding cap, ear plugs, and safety glasses. After this photo, I arranged the jacket collar to the upright position to further protect my neck before welding.
Just like the feet, legs, arms, and core, the head, face, eyes, and ears have to be protected from sparks and exposure to ultraviolet and infrared rays. Many welders will simply reverse a baseball cap on their head to protect their hair, top of their head, and the back of their neck, but there are better options. There are properly fitted flame resistant welder’s caps or bandanas that will fit comfortably under the hood (helmet) while providing hair, head, and neck protection. To protect the ears, a simple pair of ear plugs (or ear muffs) will keep arrant sparks from entering the ear canal while also protecting against hearing damage. To protect the face and eyes, a hood with an ANSI Z87.1 filter and lens is required.
The hood must be constructed of materials that comply with the ANSI Z49.1 standard. Additional eye protection requires a pair of approved safety glasses with side shields that fit properly beneath the hood. Lastly, the filter lens for MIG welding should be a #10 or #11 lens shade rating in a passive hood. A passive hood must be worn in the up position when the gun is positioned and then the hood is dropped over the face to start welding. The best design that meets the needs for almost all forms of welding is a hood with an auto-darkening lens, which will allow the filter lens shade to be dialed (adjusted) to properly protect the eyes of the welder. The lens shade rating ranges from #2 to #14 with the larger number indicating a darker shade. For additional PPE information reference HERE.

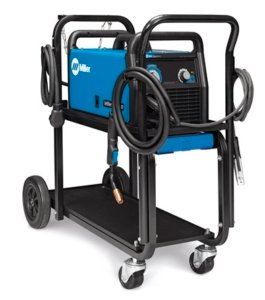

Above left: Welders in a high-volume shop often opt for a welding apron that is worn with the rest of the welding PPE. The apron provides additional welding protection for the core of the body and the legs from any sparks or spatter. Above center: The Miller Millermatic 141 is a cost-effective entry-level MIG welder that has expandability as your welding needs increase. The 141 is a 120-volt welder, which comes with everything you need to start welding with the exception of the Argon/CO2 tank. To support the tank and the 141 welder, a Miller Running Gear/Cylinder Rack can be selected. The 141 has Auto-Set, which is an advanced control that assists the operator with setting the welding parameters of the welding unit. Above right: The Miller Millermatic 180 is a nice step up from the Millermatic 141. The 180 is a 230-volt welder that can weld metal up to 5/16” thick. The 180 is housed on a cylinder rack and an Argon/CO2 tank is installed. Resting on the tank is an auto-darkening hood, and a pair of welding gloves are laying on the 180. While the hood and gloves are available for everyone to use, a seasoned fabricator will have their own hood and gloves.
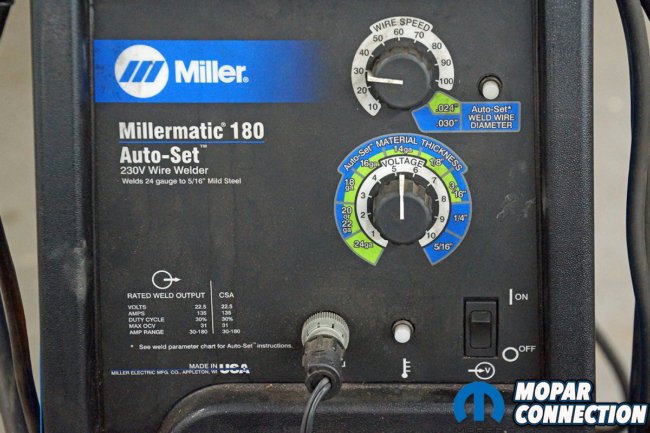

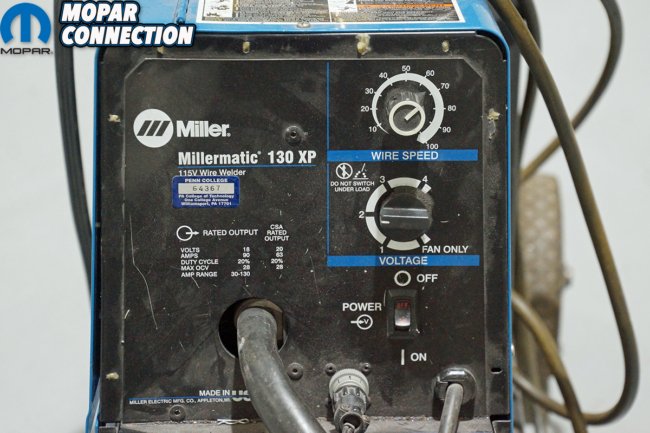
Above left: The 180 has easily understood dials on the front of the machine. The top dial is the wire speed, which includes a special option for 24- and 30-gauge metal. The bottom dial is set to the metal thickness. With the 180 as with the 141, the Auto-Set eliminates the guesswork of setting voltage and wire feed speed for your MIG welding application. Above center: The Millermatic 130XP is an older unit, but still a nice 110-volt entry-level MIG welder. Just like the 141 and the 180, the 130XP has a tank rack on wheels, which allows the welder to be portable. The tank on the rack has just been installed, and the cylinder tank cover is still installed. The cover will be removed (but not discarded), so the mix flow gauge regulator can be installed. The cover is always installed when the tank is transported to and from the welding facility. Above right: The 130XP requires a bit more expertise to set up because the dials on the front of the welder are not as self-explanatory or detailed as the 141. Lifting the 130XP side cover will provide access to a chart that will list the proper settings for the mild steel welding.

If the work can be moved, a workstation that is completely setup for welding should be utilized. The workstation should be a metal table that has a vise or areas for hold downs to be attached. A hanger bracket at the station will provide a position for the gun/cable assembly to be suspended when not in use. The workstation is surrounded by flame-retardant vinyl screens to reduce spark or spatter from contacting others in the work area.
While often overlooked, the workstation or work area in which the welding will occur must be clutter-free, which will promote a zero-accident zone for all the shop personnel. When welding in an area that has shop employees or sensitive equipment, the usage of welding flame-retardant vinyl screens or curtains can be employed to reduce eye injury from arc exposure of any onlookers and can be used to reduce spark damage to surrounding vehicles and equipment.
Furthermore, in the welding area, there must be a spray bottle filled with water and a fire extinguisher. The spray bottle will be utilized to douse a small flame or errant burning ember that may escape from the work area.
A 5-pound ABC dry-chemical fire extinguisher in the work area will quench any type of fire that may have developed during the welding process. Lastly, it is a good practice when welding to stay at the shop one hour after the last arc goes out for the night.
During this hour, the work area and equipment can be cleaned, and you can check for any hot spots or smoldering at the base of the walls, under equipment or tables, and around other vehicles in the shop. After the hour is up, the shop can be exited with almost 100% certainty there will not be a fire related concern in the shop overnight.
With the safety PPE and work area prepared and clutter-free, it is time to select an entry-level MIG welding unit. The Miller Millermatic 141 (part no. 907612) is a great, cost-effective unit that has expandability as your welding needs and proficiency increases. The Millermatic 141 comes with everything you need to start welding (except the Argon/CO2 tank). The 141 has Auto-Set, which eliminates the guesswork of setting voltage and wire feed speed for the MIG welding application.
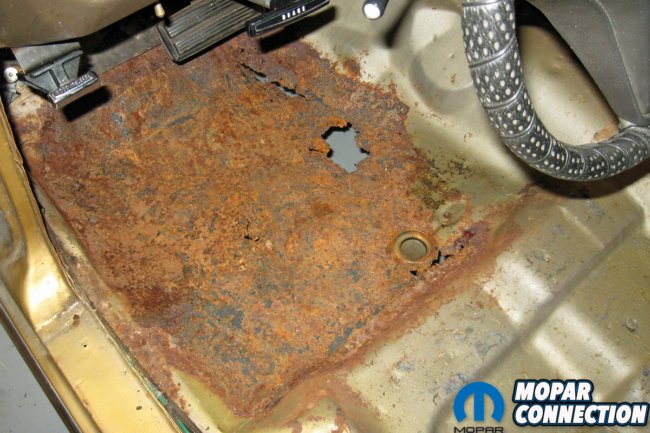
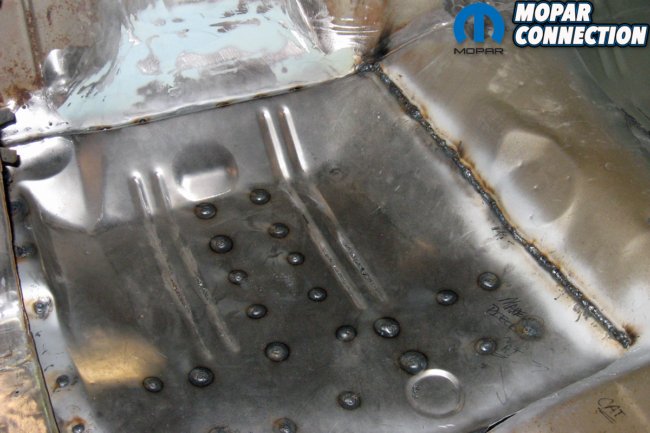
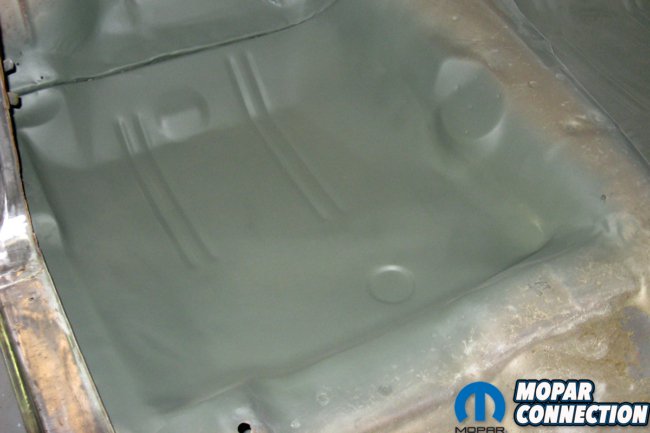
Above left: This is a floor pan of a 1975 Dodge Dart. The floor pan is badly damaged, so the removal of the damaged area is required. Without access to a MIG welder and the skills required to use the welding unit, this work would have to be farmed out to someone with the welding skills to make the repair. Above center: The rusted floor was cut out of the Dart, and all the unibody structure was cleaned and treated for rust. A coating of weld-through primer was sprayed to the treated metal before the new floor was welded in place. To ensure the floor pan was properly welded to the unibody structure, pressure was applied to the floor pan next to each plug weld via a wooden hammer handle. The weld bead was run down the transmission tunnel to affix the floor pan to the original floor. Above right: After sanding the weld areas smooth and applying epoxy primer, the floor looks like a factory piece. A 130XP provided all the weld beads to the floor pan in 2008. After ten years of driving the Dart, the floor pan has remained intact with zero cracking or damage occurring.
All that is required is set the wire diameter, adjust for the material thickness, and start welding. The 141 operates on 120-volt, 20-amp, 60Hz, single-phase household electricity via a 6.5-foot power cord, which means it can be used practically anywhere. Additionally, it comes with a 10-foot M-100 MIG gun and cable assembly, electrode tips, drive rolls for .024” solid wire or .030”/.035” flux-cored wire, and a mix flow gauge regulator with gas hose. The 141 can weld mild steel as thin as 24 gauge up to 3/16” thick plate, which should cover most requirements of the DIYer.
To provide the best welds for your projects, it is wise to forgo the flux-cored wire and use a solid wire with the mix flow gauge regulator providing a shielding gas from a tank of 75% Argon and 25% CO2. The shielding gas along with a solid wire electrode produces a clean, slag-free weld without the need to repeatedly interrupt the welding process to clean or replace the electrode. Shielding gas increases productivity and reduces clean-up requirements. The tank with the gases can be purchased (or rented) from any quality welding supplier. To support the tank along with the 141 welder, an optional Miller Running Gear/Cylinder Rack (part no. 301239) can be selected. The cylinder rack is on wheels, so the unit can be moved to the work as needed.
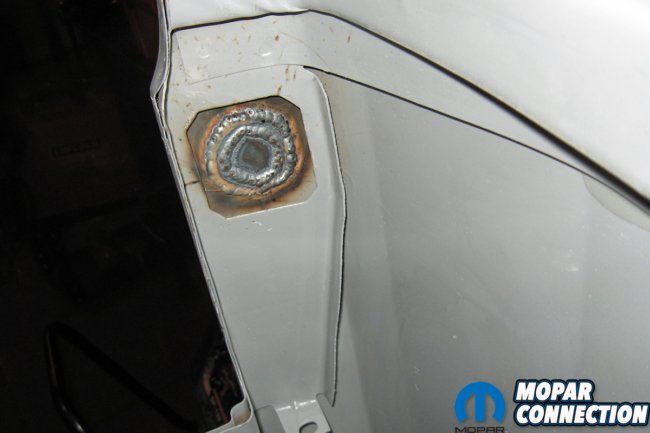

Above left: Another area on the Dart that was damaged was the antennae hole in the passenger fender, so a large washer was MIG welded to the under side of the fender. The large washer’s center diameter was still too great for the base of the antennae, which required a second smaller center diameter washer to be welded to the large washer. The two beads can be seen in the photo. Above right: With the washers welded to the underside of the fender, a properly sized antennae hole was drilled from the top side of the fender. The proper penetration of the welds held the washers in place, and the washers were treated for rust corrosion during the painting process.


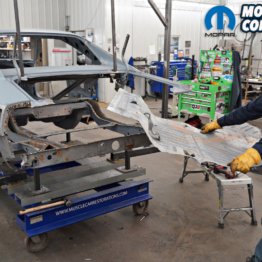
Above left: Both quarter panels of the 1975 Dart and the outer wheelwell housings had to be replaced. In this photo, the quarter panel has been tacked onto the chassis. Additional tack welds were added a few at a time and moved point-to-point often until the quarter was completely welded to the chassis. The continuous moving of the tack welds kept the temperature and the warpage of the metal to a minimum. Above right: The welding on the 1975 Dart was completed in 2008. The Dart was finished in 2011, and it has accumulated just over 10,000 miles since returning to the streets. To complete the restoration, the floor pans, driver side fender apron, bulkhead (under the master cylinder), both quarter panels, and outer wheelwells were all welded with a 131XP welder, and an entry-level (at the time) fabricator. This was my first major welding project, and it turned out well.
Once you purchased your welding unit, what is the next step? How is the gun held? To what pressures should the regulator be set? What does a good weld bead look like? How can you determine if you have too much heat or a lack of penetration in the weld? Learning the skills required to be an adept welder can be acquired from several different avenues. You could simply read the instruction manual provided with the MIG welder and try your best, or you could reference online videos for information on welding techniques, but it may be more prudent to take a continuing education class (or a few classes) at your local tech school. A tech school will provide you the opportunity to use the school’s equipment and supplies (including different metal thicknesses). You will be given proper professional instruction on how to use the personal protective equipment and the welding units, and you will be provided with the proper technique, such as cleaning the metal before welding, the proper position for welding to reduce fatigue, and whether to push or pull the welding puddle.
By having the ability to MIG weld, you will enhance your fabrication abilities as you begin transforming components you one time never considered modifying. Once you acquire the proper personal protective equipment, lay out a shop that is clutter-free, select a quality entry-level MIG welder, and get some technical training, you will be on your way to becoming an advanced fabricator. To become the best welder you can possibly be, it will take patience and practice…lots of practice, so it is up to you to get out in your shop and get working.


 Mopar Connection Magazine – The ONLY Daily Mopar Magazine © 2022. All Rights Reserved. Mopar Connection Magazine is the ONLY daily Mopar Magazine bringing you the latest Mopar news, technology, breaking news, and Mopar related events and articles. Find out the latest information about Mopar, Mopar products and services, stay up to date on Mopar enthusiast news, dealership information and the latest Mopar social media buzz! Sign up for the Mopar Connection Magazine newsletter for the latest information about new products, services and industry chatter. Mopar Connection Magazine is the best and only source you need to be a Mopar industry insider!
 by
by