


While work continues on the interior of the “Comeback ‘Cuda” (specifically the dash), we are also working on the front suspension. The 426 Hemi has been re-assembled and is ready to be mounted on the engine dolly. Since the “Comeback ‘Cuda” came with a 440 K-member and Schumacher motor mounts, we needed to acquire a real Hemi K-member so the car will be as original.
In looking for a real E-body Hemi K-member, we found these as scarce as hen’s teeth. So we turned to Mega Parts. These guys can take your 440 K-member, remove the 440 mounts and weld on correct Hemi mounts at a fraction of the cost. The mounts are now brand new and the welds are amazing.
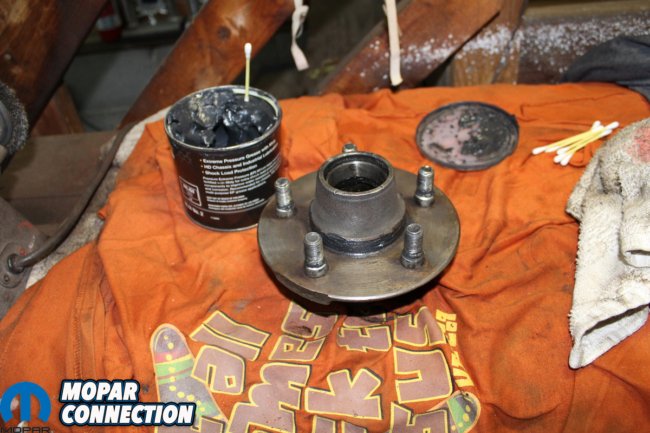
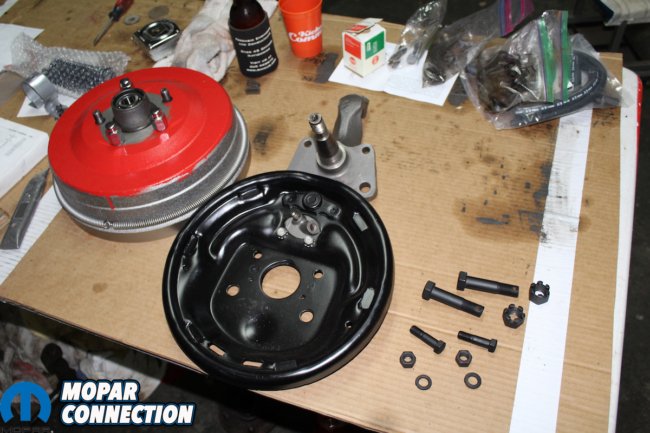
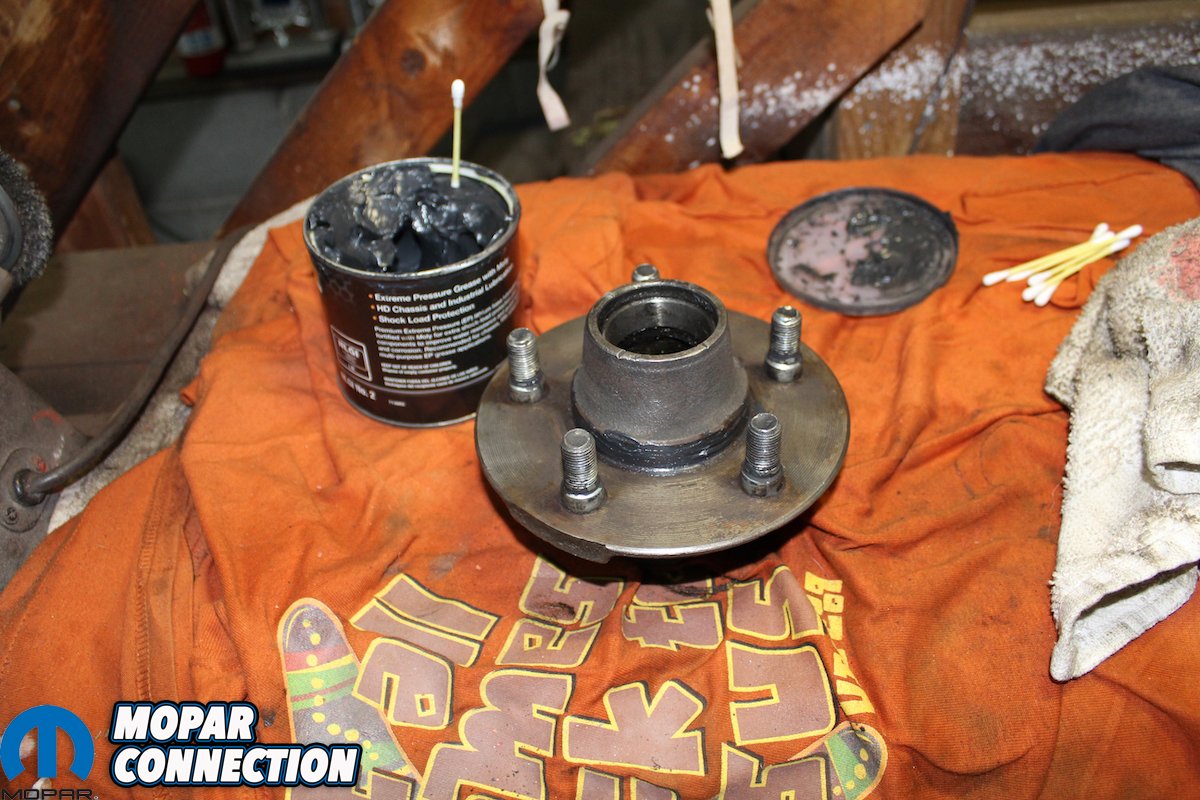
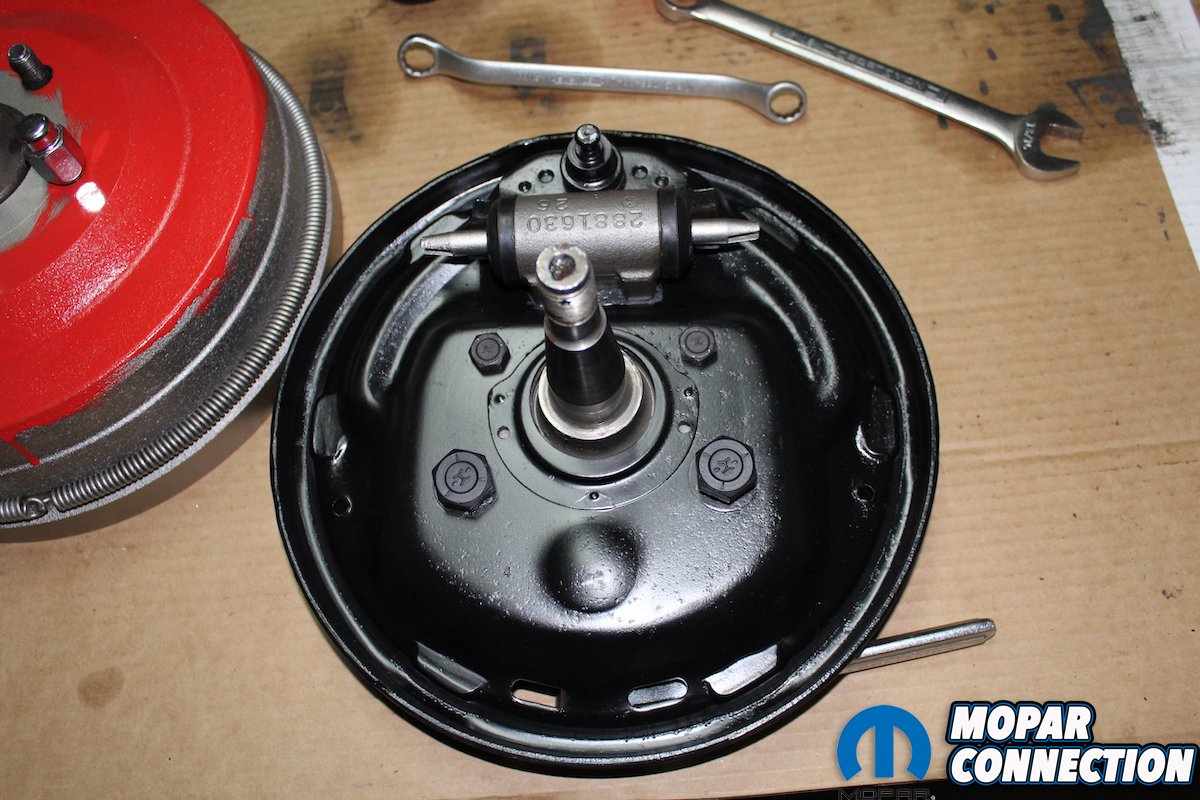
Above: Upon disassembly of the front suspension we found that much of the parts were toast and needed to be replaced. We replaced both front hubs, wheel bearings and inner and outer races as well as both brake drums. When doing a full restoration when in doubt always replace with new or NOS parts if possible. Don’t forget to use an abundance of grease.
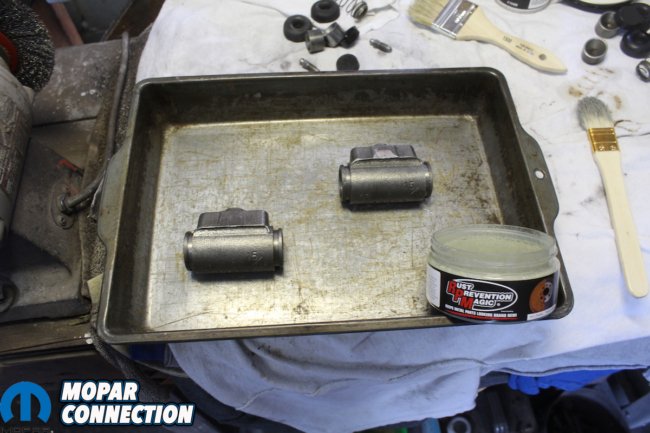
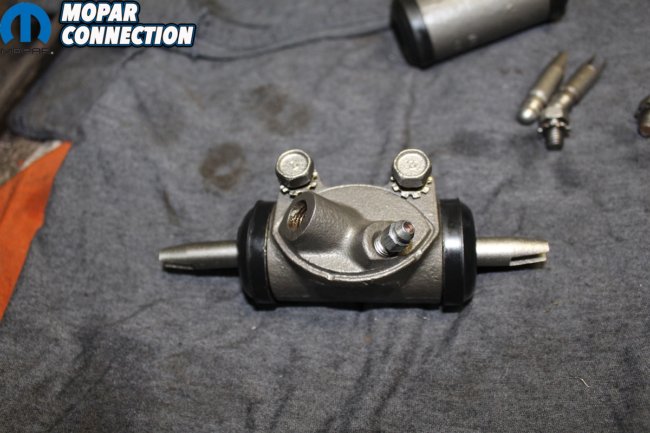
Above left: After cleaning the bores with a hone we replace the entire guts of the wheel cylinder. The last thing you want is to have anything associated with the brake system leak after assembly. Oh, and also it is kind of important for the brakes to work when you have your foot to the floor and need to stop. Above right: Just a heads up. There are several different wheel cylinders that go on these cars. This one has the large 11-inch HD brakes and needs this particular wheel cylinder. Some have a square recess. They have to match your backing plate so pay special attention to your specific application.
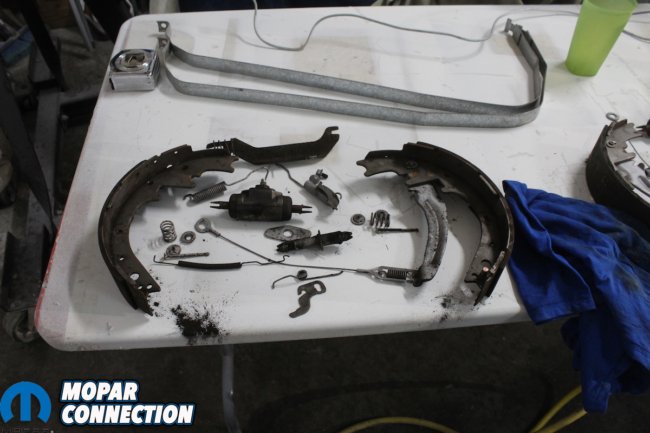
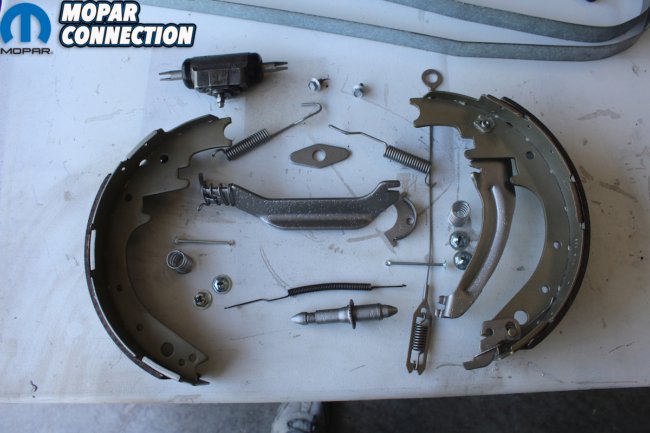
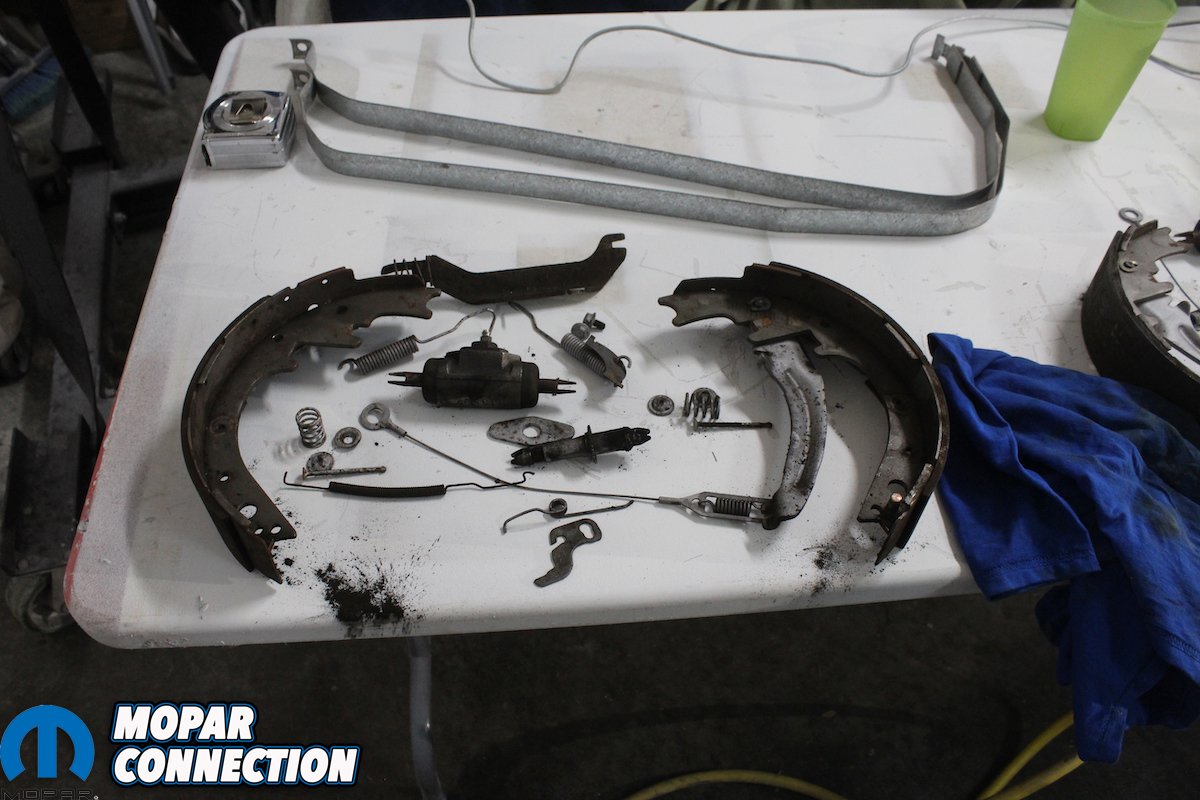
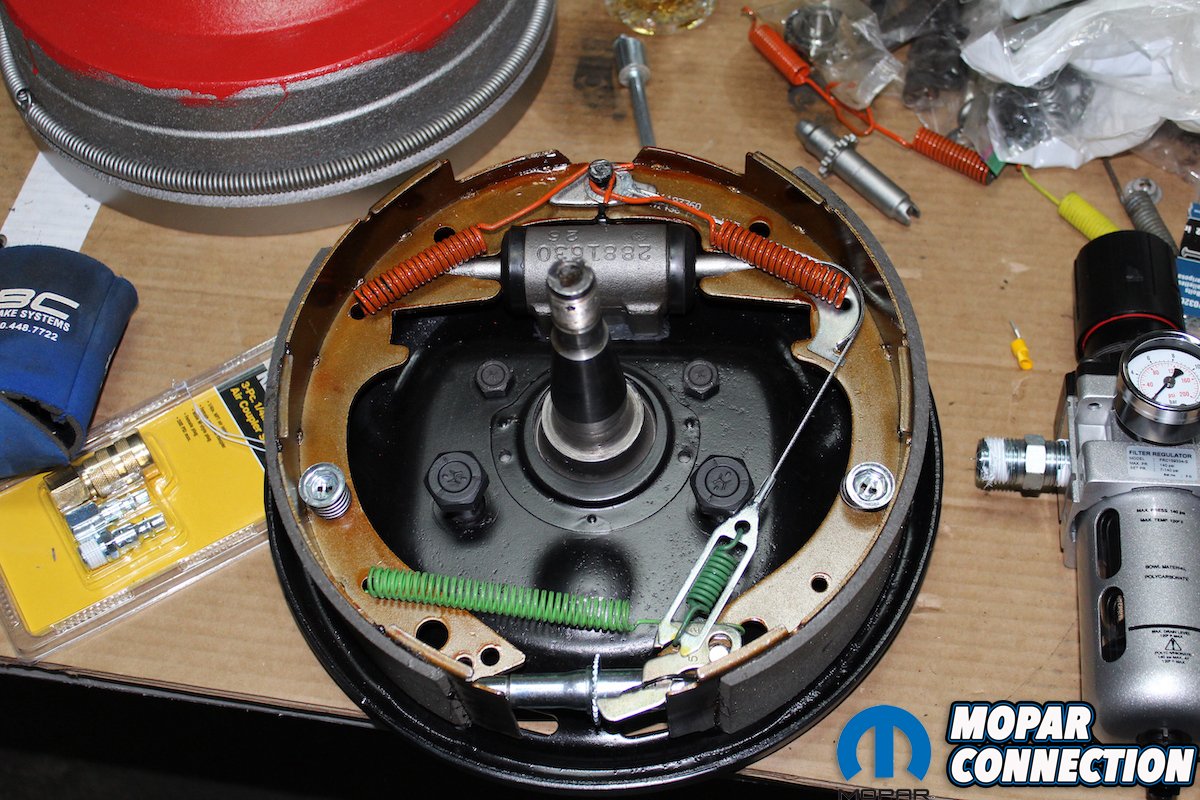
Above left: Out of these parts from the “Comeback ‘Cuda” we were able to restore and use them all except for the brake shoes and guts of the wheel cylinders. We also replaced the springs and keepers for the brake shoes. We cleaned the rest of the parts with the wire wheel on the bench grinder, and refinished them using the original finishes we found on each of the parts. Above right: We replaced the worn spring adjuster, and any other hardware that was vital to the correct functioning of the brake system. Also remember the star adjuster has a left and a right. You must have the correct one on the correct side for the brake to be adjusted correctly during use.
With the engine and Hemi K-member assembled and mounted on the engine dolly that we fabricated, we can now assemble the front suspension right on the stand. By doing this we can install everything in the car at one time from the bottom just like the factory did.
As is our standard procedure, we disassembled everything and inspected all of the parts to see if they could be restored or if they had to be replaced. That includes the upper and lower control arms, brakes, drums, backing plates, strut rods, idler arm, power steering box, ball joints, spindles, and wheel cylinders. Not only do we need them to function but they also need to be refinished to original appearance.
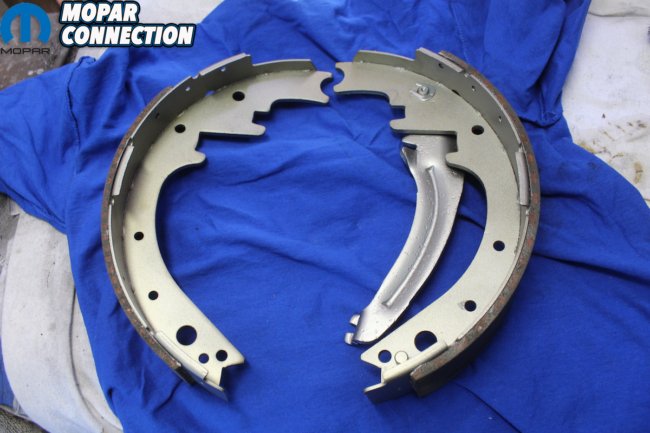
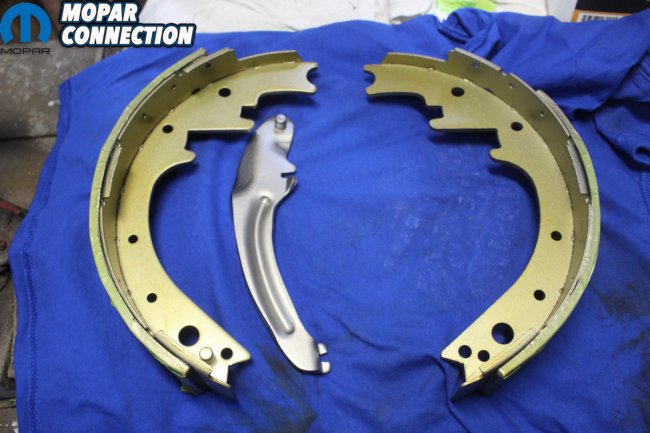
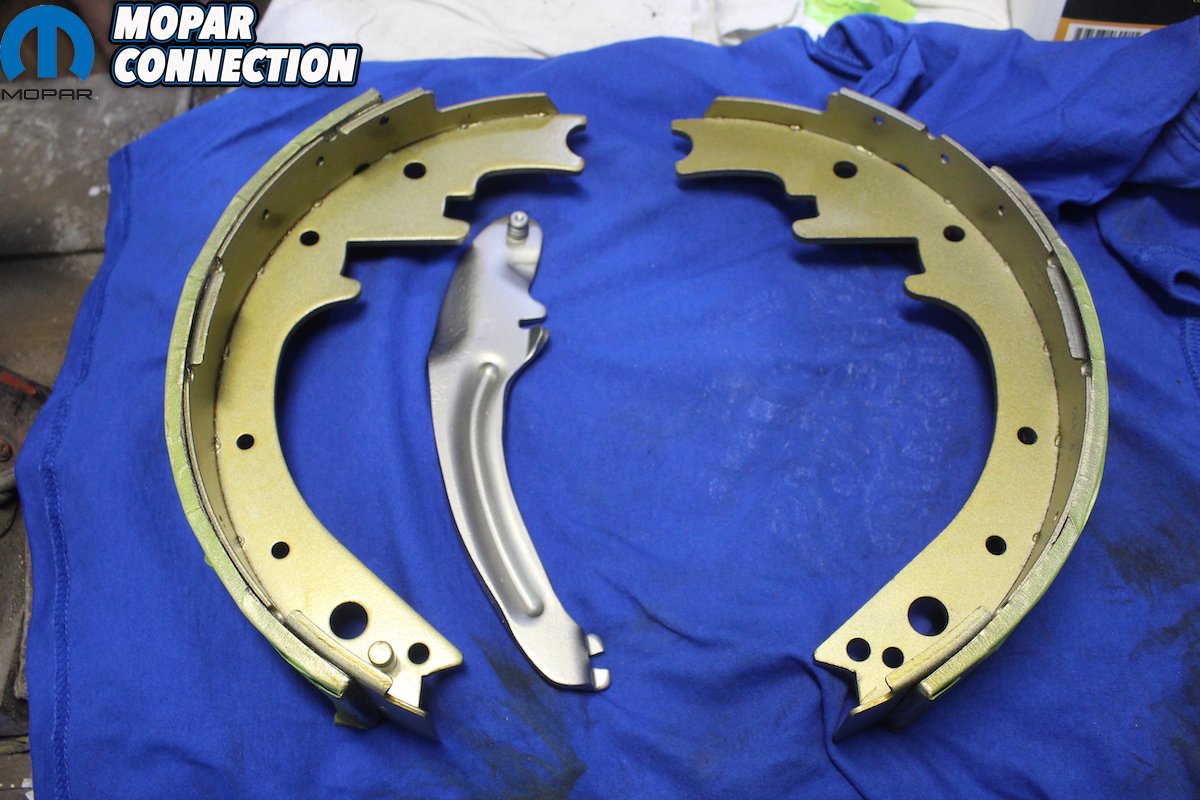
Above left: For the brakes and all the hardware we used the Seymour Stainless Steel paint. It protects all the parts from rust and cannot be seen so no need to worry about whether or not the parts are painted. Above right: Since the original brake shoes had a protective Cosmoline type coating originally, we used our process for duplicating that finish. Seymour stainless paint followed by several light coats of Eastwood’s Heavy duty rust preventative followed by a matte clear after they dry.

Above left: The spindles were in good condition as were the backing plates. The drums are finished in natural metal with Rallye Red paint brushed sloppily on the face. The bolts nuts and washers are black phosphate. There is a lot of discussion about what red is painted on these drums originally. You can get a pint of this red from Frank Badalson that will be as close to original as possible. Above right: Here you can see the correct “H” head bolts that are also fine thread. If you use grade 8 new bolts not only will the finish be wrong but so will the threads. They are all visible from the back side under the car.
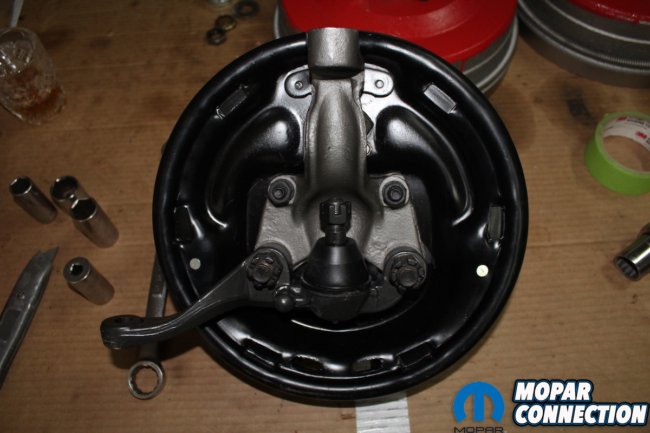

Above left: Here the subtle details of the various finishes are shown. Black phosphate bolts and nuts, semi gloss paint on the backing plates, bright zinc on the brake shoe studs, ball joint, cast metal on the spindles. Very few cars we judge have this kind of detail. Most are just painted black. Above right: Here all the details of the brakes right down to the colors of the springs, the adjusters, the brake shoes, the bolts, and the wheel cylinders are seen. All of this detail may seem to be wasted on an area that cannot be seen after the car is finished, but it is as we originally found it.
The front wheel hubs and drums were shot so we replaced them with new ones. The new drums do not come with the “grove” machined in them for the “anti- rattle spring” so we got our good friend Tray Batey machinist par excellence to make them like original.
Step-by-step, we took the completely worn-out front suspension back to original specs and appearance. All of this can be done in your home garage without any expensive tools. One of the great parts about the Mopar torsion bar suspension is there aren’t any coil springs that can come flying out and actually kill you during the rebuild!
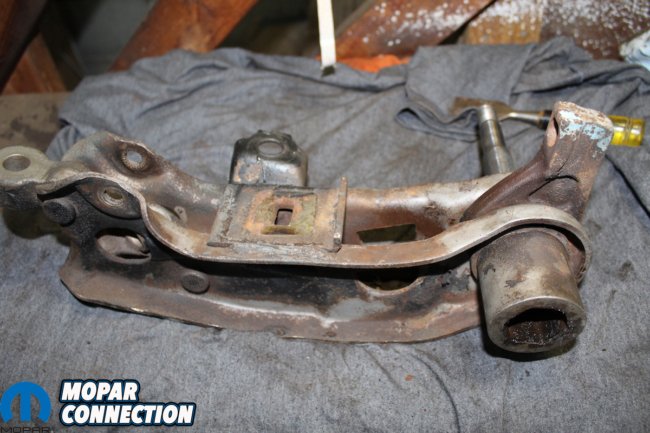
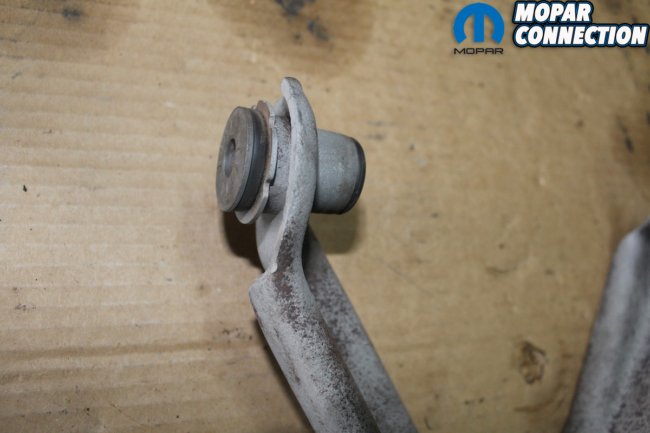
Above: The lower control arms need to be stripped and the control arm shaft must be removed. You can burn out the original rubber seal but then you must remove the metal sleeve that originally held the seal. There are poly bushings that claim you can just insert them with out removing the sleeve but we have found that not to be satisfactory. After removing the bushing and sleeve you must press in the new bushing and shaft into the lower control arm.
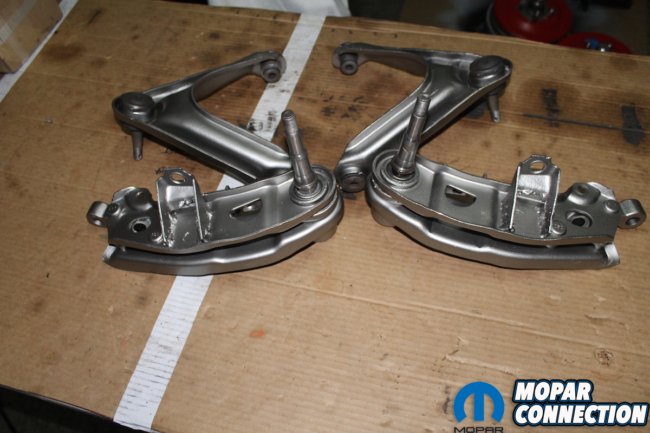
Above left: The upper control arm must also be stripped and the upper ball joint removed. You can purchase the special socket required to do this but we suggest you take it to a machine shop and let them do it for you. The threads on these ball joints are very fine and difficult to get installed correctly. Above right: The upper control arm also has two bushings that allow it to pivot in the shock tower mount. Again, they must be pressed out and in. We strip the control arm first and then remove and install the new bushing. Mask the bushing off and refinish. If you refinish the arm before installing the bushing it is likely to show the marks of the installation.
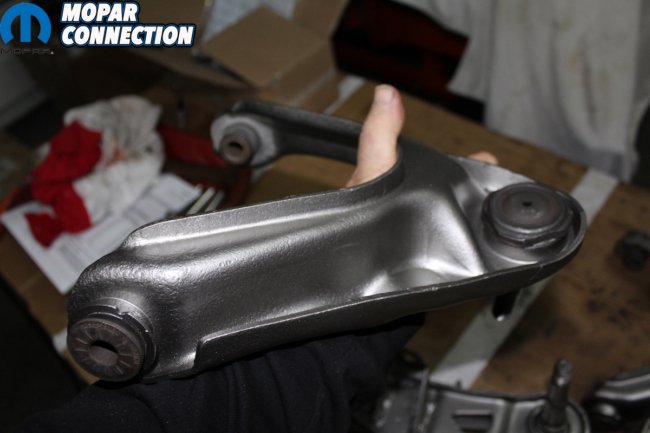
Above left: After having the bushing and ball joint installed tape them off and finish with Seymour Stainless Steel paint. If you fog the last coat it will have a natural finish just like metal. The only time this doesn’t work well is if you do not use at least 3 coats to protect the metal. Above right: By taping off the bushing and ball joint and then finishing the part you can see that the upper control arm looks fantastic. The details in the different parts remain intact.
Next steps will include installing the clutch assembly and the awesome Jamie Passon 4-speed with the custom gear ratios, but that will be in another future feature article.
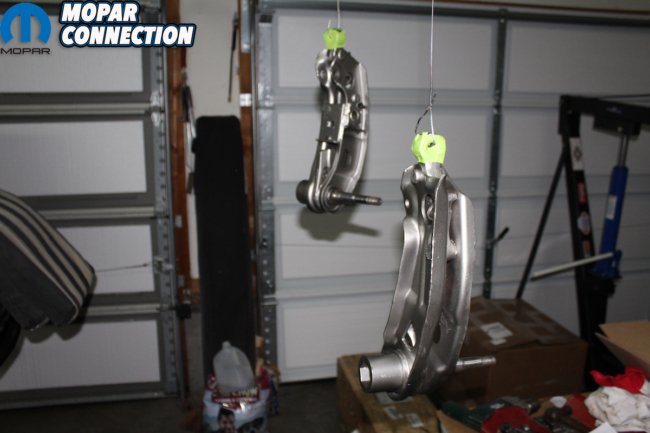
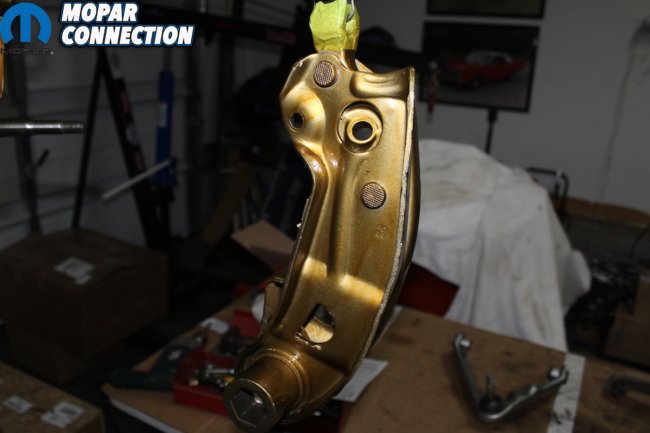
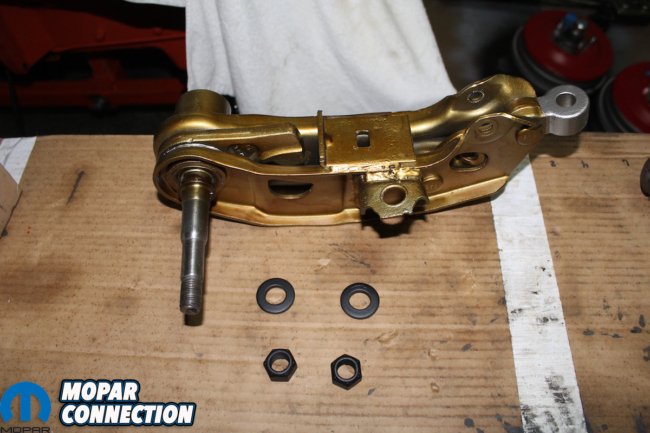
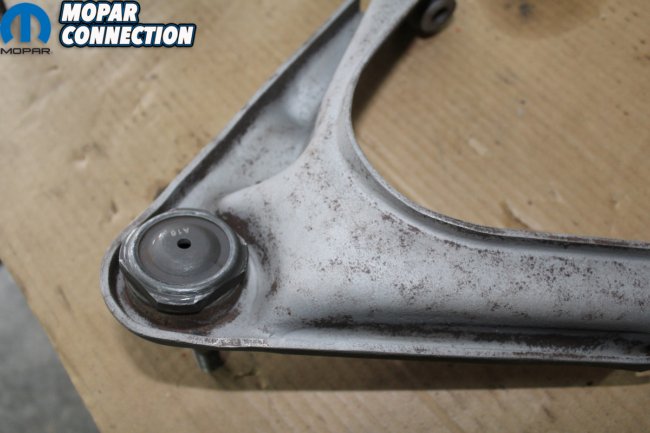
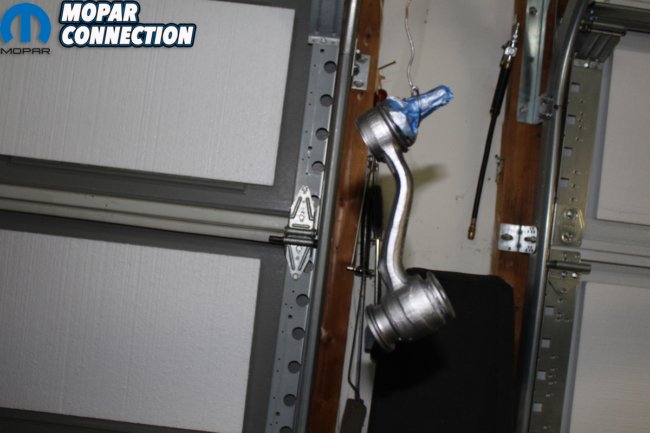
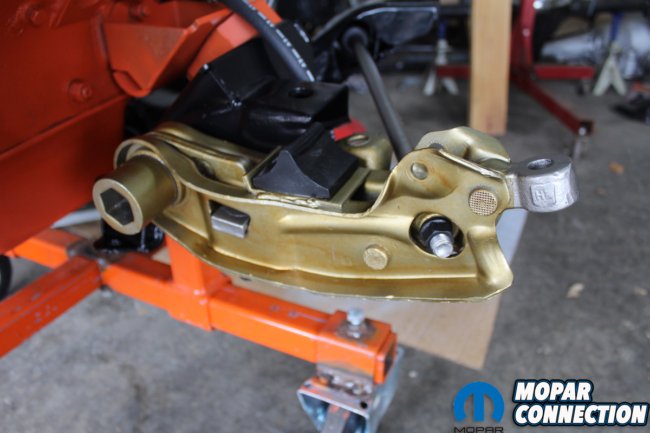
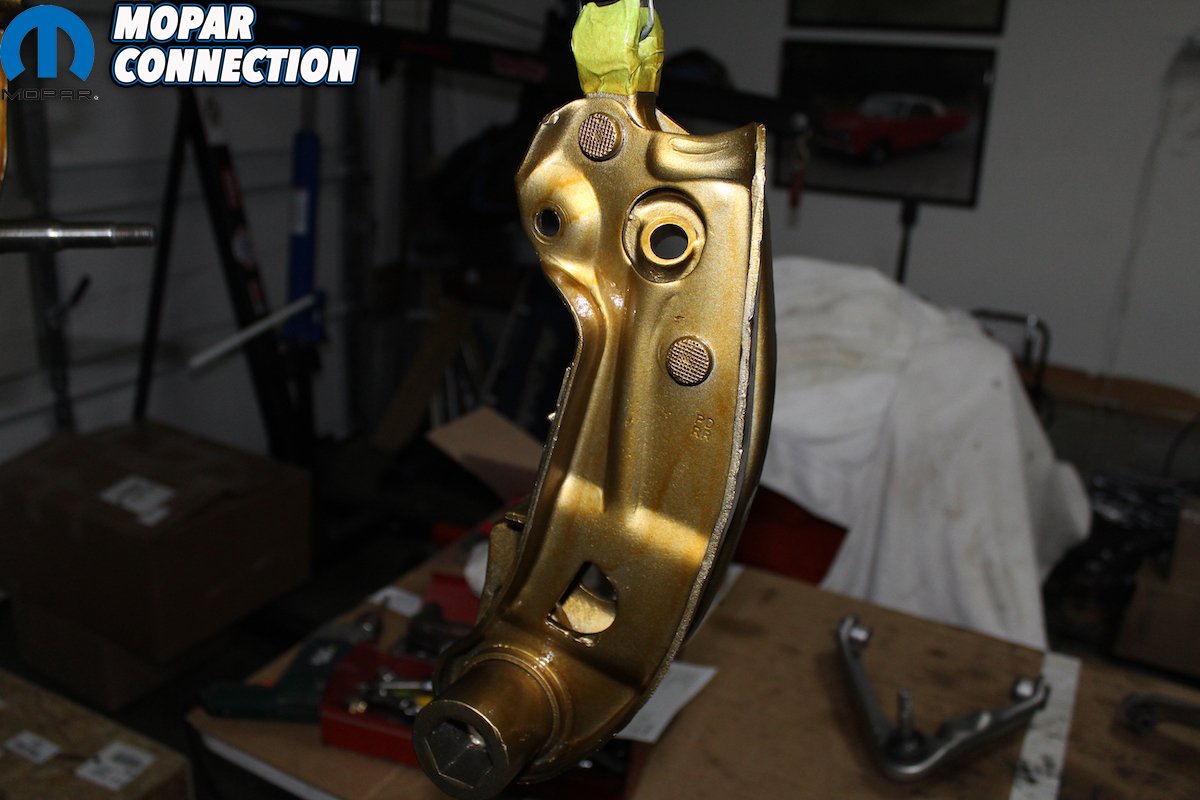
Above left: Originally the lower control arms were dipped into a vat of Cosmoline to protect them. I have seen several attempts to paint them to look like this process but all fall short. The knuckle was not dipped and should have a line showing where the coating stopped. We have taped off where the dip line would have occurred. Above center: By hanging the lower control arm, you can recreate the runs created when the part was originally dipped. This is duplicated with several medium wet coats allowing time to dry between each coat. Once the desired look is achieved let the Cosmoline dry overnight. Then spray with several coats of matte clear to seal the sticky Cosmoline surface. Above right: Once dry, the lower control arm looks as close to factory original as possible without any fake spray paint. We then use black phosphate washers and lock nuts to attach the lower arms. We purchased these again from Frank Badalson. As a foot note the tab for the sway bar link on a 70 and later car is located more toward the inside of the arm. The 69 and earlier are located more towards the outside of the arm. The “not dipped” knuckle shows up clearly in this picture.

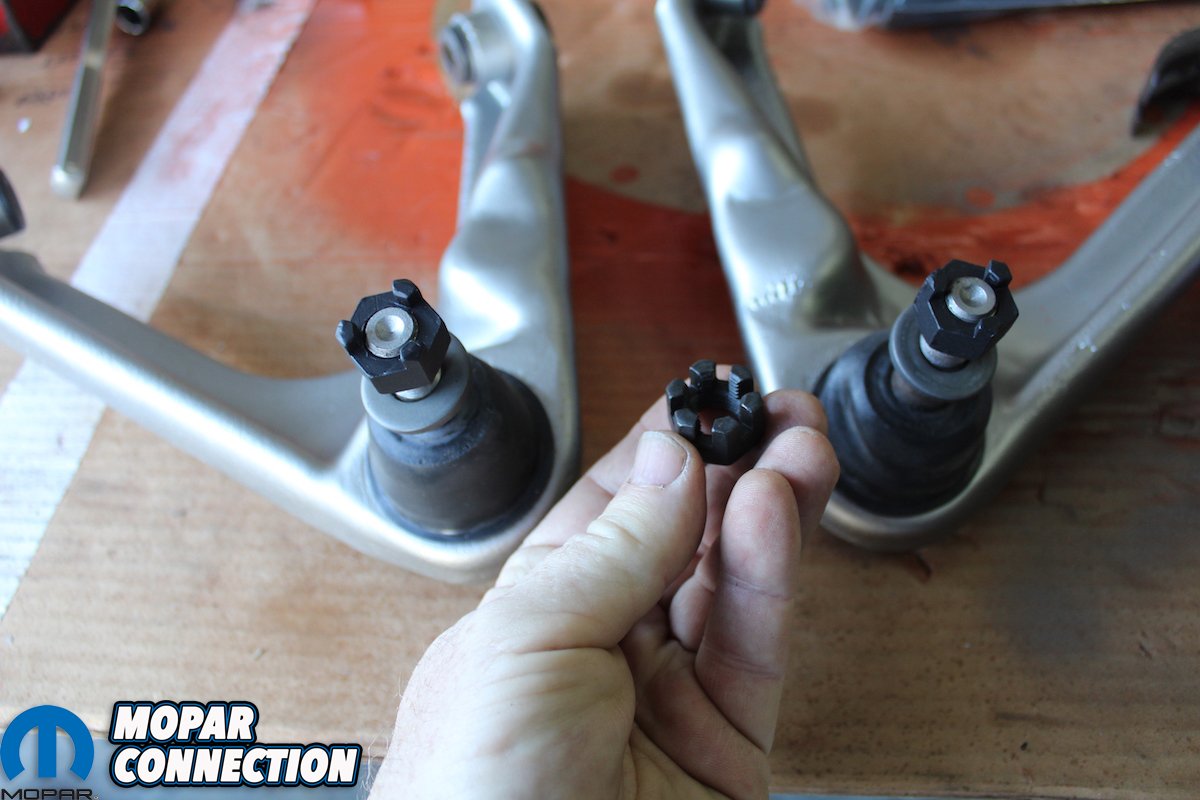
Above left: The idler arm for the steering was in good condition and therefore we chose to re-use it and simply re paint it with Seymour Stainless Steel paint. As far as we know it was never dipped in Cosmoline. Above right: The nuts on the ball joints and steering linkage are all “Tri-castle” except for the lower ball joint to spindle nut. Modern nuts have six castles and can be ground off to look correct. The only problem with using original “Tri-castle” nuts on replacement parts is that they are taller and will cause problems with the cotter pins placement. You have to use either thinner cotter pins or grind off the original “Tri-castle” nuts so the hole lines up.
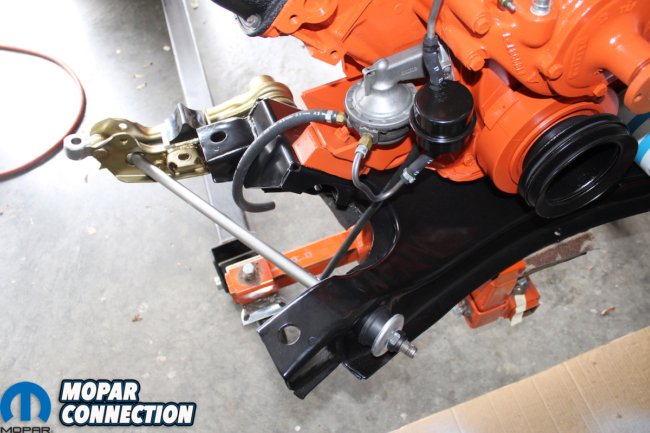
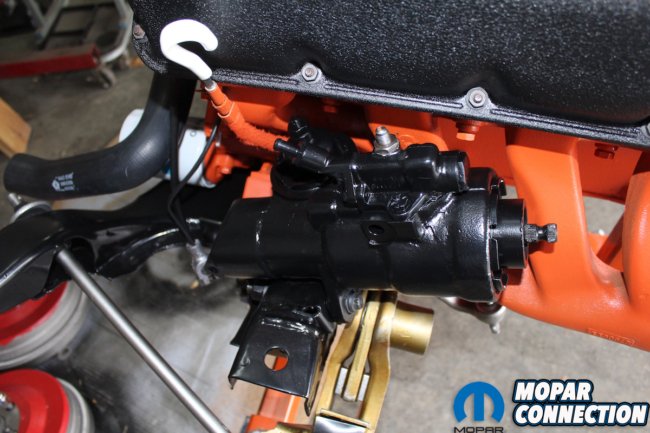
Above left: Front strut rod is natural with black phosphate nuts on both ends. Don’t forget the roll pins that go in the front of the rods. The replacement bushings are far from original in shape but are all that are available. Above center: Once installed the lower control arm, strut rod, and bolts look completely original. It is believed that the bump stop on the six pack and Hemi cars had a plate to boost the stop to compensate for the extra heavy load and 15 inch wheels. Above right: We had the original power steering box restored by Steer and Gear. We always go to them because quite frankly there isn’t really too many choices. We upgraded the response of the unit to a firmer feel. They do good work but could stand to be more organized in their communication. Just don’t let them paint your steering box. Most of the paint pealed off before the unit could be used. Paint it yourself.
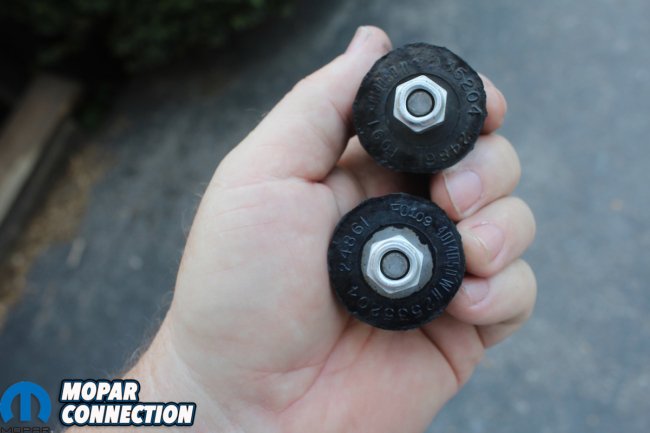
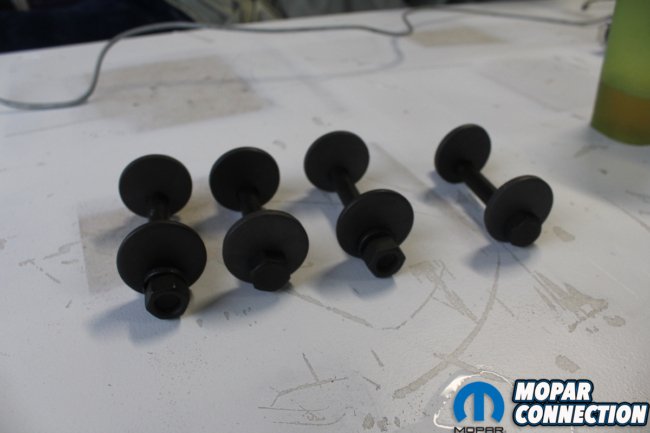
Above left: We purchased the upper control arm bumpers from Frank Badalson and they look and install like the originals. Also notice the correct nuts for this application. Thing is, when installed no one can see the numbers! But that is why you take as many pics as possible. Documentation! Above right: The cam adjustment bolts are finished in black phosphate. There really isn’t any reason to try to restore yours when these completely original repops are available. Just save yourself time and money in the long run. Replace it once with the correct part even if it costs a little more. If you are serious you will replace it later when a good knowledgeable judge calls you out!
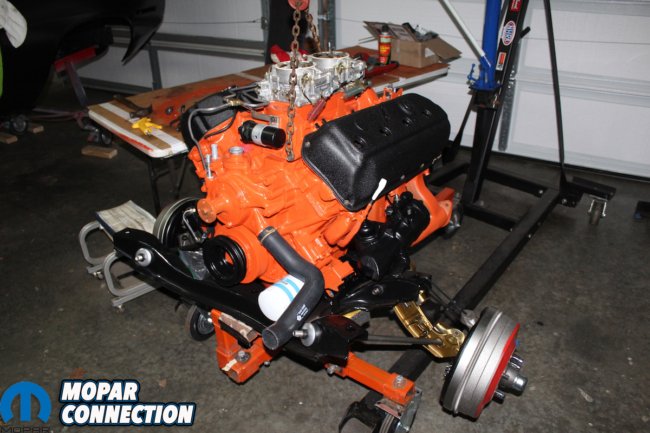
Above: Engine, K-frame, front suspension, all done and waiting for the clutch assembly, and 4-speed transmission!


