


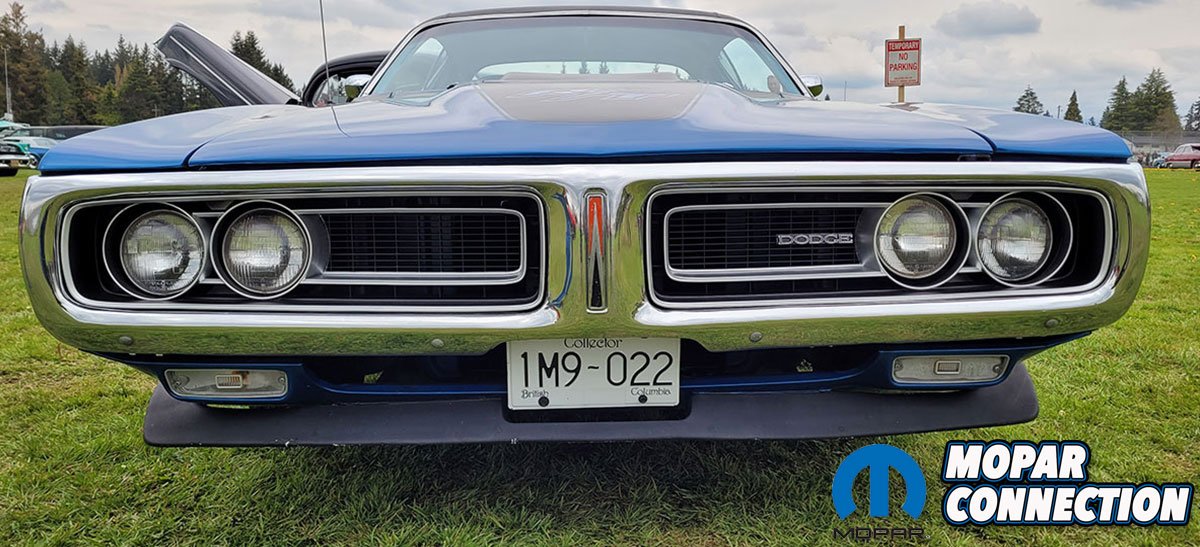
When we purchased our 1971 Dodge Charger R/T, it was a great driver quality car but it needed quite a bit of freshening up of the exterior, especially the front end. When we decided to start freshening up the front, we focused on two pivotal areas; the grille and the front park lights.
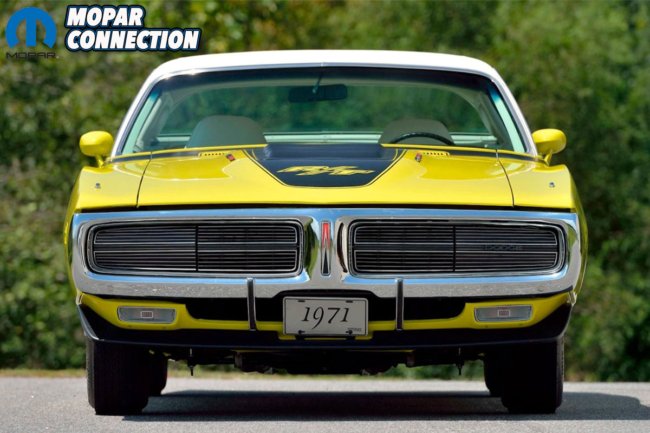
Back in 1971, you could order two different grille options for the Charger, depending on your trim level. Standard was plastic grilles with exposed headlamps. Lower trim level Chargers got basic silver grilles where the R/Ts and Super Bees got black and silver two-tone grilles.
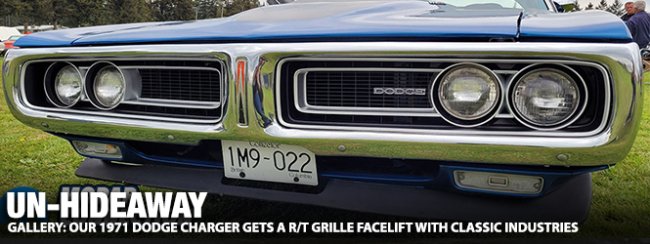
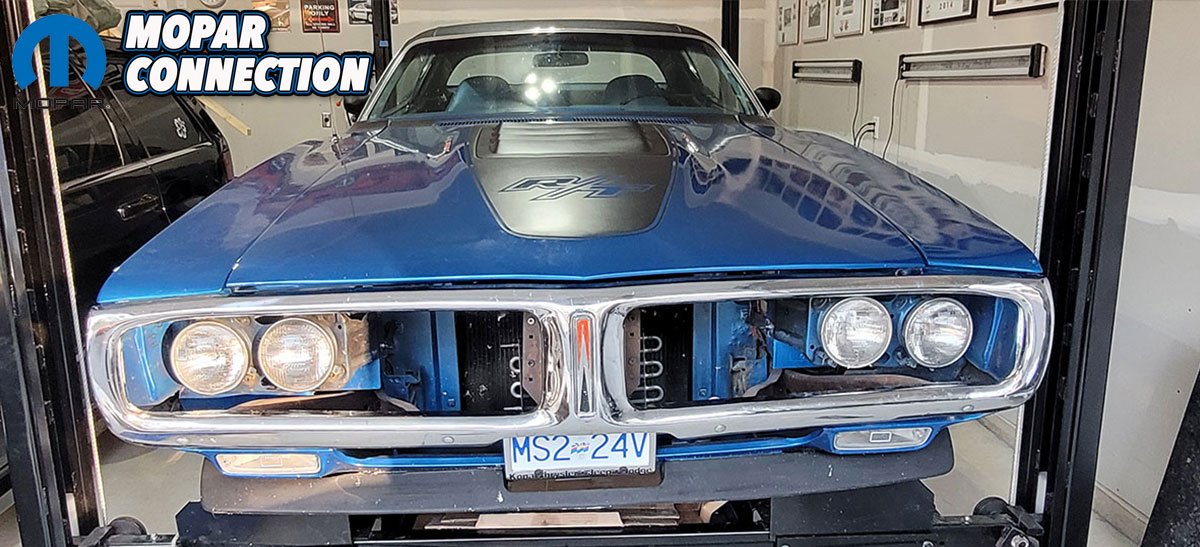
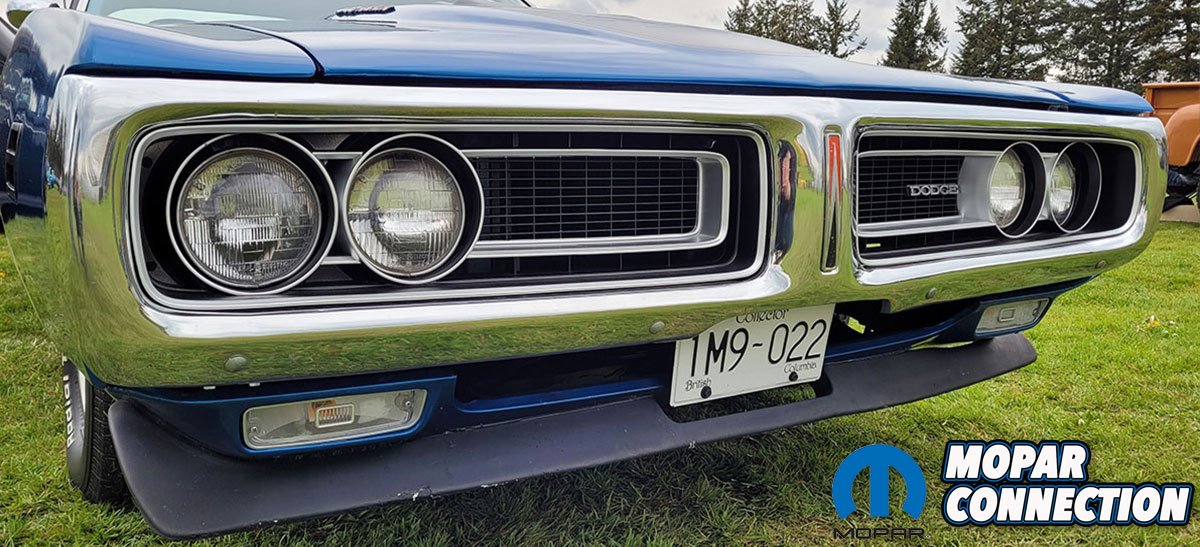
Above: Our 1971 Charger R/T when purchased with incorrect hideaways installed.
For an additional fee on your Charger R/T or Super Bee, you could option your car with concealed headlamps, or hideaways as many call them. In 1971, all Charger SE models got them standard. Originally, our Charger R/T was equipped with the black and silver plastic grilles from the factory. At some point during one of the earlier refreshes of the car, incorrect basic silver grilles were installed which made the car look not the greatest.
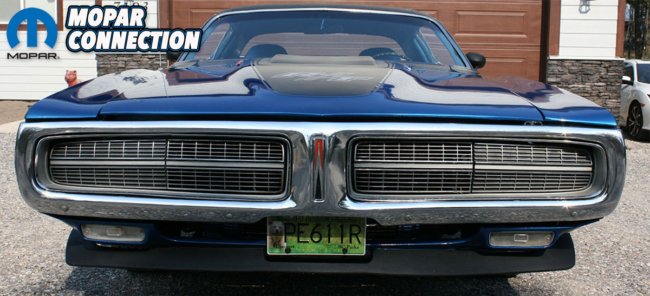
From there, the previous owner decided to install hideaways instead as he preferred the look. Now, we’re going to veer slightly off track for a few moments here to explain hideaways on 1971-1972 Chargers as they are a whole different ballgame of their own with their design and complexity. Many of which a lot of people don’t know. Both 1971 and 1972 hideaways are made out of pot metal and look somewhat similar but have very unique differences between the two years that not everyone knows about.

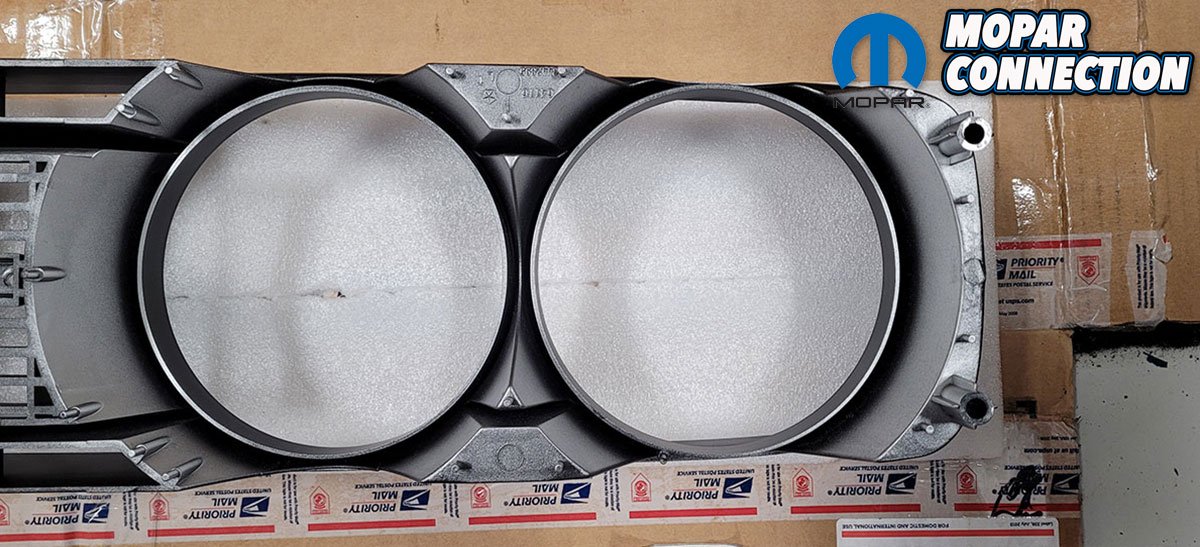
Above Left: 1971 Hideaways. Note the differences. Above Right: 1972 Hideaways. Note the differences.
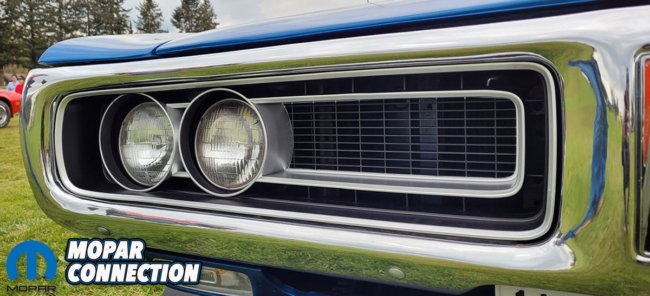
For 1971, the hideaway grilles have design bars in them that run predominately horizontal. The inner grilles have multiple horizontal bars and then three vertical bars that hide in behind. These give an appearance that breaks the inner grilles up into four sections. On the headlamp doors that move up and down to expose the headlights, they have entirely only horizontal bars and the driver side headlamp door features a Dodge logo.
For 1972, the hideaway grilles are entirely different in design look. The headlamp doors and inner grilles both match in design. Gone is the Dodge logo on the driver side headlamp door and both pieces feature dominant vertical and horizontal bars. These give the appearance of eight sections versus four in 1971.

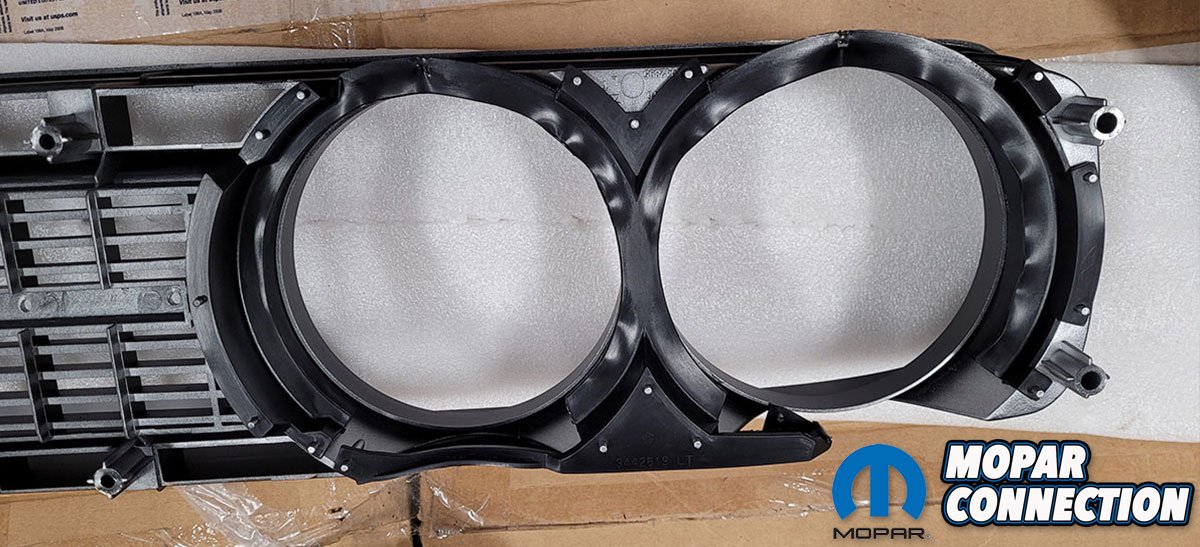
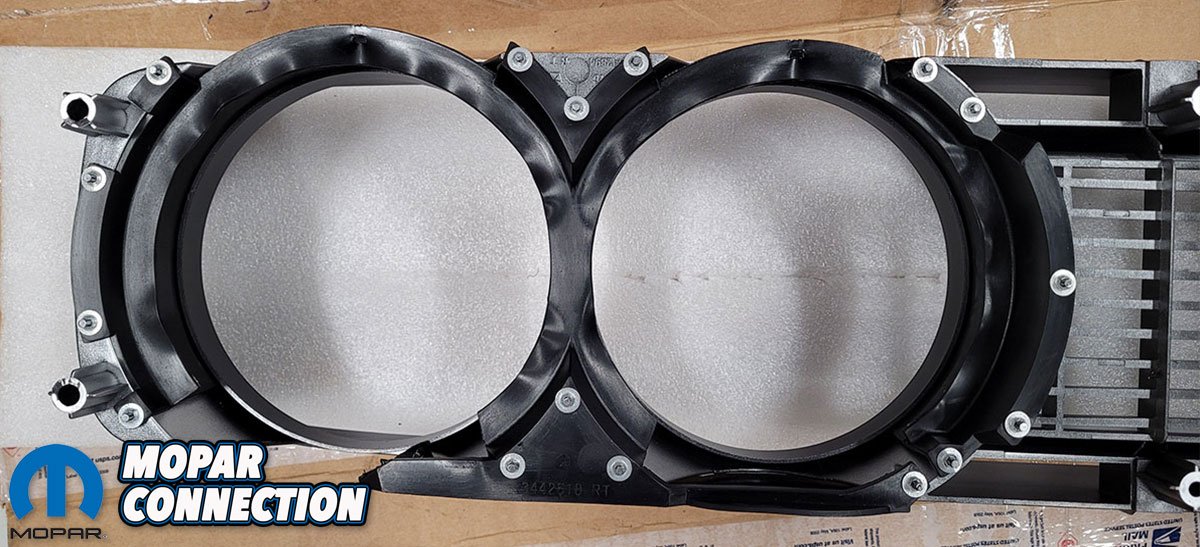
Above: After we removed the hideaways (four bolts and a bunch of zap straps!), we were ready to start installing the new grilles.
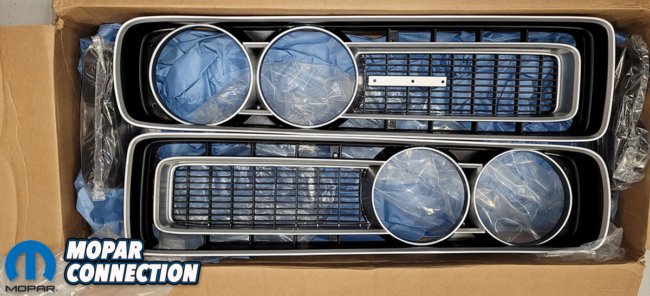
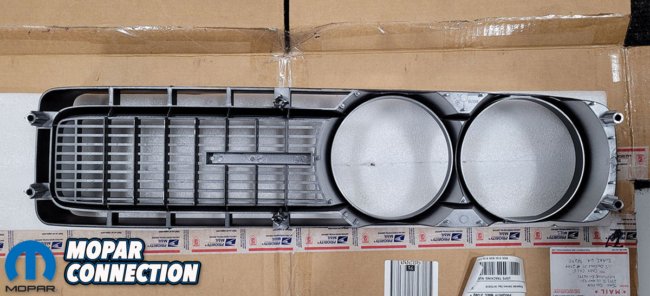
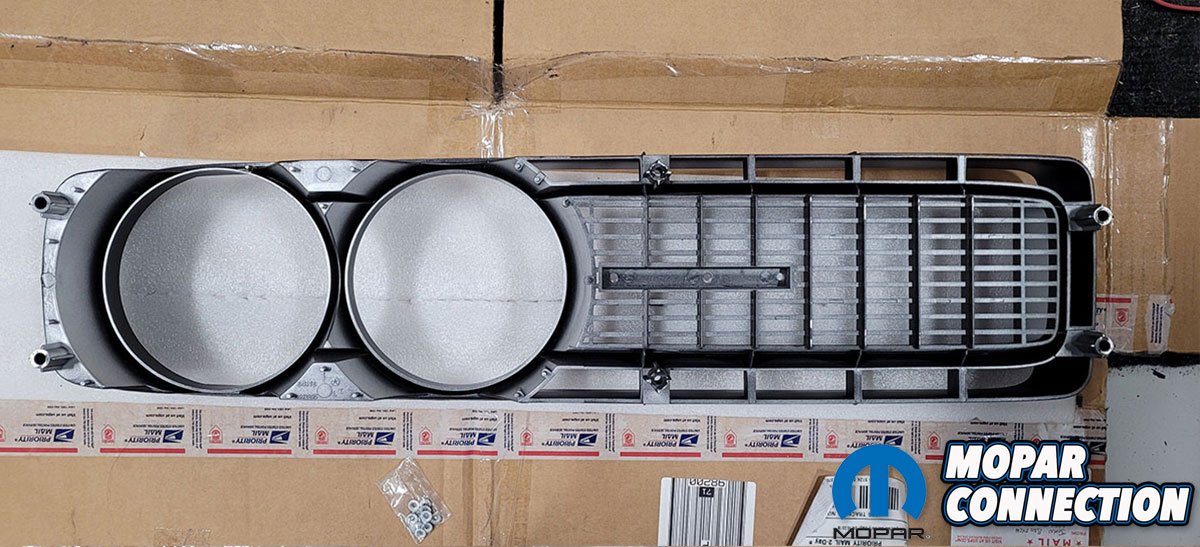
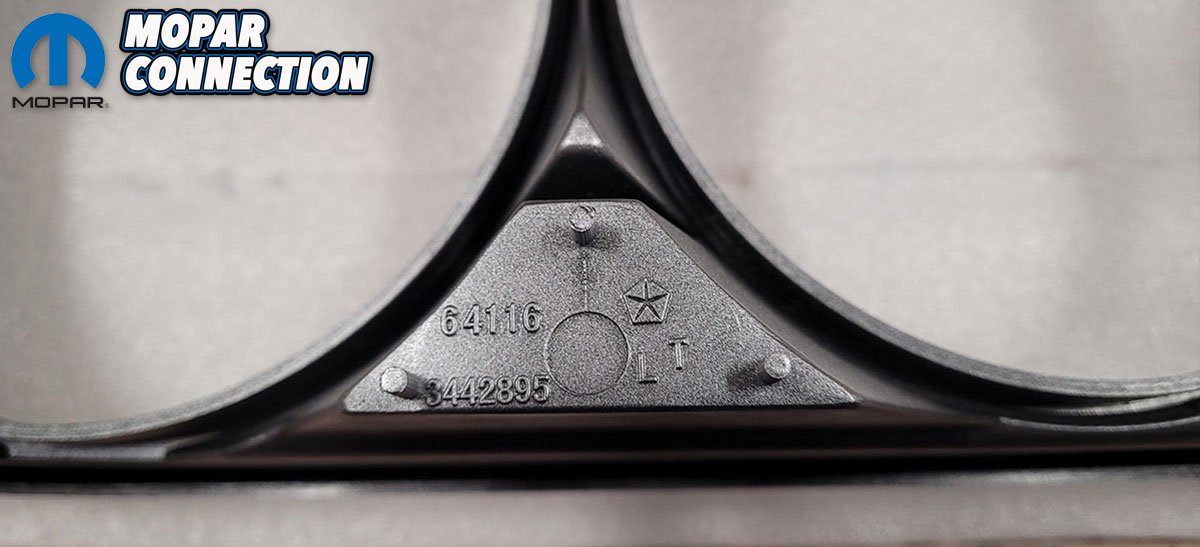
Above Left: Our reproduction grilles from Classic Industries. Note the incorrect silver block where the grille emblem goes. Above Right: Back side of the driver side reproduction grille.
Functionality wise, both 1971 and 1972 hideaway setups are the same as far as the linkage, electrical motor and likewise. Even the hideaway surrounds themselves are the same. The only difference but the biggest one is the design of the actual grilles as we explained. That being said, if you are trying to find hideaways, please be advised that 1971 assemblies usually go for quite a bit more money than the 1972 assemblies as they made a lot more in 1972 in 1971. Also, because they are pot metal, it’s hard to find them in good shape without damage.
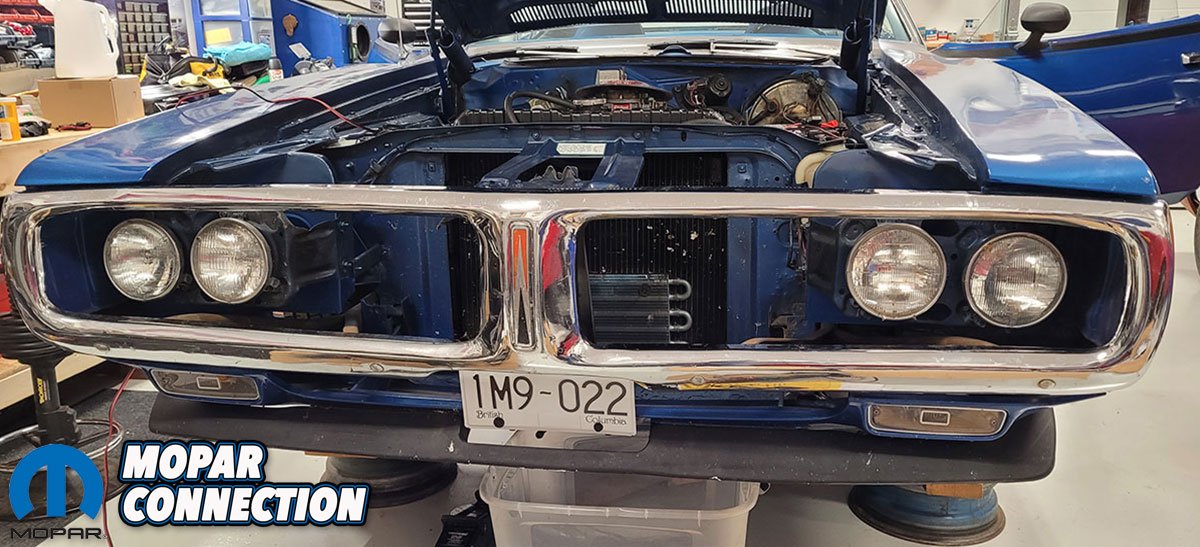
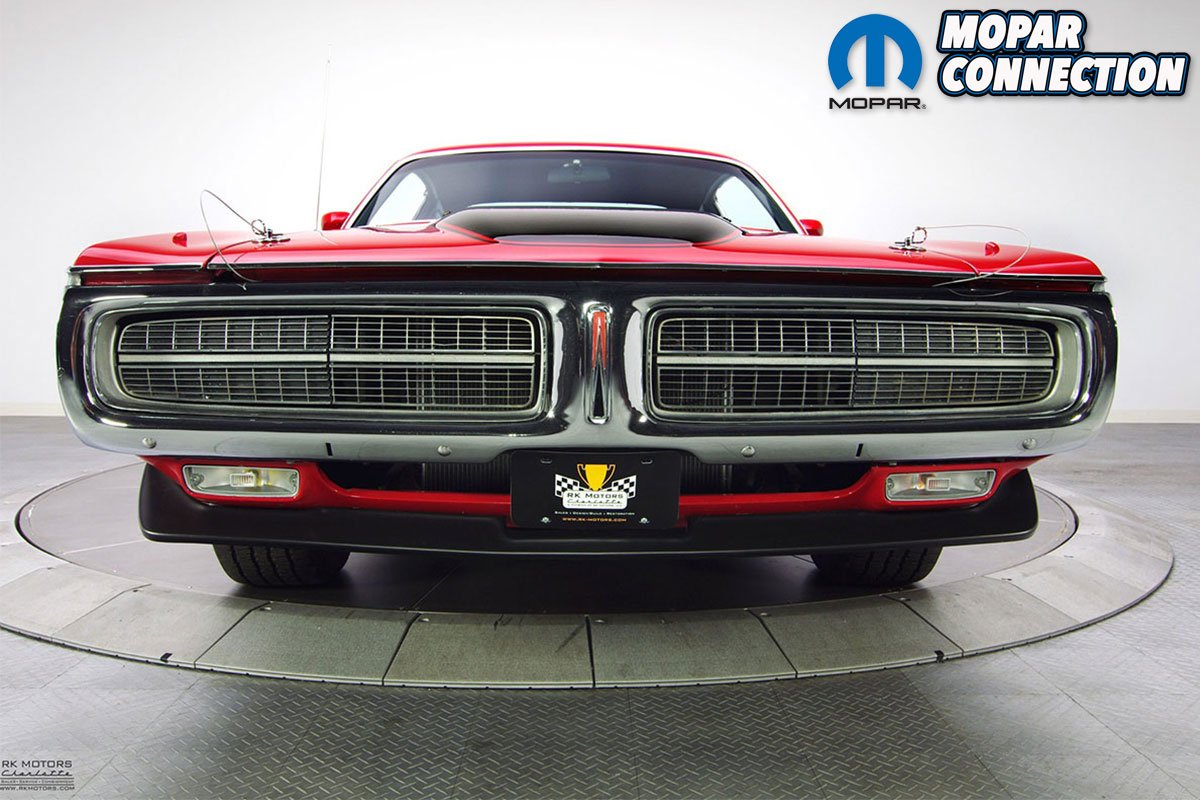
Going back to our 1971 Charger R/T, as mentioned, the previous owner installed hideaways. However, he installed 1972 assemblies that were incorrect for the car as well as crudely installed them. When we purchased the car, the seller proudly told us how he had installed them as he said “hideaways are life”.


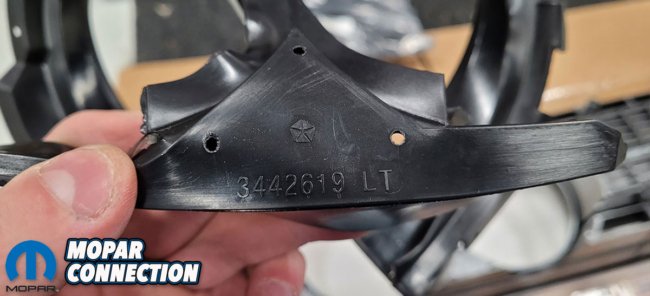
Above Left: Looking closer at the headlight area and part number. Above Right: These fantastic reproduction grills even have the factory part numbers!
Upon further inspection though, we discovered that they had only been installed for appearance and didn’t actually work at all. The linkage and electric motor that make them work was all missing. The proper hideaway only forward light wiring harness (that also requires a relay under the dash) was also missing. On top of that, the seller had installed the entire hideaway set up using only a fraction of the proper hardware. Instead, he used zap straps where he didn’t have the proper bolts. Note that Classic Industries actually sells a proper bolt kit for hideaways!
That being said, for the first few months of driving the car, we’d have to bungee cord open the headlamp doors to drive at night; a task that became quite the pain! When deciding on which route to go, we went back and forth a lot on whether to make the hideaways function correctly and look proper (we have the proper 1971 grilles needed) or remove them and install the proper black and silver plastic grilles with the exposed headlamps.

Above Left: The grille kit comes with brand new rubber headlamp shields. Above Right: Factory part numbers molded into the reproduction rubber headlamp shields.
After doing some research, we discovered that because our car didn’t have hideaways from the factory, we’d have to do some splicing in the under dash wiring to add the proper relay. That being said, we decided to remove them and go back to the original equipped plastic grilles.
Rather than try and find used originals that aren’t broken or brittle, we reached out to our good friends at Classic Industries and acquired one of their brand new reproduction grille kits. Working together with OER (Original Equipment Reproduction) Restoration Parts, Classic Industries offers a massive line up of grilles for your classic Mopar. They offer everything you need; complete grilles, grille sections, headlight bezels, full hardware kits, trim; you name it! Every grille is painted to factory specifications and ready to install right out of the box.


Above Left: Once we inserted the rubber headlamp shields into place, we were ready to install the retainers. Above Right: With the retainers installed. Assembly was the same on both sides.
For 1971 Chargers, Classic Industries sells both the basic silver and the black and silver versions in full kits. These grilles come molded in ABS plastic like the originals and even feature correct OE part numbers! These kits come with almost everything you need to install them including the rubber headlamp shields and the retainer nuts for the shields. Much to our surprise though, they did not come with the actual screws or the square plastic screw retainers required for installation so please make sure you purchase those separate as you will need them!
Once the grille kit arrived and we had removed the hideaway assemblies, we got to work getting them ready to install. For cars that came equipped with the plastic grilles, there will be six metal brackets total that hold the grilles in place to the bumper. Thankfully, we located them all in a box in the trunk. We sanded them down and refinished them in semi-gloss black paint. Our brackets had old brittle plastic square screw retainers on them so we decided to install brand new ones.
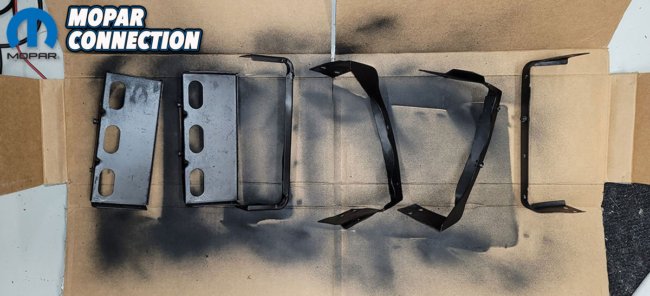
Above Left: Our grille brackets were in good shape so they just required a quick wire wheel, sand and respray. Above Right: Our factory grille brackets installed in their proper position.
From there, we installed the brackets into the bumper. The position of the brackets is quite straight forward but to give a quick explanation, the curved ones go on the outside of the bumper near the headlamps. The thin flat ones go in the middle and the larger rectangular ones go on the inside by the center of the bumper.
With the brackets installed, we shifted our attention to the grilles. We carefully flipped the grilles over and laid them on a blanket to install the rubber headlamp shields. These are pretty straight forward to figure out positioning. A helpful tip is that the part number on the grille is opposite of the part number on the shields as seen in the photos. We will note that installing the retainers that hold the shields into place on the grille was a fair bit of a pain. We ended up using a pair of flat nose pliers and pushing down evenly on the retainers proved to be the easiest way of installing them.

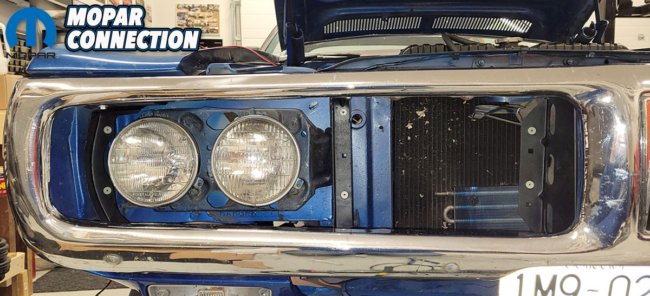
Above: The finished results.
Above Left: Everything looks and fits great. Above Right: Note we painted the incorrect silver block area black to match the grille as it should.
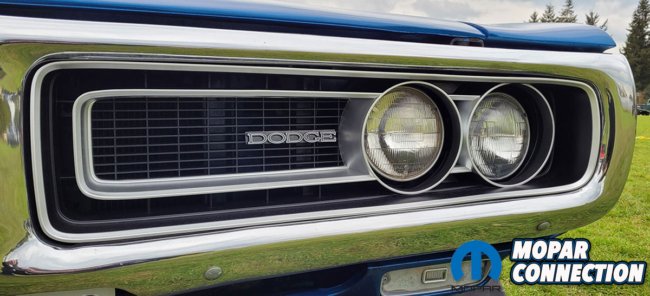
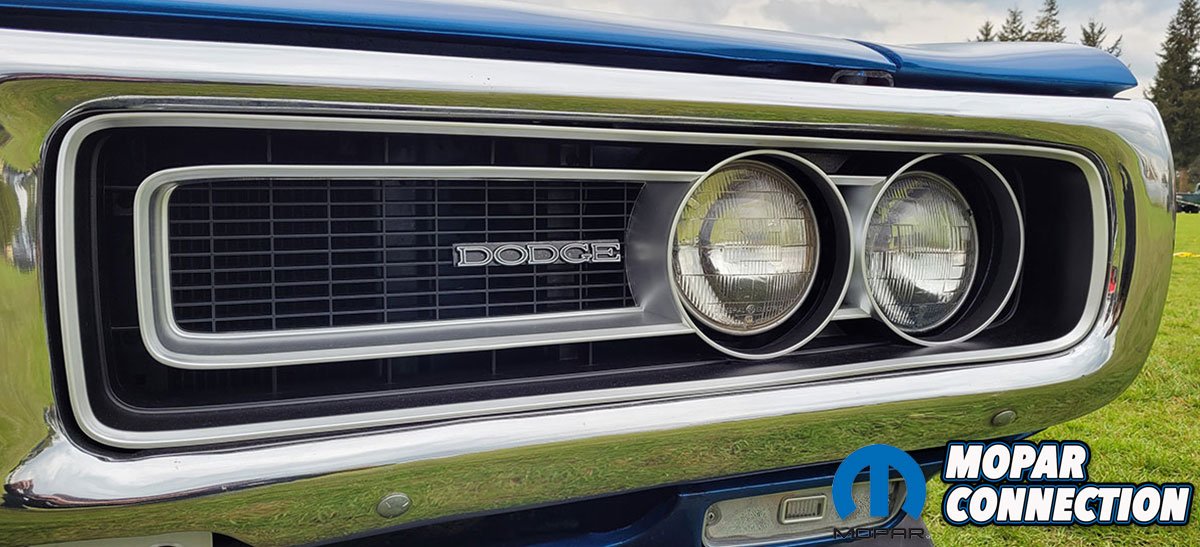
From there, we went to install the final touch, the installation of the Dodge emblem, another fantastic reproduction part we purchased from Classic Industries. Much to our surprise though, we realized the plastic “block” in the grille that the emblem attaches to was incorrectly painted silver where it’s supposed to be black to match the grille. We aren’t sure if this was a mistake on just the set we got our not as their stock photos on their website show the block as black but we have not had our hands on a different set of reproduction grilles to check.
That being said, we painted it black using some model paint and a brush. You could also mask it off and paint it with spray paint too if desired. Please keep this in mind if you purchase a black and silver grille set as yours may need to be corrected as well! Once the paint dried, we installed the reproduction Dodge emblem. Please note the Dodge emblem is the same part used on plastic grilles and the hideaways in 1971.


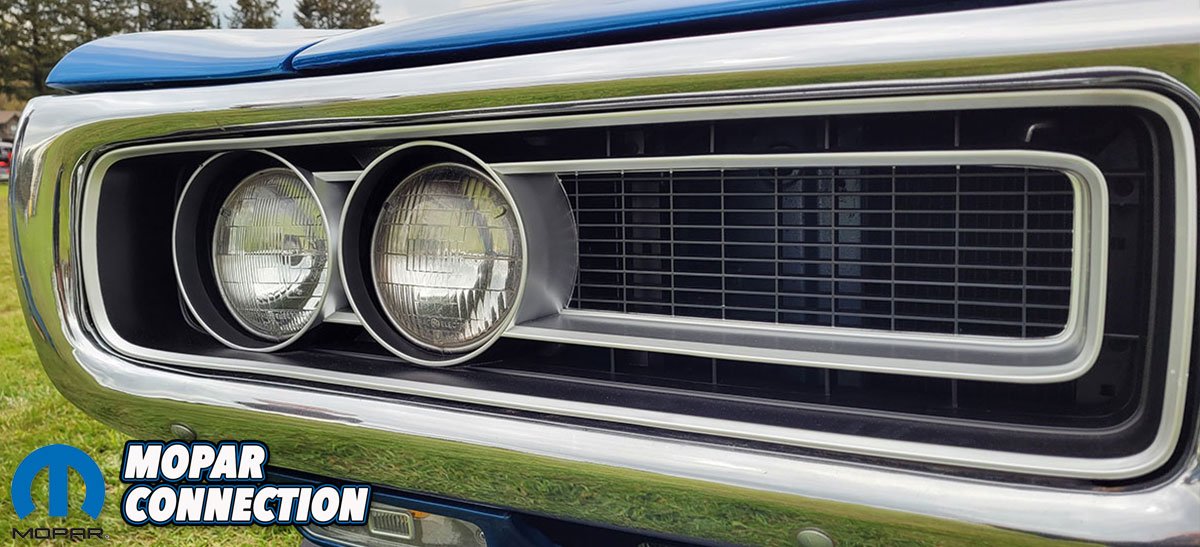
Above Left: We are very satisfied with the results. Above Right: No more worries about hideaway headlights hanging up not being able to see at night.
With that complete, we placed the grilles into the bumpers of the car. We had to loosen the bracket bolts and slightly reposition the brackets so the screw holes on the grille would line up but everything quickly lined up and installed beautifully.
These reproduction grilles from Classic Industries and OER are great! They fit perfectly and look correct. With their price point too, you can’t go wrong and honestly, it makes you not want to bother trying to restore original brittle ones!


Personally i like hide-a-ways look better but i understand why as well you installed the 4 eyes.
OEM 71 Charger RT Grilles are black plastic based, whereas the repros are silver with the black painted on. The Black will soon start flaking off, as all repro paint does.
With such an ultra-limited market, one has to wonder why any company would repro these Grilles to begin with. Especially since there are many of these Grilles available on eBay and FaceBook Groups. Which leads us to another fact left out of this article: These Grilles are not offered for repro, but you can order them and WAIT until they decide to manufacture some. This wait time can stretch for years. Then, when you get tired of waiting, you are offered credit toward other purchases, not a refund.