


Bud Lindemann, of Car and Driver TV fame, once asked, “Where do you draw the line? Where does the docility of a street machine end, and the furry of a full-blown race car begin?” Few will argue that the supercar era Mopars were predominantly considered excellent straight-line performers, which pushed the line closer to a full-blown race car. However, throw in a few turns and a heavy reliance on (the often installed) four-wheel drum brakes combined with bias-ply tires and terrible performance alignment angles, the line quickly plummeted back to merely a docile street machine.
To improve these shortcomings of the A, B, and E-bodies, aftermarket manufacturers developed products that transform the straight-line terrors into canon-carving, pro-touring machines. Tom Rightler has a potent ’69 Dodge Charger that he is preparing for the Hot Rod Drag Week in mid-September. Follow along as we cover the installation of a Baer Brakes‘ front and rear disc brake kits that will significantly advance the line of Rightler’s Charger toward a well-rounded, full-blown race car.


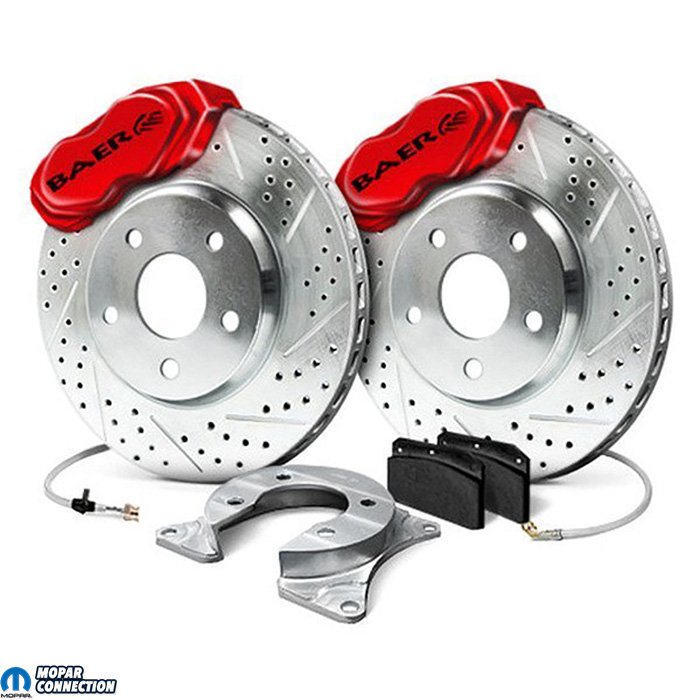
Above Left: The rear SS4+ brake kit part no. 4262703R with internal parking brakes. Above Right: The front SS4+ part no. 4141049R.
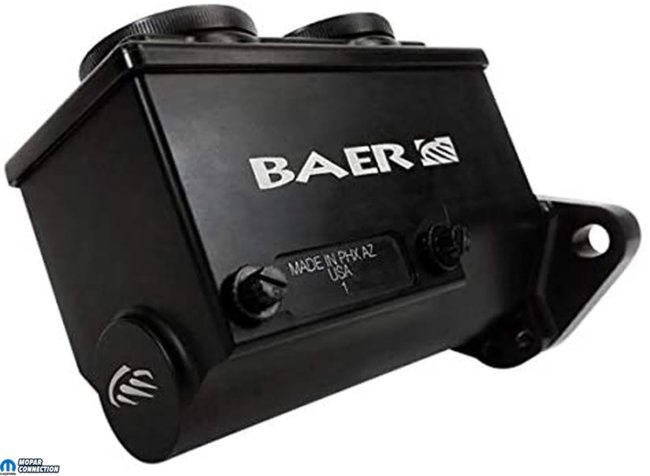

Above Left: Baer’s Remaster master cylinder in 1″ bore part no. 6801301LP Above Right: Baer’s adjustable proportioning valve part no. 2000057LP.
Rightler worked with the Baer Brakes representatives to determine which components would provide an optimum braking balance under extreme conditions. A Baer SS4+ front disc system was selected (part no. 4141049R). A matching SS4+ rear disc kit was chosen (part no. 4262703R). The master cylinder picked was a dual-tandem unit with left side ports and a one-inch bore (part no. 6801301LP), and for the brake fluid control, a Remaster adjustable proportioning valve (part no. 2000057LP) was selected. The combination of the Baer components completed the Charger’s braking needs. The Baer components are DOT approved, and all the materials sourced, machined, and assembled in the USA.
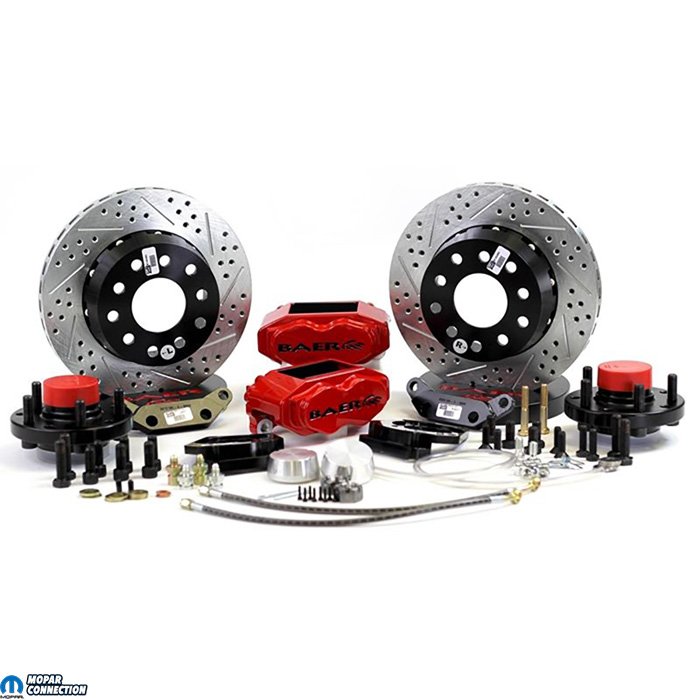
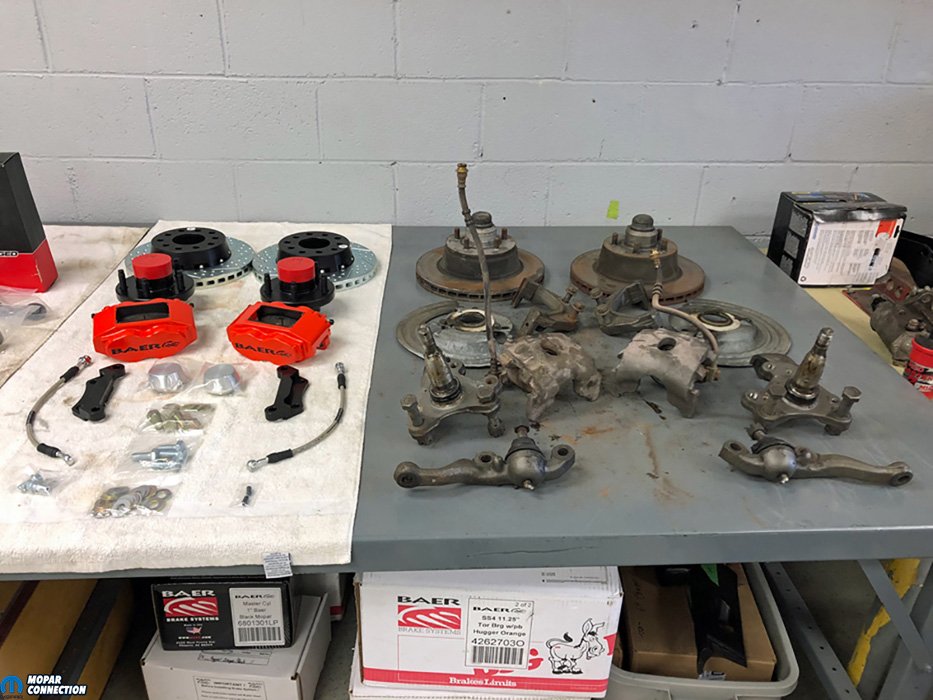
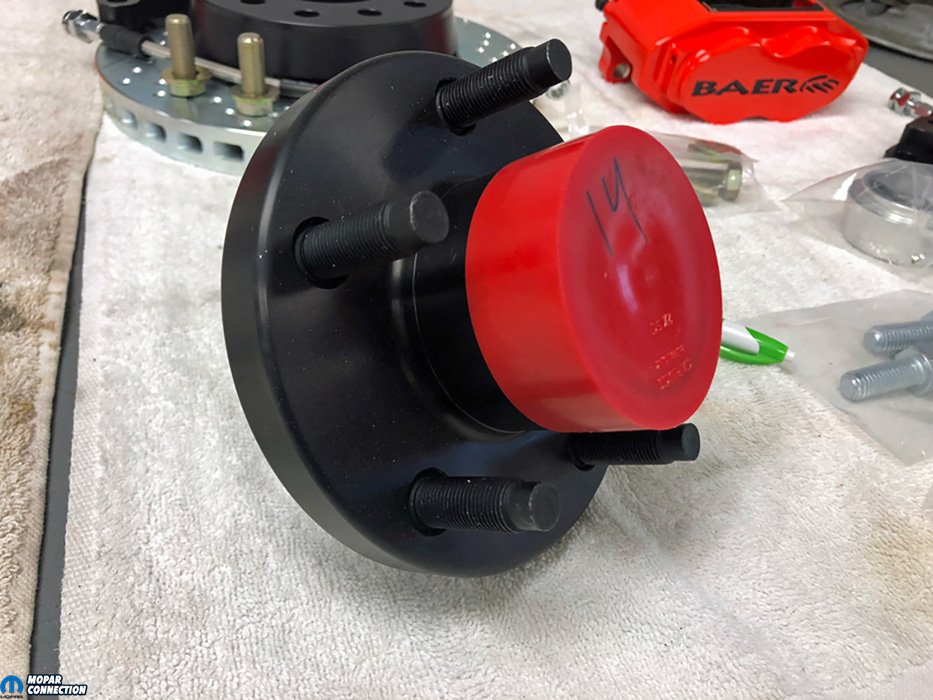
The Baer Brakes SS4+ front braking system included a beautiful pair of S4 4-piston calipers finished in red. The 11-inch cross-drilled & slotted zinc-plated 2-piece rotors were a piece of art. The kit also included caliper adapter plates, hubs, dust caps, braided brake hoses, and all the required stainless-steel mounting hardware. When Rightler restored the Charger in 2006, he upgraded the drum brakes to factory 1978 Magnum disc brake assemblies. The Magnum components allowed him to take advantage of the large factory rotors. When the Baer Brakes kit was ordered, the Baer reps needed to know what spindles would be used, so matching hubs, caliper adapter plates, and the brake hoses could be supplied for direct fitment.
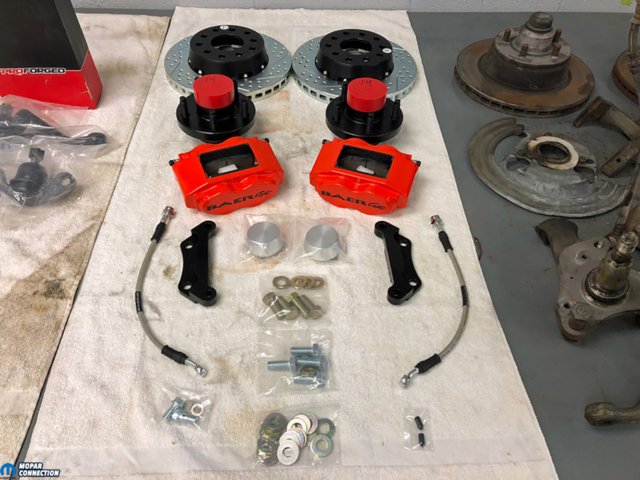
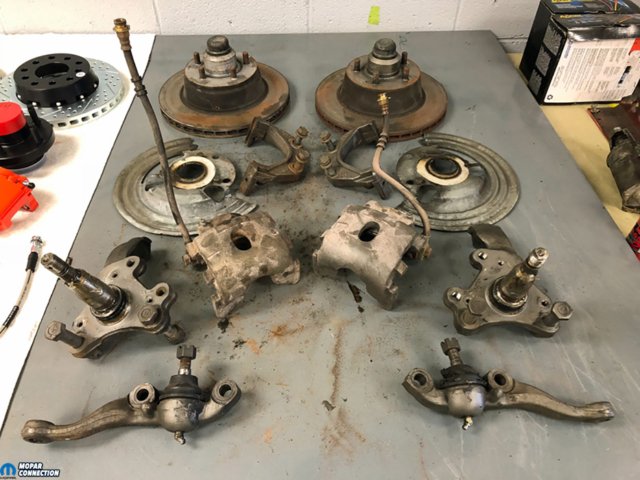
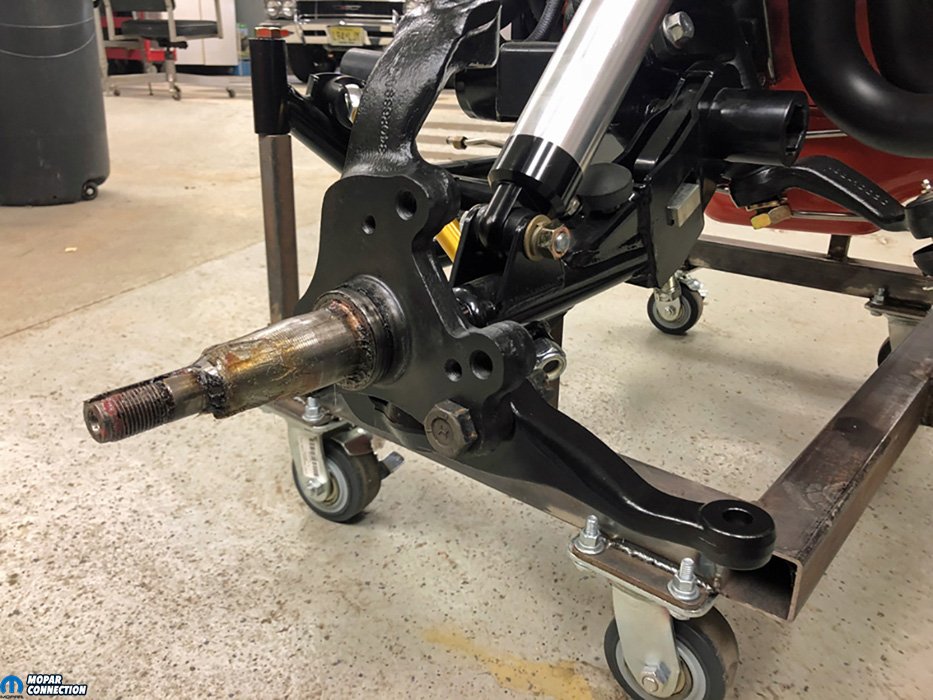
Above Left: The Baer front brake kit included the calipers, caliper adapter plates, rotors, hubs, braided brake hoses, dust covers, and all the required mounting hardware. Above Right: The brakes removed from the Charger were disc brakes from a 1978 Magnum. Rightler updated to the disc brakes in 2006 when he converted from front drum brakes. The Magnum spindles would be the only components reused.

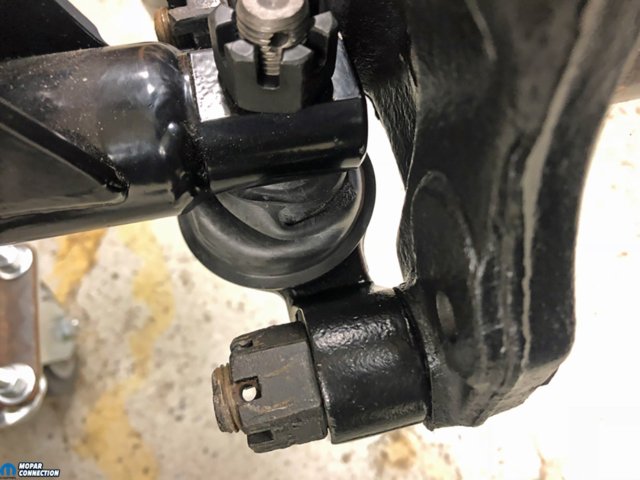

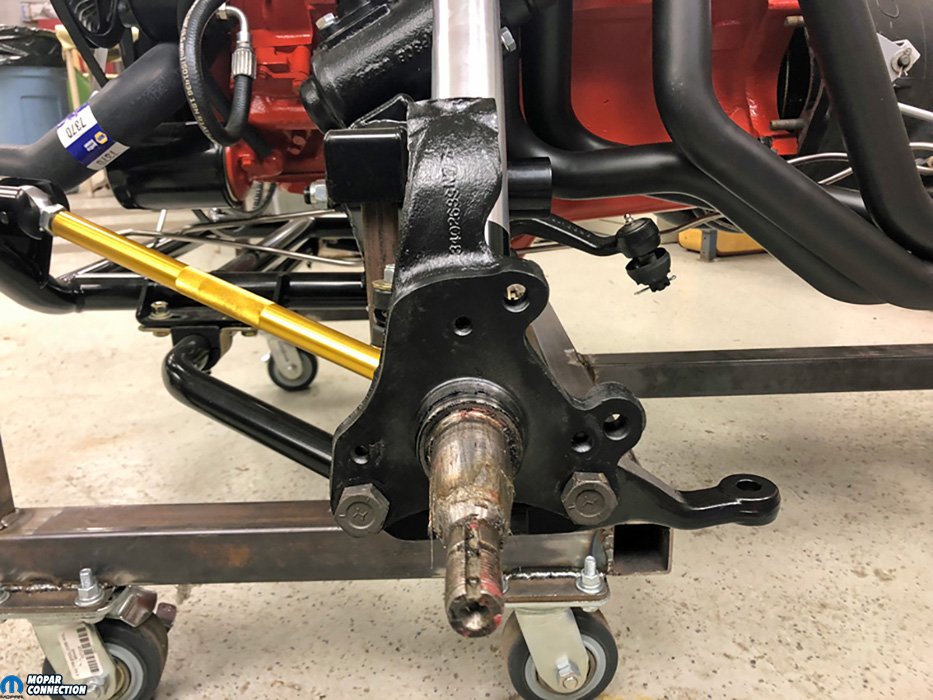
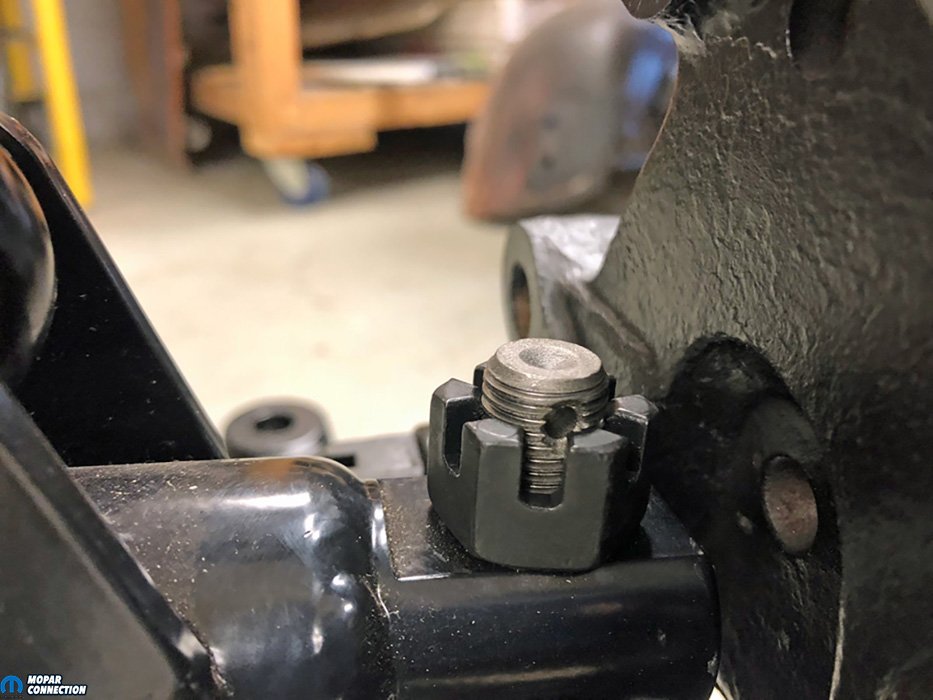
Above Left: The ’78 Magnum spindle was installed on a new lower ball joint. The front suspension included QA1 tubular lower (and upper – not in photo) control arms. A QA1 dynamic strut rod positioned the lower control arm. Above Center: Factory hardware secures the lower ball joint to the spindle and the lower control arm. The castle nuts were snugged but would not be torqued until the front end was installed and supporting the vehicle’s weight. Above Right: Once each castle nut is torqued, a cotter pin is necessary to ensure the nut will not back off. To properly torque all the fasteners, consult each manufacturer’s recommended torque specs; they may vary from the factory specs.
Assembling the front brakes started with a cleaned and painted spindle attached to a new lower ball joint. Rightler secured the ball joint assembly to a QA1 lower control arm attached to a QA1 dynamic strut rod and matching k-member. After placing a new greased inner bearing into the hub, Rightler tapped in a new hub seal. He guided the hub onto the spindle and secured it with the outer bearing, washer, and spindle nut. Next, the caliper adapter plate was secured to the spindle assembly using the existing caliper mounting points. The plate was necessary to extend the caliper away from the rotor.
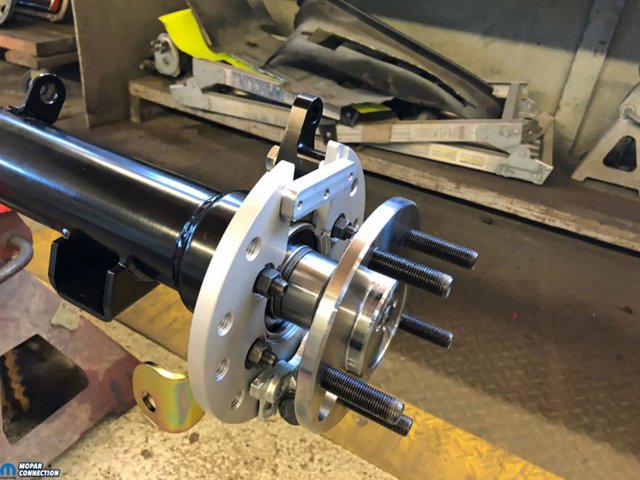
The fixed caliper was centered over the rotor by installing included adjustment shims between the caliper adapter plate and the caliper housing at each mounting bolt. Locating the caliper is a critical step in the installation. If the caliper is not centered, as the pads wear, the pistons on one side of the caliper will extend further out than the other side, which could lead to a piston traveling beyond the caliper seal. The loss of a sealed system would result in immediate brake failure. To complete the caliper installation, a braided brake hose was threaded into the caliper body.

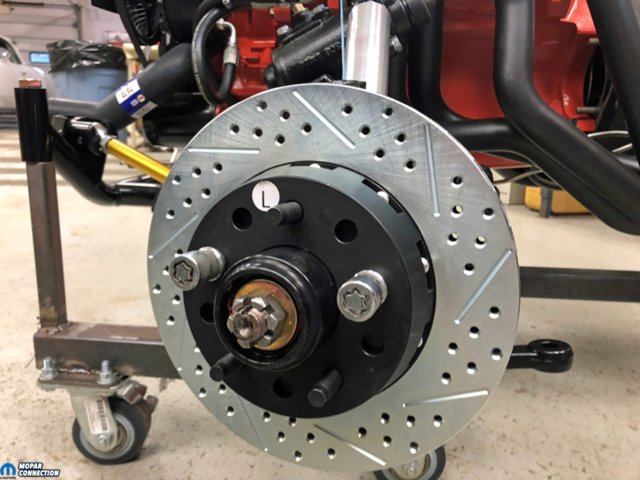
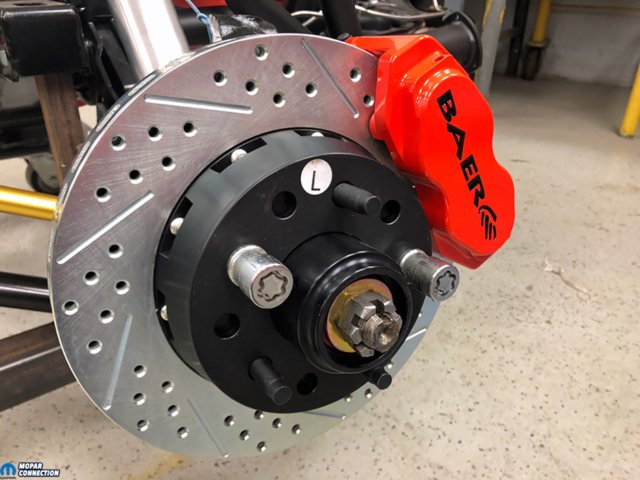
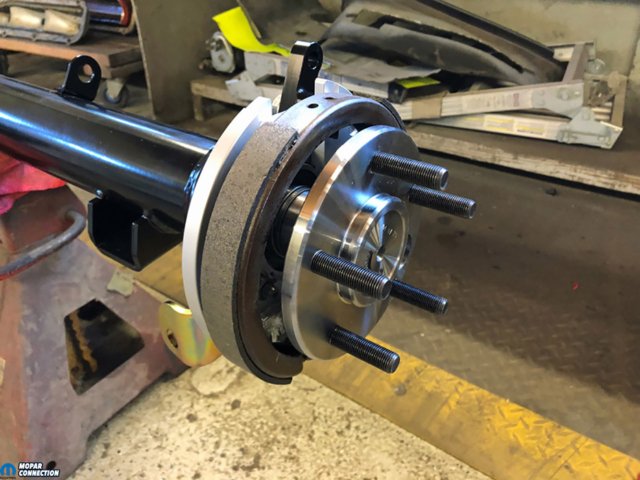
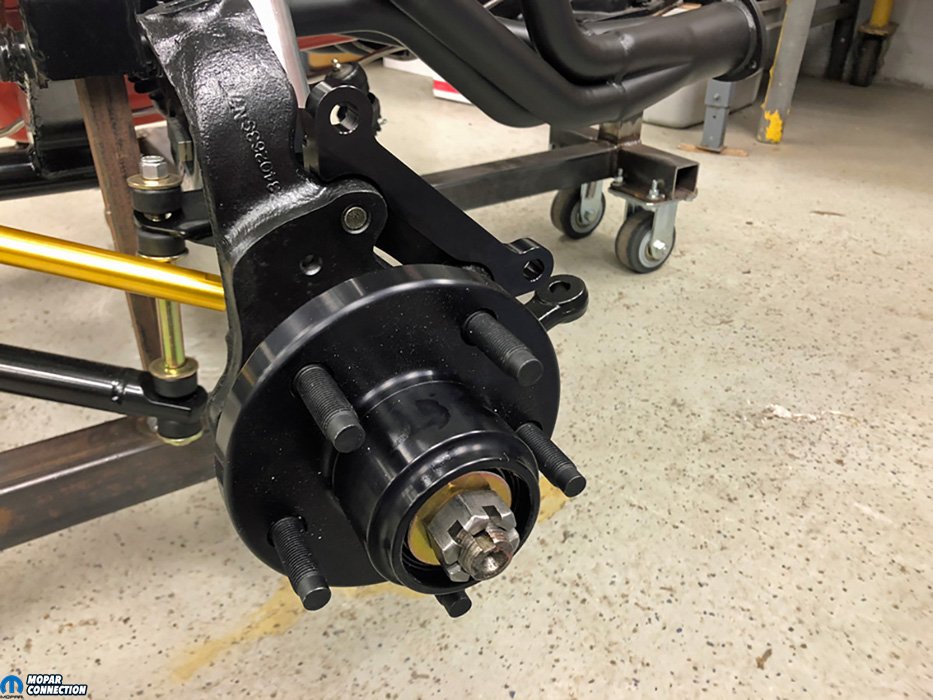
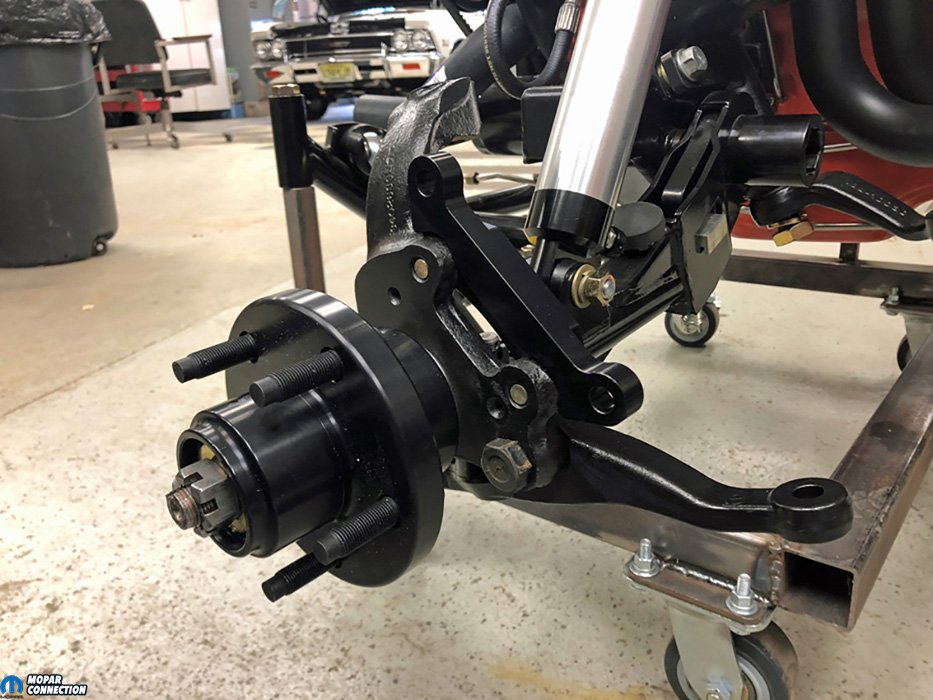
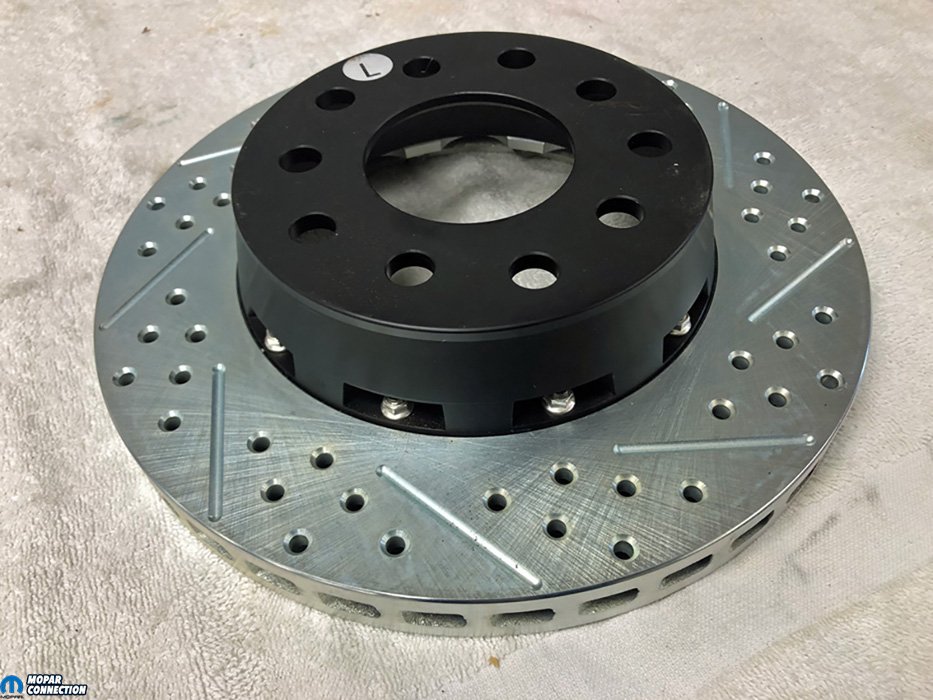
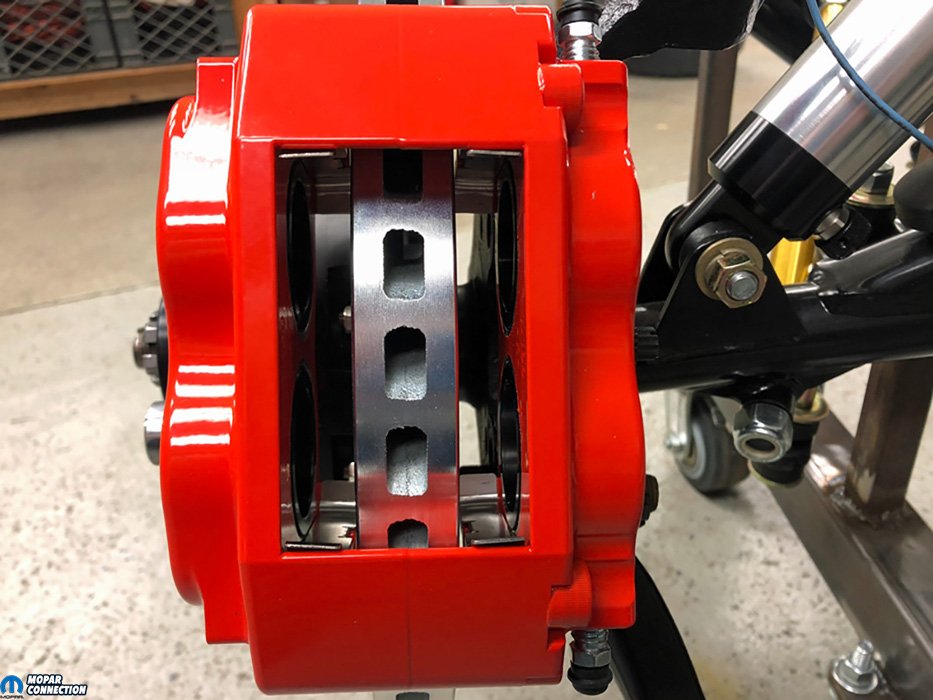
Above Left: The hardware to install the caliper adapter plate was included in the kit. Each wheel bearing was packed with synthetic grease before installation. Above Center: The hat and rotor were cleaned before installation. The rotors are directional, so it is important to note (or mark) each hat for proper mounting. If the rotors are installed on the wrong sides, the rotor’s venting will not function properly. Each hat is hub centric, which virtually eliminates runout concerns of the rotor. Above Right: The Baer 4-piston fixed caliper has been installed. The caliper attaches to the adapter plate and sits over the rotor. A fixed caliper is less prone to flex during maximum braking than a sliding or floating caliper.

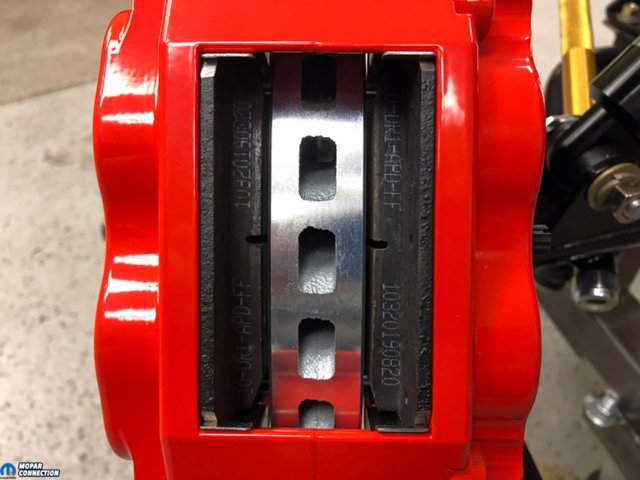
Above Left: The fixed caliper must be centered over the rotor. If the caliper is not correctly centered, a pair of caliper pistons (on one side of the caliper) may extend further out of the caliper body than the other pair. If they extend too far, they may slip past the caliper seal(s), causing catastrophic brake failure. Above Right: Centering the caliper over the rotor was achieved with shims (washers) installed between the caliper adapter plate and the caliper body. After the caliper was centered, the caliper bolts were torqued to Baer’s recommendations.
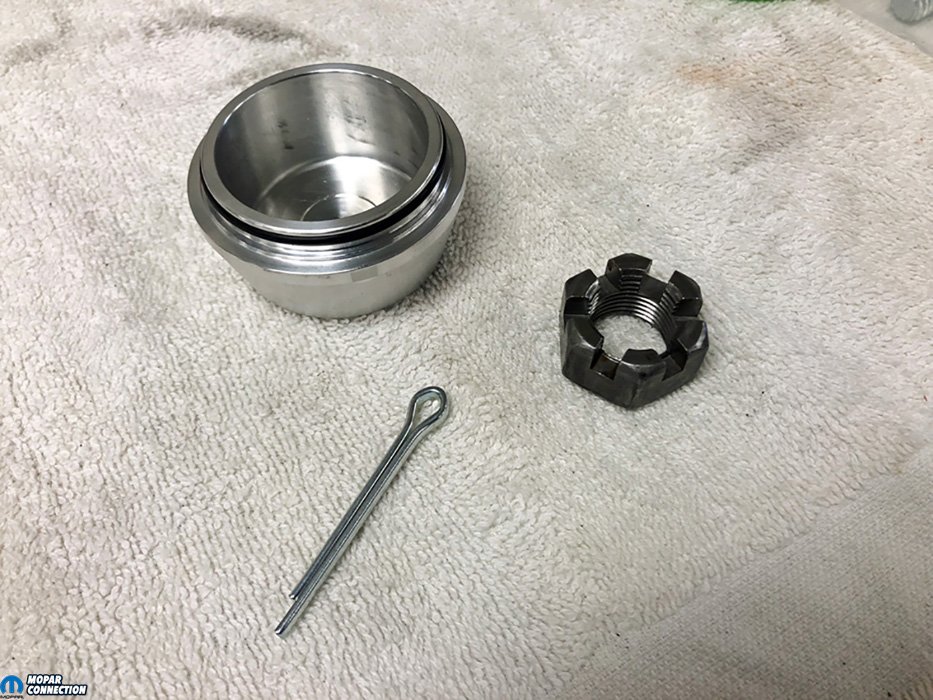
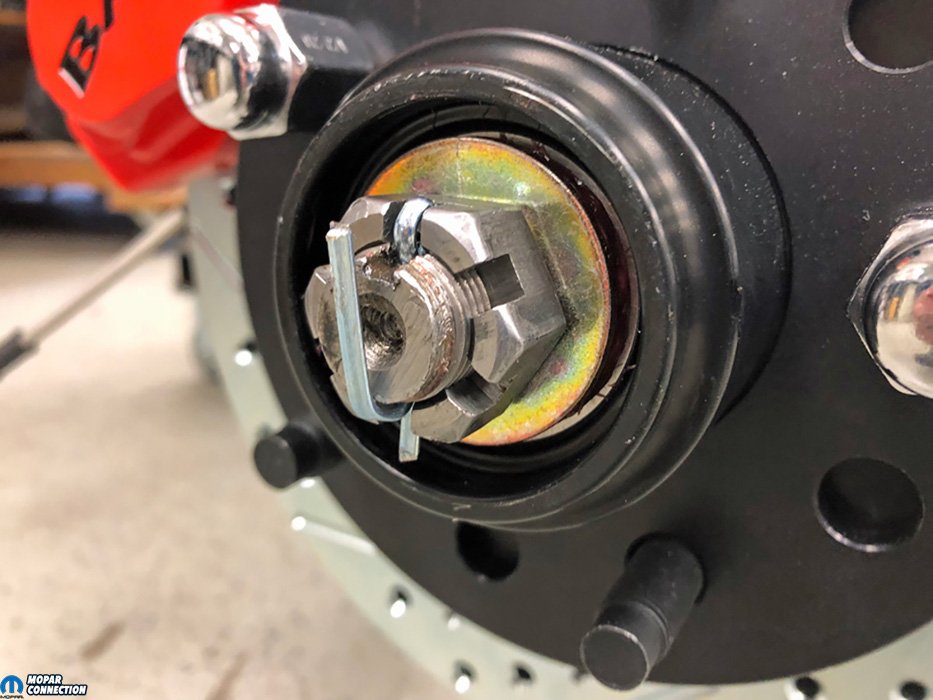
Tightening the spindle nut provided the proper preloading of the bearings. After releasing the nut about 1/2 rotation, retightening the spindle nut to the recommended torque specification ensured the proper rotor runout. A cotter pin was added to secure the spindle nut to the spindle assembly. Rightler twisted the aluminum cap onto the hub, and once seated, an O-ring on the cap sealed out water and debris. To finish the front brake assembly on the other side, the same installation procedure was followed.
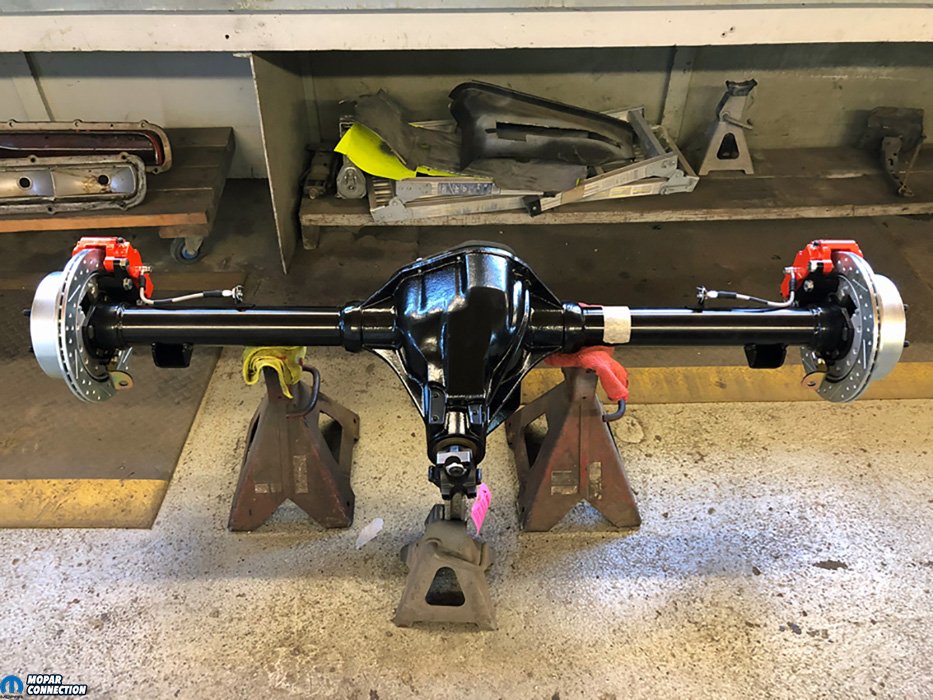
For the rear of the Charger, Rightler planned to use a Dana 60 rear end, but to increase the rear brake kit options, he had the Dana fitted with Torino axle ends. The rear kit selected came with one-piece rotors that were cross-drilled, vented, and slotted. The rear calipers are a 4-piston design ordered in red to match the front calipers. The kit also included retainer plates, caliper adapter plates, parking brake cable brackets, parking brake shoes, and all the mounting hardware.

Above: The Baer rear brake kit included, 4-piston calipers, caliper adapter plates, cross-drilled, vented, and slotted rotors, parking brake cable brackets, parking brake shoes, retainer plates, and all the required mounting hardware.

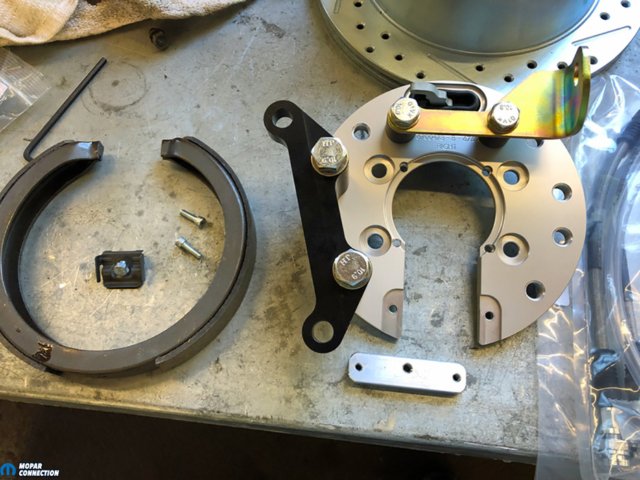

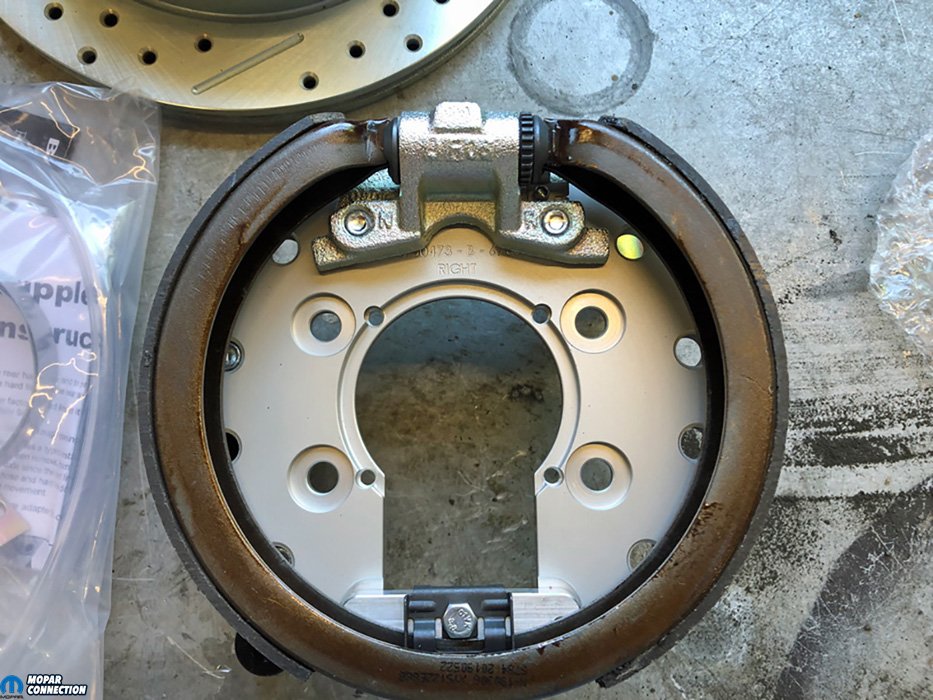
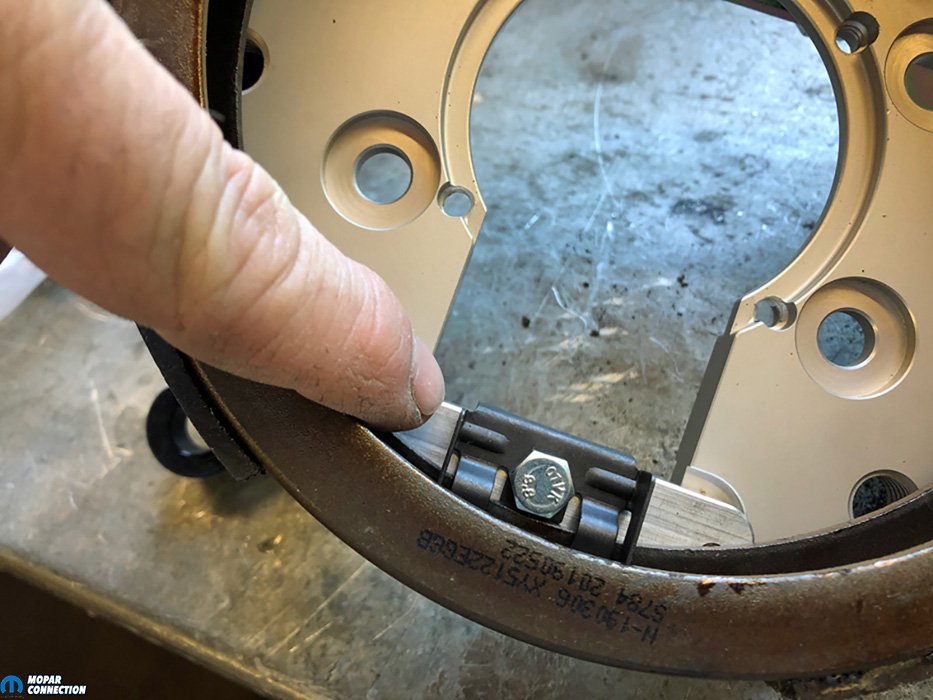
Above Left: The parking brake assembly was disassembled to assist in the installation. The spanning brace clip was removed, and the shoe assembly pulled from the retainer plate. Above Center: The retainer plate has been readied for installation. The removal of the spanning brace allowed the retainer plate to slide around the already installed axle shaft. Above Right: The Dana 60 rear end had Ford Torino axle ends installed. The Torino ends are more adaptable than the Mopar axle ends. With the Torino parts, Rightler had additional rear brake kit options.
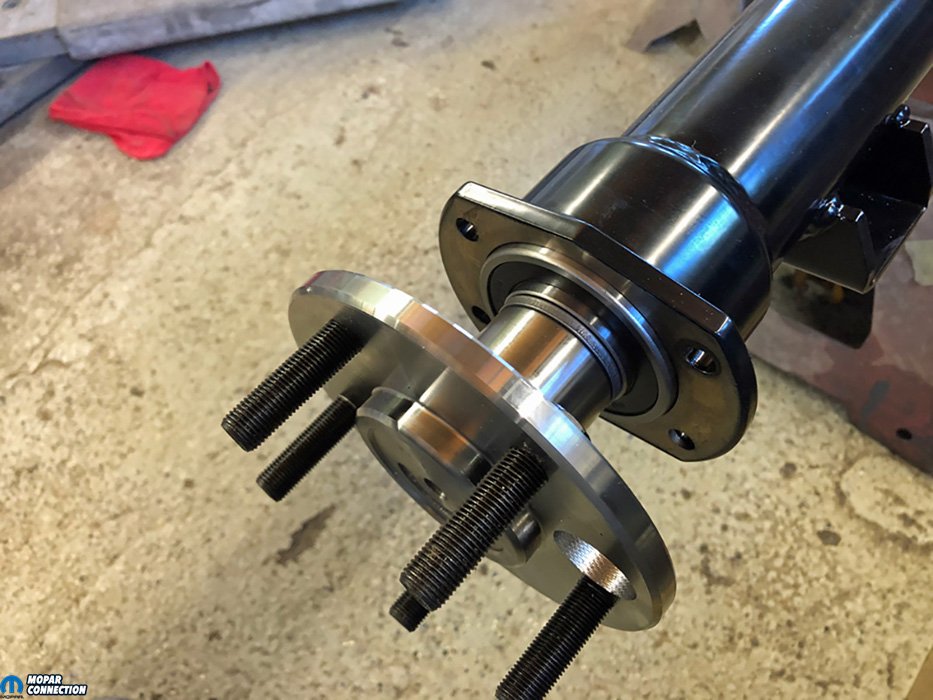
The Baer rear brake kit included, 4-piston calipers, caliper adapter plates, cross-drilled, vented, and slotted rotors, parking brake cable brackets, parking brake shoes, retainer plates, and all the required mounting hardware. Rightler removed the parking brake shoes. The shoe removal provided access to a spanning brace at the top of the retainer. By temporarily removing this brace, the retainer plate could be slipped up from the bottom around the axle shaft. Before Rightler installed the retainer plate, he fastened the caliper adapter plate and the parking brake cable bracket to the retainer plate. Supplied mounting hardware secured the retainer plate to the Torino axle housing. Besides being a mounting point for the parking brake assembly, the retainer plate holds the pressed axle bearing in the axle end.
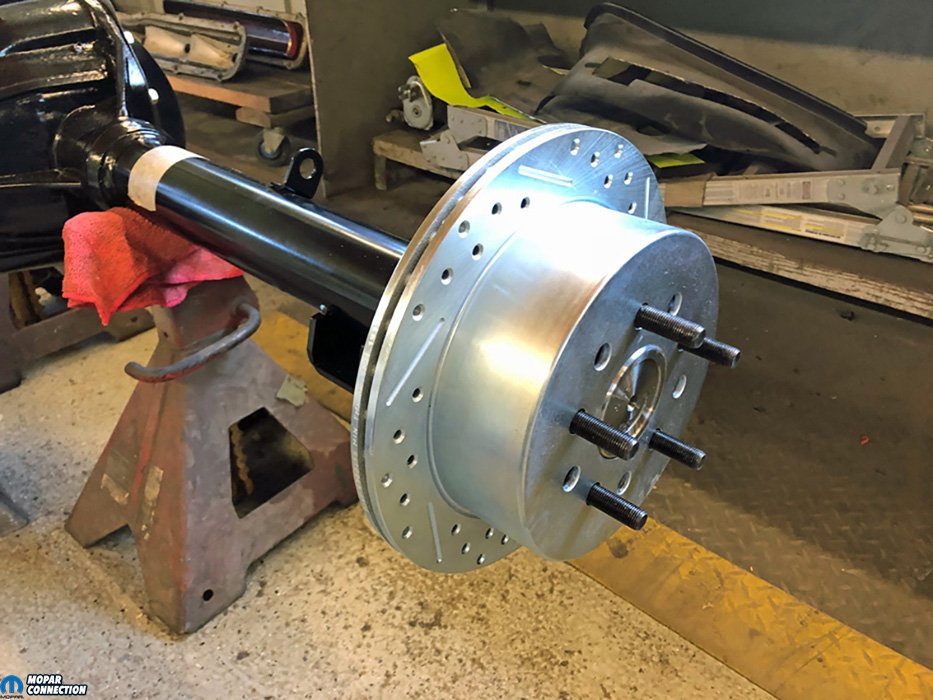
With the retainer plate installed, Rightler installed the previously removed spanning brace, followed by the parking brake shoe assembly. He secured the rotor with a few lug nuts, so he could, just like the front fixed calipers, center the rear calipers over the rotor. After a few adjustment shims were added, Rightler correctly located the caliper. The DOT brake hose was installed onto the caliper. The other end was secured to a bracket mounted at the same time the axle ends were welded in place.

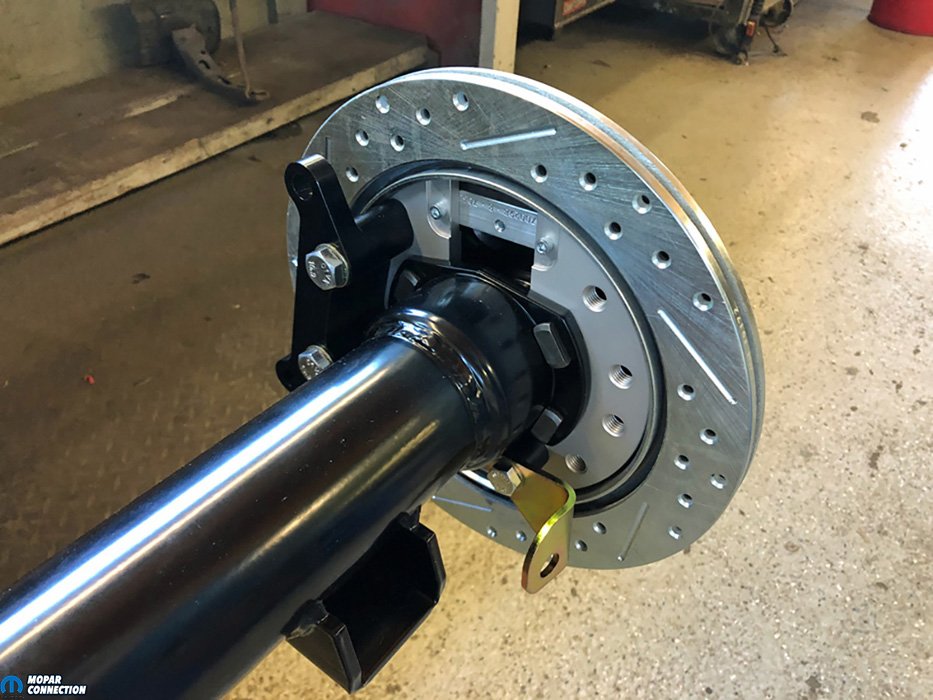
Above Left: The retainer plate was installed and reassembled. All the required mounting hardware was supplied with the kit. Each axle hub was ordered with an access hole through it. The hole made it easier to tighten each fastener. Above Center: The parking brake assembly was installed. The shoes fit inside the rotor’s hat. Each shoe has a small surface area because the shoes are not used for dynamic stopping. The shoes provide static holding friction for a non-moving vehicle. Since the shoes do not contribute to dynamic braking, they are life-time components. Above Right: The rotor slipped over the parking brake assembly. The rotor is hub centric to ensure the rotor has minimal runout.
The same installation procedure was performed on the other axle to finish the rear brakes. The only adjustments still required are the parking brake cables. The cable(s) need to be measured, cut, and installed, but this cannot occur until Rightler fits the Dana 60 under the Charger.
While not covered in this editorial, the master cylinder selected for the Charger has a 1-inch bore, which is a good mid-line design that works well with power brakes. Baer offers a 15/16-inch bore master cylinder that will increase the pressure (compared to the 1-inch bore), but will require more pedal travel (distance) and have a softer pedal feel; this bore size works excellent with manual brakes. Moving the other way, Baer also has a 1 1/8-inch bore, which requires less pedal travel while developing a firmer pedal feel. The bigger bore works well with a hydro-boost brake assist unit.

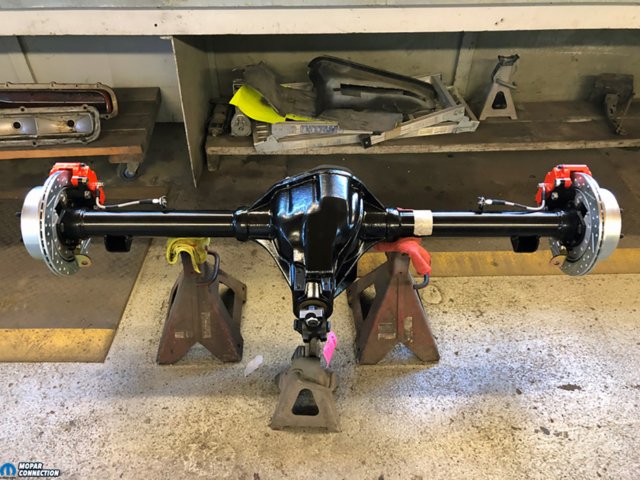
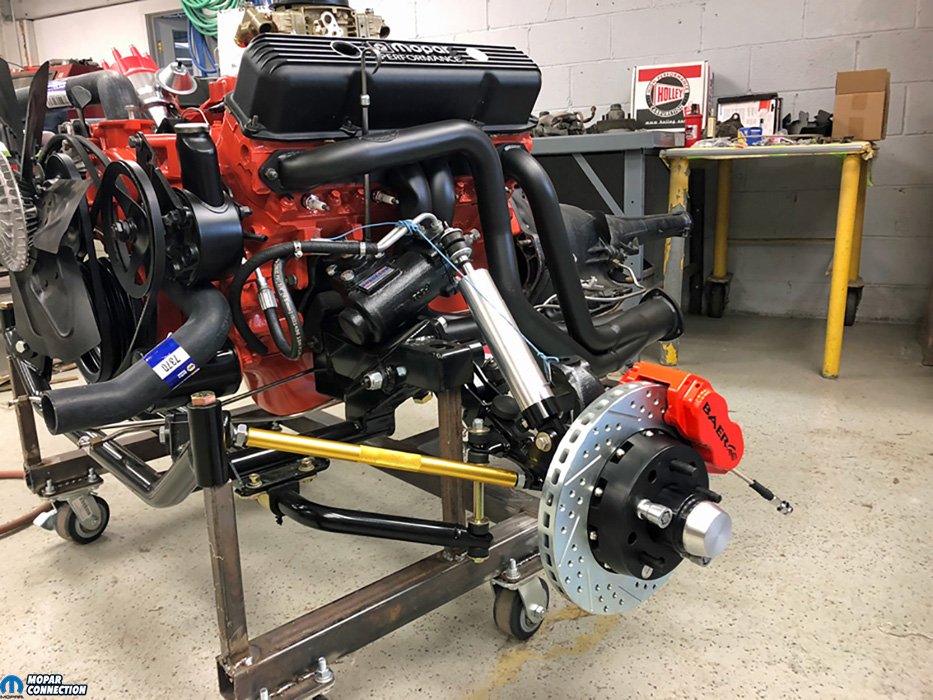
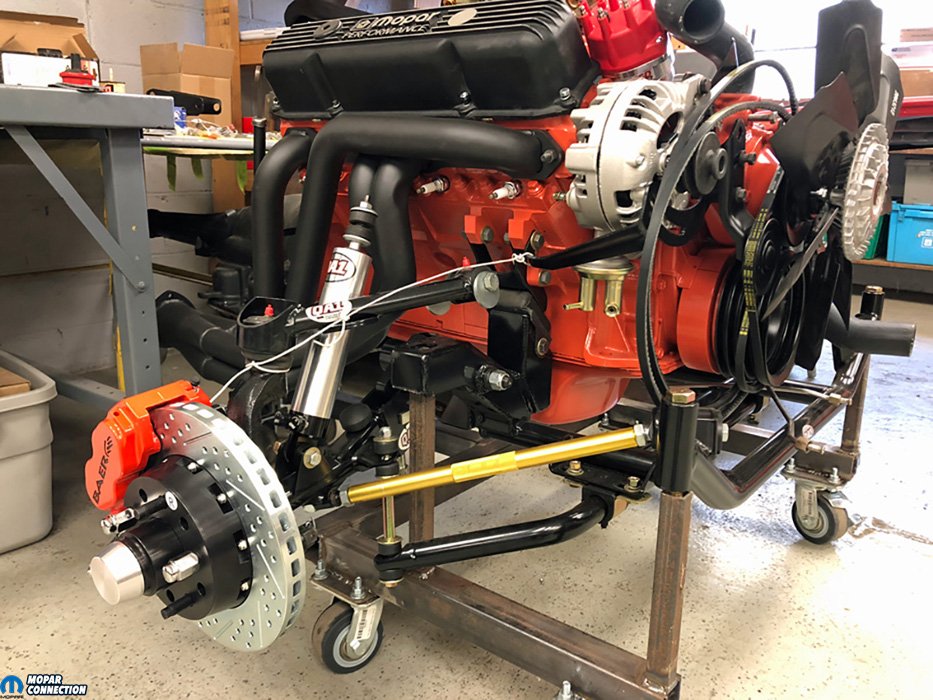
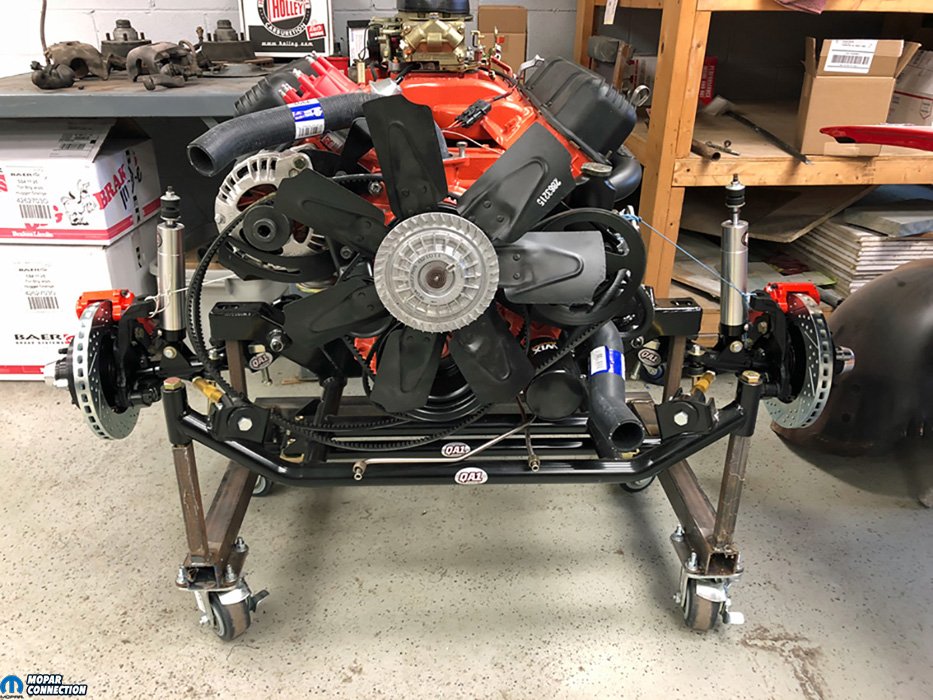
Above Left: The Charger’s big block is mocked up on the QA1 k-member. The Charger will use power steering and a Torqueflite transmission. The new Baer SS4+ brake kit will ensure proper braking for the track and street. Above Right: The Dana 60 is ready to go. The final adjustment for the rear brake assemblies is to adjust the parking brake cables. The adjustment cannot be performed until the Dana 60 is fitted into the Charger.
Lastly, the Baer Remaster proportioning valve is adjustable. During heavy brake pedal application, the braking pressure in the system increases. As the decelerating vehicle pitches forward, less weight is over the rear end, which requires limited pressure. The point at which the pressure is limited is called the split point. Once the split point is achieved, the front brake pressure will increase as usual, but the rear brake pressure increases at a lesser rate. The limited increase in pressure reduces the chances of the rear wheels locking, resulting in a more controlled deceleration. The adjustable Baer Brakes proportioning valve allows the operator to move the split point to achieve the best braking balance.
Baer Brakes has developed a complete braking system for Mopars that will operate well in all braking situations, whether street- or race-driven. Contact the representatives at Baer and gain more than five decades of braking technology advancement (since the Charger was built) that will undoubtedly push the Lindemann line away from a docile street machine and closer to a well-rounded performance ride.


