


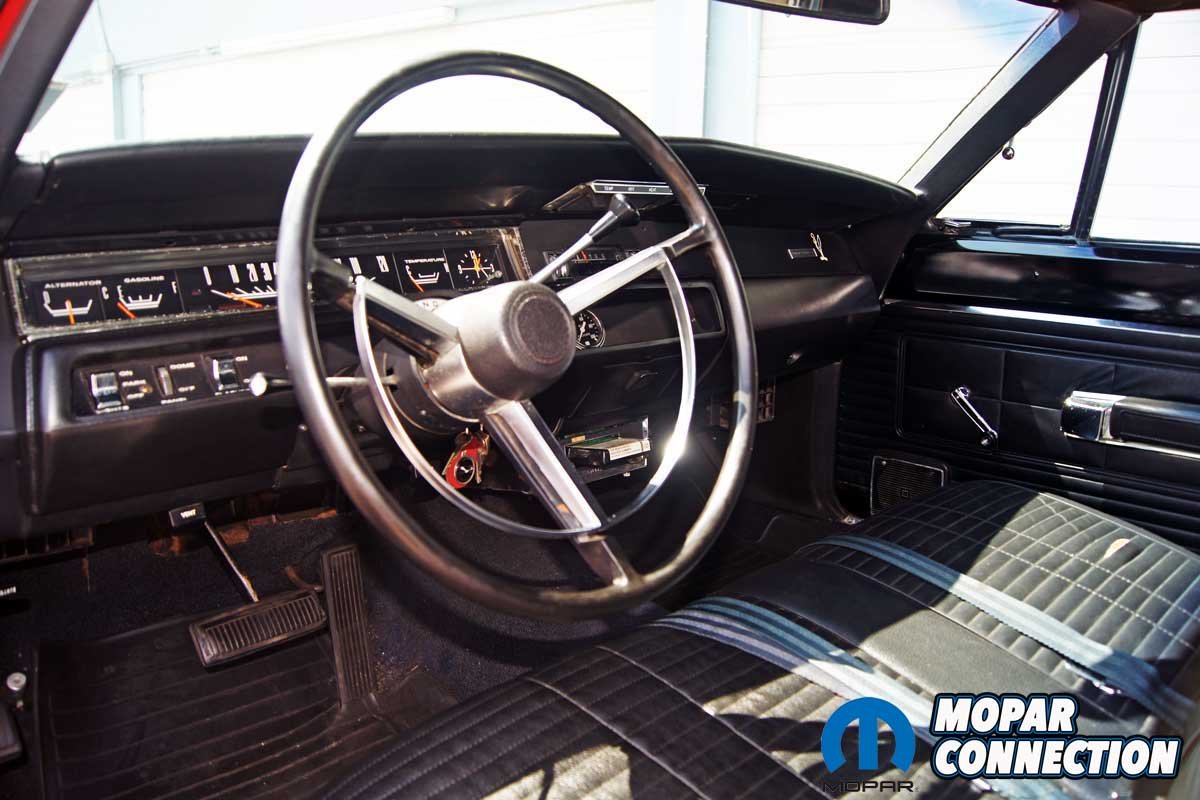
In the 1960s, muscle cars were built with one goal in mind: performance. Buyers wanted horsepower, style, and a fair price, not necessarily creature comforts. As a result, most cars left the factory with only the bare essentials, and when it came to in-car entertainment, that often meant little more than an AM radio bolted into the dash.
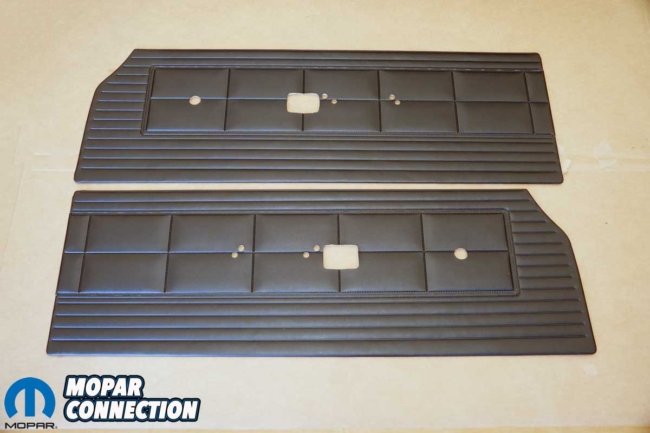

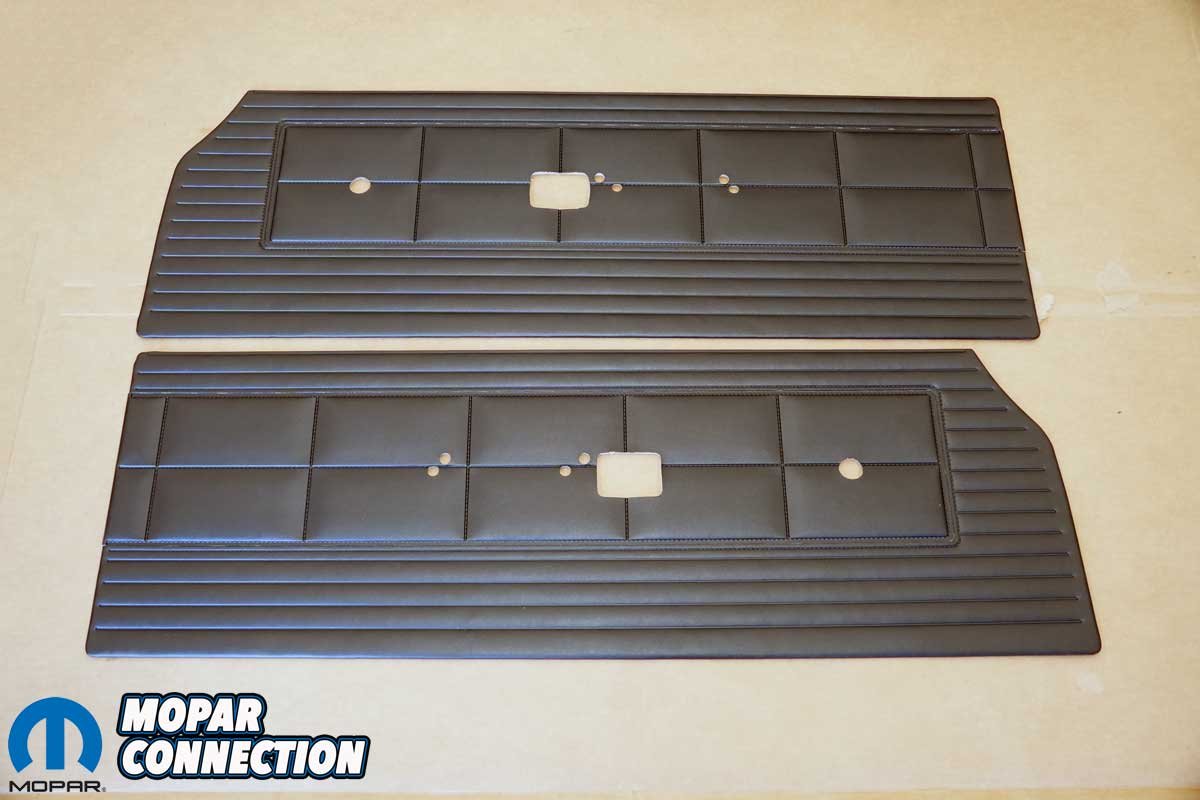
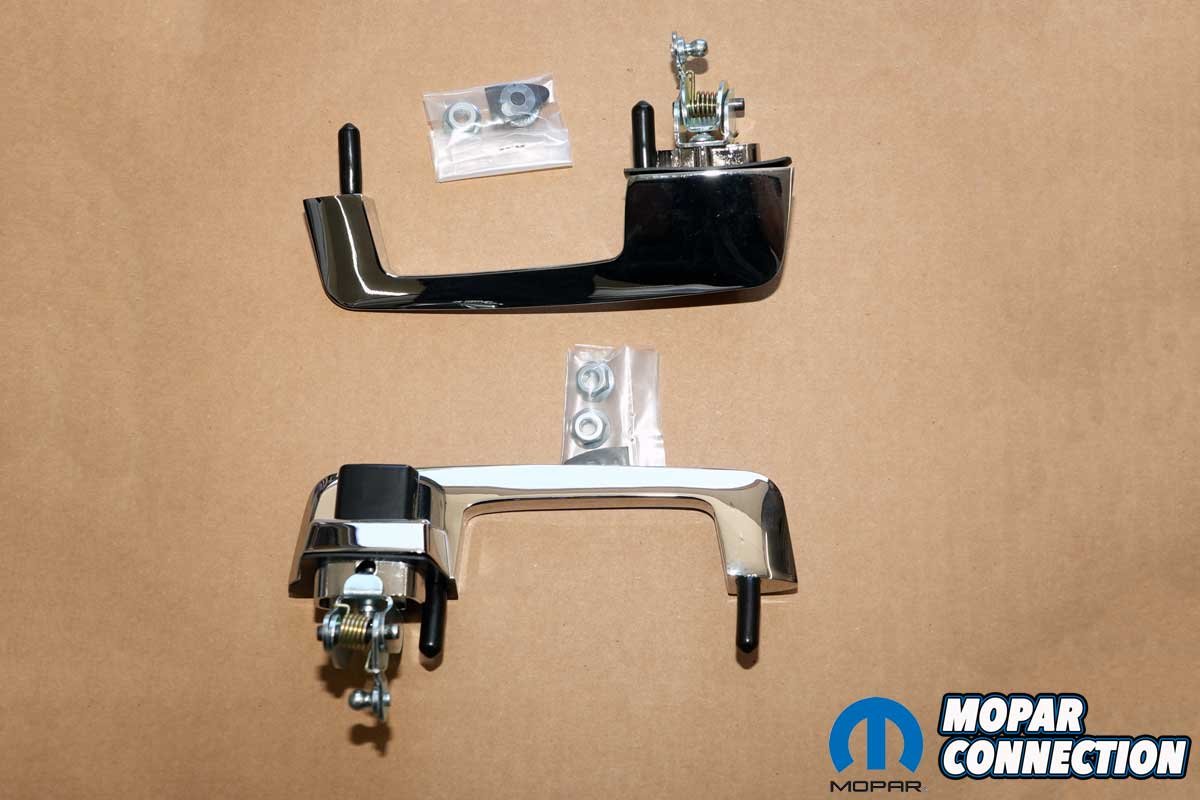
Above Left: We sourced a pair of front Décor door panels for our Road Runner from Legendary Auto Interiors. Above Right: The original exterior mirror was beyond saving, so we replaced it with a new one from Classic Industries.


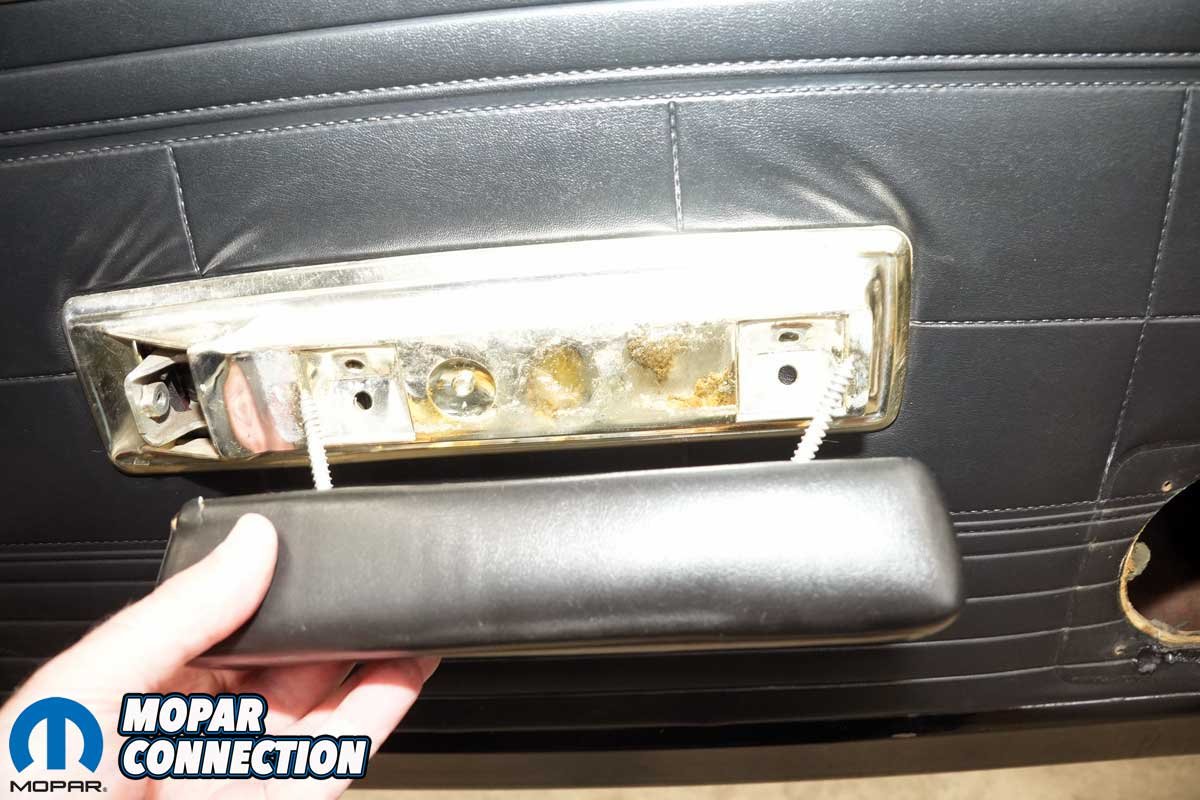
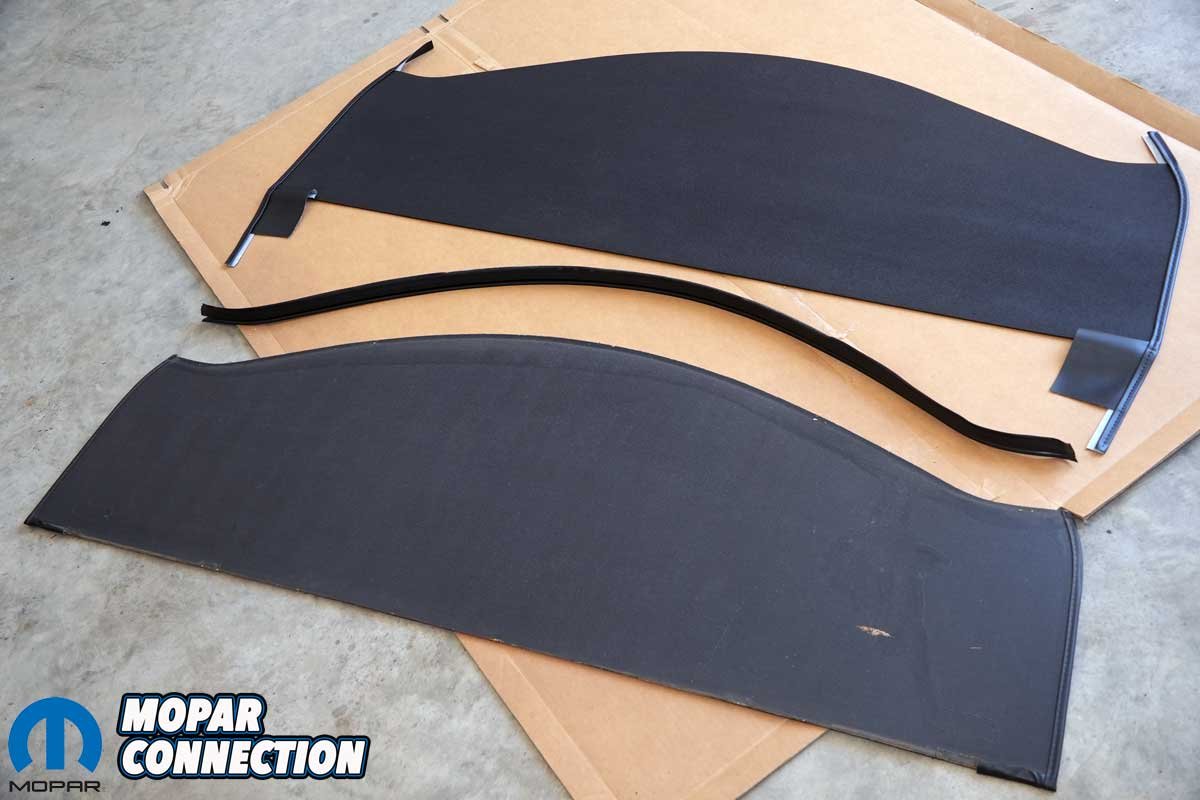
Above Left: Time and use had taken their toll on the exterior door handles, so we upgraded with factory-correct black button replacements from Classic Industries. Above Right: The package tray had long since been stained by water damage, making a fresh Legendary Auto Interiors replacement the perfect finishing touch.
For the budget-conscious, some cars did not even get that. Chrysler, like many manufacturers, offered a radio-delete plate that covered the dash opening. At the time, this level of simplicity was not only acceptable, but also expected. Driving was about the sound of the engine, not the stereo. Rolling down the highway in a big-block Road Runner, the exhaust note provided its own soundtrack.

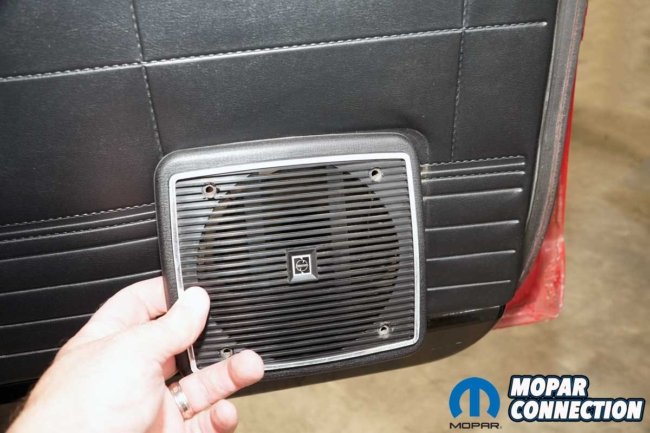
Above Left: Fortunately, the Road Runner’s dash was never hacked up for an aftermarket radio, with a period 8-track neatly mounted beneath it instead. Above Center: The doors were not as lucky, each was cut to house a pair of speakers, with the forward unit mounted directly into the exposed lower door frame. Above Right: The rear speaker did not intrude into the frame itself, but the door panel still suffered significant damage from the modification.
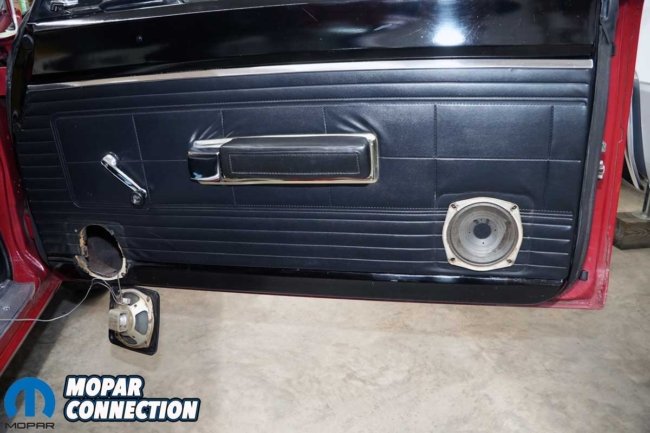

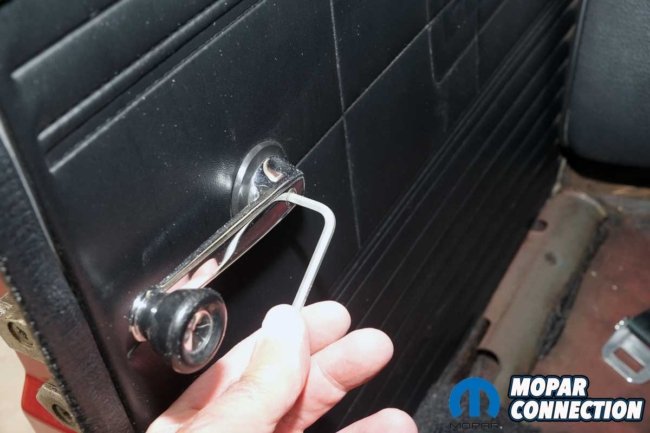
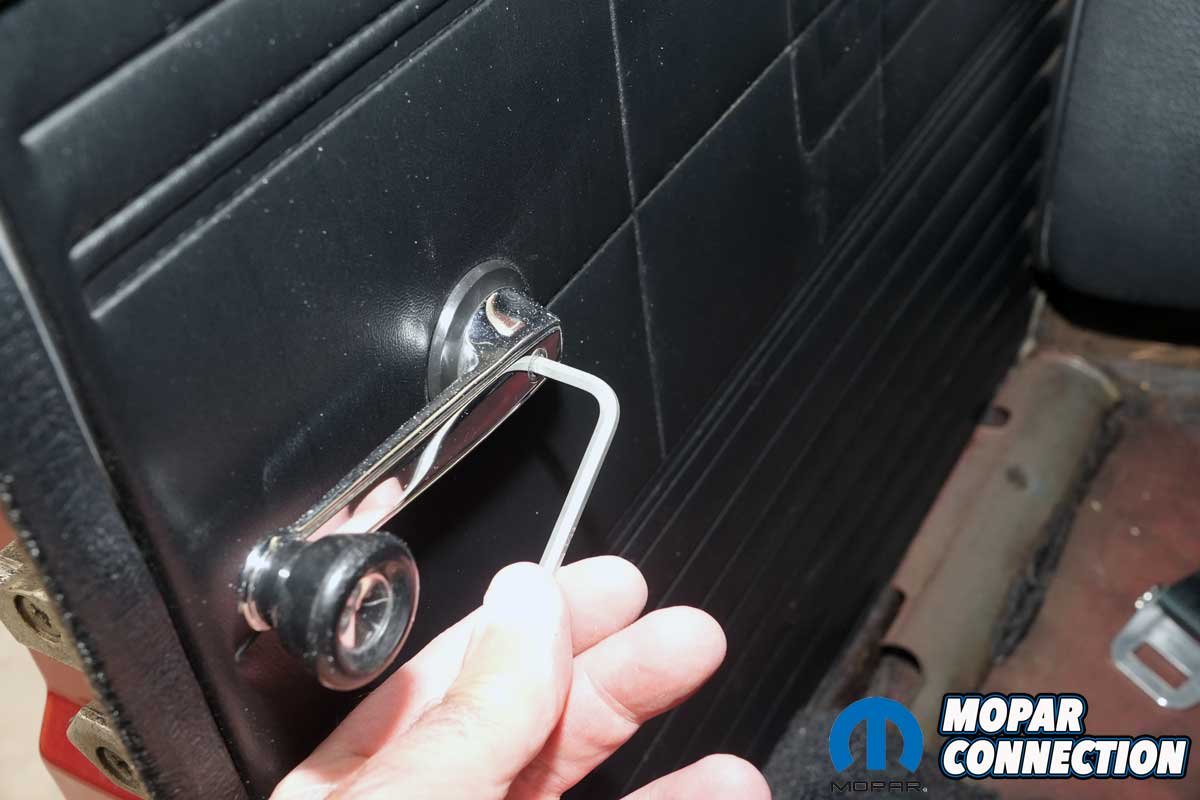
Above Left: The door panel was beyond saving, scarred with holes, black duct tape, and years of wear that left it looking rough. Above Right: Disassembly began with the simple step of removing the window crank handle.
But as the 1970s approached, technology and consumer expectations began to shift. AM radio, with its finite fidelity and heavy dependence on talk programming, was rapidly losing ground. FM, once seen as a niche option, suddenly offered cleaner reception, stereo broadcasts, and music programming aimed at younger audiences. The listening experience was night and day, and enthusiasts wanted it in their cars.
The automakers were slow to adapt, which meant many owners took matters into their own hands. Aftermarket stereo equipment boomed. Electronics shops offered AM/FM units, 8-track players, and later cassette decks, all of which were marketed as plug-and-play upgrades.


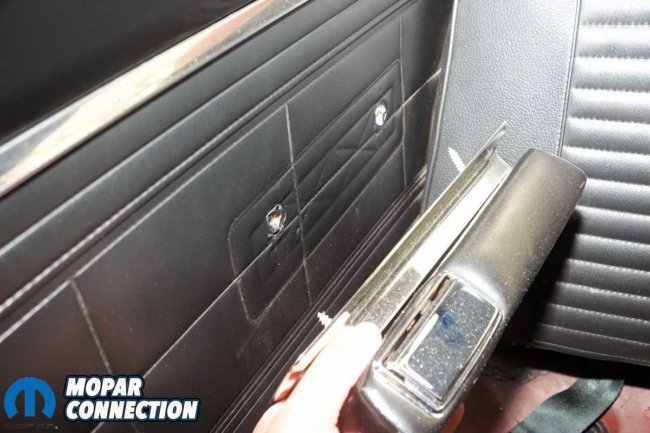
Above Left: Next up in the teardown was the door handle, carefully removed to preserve what could be saved. Above Right: The armrest and its base were then lifted off. We set aside the window crank handles and screws and armrest screws for reuse, while everything else showed enough wear to be discarded.
In reality, they were anything but. Dashboards were hacked apart with little regard for aesthetics, factory wiring was cut and spliced without planning, and doors were butchered to hold oversized, bargain-bin speakers. What might have sounded acceptable in the moment often left behind decades of scars for future restorers to discover.


Above Left: The door panel had been virtually “glued” to the frame, with no plastic barrier in sight. Removing all the old adhesives took hours of painstaking work. Above Right: The speaker hole opening was brutal. A hack saw and a hammer were used to clearance the door for the speaker.


Above Left: Unsurprisingly, the driver’s side door was in equally rough shape. Above Center: The speaker opening had been crudely cleared with a massive hammer, an emergency room visit, and tetanus shot waiting to happen. Above Right: Both door panels were beyond salvage. Oddly, despite having four speaker covers, only two speakers remained between the two doors.
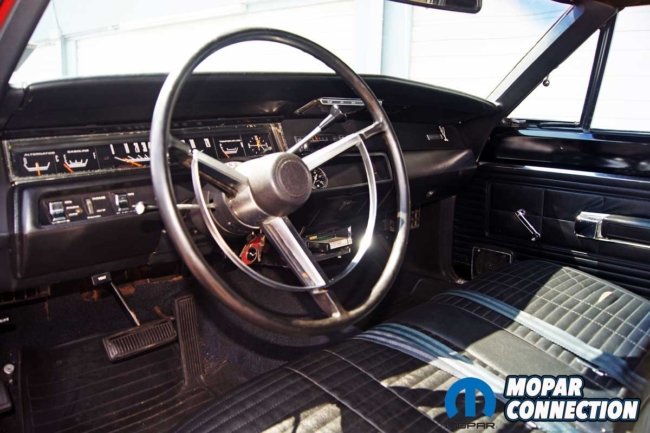
Our 1968 Plymouth Road Runner, fortunately, dodged the worst of these period “upgrades.” The dash remained untouched, spared by a previous owner who wisely mounted an under-dash 8-track player instead of carving into the factory opening. This decision preserved the integrity of the interior, and remarkably, both the original AM radio and the dash speaker still function today.
The doors, however, did not escape so cleanly. At some point in its history, an owner embraced the “more is better” philosophy and decided that two speakers per door would deliver the ultimate sound system. The reality was far less impressive.


Above Left: We located a donor door to harvest the pieces we needed. Above Center: The sections were carefully marked on the donor door for cutting. Above Right: The required section was cut out, along with an additional hidden area that, while not visible, was important to our restoration goals.

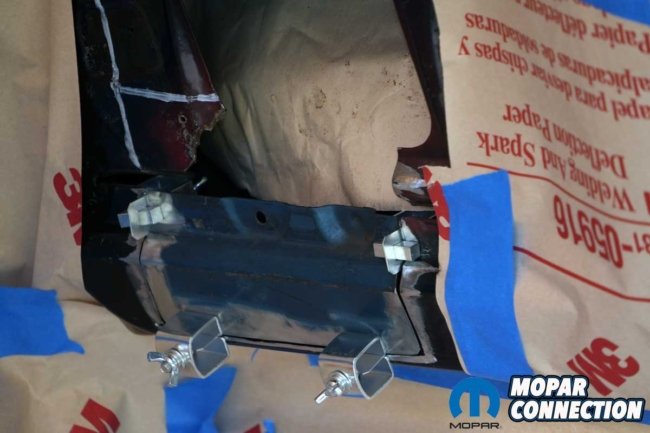

Above Left: Overkill? Perhaps, but we didn’t want a stray spark damaging the paint, glass, or interior. Above Center: The donor metal was carefully clipped into place on the Road Runner’s door with four secure fasteners. Above Right: Both donor pieces were welded in, and after some light sanding, the welding marks vanished, leaving a seamless finish.
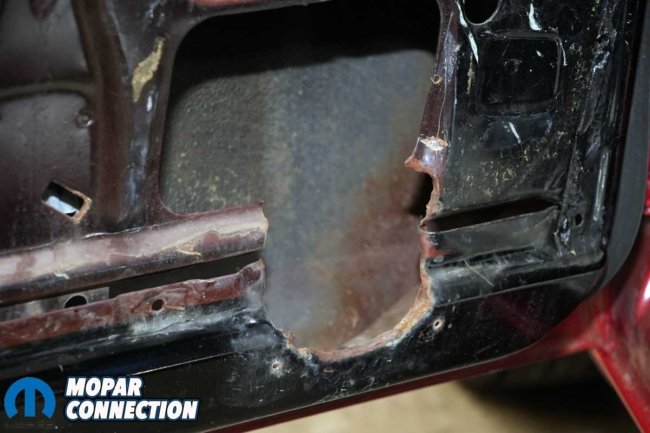
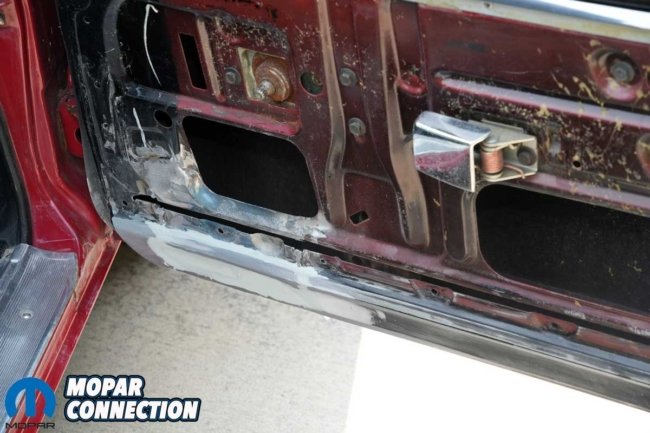
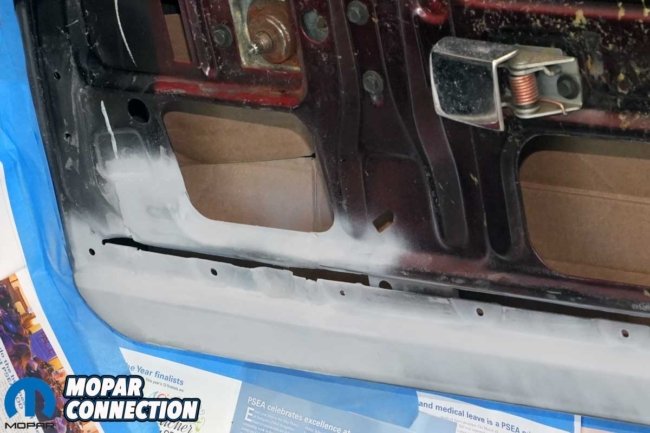
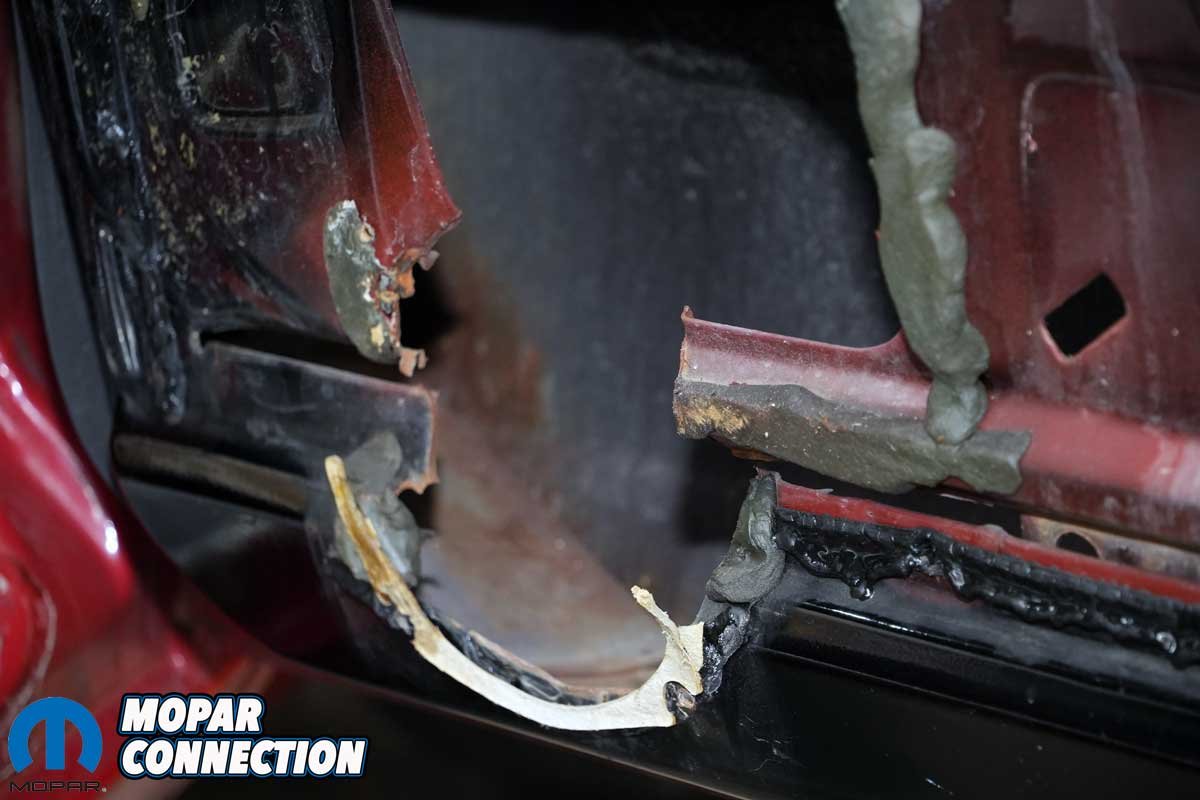
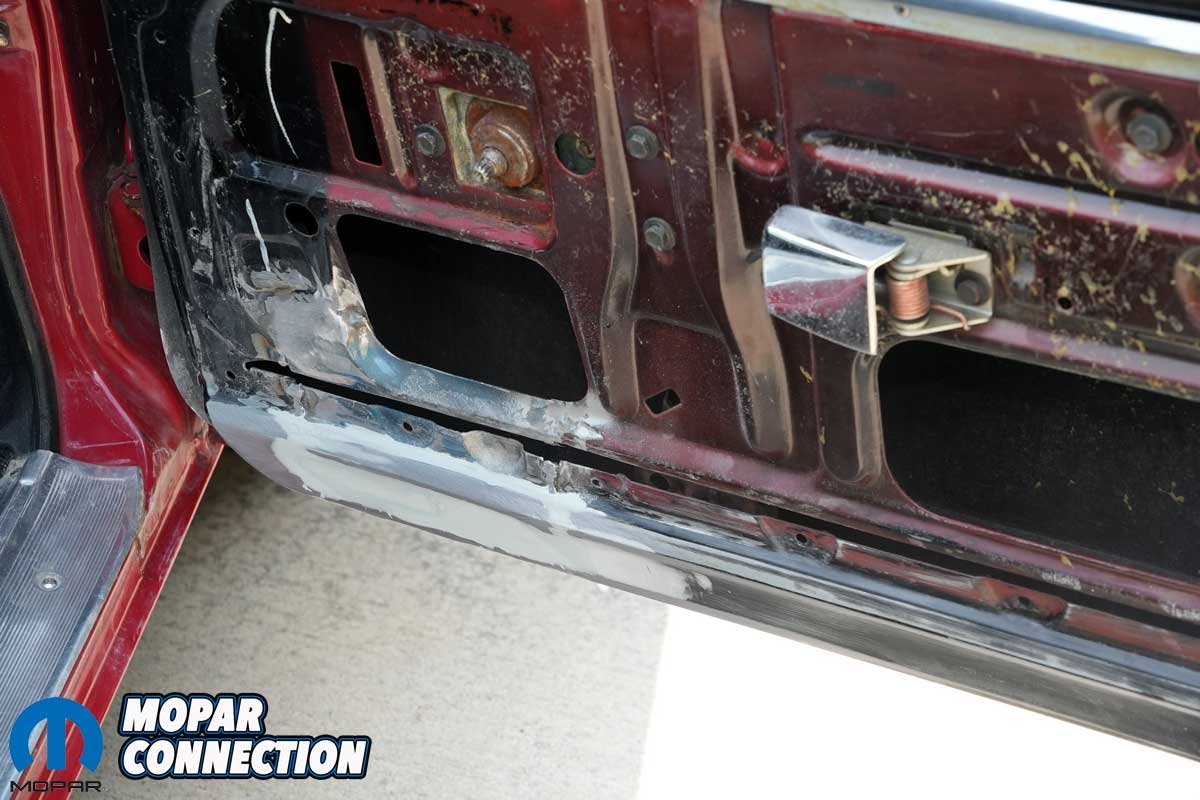
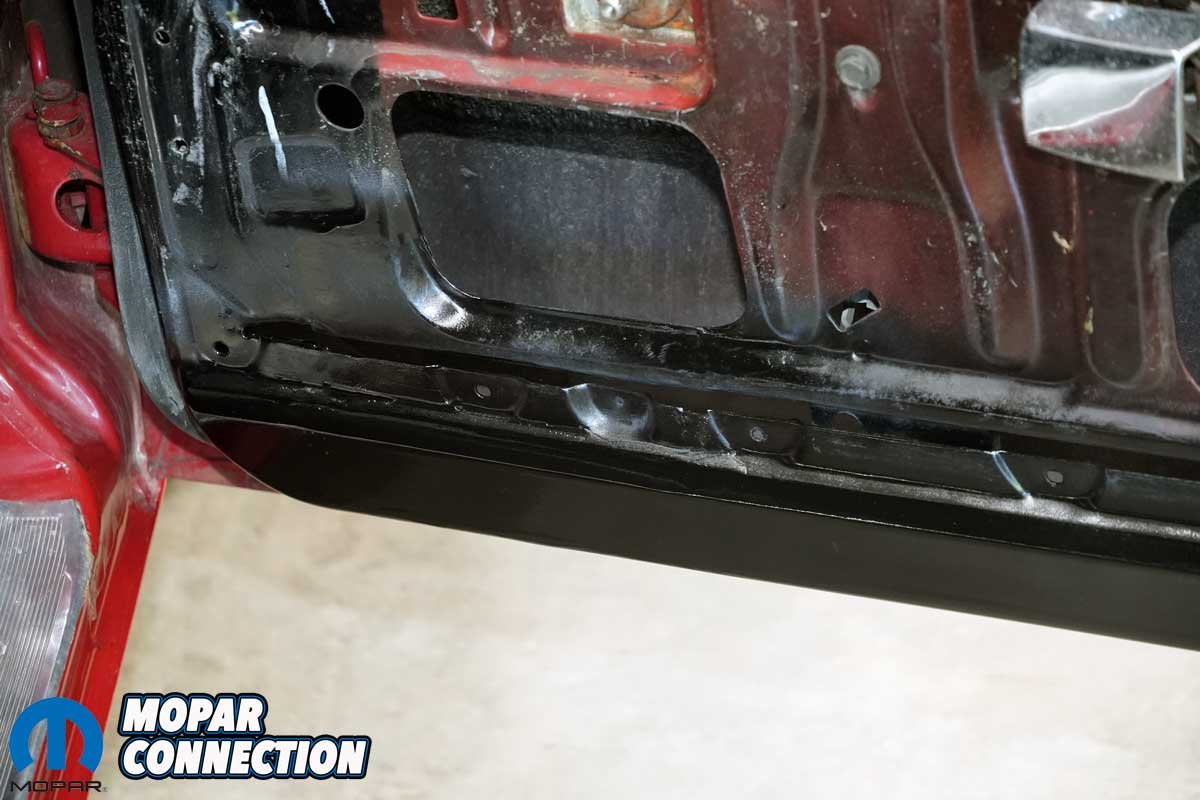
At first, the damage appeared minor. We assumed there were just a few extra screw holes beneath the panels in the lower door frame, which could be easily patched once the speakers were removed. Unfortunately, the truth revealed itself once the panels were pulled. The lower door frames had been hammered, rolled, and distorted; the sheet metal stretched beyond its intended contours to squeeze the speakers into place. From the outside, the work looked acceptable. From the inside, it was a disaster.
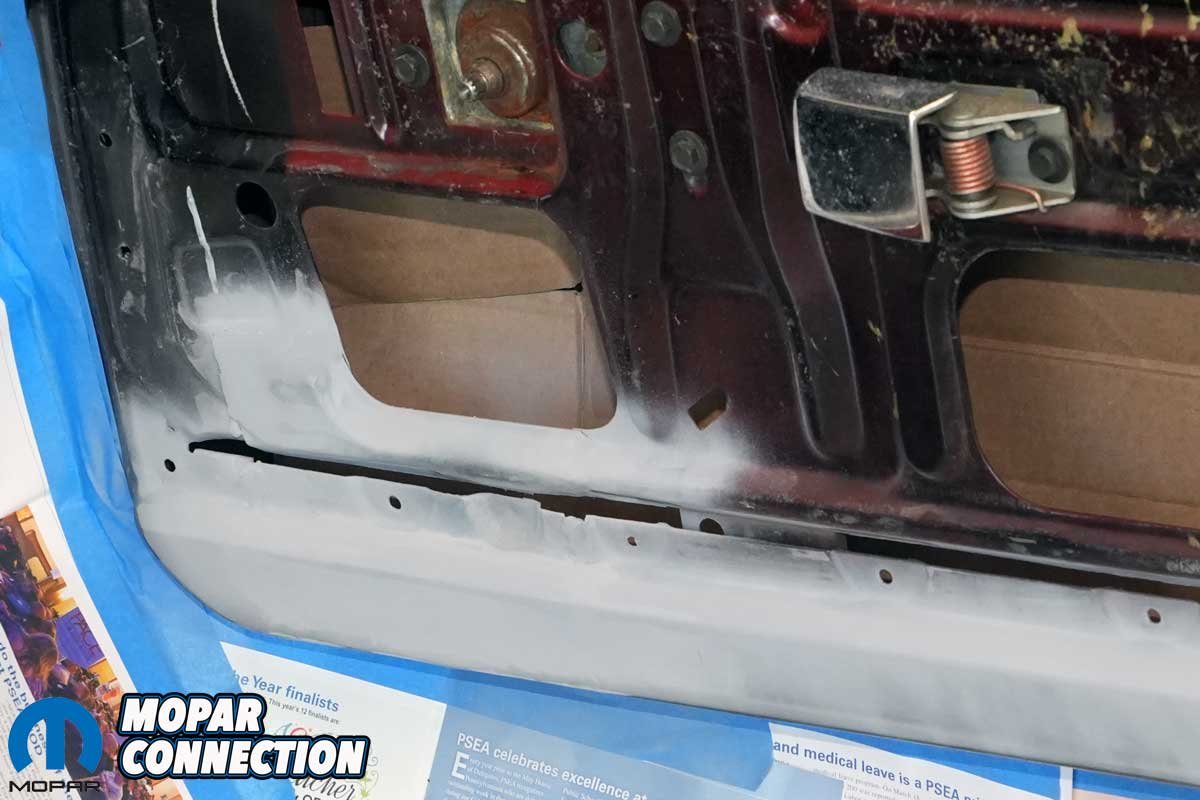
Above Left: A thin skim coat of filler was applied and sanded smooth for a flawless surface. Above Right: With the door carefully masked, a primer coat was sprayed over the repaired area, readying it for paint.


Above Left: With a fresh coat of black paint, the door frame looked fantastic. We did not make any repairs at the rear speaker other than a light spray, since it will be covered by the panel. Above Right: A close-up of the previously damaged area shows that, once we install the door panel, it will be nearly impossible to tell a speaker was ever there.
The panels themselves were equally compromised. Rather than being mounted with factory clips and shielded by a plastic vapor barrier, they had been glued directly to the frames. The person who executed the “upgrade” slathered RTV silicone and sealant around the edges, virtually cementing the panels into place. Removing them became a tedious, painstaking process, and the hardened adhesive left behind required hours of scraping to clean.


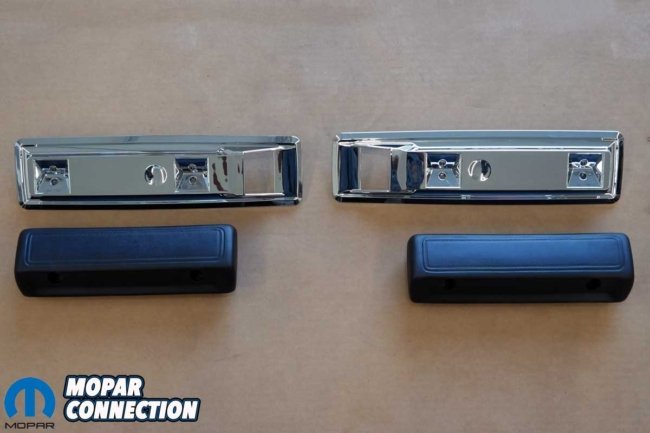
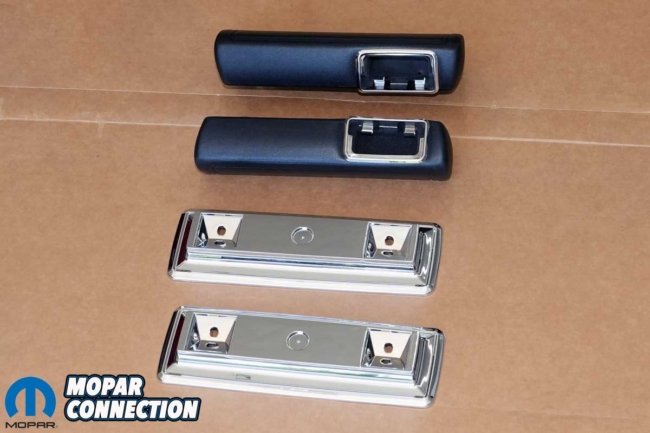
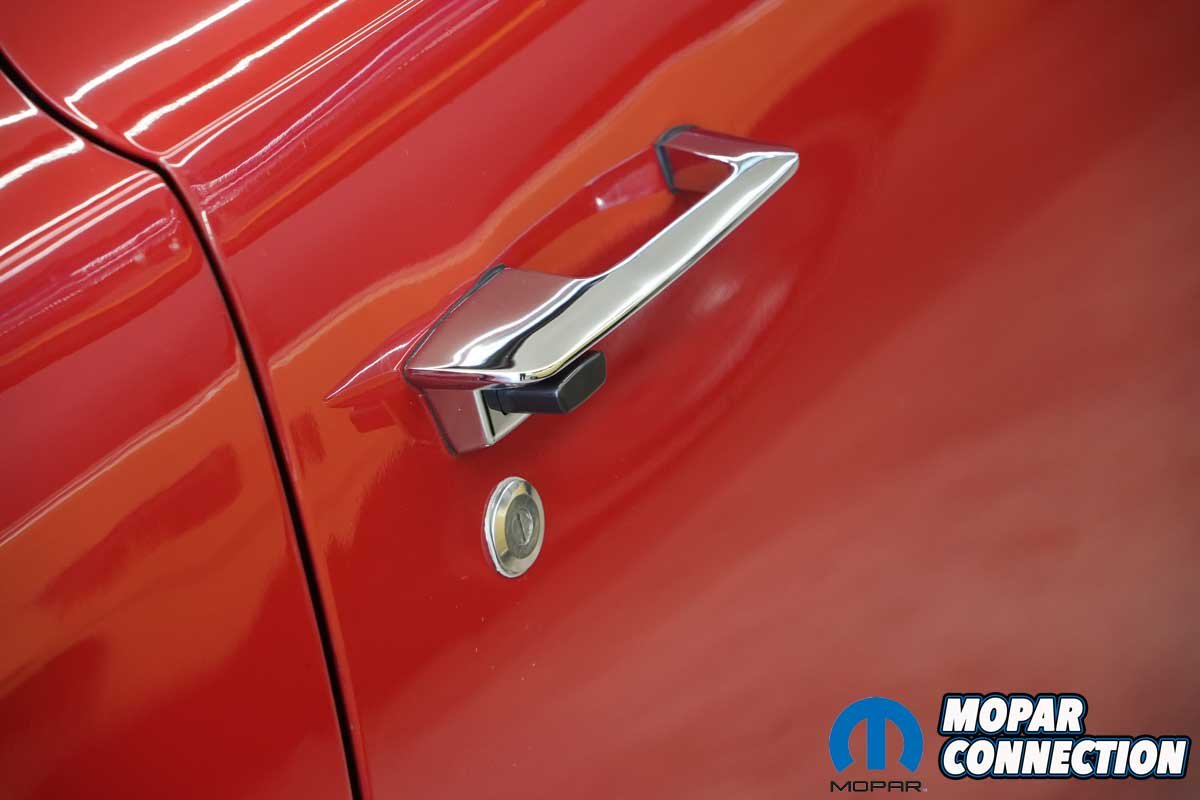
Above Left: With the door handle removed, we cleaned and polished the surrounding paint. Everything was spotless, with no rust to worry about. Above Right: The Classic Industries black-button door handle fit perfectly and operated smoothly, with chrome that shined far brighter than the original factory pieces.
It became clear that restoring the original panels was unthinkable. The front panels were too far gone, with cracked and faded armrests that were beyond repair. The only sensible path forward was to replace them, and there was only one logical source: Legendary Auto Interiors.


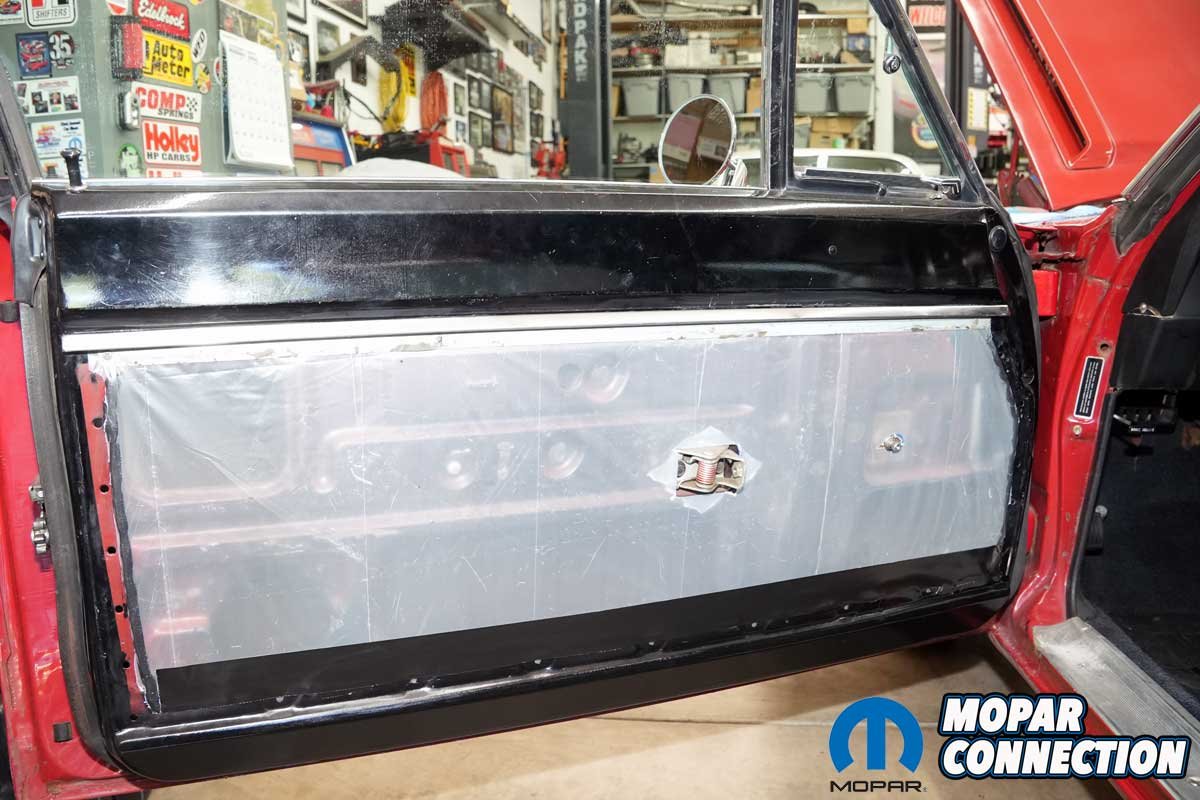
Above Left: The vapor barrier was missing when the door panel was removed, so we installed a 9-mil plastic sheet beneath the chrome strip on the door. Above Center: Butyl strips were applied along the left and right edges of the door. Above Right: With the strips in place and the backing removed, the barrier was secured to the butyl strips. The bottom edge was tucked into the door frame slit, and a tape strip was applied along the bottom perimeter. This ensured that any water entering the door was channeled out the bottom, unable to escape from the sides, keeping the interior protected.
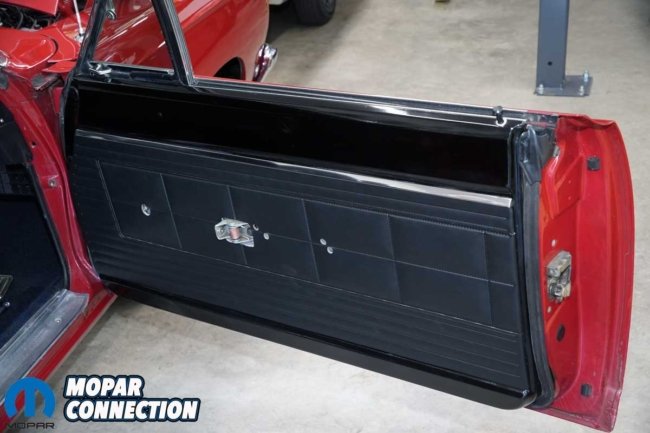
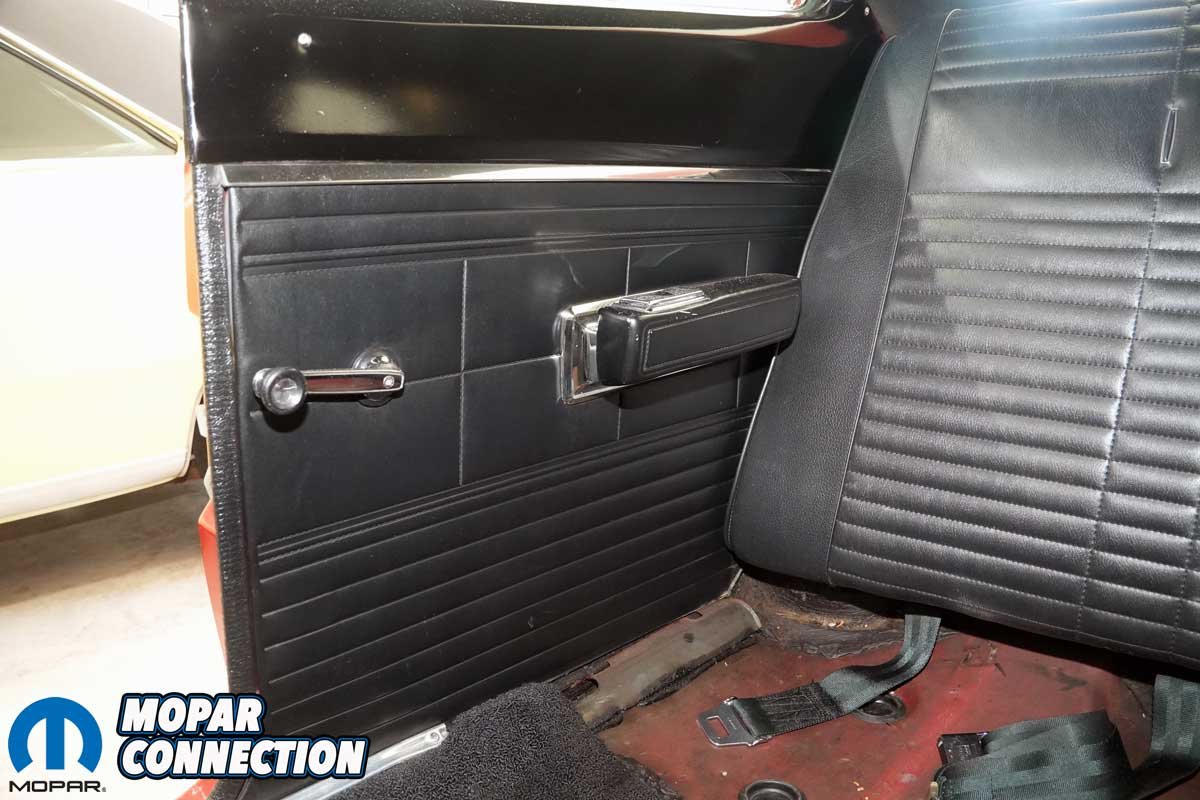
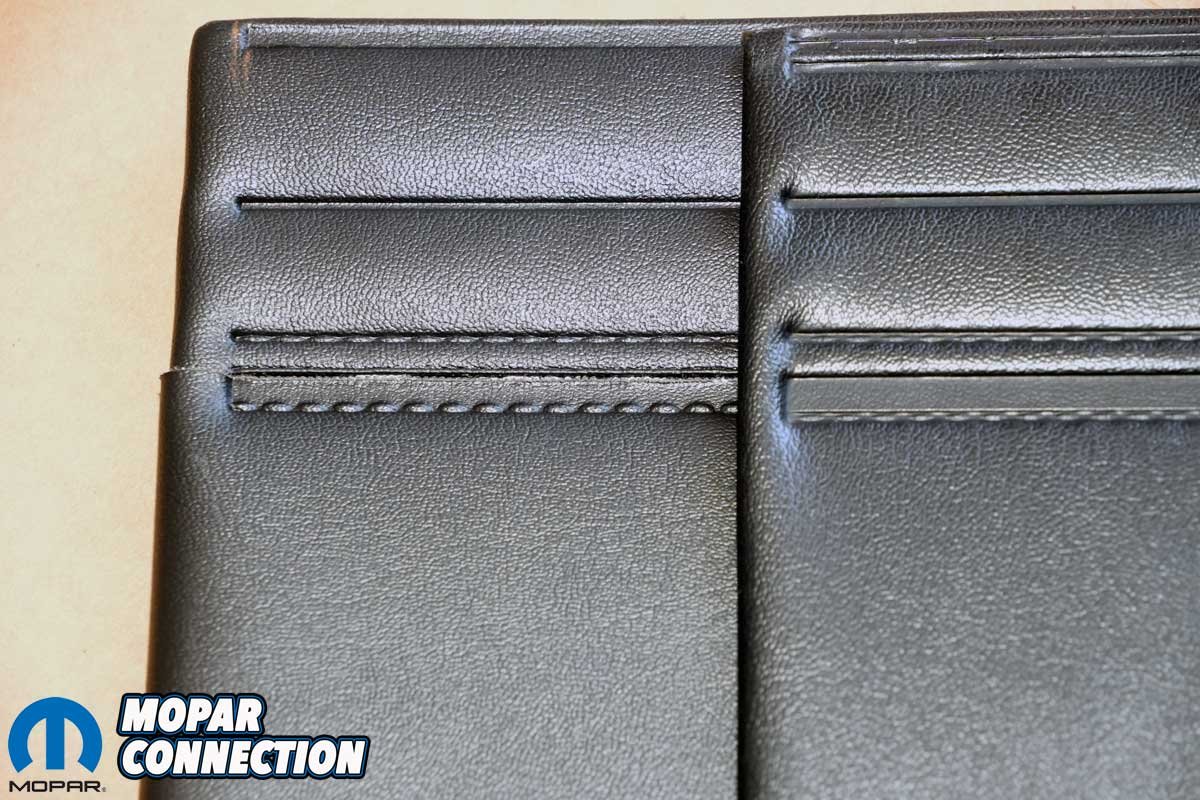
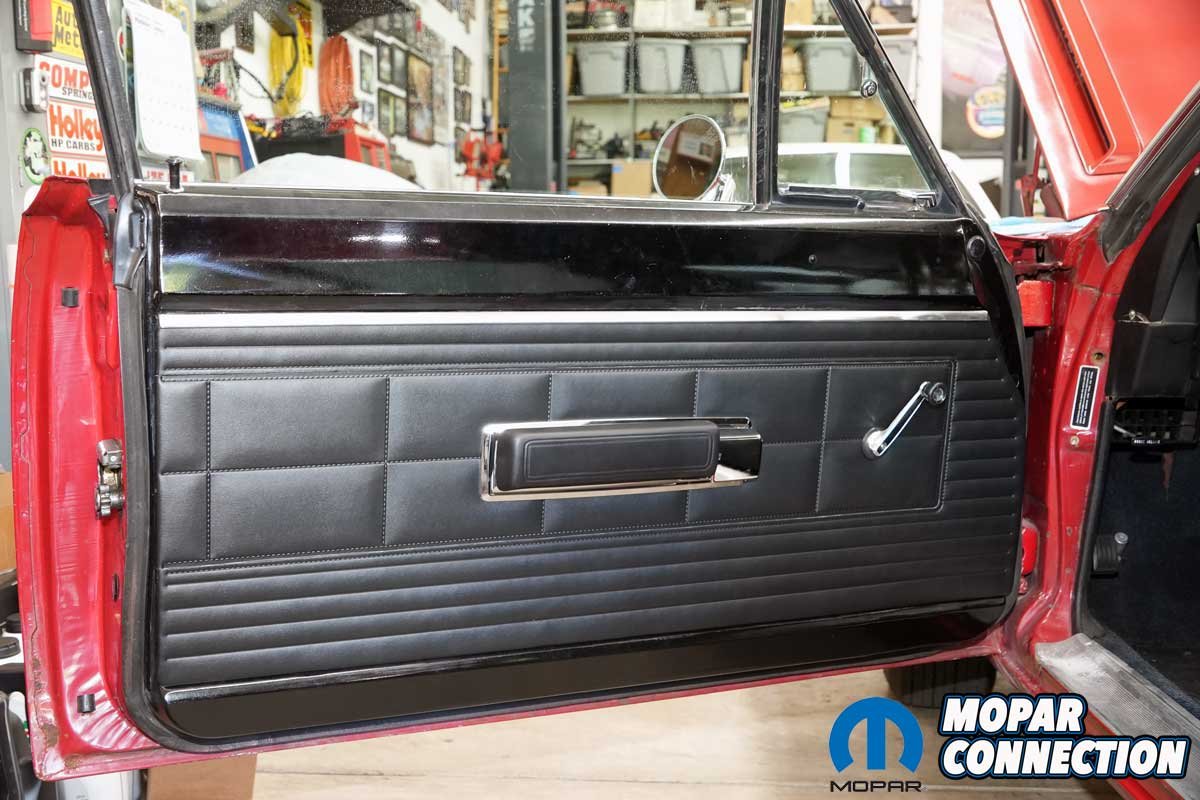
Above Left: The Legendary door panel fit perfectly, secured in place with new panel clips. Above Right: We opted for chrome armrest bases and black armrests.
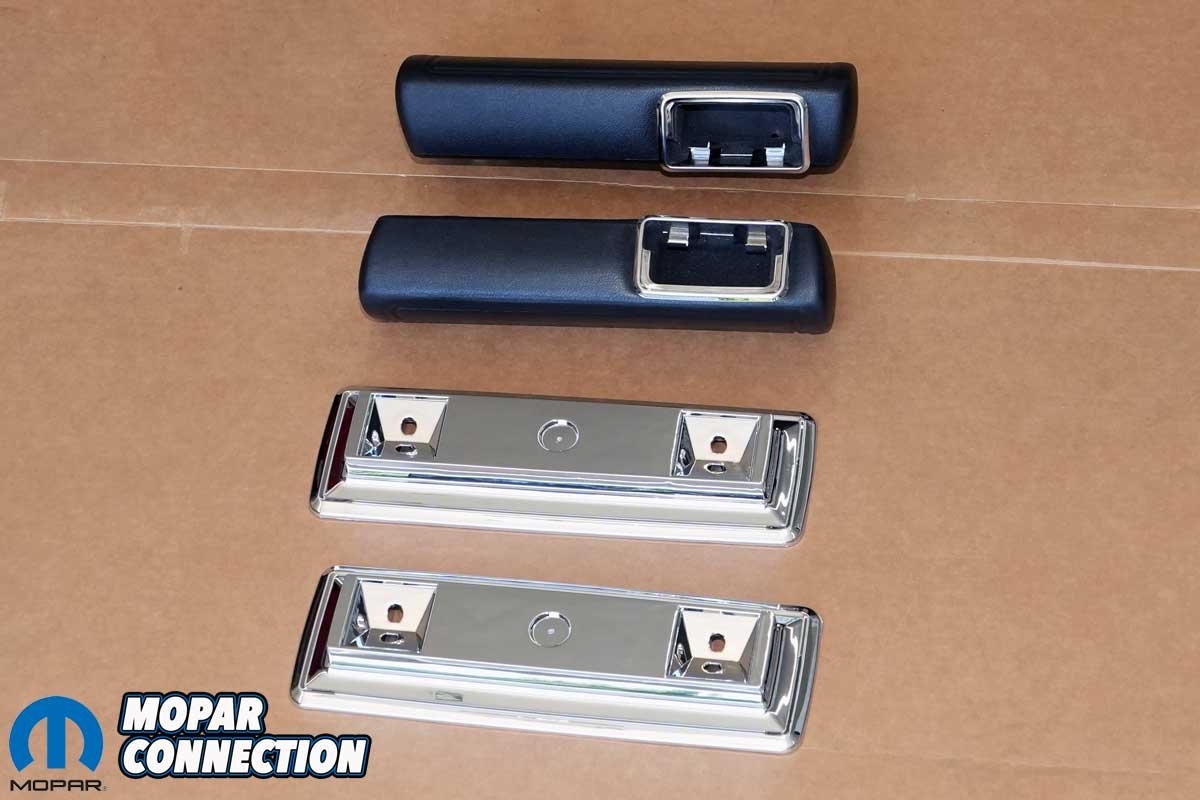
Known throughout the Mopar community for their factory-correct reproductions, Legendary supplied us with new front and rear panels (part no. DO68CRP0020100 – front and DO68CRP0080100 – rear), armrest bases (part no. AP68CRWBASECHR – front and AP66CRWBASERR2 – rear), fresh armrests (part no. AP68CRW100), and a package tray (part no. PT68CRW100N), nearly everything needed to bring the Road Runner’s interior back to showroom form. However, we did source the rear armrests with ashtray holders (part no. 1280-9AR) from Moparplus Antique Parts.


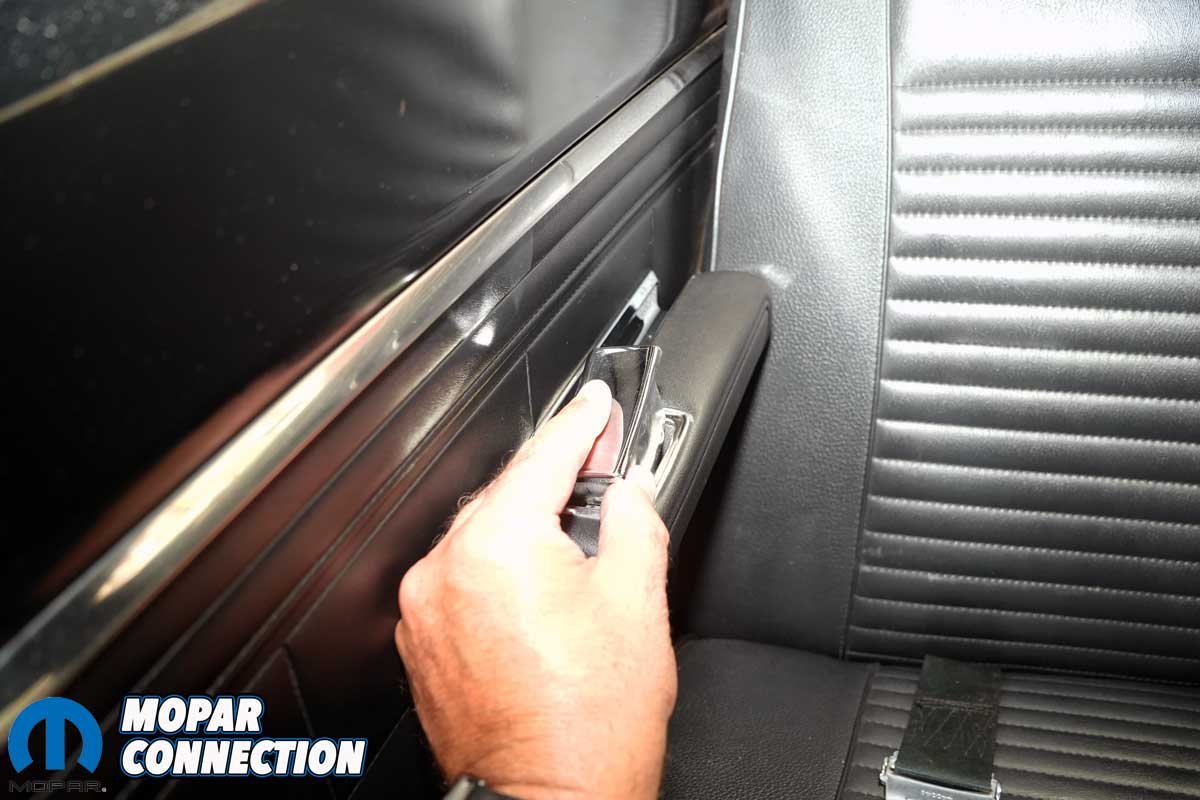
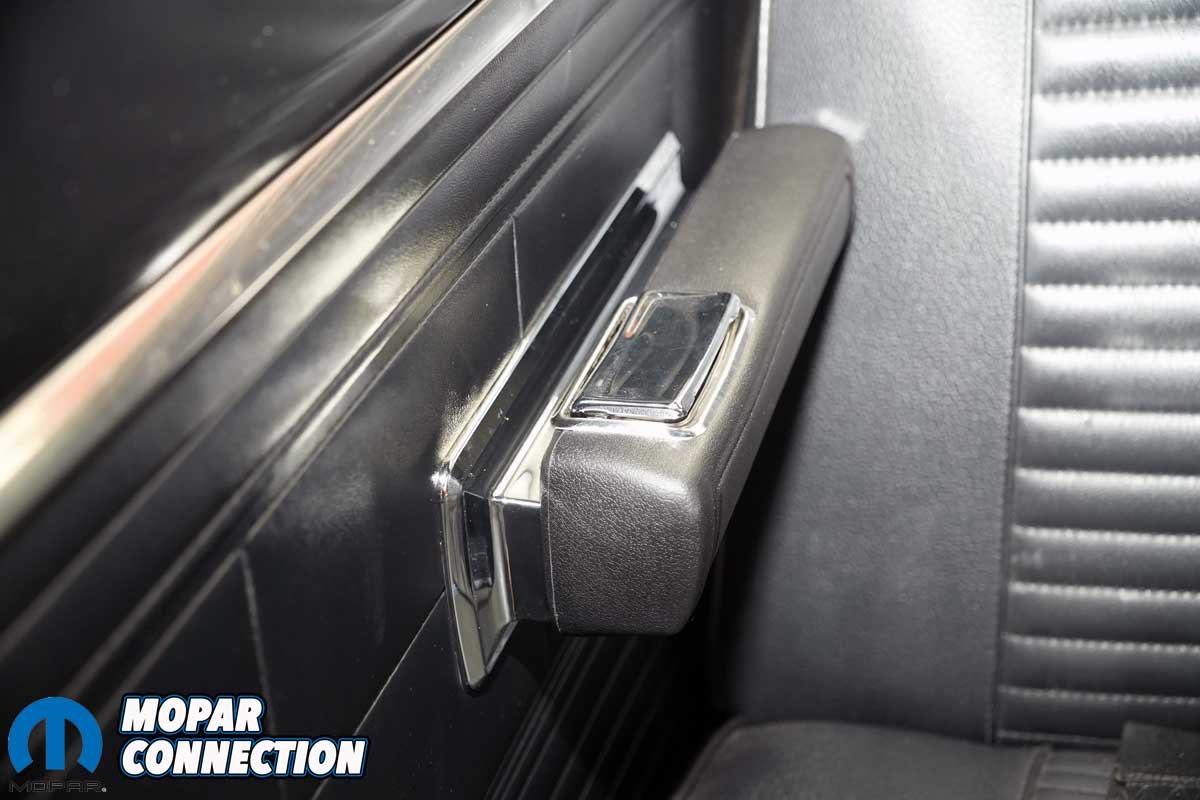
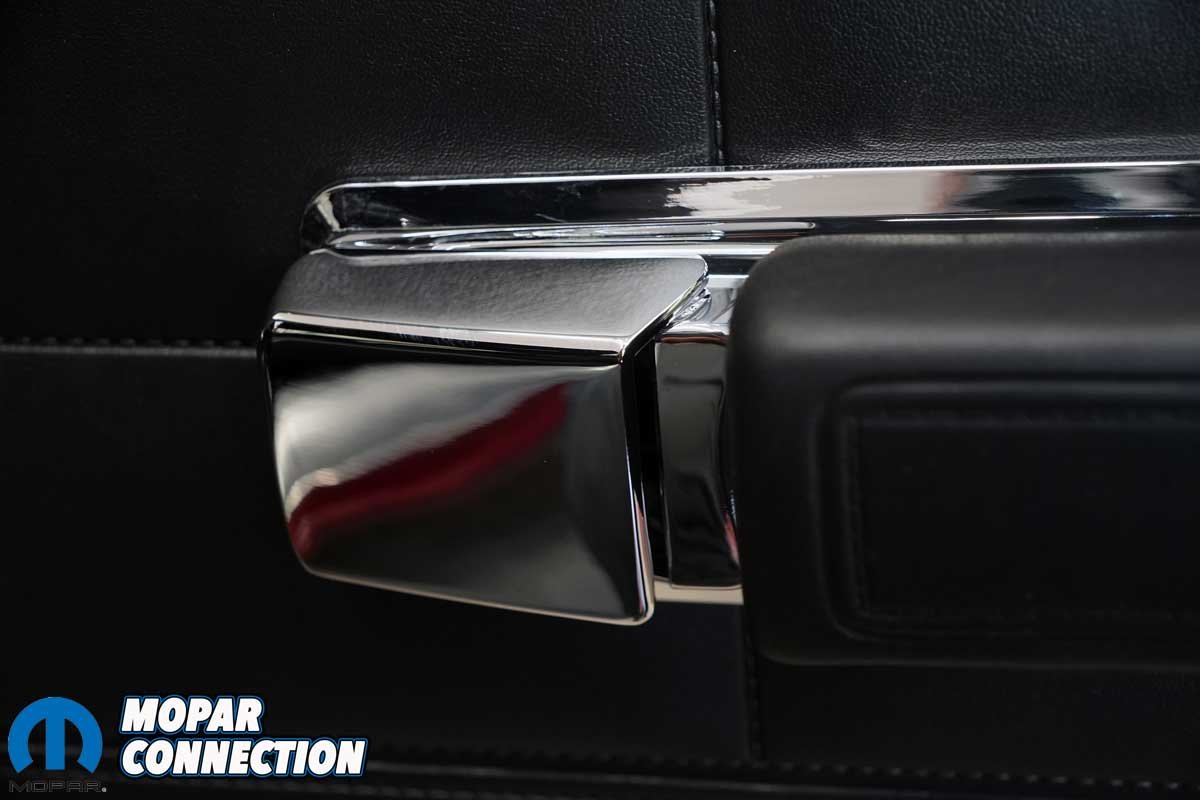
Above Left: New chrome interior door handle releases were installed, with both driver and passenger handles shining beautifully. Above Right: With the assembly complete, the repair is virtually undetectable.
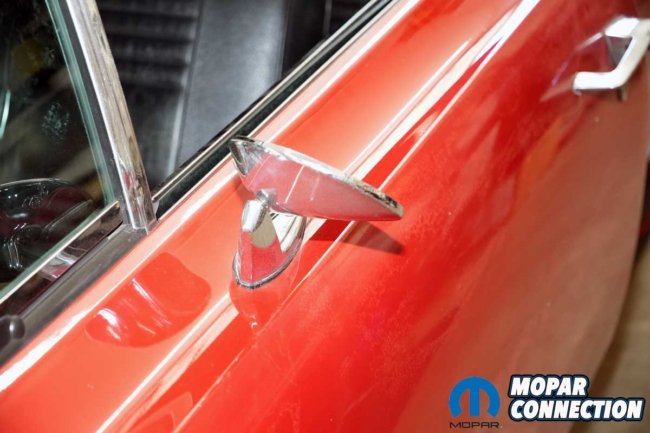
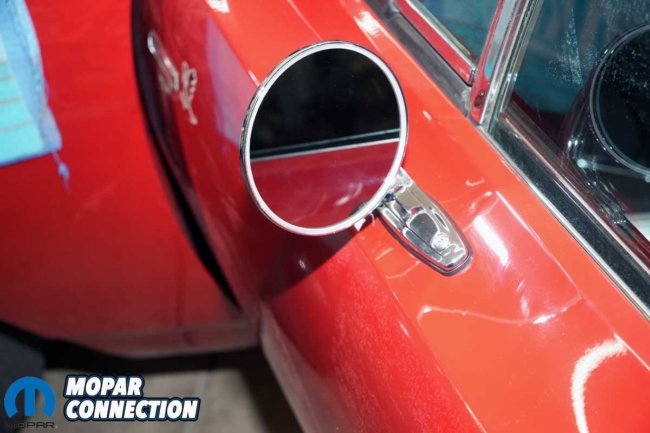
Above Left: The exterior mirror refused to stay in position, no matter how many adjustments we made. The new exterior door handle had already been installed. Above Right: A new mirror from Classic Industries was fitted, easily adjustable, and held its position perfectly. The chrome gleamed.
Interestingly, the rear panels told a different story. Unlike the butchered fronts, they had survived remarkably well over the decades. The vinyl remained soft, the grain was intact, and even the vapor barriers were still in place. They stood as a snapshot of how the car once looked, and a preview of what it would soon become again.


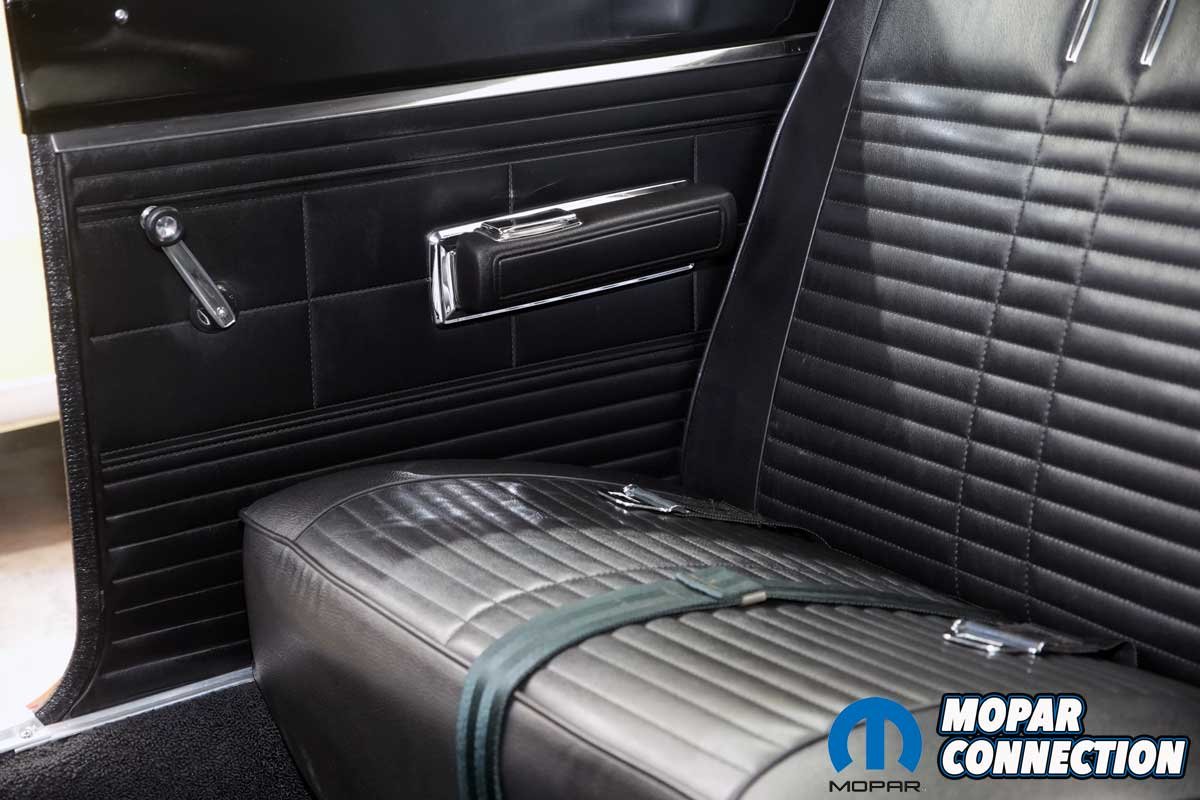
Above Left: Like the passenger-side door, a vapor barrier was installed and secured with butyl rubber and tape. Above Right: The finished door looks fantastic, featuring a Legendary Auto Interiors panel, armrest base, and armrest. The window crank is original, and the door panel displays a glue seam explained further into the story.
With the front panels removed, our focus shifted to repairing the door frames. The initial plan seemed straightforward: cut away the damaged areas, fabricate new patches from flat sheet steel, and weld them into place. While the process worked in theory, the result fell short of expectations. The handmade patches never quite captured the crisp contours of the original stamping. For a car of this caliber, “close enough” was not good enough.

Above Left: Removing the rear seat back to gain access to the package tray required disconnecting the window crank handles and armrests on both doors. Above Center: The armrests and bases were lifted off, with screws and ashtrays set aside for reuse, while the worn assemblies were discarded. Above Right: The window crank handles were removed and saved along with their screws for later reinstallation.
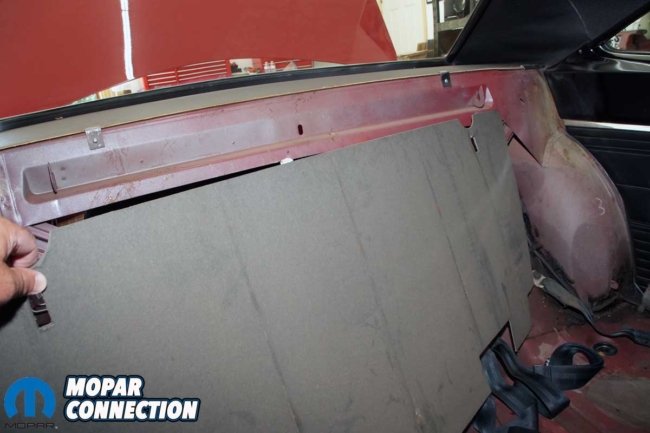


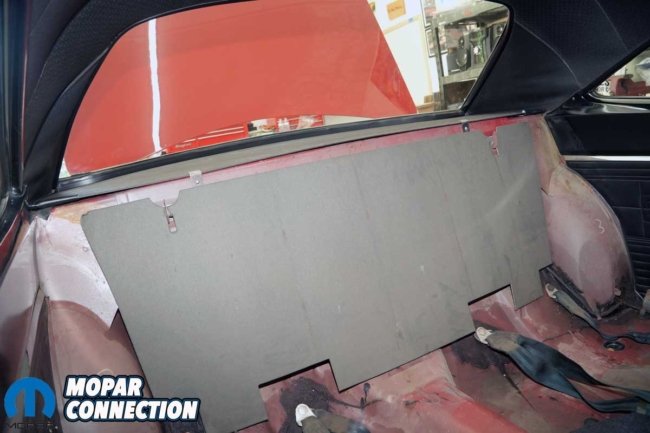
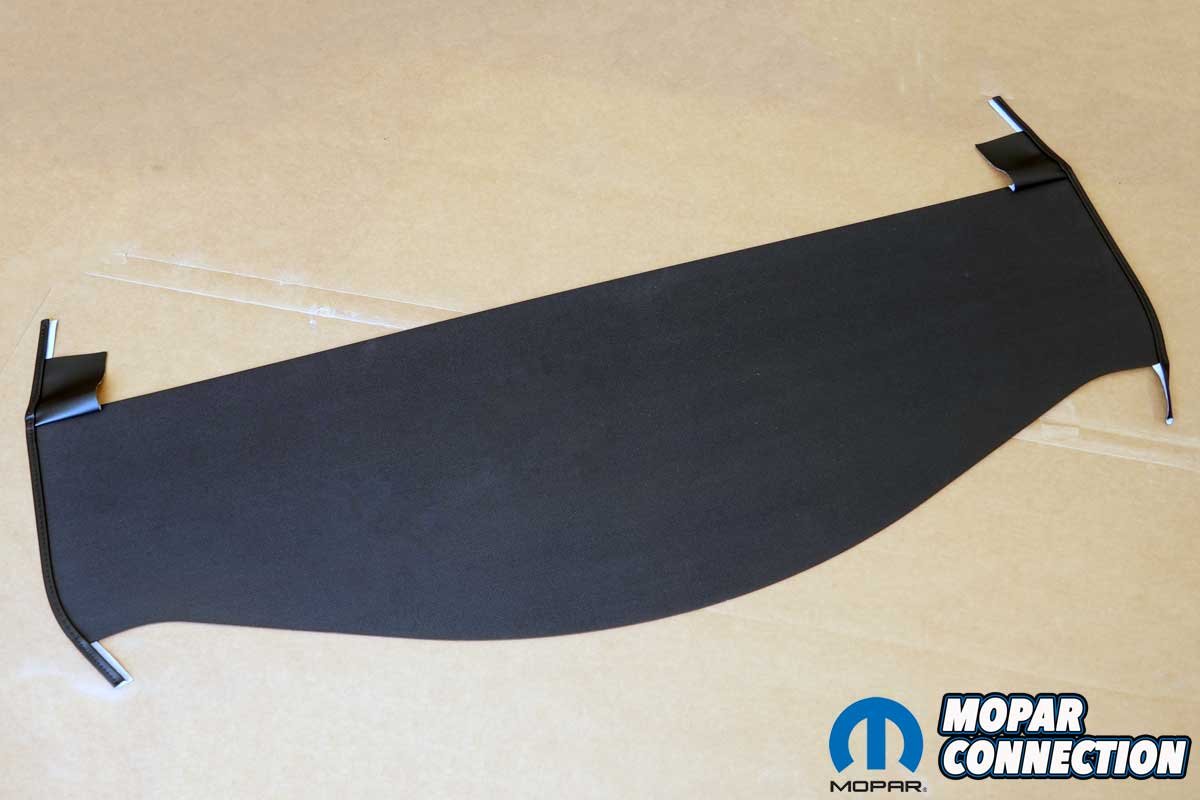
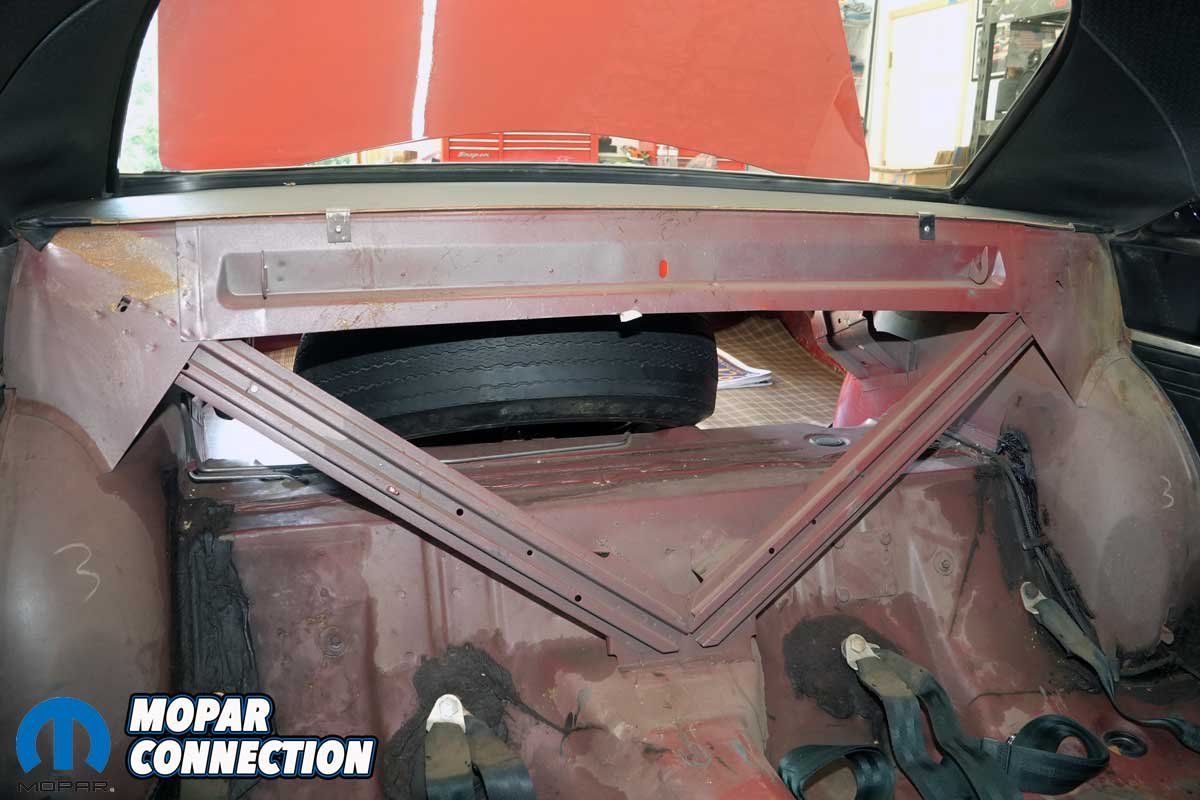
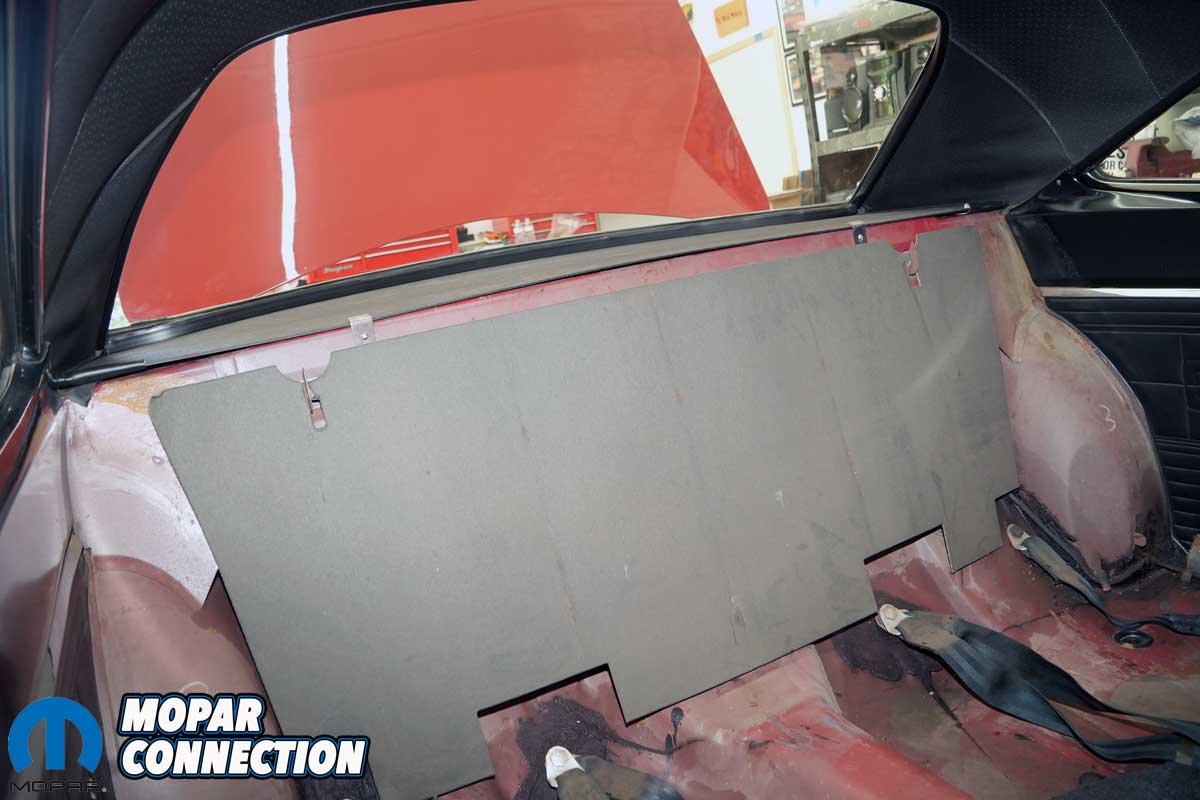
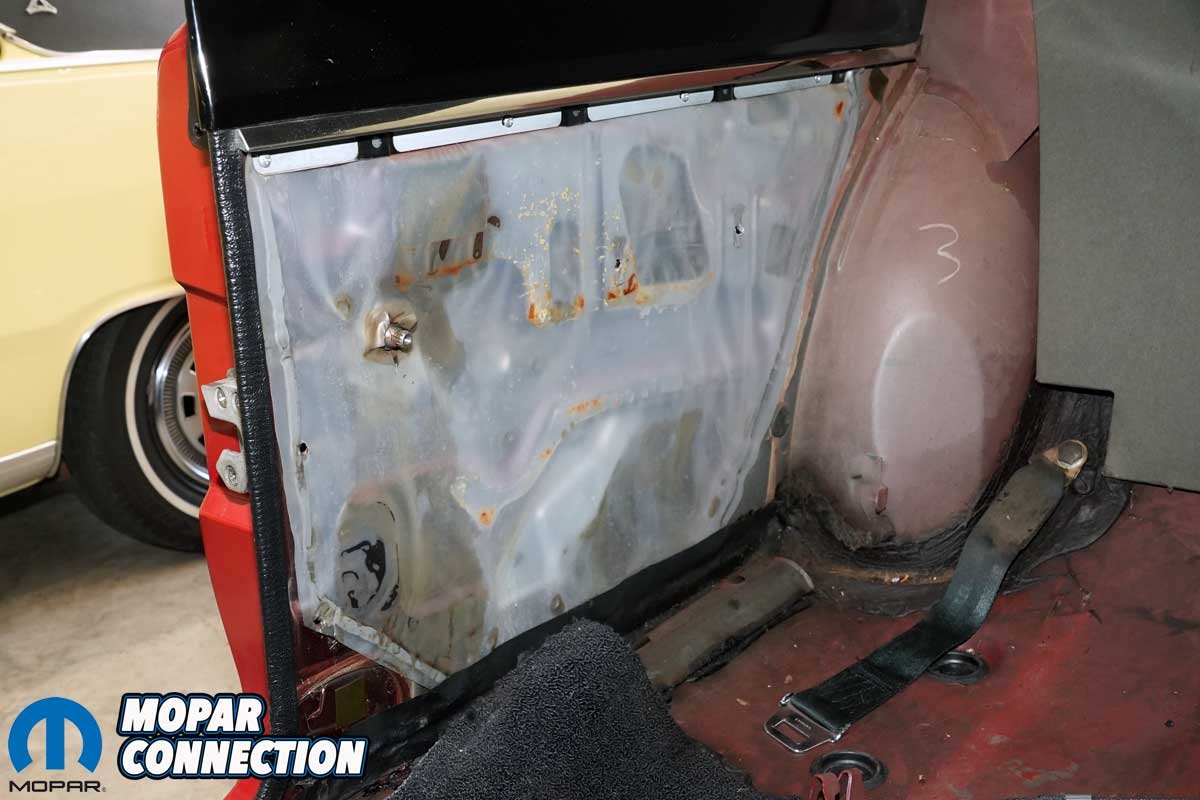
Above Left: While not required to access the package tray, we removed the trunk divider panel for easier work. Above Center: With the divider out of the way, the trunk and the rear belt anchors were clearly visible. Above Right: The new package tray (top) perfectly matched the original (bottom). We transferred the trim piece to the Legendary replacement, tucking the extra material underneath just like the factory-installed piece.
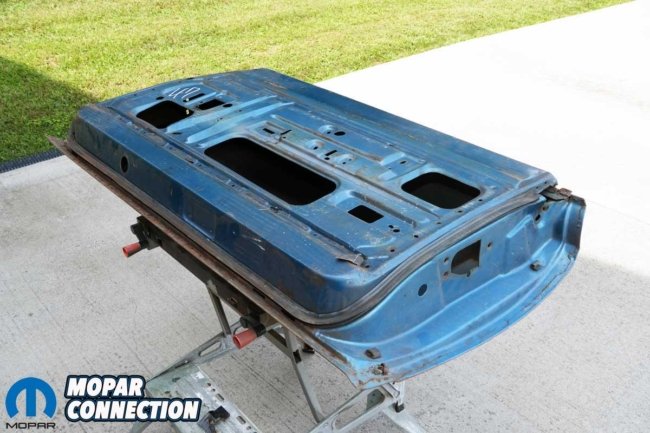
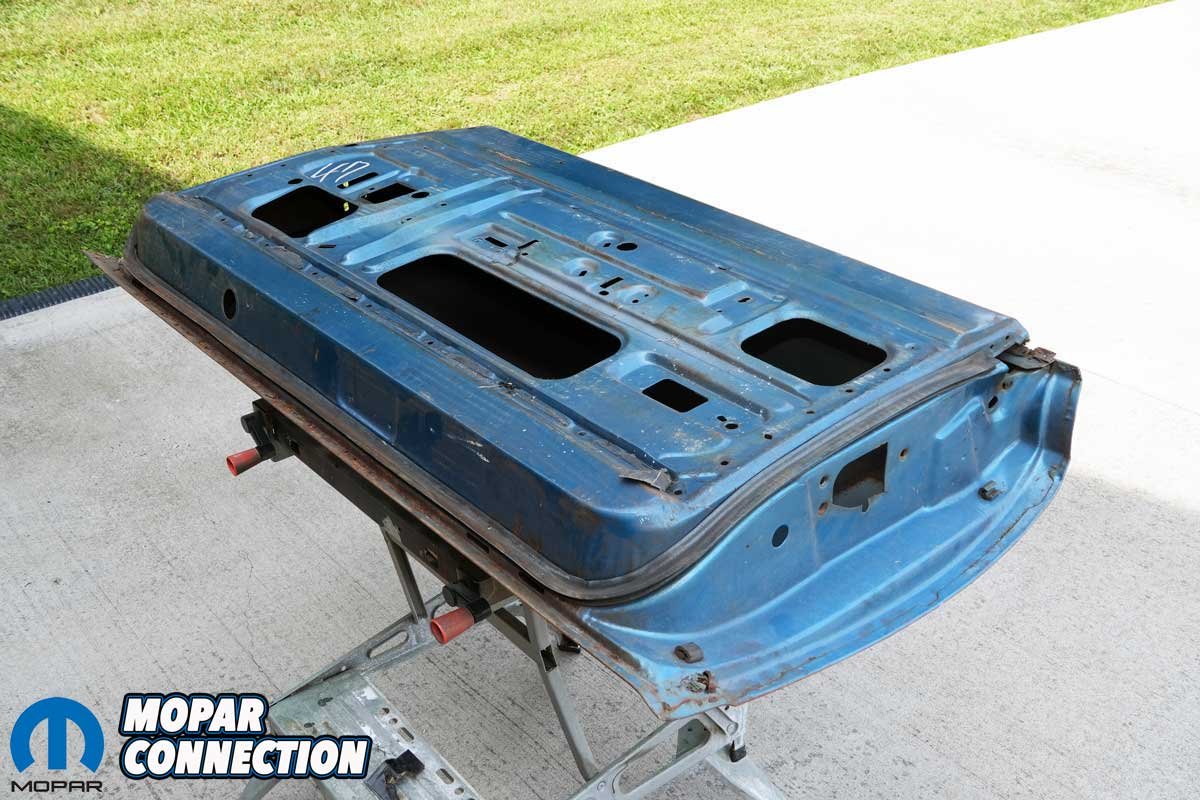
That led to a better answer, sourcing a donor door. Finding a 1968 Plymouth B-body door in central Pennsylvania proved difficult. Local leads dried up quickly, and online listings were priced beyond reason. After weeks of surfing, a 1968 Satellite door surfaced on eBay for $30. The skin was rusty and full of filler, but the inner structure, the part we needed, was solid. Shipping from Texas added another $70, but at a total of $100, it was still a bargain compared to fabricating imperfect repairs.

Above Left: With the new package tray installed, the trunk divider was reinstalled. Above Right: While we had planned to replace the rear panels with new Legendary units, a closer look revealed our originals were in excellent condition, no replacement needed. The vapor barrier was intact and in great condition as well.
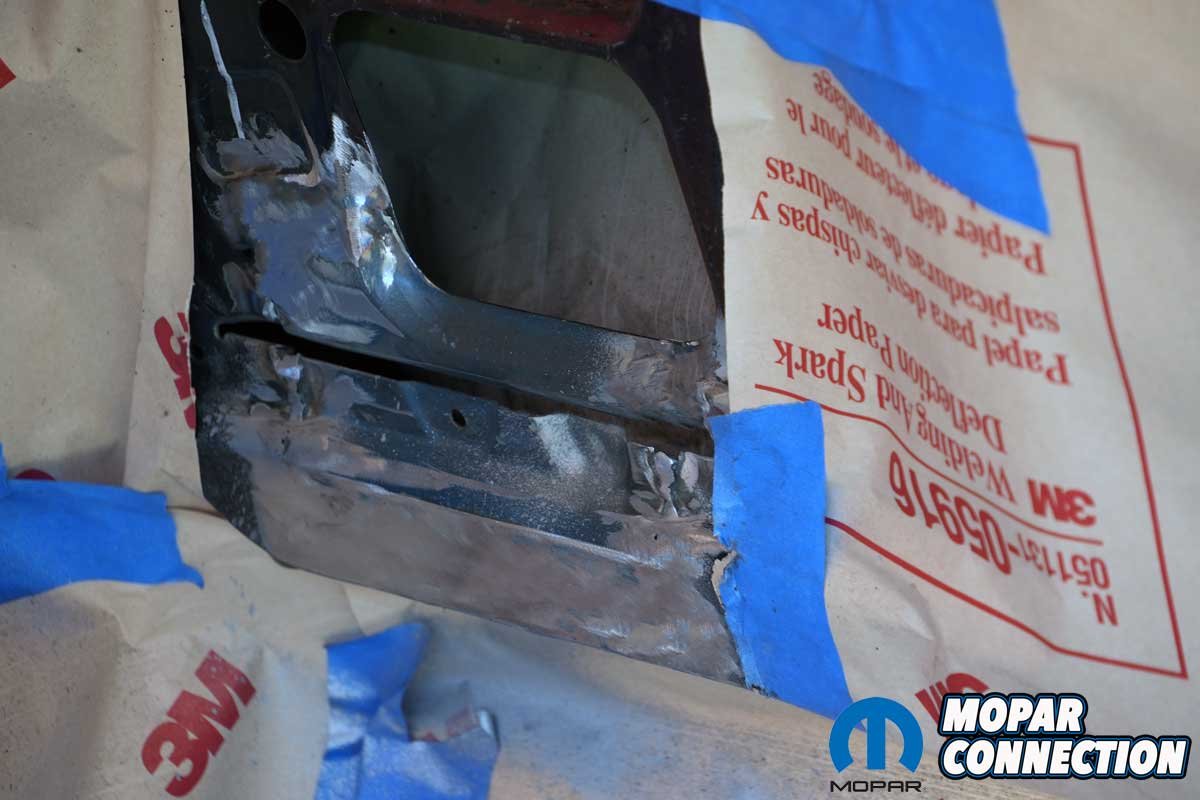
When the donor door arrived, we carefully sectioned it and test-fitted the pieces against our Road Runner, immediately seeing the improvement. The contours matched perfectly, something impossible to duplicate from flat stock. With the Road Runner wrapped in welding paper and fireproof blankets, the donor steel was welded into place, the seams were ground smooth, and a thin skim of filler was applied. Once sanded, the repair integrated seamlessly into the original door frame. The inside was refinished in gloss black, faithfully replicating the factory look.
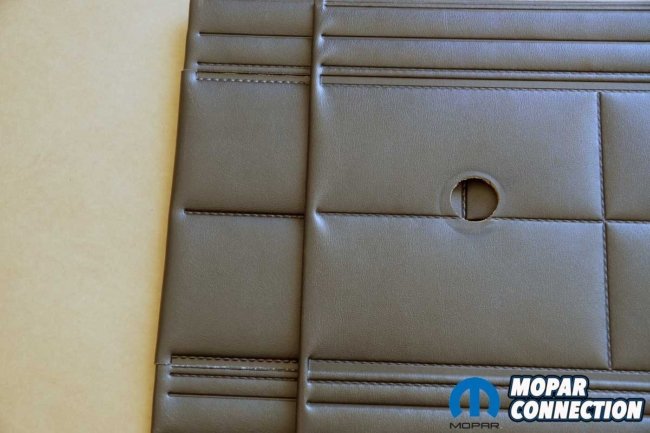

Above Left: Our plan was to install Legendary panels at the rear of the Road Runner. The original panel sits on top, with the Legendary replacement underneath. The original looked virtually factory-new and differed noticeably from the aftermarket piece. Above Right: A close-up of the same panels shows the difference more clearly. We asked Legendary about the material overlap and glue seam at the edges, they confirmed all factory Décor panels had the seam. Our original panel, on top, showed no seam, glue marks, or overlap. Observe both photos, and you be the judge.
The driver’s side required more creativity, as the donor piece did not align perfectly with the inner structure. Since this portion would be hidden behind the panel, we fabricated the necessary filler sections, welded them in, and finished the surface. When completed, both doors looked factory fresh, ready to accept the new Legendary panels.

Above Left: New Legendary armrest bases and Moparplus Antique Parts armrests were installed. Above Right: The parts fit perfectly, and to complete the rear armrests, we reused the original, unused ashtrays.
Reassembly began with the installation of new exterior handles (part no. MD4231) and the replacement of the driver’s-side mirror (part no. 2802710), both from Classic Industries. Next came the vapor barrier, cut from 9-mil plastic and sealed with butyl rubber along the sides, with tape securing the lower edge above the exposed frame.
With the barrier in place, the Legendary panels snapped securely into position using the correct-style clips. Armrests, bases, and handles were installed with factory hardware, and the original window cranks were reused for authenticity.
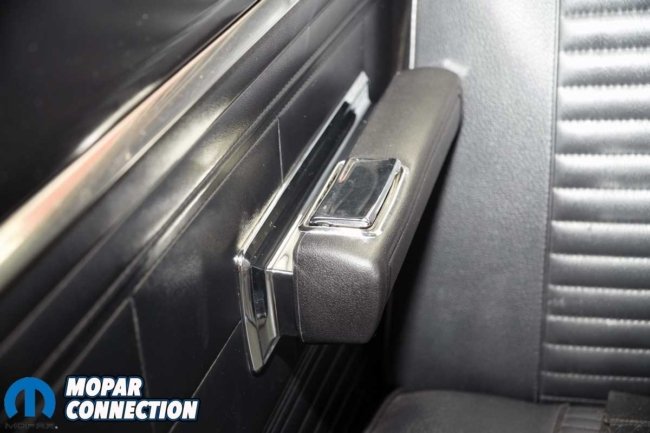
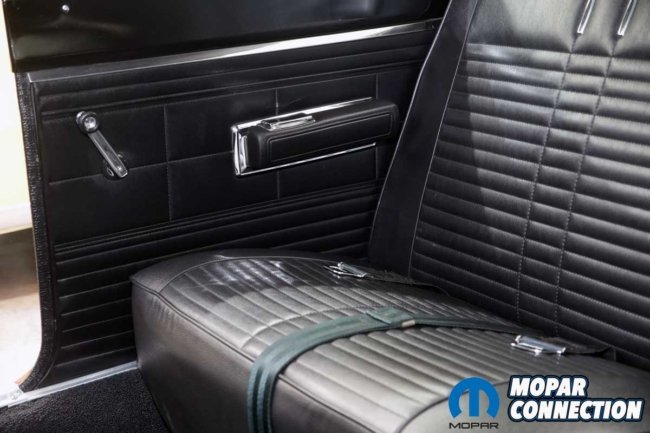
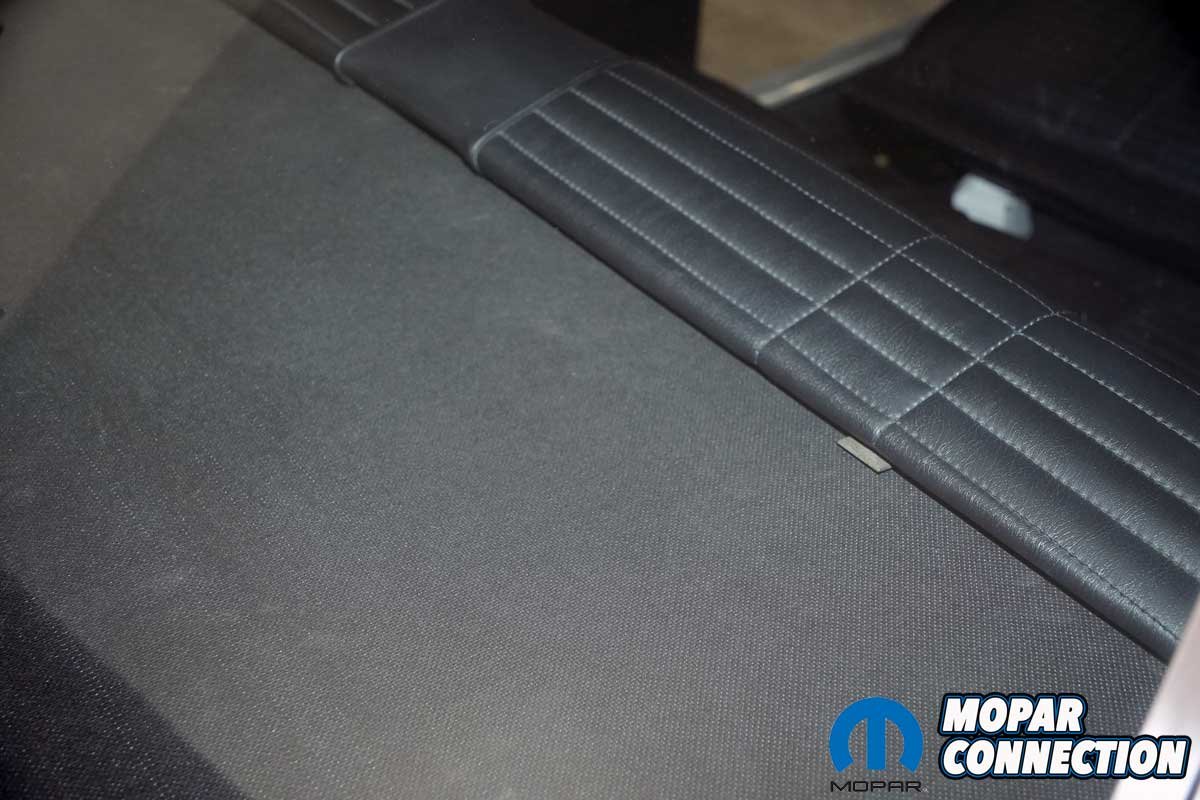
Above Left: The new armrests were a significant upgrade over the originals. While the cause of the damage to the right rear armrest was unclear, the repair has greatly improved its appearance. Above Right: The rear seat area now looks factory-fresh, with the original panels and seat covers still in place.
Once the front doors were restored, we moved to the rear of the Road Runner. The armrests and cranks were removed, the rear seat bottom lifted free, and the seat back released by bending its two retaining tabs. With the seats removed, we gained access to the package tray, which was replaced with a Legendary reproduction. The original trim was transferred over, and after several careful adjustments, the seat back and bottom were reinstalled, with seat belts routed correctly over the cushion.
The rear panels were judged too good to replace, so they were retained. However, new Moparplus Antique parts armrests and Legendary parts bases were added to freshen the appearance and provide symmetry with the front.


Above Left: The package tray fits snugly beneath the seat back, with both mounting tabs (only one visible here) slightly exposed, just like the originals. Above Right: The driver’s side rear turned out just as well as the passenger side. Both the seat covers, and panel remain the original 1968 installations.
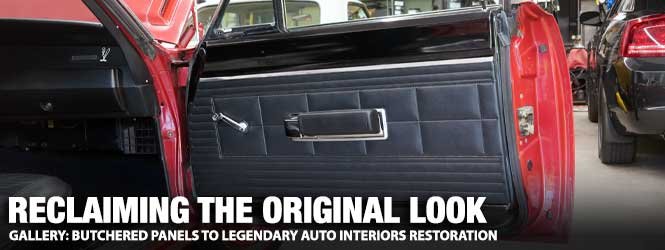
The transformation was nothing short of remarkable. What had once been an interior scarred by ill-conceived modifications had been restored to its factory-correct condition. The dash remained authentic, the rear panels preserved, and the new Legendary pieces merged seamlessly with the surviving originals. With careful metalwork, quality reproduction parts, and respect for factory design, the Road Runner’s interior was restored to the standard it deserved: clean, correct, and ready for the road.


