


After getting the complete driveline installed from the bottom of the car just like the factory did, we want to get the Comeback ‘Cuda moving under its own power. Also, this is a great time to make sure everything is working as it should, before we install interior, glass and trim that we would have to remove if we run into any problems.
We got out the tires we received from one of our sponsors at Classic Industries, the wheels we bought from Coker, and while we are there, we restored the “space saver” spare tire. Once the car was rolling, we then broke out the complete and correct Hemi exhaust system from ECS.
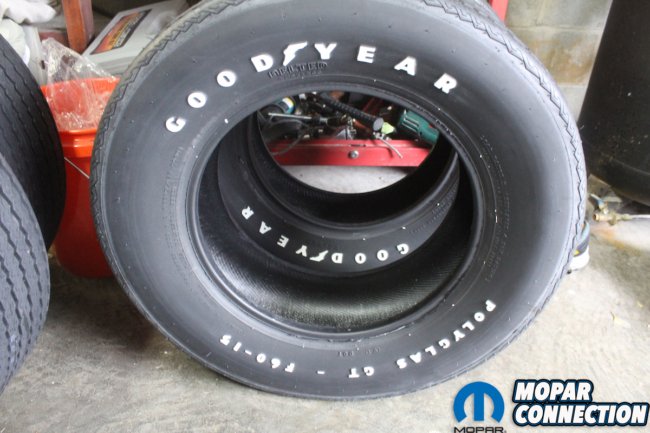

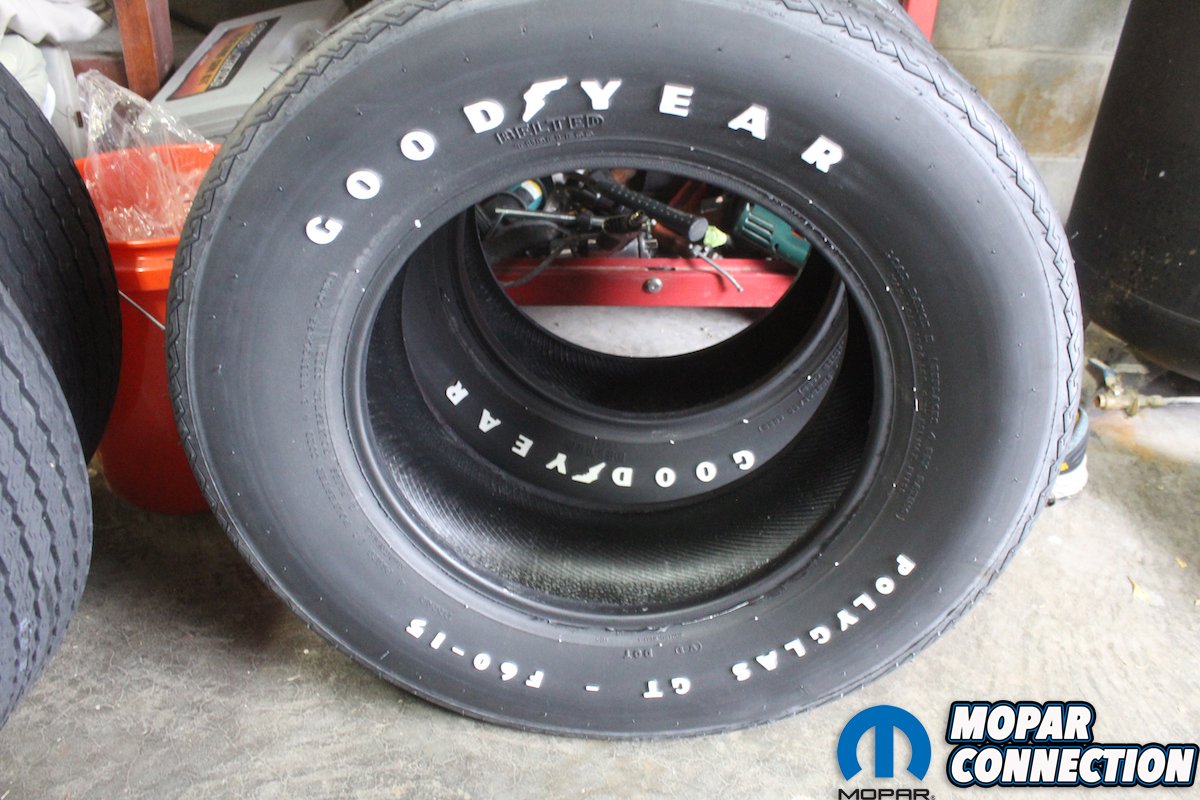
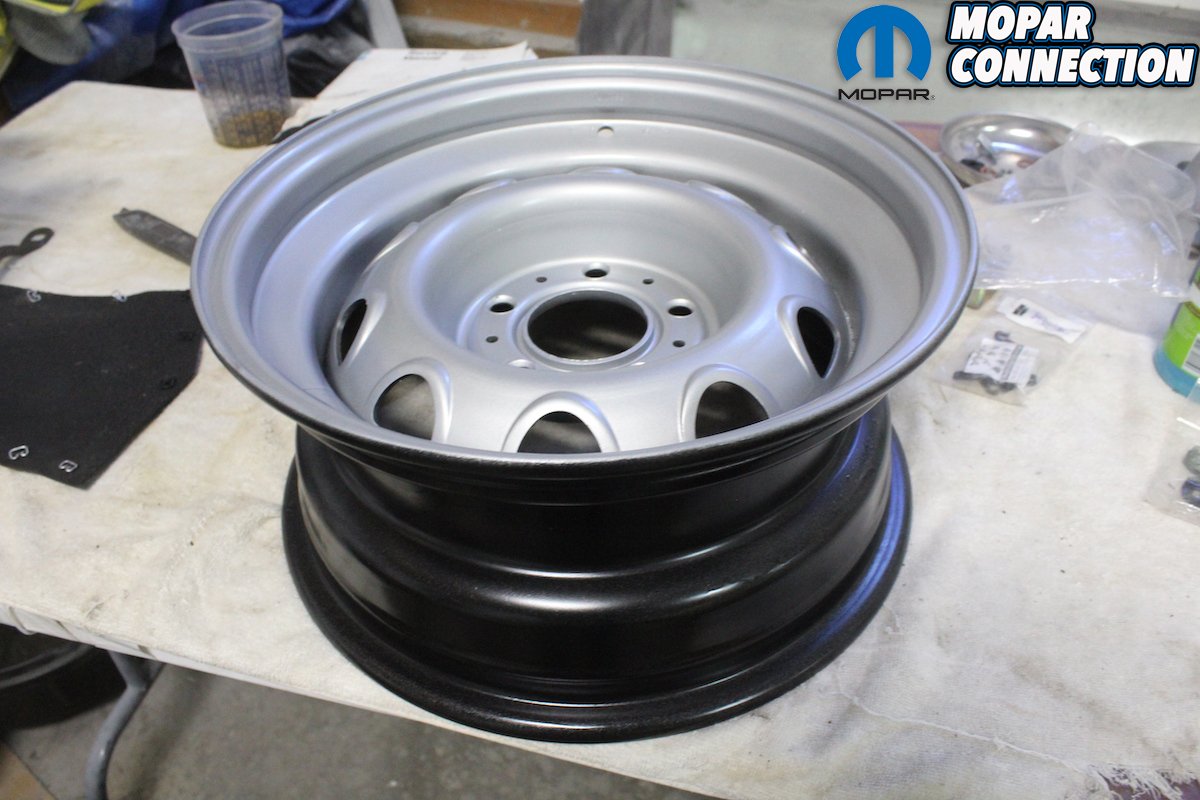
Above left: One of our great sponsors, Classic Industries, helped us out with a set-of-4 hard-to-find in stock Goodyear, raised white letter, F-60-15 later edition, tires. For earlier built cars you would use the tires that do not have the “Polyglas GT – F60-15” but has “Wide Tread GT” in raised white letters. Above right: We got the correct Rallye wheels from Coker. However, they are completely powder coated silver. For most people that would be fine, but for the Comeback ‘Cuda its gotta be correct. So, we scuffed the entire wheel and painted the inside and backside cheap gloss black. Then we painted the front side with the VHT Ford argent silver.

Above left: We then mounted and balanced the tire. We use the original style weights and the standard short valve stem. Some people make the mistake of using a longer valve stem that will stick out farther than the trim ring hole. As we will show you later, there is a “valve stem extension” that goes on these wheels and trim rings. Above right: After mounting we scrub the tires with fine steel wool and “Wesley’s Bleche Wite”. After they dry, we use a little lacquer thinner on the tip of the rag and re-clean the white letters. It really makes them stand out.
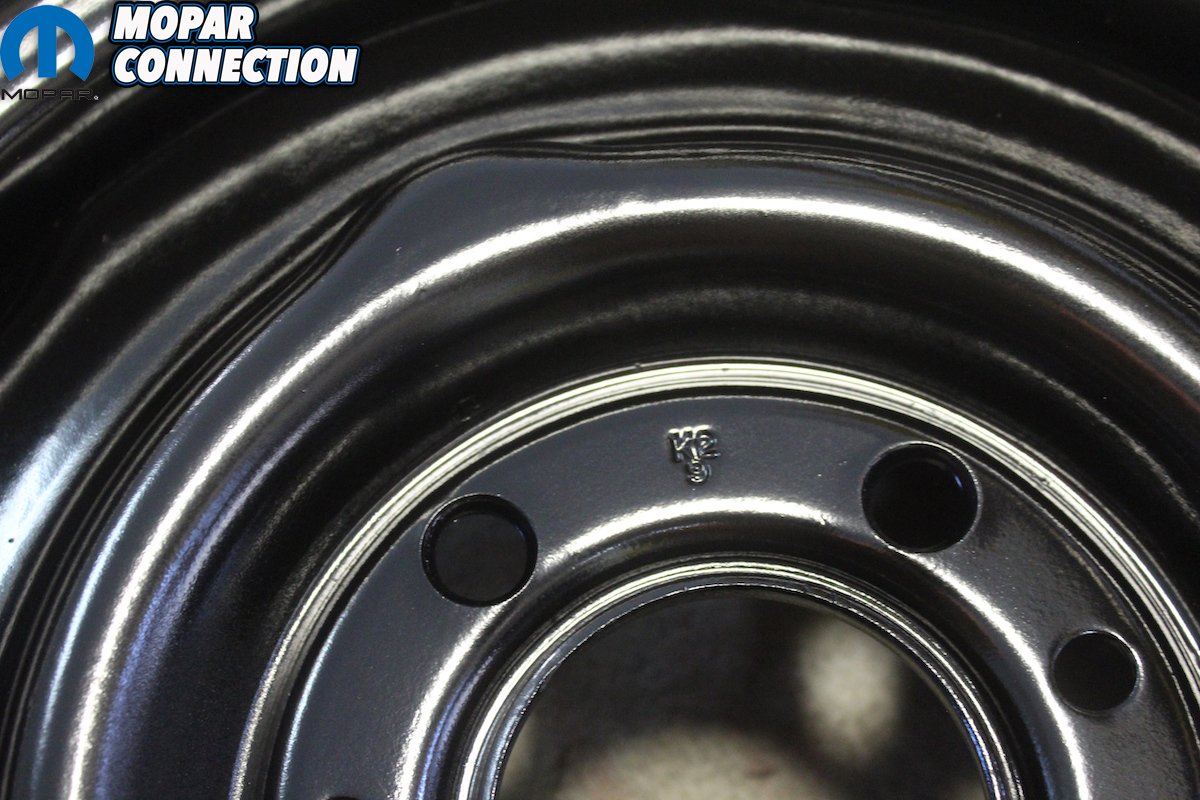
Originally, a base model Hemi ‘Cuda would have had steel wheels with dog dish poverty caps or 14-inch Rallye wheels. The 15-inch Rallye was an additional option and who could resist not putting on the bigger Rallyes? The 15X7 Rallye wheels we got from Coker were spot-on except the silver color is a little off. We have discovered through trial and error that the VHT High Temperature Wheel Paint # SP188 Ford Argent Silver is a perfect match to the original color of these wheels.
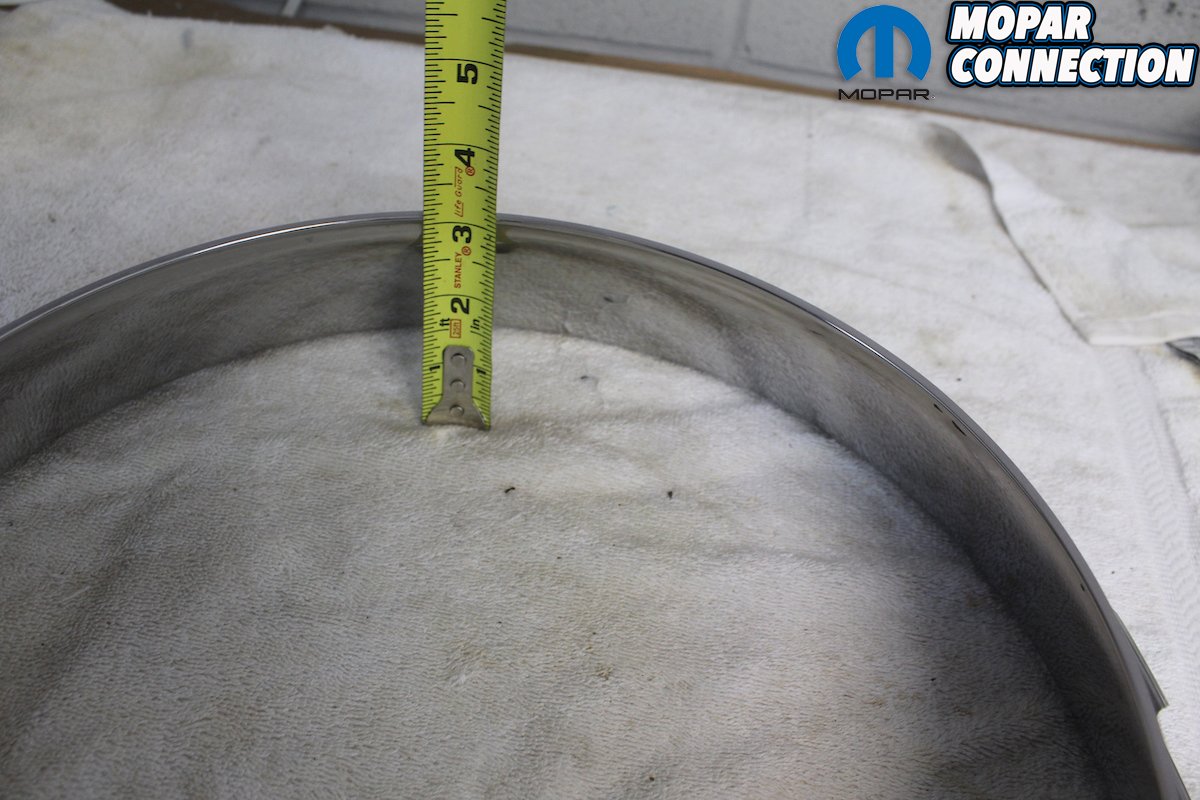
The center caps are “Light Argent” in 1970 and “Dark Argent” in 1971. The lug nuts have a small dimple in the top of the chrome lug. And there isn’t a reproduction correct polished 15-inch trim ring on the market. The re-pops are not deep enough because the originals were 3-inches deep and the valve stem hole is not the correct shape. So, you must bite the Bullitt and find originals. Then restore those because they all will have dings, dents, or curb rash.
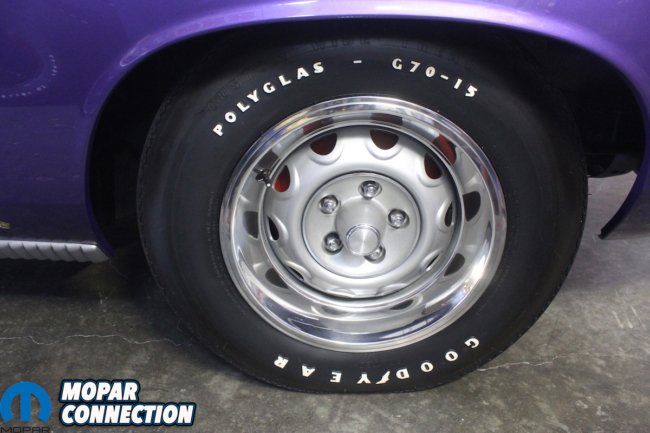

Above left: Here is the Rallye wheel with an aftermarket 15-inch trim ring. As you can see it is not deep enough and leaves a gap between the ring and the wheel. It also has an oval hole for the valve stem. The valve stem extension is present, but the tire is also the incorrect size. This might not be noticed by many people, but it is incorrect. Above right: Off we go on a hunt to find a set of correct polished trim rings. These are not cheap and are all over the board price wise. We were fortunate enough to find a set of five for sale at a decent price. We then had them straightened and polished by our stainless – steel wizard. Notice the correct round valve stem hole.


Above left: On the back side of an original 15×7 3-inch deep trim ring you will find a sticker from Chrysler. Some you can read others are just the remnants of the sticker. Above right: The fastest and most fool proof way to make sure you are getting the correct original trim ring is to lay it face down and get your tape measure. Yes, 3-inches exactly!
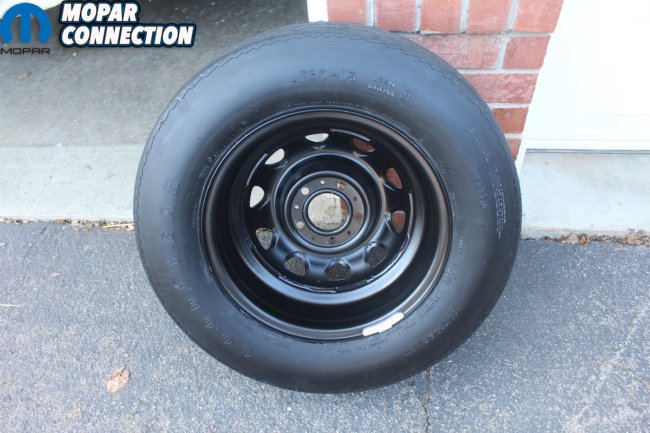
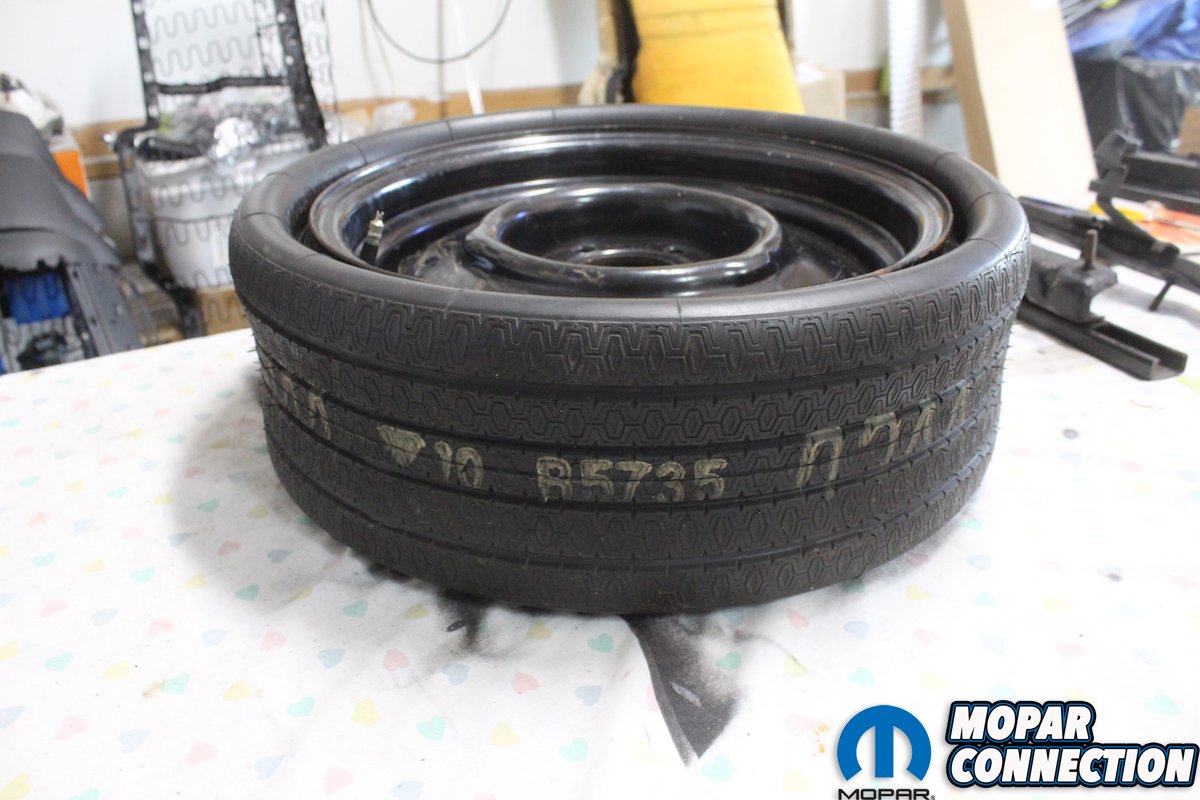
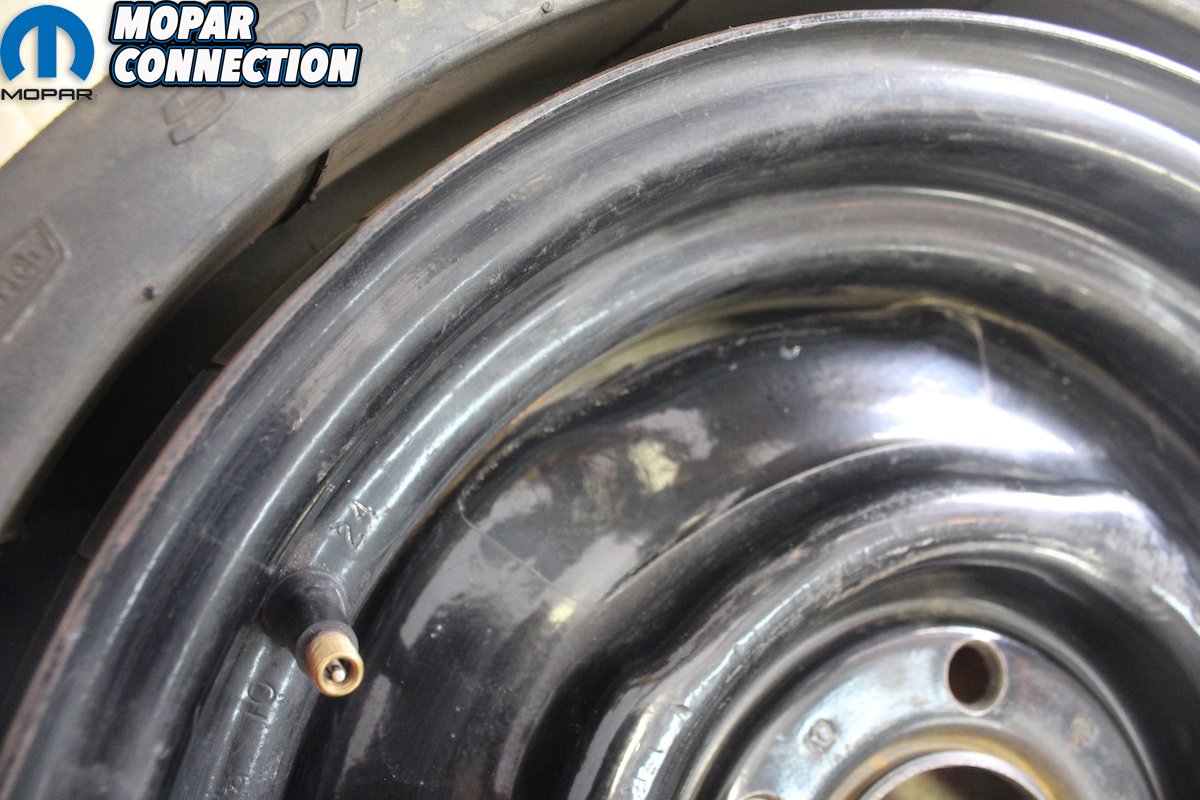
The “space saver” spare tire was required in the convertible model because of very limited trunk space that allowed the “top” to retract. The spare tire has a special valve stem cap that allows you to inflate the collapsed tire with a compressed air canister, all attached with a special hold down bracket. The wheel will have a date code and the tire must be a BF Goodrich F 78 X 14 with a V-1 on the side wall.
We have seen cars with a Goodyear tire, but it is incorrect size and tread pattern. Both are hard to find and can be quite expensive. Luckily, we found one that had been removed from a car in 1970 and was on a dealer shelf most of its life. It had never been on the ground and it still faintly had the letters on the tread “KICU”.
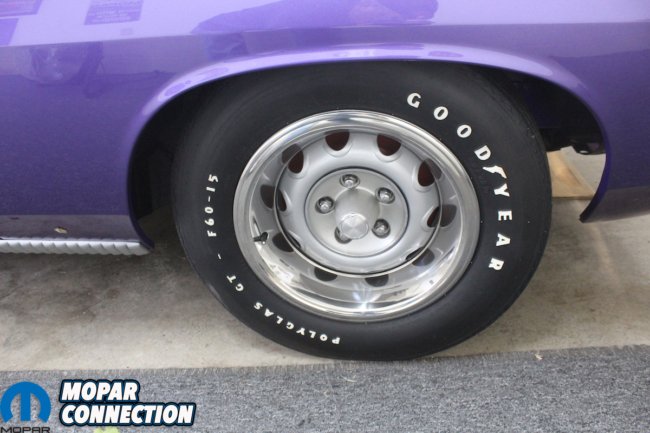

Above left: Ah! Now everything is correct. Red faced brake drums, correct light argent center caps. Correct dimpled lug nuts and correct valve stem extension. Correct finish on the Rallye wheel with correct polished trim rings, and finally the correct tires. Above right: Space saver tire time. The car came with a space saver tire, but wouldn’t you know it. The wrong one. This one is a Goodyear brand. It is a nice one but incorrect. Wrong tire size and tread pattern.


Above left: We went on Moparts to the E-body parts wanted section and put out the bulletin on finding a correct BF Goodrich tire. We got several responses, and we were able to make a deal on one. We scuffed and cleaned it thoroughly, documenting all the numbers we found. Above right: We then masked off the tire and painted the wheel cheap gloss black.
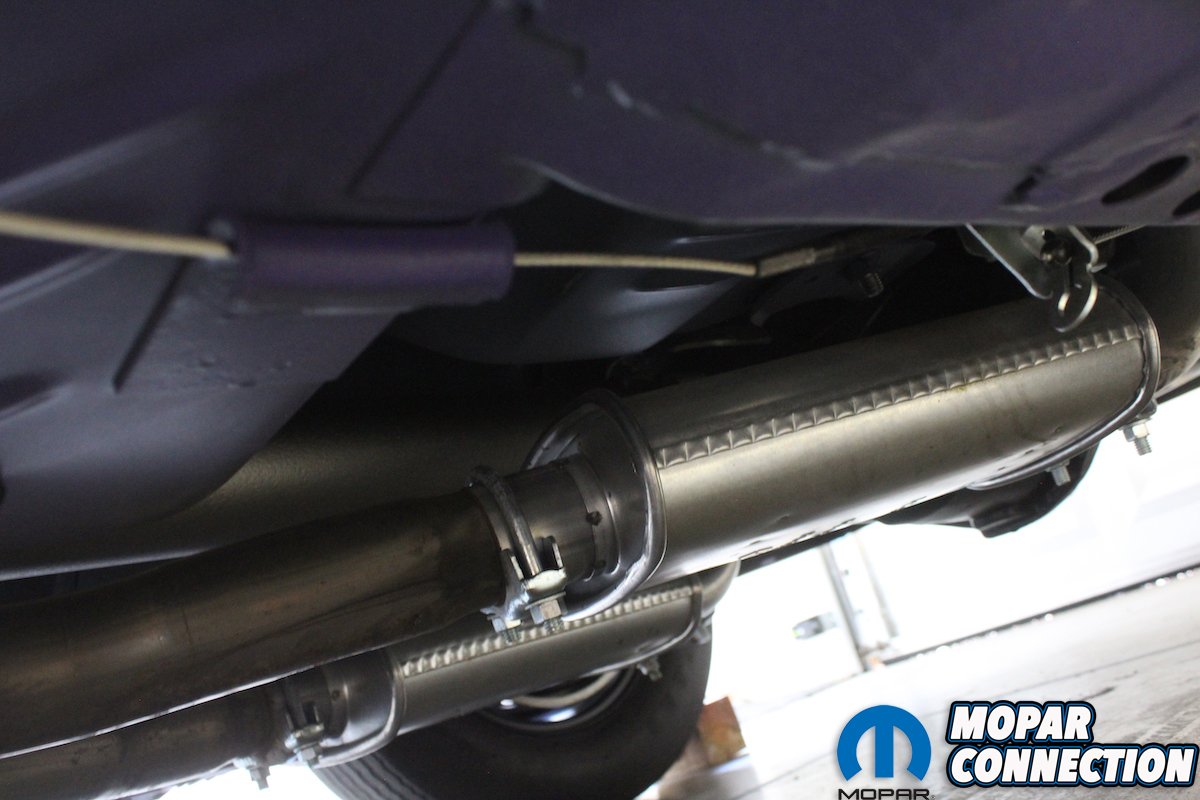
The exhaust system thankfully is reproduced complete with date code, part numbers, and Pentastar with all the correct bends, swedges, and clamp markings. The Hemi required mufflers and resonators that really quiet down the elephant. Once you hear what the car originally sounded like it is not hard to see why one of the first things to be tossed was the muffler and resonator for some much less restricted and meaner sounding system. We got the heat shields from our good friends at YearOne, complete with the correct mounting screw bolts. Hangers were purchased from Accurate Exhaust as well as the exhaust tips.
After installing everything necessary to re-fire the Hemi, with exhaust, tires, and wheels installed the Comeback ‘Cuda could finally move under its own power. Something it had not done since that fateful day 4 years ago. Man, what an exciting moment. No longer having to push the car around, the rest of the build would go much smoother. On to the interior!


Above left: After painting we add the original valve stem cap and a correct instructional decal, we bought from ECS. Also notice in the back- ground our new trunk mat from ECS. It is for sure the best and most correct mat you can get for an E-body. Above right: Final reference picture time. BF Goodrich F78X14, V-1, correct tread pattern, cap, decal, air canister, hold down bracket, jack base and hook, wing nut, lettering reproduced on the tire as found, best trunk mat. Done! By the way if your car is not a convertible the spare tire hold -down bracket will be mounted farther up in the trunk.

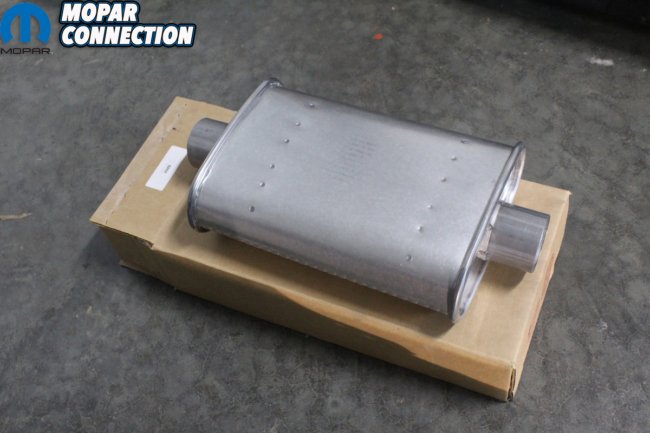
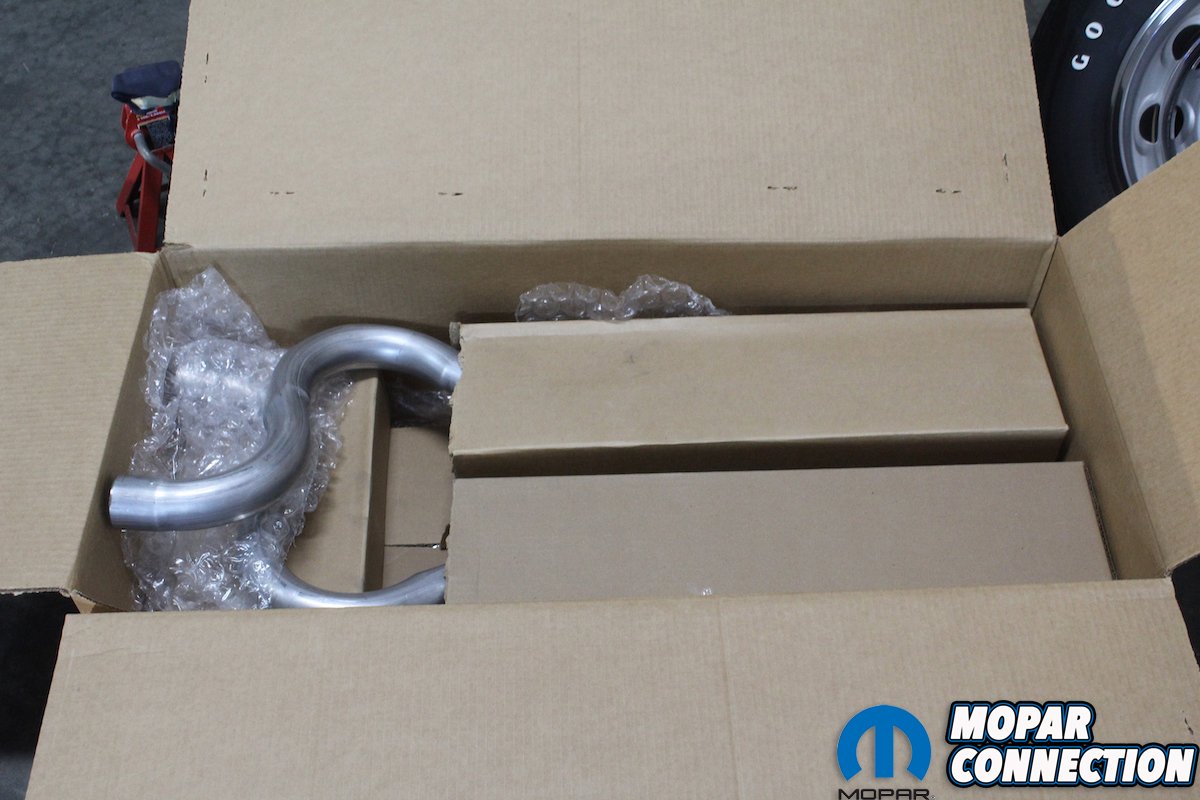
Above left: We turn to ECS again. We order their reproduced as original exhaust system. All the correct numbers, head pipe, mufflers, resonator, tail pipes and clamps. Everything shipped in one nice box except the head pipe. Notice, even though not completely original we opted for the stainless- steel pipes. The originals just rust too easily. Above right: Everyone associates a deep loud rumble with a Hemi exhaust, but originally Chrysler wanted this car to be more on the quiet side. They muted the Hemi with not just a muffler but added on a resonator. Here is what the factory called a “resonator.” Then the round unit they called a muffler.
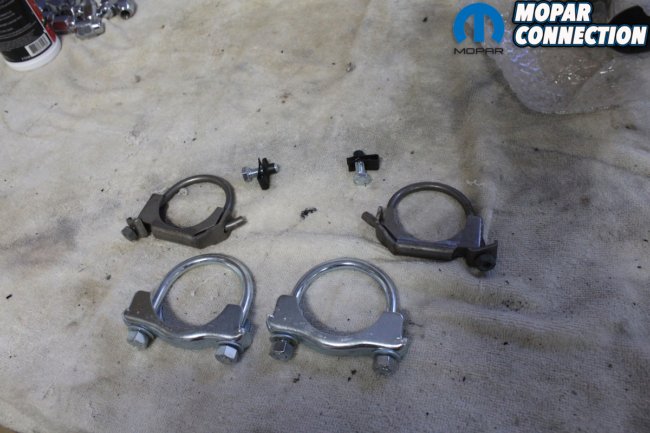

Above left: Correct style and finish muffler and tip clamps including the pipe hanger bolt and clip. The “saddle” clamps go on the tips. We had to get the hangers and tips from Accurate exhaust since ECS doesn’t make these. Above right: Since the trunk floor was replaced you have to drill mounting holes for the rear pipe hangers. After measuring 3 times and making a pattern we drill the holes through the already painted floors. Pucker time!


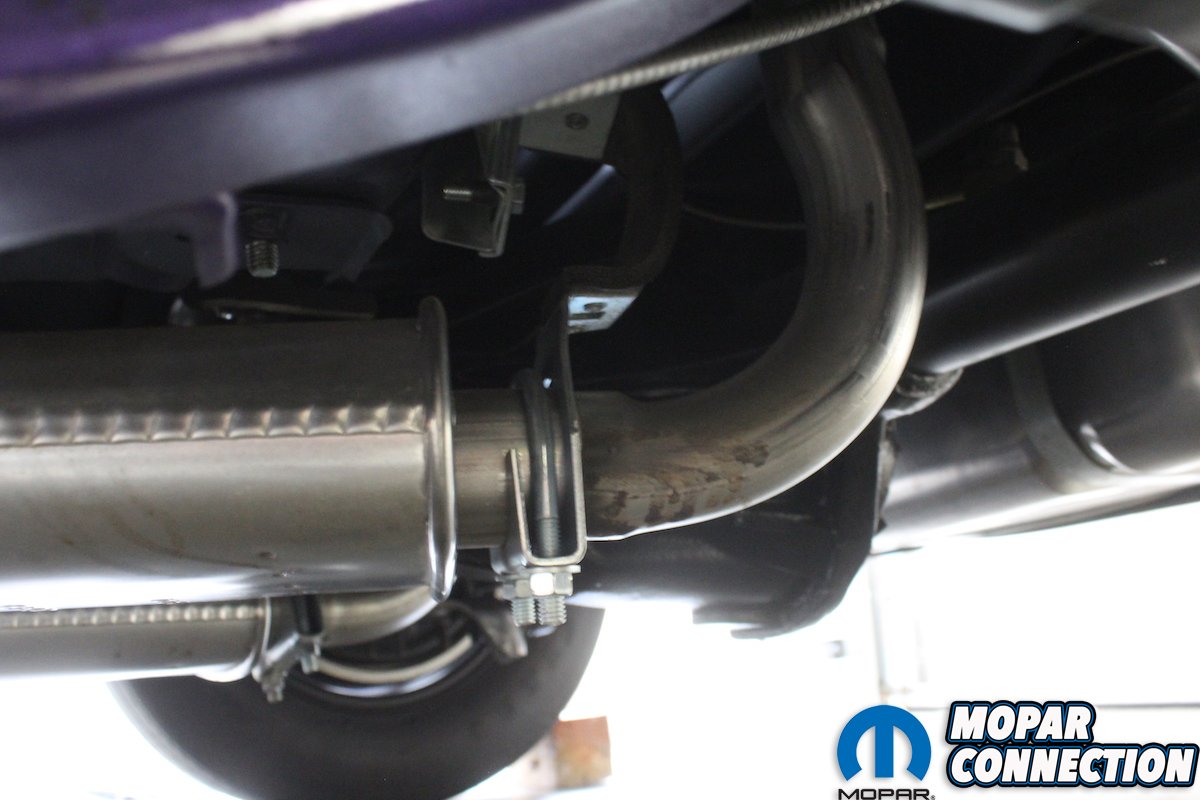
Above left: One of our great sponsors YearOne provided us with heat shields complete with correct attaching hardware. These mount above the rearmost round mufflers just after the rear end assembly. Above right: Here is a pic of the correctly mounted head H-pipe after about 150 miles. It has a clean finish with all the subtle factory welds. Notice the dip primer and the cosmoline finish on the drive shaft.

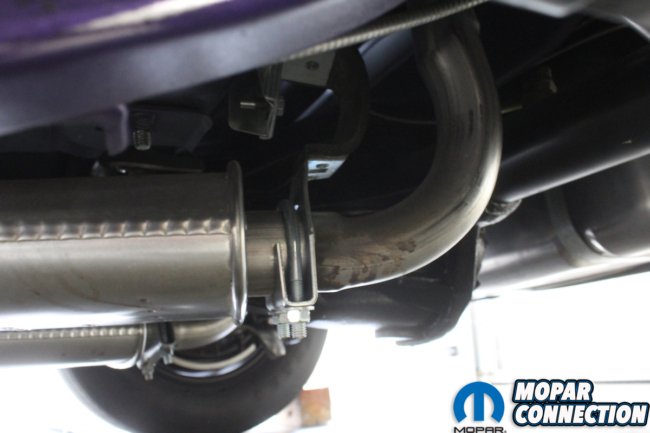
Above left: Correct clamps mounting the H-pipe to the before-axle resonators. Great details on each part of this exhaust system right down to the Pentastar. Above right: Since ECS didn’t make the pipe hangers at this time we turned to Accurate exhaust. Very nice hangers and stainless- steel exhaust tips.

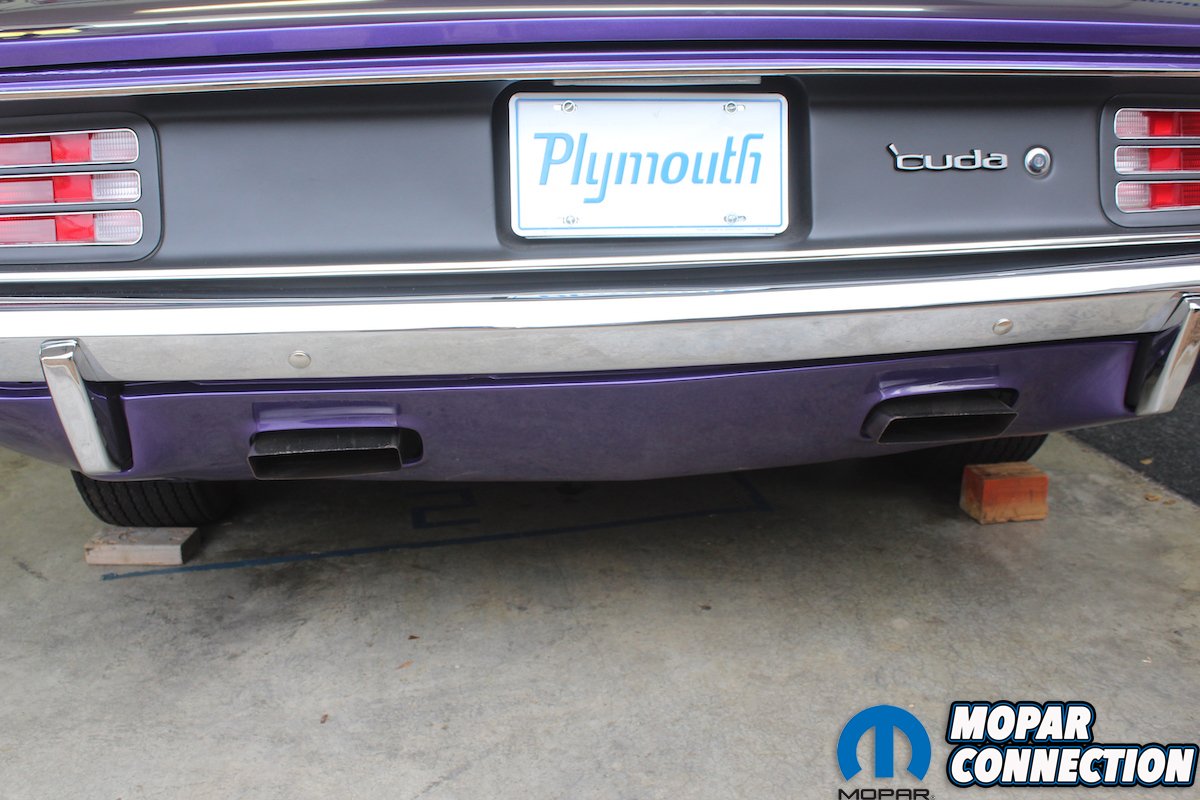
Above: We then install the bumpers and rear valance and position the tips through the holes in the valance. Done.


