


It has been a little while since we have tinkered with Project Trail ’n Thrash. With that said, we have been enjoying Project Trail ’n Thrash a-lot, thanks to the likes of the Edelbrock E-Force Supercharger.
A couple months back, we were talking with our good friends at Edelbrock about our Wrangler and how it lacked power. We would like to eventually swap in a Gen III Hemi, but that is a big project and our Wrangler is currently our daily driver.
One thing led to another and their E-Force Superchargers were brought up. We never really thought about a power adder to the Jeep’s 3.6L Pentastar V6. Mostly because it was our daily driver and did not want to ruin drivability.
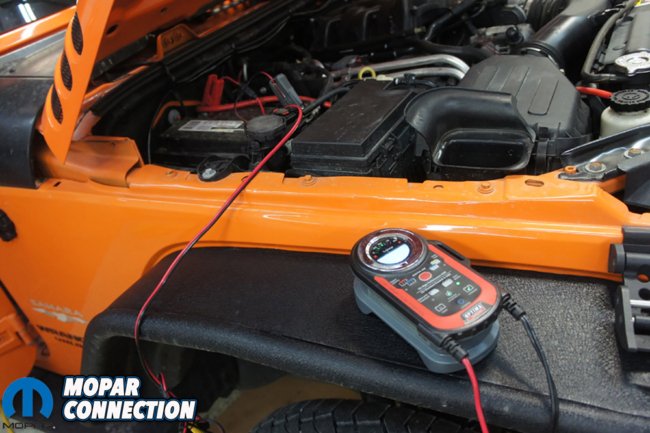

Above Left: We made sure the battery was fully charged. Above Right: With battery fully charged, we uploaded the stock tune from the ECU with HP Tuners.
We chatted some more and decided that for the time being, this might be the cure that we wanted (needed) for more power without tearing the Jeep apart for months.
If you do not know, Project Trail ’n Thrash is a 2013 Jeep Wrangler with the 3.6L Pentastar V6 engine and automatic transmission. It is a Sahara model, although much has changed, the drivetrain is still stock.
The stock Dana 35 front axle and Dana 44 rear axle are bone stock and equipped with the optional 3.73 gears. The Jeep is pushing 120k miles, but has been maintained well.
Above: We started by removing air box and disconnecting battery.
We have modified the suspension and body a lot with parts from Extreme Terrain. Every time we get on Extreme Terrain’s website, we find something else we need for the Jeep.
Project Trail ’n Thrash modifications include a 3” Synergy lift, 35” Yokahama A/Ts and a Flowmaster Force II exhaust. Although we looked good, we were a little sluggish.
It was becoming difficult to keep up with traffic on the highway and we were definitely not passing anyone.

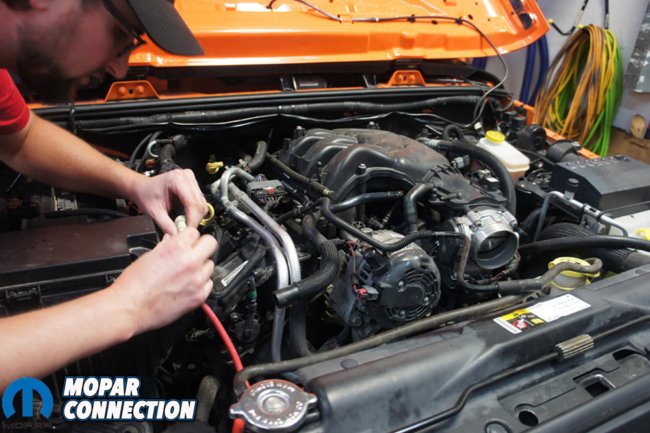
Above Left: We got pretty quick at removing upper intake. Above Right: We stuffed the lower intake with shop towels while we continued to work on the front of the motor.
We even tried a Superchips Trail Dash 2 and use their 93-octane tune for a little more go juice. While there was a difference, it was not what we wanted.
We were a little skeptical with our Jeep since it was not lower miles or had steeper gear ratios like that of Rubicons, but Edelbrock explained we would benefit the same.
Although we did not qualify for warranty, we were pleased to learn that Edelbrock does offer a 36k mile or 36 month warranty if the kit is installed at a Edelbrock installer or ASE certified repair shop and your Jeep has under 36k miles.

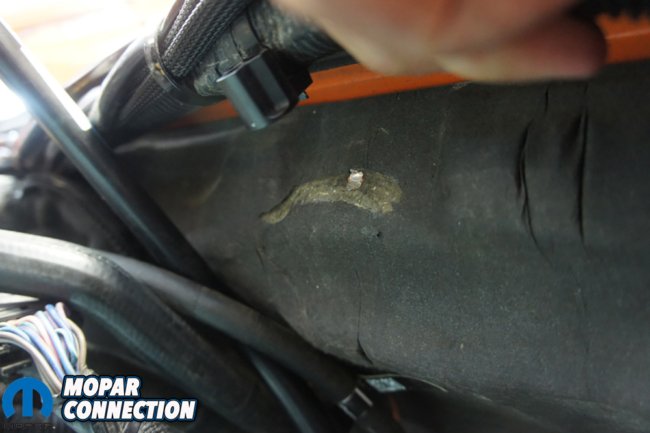
Above: We should have started draining coolant first, but since we have to change out a hose on the oil cooler, you will want to drain coolant.
We were way past the 36k mile mark, but the fact that they offer a warranty for that long on the E-Force made us feel a little more comfortable that the engine was not going to explode in 5k miles, which we have surpassed now anyway.
Our Jeep is far past new, but Edelbrock E-Force Superchargers are 50-State emissions legal (pending). This allows your factory warranty to not be compromised when installing an E-Force Supercharger on your new Jeep Wrangler. Also, their 36,000 mile/36 month warranty would also apply.
We were a little blown away by the fact you could order a new Jeep Wrangler and have an ASE certified shop install an E-Force Supercharger and not void your factory warranty and have a separate warranty through Edelbrock.
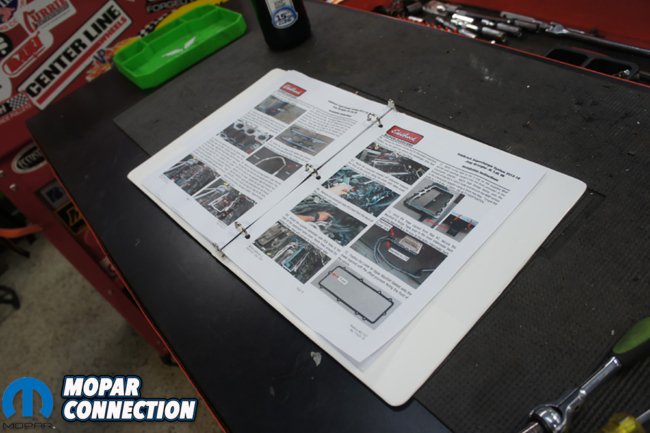
Above: Edelbrock’s instructions are some of the best in the business.
This gave a big boost of confidence that Edelbrock was not trying to push the Pentastar to its limits for big numbers on the dyno. Instead, Edelbrock has really dialed in their supercharger to make a considerable amount of power, yet retaining reliability.
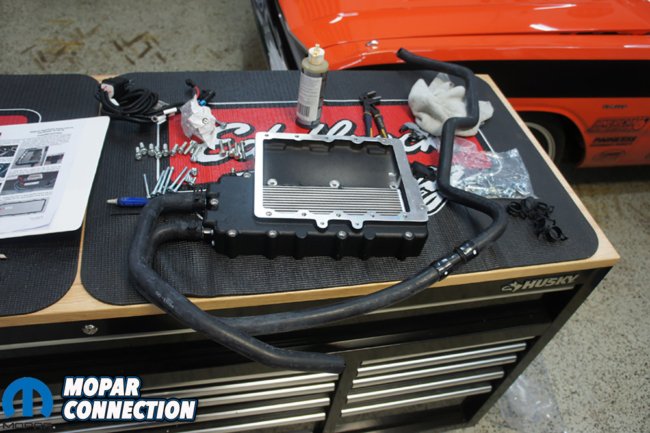
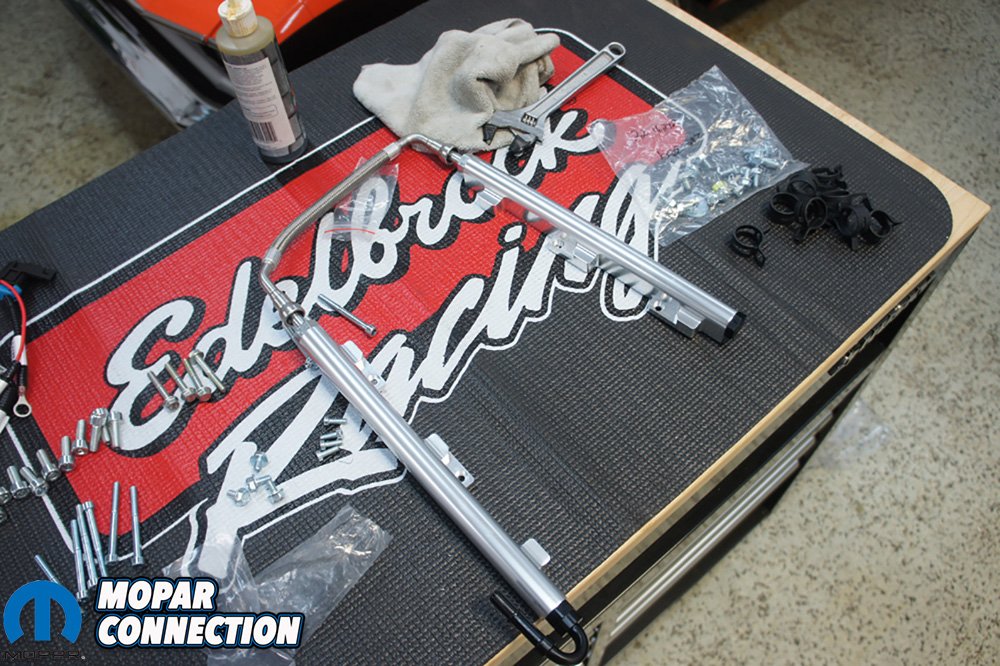
You can check out our unboxing video here. We were stunned at how well everything was packaged and labeled. They ship the kit on a pallet with everything inside a big box to protect all the individual pieces from being tossed around in a box truck.
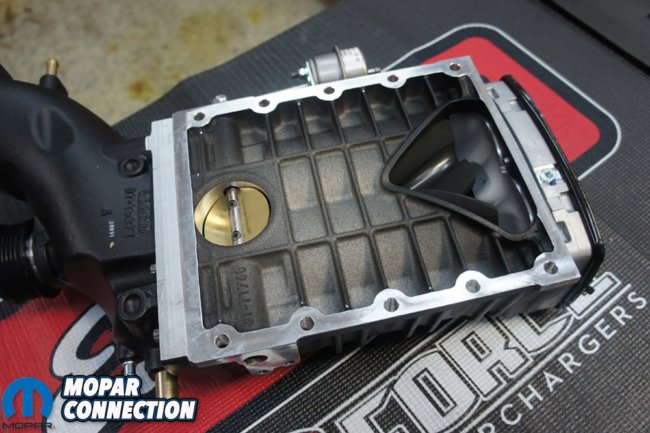
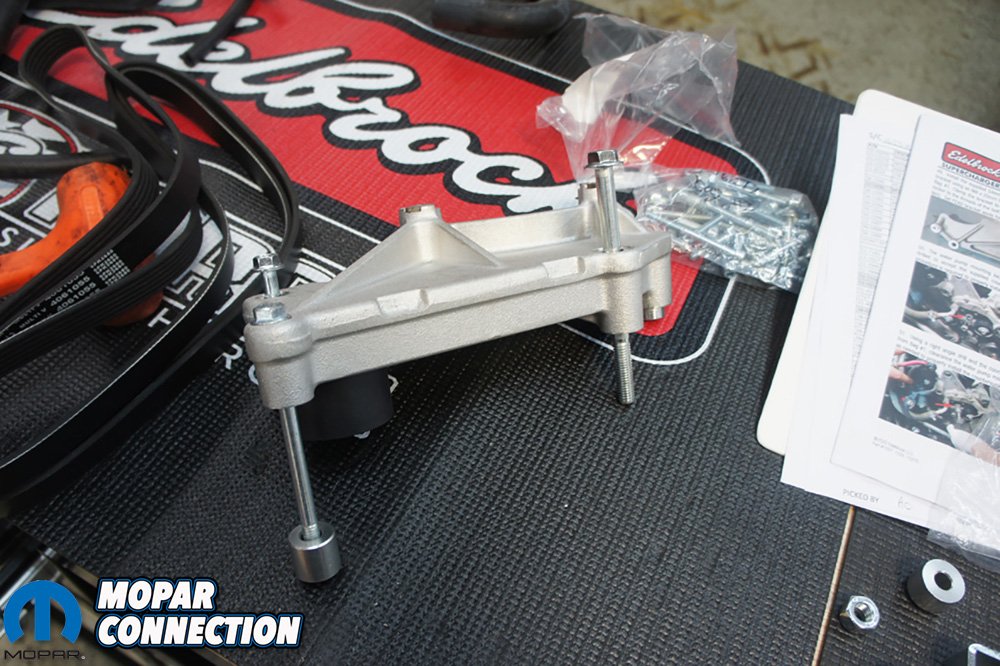
We needed Edelbrock’s E-Force kit part #1527, which covers 2012-2014 Jeep Wranglers with the 3.6L. The kit would come with everything needed, including a tune and tuner after installation.

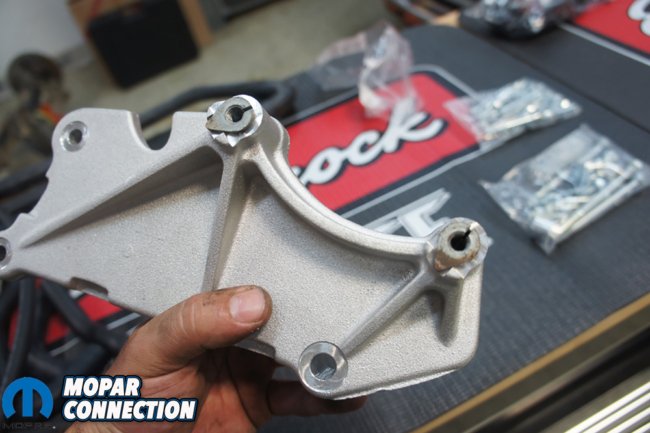
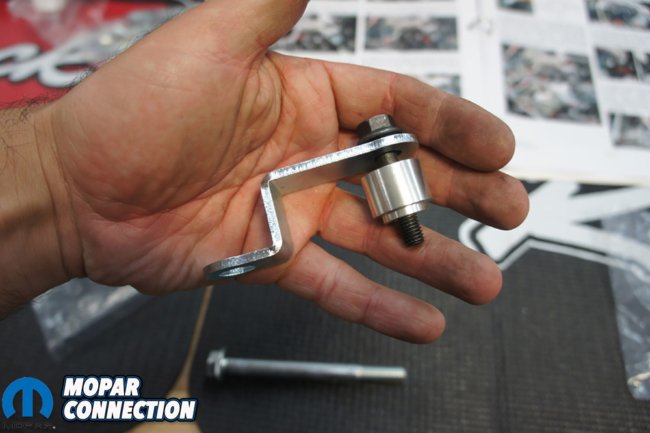
Above Left: We needed to cut a stud off the firewall for clearance for the E-Force supercharger. Above Right: Its a very small stud and the only modification we had to do for the whole kit.
Once we confirmed everything was present and not missing anything, it was time to schedule some down time for Trail ’n Thrash (T’nT). We wanted to give ourselves plenty of time for installation and room for any potential hiccups along the way.
Normally we would go through the full installation of the supercharger, but honestly the Edelbrock instructions are some of the best instructions we have ever seen.
Along with all the parts, Edelbrock sends you a binder of instructions. The binder has complete step by step installation, torque specs, parts list, warranty information and more.
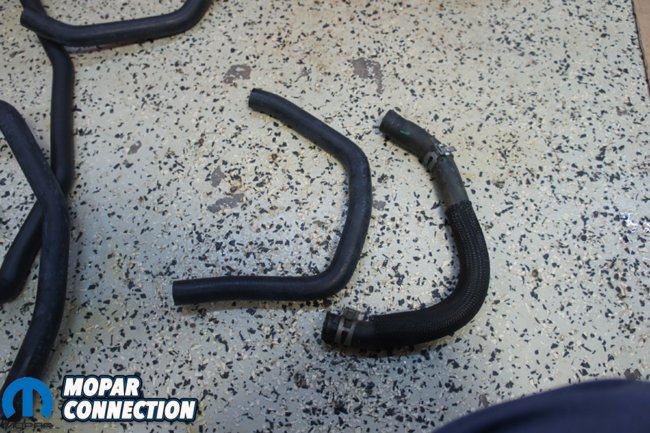

Above Left: The oil cooler hose that needs replaced. They look similar but Edelbrock’s is just a little longer. Above Right: Changing out the coolant sensor.
The step by step instructions did not miss a beat. There was a detailed description of every step with crisp and colorful photos. As many of you might know, pictures can be a huge help and when they are all blurry you cannot see any details.
We did spend some time days prior reading through the instructions. There are some warnings that really do need to be read. One of which was a small hiccup for us, but we over came it fairly easy.
Being familiar with the instructions made the installation go a little quicker. We also were able to plan out a couple of the steps we needed to take ahead of time to keep T’nT’s downtime to a minimum.

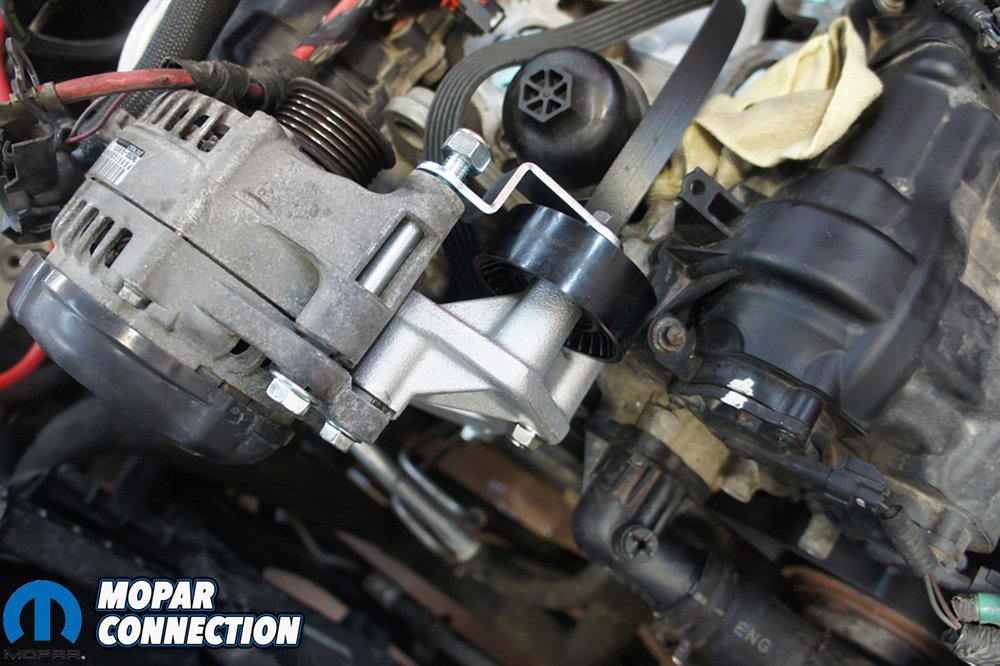
Above: We continue through the instructions and start on the new alternator bracket.
The installation of the components went great. Prior to the supercharger installation, we did install new spark plugs, oil cooler, cam followers and lifters. We were getting familiar with the removal of the intake.
We would recommend that if you have a 2012-2017 Jeep Wrangler, that you plan to replace plugs and possibly oil filter housing while you have the engine tore apart.
For once, the installation of the hard parts went perfect and did not have any left over nuts or bolts. What did put a hiccup in things was our prior tuning with the Superchips Trail Dash 2.
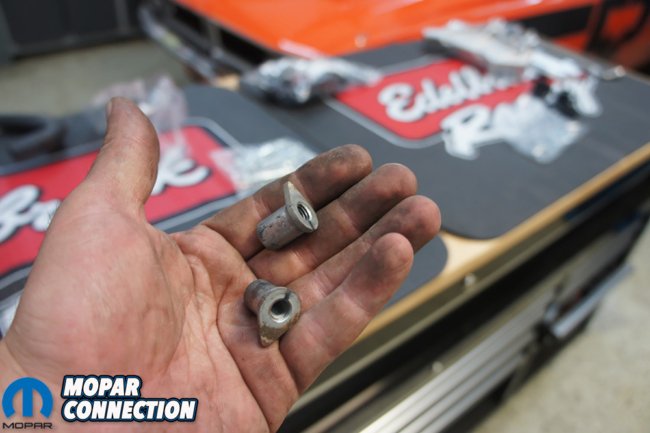

Above Left: These inserts need to be removed and reused from your factory alternator bracket. Above Center: We used our vise to press the inserts in to the new bracket. Above Right: You can see how the inserts are clocked in the new bracket.
We used our Trail Dash to not only change tire size, but also programmed their 93-octance performance tune. This would create a problem with our ECU, even though we removed the tune and Trail Dash from the Jeep.
Since T’nT was a 2013, we did not have to send our TCM or ECU away for a reflash like the newer Jeeps. Our kit included a preloaded tune in a SCT handheld from Edelbrock.
In theory we would have installed all the components, plugged in the SCT handheld, uploaded the tune, and been off driving. That is not what exactly happened.

Above: Work bench is filling up with tools but less parts.
Since we used the Superchips tuner, our ECU, for better lack of words, was compromised. We talked to multiple shops, read on multiple forums, and even talked with Edelbrock tech support.
To use the supplied SCT tuner, we were going to have to buy a new ECU and have it flashed with the latest software from a dealer. The other option was to find someone to custom tune the Jeep.
Our first call was to HP Tuners. We talked with them about our issue and they told us not to worry. Their VCM Suite has been used on a ton of Jeeps. They have tuned everything in Jeeps from Gen III Hemi swaps and superchargers to as simple as a gear and tire change.


Above Left: For clearance purposes, you have to counter sink one hole on the water pump with the supplied bit. Above Right: Then you will need to torque the supplied bolt back in to water pump prior to installing new alternator bracket.
The plus side about HP Tuners VCM Suite would be that once we paid for the credits and bought a MPVi2 (the MPVi3 was not available yet), we could do tire changes, gear changes, change our cooling fan temperatures, turn off traction control, and much more.
We would also be ready to tune T’nT for that Gen III Hemi swap whenever we got around to it. No other tuning hardware or software would need purchased for the life of the T’nT.
All we needed to do was find a tuner and dyno shop to help us get T’nT dialed in with the Edelbrock E-Force Supercharger. Luckily we know a few people and started making some calls.


Above Left: Another part of the new alternator bracket with an idler pulley. Above Center: The bracket helps stabilize one of the idler pulleys. Above Right: You can see here how the bracket and is installed. Note that your belt needs routed under the bracket before final installation.
Our friends at Big 3 Racing said they would make an exception and help us with dynoing T’nT. The only problem was they only work on V8s and some V10s (Viper). They would not have a clue where to start tuning a Pentastar V6.
We knew someone that did have a clue about Pentastars, Flyin’ Ryan Performance. The only problem was that he was located across the country.
After chatting with Big 3 Racing and Flyin’ Ryan, Big 3 Racing was going to make a big exception for us and allow Flyin’ Ryan to remote tune T’nT.
Above: With the new alternator bracket mounted, we were ready to install the manifolds.
Big 3 Racing works with Flyin’ Ryan often with his Gen III Hemi products. One of the owners of Big 3 Racing is running Flyin’ Ryans Tomahawk cam. They have never had a need, until now, to need his assistance on a supercharged Pentastar V6.
What started out as a big mess, ended up being a better solution for our situation.
With all of our ducks in a row, we trailered T’nT up to Big 3 Racing. One side note, do not try to start your Jeep without a tune. We had to work with Flyin’ Ryan for a base tune to get T’nT parking lot drivable.


Above: A layout of the new fuel rails and injectors. Above Right: We get the fuel rails and injectors installed before the mid/upper manifold is installed.
We got T’nT all hooked up on the dyno and Big 3 and Flyin’ Ryan worked their magic. We ended up netting 321 horsepower out of the little 3.6L Pentastar engine. That is just a tad over what Edelbrock claims, but in their defense, there are so many variables with dyno numbers.
We were just happy to see over 300 at the wheels. Unfortunately, the dyno sheet has been lost in transit over the last couple months for exact numbers and graphing.
We did peak a little more horsepower and torque than Edelbrock stated, but not by much. The curves were very similar to that of Edelbrock’s too. We are not drag racing T’nT and although the numbers are cool to brag about, they do not mean much to us.

Above Left: You will need to route hoses and install supplied clamps before the mid/upper manifold is put on. They are molded hoses, so make sure they are clocked about the 9 o’clock position. Above Center: The MAP sensor will need plugged in before you install the supercharger. Above Right: Taking a step back and a final once over before the supercharger unit is put on top.
What we really wanted to know was how those numbers affected drivability of the Jeep. Our first impressions was why did we wait so long. We had more power and T’nT felt like it should, or at least how we think it should.
It is not over powerful or has a crazy surge of power where it makes daily driving unbearable. It drove the exact same as before, but with more power.
At first we were a little disappointed that the E-Force did not have more of a whistle to it, but now after driving almost 5k miles on it, we are glad it did not.

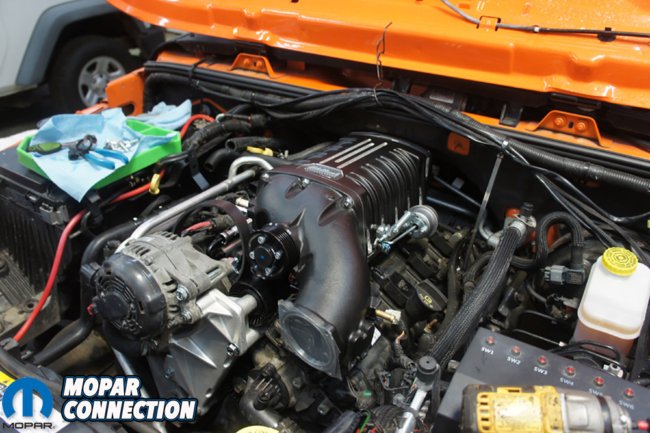
Above Left: Edelbrock sends there E-Force Superchargers out with vacuum operated bypass valve and does not need any adjustment. If you try to adjust it, then the solenoid could be damaged. Above Center: You can see where the magic happens. Also note the bypass valve. Above Right: We had to zip tie our wire harness up and out of the way but E-Force Supercharger fit perfectly.
Honestly driving around town or putting our friends behind the wheel, you cannot tell that it has been supercharged. Everything fits nicely under the hood, it looks like it could have came on it stock and it is quiet.
We have no issue keeping up with traffic and passing a slow moving vehicle if needed. When you really step on the throttle is when the real fun happens.
The power is delivered nice and smooth but around 4k rpms is when a little more boost is present and start to make the real power.
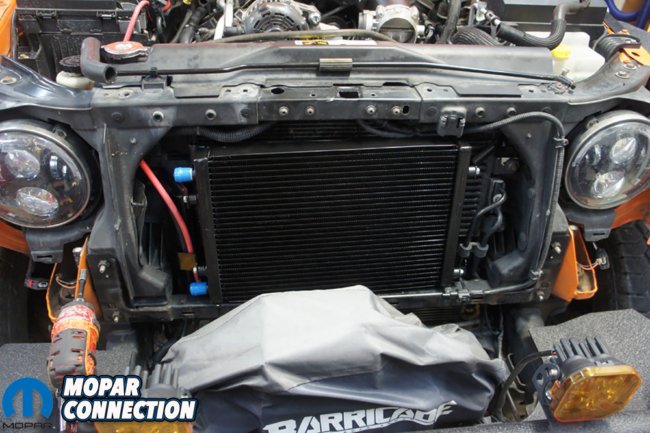

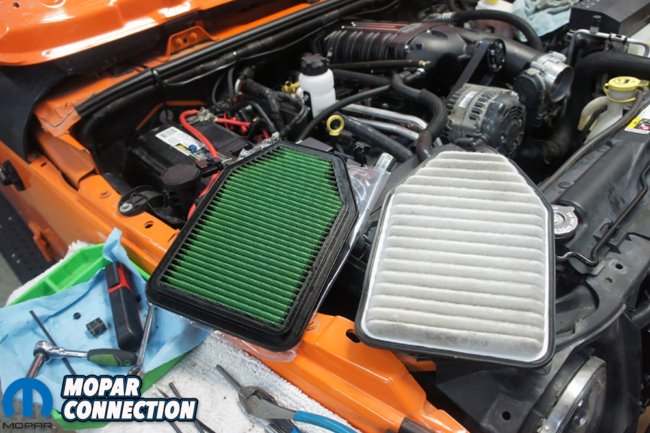
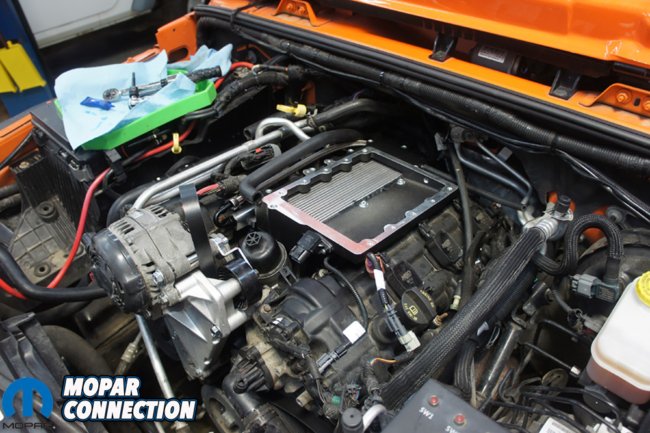
Above Left: With the supercharger on, it was time to finish up Edelbrock’s cooling system for the supercharger and started with the supplied radiator in front. Above Center: You can see the external water pump that comes in the kit. There is a bracket for the pump to mount to the frame and out of harms way. Above Right: The kit also supplies you with a new air filter element. They also recommend removing the inlet of the air box for increased air flow.
The rest of the time driving around town at 35mph and stop light to stop light, you really do not know it is even there, in a good way. Cruising the mall parking lots is much better.
Stepping of the beaten path and taking T’nT on some trails and the E-Force Supercharger performs just the same. We visited some local trails shortly after the installation and had no problems.
On the trails we knew the extra power would be useful, but when trail riding your moving slow with lots of stopping. There was no overing heating, all the temps stayed nice and cool. We did not have a bit of trouble.

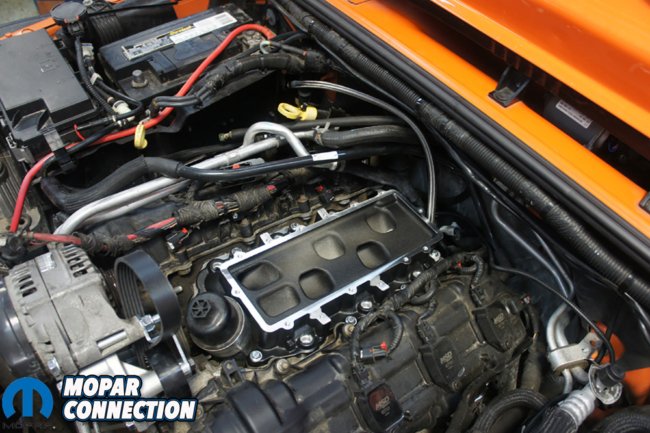
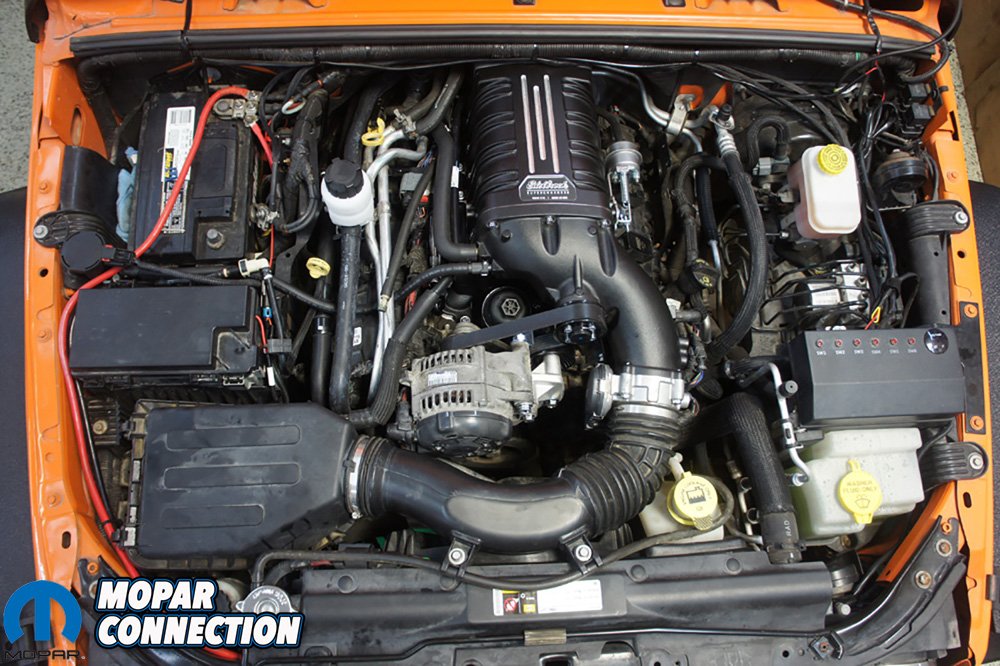
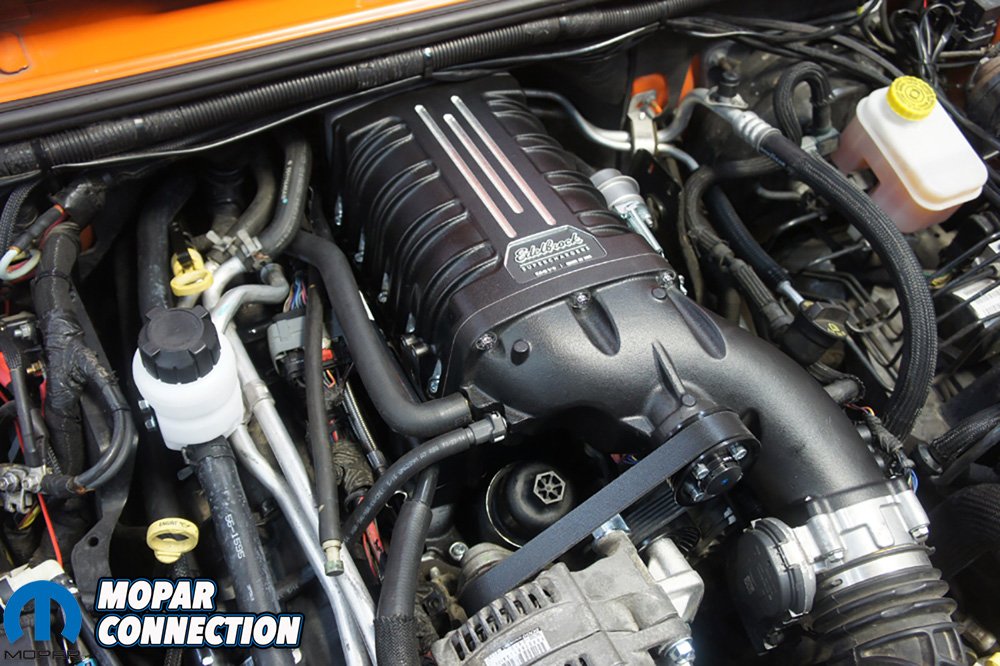
Above: The installation is complete and looks like it came straight from Jeep. We are very impressed how well Edelbrock made the kit fit and go together.
During the dyno tuning, Flyin’ Ryan adjusted our cooling fans to come on a little sooner, which really helped keep T’nT cool. Edelbrock’s separate cooling system for the supercharger also plays a part in keeping the engine cool.
With the fan adjustment and the Edelbrock E-Force Supercharger, T’nT was running nice and cool around 208-210. Prior to the supercharger installation we were hanging around 220-225 degrees operating temperature.


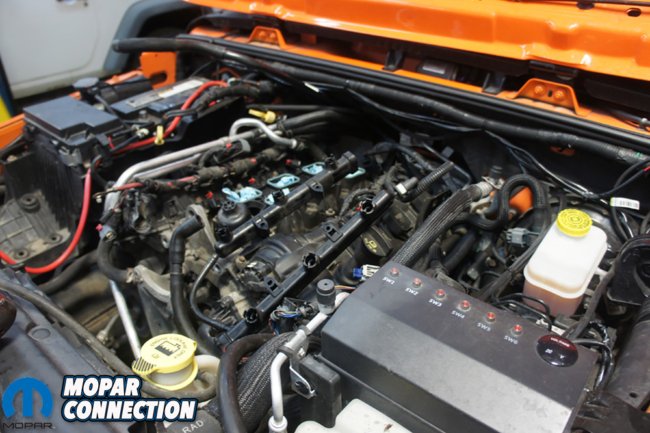
Above: Here are a few shots of the Edelbrock E-Force Supercharger after final installation. Note the inlet on the air box has been removed and the small surge tank for the cooling system for the supercharger.
The last 5k miles have been the best 5k miles yet. We find ourselves driving the T’nT even more than we did before. Its fun driving a Wrangler, add an Edelbrock E-Force Supercharger and you wont want to drive anything else.
The premium fuel has not been a fun button to press at the pumps lately, but if you bought a Wrangler to save money at the pump, you made a major mistake.
In the end we are super happy with the results and cannot wait to see what T’nT is like after some gear upgrades. The installation took a day and a half. We took our time to make sure everything was done to Edelbrock’s specifications listed in the instructions.
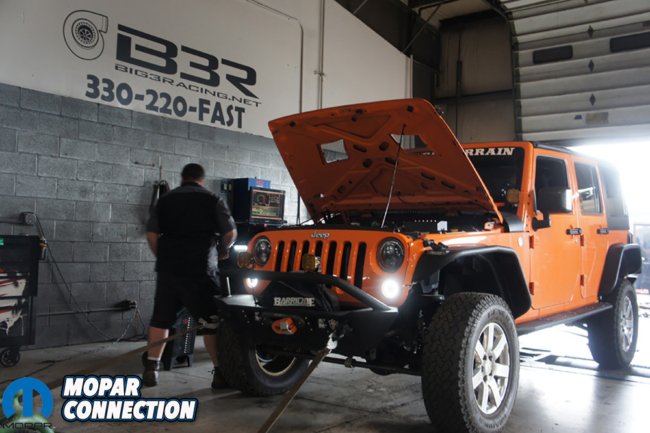
Above: The final piece of the puzzle was dyno tuning Project Trail ‘n Thrash at Big 3 Racing with HP Tuners and Flyin’ Ryan Performance.
This obviously would not have been a success without Edelbrock, Hp Tuners, Big 3 Racing and Flyin’ Ryan Performance. We have made a lot of improvements on our Jeep, but this one was the biggest and best so far.
Project Trail ’n Thrash plans to see many more miles on and offroad. The E-Force Supercharger and HP Tuners is going to make those miles much more fun. Now to see how it does in the snow this winter.


so you had Big 3 Racing and Flyin’ Ryan at your disposal. How are regular people supposed to do this?
Big 3 Racing did do a big favor for us, but Flyin’ Ryan would help remote tune anyones 3.6 Pentastar, Hemi, etc., if you have a dyno shop that will allow him to. Big 3 Racing tunes Gen III Hemis all the time and have worked with Ryan with tuning some of his cams, so it just worked out. If you are needing a Jeep tuned, with or without supercharger, start by calling Flyin’ Ryan and see if there are any shops near you that he works with.